How to Clean Exterior Door Before Painting Properly
You’ll start by removing or labeling hardware and covering nearby plants and fixtures, then sweep away dust and cobwebs. Wash the door with a mild detergent or TSP alternative, degrease stubborn fingerprints or nicotine stains, and rinse top to bottom. Scrub glass and crevices with a soft brush, dry thoroughly, and sand flaking paint or rough spots before filling holes and sanding smooth. Follow with a tack cloth and primer—keep going for full prep details.
Quick Step-by-Step: Clean an Exterior Door Before Painting

Before you paint, give the exterior door a quick, thorough clean so the new finish will stick and look smooth. Start by removing hardware and sweeping dust away. Mix an eco-friendly cleaning solution, test a small area, then wash from top to bottom with a soft brush. Rinse thoroughly and let the door dry fully.
Scrape loose paint, sand glossy spots, and wipe away residue. For older doors, follow historical preservation guidelines—avoid harsh stripping that damages original features. Reinspect for mold or stains, treat as needed, and only then proceed to priming and painting for best adhesion.
Tools and Supplies Checklist
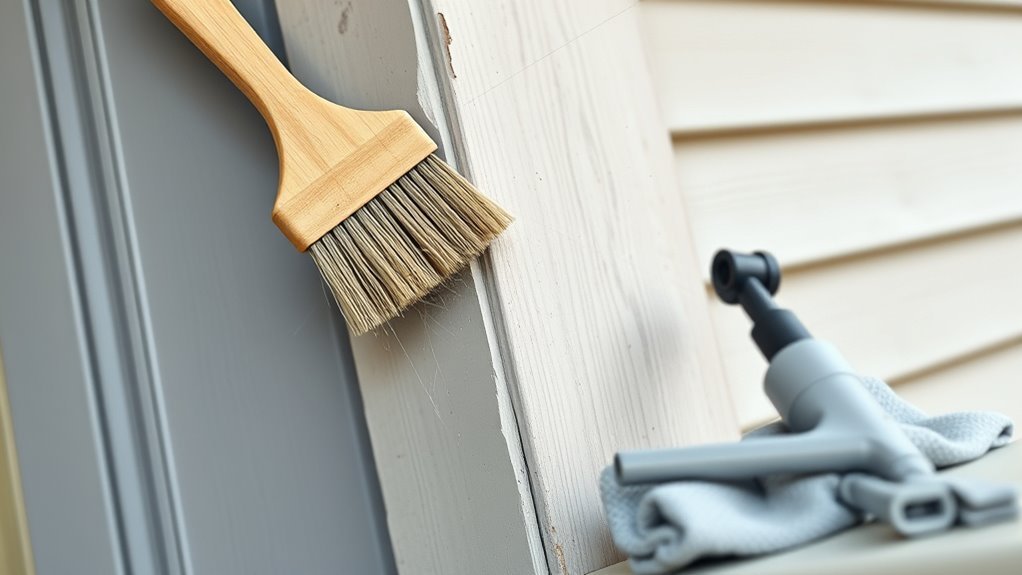
Now that the door’s clean and prepped, gather the right tools and supplies so you can work efficiently and get a lasting finish. You’ll need mild detergent, TSP alternative, sandpaper (120–220 grit), sanding block, tack cloths, primer, exterior-grade paint, angled and sash brushes, foam roller, painter’s tape, drop cloths, screwdrivers to remove hardware, and a putty knife with exterior filler.
Consider paint color samples and swatches to honor the door’s historical significance or match your home. Keep extra rags, a small bucket, and a paint tray handy. Check brushes for quality to avoid brush marks.
Safety: Ventilation, Gloves, and Eye Protection
When you’re working on an exterior door, keep ventilation strong, wear nitrile or chemical-resistant gloves, and protect your eyes with snug safety goggles to prevent chemical splashes and dust from causing irritation or injury. You’ll choose Safety gear that fits, check for tears, and replace disposable gloves between solvent tasks. Use ventilation tips: open the door, run a fan toward outdoors, and avoid enclosed spaces. Keep a spare pair of goggles and a cloth for wiping. Stay alert to fumes, take breaks, and don’t eat or smoke nearby.
| Item | Purpose | Frequency |
|---|---|---|
| Gloves | Chemical barrier | Every job |
| Goggles | Eye protection | Every job |
| Fan | Airflow | Continuous |
| Mask | Dust filter | As needed |
| Spare | Backup gear | Always available |
Protect Surrounding Surfaces and Plants
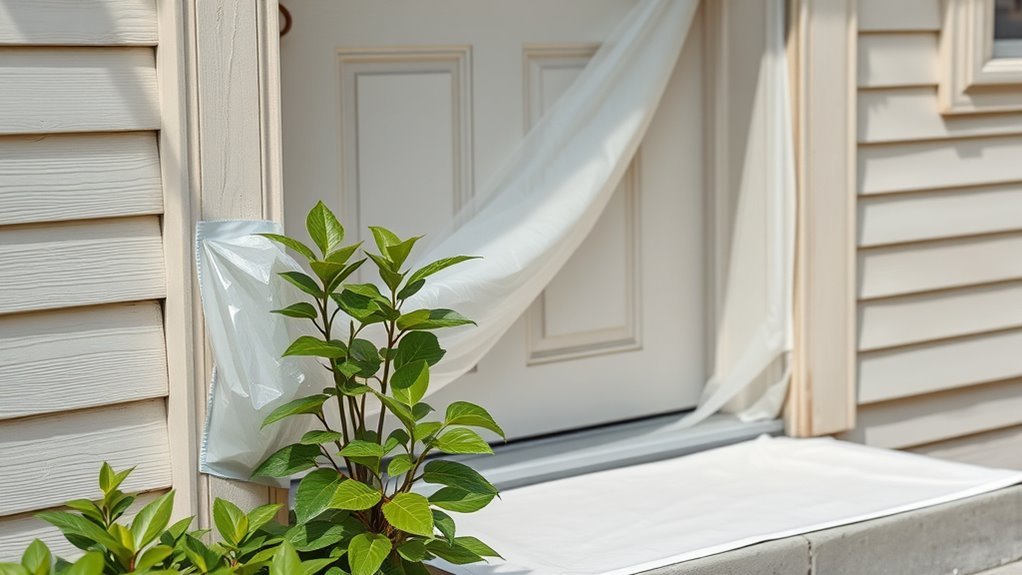
Before you start cleaning, protect any nearby plants with drop cloths or plastic sheeting so they don’t get chemical spray or runoff.
Tape off and cover adjacent surfaces—trim, windows, and hardware—to prevent cleaner stains or accidental scrubbing damage.
Taking these simple steps saves cleanup time and keeps your landscaping and finishes intact.
Cover Nearby Plants
Although you’ve cleaned and sanded the door, don’t forget to protect the plants and surfaces around the entryway. Cover shrubs and flowerbeds with breathable drop cloths or lightweight tarp to block paint splatter and dust.
You’ll want simple Plant protection and practical Gardening tips so foliage stays healthy. Secure coverings with stakes or weights, keep cloths off leaves to avoid moisture buildup, and remove coverings daily to check soil and pests.
Work from top down to prevent tracked debris.
- Use breathable drop cloths
- Anchor edges with rocks or stakes
- Keep covers off plant foliage
- Check soil and pests daily
- Replace soaked tarps promptly
Mask Adjacent Surfaces
If you want clean edges and no accidental splatters, mask adjacent surfaces and plants with painter’s tape, plastic sheeting, and breathable cloths so paint only lands where you intend. Start by wiping edges clean, then apply tape along trim, doorframe, and any nearby siding.
Drape plastic over walkways, fixtures, and furniture; weigh it down so wind won’t shift it. Use breathable cloths or paper to cover shrubs and delicate foliage—don’t wrap them tightly; allow airflow to protect plants from heat and moisture.
Remove tape while paint is tacky to avoid peeling. Inspect for missed spots before finishing.
Remove Loose Dirt, Dust, and Cobwebs
Since the paint won’t stick well to grime, start by knocking down loose dirt, dust, and cobwebs with a soft broom or a long-handled brush so you get a clean surface to work on. You’ll sweep from top to bottom, paying attention to corners, transoms, and the door frame where interior dust meets outdoor debris.
Remove nests or signs of exterior pests gently, then vacuum or brush away residues. Finish by wiping with a damp cloth to catch remaining particles. Repeat until the surface looks uniformly clean.
- Sweep high corners first
- Brush panels and molding
- Check hinges and crevices
- Vacuum loose debris
- Wipe down with a damp cloth
Degrease Oily or Nicotine-Stained Doors
When greasy fingerprints or nicotine film have settled on your exterior door, you’ll need a stronger cleaner than water to make certain paint bonds properly. Remove or cover door hardware, then mix a degreasing solution: warm water with trisodium phosphate (TSP) substitute or a strong dish soap.
Scrub with a nonabrasive sponge, working from top to bottom, rinsing thoroughly. For stubborn stains, repeat or use a citrus-based solvent sparingly, then rinse.
Let the door dry fully before sanding or priming. Protect seals and consider weatherproofing techniques after painting to reduce future oily buildup and prolong finish life.
Remove Mildew and Mold From Exterior Doors Safely
After you’ve removed grease and nicotine, tackle mildew and mold before sanding or priming, because these organisms can lift paint and compromise adhesion. You’ll inspect for mildew identification—fuzzy black, green, or gray spots in damp areas.
After removing grease and nicotine, check for fuzzy black, green, or gray mildew before sanding or priming.
Work outside or ventilate, wear gloves and a mask, and test cleaners on a small area. Use a diluted bleach solution or commercial mildew remover, scrub with a soft brush, rinse, and dry thoroughly.
For mold prevention, fix leaks, improve drainage, and increase ventilation. Reinspect before priming to guarantee surfaces are clean and fully dry.
- Wear PPE: gloves, mask, goggles
- Test cleaner first
- Scrub gently, don’t gouge
- Rinse and dry completely
- Improve ventilation and drainage
Strip Flaking Paint and Loose Finish
Before you prime or repaint, remove any flaking paint and loose finish so the new coating can adhere properly. You’ll start by scraping and sanding all unstable areas until you reach firmly bonded paint or bare wood. Use a sturdy scraper, medium-grit sandpaper, and a wire brush for stubborn spots.
Feather edges so gradual changes are smooth and test adhesion with gentle pressure. Any paint peeling indicates more removal is needed. Clean dust away before proceeding.
If old finish’s failure is extensive, consider a chemical stripper or targeted spot-priming after thorough sanding to restore reliable paint adhesion.
Rinse and Neutralize Cleaners After Cleaning
Because cleaning agents can leave residues that interfere with primers and paints, rinse the door thoroughly with clean water to remove any soap, detergent, or degreaser film.
You’ll perform rinse neutralization to make sure no alkaline or acidic residues remain that could affect adhesion. Use a gentle spray and work from top to bottom, flushing edges and hardware.
If you used a strong cleaner, repeat the rinse and test with a pH strip. After neutralizing, buff with a clean cloth and inspect for streaks before painting.
- Use potable water for rinsing
- Wear gloves and goggles
- Rinse twice if needed
- pH-test problem areas
- Avoid high-pressure washers
Drying Time and When to Sand
While the surface is still damp, wait long enough for the wood or metal to dry completely—this usually takes 2–24 hours depending on temperature, humidity, and the cleaner you used.
Check dryness by touching hidden areas; paint or filler won’t adhere to damp substrates. Your drying time will vary—cooler, humid conditions need longer.
Once fully dry, choose sanding techniques that match the material: use fine-grit sandpaper (120–220) for wood and 220–320 for metal or previously painted surfaces.
Sand lightly to scuff glossy finishes and smooth rough spots, keeping strokes even and wiping dust away before priming or painting.
Fill Cracks, Gouges, and Nail Holes After Cleaning
Now that the door’s clean and dry, inspect every seam, crack, gouge, and nail hole and mark them so you don’t miss any.
You’ll choose an exterior-grade wood filler or epoxy for larger gouges.
For Crack filling, push filler into gaps with a putty knife, overfill slightly, and let it cure fully.
For Nail hole repair, use lightweight filler or caulk for tiny holes, then trim excess.
After curing, scrape away high spots.
Follow paint manufacturer cure times before priming.
- Use exterior wood filler for deep damage
- Pack small cracks with flexible filler
- Smooth with a putty knife
- Remove excess after drying
- Check for missed spots
Sanding Tips for a Smooth Paint Surface
Pick the right grit—start with a coarser paper to level repairs and finish with a finer grit for a smooth surface.
Sand with the grain to avoid visible scratch marks that show through paint.
Wipe away dust between passes so each sanding step bonds cleanly to the next.
Choose The Right Grit
Because the grit you choose determines how well paint will stick and how smooth the finish looks, select sanding paper with purpose. You’ll pick coarser grits for stripping old finish and finer grits for final smoothing.
Consider nearby elements like doorbell wiring when working around edges, and plan paint color selection after you’ve prepped evenly. Match grit to damage: don’t over-sand delicate details.
Keep a hand block for control and test on a hidden spot. Replace worn paper quickly to avoid scratches.
- 60–80 grit: heavy removal
- 100–120 grit: surface leveling
- 150–180 grit: smoothing
- 220 grit: final prep
- 320+ grit: extra smooth
Sand With The Grain
While you sand, follow the wood’s grain to prevent visible scratches and create a uniform surface that paint can adhere to. Work steadily with even pressure, moving along planks or panels so abrasions stay consistent.
Use a sanding block or orbital sander for flat areas and hand-sand trim delicately. Watch edges near doorbell wiring and door frame insulation so you don’t nick electrical components or compress insulation.
Change grits progressively for a smooth finish, and inspect for raised fibers or gouges as you go. Keep dust control in mind, but don’t pause here to discuss cleaning between passes.
Clean Between Passes
After each sanding pass, stop and remove the dust so the next grit can cut cleanly and you don’t trap particles under the paint. You’ll wipe with a tack cloth or a damp microfiber, using mild cleaning solutions if needed, then let the surface dry.
Follow safety precautions: wear a mask, goggles, and gloves.
Check for remaining rough spots and repeat lighter sanding where required.
Maintain consistent pressure and sanding direction to avoid gouges.
- Use a soft brush to lift loose dust.
- Wipe with a damp cloth for stubborn particles.
- Vacuum crevices before final wipe.
- Change cloths often.
- Inspect under good light.
Degrease Again and Use a Tack Cloth Before Priming
Before you prime, degrease the door one more time and then wipe it with a tack cloth to remove any lingering residue and dust.
You’ll tackle oils, fingerprints, and cleaner film with a low-VOC degreaser or trisodium phosphate alternative, rinsing and drying thoroughly.
After drying, run a tack cloth over the entire surface to pick up fine dust and particles that interfere with paint adhesion.
This final surface preparation step guarantees primer bonds evenly and prevents bumps or fish-eyes.
Work methodically from top to bottom, changing tack cloths when they’re loaded, and avoid touching the cleaned surface.
Clean a Metal or Steel Exterior Door
Start by knocking off loose dirt and debris with a soft brush or cloth so you’ve got a clean surface to work on.
Then degrease the door thoroughly with a suitable cleaner and rinse well so paint will stick.
If you spot rust, sand it back to bare metal and apply a metal primer before painting.
Remove Dirt And Debris
While you’re preparing the door for paint, remove loose dirt, cobwebs, and surface grime with a soft brush or a microfiber cloth so the cleaner can reach the metal. Work top to bottom, sweeping away dust that’s collected near hinges, thresholds, and any garden furniture nearby that may transfer grime. Use a hand broom for corners and a vacuum for stubborn debris.
Check the exterior wall junction and remove flaking paint chips. Rinse with clean water and dry with a lint-free cloth before proceeding.
- Brush vents and decorative trim
- Clear door sweep area
- Remove insect nests
- Wipe glass inserts
- Sweep surrounding porch
Degrease Surface Thoroughly
Because oils and residues repel paint, you’ll need to degrease metal or steel doors thoroughly so the new finish will adhere and last. Use a citrus or TSP substitute, work in small sections, and rinse well; this surface preparation step boosts paint adhesion and prevents peeling. Wear gloves, test cleaners on an inconspicuous spot, and avoid harsh abrasives that damage the metal.
| Step | Product |
|---|---|
| Wipe down | Microfiber cloth |
| Degrease | TSP substitute |
| Rinse | Clean water |
| Dry | Lint-free towel |
Sand And Prime Rust
After degreasing and rinsing, inspect the door for rust spots and loose paint so you can address them before priming. You’ll sand rust to bare metal with medium-grit sandpaper, remove dust, and treat remaining pits with a rust converter.
Apply a metal primer designed for corrosion resistance; that primer helps paint adhere and supports door security by preventing metal weakening. Seal edges to reinforce weatherproofing techniques and prolong finish life.
Finish with exterior-grade topcoat once primer cures.
- Sand to clean metal
- Use rust converter on pits
- Blow off dust
- Apply corrosion-blocking primer
- Seal edges for weatherproofing techniques
Clean a Wooden Exterior Door Without Damaging It
If you want the new paint to stick and look smooth, start by removing dirt, grease, and old flaking finish gently so you don’t damage the wood. Use a soft brush and mild detergent mixed with water; wipe with a damp cloth and dry thoroughly.
Test a small hidden area with diluted trisodium phosphate alternative if needed.
Lightly sand raised grain or rough spots to match the door’s exterior texture, then clean dust with a tack cloth.
Choose primers and paints for paint compatibility with wood.
Repair cracks with wood filler, sand smooth, and assure the surface is fully clean before painting.
Clean a Fiberglass or PVC Exterior Door
Start by inspecting the fiberglass or PVC door for cracks, gouges, or loose trim so you know what needs repair before cleaning.
Use a mild detergent and a soft brush or cloth to remove dirt and grime without scratching the surface.
Rinse thoroughly with clean water and dry completely to prevent streaks and guarantee paint will adhere.
Inspect Surface For Damage
Before you clean a fiberglass or PVC exterior door, take a close look for cracks, chips, gouges, or areas where the factory finish has worn away; these flaws will affect adhesion and how the new paint looks. Inspect for surface cracks and any paint peeling spots, noting size and depth.
Run your hand to feel roughness and use a flashlight for hairline defects. Record repairs needed: small filler, sanding, or panel replacement. Check seals and weatherstripping near damage so moisture hasn’t entered.
- Mark cracks and chips
- Note areas with paint peeling
- Feel for soft spots
- Shine light for hairlines
- Photograph for reference
Remove Dirt And Grime
Once you’ve noted repairs, tackle dirt and grime so paint will adhere properly and look smooth; use mild cleaners that won’t damage fiberglass or PVC. Start by sweeping loose debris, then mix a gentle detergent with warm water.
Use a soft brush or microfiber cloth to scrub panels, paying attention to crevices, seals, and hardware edges. Work during favorable weather conditions—dry, mild temperatures—to avoid residue or streaking.
Check exterior lighting shadows to verify you don’t miss spots. Avoid harsh solvents or abrasive pads that can mar the surface. Rinse and dry are next, but first remove all visible contaminants thoroughly.
Rinse And Dry Thoroughly
After scrubbing, you’ll need to remove all soap and loosened grime so paint will bond evenly. Use a garden hose with a moderate spray or a bucket of clean water and a soft sponge to rinse from top to bottom. Focus on rinse techniques that avoid blasting seals or hardware.
After rinsing, apply quick drying methods to prevent water spots and mildew: towel-blot panels, use a microfiber cloth for crevices, and open the door to air-dry. Confirm surfaces feel cool and fully dry before sanding or priming.
- Rinse from top to bottom
- Protect weatherstripping
- Towel-blot panels
- Use air circulation
- Check hinges and edges
Clean Glass Panels and Decorative Inserts
When you’re prepping glass panels and decorative inserts, work gently to avoid scratching the glass or damaging leaded, stained, or painted details.
Use a soft, lint-free cloth and a mild, non-abrasive glass cleaning solution for glass cleaning; spray the cloth, not the glass, to safeguard surrounding trim.
For decorative detailing, remove loose dust with a soft brush or cotton swab, then lightly clean crevices with a dampened swab.
Avoid ammonia on painted or leaded elements.
Rinse residues with a clean, damp cloth and dry immediately.
Let everything fully dry before masking or painting to guarantee adhesion and a clean finish.
Clean and Remove or Label Hardware, Locks, and Hinges
With the glass and decorative inserts cleaned and dry, turn your attention to the door’s hardware, locks, and hinges. These parts either need careful cleaning in place, temporary removal, or clear labeling so reinstallation is foolproof.
You’ll decide whether to do hardware removal or simply clean around pieces. If you remove parts, keep fasteners organized and document placement.
- Use a small bag for screws and label each one.
- Photograph the hardware before disassembly.
- Clean brass or chrome with a mild cleaner.
- Hang hinges on a peg or label with tape.
- Store locks and plates together.
Labeling hardware prevents mix-ups during reassembly.
Troubleshooting: Stains or Residues That Won’t Come Out
Start by identifying what’s staining the door—oil, mildew, paint bleed, or rust—so you can pick the right fix.
Use an appropriate solvent for the stain type, from mild detergent or vinegar to a stronger cleaner or commercial remover.
If solvents don’t work, gently use safe mechanical methods like a nylon scrub pad or fine-grit sanding, taking care not to damage the surface.
Identify Stain Types
If stubborn spots won’t budge after basic cleaning, you’ll need to pinpoint what they’re before trying stronger treatments. Check origin, texture, and how long stains have set; weather conditions affect penetration, and paint compatibility matters for repair choices.
Identify whether stains are organic, rust, oil, paint bleed, or mildew so you choose safe fixes later.
- Organic (bird droppings, sap) — usually acidic
- Rust — orange/brown, often from hardware
- Oil/grease — dark, repels water
- Paint bleed/old finish — color transfer or peeling
- Mildew/mold — fuzzy, often in damp spots
Use Appropriate Solvent
When basic cleaners don’t shift a stain, pick a solvent that matches the stain type and the door’s finish so you don’t damage the surface. You’ll test solvents on an inconspicuous area first, letting each dry to check for softening, discoloration, or lifting of existing exterior paint.
For grease, try mineral spirits; for marker or ink, use rubbing alcohol or lacquer thinner cautiously. Work gently with a soft cloth, rinsing thoroughly after treatment to remove residues.
Document which solvent worked so your solvent selection informs future cleaning without harming the door’s substrate or planned repainting.
Safe Mechanical Removal
If solvents and targeted cleaners won’t lift a stubborn stain, you’ll need to resort to careful mechanical removal to avoid damaging the door. You’ll work patiently, testing in an inconspicuous spot, using gentle tools and increasing aggressiveness only as needed.
Mechanical removal is part of proper surface preparation, so keep edges crisp and fibers intact.
- Use a plastic scraper first to lift residue without gouging.
- Try fine-grit sanding block, following the grain.
- Use a nylon abrasive pad for tricky spots.
- Clean dust with a tack cloth before recoating.
- Wear gloves and eye protection; control dust.
Final Ready-to-Paint Checklist and Common Mistakes to Avoid
Before you pick up the brush, run through a short checklist to confirm the door’s surface, hardware, and surroundings are truly paint-ready so you won’t have to stop mid-job.
Check for dust, grease, or loose flakes and sand smooth any rough exterior texture. Confirm primer compatibility with your chosen paint color and verify temperatures and humidity match label specs.
Remove or mask hardware, secure weatherstripping, and lay drop cloths to protect thresholds.
Avoid common mistakes: skipping primer, painting over damp surfaces, using interior paint, or ignoring rusted hinges.
Take photos of alignment and note repairs before the first coat.
Frequently Asked Questions
Can I Power-Wash an Exterior Door Without Damaging It?
You can power-wash an exterior door cautiously; Door material matters. Use low pressure, wider nozzle, and gentle Cleaning techniques for wood or painted surfaces. Avoid direct high-pressure spray on trim, panels, or damaged finishes to prevent harm.
How Long After Rain Should I Wait to Clean and Paint?
You should wait until the rain delay ends and surfaces reach full drying time—usually 24–48 hours in warm, sunny weather. If humidity’s high or temperatures are low, give it longer so paint adheres properly.
Can I Paint Over Lead-Based Exterior Door Paint Safely?
You can’t safely paint over deteriorating lead-based exterior door paint without precautions; lead paint removal or encapsulation by a certified pro is safest. Use strict safety precautions, containment, HEPA cleanup, and notify occupants before work starts.
What Primer Works Best for Extreme Weather Exposure?
Think of a weather resistant primer as armor for your door: you’ll want a high-build, acrylic-alkyd hybrid that boosts exterior durability, repels moisture and UV, and bonds well to old paint for long-lasting protection.
How Do I Clean Ornate Door Knockers Without Scratching Them?
You’ll gently remove dust with a soft brush, then use a mild soap solution and microfiber cloth for ornate hardware, testing a small area first; for stubborn grime, use cotton swabs and brass-safe polish with delicate cleaning.
Conclusion
Before you paint, remember that a clean door means a longer-lasting finish — and contrary to a common theory, you don’t need harsh chemicals to get professional results. Gentle cleaners, elbow grease, and proper prep (especially around hinges and glass) usually outperform aggressive stripping that can damage surfaces. Follow the checklist, protect nearby plants and trim, and tackle stubborn residues with targeted products. Do this, and your freshly painted door will look better and last far longer.