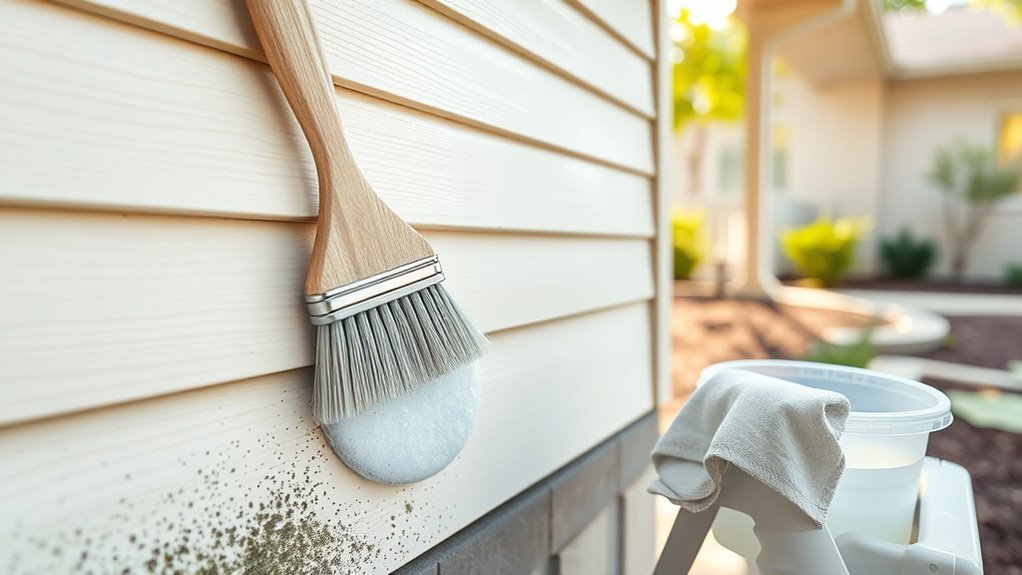
How to Clean Mildew Off Exterior Paint
You can remove mildew from exterior paint safely by wetting the area, applying a gentler cleaner like oxygen bleach or diluted vinegar, scrubbing with a soft brush, then rinsing low-pressure from top to bottom; avoid undiluted chlorine bleach, harsh abrasives, and high-pressure washing that can strip paint. Protect plants, wear gloves and eye protection, and test a hidden patch first. If stains or rot persist, consider repairs or pro tips below to prevent recurrence.
What This Guide Covers: Quick Fix to Prevention
Because mildew on exterior paint can spread quickly and damage surfaces if you ignore it, this guide walks you through fast cleanup and long-term prevention. You’ll learn to spot growth early, assess causes like outdoor humidity and shade, and pick cleaning methods matched to surface porosity.
You’ll get clear safety tips, materials lists, and timing advice so you don’t damage trim or siding. The guide also covers follow-up care: rinsing, drying, and protective coatings that reduce recurrence.
Finally, you’ll find simple maintenance routines to keep mildew from returning and when to call a pro for persistent or widespread problems.
Quick: Safest Way to Remove Mildew From Painted Exteriors
Start by protecting yourself with gloves, goggles, and a mask, and wet nearby plants before you work.
Use a gentle cleaner—like diluted vinegar or a mild detergent solution—and scrub with a soft brush to avoid harming the paint.
Rinse thoroughly with a garden hose and let the surface dry completely to prevent mildew from returning.
Safety First Steps
Before you touch any cleaning solution, make sure you protect yourself and the surrounding area. Put on gloves, eye protection, and a mask that filters spores. Cover nearby plants, outdoor furniture, and vents with plastic sheeting.
Work on a cool, dry day to reduce inhalation and runoff risks.
Test a small, hidden paint patch to guard paint longevity and avoid surprising reactions.
Beware mildew myths that promise instant removal without precautions—shortcuts can damage finish or harm you.
Keep kids and pets away, have water for rinsing, and read product labels before starting.
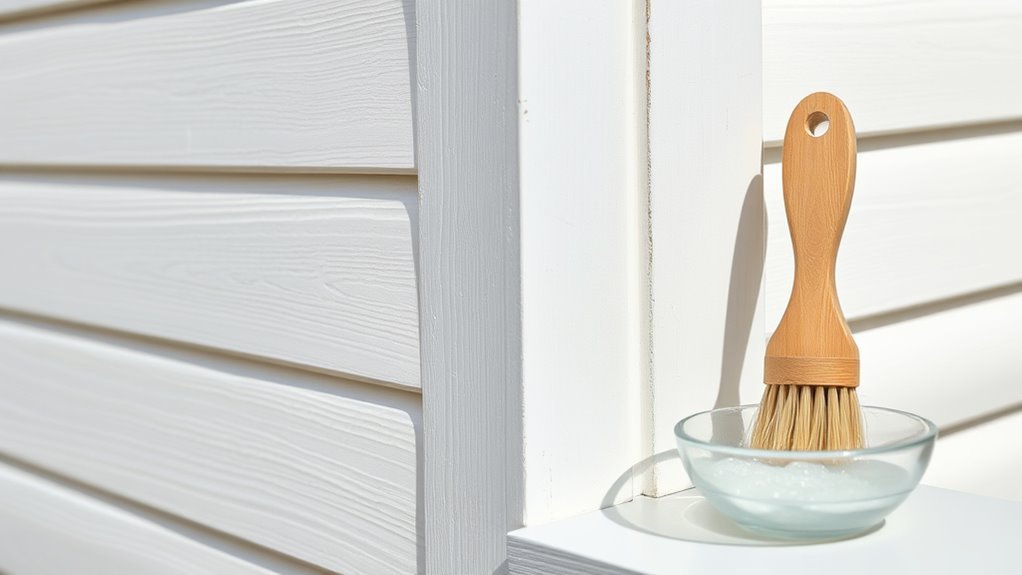
Gentle Cleaning Solutions
When you’re ready to clean, choose mild cleaners that kill mildew without stripping paint: a mix of water and liquid dish soap, or a solution of one part white vinegar to three parts water, works well for most painted exteriors. Test a small area first.
Use a soft-bristle brush or sponge, apply gently, and let the cleaner sit briefly to loosen spores. For stubborn spots, repeat rather than increasing strength.
Avoid bleach unless absolutely necessary, since it can damage color and compromise paint longevity. Regular gentle cleaning supports mildew prevention and helps preserve your finish over time.
Rinse And Dry Thoroughly
How will you know you’ve removed all cleaner and loosened mildew? Rinse surfaces with a gentle, steady stream from a garden hose, working top to bottom so runoff carries residue away. Check areas used for mildew identification to guarantee stains and spores rinse clear.
Use a soft brush only if film remains, then rinse again. Dry quickly with clean towels or let sun finish the job to prevent new growth; moisture invites mildew.
Note cleaning frequency on a calendar—every six months or after storms—so buildup doesn’t return. Proper rinsing and prompt drying protect paint and extend your efforts’ lifespan.
How to Tell Mildew vs. Mold vs. Dirt on Paint
You can usually spot the difference by looking, feeling, and sniffing the stain.
Mildew tends to form flat, powdery gray or white spots and smells musty.
While mold often appears darker, fuzzy or slimy, and has a stronger odor.
Dirt will brush away and has little to no smell.
Run your hand lightly (or use a cloth) to check texture and note any scent before cleaning.
Visual Appearance Differences
Because they can look similar at a glance, it helps to know the quick visual clues that separate mildew, mold, and regular dirt on exterior paint.
You’ll spot mildew as flat, powdery patches—often gray or white—that show up where moisture repeats; they create low color contrast against paint and rarely change paint sheen.
Mold appears darker—black, green, or brown—and forms clustered, spreading spots with higher contrast and irregular edges that suggest biological growth.
Dirt usually smears, follows run patterns, and matches ambient grime with no sudden contrast or clustered colonies.
Use these cues to decide cleaning intensity.
Texture And Smell
While color and pattern give quick clues, texture and smell often confirm whether the spots on your paint are mildew, mold, or just dirt. You’ll use texture analysis to probe feel and adhesion, and smell detection to note musty versus earthy scents. Run a fingertip test gently—don’t smear potential spores.
- Mildew: powdery or velvety, wipes off with light pressure.
- Mold: slimy or embedded, clings and may reappear after cleaning.
- Dirt: gritty, brushes away easily.
- Smell cues: mildew/mold = musty; dirt = neutral or dusty.
Combine both checks to decide cleanup steps.
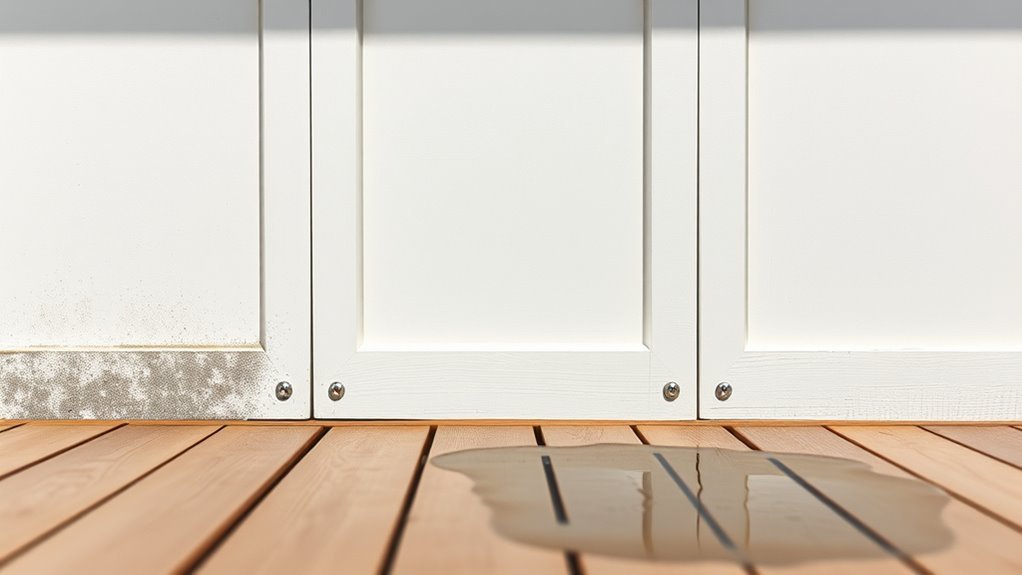
When Mildew Damages Paint vs. Cosmetic Growth
Although mildew often just sits on the surface, it can sometimes eat into paint and cause lasting damage, so you need to tell cosmetic growth from true deterioration before deciding how to treat it.
Look for soft, powdery patches that wipe away with mild detergent—those are cosmetic and usually won’t harm paint film. If paint flakes, bubbles, or shows dark staining beneath the top layer, mildew has likely compromised the coating and you’ll need sanding and repainting.
Check shaded areas near overgrown hedges, clogged gutters, garden pests, or poor exterior lighting that retain moisture; fixing those conditions prevents recurrence.
Which Paints Resist Mildew Best (Latex, Oil, Acrylic)
When you pick paint for an exterior prone to mildew, focus on the binder more than the color—acrylic-latex blends and 100% acrylics generally resist fungal growth best because they shed moisture and hold up to cleaning.
You’ll want a finish with mildewcide additives and good Paint durability to avoid frequent recoats.
Oil-based paints resist stains but trap moisture and can promote mildew under poor ventilation; they also show different Color fading patterns.
Consider these quick comparisons:
- 100% acrylic: best mildew resistance, strong Paint durability
- Acrylic-latex blend: balanced performance, easier application
- Oil-based: stain-resistant, less breathable
Finish choice affects maintenance and fading
Tools You’ll Need to Remove Mildew From Exteriors
Before you start, make sure you’ve got the right protective gear—gloves, goggles, and a mask—to keep yourself safe from spores and cleaning chemicals.
You’ll also want effective cleaning solutions, like a mildew remover or a bleach alternative, and a sprayer or bucket for application.
For scrubbing, bring a stiff-bristle brush, a scrub pad, and a long-handled tool for high or hard-to-reach spots.
Protective Gear Essentials
Because mildew spores can irritate your eyes, lungs, and skin, you’ll want the right protective gear before you start scrubbing exteriors. Follow safety precautions to limit exposure and work confidently. Wear items that fit well and are rated for chemical use when needed.
- NIOSH-approved respirator or mask (P100 or N95 depending on product use)
- Chemical-resistant gloves (nitrile or rubber) and long sleeves
- Safety goggles or a face shield to block splash
- Sturdy, slip-resistant shoes and knee pads if you’ll kneel
Inspect gear for damage, replace as needed, and ventilate the area while you work.
Cleaning Solutions Needed
Wondering which cleaners and tools will actually remove mildew without damaging your paint? You’ll need appropriate cleaning agents: a diluted bleach solution (1 part bleach to 3 parts water) or oxygen bleach for gentler action, plus a mild detergent to break grime.
Use a pump sprayer or bucket for application and clean water for rinsing. Focus on surface preparation—remove loose dirt, test a small area, and protect nearby plants.
Wear gloves and eye protection. Mix only what you’ll use, follow dwell times on labels, and rinse thoroughly to prevent residue that could harm paint or promote regrowth.
Tools For Scrubbing
When you tackle mildew on exterior paint, the right scrubbing tools make the job faster and protect the finish. You’ll want items that remove spores without causing paint peeling or damaging surfaces, especially if later color matching or touch-ups are needed.
- Soft-bristle brush for gentle scrubbing on painted siding
- Nylon scrub pad for stubborn spots without abrasion
- Extendable pole to reach high areas safely
- Garden hose with adjustable nozzle for rinsing grime away
Use steady pressure, test a hidden spot first, and keep replacement brushes handy so worn tools don’t cause damage during cleanup.
Protect Plants and Surfaces Before You Clean
Before you mix solutions or start scrubbing, shield nearby plants, outdoor furniture, and delicate surfaces from runoff and overspray. You’ll want plant protection: cover foliage with breathable fabric or plastic sheeting, moving potted plants aside.
Wet soil and roots by lightly watering before covering to reduce chemical uptake.
For hardscape and trim, use tarps and painter’s tape; consider surface sealing on porous masonry with temporary barrier film to prevent staining.
Secure coverings against wind.
Keep pets and children away while you work.
Once cleaning’s done, rinse surrounding areas thoroughly and remove coverings carefully to avoid spreading residues.
Household Cleaners That Safely Remove Mildew
Now that you’ve protected plants and surfaces, it’s time to pick cleaners that remove mildew without damaging paint or surrounding landscaping. You’ll want safe, effective options that respect paint durability and debunk mildew myths about harsh chemicals being necessary. Use these household choices, testing a small area first:
- Mild detergent and water: good for light growth, nonabrasive, preserves finish.
- Vinegar solution (white vinegar diluted): antifungal, eco-friendly, gentle on most paints.
- Borax paste: effective without rinsing residue, avoids harsh fumes.
- Hydrogen peroxide (3%): oxidizes spores, breaks down organic material safely.
Always rinse thoroughly and spot-test for colorfastness.
Oxygen Bleach vs. Chlorine Bleach: When to Use Each
When you’re choosing a cleaner, oxygen bleach is gentler on paint, plants, and metal while still breaking down mildew effectively.
Chlorine bleach can work faster on stubborn stains but it’s harsher, can discolor surfaces, and will damage nearby vegetation if it splashes.
We’ll compare when the mild, safer option is best versus when the stronger, riskier choice might be necessary.
Oxygen Bleach Advantages
You’ll find two common bleaches for tackling mildew—oxygen-based and chlorine—and each has clear strengths depending on the job. You’ll prefer oxygen bleach for exterior cleaning when you want a gentler, eco-friendlier option that won’t strip paint. It brightens surfaces, lifts organic stains, and’s biodegradable. Use it on wood, vinyl, and delicate finishes where strong chemicals could cause harm.
Apply with a pump sprayer, let it sit, then rinse.
- Safer for plants and pets when rinsed
- Non-corrosive to metals and fixtures
- Effective on mildew and organic stains
- Works well in sunlight
Chlorine Bleach Limitations
Oxygen bleach works well for gentle cleaning, but chlorine bleach still has a role—despite several important limits you should know. You can use chlorine for stubborn mildew, yet Chlorine limitations matter: it can fade paint, corrode metal, and harm plants and pets. You should dilute it carefully, protect surrounding landscaping, and rinse thoroughly. Prefer oxygen when possible; consider bleach alternatives for routine cleaning. Use chlorine only for persistent stains, and test a hidden spot first.
| Scene | Impression |
|---|---|
| Painted siding | Faded risk |
| Metal trim | Corrosion risk |
| Nearby plants | Damage risk |
| Tough stains | Chlorine works |
How to Mix Bleach‑Based Mildew Cleaners Safely
Because bleach can release dangerous fumes and react with other cleaners, you should mix bleach-based mildew solutions carefully and only with compatible ingredients. You’ll counter common mildew myths by using simple, safe ratios that support paint preservation while killing spores.
Wear goggles, gloves, and a respirator, and work outside or with ventilation.
- Use 1 part household bleach to 3 parts water for general cleaning.
- Never mix bleach with ammonia, acids, or other cleaners.
- Add bleach to water, not water to bleach.
- Rinse thoroughly after treatment and dispose of leftovers safely.
How to Test Cleaners on Painted Surfaces First
Before treating a whole wall, test your cleaner on a small, inconspicuous painted area to make sure it won’t strip color or damage the finish.
Dampen a cloth with the solution, blot a hidden corner, and wait 24 hours to check for fading, peeling, or tackiness.
Try a second spot if different paint or trim exists, and note how nearby exterior lighting or shade affects dry time.
Keep pets and garden pests away during testing.
If paint softens or color shifts, stop and choose a milder formula or consult the paint manufacturer before proceeding with larger cleaning.
Soft‑Washing Technique for Siding and Trim
Before you start soft‑washing siding and trim, mix a gentle solution suited for painted surfaces—usually a low‑concentration bleach or peroxide cleaner with a surfactant—and follow label ratios.
Apply it with a low‑pressure sprayer from the bottom up, keeping hardware and plants covered and avoiding overspray on glass.
Rinse thoroughly with low pressure and spot‑check for paint lift, reapplying protection or touch‑up where needed.
Preparing The Soft‑Wash Solution
When you’re ready to mix the soft‑wash solution, gather a pump sprayer, a measured bleach source, a surfactant (or cleaner designed for soft‑washing), and protective gear so you can work safely and accurately.
Check mildew identification—note texture, color, and growth pattern—so you choose strength accordingly and avoid harming different exterior paint types.
Measure ratios: common mixes use low bleach concentration with surfactant to cling to surfaces.
Mix outdoors, downwind, and keep water source separate.
Test a small, inconspicuous patch for paint reaction before proceeding.
- Bleach-to-water ratio
- Surfactant amount
- PPE checklist
- Spot test step
Safe Application Techniques
Although soft‑washing relies on low‑pressure application, you’ll still need to control nozzle distance, spray angle, and overlap to avoid streaking or driving solution under trim.
You should test a small area, wear gloves and eye protection, and keep cleaning tools dedicated to mildew work.
Apply solution in horizontal passes from the bottom up to minimize runs, and pause briefly between coats for dwell time without scrubbing.
Watch for paint-sensitive areas and adjust dilution to prevent unwanted chemical reactions.
Keep ladders stable, avoid spraying into vents or landscaping, and follow label directions for safe, consistent siding and trim treatment.
Rinsing And Surface Protection
After you’ve applied the solution and allowed proper dwell time, rinse carefully to remove residues without damaging paint or landscaping. You’ll use low-pressure water to avoid color fading or paint peeling, working top-to-bottom and keeping spray at a shallow angle.
Protect plants and hardware, and don’t let runoff pool against foundations. After rinsing, inspect for missed spots and repeat soft-wash if needed.
Finish by applying a safe, breathable sealant or mildew inhibitor to slow regrowth and protect trim.
- Use 25–40 psi with a wide fan nozzle
- Cover vegetation and fixtures
- Rinse toward gutters, not beds
- Recoat suspect areas promptly
Pressure‑Washer Settings That Won’t Damage Paint
Because too much pressure or the wrong nozzle can strip paint, you’ll want to set your washer for a gentle but effective clean—typically 1,200–1,500 psi with a 25° or 40° fan tip, and a flow of about 2–3 GPM.
Start at the farthest distance—8–10 feet—and move closer gradually until mildew lifts without damaging the finish. Test a small, inconspicuous area first, especially if you used mildew resistant paint.
Keep the spray angle shallow to avoid driving water under trim or into siding seams. Use consistent sweeping motions and avoid concentrated blasting on seams, corners, or aged paint.
Step‑by‑Step Cleaning for Wood Siding and Trim
Before you start cleaning wood siding and trim, inspect the surface for paint damage, rot, or soft spots so you know what needs gentle handling or repair.
Use milder cleaners and a soft-bristle brush or low-pressure washer to remove mildew without stripping paint.
If areas look compromised, spot-treat them with appropriate cleaners and plan repairs before repainting.
Assess Surface And Damage
When you start evaluating the wood siding and trim, look for soft spots, peeling paint, and cracked caulk that signal underlying rot or moisture damage. Check how surface texture varies—rough, blistered, or chalky—and note any fading or mismatched paint color that could hide repairs.
Probe suspect areas with a screwdriver and press gently to detect sponginess. Document locations and severity before cleaning so you can prioritize repairs.
- Mark areas needing patching or replacement
- Note caulk joints and trim seams
- Photograph problem spots for records
- Measure extent of mildew versus structural damage
Safe Cleaning Methods
Now that you’ve assessed the siding, you can move into safe, effective cleaning methods that remove mildew without damaging paint or wood.
Work in sections, wetting the area, then apply a mild detergent or a 1:3 bleach-to-water mix with a sprayer or soft brush. Scrub gently along the grain to lift mildew spores; avoid aggressive sanding that causes paint peeling.
Rinse thoroughly and let dry before repeating if needed.
For trim, use smaller brushes and protect plants. Wear gloves, goggles, and a mask. Dispose of rinse water responsibly.
Repaint or seal only after the wood is fully dry and mildew-free.
Step‑by‑Step Cleaning for Vinyl Siding and Painted Surfaces
Although mildew can seem stubborn, you can remove it from vinyl siding and painted surfaces with a simple, careful routine that protects both the finish and your family’s health. Assess affected areas for mildew growth and any signs of paint damage before starting. Wear gloves, goggles, and a mask. Mix a gentle cleaner (water, detergent, or diluted bleach per label) and test a small spot.
- Wet surface and apply cleaner from bottom up
- Let sit briefly, then scrub with soft brush
- Rinse thoroughly with low-pressure hose
- Repeat only if stains persist
Dry completely to prevent recurrence.
Cleaning Painted Stucco and Masonry Safely
Because painted stucco and masonry absorb water and cleaners differently than smooth siding, you’ll need gentler techniques and lower pressure to avoid damaging the paint or substrate.
Work in small sections, test a mild detergent solution on an inconspicuous spot, and rinse promptly.
Use a soft-bristled brush and low-pressure hose; avoid power washers that force water into pores and promote mildew growth or cause paint peeling.
Wear gloves and eye protection, and allow surfaces to dry fully between treatments.
For porous areas, repeat gentle cleaning rather than harsher chemicals to protect the finish and underlying masonry.
How to Remove Stubborn Mildew Stains and Black Streaks
First, you’ll want to identify what’s causing the stains—mildew, algae, or water runoff—so you can pick the right treatment.
Then choose an effective cleaner (oxygen bleach or a mild detergent with an anti-fungal agent) that’s safe for your paint.
Finally, use gentle scrubbing with a soft brush and rinse thoroughly to remove streaks without damaging the finish.
Identify Stain Causes
When you’re dealing with stubborn mildew stains and black streaks on exterior paint, the first step is figuring out what’s actually causing them so you can choose the right removal method. Inspect the area closely: look for mold growth, water runoff, or nearby plant cover.
Note whether stains sit on top of the finish or have stained the substrate, and check for paint peeling that indicates moisture damage. Also consider previous repairs, age, and color matching issues that might make stains more obvious.
Use this checklist to identify root causes before you proceed with targeted cleaning.
- Mold vs. dirt
- Water paths
- Paint peeling
- Color matching issues
Choose Effective Cleaners
Now that you’ve identified likely causes—mold growth, water paths, or failing paint—you can pick cleaners that match the problem and the surface.
Choose EPA-approved cleaning agents for biological stains; oxygen bleach works on most paints without bleaching color.
For raw wood or porous masonry, pick a milder formula and test a small area.
Read labels for contact time, dilution, and safety gear.
Combine thoughtful surface preparation—rinsing loose debris and protecting plants—with correct mixing to boost effectiveness.
Avoid harsh acids or undiluted bleach on sensitive finishes.
Dispose of rinse water responsibly and recoat only after surfaces fully dry.
Gentle Scrubbing Techniques
Before you start scrubbing, wet the area and apply your chosen cleaner so it has time to loosen the mildew; this softens stains and reduces the elbow grease you’ll need. Use gentle, circular motions with a soft-bristle brush to lift stubborn mildew stains and black streaks without causing color fading or paint cracking. Rinse frequently to check progress. If spots persist, repeat rather than increasing pressure.
- Test a small hidden area first.
- Work top to bottom to avoid re-soiling.
- Use a sponge for trim and crevices.
- Protect plants and rinse runoff thoroughly.
Getting Mildew Out of Tight Spots and Crevices
Since mildew loves hiding in narrow joints and shadowed crevices, you’ll need small tools and targeted cleaners to reach spots a garden hose or sponge can’t.
Since mildew hides in tight joints and shadowed crevices, use small tools and targeted cleaners to reach those spots.
Use a soft-bristle toothbrush, cotton swabs, or a plastic scraper to dislodge growth without gouging paint. Apply a mildew removal solution—diluted bleach or a commercial cleaner—directly with a spray bottle or brush, letting it sit briefly.
Agitate gently, then repeat on stubborn patches. Work methodically along seams, window tracks, and trim gaps.
Wear gloves and eye protection, ventilate well, and dispose of contaminated cloths safely to protect both finish and health.
Rinsing and Drying Best Practices to Protect Paint
When you’ve finished treating mildew, rinse thoroughly with low-pressure water to remove cleaner residue and loosened spores without blasting paint or grout loose. Move evenly to protect exterior texture and avoid etching. Dry promptly to preserve paint durability and prevent new growth.
- Start at the top, work downward to carry contaminants away.
- Use a soft-bristled brush for stubborn spots, then rinse gently.
- Blot nearby wood and metal trim to prevent moisture seepage.
- Allow full sun or cross-ventilation to speed drying, but avoid heat stress on fresh paint.
Check surfaces for streaks; repeat gentle rinsing if needed.
When and How to Prep Surfaces Before Repainting
If mildew was present, you’ll want to verify the surface is completely clean, dry, and free of loose paint before priming or repainting.
Inspect for stains, chalking, and soft or blistered areas; sand or scrape back to sound substrate. Wash again where dust or residues remain, then allow full drying time.
Use an appropriate primer on bare wood, metal, or masonry to promote paint adhesion.
Prime bare wood, metal, or masonry first to ensure proper adhesion and a long-lasting paint finish.
Mask trim and protect landscaping.
Replace rotted trim and caulk gaps to prevent future moisture intrusion.
Proper surface preparation saves time and guarantees a durable, attractive finish once you repaint.
Mildew‑Resistant Paints and Additives to Consider
After you’ve removed mildew, repaired damage, and primed bare spots, choose paints and additives that actively resist future growth so your work lasts longer. You’ll want Mildew resistant paints labeled for exterior use and breathable formulas that shed moisture. Look for paints with biocides or fungicides already included, and pick colors that don’t trap heat.
Consider Additives for mildew when a specific paint lacks protection; mix per manufacturer directions to maintain warranty. For best results, follow these tips:
- Use 100% acrylic exterior paints with mildew preservatives
- Add EPA‑registered mildew additives as directed
- Apply two coats for full coverage
- Store mixed paint properly after use
Improve Drainage and Sunlight to Prevent Mildew
Because mildew thrives in damp, shaded areas, you should direct water away from siding and open up dark spots to sunlight so surfaces stay dry. Check gutters, downspouts, and grading so runoff doesn’t pool near foundations.
Trim overhanging branches and thin dense foliage to increase air circulation and sun exposure without altering major landscaping. Use splash blocks or extensions to route water; consider French drains for persistent seepage.
Manage plant growth close to walls to reduce moisture retention and mating sites for pests; integrate routine Pest control inspections to catch moisture‑attracting issues early. Dry surfaces quickly after cleaning to prevent regrowth.
Landscaping Changes That Reduce Mildew on Painted Exteriors
When you rethink the plants and hardscaping near your house, you can greatly reduce the moisture that lets mildew take hold on painted surfaces. You’ll focus on smart landscaping design and site adjustments that keep walls drier and cleaner. Consider these practical changes:
- Select drought-tolerant plants and space beds away from siding.
- Grade soil and add swales or gravel to divert water from foundations.
- Use hardscaping (patios, mulch-free strips) to limit splashback onto paint.
- Test and amend Soil pH to support chosen plants and prevent dense, moisture-retaining growth.
These moves cut humidity and lower mildew risk on exterior paint.
Seasonal Maintenance Checklist to Keep Paint Mildew‑Free
Landscaping changes will cut mildew pressure, but keeping paint clean also requires a regular maintenance rhythm throughout the year. Each season, inspect shaded and damp areas for early mildew growth and soft spots that signal moisture intrusion.
Spring: wash siding, clear gutters, trim vegetation to improve airflow.
Summer: spot-treat stains and repaint small damaged areas to prevent paint peeling.
Fall: clean debris, reseal joints, and check caulking.
Winter: monitor for ice dams and address leaks promptly.
Keep a simple checklist, set reminders, and act quickly on issues to limit mildew spread and preserve your exterior finish.
Common Cleaning Mistakes That Damage Paint
If you scrub too hard, use the wrong cleaner, or ignore prep steps, you can strip paint, etch finishes, or leave residues that invite mildew back. You should avoid shortcuts that harm paint health and encourage mildew growth.
Common mistakes include using undiluted bleach, abrasive tools, skipping a test patch, and neglecting rinsing. Watch for these pitfalls:
Common missteps: undiluted bleach, abrasive tools, skipped test patches, and inadequate rinsing—avoid these pitfalls.
- Applying concentrated cleaners directly to the surface
- Scrubbing with wire brushes or harsh pads
- Failing to test a small area first for color or finish changes
- Leaving cleaner residue that promotes mildew growth and degrades paint health
Follow proper methods to preserve finish.
Safety Checklist: PPE and Safe Chemical Handling
You’ve seen how scrubbing too hard or using the wrong cleaner can damage paint and invite mildew back, so now protect yourself and the surface by using proper personal protective equipment and handling chemicals safely.
Wear chemical-resistant gloves, eye protection, and a respirator rated for mold spores when needed. Work outdoors or ventilate well to avoid inhaling fumes.
Read labels to prevent dangerous chemical reactions—never mix bleach and ammonia. Test cleaners on a hidden patch to gauge effects across mildew types and paint finishes.
Store and dispose of cleaners per instructions, keep kids and pets away, and wash up thoroughly afterward.
When to Call a Pro for Widespread or Persistent Mildew
When mildew covers large areas, keeps returning after treatments, or has penetrated under siding or into porous trim, call a professional—these situations often need specialized inspection, commercial-grade remediation, and repairs you mightn’t safely or effectively do yourself.
If mildew spreads widely, recurs after cleaning, or has worked under siding or trim, call a pro.
You’ll want an expert if:
- you see structural rot or hidden growth behind cladding
- DIY methods won’t stop recurring stains despite correct cleaning
- you need verification that mildew myths haven’t led to improper fixes
- paint durability is compromised and requires matched repainting or replacement
A pro will assess health risks, moisture sources, and ensure remediation prevents recurrence and preserves your home’s finish.
Troubleshooting: Why Mildew Keeps Coming Back and Fixes
Large or recurring mildew problems often point to underlying causes you can fix yourself or with targeted help. You’ll check moisture sources: clogged gutters, poor drainage, leaking trim, or overhanging branches trapping humidity.
Improve ventilation and sunlight exposure, repair leaks, and redirect runoff to cut mildew-friendly conditions. Use mildew-resistant primers and quality topcoats to boost paint durability and finish integrity.
Clean properly, allow full drying before repainting, and follow mildew prevention steps like periodic inspections and gentle washings.
If mildew returns despite fixes, consult a pro for mold testing and structural moisture assessment to prevent recurrence.
Frequently Asked Questions
Can Mildew Cause Health Problems for Household Pets?
Yes — you’ll worry: pet allergies and toxic mold can make your pets miserable, causing sneezing, coughing, skin irritation, lethargy, or worse; get them checked, remove mold, and consult your vet if symptoms persist.
Can Interior Humidity Control Affect Exterior Mildew Growth?
Yes — you’ll reduce exterior mildew risk by using indoor dehumidifiers to lower indoor moisture that can migrate outward, and by improving exterior ventilation so damp air disperses quickly, preventing persistent moisture buildup on surfaces.
Will Cleaning Void My Home Insurance or Warranty on Paint?
Generally, cleaning won’t void your warranty or insurance, but you’ll want to follow manufacturer guidelines to protect paint durability and check insurance policies for exclusions; document proper cleaning methods and products to avoid disputes later.
How Long After Rain Is It Safe to Clean Exterior Paint?
Like a fresh page, you should wait 24–48 hours after rain before cleaning the exterior surface; you’ll avoid damage and slipping. Adjust cleaning frequency seasonally—more often in humid months, less in dry periods.
Can Solar-Powered Lights or Motion Sensors Reduce Mildew Growth?
Yes — solar lights and motion sensors can help indirectly; they’ll reduce dampness and shade by increasing airflow and discouraging prolonged moisture, which limits mildew-friendly conditions but won’t replace regular cleaning and proper ventilation maintenance.
Conclusion
You’ve got this—think of cleaning mildew like weeding a garden: one afternoon of care keeps it from reclaiming the fence. I once spent an hour scrubbing a mildew-streaked porch, then sealed it; two seasons later it still looked new. Follow the quick fixes, preventive tips, and safety checks here, and you’ll avoid repeat work. If growth persists or paint peels, call a pro before small spots turn into a bigger job.