How to Dry Brush Paint Technique for Beginners
Dry brushing is a simple way to add texture and highlights using a nearly dry brush with very little paint. Load the tips, wipe most off on a rag, then lightly drag short, directional strokes across raised areas to suggest wear, edges, or light. Use stiff flat brushes for rough surfaces and softer ones for canvas; layer thinly and clean brushes often. Try it on a scrap first, and keep going to learn more techniques and safety tips.
What Is Dry Brushing and When to Use It

Ever wondered what dry brushing actually is and why artists reach for it? You apply a nearly dry brush with minimal paint to highlight texture, edges, and subtle gradations without heavy coverage. You’ll use it to suggest wear, bring out raised details, or add luminous accents.
Its roots connect to historical techniques across media, showing painters and modelers how restraint enhances form. You’ll also notice cultural significance: many traditions favor understated marks to convey age or craftsmanship.
Choose dry brushing when you want controlled, textured effects rather than opaque layers, letting surfaces read more naturally and detailed.
Quick Dry-Brush How-To: The 3-Step Process
When you’re ready to add texture and highlights, follow this simple three-step dry-brush routine: load a small amount of paint, wipe most of it off, then lightly drag the brush across raised areas to build subtle, controlled marks.
Step 1: choose a lighter or contrasting hue from your color mixing plan and pick a nearly dry brush.
Step 2: tap excess paint onto a rag until bristles leave faint streaks.
Step 3: apply with short, directional strokes, building layers gradually.
Rinse and reshape bristles after each session to guarantee proper brush maintenance and consistent results.
Essential Tools for Dry Brushing
Although dry brushing looks simple, having the right tools makes your results predictable and clean. You’ll want a palette or plate to offload paint, quality acrylics that show contrast, and a selection of surfaces or primers suited to your project.
Keep a dedicated rag or paper towels, a gentle solvent for cleanup, and gloves to protect skin.
Study basic color theory so your highlights and tones harmonize.
Finally, prioritize brush maintenance: clean and reshape bristles promptly, store brushes flat or upright to avoid damage, and rotate worn tools to keep strokes consistent and controlled.
Choosing Brushes: Bristle Type, Size, and Shape
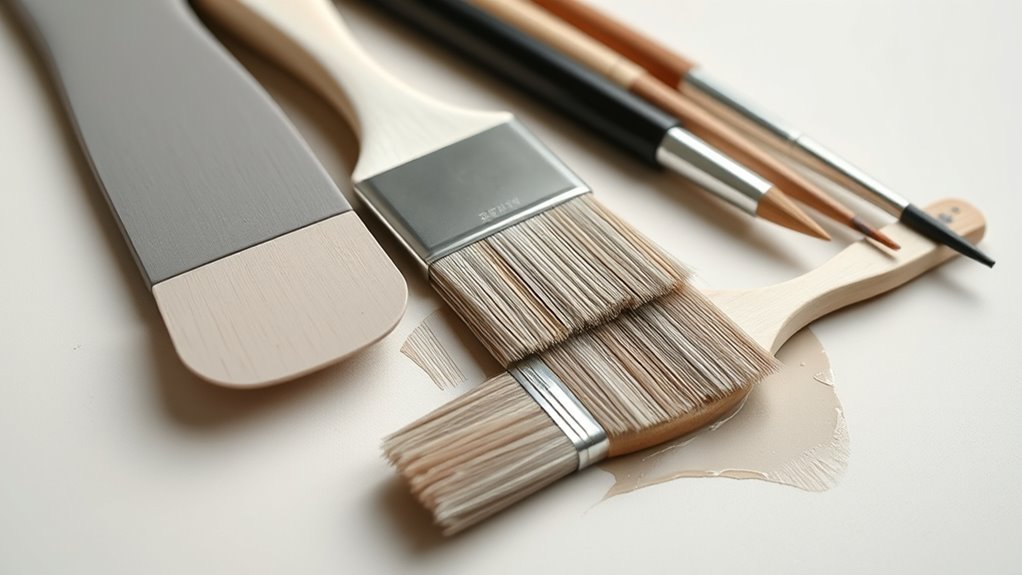
Because the brush is your direct link to the surface, choosing the right bristle type, size, and shape changes how your highlights read and how much control you have, so you should match each brush to the effect you want.
Choose stiff synthetic bristles for bold, textured highlights and softer natural or sable blends for subtle glazing.
Use flat, wide brushes to hit broad edges and small round or filbert tips for precision on raised detail.
Match brush size to model scale and pressure you plan to apply.
Rinse carefully after use, manage color mixing on palettes, and practice good brush storage to prolong life.
Picking Paints and Surfaces That Work Best
If you want crisp, controllable dry-brushing, pick paints with higher pigment load and slightly thicker consistency — not the runny, ink-like washes — and choose surfaces with a bit of tooth so the bristles can catch on raised detail.
For crisp, controllable dry-brushing, use higher-pigment, slightly thicker paints and textured surfaces that catch the bristles.
You’ll favor acrylics labeled heavy body or artist grade for opacity and control; metallics and washes can work sparingly as highlights.
Match paint choice to the project’s Color theory so highlights and shadows read correctly. Test on scrap to confirm opacity.
Keep brush maintenance in mind: remove buildup and reshape bristles after each session to preserve crisp application and surface interaction.
Prime and Prep Surfaces for Dry Brushing
Before you start dry brushing, make sure the surface is clean, smooth where needed, and primed with the right base so your highlights read clearly and adhesion holds up. You’ll sand glossy spots, fill deep pits, and wipe away dust or oils so paint bites evenly.
Choose a primer color that supports your highlight and shadow plan; mid-tones make color blending easier than stark black or white. Test small areas to confirm surface adhesion and primer compatibility with your chosen paints.
Let primers cure fully before you work, and mask edges where you don’t want texture buildup.
Remove Excess Paint for Dry Brushing
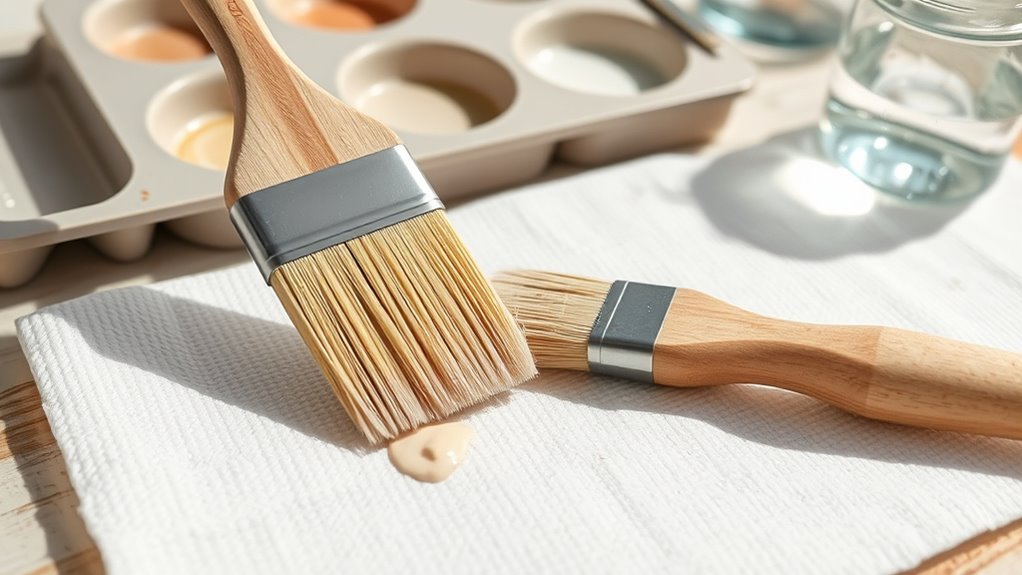
Now that your surface is prepped and primed, learn to remove excess paint so your dry-brushing creates crisp, controlled highlights instead of blobs.
Dip only the tips of a stiff brush into paint, then wipe rigorously on a paper towel or rag until almost dry. Test on scrap material to check opacity and color blending behavior. You want a whisper of pigment that skims raised texture, not saturated strokes.
Re-wipe between color changes to avoid contamination. Good surface preparation and disciplined wiping guarantee predictable results, letting you build subtle highlights without overloading the surface or losing detail.
Basic Dry-Brush Strokes to Start With
When you pick up the brush, load only the tips and drag it lightly across the surface with short, confident strokes; this lets the bristles catch raised texture while leaving recesses untouched.
Start with straight, controlled passes to establish rhythm, then try crisscross strokes for more even coverage.
Use flicks for tiny highlights and gentle dabbing for subtle speckles.
Keep paint sparse to avoid buildup; practice on scrap material before committing.
Remember basic color mixing principles so highlights complement base tones.
After each session, prioritize proper brush maintenance—clean and reshape bristles so your dry-brush strokes stay crisp and predictable.
Layering and Building Texture With Dry Brushing
Start with thin layers so you can control the color and avoid overloading the surface.
Gradually build texture by adding more light strokes between layers, letting each one dry if you want sharper effects.
Vary your brush pressure to create contrast—lighter for soft highlights, firmer for pronounced texture.
Start With Thin Layers
Although dry brushing is known for bold texture, begin with thin, controlled layers so you can build depth without overpowering the surface. You’ll prep the area, ensuring surface preparation is complete—clean, dry, and primed—so paint adheres predictably.
Load your brush lightly, wipe excess, and move in short strokes, checking progress often. Thin layers let you adjust color blending gradually, mixing tones on the surface instead of forcing corrections later.
Work one small section at a time, letting each layer dry fully. This disciplined approach gives you control, reduces mistakes, and sets a strong foundation for richer effects later.
Build Gradual Texture
Now that you’ve laid down thin, controlled layers, begin building texture by layering slightly varied tones and pressure. You’ll focus on subtle color blending to suggest depth without overworking the surface. Work in short, deliberate strokes, cleaning excess paint often to preserve brush life and Brush maintenance habits. Alternate midtones, highlights, and slight desaturation to create believable wear. Step back frequently to assess overall contrast, then add tiny highlights sparingly. Use a light hand toward edges to keep gradations soft. Below is a simple guide to help you plan layers and results.
| Layer | Effect |
|---|---|
| Base | Foundation tone |
| Mid | Texture definition |
| Highlight | Light catch |
| Scuff | Wear and realism |
Vary Brush Pressure
When you vary brush pressure, you control how much paint the bristles deposit and where texture appears, so practice pressing lightly for soft blends and increasing pressure for pronounced grain. You’ll learn to vary pressure to reveal underlying layers and build highlights without overloading surfaces.
Keep strokes short and directional, lifting slightly to feather edges. Maintain brush control by loading little paint, testing on scrap, and adjusting wrist tension rather than arm force.
For deeper texture, push firmer and scrub gently; for subtle shifts, glide with barely-there contact. Track results, refine pressure choices, and layer gradually for balanced, textured finishes.
Highlight Raised Details With Dry Brushing
Before you start, pick a flat, stiff brush and load it with a small amount of paint, then wipe most of it off on a paper towel so only a thin film remains—this lets you drag color across raised edges without filling recesses.
Lightly sweep the brush across ridges and textures, angling strokes to catch highlights. Use minimal pressure and short motions to control coverage; build intensity gradually rather than overloading.
Practice color blending on a scrap to match tones.
Keep brushes clean and reshape bristles after use—tool maintenance preserves stiffness and predictable dry-brush results for future projects.
Create Subtle Gradients and Fades
After highlighting raised details with dry brushing, move focus to building soft gradients that tie those highlights into surrounding tones. You’ll feather paint with very light strokes, reducing pressure as you move outward to blend edges.
Thin your pigment through careful color mixing to avoid abrupt shifts, and test on a scrap to confirm opacity. Guarantee surface preparation is even and matte so the dry brush transitions sit smoothly.
Work in thin layers, glazing between passes to deepen midtones without losing texture. Step back often, adjust contrast subtly, and stop once fades read natural and cohesive.
Weathering and Aging With Dry Brushing
To age your piece, start by building thin, layered paint to mimic accumulated grime and faded finishes.
Then use controlled paint removal—light sanding or a damp rag—to reveal underlying tones without overdoing it.
Finish by dry brushing lighter shades on edges and raised details to highlight natural wear.
Layered Paint Build-Up
When you build up layers with dry brushing, you mimic years of wear by working from broad, subtle tones to sharper highlights. Let each thin pass add texture and depth without obscuring previous marks.
You’ll start with muted base washes and use careful color mixing to create believable midtones.
Load the brush lightly, wipe most paint off, then apply short, controlled strokes that catch raised edges.
Gradually increase contrast with lighter, finer passes.
Let each layer fully dry and consider gentle varnishing techniques to protect and unify the finish.
This patient layering creates realistic, aged surfaces without heavy paint buildup.
Controlled Paint Removal
Layered build-up creates believable age, but controlled paint removal lets you suggest long-term wear by selectively revealing what’s underneath.
You’ll work in stages: soften edges with light dry brushing, then lift tiny areas with a damp cotton swab or soft brush to expose base layers.
Practice color mixing to match faded tones before removing paint so exposed areas read naturally.
Use minimal pressure and small, varied motions to avoid uniform streaks.
Keep a scrap for tests and do careful brush cleaning between colors to prevent contamination.
Step back often; subtlety convinces more than heavy-handed abrasion.
Highlighted Edge Wear
Because edges catch light and abrasion first, highlighted edge wear uses dry brushing to mimic that natural contrast by depositing just a touch of lighter pigment along corners, ridges, and raised details.
You’ll load very little paint on a stiff brush, wipe most off, then lightly skim edges with short, controlled strokes. Focus on high points where real wear would occur, vary pressure to avoid uniform lines, and build up thin layers for realism.
Combine this with subtle surface distress—small chips or scuffs—to sell age. Finish by stepping back often to guarantee balance and avoid overdoing highlights.
Combine Dry Brushing With Washes and Glazes
Although dry brushing brings out crisp highlights and texture, combining it with washes and glazes helps you control depth, tone, and subtle color shifts without losing detail. Start with good surface preparation so washes flow into recesses and glazes sit evenly.
Use a thin wash to define shadows, then dry brush back over raised areas to restore highlights. Apply glazes to tweak hue and achieve smooth color blending between highlights and shadows.
Work in layers, letting each dry. That layered approach preserves texture while granting nuanced control, letting you enhance realism without obscuring fine detail.
Control Opacity: Load, Dilution, and Stroke
Decide how much paint you load on the brush—more for bolder marks, less for subtle texture.
Adjust your paint-to-water ratio to control translucency, testing until the mix sits on bristles without dripping.
Vary your stroke pressure to layer opacity precisely, using light taps for thin veils and firmer pulls for stronger coverage.
Brush Load Amount
Start by thinking of brush load as the single most important tweak you can make to control opacity. You’ll adjust how much paint sits on bristles to shift from whisper-thin highlights to bold texture.
Use light taps and wipe excess on a rag for a near-dry brush; add a bit more paint for stronger coverage. Pay attention to color mixing on your palette so layered dry brushing behaves predictably.
Remember that varying drying times will change how successive passes blend. Practice short, confident strokes and test load on scrap to find the sweet spot between subtlety and opacity.
Paint Dilution Ratio
Think of paint dilution ratio as the dial that fine-tunes opacity between your brush load and stroke—add a drop of thinner and the paint feathers out, leave it thicker and it lays down more color.
You’ll test small increments: thin a bit for subtle highlights, keep slightly viscous for stronger texture.
Track mixing for consistent results—note ratios during color mixing so repeats match.
Use a palette well and wipe excess to maintain dry-brush effect.
Proper brush maintenance keeps bristles responsive to diluted mixtures; clean and reshape after sessions so your next ratio tests behave predictably and reliably.
Stroke Pressure Control
When you vary how hard you press, you control opacity more than any other single factor. You’ll adjust load, dilution, and stroke to coax subtle shifts: light sweeps for highlights, firmer pulls for texture. Keep strokes deliberate and consistent, and practice color blending with minimal paint on the brush.
Prioritize brush maintenance so bristles stay responsive.
- Feathered wrist for soft edges
- Firm tip for visible grain
- Quick tap for speckled highlights
- Long drag for worn surfaces
- Zigzag for uneven wear
You’ll learn to read surfaces and modulate pressure to achieve controlled, expressive dry brushing.
Adjust Technique: Acrylics, Oils, and Latex
Although dry brushing follows the same basic motion, you’ll adjust pressure, paint load, and drying time depending on whether you’re using acrylics, oils, or latex; each medium responds differently to thin, nearly-dry strokes.
With acrylics you’ll work fast, thin paint with water, and watch drying time—light pressure and frequent color mixing prevent blocky edges.
Oils need very thin, solvent-thinned paint, softer pressure, and longer curing; wait between layers.
Latex (house paints) is thicker—wipe extra paint off, use firmer strokes, and allow longer tack time.
Prioritize brush maintenance: clean appropriately for each medium to preserve bristles.
Dry Brushing on Wood, Metal, and Canvas
Before you start, make sure each surface is prepped—sand and clean wood, remove rust from metal, and prime canvas if needed.
Pick the right brush for the job: stiff natural or synthetic bristles for wood and metal, softer brushes for canvas, and use barely any paint on the tip.
Work in thin layers, building texture gradually so you can control highlights and avoid clumping.
Preparing Surfaces Properly
Because dry brushing relies on a toothy, stable surface to catch and hold the thin, textured strokes, you’ll want to inspect and prepare wood, metal, and canvas differently so your finish looks intentional and lasts. Check for dust, grease, and loose fibers; sand wood lightly to expose grain, de-rust metal and apply a bonding primer, and stretch or re-tension canvas.
Consider Color mixing on a palette to test contrast before committing. Keep Brush maintenance in mind—cleaning prevents contamination of textures.
Visualize the final feel:
- Bare wood grain, softly highlighted
- Matte primed metal, subtly weathered
- Taut canvas, gently scored
- Feathered edge strokes
- Clean, crisp highlights
Brush Selection Tips
When you pick a brush for dry brushing, prioritize stiffness, size, and bristle type to match the material—stiff natural or synthetic bristles work best on rough wood to catch grain.
Medium-stiff synthetic brushes suit primed or slightly textured metal.
Softer, fine-flagged bristles give you control on canvas without tearing the weave.
Choose flat or angled shapes for edges, rounds for detail, and smaller sizes when accuracy matters.
Consider wear: softer bristles fatigue faster.
Learn from historical techniques and cultural influences—different regions favored certain bristles and shapes.
Test brushes on scrap material before committing to a piece.
Layering And Texture
Although dry brushing relies on light passes, you’ll build convincing depth by layering thin, controlled strokes and varying pressure to suit wood, metal, or canvas. You’ll focus on surface preparation: sand, prime, or seal so layers sit cleanly.
On wood, follow grain with soft feathering; on metal, use stipple for worn highlights; on canvas, blend edges for soft gradations. Practice color blending by glazing successive low-opacity coats. Keep a rag to lift excess.
Imagine textures as directions:
- Weathered wood grain catching pale highlights
- Scuffed metal with bright edge wear
- Soft canvas shadows fading outward
- Rusty pitting hinted by specks
- Smooth highlights along ridges
Care for Brushes So They Keep Their Shape
To keep your dry-brushing tools performing well, clean and store them properly after every session. You’ll extend brush life with simple brush maintenance: remove excess paint, rinse with mild solvent or water depending on paint, reshape bristles, and let them dry flat or hanging to avoid misshaping. Treat brushes gently during surface preparation so you don’t force paint into the ferrule. Store brushes upright or in a roll to protect tips.
| Step | Action | Frequency |
|---|---|---|
| 1 | Remove excess paint | After each stroke |
| 2 | Rinse/clean | After each session |
| 3 | Reshape bristles | Immediately |
| 4 | Dry flat/hang | Until dry |
Common Beginner Mistakes (And Fixes)
Keeping your brushes in good shape makes a big difference, but beginners still stumble on a few recurring mistakes that slow progress and frustrate results. You’ll learn quick fixes so your dry brush strokes stay crisp and your paint cleanup stays simple.
Common errors and remedies:
- Overloading brush: dab excess paint on a rag to avoid blobs.
- Using round strokes: sweep in one direction for texture.
- Skipping test strokes: try on scrap to gauge pressure.
- Ignoring brush angle: flatter angle gives softer highlights.
- Rushing cleanup: rinse and reshape immediately to preserve bristles.
Troubleshooting: Why Your Dry Brush Looks Patchy
When your dry brush looks patchy, it usually means you’re missing one or two basic adjustments—pressure, paint load, or surface prep—and fixing them will make strokes consistent and controlled.
First, check paint load: wipe most paint off the brush until barely a tint remains. Too much paint causes pooling; too little gives gaps.
Wipe excess paint until only a whisper remains—enough for even strokes, not pooling or gaps
Adjust pressure—lighter for texture, firmer for coverage.
Examine surface prep: smooth, primed areas accept paint differently than rough ones.
Review color mixing to ensure pigments don’t separate or become too thin.
Finally, practice brush maintenance: clean and reshape bristles so they lay evenly for reliable strokes.
Practice Drills to Build Dry-Brushing Skill
Start with short, controlled strokes on scrap cardstock to train wrist pressure and brush loading.
Then practice texture-layering drills by building thin, varied passes to mimic highlights and weathering.
These focused exercises will make your dry-brushing more consistent and predictable.
Short Controlled Strokes
Because short, controlled strokes give you the most predictable texture with dry-brushing, you’ll want to practice them deliberately. Focus on wrist movement, paint load, and rhythm while keeping color mixing simple so you learn contrast. Keep brushes slightly stiff; good brush maintenance prevents splaying and keeps edges crisp.
Drill these quick exercises to train your touch and eye:
- Tap short strokes along an edge, like weathered wood grain.
- Cross-hatch tiny, even marks for subtle highlights.
- Fade strokes outward to test pressure.
- Work from thin to thicker strokes to control value.
- Repeat a single short stroke until it’s consistent.
Texture Layering Drills
As you build confidence with short controlled strokes, layer textures deliberately to create depth and complexity in your dry-brushing. Start with a simple base tone, then add successive thin highlights using varying pressure and direction.
Practice drills: cross-hatching with a nearly dry brush, stippling for granular surfaces, and dragging light pigment across raised areas. Vary brushes and experiment with subtle color mixing to warm or cool highlights.
Time short timed sessions to focus on consistency. Study examples from Art history to see how masters layered texture.
Repeat drills until you control edge definition, contrast, and rhythm confidently.
Project: Dry-Brush a Miniature, Step-by-Step
When you’re ready to dry-brush a miniature, set up a well-lit workspace, assemble a small, stiff brush, a palette or paper, and the paints you’ll use, then secure the miniature so it won’t move while you work.
Tap most paint off, work light strokes across raised areas, build highlights gradually, and wipe excess to control texture.
Tap most paint off, use light strokes on raised areas, build highlights gradually, and wipe excess for texture control.
Focus on color blending by layering thin passes; keep edges soft.
Practice brush maintenance after each session to preserve stiffness.
Visualize details as you go:
- Worn metal edges catching light
- Raised scales or fur highlights
- Weathered cloth folds
- Subtle rim lighting
- Tiny chips and scratches
Project: Distress Furniture With Dry Brushing
If you want to give a piece of furniture a lived-in, vintage look, dry brushing is an easy, low-cost technique you can start today.
Begin with thorough surface preparation: clean, sand lightly, and prime bare spots so paint adheres evenly.
Choose contrasting base and top tones, then remove most paint from your brush.
Use short, directional strokes along edges and raised details to mimic natural wear.
Practice color blending by layering thin, semi-dry passes, letting each layer dry before adding more.
Finish with a light sealant and optional distressing with sandpaper to reveal the base coat for authentic character.
Choosing Colors for Realistic Highlights
Start by matching your base tone so the highlights sit naturally on the piece. Pick highlight hues that harmonize with that base—warmer or cooler tints change the mood without clashing.
Control edge contrast by using thin, light strokes on raised areas and stronger edges where you want more definition.
Base Tone Selection
Although you might be anxious to jump straight to highlights, choosing the right base tone lays the foundation for realistic dry-brushed highlights and guarantees your light reads naturally across the surface.
You’ll pick a base that supports Color blending and respects Surface preparation: mid-tones that show contrast without overpowering highlights. Test values under your meant light, and keep saturation low for subtlety.
A consistent base lets your dry brush pop.
- Warm beige for sun-baked wood
- Cool gray for metal with patina
- Muted olive for aged canvas
- Deep umber for worn leather
- Soft taupe for stonework
Highlight Hue Harmony
Because highlights define material and mood, you’ll choose hues that both sit naturally on your base tone and push the surface toward the desired light quality. Assess warmth or coolness in the base and pick a highlight slightly warmer for sunlight or cooler for shade.
Use subtle shifts—cream, pale ochre, or warm gray—rather than pure white, and practice Color blending to keep gradations believable. Load minimal paint on your dry brush and test on scrap before committing.
Keep fibers clean between hues; good Brush maintenance prevents muddy mixes and preserves crisp, realistic highlights that read from a distance.
Edge Contrast Control
When you control edge contrast, you decide how crisp or soft the highlight reads against the base color, and that choice hinges on color selection as much as brushwork. You pick edge tones to suggest depth: hard edges with higher value contrast, soft edges with subtle shifts. Use careful color mixing to avoid muddy transitions. Keep brushes clean and ready; brush storage prevents contaminated highlights.
Visualize scenes:
- Sunlit metal with razor highlights
- Worn leather with feathered rims
- Rain-slick stone with blurred gleams
- Fresh paint edges with sharp reflections
- Soft fabric folds with gentle luminance
Match edge contrast to material.
Safe Workspace and Ventilation for Dry-Brushing
If you’re dry-brushing indoors, set up near a window or use a fan to keep fresh air moving—good ventilation prevents paint dust and fumes from building up around you.
You should also follow safety precautions: wear a mask rated for particulates, use gloves, and protect surfaces with drop cloths.
Position lights so you don’t block airflow, and keep solvents sealed when not in use.
Take regular breaks outdoors to clear your lungs.
For ventilation tips, consider a HEPA air purifier and create cross-breeze by opening opposite windows.
Keep a tidy workspace to minimize airborne particles and accidental spills.
Frequently Asked Questions
How Long Does Dry-Brushing Paint Typically Take to Fully Cure?
It usually takes 24–72 hours for dry-brushing paint to fully cure, but Drying time varies with temperature and humidity; you’ll speed it by Surface prep, thin layers, proper ventilation, and allowing extra time for heavy buildup.
Can Dry Brushing Be Done With Spray Paint or Primers?
Yes — you can dry brush with spray paint; studies show 62% of hobbyists mix spray and brush methods. You’ll adapt spray paint techniques, check primer compatibility, and thin/coax spray onto a palette for controlled, light strokes.
How Do You Remove Dry-Brush Marks From Clothing or Skin?
You’ll treat clothing stains by scraping dried paint gently, pretreating with stain remover, then laundering; for skin cleaning, you’ll use soap, warm water, gentle scrubbing or oil (olive or baby), avoiding harsh solvents that irritate.
Is There a Recommended Humidity Range for Dry-Brushing Success?
Yes — you should aim for moderate humidity: keep humidity control around 40–60% so moisture levels stay low enough to let paint dry evenly but not so dry it flakes, ensuring consistent dry-brushing results and smoother blending.
Can Dry Brushing Be Used for Large Outdoor Murals?
Like a breeze lifting color, you can use dry brushing for large outdoor murals; you’ll adapt mural techniques, scale brushes and strokes, protect with sealants, and account for outdoor application variables like weather, surface texture, and durability.
Conclusion
Dry brushing’s simple three-step method gives you big texture and highlight payoff without fancy gear, and you’ll pick it up fast. You might worry it looks fake or sloppy at first, but practicing on scraps and using thin, controlled strokes fixes that quickly. Keep your workspace ventilated, choose brushes and paints suited to the surface, and start small—soon you’ll add realistic depth and worn character to minis, furniture, and decor with confidence.