How to Fix Latex Over Oil Paint Problems
First, test whether the existing paint is oil by rubbing denatured alcohol on a hidden spot; if pigment doesn’t smudge it’s oil. Remove loose or flaking latex with a plastic scraper, clean with a degreaser, scuff glossy oil with 120–220 grit, then wipe dust. Spot-prime or full-prime with a bonding, stain‑blocking primer and let it fully cure before applying thin latex coats in proper temperature and humidity. Keep going and you’ll find detailed troubleshooting and timing tips.
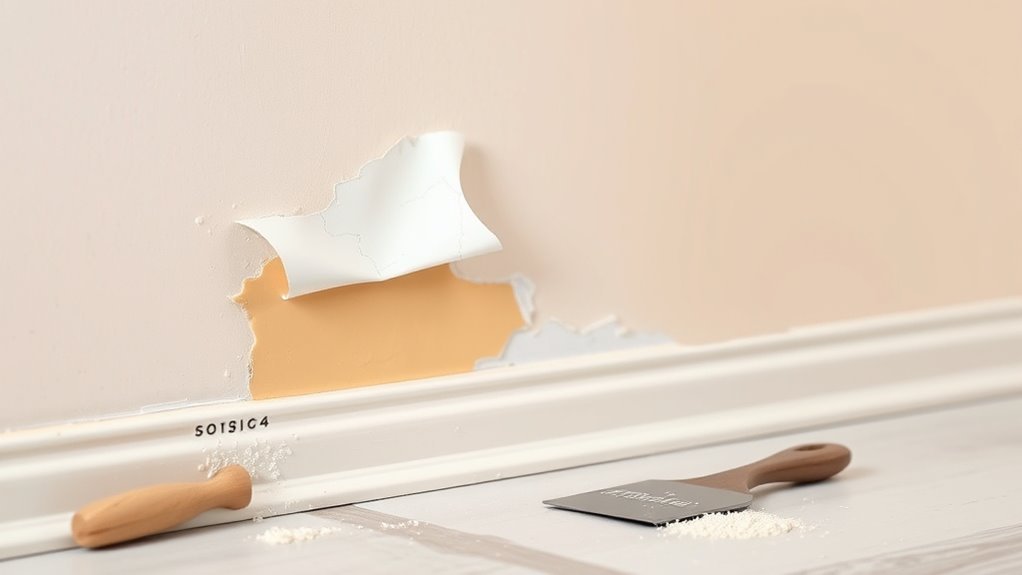
Quick Repair Checklist: Stop Peeling and Secure Paint Now
If you’re seeing latex paint peeling over oil, act quickly to stop further damage: scrape loose edges, clean the area with a degreaser, and sand the surface to create a key for new coatings.
If latex is peeling over oil, act fast: scrape loose paint, degrease thoroughly, and sand to key the surface.
After prep, apply a high-adhesion bonding primer compatible with oil beneath latex. Feather edges smooth, and let primer cure fully before repainting.
When choosing finish, consider paint sheen to match surrounding surfaces; test a small patch.
For best results, address color matching now so repairs blend invisibly.
Clean tools promptly, monitor the repair over a week, and touch up if any lifting reappears.
Quick Test: Oil or Latex Base?
Wondering whether the old coat is oil or latex? Do a quick solvent test: rub a cotton swab with denatured alcohol over a small hidden spot. If pigment smears, it’s latex; if it stays, likely oil. Note any tackiness after testing.
Observe color mixing: latex layers often blend cleaner when scraped; oil tends to smear viscously. Also check sheen and drying time—oil stays glossy longer.
For any touch-ups, plan brush selection accordingly: use synthetic brushes for latex and natural-bristle for oil to match texture. Record your findings before proceeding so you choose the correct prep and products.
How to Tell If Latex Is Failing Over Oil Paint
When latex starts failing over an oil base, you’ll notice distinct visual and tactile cues: peeling or flaking paint, bubbling or blistering, and areas where the latex film rubs off or feels powdery. You can confirm failure by checking adhesion with a light scrape and observing inconsistent Color blending where new paint doesn’t integrate. Texture matching will look off — smooth oil beneath rough latex or vice versa. Use the table below to quickly log signs.
| Sign | What to check |
|---|---|
| Peeling | Edge adhesion, lift with blade |
| Powdery residue | Rubs off, poor bonding |
| Blisters | Moisture or trapped solvents |
Common Causes of Latex Peeling on Oil‑Based Surfaces
You’ll usually find latex peeling on oil‑based surfaces for a few clear reasons.
If you didn’t clean and sand the surface, the new paint can’t bond properly, and leftover oil or incompatible paint chemistry will keep the latex from adhering.
Addressing poor prep, chemical mismatch, and residual oil contamination fixes most peeling problems.
Poor Surface Preparation
Why did the latex start peeling off the oil‑based paint so quickly? You likely skipped proper cleaning and sanding, letting surface deterioration persist and breaking paint compatibility. Prep prevents peeling: remove dirt, chalk, and loose oil paint; sand to dull glossy surfaces; wipe with solvent; prime with a bonding primer.
| Step | Problem | Fix |
|---|---|---|
| 1 | Dirt/chalk | Clean with TSP |
| 2 | Glossy oil | Sand scuffing |
| 3 | Loose flakes | Scrape to sound paint |
Do the steps carefully so your latex will adhere and last.
Incompatible Paint Chemistry
Good prep fixes a lot, but chemical incompatibility can still make latex lift off oil paint. You’ll run into problems when binders, solvents, or additives in the original oil layer don’t play well with the latex topcoat.
Check chemical compatibility between coatings: some alkyd or oil formulations create a slick, nonporous surface that repels waterborne latex. Match primers and topcoats designed to bridge those differences—use a bonding primer formulated for oil-to-latex conversions.
Read product data sheets to confirm compatibility with the existing paint formulation. If uncertain, test a small area before committing to full repainting.
Residual Oil Contamination
Ever notice fresh latex lifting in patches even after sanding? You’re likely facing residual oil contamination. Oil from old alkyds, waxy cleaners, or furniture polish can remain in pores and block surface adhesion.
You should degrease with TSP or a trisodium replacement, scrub stubborn spots, then rinse thoroughly and let dry. If contamination persists, strip to bare substrate or use a solvent wipe test to confirm.
After cleaning, apply a high‑adhesion oil‑blocking primer before latex. These steps eliminate hidden oils, restore proper surface adhesion, and prevent premature peeling when you repaint.
When to Choose Repair vs Full Strip: Cost & Time
When deciding between a targeted repair and stripping the entire surface, weigh the scope of adhesion failure, your timeline, and budget. Consider environmental factors and paint color: small peeling in a stable room often warrants repair; widespread bubbling or multiple layers usually need stripping. Repairs save time and money but may mismatch sheen or hide residual oil. Full strip costs more and takes longer yet gives a reliable base for new latex.
| Situation | Recommendation |
|---|---|
| Small bubbles | Repair |
| Localized peeling | Repair |
| Widespread failure | Strip |
| Multiple oil layers | Strip |
| Tight budget | Repair |
When to Choose Oil/Alkyd Instead of Latex Over Oil
If the old oil finish is still relatively fresh and hard, you’ll often get better adhesion by using an oil or alkyd primer and topcoat instead of forcing latex onto it.
Choose alkyd when you need the durability and leveling of oil with faster drying than traditional oils—especially on trim, doors, or high-wear surfaces.
You’ll save time and reduce failure risk by matching chemistry rather than covering oil with latex.
When Oil Is Fresh
Although oil paint can look dry to the touch within a day or two, you should pick oil or alkyd topcoats whenever the underlying finish is still soft, tacky, or hasn’t cured through—because latex over a fresh oil risks adhesion problems, wrinkling, and solvent trapping. You’ll test firmness, note smell, and check tack. Use proper color mixing and brush techniques when you plan further oil work; they affect drying and surface feel. Wait weeks for heavy layers. Quick reference:
| Surface | Test | Action |
|---|---|---|
| Tacky | Finger | Use oil/alkyd |
| Firm | Light press | Latex possible |
| Soft | Smell | Wait or use alkyd |
Best Alkyd Use Cases
Because fresh or slow-cure oil layers can trap water and solvents, you’ll choose alkyd or oil topcoats whenever the underlying finish is still soft, heavily pigmented, or applied in thick films—situations where latex is likely to wrinkle, lift, or peel.
You’ll pick alkyd for trim, doors, and high-touch surfaces because alkyd advantages include faster solvent compatibility and better flow into imperfect substrates.
Choose oil for restoration or exterior wood where oil based durability resists abrasion and moisture.
Prep by cleaning, scuff-sanding, and using a compatible primer.
Test a small area first to confirm adhesion and appearance.
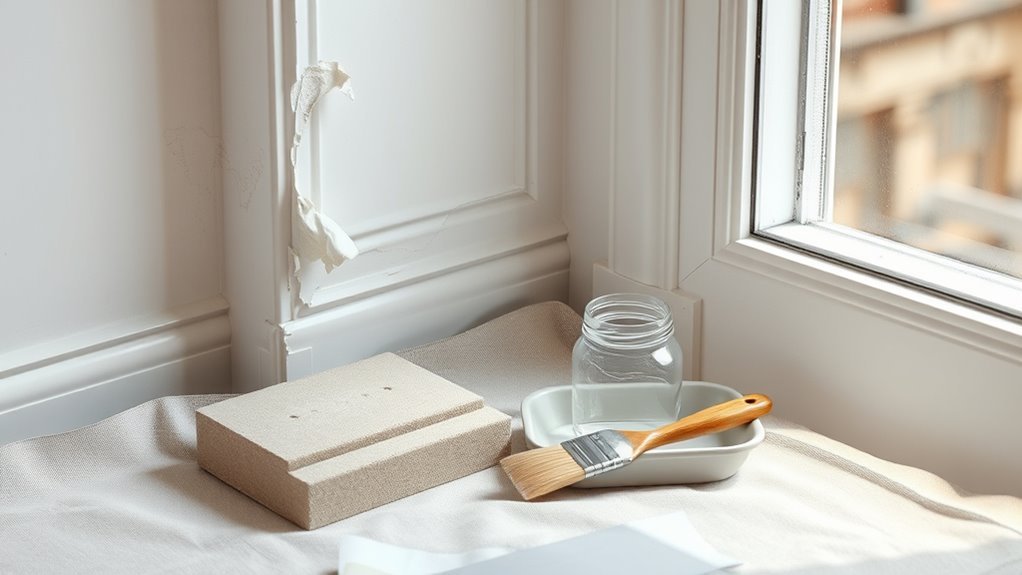
Safety Gear and Workspace Prep Before Repairs
Before you touch the paint, set up a safe workspace and put on proper safety gear so you can work confidently and avoid hazards.
Wear personal protective equipment: nitrile gloves, safety goggles, and a respirator rated for organic vapors if sanding or using solvents.
Make sure there is good ventilation by opening windows and using a fan to exhaust fumes.
Clear the area of tripping hazards and protect floors with drop cloths.
Organize tools and supplies within arm’s reach to minimize movement; label containers and keep solvent rags in a metal can with a lid.
Have a fire extinguisher and first aid kit accessible.
Tools and Materials You’ll Need for Fixes
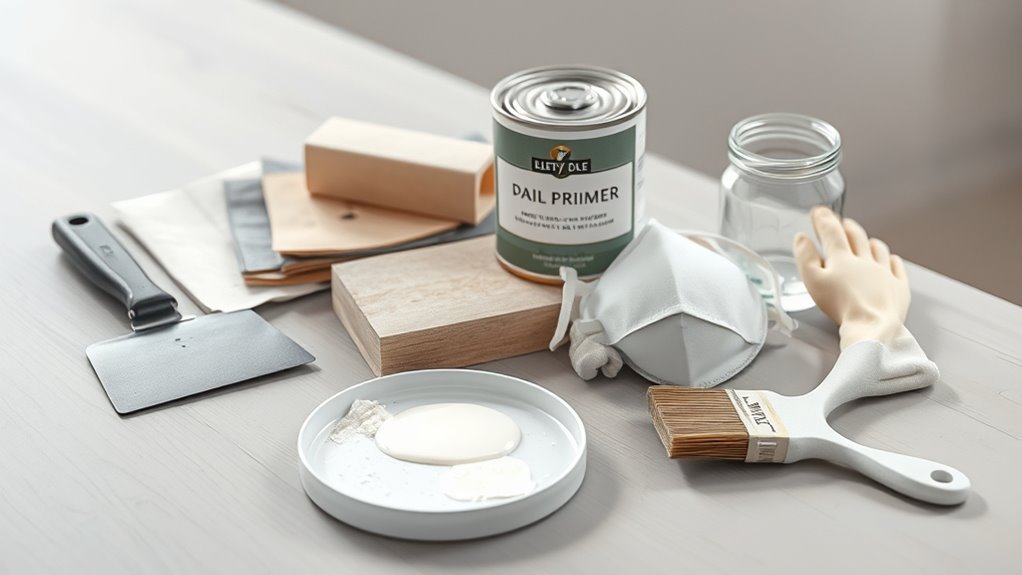
You’ll want the right safety gear—gloves, goggles, and a respirator—before you start any repairs.
Gather surface prep tools like sandpaper, scrapers, tack cloths, and a solvent for removing failed coatings.
Having these essentials on hand makes the fix safer and more efficient.
Essential Safety Gear
Want to stay safe while fixing latex-over-oil paint problems? Wear nitrile gloves, eye protection, and a respirator rated for organic vapors; follow safety precautions for solvents and cleaners.
Use a long-sleeve shirt and knee pads if you’ll crouch.
Keep a fire extinguisher nearby when using flammable products.
Arrange a well-ventilated workspace and use drop cloths to contain mess.
Store unused chemicals in labeled, sealed containers and follow equipment storage guidelines to prevent accidental spills or degradation.
Keep a first-aid kit and emergency numbers accessible.
Inspect gear before use and replace damaged items to maintain protection and efficiency.
Surface Preparation Tools
If you’re tackling latex-over-oil paint problems, gather a compact set of reliable surface-prep tools: a good-quality scraper and putty knife, medium- and fine-grit sandpaper or sanding blocks, a power sander for large areas, a chemical stripper or deglosser (when needed), tack cloths, clean rags, a stiff nylon brush, and appropriate masking tape and drop cloths to protect surrounding surfaces.
You’ll want tools that preserve paint texture while removing failed coatings, and that let you feather edges for seamless color matching later. Essentials include:
- Battery or corded power sander
- Assorted sandpaper grits
- Plastic and metal scrapers
- Deglosser and solvent-safe rags
How to Remove Loose or Flaking Latex Paint Safely
When latex paint is lifting or flaking, start by loosening and removing the unstable bits before you do any repairs; this prevents further peeling and gives you a solid surface to work on.
Wear gloves, goggles, and a dust mask.
Use a stiff nylon brush or a plastic scraper to lift flakes gently; avoid metal tools that gouge.
Collect debris and dispose of it properly.
Clean the area with mild detergent and rinse; let dry completely.
Spot-prime exposed areas with a bonding primer to restore paint durability.
Test a small patch to check color mixing and adhesion before full repainting.
How to Sand Oil‑Based Surfaces for Latex Topcoats
Before you sand, clean the oil‑based surface thoroughly with a mild degreaser so the new latex will stick.
You’ll then scuff the finish with fine‑grit sandpaper and feather any edges where old paint remains to create a smooth shift.
Wipe away dust with a tack cloth before priming and topcoating.
Surface Cleaning Prep
Sanding oil-based paint so a latex topcoat will stick starts with removing gloss and feathering any damaged areas so the new paint can mechanically bond. You’ll want to work methodically with the right grit, pressure, and sequence to avoid sanding through the finish or leaving visible scratches.
First, clean to remove grease, wax, and dirt that hide surface texture and interfere with adhesion. Use TSP or a mild degreaser, rinse, and dry.
Scuff lightly where needed. Check color matching and repair stains before priming.
- Wear gloves and a mask
- Use 120–220 grit sandpaper
- Clean between passes
- Inspect under good light
Scuffing And Feathering
Although the surface may look intact, you still need to scuff and feather oil-based paint to create a uniform profile that the latex will grab onto. You’ll start with 220–320 grit sandpaper to dull high surface gloss areas without cutting through to substrate.
Scuff broadly, then feather edges where old paint overlaps repaired spots so blends disappear. Wipe with a tack cloth, inspect paint sheen for inconsistent pockets, and sand those gently.
Clean again with a degreaser, let dry, and prime with a bonding primer. Proper abrasion and feathering prevent lifting, fish eyes, and adhesion failures when you apply latex.
Clean and Etch Glossy Oil Paint Safely With Solvent
If the latex is peeling or just won’t adhere, you’ll need to clean and etch the glossy oil paint with a solvent to remove contaminants and dull the surface so the new coat can grip. You’ll work carefully to avoid harming underlying layers while promoting surface adhesion and minimizing unwanted chemical reactions. Wear gloves, eye protection, and ventilate.
Use a mild solvent like mineral spirits for light contamination; stronger solvents only if necessary. Follow with a scuff sand. Don’t over-strip.
- Test solvent in an inconspicuous spot
- Wipe residues thoroughly
- Sand lightly after cleaning
- Allow full solvent evaporation before priming
When and How to Use a Chemical Stripper on Oil Paint
If the oil layer is thick, badly failed, or won’t etch, you’ll need a chemical stripper to remove it before repainting. Use a stripper labeled for oil-based coatings, follow the manufacturer’s instructions, and work in a well-ventilated area with gloves and eye protection.
Apply the stripper in small sections, and scrape gently with a plastic or wood tool.
After stripping, neutralize or clean the surface as directed before sanding and priming.
When To Use
When oil paint is thick, stubbornly bonded, or has multiple layers that won’t sand or scrape cleanly, you’ll want to reach for a chemical stripper. Use it when other methods fail, especially if latex compatibility with future coatings matters.
You’ll choose stripping when oil paint durability creates adhesion problems for latex finishes or when surface profiling is uneven. Consider these triggers:
- Multiple aged oil layers resisting mechanical removal
- Visible solvent-insoluble film or hard, cured enamel
- Severe surface contamination that prevents bonding
- Restoration where original oil must be removed intact afterward
Act decisively, then follow safe stripping methods.
Safe Stripping Methods
Now that you’ve decided stripping is the right choice, know that safe chemical removal combines the right product, correct technique, and proper precautions.
You’ll select a stripper suited for oil paint—gel or poultice for vertical surfaces, biodegradable for indoor use—and test a small area to confirm it won’t alter the underlying paint color.
Work in a ventilated space, wear nitrile gloves, eye protection, and a respirator rated for organic vapors.
Apply per manufacturer instructions, wait the recommended dwell time, and gently lift softened paint with a plastic scraper.
Dispose of waste responsibly.
Consider conservation lessons from art history when restoring finishes.
Choose a Primer: Oil‑Blocking vs Bonding – Which to Use
Wondering which primer will save your latex paint from oil‑borne stains? You’ll weigh oil‑blocking versus bonding primers based on surface condition and goals.
Oil‑blocking prevents bleed‑through; bonding sticks to slick or cured alkyds. Consider these points:
- Oil‑blocking: best for stain control and long‑term paint durability.
- Bonding: ideal when adhesion is the main concern on glossy oil finishes.
- Compatibility: check manufacturer notes to ensure topcoat adhesion and color matching.
- Surface prep: clean and scuff to maximize primer performance.
Choose oil‑blocking when stains threaten finish; choose bonding when adhesion or glossy surfaces are the primary issue.
Apply Oil‑Blocking Primer for Latex Over Oil
Ready to stop oil bleed‑through for good? You’ll prep the surface by cleaning, sanding glossy spots, and ensuring it’s dry.
Choose a quality oil‑blocking primer labeled for stain‑blocking; check primer compatibility with your latex topcoat to prevent adhesion issues.
Apply thin, even coats with a brush or roller, following manufacturer dry times between coats. Focus on areas with visible oil stains, feathering edges to blend.
After the primer cures, inspect for lingering discoloration and recoat if needed. Proper application creates a stable barrier so your latex paint adheres and resists future bleed‑through.
Spot‑Prime vs Full‑Prime: How to Decide
Which areas need sealing — just the stained spots or the whole surface? You’ll weigh stain extent, adhesion risk, and finish goals.
Spot‑prime when contamination is isolated and you’ll preserve existing paint texture and color matching; full‑prime when stains are widespread, adhesion is uncertain, or you plan a new finish.
Consider these quick checks:
- extent of stains and bleed‑through
- adhesion test results (tape pull)
- whether uniform paint texture matters
- future color matching complexity
Spot‑priming saves time and preserves character; full‑priming creates a reliable, uniform base for latex over oil. Choose based on coverage and risk.
How to Repair Surface Imperfections Before Priming
Before you prime, fix every ding, gouge, and gloss issue so your sealer and topcoat can bond and look smooth. Inspect the surface under good light, note texture inconsistency and any finish buildup.
Before priming, repair dings, sand glossy areas to dullness, and remove finish buildup for proper bonding.
Sand glossy spots to a dull feathered surface, clean dust, and use a quality filler for holes or gouges; sand the filler flush.
For stain or tannin bleed, apply a suitable stain-blocking primer to prevent bleed-through before final priming.
When repairing patched areas, check color matching only after priming—prime first, then evaluate whether additional corrections or spot priming are needed.
How to Feather Edges and Blend Old Paint Smoothly
When you’re blending new latex over old oil, feather the shift by sanding the edges until they’re barely raised so the new paint can taper in.
Use light sanding, tack cloths, and thin coats to build a smooth, even blend.
Finish with fine-grit sanding between coats to remove ridges and guarantee a seamless look.
Feathering The Transition
Wondering how to make the seam between old oil-based paint and new latex disappear? You’ll feather the transition by softening the edge, blending tones, and prepping carefully. Use color matching and paint mixing to get base tones close before you start. Follow these quick steps:
- Sand the oil edge lightly to a dull feathered profile.
- Wipe clean, then apply a thin latex primer at the edge.
- Thin your latex paint slightly to ease flow and overlap.
- Use a dry brush to lightly pull wet paint into the old area until the line softens.
Work quickly, check in natural light, and let layers dry.
Smooth Blend Techniques
Now that you’ve softened the seam and matched base tones, focus on techniques that make the edge disappear completely. You’ll use light pressure and long, tapering strokes—brush techniques that feather paint into the old film.
Work quickly while the latex is wet, dragging paint outward and lifting at the end of each stroke to avoid ridges. Keep a clean, slightly damp brush to soften hard lines.
Check color matching under real light, adding tiny glazes to adjust hue and value. Blend thin layers, let them dry, then reassess.
Repeat until the progression reads seamless and uniform.
How to Apply Latex Paint Over Primed Oil Surfaces
Ready to tackle painting over oil-based primer? You’ll prepare, choose Paint color wisely, and use the right Brush techniques to get a durable finish.
Start by sanding primer lightly, wipe dust, and inspect for adhesion. Use quality latex designed for primed surfaces and a high-density roller for smooth coverage.
Apply thin, even coats and avoid overworking edges.
- Sand primer to dull gloss before painting
- Wipe surface with a tack cloth or mild degreaser
- Use synthetic brushes and high-density rollers for even laydown
- Test a small patch to confirm color and adhesion before full application
Drying and Recoat Times That Prevent Failure
You’ll need to let oil-based primers and any remaining oil paint fully dry before applying latex to avoid adhesion issues.
Follow the manufacturer’s recommended drying times and wait the safe recoat interval—often 24–72 hours for primers and longer for fresh oil paint.
Rushing the recoat increases the risk of peeling or blistering, so be patient and check surface readiness before proceeding.
Proper Drying Times
Because latex sits on top of oil rather than bonding into it, you’ve got to respect longer drying and recoat times to avoid adhesion failure. You should wait longer than typical latex intervals, especially in cool or humid conditions. Check tackiness before sanding or applying primer. Consider how color matching and paint sheen can reveal defects if you rush.
- Allow oil to cure fully per manufacturer instructions.
- Use ambient temperature and humidity to adjust wait times.
- Lightly scuff, then test a small area before full application.
- Prefer slower, controlled drying to prevent blushing and poor adhesion.
Follow these steps to reduce peeling risk.
Safe Recoat Intervals
After the oil has fully cured and you’ve scuffed and tested a small area, plan your recoat intervals to match real-world conditions rather than the paint can’s ideal times. You’ll base timing on temperature, humidity, and how the previous oil layer feels—tacky, firm, or brittle.
Wait longer in cool or damp spaces; rush and adhesion fails. Test with a scalp or tape pull before full recoating. When blending or doing color mixing, match batches and allow extra cure between coats.
Choose compatible paint sheen to minimize visual defects and follow gradual recoat steps to prevent wrinkling, lifting, or premature peeling.
Troubleshooting Adhesion After Repainting
If your new latex topcoat is peeling, flaking, or showing bubbles where it was applied over oil-based paint, don’t panic—these are usually signs of adhesion failure that you can diagnose and fix.
First, inspect for residue, glossy oil paint, or trapped moisture. Test adhesion with tape pulls and note where primer was skipped. Consider surface prep and primer selection; even eco-friendly paints need a proper bonding primer over oil.
Address causes: sand, clean, prime, and repaint.
- Tape adhesion test
- Degrease and degloss
- Use bonding primer
- Respect dry times and temperatures
How to Fix Recurring Yellowing or Staining Under Latex
When yellowing or staining keeps reappearing under your latex topcoat, you’ll want to identify the source quickly so your fixes last—common causes include tannin bleed from wood, residual smoke or nicotine, old oil-based primers leaching through, or trapped stains like water marks and grease.
Start by removing contaminated finish, clean the substrate with appropriate cleaners, and let it dry.
Apply a high-quality stain-blocking primer formulated for tannins and nicotine.
Check color matching before topcoating to avoid visible repairs, and match paint sheen to surrounding areas.
Finish with two coats of latex for durable coverage.
Quick Test for Primer Failure and Next Steps
Wondering whether your primer actually blocked the stain? Do a quick Primer testing routine to confirm paint compatibility and decide next steps. Clean a small area, apply a pen-sized mark of rubbing alcohol, and press a white cloth; if color transfers, stain likely bled through.
Wondering if your primer stopped the stain? Quick test: rubbing alcohol on a cleaned spot—color transfer means bleed-through.
Then:
- Sand a tiny patch to bare the profile and spot-prime with a high-blocking product.
- Apply a small test coat of your latex topcoat to check adhesion and color match.
- Wait 48 hours; re-inspect for bleed-through or yellowing.
- If failure shows, remove primer and prep for a full re-prime with a stain-blocking sealer.
Repair vs Full Strip: Cost & Time (Detailed Comparison)
Because budgets and timelines vary, you’ll want to weigh repairing localized primer failures against a full strip-and-repaint by comparing cost, time, and risk. You can repair spots to save time, keep existing Color matching, and restore Paint durability if adhesion is sound; expect lower cost but repeat touch-ups. A full strip is pricier and slower but removes hidden adhesion issues and yields uniform durability and easier Color matching across surfaces.
| Option | Notes |
|---|---|
| Repair | Quick, low cost |
| Full strip | Higher cost, longer |
| Risk | Repair may need repeats |
| Outcome | Strip gives uniform durability |
Preventive Maintenance to Avoid Future Latex‑Over‑Oil Issues
If you want to avoid future latex-over-oil problems, schedule regular inspections and simple maintenance tasks to catch adhesion issues early. You’ll monitor surfaces, address loose paint, and preserve underlying oil layers by respecting historical techniques when restoring and repainting.
Keep records of primers and topcoats, and practice proper color matching to reduce unnecessary repainting. Follow a seasonal checklist to spot failure before it spreads.
- Inspect seams, trim, and high-wear areas quarterly.
- Test adhesion with a small pull or solvent check.
- Reprime bare spots with compatible primer.
- Document materials, dates, and any historical techniques used.
How Humidity and Temperature Affect Adhesion and Cures
When temperature and humidity swing outside recommended ranges, paint chemistry and adhesion suffer. You’ll notice slower curing, tacky surfaces, and poor bond when Humidity effects raise moisture on old oil layers or the latex coat.
Temperature fluctuations change viscosity and drying time: heat speeds skinning but can trap solvents; cold stalls crosslinking and weakens adhesion.
Work in stable conditions—moderate temperature, low-to-moderate humidity—and follow manufacturer specs for dew point and substrate temperature.
If you must paint in borderline conditions, extend drying times, use slow-dry formulations, and test a small area first so you don’t trap moisture or create blisters.
When to Call a Professional Painter
Should you spot extensive flaking, widespread oil bleed-through, or active blistering after attempting fixes, call a professional painter—these signs mean the job needs more than a weekend repair. You’ll want pros when structural prep, solvent stripping, or substrate repair is required. They’ll assure proper adhesion, longer paint durability, and accurate color matching for seamless results.
If you see heavy flaking, oil bleed, or blistering after repairs, call a professional painter for proper prep and lasting results
Consider hiring a pro if you face:
- Large affected areas beyond spot repairs
- Uncertain underlying contamination or solvent issues
- Historic or custom color matching demands
- Recurrent failures after DIY attempts
A pro saves time, prevents wasted materials, and guarantees lasting finishes.
Common DIY Mistakes That Cause Latex to Fail on Oil Paint
Because you probably rushed or skipped key prep steps, latex often fails on oil-painted surfaces for predictable reasons. You might skip degreasing, sanding, or using a proper primer, so adhesion never develops.
You may overlook curing time for oil paint or apply latex over glossy finishes.
Poor paint mixing or using leftover cans without stirring creates inconsistent binders.
Ignoring incompatibility—confusing color theory with chemical compatibility—leads you to focus on hue instead of solvent issues.
Using wrong tools, thin coats, or painting in extreme temperatures accelerates peeling.
Follow prep, primer, and correct mixing to avoid these DIY failures.
Frequently Asked Questions
Can Old Wallpaper Adhesive Under Oil Paint Affect Latex Adhesion?
Yes — wallpaper residue under oil paint can harm latex adhesion. You’ll need to test and remove stubborn adhesive, clean thoroughly, and verify adhesive compatibility before priming so latex will bond reliably to the prepared surface.
Are There Specific Brands Known to Work Better Over Oil-Based Primers?
Yes — you’ll find some brands perform better; prioritize paint compatibility and primer selection. Zinsser, BIN, and Kilz often work well with oil-based primers, and Benjamin Moore and Sherwin-Williams pair reliably with them.
Will Painting Over Lead-Based Oil Paint Require Special Steps?
Yes — you’ll need precautions: treat lead paint removal seriously, test substrate, contain and vacuum per regulations, and use oil paint compatibility checks; don’t sand without proper containment, and follow local abatement rules to protect everyone.
Can Moisture Trapped in Walls Under Oil Paint Cause Future Peeling?
Yes—moisture trapped acts like a hidden river, and it’ll promote moisture infiltration and wall deterioration, so you’ll see future peeling as the paint loses adhesion; you should diagnose and address leaks before repainting.
How Long Should Newly Primed Oil Surfaces Cure Before Heavy Cleaning?
You should wait about 7–14 days for primer compatibility and curing time to guarantee the oil-based primer has fully cured; then you can perform heavy cleaning gently, avoiding harsh solvents that could damage the new surface.
Conclusion
You’ve got this — a little prep stops peeling before it starts. Think of one neighbor who painted over oil without sanding; within months, their trim looked like an old map, flaking everywhere. Studies show proper adhesion prep cuts failures by up to 70%, so sand, clean, and prime. If peeling’s already started, spot-repair or strip as needed, and call a pro for large jobs. Prevention saves time and money.