How to Paint Hard to Reach Exterior of House
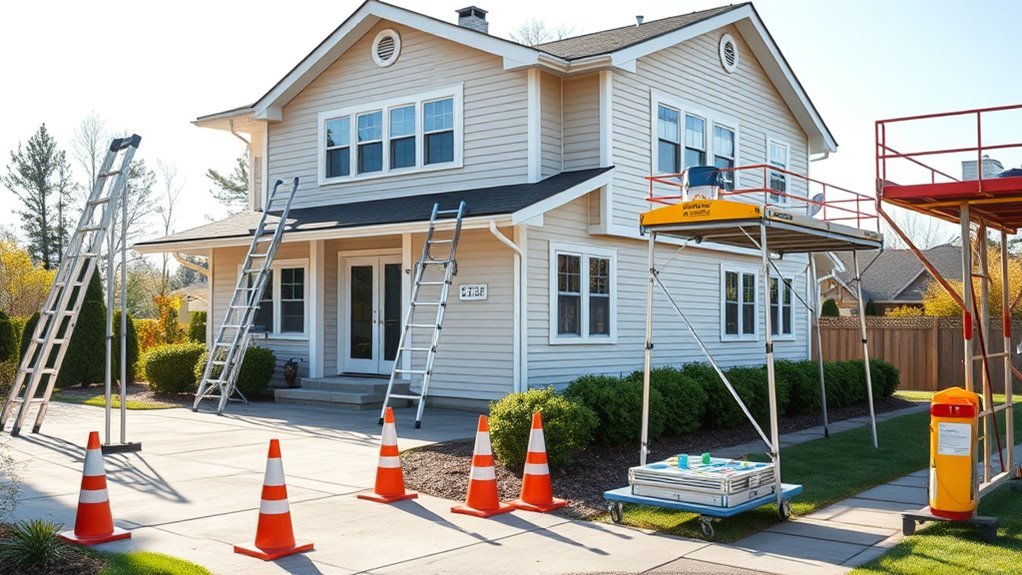
You can paint hard-to-reach exterior areas safely by planning access, using proper tools like extension poles, scaffolds or lifts, and wearing PPE with a spotter on hand; prep surfaces, clear gutters and trim back landscaping, prime where needed, and follow weather and ladder-safety rules. Avoid DIY on steep roofs, multi-story scaffolding, or anything above about 12 feet without pro training and insurance. Keep permits, HOA or historic rules in mind, and read on to get detailed steps and tips.
What “Hard-to-Reach” Exterior Work Means

When we talk about “hard-to-reach” exterior work, we mean any painting tasks on parts of your house that require special access, tools, or safety measures—think high eaves, steep roofs, narrow soffits, tall chimneys, and behind gutters or dense landscaping.
You’ll face challenges like working around roof ventilation systems without damaging seals, accessing tight soffit cavities, and avoiding obstruction by mature trees. Gutter maintenance often precedes painting, since clogged or loose gutters hide trim and cause moisture stains.
You’ll need planning, proper equipment, and respect for safety to guarantee quality results on these awkward, critical areas.
Can You DIY Hard-to-Reach Exterior Painting? Quick Checklist
If you’re handy, have the right gear, and respect safety limits, you can tackle some hard-to-reach exterior painting yourself—but only after a careful reality check. Use this quick checklist: assess access (ladders, lifts), confirm materials (primer, exterior paint), and plan color matching and paint mixing before you start. Check weather, PPE, and a partner for spotting. Know when conditions exceed your skills.
| Task | Yes/No | Notes |
|---|---|---|
| Stable access | ladder/boom? | |
| Color matching ready | sample test | |
| Paint mixing kit | measured ratios |
When to Call a Pro (Risk, Permits, Complexity)
If the job requires working from high scaffolding or over steep slopes, you should call a pro to avoid serious risk.
You should also hire a pro when local permits, inspections, or building codes make the project complex.
A contractor can handle safety gear, insurance, and paperwork so you don’t get stuck or fined.
High-Risk Access
Ever wonder whether that steep roofline, multi-story scaffolding or rooftop HVAC unit is worth tackling yourself? High-risk access demands honesty: if DIY safety hinges on precarious ladder selection, complex rigging, or working above 12 feet, call a pro.
Pros bring specialized harnesses, trained spotters, edge protection, and insurance that covers falls or property damage. You’ll save time and avoid costly mistakes when equipment or access restricts safe positioning.
Get written estimates, confirm qualifications and ask about previous similar jobs. When exposure, height, or structural instability raise stakes, hiring a licensed contractor is the prudent choice.
Permit And Code Complexity
When local building codes, historic-district rules, or HOA covenants affect what you can change, don’t assume your paint job is exempt—permits and specific approved materials or colors may be required. You should check Permit requirements early, because missing permits or ignoring code compliance can halt work or lead to fines. If scaffolding, lead-safe procedures, or color approvals are involved, call a pro who knows local rules. Pros handle applications, inspections, and documentation, reducing risk and delays. Use experts when access and legal complexity overlap; they’ll keep your project safe, compliant, and on schedule.
| Situation | Action |
|---|---|
| Historic district | Confirm color approvals |
| Scaffolding | Verify permits |
| Lead paint | Follow abatement rules |
| HOA | Submit plans |
Cost Snapshot: DIY vs Hiring Exterior Painters
Because tackling exterior painting yourself can save money up front, it’s worth comparing the real costs against hiring pros so you can decide what’s practical for your budget and skill level. You’ll weigh materials, equipment rental, and time versus labor quotes.
DIY can fit if you already handle tasks like adjusting outdoor lighting or trimming around garden design features, but hidden costs add up.
- Paint and primer costs
- Scaffold or lift rental
- Time investment and potential rework
- Professional warranty and speed
Calculate total hours, factor in safety gear rental, and get multiple pro estimates before choosing.
Essential Safety Rules Before You Start
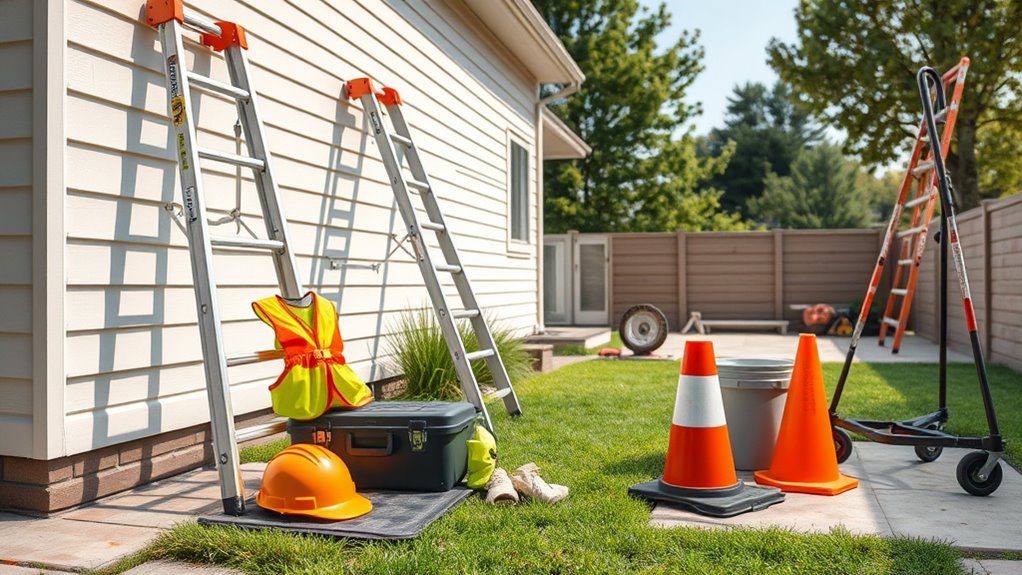
Saving money by DIYing exterior paint is worthwhile only if you keep safety front and center, since a serious fall or mistake can erase any savings. Before you climb, inspect the work area for hazards: loose siding, slippery surfaces, overhead lines, and signs of garden pests that could startle you.
Check weather, light, and footing; plan breaks so fatigue won’t compromise balance. Use ladders on stable ground and have a spotter when possible. Secure tools and use appropriate containers to avoid spills that attract pests or ruin paint color options.
Know emergency contacts and don’t rush the prep.
Pick Fall Protection Gear You Actually Need
Before you start painting up high, pick fall protection gear that matches the job—secure anchor points and a fitted harness if you’ll be working off the roof or scaffolding.
For ladder work, use ladder-specific fall protection like stabilizers, a tether, or a positioning belt to keep you steady.
Check that all equipment is rated for your weight and inspected for wear before each use.
Anchor Points And Harnesses
When you’re working high on the exterior, pick anchor points and harnesses that actually match the job rather than what’s cheapest or easiest to find. You’ll inspect fixed anchors near gutters, roof vents, garden irrigation lines and exterior lighting to avoid damage.
Choose a harness rated for suspension comfort and rescue, sized correctly, and compatible with your connectors. Attach only to structural, rated points. Practice donning and a rescue plan before starting.
- Verify anchor load ratings and certifications.
- Use redundant connections where possible.
- Keep webbing away from sharp edges.
- Replace gear after any fall or visible wear.
Proper Ladder Fall Protection
If you’re using a ladder to reach eaves or second‑story trim, pick fall‑protection that matches the ladder type, work height, and how long you’ll be suspended if you slip. Choose a ladder-rated harness, connect to a certified anchor or a properly installed roof guttering anchor designed for lateral loads, and use a shock-absorbing lanyard or self-retracting lifeline sized for expected fall distance.
Inspect anchor points near window flashing and roof edges before climbing. Practice donning the harness on level ground, adjust straps snugly, and plan rescue timing—long suspension can cause suspension trauma, so have a partner and a rescue plan.
Choose a Harness, Lanyard, and Anchors
Want to stay grounded while you work up high? Choose a full-body harness rated for painting tasks, matching comfort to duration and fit. Pick a shock-absorbing lanyard long enough for reach but short enough to limit fall distance.
Anchor points should be certified, compatible with roof or structural tie-offs, and placed to avoid scraping fresh paint or disturbing exterior texture and color matching. Check connectors for corrosion and secure attachment.
- Use a harness with adjustable straps for snug fit
- Select a lanyard with energy absorber
- Choose anchors rated for your load and surface
- Carry spare carabiners and webbing
Inspect Fall-Arrest Equipment Before Each Use
Before each shift, inspect every piece of your fall-arrest system so you catch wear or damage that could fail under load. You’ll check harness stitching, D-rings, lanyards, anchors, and connectors for frays, corrosion, or deformation. Clean off dirt and garden pests residue; avoid solvents that weaken fibers. Test buckles and shock absorbers, and confirm anchor points are rated and solid. Replace any suspect component—don’t gamble. Store gear away from outdoor lighting heat and moisture. Record inspections and dates so you track service life and spot patterns before equipment becomes unsafe.
| Item inspected | What to look for |
|---|---|
| Harness | Frays, stitching |
| Lanyard | Shock pack |
| Anchors | Corrosion |
| Connectors | Gate action |
| Records | Dates, notes |
Plan Safe Access Routes and Work Zones
When you map access routes and work zones, prioritize clear, safe paths that keep workers and bystanders out of harm’s way. You’ll mark entry, ladder positions, and scaffold footprints to avoid trip hazards and maintain emergency egress.
Consider visibility—use high-contrast signs and warn neighbors—since color psychology affects how quickly people notice barriers. Restrict zones to trained personnel, and plan storage for brushes, cans, and eco-friendly paints so spills stay contained.
Review routes daily and after weather changes.
- Designate single-direction walkways
- Tape off drop zones
- Place non-slip mats at entries
- Keep communication devices accessible
Protect Plants, Windows, and Outdoor Fixtures
Before you start painting, cover plants and shrubs with breathable drop cloths or plastic sheeting to keep them safe from drips and fumes.
Tape and film windows, lights, and fixtures or remove delicate pieces so paint won’t damage them.
Taking these simple steps saves cleanup time and prevents costly replacements.
Cover Plants and Shrubs
If you’ve got shrubs, flower beds, or potted plants near the work area, cover them with breathable cloths or drop cloths and secure the edges to keep paint, primer, and dust off foliage and soil. You’ll protect fragile leaves and roots while preserving garden decor and avoiding chemical contact that harms pollinators.
Check covers daily for trapped moisture and pests, and adjust to allow airflow.
- Use lightweight fabric or canvas, not plastic, to prevent overheating.
- Anchor edges with stakes or rocks to stop wind.
- Remove coverings during rain to prevent mold.
- Keep mulch and soil dry for pest control.
Protect Windows and Fixtures
Alongside protecting plants, you should shield windows, doors, light fixtures, and hardware so paint doesn’t ruin glass, finish, or seals. Cover glass with low-tack masking film, wrap fixtures with plastic, and remove or tape hardware. Check seals after painting and keep window cleaning supplies handy for final touch-ups. If you’re working high, clear gutters first—gutter repair prevents clogs that interfere with drip lines. Secure tarps and label covered items so you won’t miss spots.
| Item | Protection | Tip |
|---|---|---|
| Windows | Masking film | Clean after paint cures |
| Fixtures | Plastic wrap | Remove bulbs |
Assess Height and Access Points
When you’re preparing to paint hard-to-reach exterior areas, start by measuring the building’s height and mapping all potential access points—windows, doors, eaves, gutters, balconies, and nearby trees or structures that could support a ladder or scaffold. You’ll note safe anchor points, assess ground slope, and plan equipment placement.
Consider color matching and paint selection early so you know where to position lighting for accurate color checks. Prioritize routes that minimize disturbance to landscaping and occupants.
- Identify stable ladder/scaffold locations
- Note window and door clearances
- Mark electrical and drainage obstacles
- Plan safe fall zones and access paths
Measure Eaves, Soffits, and Overhang Clearances
Because eaves, soffits, and overhangs directly affect ladder placement and scaffold clearances, measure their depth and underside height before you set up equipment. You’ll take precise Eaves measurement and note Overhang clearance to ensure safe reach and avoid damage. Record dimensions at multiple points, check for sagging or obstructions, and plan equipment offsets for gutters and vents.
| Element | Typical Data |
|---|---|
| Eaves depth | 6–24 in |
| Soffit underside height | 8–14 ft |
| Overhang clearance needed | 12–36 in |
| Notes | Mark uneven spots and obstacles |
Which Surfaces Need Special Access: Siding, Trim, Soffits, Fascia
After you’ve measured eaves, soffits, and overhang clearances, pinpoint which exterior surfaces will need special access so you can match gear and technique to the job. You’ll inspect siding for loose panels and roof algae stains that need gentle scrubbing before painting.
Trim demands stable platforms for detailed work and tight-edge brushes.
Soffits often require scaffolds or extension ladders and vigilance around vents.
Fascia needs secure access near gutters—coordinate gutter cleaning first to avoid debris and damage.
- Siding: power-wash and spot-treat stains
- Trim: ladders with stabilizers
- Soffits: scaffold or long-reach tools
- Fascia: clear gutters, secure footing
How Weather Affects Exterior Painting
If you plan your painting around the forecast, you’ll avoid tacky paint, poor adhesion, and wasted effort—temperature, humidity, and recent precipitation all change how paint dries and bonds to exterior surfaces.
You should wait for moderate temps and low humidity so coatings cure properly; extreme heat can blister, and damp air slows drying. After rain, allow surfaces to fully dry to prevent peeling.
Sunlight and wind affect flash-drying on high elevations, so plan shading or slower-drying formulas. Consider color selection since darker colors absorb heat and alter cure times.
Choosing proper products and timing boosts paint durability and long-term finish.
Best Seasons and Windows for High-Elevation Paint
You’ll get the best results when you pick mild, dry seasons—usually late spring or early fall—so paint can cure without extreme heat or sudden storms.
Check which window types give safe access (casement and awning windows often open wide, while fixed panes don’t), and plan your approach around them.
Finally, watch short weather windows and start work when you have several consecutive dry, moderate days for high-elevation sections.
Best Seasons To Paint
When planning high-elevation exterior painting, pick a season with mild, consistent temperatures and low humidity so paint can dry evenly and adhere properly. You’ll choose spring or fall in most regions; avoid extreme heat or freezing conditions.
Consider color psychology when selecting shades that suit exposure and neighborhood light. Pick eco-friendly paints to reduce odors and speed site re-occupation.
Plan around predictable weather windows and allow extra drying days for shaded eaves.
- Spring: stable temps, blooming distractions
- Early fall: lower humidity, steady days
- Dry spells: best for long runs
- Avoid stormy or freezing periods
Window Types For Access
Seasonal choices shape not just paint performance but which windows you’ll use for safe, efficient high-elevation access. You’ll favor casement or awning windows that open wide for scaffold tie-ins or through-window hoisting, and tilt-in sashes for easy cleaning and gear transfer.
Skylights with removable panes help when roof maintenance limits ladder placement. Avoid fragile stained glass or outward-swinging bay windows that block secure anchor points.
Position scaffolds to protect garden landscaping and prevent soil compaction. Always check window frame strength before attaching hardware, and coordinate with roof maintenance schedules so access methods won’t interfere or create hazards.
Weather Windows And Timing
Because paint jobs at height depend on stable conditions, pick your weather windows with care so coats cure properly and crews stay safe. You’ll aim for mild, dry days with low wind; check weather forecasts often and adjust plans if rain or gusts threaten.
Protect landscaping and plant protection covers from overspray and rain runoff.
Choose seasons with predictable afternoons and cooler mornings to speed curing without blistering.
- Favor late spring or early fall for stable temperatures
- Avoid windy, humid, or freezing days
- Monitor multi-day forecasts before setup
- Schedule flexible crews for last-minute shifts
How to Clean High Eaves, Soffits, and Gutters
As you tackle the high eaves, soffits, and gutters, prep is essential: gather a stable ladder or lift, safety gear, and the right cleaning tools so you can work efficiently and safely.
Start by removing debris from gutters with a scoop and rinsing with a hose.
Begin by scooping out gutter debris, then rinse thoroughly with a hose to clear remaining dirt and clogs.
Use a soft-bristle brush and mild detergent on soffits to protect exterior texture and avoid altering paint sheen. Rinse downward to prevent streaks.
Inspect for mold or bird nests and treat affected spots with a mild bleach solution, then rinse thoroughly.
Work in sections, using a partner to steady the ladder and hand tools.
Remove Loose Paint and Rust in Narrow Gaps
When you tackle narrow gaps—like between trim, flashing, or siding seams—start by removing loose paint and rust so new coatings can adhere properly and prevent further damage. Use a stiff brush, small scraper, and wire brush to reach confined spots; work from top down so debris falls away from cleaned areas.
Pay attention to nearby roof moss and schedule gutter cleaning first to avoid recontamination.
Wipe surfaces with solvent or a damp cloth and let dry before priming.
- Scrape loose paint gently
- Wire-brush rusted seams
- Vacuum debris from gaps
- Clean surrounding areas before priming
Fill Cracks and Gaps in Hard-to-Reach Trim
Before you prime or paint, seal any cracks and gaps in hard-to-reach trim so moisture can’t get behind the finish and cause rot or peeling. Use caulk rated for exterior use and low-modulus flexibility; apply with a long-reach squeeze tube or brushable caulk on an extension pole.
Back larger voids with foam backer rod before sealing. Smooth joints for neat paint adhesion and let curing times finish fully.
Consider how Color psychology influences trim choices after repairs, but keep sealants neutral. If you prefer sustainable options, pick products compatible with eco-friendly pigments and low-VOC paints for safer, durable results.
Choose Primers for Weathered High Surfaces
Because high, weathered surfaces have been exposed to sun, rain, and temperature swings, you’ll need a primer formulated for adhesion, UV resistance, and moisture control to guarantee long-lasting paint performance.
For weathered, high surfaces, use a primer offering strong adhesion, UV protection, and moisture control for lasting paint.
Choose a primer that boosts priming adhesion on chalky or aged wood and masonry, and pairs well with your desired topcoat.
Look for mildew-resistant, fast-drying formulas labeled Weatherproof coating.
Apply with extension poles or sprayers for even coverage, and spot-sand glossy areas first.
Allow full cure before painting.
Inspect for peeling after primer dries and touch up problem spots to prevent future failure.
- Use high-adhesion primers
- Pick mildew-resistant types
- Prefer fast-drying formulas
- Prime in mild weather
Select Exterior Paint for Elevated Exposure
Now that you’ve primed those high, weathered areas for adhesion and moisture control, pick an exterior paint formulated for prolonged UV exposure, temperature swings, and moisture. You should choose 100% acrylic or advanced elastomeric formulations for flexibility and fade resistance.
Consider Color selection carefully: lighter hues reflect heat and slow fading, while darker accents add contrast but need higher-UV resistance. Check for mildew inhibitors and breathable coatings to prevent trapped moisture.
Match Texture options to existing siding—smooth for metal or smooth vinyl, acrylic-latex with slight tooth for wood or stucco—to maintain appearance and adhesion on elevated surfaces.
Choosing the Right Ladder for Tall Eaves
When you’re tackling tall eaves, pick a ladder that gives you reach, stability, and safe footing—extendable aluminum models with fly sections are common because they combine height with manageable weight. You’ll want a ladder that lets you access eaves without straining, so check load rating, non-slip feet, and secure locking.
Keep tools in a belt or platform so you can focus on brushing on eco friendly paints and considering Color theory for trim contrast as you work.
- Verify weight capacity and locking mechanisms
- Choose non-slip, wide-footed bases
- Use stabilizers or stand-offs to protect gutters
- Inspect for bends or corrosion
Extension Ladder vs. Step Ladder: When to Use Which?
Decide whether an extension or step ladder fits the job by matching ladder height needs to the area you must reach.
Check stability and support—an extension ladder can span taller walls but needs a solid footing and proper angle.
While a step ladder gives self-support on flat ground.
Also consider the surface and access: uneven terrain or tight eaves may force you to choose one type over the other.
Ladder Height Needs
Because working safely means matching ladder type to the height and task, you’ll choose an extension ladder for tall, straight runs like siding or gutters and a step ladder for lower, freestanding jobs such as trim or porch columns.
Plan ladder height so you never stand on the top rung. For roof insulation checks or gutter cleaning reach, pick an extension ladder that extends 3 feet above the roofline. Use a step ladder that allows comfortable reach without overreaching.
- Measure work height before buying or renting.
- Add 3 feet for roof access.
- Factor tool reach and paint poles.
- Never stand on top step.
Stability And Support
If you need height and long, steady support for siding, gutters, or roofline work, choose an extension ladder. For lower, freestanding tasks like trim, porches, or painting columns, use a step ladder that gives stable footing without leaning.
You’ll want solid footing, so set extension ladders on level ground and secure the base; anchor or tie the top when possible. Step ladders work great near outdoor furniture or garden illumination fixtures since you won’t lean them against surfaces.
Inspect feet, locks, and spreaders before climbing. Don’t overreach: move the ladder instead. Follow manufacturer load ratings and use a spotter when needed.
Surface And Access
Knowing which ladder to use goes beyond height—surface and access determine whether an extension ladder or a step ladder will keep you safe and efficient.
You’ll pick an extension ladder for uneven ground or when you need to reach rooflines, balancing against walls or using stabilizers.
Use a step ladder for flat patios, stable garden landscaping paths, or when you work near exterior lighting fixtures.
Consider access points, obstacles, and load capacity before climbing.
- Choose extension for height and narrow access
- Choose step for stability and closer tasks
- Check footing and clear debris
- Use helpers and proper anchoring
How to Safely Position and Secure Ladders
When you set up a ladder, take a moment to check the base, angle, and top contact points so the whole setup stays stable; small adjustments now prevent big accidents later.
Position feet on firm, level ground; use a board under soft soil.
Clean roof moss and gutter debris from contact areas so the ladder won’t slip.
Angle the ladder at roughly 75 degrees—1 foot out for every 4 feet up.
Lock spreaders and extend rungs above the roofline where you’ll step off.
Face the ladder when climbing, keep three points of contact, and never lean or overreach.
Fit Ladder Stabilizers and Stand-Off Arms
Want the ladder to hug the wall without damaging trim or gutters? Fit stabilizers and stand-off arms to keep rungs away from surfaces, protect gutters, and give space to work on paint texture and color mixing tests. Secure attachments per manufacturer instructions, check bolts, and test stability before climbing.
- Choose a stabilizer width that clears trim and allows safe reach.
- Use non-marring pads to protect finishes while you lean the ladder.
- Angle stand-off arms to maintain balance when you lean sideways for detail work.
- Recheck fasteners and level each setup, especially on uneven ground.
When to Rent or Buy Scaffolding
Think about how often you’ll need scaffolding and how long your project will take before deciding to rent or buy.
If you’re tackling a one-off weekend job, renting usually saves money and storage hassles.
But if you expect regular use or long timelines, buying can be more cost-effective and convenient.
Cost Versus Frequency
Although renting looks cheaper upfront, you’ll save money over time if you seriously expect to use scaffolding often enough to justify buying it. You should weigh purchase cost against rental rates, storage, maintenance, and how often you’ll repaint or do other high-reach jobs.
Also consider color psychology choices and eco-friendly pigments—premium paints may change how often you need to repaint, affecting scaffold decisions.
- Calculate break-even: purchase price versus cumulative rentals.
- Include upkeep: inspections, repairs, insurance.
- Factor storage and transport costs.
- Account for resale value if you upgrade.
Make a clear tally before deciding.
Project Timeline Needs
When your painting schedule is tight, plan scaffolding decisions around project duration and flexibility so you don’t overpay or delay work. Decide whether rental suits short jobs: you won’t store bulky frames, and rentals offer varied heights for trim, eaves, or cupolas.
Buy if you’ll repaint frequently or hire pros often; ownership saves rental fees and guarantees familiar setup. Factor setup time, local permit needs, and storage space so scaffolding doesn’t interfere with lawn care or attract garden pests.
Coordinate timing with interior décor updates to minimize disruption. Get quotes, compare costs over projected uses, and pick the option matching your timeline.
Types of Scaffolding for Narrow or Uneven Yards
If your yard’s narrow, sloped, or cluttered with landscaping, choosing the right scaffolding keeps the job safe and efficient. You’ll evaluate access, ground stability, and nearby features like garden lighting or fixtures you don’t want disturbed during exterior cleaning.
Pick systems that adapt to tight footprints and uneven ground so you can work steadily.
- Narrow-frame scaffolds for alleyways and side gardens
- Adjustable-leg platforms that compensate for slopes
- Cantilevered brackets to clear plants and hardscaping
- Low-impact base plates to protect turf and irrigation
Inspect components, secure anchors, and plan paths before you assemble.
Set Up Mobile Scaffold Towers Safely
Because mobile scaffold towers give you both height and mobility, you should set them up with a clear plan that prioritizes stability, level footing, and safe access. Check ground, lock wheels, spread outriggers, and use guardrails. Wear harnesses if required and keep tools secured. Plan platforms to reach eaves for consistent Color schemes and to practice steady Painting techniques without overreaching. Inspect daily and avoid wind above recommended limits.
| Checkpoint | Action |
|---|---|
| Ground | Level and compact |
| Wheels | Locked and chocked |
| Outriggers | Fully extended |
| Guardrails | Installed |
| Weather | Stop if windy |
Use Boom and Articulating Lifts Safely (Owner vs. Rental)
Decide whether owning or renting a boom or articulating lift makes sense for your project by comparing upfront costs, maintenance, and storage needs.
Know that operating these machines safely takes training and regular inspections, so factor in the time and expense of certification or professional operators.
If you’re unsure, renting gives flexibility and access to newer safety features, while ownership pays off only with frequent, well-maintained use.
Owner vs. Rental Costs
When weighing whether to buy or rent a boom or articulating lift, you’ll want to compare upfront cost, frequency of use, and ongoing expenses like maintenance, storage, and insurance.
If you’re repainting to follow exterior color trends or using eco-friendly paints, factor in specialized cleanup and ventilation needs.
Buying pays off if you’ll use the lift often; renting minimizes storage and depreciation. Consider resale value and tax implications.
- Upfront purchase price vs. rental rates
- Expected annual hours of use
- Maintenance, inspections, and repairs
- Insurance, storage, and transportation costs
Safety And Operation
While you’re comparing ownership and rental, prioritize safe operation. You’ll inspect lifts before use, check brakes, controls, harness points, and emergency lowering.
If you own, schedule regular maintenance; if you rent, confirm service records and operator training.
Always wear fall protection, secure tools, and keep bystanders clear.
Use spotters and follow manufacturer load limits, especially when carrying paint, ladders, or drone photography gear.
Choose eco friendly paints to reduce fumes aloft and follow spill containment procedures.
Log hours and incidents, and never work in high wind or electrical hazard conditions—safety beats speed every time.
Professional-Only: Rope Access Basics and When to Hire
If your exterior painting project puts crews in high, awkward, or otherwise unsafe positions, rope access teams offer a controlled, efficient way to reach those spots without bulky scaffolding. You’ll get trained technicians who manage anchors, redundancy, and rescue plans while you focus on color mixing decisions and paint drying schedules.
Consider hiring when height, complexity, or risk exceed DIY or ladder methods.
- Certified technicians with documented training
- Reduced setup footprint and faster access
- Precise work on difficult façades and trim
- Clear rescue and insurance protocols
Ask for references, insurance proof, and a written method statement before hiring.
Bracing Techniques for Painting Narrow Ledges
Because narrow ledges give you little room to work, you’ll need bracing that secures both your stance and your tools without damaging the surface. Use padded clamp-on brackets or a narrow plank with non-slip pads to create a stable foot platform.
Position a compact tool tray that clamps to the bracket so brushes, rollers, and a small paint cup stay within reach.
Keep movements controlled to maintain consistent Color blending and apply texture techniques smoothly.
Test each anchor point before painting, tighten hardware periodically, and avoid overreaching—if the ledge feels unstable, stop and reassess your bracing.
Two-Person Strategies for Steady, Safe Work
You’ll want clear hand or voice signals so you can coordinate moves without shouting.
One person should secure the ladder and check footing while the other paints.
You’ll switch roles as needed to keep things even.
Agree on who watches for hazards and calls time-outs so you both stay safe.
Team Communication Signals
When two people tackle hard-to-reach exterior work, clear, simple signals keep you steady and safe on ladders and scaffolds. You should agree on compact team signals and communication protocols before starting so both of you react instantly. Use voice, hand, and tool gestures that are unmistakable and practiced.
- Call “steady” for minor adjustments.
- Tap twice for “hold position.”
- Wave down for “lower load.”
- Point and nod to confirm hazards.
Review signals each day, keep them consistent, and pause if noise or distance interferes. Clear protocols cut mistakes and keep both of you protected.
Ladder Stability Techniques
Good communication sets the stage for safe ladder work, so pair your signals with physical techniques that keep the base and top secure.
You hold the base with a wide stance, feet braced, and knees slightly bent while the painter climbs, keeping hands ready to steady.
At the top, you spot against the house, preventing lateral slip without leaning on wet trim or fresh color theory trials.
Switch roles smoothly so fatigue doesn’t compromise grip.
Use ladder levelers on uneven ground and a stabilizer bar near gutters to protect paint formulation and finish.
Review position regularly and call adjustments promptly.
Shared Safety Responsibilities
Although one person can steady a ladder, a two-person team halves the risk and doubles your control. You both check safety gear, communicate load shifts, and monitor weather conditions so you stop before wind or rain makes work unsafe.
One holds and watches footing while the other paints, switching roles to avoid fatigue. Agree on signals for sudden hazards and keep tools tethered.
- Assign clear roles: holder and painter
- Inspect gear together before starting
- Watch sky and ground for changing weather conditions
- Use simple verbal/visual signals for emergencies
Best Brushes for Tight Corners and Trim
If you want clean lines in tight corners and detailed trim work, choose brushes with a slim profile, firm bristles, and a comfortable handle that lets you control strokes precisely.
Pick synthetic filaments for water-based paints and natural-bristle for oils; both aid color blending and maintain edge control.
Opt for narrow widths (1–2 inches) for trim and very small angled tips for crevices.
Look for tapered points and a good ferrule to prevent splaying.
Keep a dedicated trimming brush clean to preserve paint sheen and avoid cross-contamination.
Replace worn brushes to maintain crisp lines and efficient touch-ups.
Angled Brushes vs. Sash Brushes: Which to Use
Pick the brush by shape: angled brushes give sharp lines on trim while sash brushes offer a flatter profile for broader strokes.
You’ll find angled brushes give more control in tight joints and sash brushes reach better over flat surfaces.
Match the brush to the surface and finish you want for the cleanest result.
Brush Shape Comparison
When you’re choosing between angled and sash brushes, focus on the job’s edges and the profiles you’re painting. For a clear brush shape comparison, pick angled brushes for crisp cuts and sash brushes for flat, even strokes.
You’ll notice color blending is easier with sash brushes on large panels, while angled tips handle corners and trim precisely.
- Angled: great for tight edges and trim work.
- Sash: best for broad, flat surfaces and smooth blending.
- Angled: directs paint into creases without overloading.
- Sash: maintains consistent lay with fewer brush marks.
Control And Reach
Although both angled and sash brushes can cover most exterior tasks, your choice will come down to how much control you need and how far you have to reach.
You’ll grab an angled brush for tight corners and trim because its cut lets you steer strokes precisely, aiding neat color mixing at edges without overloading.
Use a sash brush when you’re on an extension pole or tackling broader surfaces where reach matters more than micro-control.
Both influence paint durability by affecting film thickness and overlap consistency, so pick the tool that keeps application even and reduces drips when working at awkward angles.
Surface And Finish
Because surface texture and desired finish determine how paint lays down, choose your brush to match the job. You’ll pick angled brushes for trim and tight corners, sash brushes for flat boards and wider strokes. Consider color schemes and texture variations when deciding—smooth finishes benefit from softer filaments; rough facades need stiffer bristles.
Match brush size to reach and control to avoid drips and uneven coverage.
- Angled brushes for crisp lines and detailed trim
- Sash brushes for broader, even coverage on siding
- Softer bristles for glossy, smooth finishes
- Stiffer bristles for rough, textured surfaces
Using Mini-Rollers and Extension Poles Effectively
If you want consistent coverage without climbing every ladder, mini-rollers on extension poles are your best bet: you’ll reach eaves, gutters, and tight trims while keeping steady pressure for even color mixing and improved paint durability.
Choose a high-quality roller nap for the surface, load evenly to avoid drips, and work in overlapping strokes.
Keep the pole at a comfortable angle, reposition your feet rather than twisting your torso, and use controlled, short passes near edges.
Clean rollers promptly to maintain nap texture.
Inspect for thin spots and touch up with a hand roller or brush as needed.
Pole Extensions and Adapters That Work
Extend the reach you gained with mini-rollers by choosing the right pole extensions and adapters—these parts determine stability, compatibility, and how comfortably you can hold a loaded roller for long periods.
You’ll want lightweight, locking telescoping poles with sturdy threaded or quick-connect ends. Match adapters to roller frames and paint pans, and pick corrosion-resistant materials if you also tackle roof cleaning or gutter repair.
Test balance before coating. Consider padded grips and wrist straps for long jobs.
- Telescoping aluminum pole, twist-lock
- Fiberglass pole, cam-lock
- Threaded adapter set, brass or stainless
- Quick-connect universal coupler
Adapters and Attachments for Awkward Angles
Check that any adapter you buy is compatible with your extension pole’s thread and locking system so it won’t wobble when you’re working up high.
Use angled brush attachments to keep paint lines straight on soffits and overhangs without twisting your wrist.
Together they let you reach awkward corners safely and finish faster.
Extension Pole Compatibility
When you’re tackling awkward angles on your home’s exterior, the right extension pole adapters and attachments let you reach tight spots without contorting or climbing ladders. You’ll want poles that lock securely, fit common threaded heads, and work with tasks beyond paint—like roof insulation checks and gutter cleaning—so you don’t swap tools constantly.
Check material, length range, and joint durability to avoid wobble.
- Verify universal threading or included adapters
- Choose lightweight but rigid materials (aluminum or carbon)
- Confirm weight limits for larger attachments
- Test quick-release mechanisms and secure locks before use
Angled Brush Attachments
If you need to paint soffits, eaves, or other tight spots without contorting yourself, angled brush attachments let you keep the pole and paintbrush aligned for clean, controlled strokes. You’ll choose swiveling heads, fixed-angle adapters, or low-profile paddles to match the angle you need.
Attachments save time and reduce mistakes by holding consistent angles as you work. Carry spare brushes and a small kit for color mixing on site, and keep touch-up cans in organized paint storage to avoid trips back to the ladder.
Test fit before full strokes, and clean attachments promptly to preserve performance and fit.
Paint Sprayer Types for Exterior Work
You’ll choose a sprayer based on coverage, finish, and the scale of your project; different types handle exterior tasks very differently. You’ll match sprayer type to paint texture and desired finish, remembering color psychology affects perceived surface quality.
Consider portability, power, and cleanup when planning.
- Airless: high pressure, fast coverage for siding and large walls.
- HVLP: smoother finish for trim, lower overspray on detailed areas.
- Compressed air: fine atomization, best for thin coatings and precise control.
- Powered garden sprayers: economical for primers and stains, watch consistency and nozzle size.
Which Sprayer Is Best for Eaves and Soffits
Having picked a sprayer for large surfaces or trim, narrow your choice for eaves and soffits to one that balances reach, control, and minimal overspray.
Choose a lightweight, hose-fed unit with adjustable pressure so you can aim into tight soffit cavities without blasting paint onto fascia or gutters. A fine-tip nozzle and comfort grip improve control when matching roof color at junctions.
Work from a stable ladder or platform, mask nearby vents, and remove or cover fixtures.
Schedule gutter cleaning before spraying to prevent debris from sticking to fresh paint and to keep lines crisp where soffit meets gutter.
Pros and Cons of Airless Sprayers for High Work
When you’re spraying high eaves, dormers, or the upper siding, airless sprayers deliver fast, even coverage and let you reach awkward angles without repeatedly climbing the ladder. You’ll appreciate speed and atomization, though overspray and setup time demand care.
Color mixing stays consistent in the pump, but test batches first. Keep brush selection in mind for trim touch-ups after spraying. Safety, cleanup, and control are the trade-offs.
- Pros: fast coverage, smooth finish
- Cons: more overspray, heavier equipment
Tip: practice pressure settings on scrap.
Maintenance: flush pump and filters promptly.
How to Mask and Protect Nearby Surfaces for Spraying
Before you start spraying, pick the right masking materials—drop cloths, painter’s tape, and plastic sheeting—to fit the surfaces you’ll protect.
Secure nearby plants and shrubs with breathable covers or temporary barriers so they don’t get overspray or trampled.
Create tight temporary seals around windows, vents, and fixtures to prevent paint bleed and keep cleanup minimal.
Choose Proper Masking Materials
Wondering which masking materials will save you time and prevent overspray headaches? Choose lightweight paper for large flat areas so your chosen color schemes and paint textures stay pristine.
Use contractor-grade plastic sheeting for windows and doors; it resists tearing and sheds paint.
Grab painter’s tape that removes cleanly—match width to trim for sharp lines.
For edges and tight spots, get masking film with adhesive strips to conform without residue.
- Kraft masking paper for siding
- Clear plastic sheeting for glazing
- Low-tack painter’s tape for trim
- Masking film for irregular details
Apply firmly, overlap seams, and check adhesion before spraying.
Secure Surrounding Vegetation
Because fine spray and paint particles travel farther than you expect, you’ll want to shield plants, lawn furniture, and nearby surfaces with care. Start by doing vegetation trimming to create a clear buffer; prune branches and remove loose leaves so tarps and masking film sit flat.
Cover shrubs and groundcover with breathable drop cloths, securing edges with rocks or weights so wind won’t lift them. Protect planters and furniture with plastic sheeting taped loosely to avoid crushing.
Check for nesting birds or small mammals and pause work if present—observe wildlife safety, relocating only when legally allowed and humane methods are available.
Create Tight Temporary Seals
When you’re getting ready to spray, tight temporary seals turn a messy job into a precise one by keeping paint off windows, trim, and fixtures; you’ll focus on sealing gaps and weatherproofing surfaces to prevent overspray and moisture intrusion. Use painter’s tape, plastic sheeting, and masking film to form clean edges.
Press tape firmly, overlap seams, and test seals before spraying. Remove coverings promptly after tack dries.
- Use low-tack tape on glass and high-bond tape on rough trim.
- Create pleats in plastic to follow contours.
- Seal gaps around fixtures with removable caulk.
- Anchor sheets with weighted clips.
Step-by-Step: Painting High Eaves and Soffits
Although working overhead can feel awkward, tackling high eaves and soffits is straightforward if you prepare properly. You’ll inspect surfaces for rot, dirt, and peeling, noting house textures to choose primer and brush types.
Pick paint color selection that complements walls and hides imperfections; lighter colors hide shadows. Set sturdy extension ladders or a scaffold, secure someone to spot you, and wear eye protection and a dust mask.
Clean with a pressure washer or scrub brush, let dry, then prime damaged areas. Use an angled brush or roller on an extension pole, apply two thin coats, and check edges for drips.
Step-by-Step: Painting Narrow Trim and Gutters
After finishing eaves and soffits, move on to narrow trim and gutters where steady hands and the right tools make the biggest difference. You’ll prep by cleaning, sanding, and masking to protect siding and downspouts.
Choose color schemes that complement your house and pick paint textures suitable for metal or wood. Work in short sections, use a sash brush for trim, and a narrow roller or touch-up wand for gutters.
Keep runs and drips in check by applying thin coats and inspecting from below.
- Clean and degrease surfaces
- Sand and prime stubborn spots
- Use a quality sash brush
- Apply thin, even coats
Step-by-Step: Painting Under Overhangs and Awnings
Because overhangs and awnings sit tight to the house and catch drips, you’ll need a steady plan for access, masking, and ventilation before you paint. Start by removing loose dirt and sanding glossy spots; choose a ladder or extension pole so you work level and safe.
Tape edges with low-tack masking, covering fixtures and plants. Pick a color with color psychology in mind—light tones brighten shadowed undersides, darks add depth.
Test paint texture for sag resistance; satin or semi-gloss often performs well. Use small brushes for edges and a short-nap roller for even coverage, drying between coats.
Manage Paint Runs and Drips at Height
Before you paint at height, prep the surface and tape edges so any drips land on protected areas instead of your siding. Use a loaded brush for control and keep your roller light—too much paint will run before it can set.
If a drip forms, catch and smooth it immediately with a brush to prevent streaks.
Prep Surface And Tape
When you’ll be working at height, prep your surfaces and tape carefully so paint runs and drips never become a big cleanup job. You’ll clean, sand, and prime to guarantee tape sticks and paint behaves—think color psychology when selecting hues that read correctly from ground level, and respect historic preservation by matching original textures.
Secure drop cloths and tape edges tightly; overlapping protection prevents stains.
- Clean surfaces with mild detergent and rinse thoroughly.
- Sand glossy spots and remove loose paint before taping.
- Use high-quality exterior tape rated for rough surfaces.
- Apply primer to seal porous areas and help adhesion.
Control Brush And Roller
Now that surfaces are prepped and taped, focus on controlling your brush and roller to prevent runs and drips at height. Work in short, controlled strokes, loading tools lightly and tapping excess back into the tray. Use a high-quality angled brush for edges and a short-nap roller for vertical siding.
Your color choices affect how many coats and how heavy you can load the tool. Keep a damp rag handy to catch drips immediately. When pausing, wrap brushes in plastic or use proper brush storage to keep bristles ready.
Move methodically, inspect for drips below, and smooth any runs before they dry.
Maintain Consistent Coverage in Tight Spots
If you want even, professional-looking paint in tight spots, use the right tools and a steady technique to avoid drips, missed patches, and heavy buildup. You’ll match color coordination across trims and surfaces by feathering edges and maintaining consistent paint sheen.
Work from well-loaded small brushes, tip out excess, and pull strokes toward wet edges. Rotate tools so you don’t overload one area.
- Use angled sash brushes for corners.
- Keep a small foam roller for narrow runs.
- Carry a trim pad to smooth overlaps.
- Have a detail brush for touchups.
Check frequently and correct thin areas before they set.
Drying Time and Recoating Best Practices Outside
Because outdoor conditions change fast, plan your drying and recoat windows around temperature, humidity, and sun exposure so paint cures evenly and bonds well. Check manufacturer times but expect longer waits when it’s cool or humid; touch tests beat the clock.
Recoat only when the previous layer is dry to the touch and resists fingernail pressure. Thin, smooth paint texture dries faster than heavy, stippled coats, so adjust application and drying intervals accordingly.
Work in consistent sections to avoid lap marks and consider color psychology when choosing sheen and layering—gloss reflects light and highlights flaws, matte hides imperfections.
Cleaning and Storing Tools After High-Reach Jobs
After a high-reach job, rinse brushes, rollers, and extension poles thoroughly to remove paint and prevent buildup.
Dry each part completely before storing to stop rust and mold.
Store tools in a clean, dry place—hang poles and keep brushes flat or suspended to preserve their shape.
Rinse And Dry Tools
When you finish a high-reach paint job, rinse your brushes, rollers, and extension poles promptly to prevent dried paint buildup that’s harder to remove. You’ll avoid ruined tools and keep paint off areas that could attract garden pests or spoil interior decor if brought indoors.
Use warm water for latex, solvent for oil, and flush pole joints. Shake excess water, spin rollers, and blot brushes with a clean rag.
- Rinse until water runs clear
- Inspect ferrules and roller cores
- Air-dry tools horizontally out of direct sun
- Reassemble only when fully dry
Proper Storage Techniques
Though the rinse-and-dry stage removes most residue, you’ll extend tool life and cut future prep time by storing everything correctly. Hang brushes bristle-up to keep shape, and use breathable storage containers for rollers and drop cloths to prevent mildew.
Coil extension poles and secure loose parts with straps or labeled bags so you’ll reassemble quickly. For leftover paint, follow paint storage guidelines: seal cans tightly, clean rims, and store upright in a cool, dry spot away from heat.
Keep a small maintenance kit with solvent, rags, and a wire brush handy. Inspect tools before each job to catch wear early.
How to Touch Up Spots Safely After the Initial Coat
If small flaws still show once the initial coat dries, take a measured approach to touch-ups so you don’t create uneven sheen or drips. Match color carefully—use the original can or a sample to guarantee color matching and preserve paint durability. Feather edges with a small brush or foam roller, apply thin layers, and let each dry fully. Sand any raised drips lightly before recoating.
- Clean the spot and remove loose flakes
- Use the same paint batch or mix-in measured amounts
- Work from the center outward to blend
- Inspect in daylight for uniform sheen and coverage
Preventive Maintenance to Avoid Future Hard-to-Reach Work
Fixing small touch-ups now will save you more work later, but taking steps to prevent hard-to-reach painting tasks is even smarter. You’ll inspect siding, trim, and joints seasonally, address moisture sources, and keep gutters clear to protect exterior texture. Repaint high-wear areas with durable finishes and keep a sample for color matching. Document paint codes and application methods so future touch-ups blend seamlessly.
| Task | Frequency | Tool |
|---|---|---|
| Inspect seams | Twice yearly | Ladder/stabilizer |
| Clean surfaces | Annually | Power washer |
| Record paint specs | After job | Photo/label |
Common Mistakes and Troubleshooting for Elevated Paint Jobs
When you work on elevated paint jobs, common mistakes—like poor surface prep, wrong ladder setup, or using incompatible primers and topcoats—quickly become costly and unsafe, so catch them early and correct them methodically.
Elevated paint work demands meticulous prep, correct ladder setup, and compatible primers to avoid costly, unsafe failures.
You should inspect surfaces, test paint texture for adhesion, and consider color psychology for visibility and curb appeal.
Troubleshoot failures by isolating causes: moisture, wrong solvent, or movement.
- Check anchors, ladder angle, and harness points.
- Sand and clean before priming; spot-test adhesion.
- Match primer chemistry to topcoat.
- Review weather, drying times, and paint texture for consistent finish.
Act promptly to prevent escalation.
Frequently Asked Questions
Can Wildlife Nests in Eaves Delay or Restrict Painting Work?
Yes — wildlife nesting can delay or restrict painting; you’ll need an eaves inspection first, follow legal protections, pause work during active nests, and reschedule or use noninvasive methods once nests are vacated.
How Do Historic Preservation Rules Affect Exterior Paint Color Choices?
Historic hues help: you’ll follow Historic color palettes and Preservation guidelines, so you’ll choose period-appropriate paints, consult preservation boards, document decisions, and prioritize authenticity, avoiding modern mismatches while securing permits and community approval.
Are There Insurance Implications if Volunteers Help With High-Up Painting?
Yes — you’ll face insurance implications: volunteer safety must be prioritized, and your insurance coverage may not extend to volunteers on high-up painting tasks, so you’ll need waivers, additional liability or volunteer accident policies.
How to Handle Lead Paint Testing and Regulations on Older Homes?
You should get professional lead testing, follow regulatory compliance for disclosure, abatement, and worker protection, and document results; hire certified contractors if needed, since you’ll need permits, training, and safe disposal to avoid liabilities.
Can Exterior Lighting Fixtures Be Painted Without Voiding Warranties?
You can, but you’ll likely void some warranties if you alter finishes; check manufacturer terms. For good results, use color matching and coatings rated for outdoor paint durability to preserve appearance and resist corrosion.
Conclusion
So you’re heroically dangling from a ladder because gravity’s personal now — cute. You can DIY some of this if you respect safety, know your limits, and don’t mind a few paint splatters as battle scars. Hire pros when permits, danger, or stubborn peaks laugh at you. Clean tools, touch up carefully, and do routine maintenance so future you isn’t back on a wobbly ladder drinking regret. Smart choices keep your paint and dignity intact.