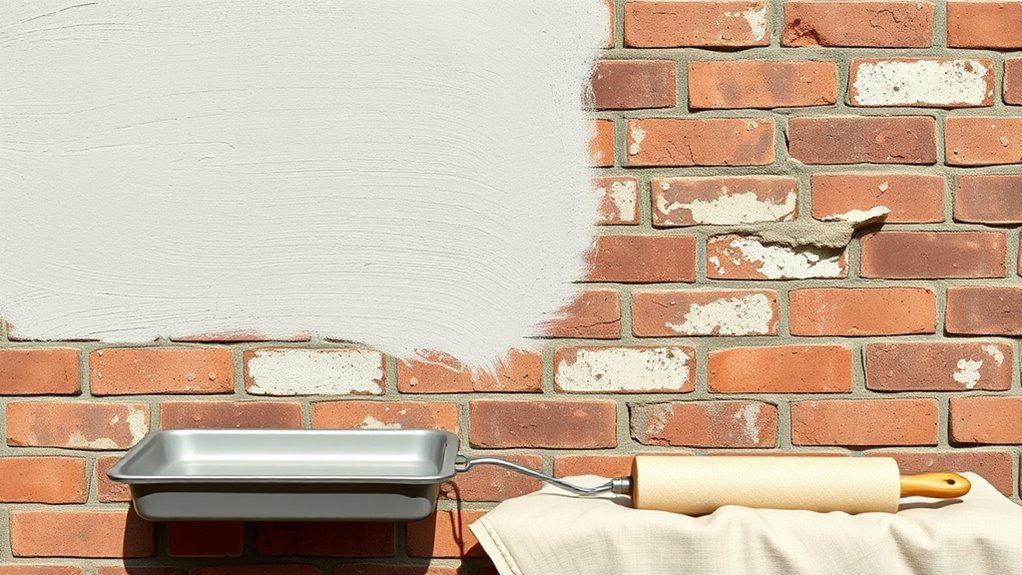
How to Paint Old Brick Wall the Right Way
You can make old brick look great and last by inspecting and repairing cracks, spalls, and mortar, testing for moisture and efflorescence, and cleaning thoroughly before priming. Use a high-penetration or breathable masonry primer on dry, patched brick, then apply breathable masonry or mineral paint in even coats, working top to bottom and allowing full dry times. Match products to your climate and use low‑VOC options for safety, and keep going for detailed prep, materials, and timing tips.
Quick Step-by-Step: Painting Old Brick Wall
Before you start, gather your tools and inspect the brick for loose mortar, efflorescence, or heavy dirt—then clean, repair, and prime as needed so paint will stick.
Before painting, gather tools and inspect and repair brick—clean, remove efflorescence, and prime so paint adheres.
You’ll plan in stages: test a small area, choose breathable masonry primer and paint, and pick tools—rollers for flats, brushes for mortar.
Mask and cover nearby surfaces, mix paint thoroughly, and work top to bottom in manageable sections.
Maintain consistent wet edges, inspect for missed spots, and apply a second coat when dry.
Consider color psychology for mood and respect historical preservation guidelines if the wall has heritage value.
Should You Paint This Brick or Leave It Natural?
Now that you know how to prepare and paint old brick, decide whether painting is the right choice for this particular wall. You’ll weigh aesthetics, maintenance, and context: paint can refresh a dull facade and create bold color contrast, but it may hide original texture and complicate future restoration.
If the building has historical value, prioritize historical preservation and consult guidelines before altering surfaces. Consider long-term upkeep versus the immediate visual gain.
Ask yourself whether the new look complements the property and neighborhood, and whether you’re prepared for repainting or potential removal challenges later.
- Visual impact vs. authenticity
- Maintenance commitment
- Neighborhood context
Inspecting Brick Condition Before You Paint
If you’re planning to paint, start by closely inspecting the brick and mortar for damage that’ll affect adhesion and longevity. Walk the wall, looking for cracked, spalling, or crumbling bricks and deteriorated mortar joints that need repair.
Note variations in brick texture that influence primer and paint choice; rough, porous surfaces absorb more and may need extra coats. Check for previous coatings, loose paint, or buried repairs that could delaminate.
Consider historical preservation—consult guidelines or a pro before altering landmarked masonry. Document defects, prioritize structural repairs, and only proceed once the substrate is sound and stable.
Test for Moisture and Efflorescence
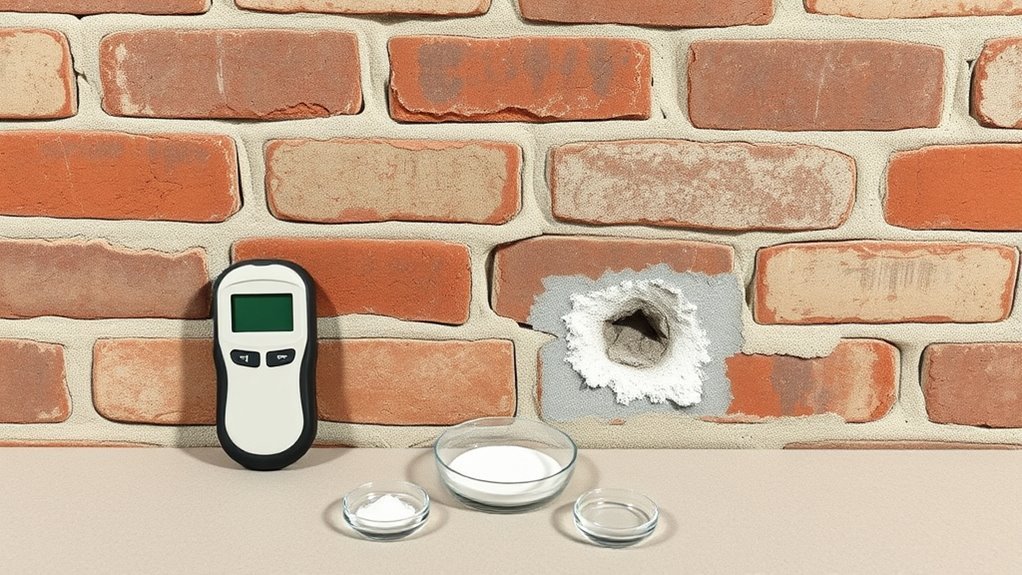
Because trapped moisture ruins paint adhesion and leads to efflorescence, you should check the wall’s moisture levels before you paint. You’ll do Moisture testing with a moisture meter and by taping a plastic sheet to the brick for 24–48 hours to spot trapped damp.
Perform an Efflorescence inspection by looking for white powdery deposits and probing suspect areas. Address issues before painting.
- Use a pin or pinless moisture meter for quick readings.
- Tape test: secure plastic and check condensation after 24–48 hours.
- Scrape any powdery efflorescence and record locations for follow-up.
When to Repair Mortar vs. Repoint First
After you’ve checked for moisture and removed efflorescence, decide whether to repair isolated mortar damage or repoint entire sections. If only a few joints crumble or wash out, choose mortar repair: you’ll patch gaps, match texture, and let it cure before painting.
If multiple adjacent joints or whole courses fail, repointing is necessary to restore structural integrity and uniform appearance. Consider a repointing timeline based on weather—work in dry, moderate temperatures and allow full curing (often several days to weeks) before painting.
Prioritize sound substrate over speed: paint only after mortar has fully set to avoid trapped moisture.
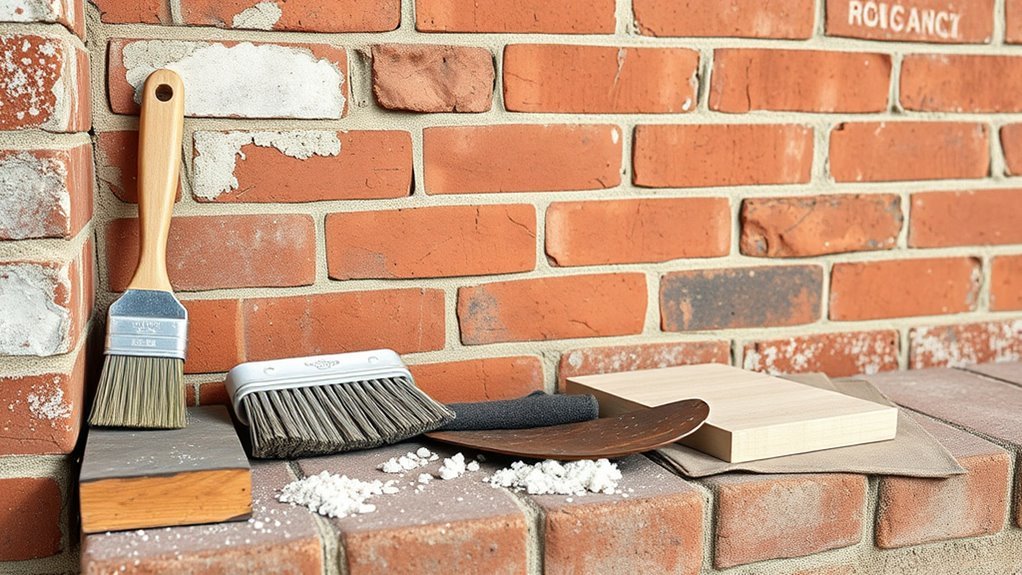
Tools and Safety Gear You Need
Before you start painting, gather the essential tools you’ll need—brushes, rollers, masonry primer, scraper, wire brush, and drop cloths.
You’ll also want proper personal protective equipment like gloves, goggles, a dust mask or respirator, and knee pads if you’ll be working low.
I’ll walk through a concise checklist and safety tips next.
Essential Tools Checklist
A good paint job starts with the right tools and safety gear, so gather them before you touch the brush. You’ll respect historical preservation while using artistic techniques to update the brick without harming its character. Collect quality items to work efficiently and cleanly.
- Sturdy wire brush and masonry cleaner for prepping mortar joints and removing efflorescence.
- High-quality masonry primer and breathable paint formulated for brick surfaces.
- Extension pole, angled brushes, and nylon rollers sized for rough texture.
Keep tools organized, replace worn brushes, and test techniques on a hidden patch before committing to the full wall.
Personal Protective Equipment
Wondering what gear you’ll need to stay safe while painting brick? You’ll prioritize personal safety with simple, effective protective gear: NIOSH-rated respirator for dust and fumes, safety goggles to shield your eyes, and nitrile gloves to protect skin from primers and cleaners.
Wear a long-sleeve shirt, durable pants, and closed-toe shoes; consider disposable coveralls for heavy prep. Use knee pads if you’ll crouch often and a hard hat when working under scaffolding. Keep a first-aid kit and eye-wash nearby.
Inspect equipment before use and replace any damaged items to maintain protection throughout the project.
How to Clean Old Brick for Painting
If your brick’s surface is grimy, chalky, or moldy, you’ll want to remove those contaminants so paint can stick and look even. Start by sweeping loose dirt, then rinse with a garden hose; avoid high-pressure washers that can damage mortar.
Use a mild trisodium phosphate (TSP) solution or a diluted bleach cleaner for mold, rinsing thoroughly. Test a small area to respect historical preservation concerns and to see how color psychology choices will read on cleaned brick. Wear gloves and eye protection.
- Scrub stubborn spots with a stiff nylon brush
- Rinse until water runs clear
- Let brick dry 48 hours
Removing Loose Paint and Scaling
Before you start painting, remove any loose paint and scaling so the new finish will adhere and look smooth. Use a stiff brush, putty knife, or wire brush to scrape flaking areas, working methodically across the wall.
For larger peeling zones, consider a scraper or power washer on low pressure—avoid damaging mortar. After scraping, vacuum or brush away dust, then wipe with a damp cloth and let dry.
Removing loose material reveals true texture, which helps you plan color combinations and Texture enhancement techniques like glaze or highlight washes. Proper prep guarantees a long-lasting, professional-looking result.
How to Fix Cracks, Spalls, and Damaged Mortar
When you find cracks, spalls, or crumbling mortar, address them now so your paint job won’t peel or hide structural problems. You’ll inspect surfaces, chip out loose fragments, and clean dust before repairs.
Match repair materials to the brick’s strength and the building’s age to respect historical preservation while prepping for color psychology choices later.
- Use patch mortar for small spalls and epoxy for deeper voids.
- Repoint damaged joints with compatible mortar, avoiding overly hard mixes.
- Consolidate loose brick faces with a substrate stabilizer to prevent future flaking.
Work carefully so repairs stay sound and discreet.
Prep Mortar Joints and Porous Brick for Primer
Although the mortar and brick surface may look intact, you need to prep joints and any porous faces so primer bonds evenly and won’t trap moisture. Start by brushing loose grit, then rinse and let dry thoroughly.
Cut out and repoint crumbling mortar to match original profile for historical preservation and structural soundness.
Test porosity with a few drops of water; if absorbed quickly, sand or use a masonry primer designed for high-absorption surfaces.
Mask surrounding areas, remove dust, and apply primer in thin, even coats. This careful prep ensures paint adheres properly and lets color psychology choices read true and consistent.
When to Use a Masonry Sealer Before Painting
If your brick absorbs water quickly, or if you’re dealing with old, crumbly mortar, use a masonry sealer before priming and painting. You want to protect brick durability and stop moisture from undermining paint adhesion.
A sealer application evens porosity, reduces efflorescence risk, and stabilizes friable joints so primer bonds better. Apply in dry weather, following manufacturer dwell times, and test a small area to confirm absorption and finish.
Don’t skip this step when brick shows powdering or uneven suction.
- Test porosity with a water drop.
- Apply sealer with a roller or sprayer.
- Recheck after 24 hours.
Choosing the Right Paint for Old Brick
When picking paint for old brick, you’ll want a breathable masonry paint that lets moisture escape and prevents peeling.
For exterior jobs, choose a high-quality, durable exterior latex formulated for masonry to withstand weather and UV. These choices protect the brick and make your finish last longer.
Pick Breathable Masonry Paint
Because old brick needs to release moisture, choose a breathable masonry paint that lets vapor pass through while sealing out water and dirt. You’ll protect masonry, honor historical preservation, and use color psychology to pick a finish that complements the building’s era and surroundings.
Look for mineral or silicate-based formulations labeled vapor-permeable and compatible with lime or old mortar. Test a small area first, observing adhesion and breathability over weeks.
Maintain mortar joints and avoid sealing with impermeable coatings that trap moisture.
- Pick mineral or silicate paints for breathability
- Test compatibility on an inconspicuous patch
- Match color to period using color psychology
Choose Durable Exterior Latex
After confirming breathability needs with mineral or silicate options, you may still prefer the practicality of a high-quality exterior latex for old brick—especially in climates with frequent rain or wide temperature swings.
Choose a 100% acrylic latex formulated for masonry; it resists peeling, UV fade, and mildew while allowing slight vapor movement. Test adhesion on a small area and pair primer where needed.
Pick color schemes that respect the structure and surrounding landscape; consult historical preservation guidelines if the building’s heritage matters.
Apply evenly with a roller and brush into mortar lines, and follow manufacturer recoat windows.
Primer Options for Masonry: What to Use When
Although masonry soaks up paint differently than drywall, choosing the right primer makes the difference between a long-lasting finish and peeling problems. You’ll pick based on substrate, moisture, and desired sheen.
Use a high-penetration masonry primer for porous brick.
Use a bonding primer for previously painted or glazed surfaces.
Use a breathable masonry primer when moisture management and historical preservation matter.
Consider color trends when selecting tinted primers to reduce topcoat coats.
Match primer to sealer type: acrylic primer for latex paint, oil-based or epoxy primer for problematic stains.
- High-penetration masonry primer
- Bonding primer
- Breathable masonry primer
How to Apply Primer to Brick
When you’re ready to prime brick, start by cleaning and repairing the surface so the primer can bond properly. Rinse away dust, efflorescence, and loose mortar; patch cracks and let everything dry.
Choose a masonry primer compatible with your previous primer-option decisions, and stir thoroughly.
Work from top to bottom with a brush for mortar joints and a roller for broad surfaces; use a sprayer for large areas, then back-roll.
Apply even coats, avoiding drips and pooling. Respect drying times between coats and mask nearby surfaces.
Consider color psychology in primer choice only for undertone influence, and honor historical preservation when prepping.
Selecting Finish and Color for Brick Walls
Picking the right finish and color will shape how your painted brick looks, feels, and performs, so decide based on light, style, and maintenance needs. You’ll want a hue that respects existing tones and uses color coordination with trim, mortar, and surroundings.
Pick a finish and hue that suit light, style, and upkeep—coordinate with trim, mortar, and surroundings.
Choose between matte for texture, satin for subtle sheen, or semi-gloss for easy cleaning; weigh finish durability against desired look. Test samples in different light and let them cure before committing.
Consider long-term upkeep and fading resistance when selecting pigments and finishes.
- Test swatches on multiple walls
- Match trim and mortar accents
- Prioritize finish durability
Best Techniques for Cutting In Around Trim and Masonry
When cutting in around trim and masonry, you’ll want to use proper tape and masking to protect woodwork and window panes.
Use angled brushes for precise edges and small rollers for textured brick, keeping your strokes steady and feathered.
For mortar joints, work a thin-bristled brush into the crevices or use a narrow artist brush to avoid buildup and maintain clean lines.
Proper Tape And Masking
A clean, straight paint line starts with the right tape and careful masking, so pick high-quality painter’s tape and mask off trim, windows, and masonry joints before you open a can. You’ll prep surfaces, press tape edges firmly, and protect adjacent areas to control color blending and respect paint sheen.
Use plastic sheeting for large areas and paper for detailed trim. Remove tape at a 45° angle while paint’s tacky to avoid lifting.
- Use low-tack tape on delicate trim.
- Seal brick gaps with caulk before taping.
- Label masked zones to track progress.
Brush And Roller Techniques
Now that your tape and masking are in place, get your brush and roller ready for precise cutting in around trim and masonry. You’ll use a sash brush for edges and a short-nap roller for brick faces to control paint film and texture enhancement.
Work from trim outward, keeping a wet edge and matching stroke direction for color matching. Feather the brush into the roller-applied paint to avoid lap marks. Clean brushes often to maintain a sharp edge.
Move methodically, checking for drips. Finish by inspecting under different light to ensure uniform coverage and seamless flow.
Cutting Around Mortar Joints
Because mortar joints create narrow, uneven channels, you’ll need steady hands and the right tools to cut in cleanly without clogging the grooves. You’ll prep the surface, removing dust and loose mortar as part of surface prepping so paint adheres.
Use a sash brush or angled trim brush and thin coats to avoid buildup. Practice steady wrist motion, load the brush sparingly, and follow joint lines.
Pay attention to color mixing so touchups match existing brick and mortar. Seal edges with a dry brush stroke to blend.
- Use angled sash brush
- Keep thin, controlled strokes
- Match paint with color mixing
Roller, Brush, or Sprayer: Which to Choose?
Which tool will give you the finish you want: roller, brush, or sprayer? You’ll pick based on coverage, detail, and desired effects. For color matching and texture enhancement, use a sprayer for even base coats, a roller for textured consistency, and a brush for tight spots and mortar edges. Consider speed versus control.
| Tool | Best use |
|---|---|
| Sprayer | Fast, smooth base coats |
| Roller | Handles texture, consistent film |
| Brush | Detail, mortar joints |
| Combination | Best results: sprayer + brush or roller |
Match tool to goal, test a small area, and adjust technique.
How to Apply Paint for Even Coverage on Brick
When you’re ready to paint, work in small, manageable sections and apply a consistent technique so the color and sheen stay even across the brick and mortar.
Start by cutting in edges with a brush, then use a roller or sprayer in overlapping strokes, keeping wet edges to avoid lap marks.
Press paint into mortar joints for uniform texture.
Respect the building’s history by choosing a complementary color palette that supports historic preservation goals.
- Maintain a wet edge and steady pressure
- Blend freshly painted sections into adjacent areas
- Check for drips and back-roll textured spots
How Many Coats of Paint Does Brick Need?
Start by checking how porous your brick is, because highly porous surfaces will drink up paint and need more coverage.
You’ll usually want a primer coat on bare or very porous brick to seal the surface and improve adhesion.
Finish with one or two topcoats to build the proper film thickness for durability and uniform color.
Assess Brick Porosity
Because brick absorbs paint unevenly, you’ll need to assess its porosity before deciding how many coats to apply. Feel the brick: rough, pitted faces soak more, smooth faces less.
Test a small area with water—fast darkening means high porosity. That tells you whether to expect multiple coats and affects brick texture and color matching decisions.
- Dab water on several spots to compare absorption.
- Note mortar vs. brick differences; they soak differently.
- Mark test areas and record drying time for consistency.
Use those results to estimate coats needed and to plan color matching across varied surfaces.
Primer Coat Necessity
If your brick soaks up water quickly, you’ll want to prime it before painting, since a primer seals porous surfaces, evens suction, and improves paint adhesion. Otherwise, a single coat of paint will look blotchy and absorb inconsistently.
You’ll usually apply one quality masonry primer; highly porous brick may need two primer coats before color. After priming, one to two finish coats typically suffice, but test a small area.
When planning, account for color mixing—tint batches consistently—and label them for storage. Store leftover primer and paint sealed, upright, and temperature-controlled to maintain performance for touch-ups.
Final Coat Thickness
Once your primer’s sealed and evened out the surface, you’ll decide how many finish coats the brick will need. You’ll usually apply two coats: the first bonds to primer and fills pores. The second evens coverage and refines paint sheen.
Rough brick texture might demand a third light coat to eliminate thin spots. Roll with a nap suited for masonry and keep wet edges. Check for drips in crevices and let proper dry times pass before evaluating.
- Two coats for most situations
- Add a third for rough brick texture or heavy color change
- Choose paint sheen based on desired durability and look
Drying Times and Ideal Weather for Exterior Brick Paint
When you paint exterior brick, drying times depend on paint type, temperature, humidity, and wind, so plan your schedule around those variables. You’ll check forecasted temperatures (50–85°F ideal), low humidity, and steady breeze for even cure. Brick texture affects absorption rates; porosity may lengthen tack time, so factor extra drying before recoats. Test a small area to confirm color matching after full cure. Use this visual guide:
| Morning | Midday | Evening |
|---|---|---|
| Damp brick slows dry | Warm sun speeds cure | Cool slows curing |
| Wind aids evaporation | Intense heat risks blistering | Stable temps ideal |
Start projects with a 48–72 hour clear window.
Common Painting Mistakes and How to Avoid Them
Because mistakes on old brick are costly to fix, you’ll want to avoid the usual pitfalls: poor surface prep, wrong paint type, and skipping primer. Inspect and clean thoroughly, repair crumbling mortar, and choose masonry paint suited to vapor-permeable brick.
Avoid costly brick painting mistakes: prep, repair mortar, and use breathable masonry paint plus primer for lasting results
Don’t rush color matching — test swatches on brick and view them at different times. Watch paint drying conditions; humidity and temperature affect adhesion.
Use proper brushes and a masonry roller for even coverage. Avoid over-thinning, which weakens film, and don’t paint over efflorescence.
- Test small swatches
- Follow manufacturer drying times
- Use breathable masonry primer
How to Maintain Painted Brick Long-Term
Once your brick is painted, you’ll keep it looking fresh by setting a regular cleaning routine—gentle washing every few months removes dirt and mildew before they damage the paint.
Check for chips and worn spots seasonally, and do small touch-up painting right away to prevent larger repairs.
With simple upkeep, your painted brick will stay attractive and last much longer.
Regular Cleaning Routine
If you want your painted brick to look fresh for years, establish a simple cleaning routine that removes dirt, mildew, and pollutants before they damage the paint. You’ll gently wash with a soft brush and mild detergent, rinse thoroughly, and inspect mortar and paint for stains or growth.
Keep cleaning frequency tied to exposure—once or twice yearly for sheltered walls, quarterly for exposed façades. Balance preservation goals like color coordination and historical preservation when choosing cleaners and tools to avoid stripping or discoloring finishes.
- Soft brush and mild soap
- Low-pressure rinse, avoid power washers
- Treat mildew with diluted bleach solution
Periodic Touch-Up Painting
When small chips, peeling, or mortar staining appear, act quickly with targeted touch-ups to prevent larger repairs and preserve the finish.
Inspect annually and after severe weather, noting areas where the paint sheen has dulled or flaked.
Clean and dry surfaces, scrape loose paint, and sand feathered edges before priming bare brick.
Use the original formula where possible; if not, test small swatches for accurate color matching under different light.
Apply thin, even coats, matching the original paint sheen to blend repairs.
Keep spare mixed paint and labeled touch-up materials for faster, consistent maintenance over time.
Removing Paint From Brick If You Change Your Mind
Although removing paint from brick takes time and the right tools, you can restore the original masonry without damaging it. You’ll test a small area, choose a gentle chemical stripper or low-pressure soda blast, and work in sections.
Protect surrounding surfaces and wear PPE. If the wall has historical preservation concerns, consult local guidelines before proceeding.
After removal, you may need color matching for touch-ups or repointing to blend new mortar. Seal or leave unsealed based on porosity.
Work methodically to avoid etching. If unsure, pause and get a specialist’s opinion.
- Test small areas first
- Use gentle methods
- Protect surroundings
Cost Breakdown: DIY vs. Hiring a Pro
Deciding whether to tackle painting your old brick yourself or hire a pro comes down to comparing upfront costs, time, and the risk of mistakes that can be costly to fix. You’ll save labor costs DIY but pay for tools, primers, and sealers; pros charge more but often guarantee even color contrast and respect for historical preservation. Factor your skill, schedule, and warranty needs.
| Item | Typical Cost |
|---|---|
| DIY materials | $50–$300 |
| DIY tools/rental | $20–$150 |
| Pro labor | $300–$1,500+ |
| Fixes/mistakes | $50–$800+ |
How Climate and Location Affect Product Choice
Your climate and where the brick sits will shape which primers, paints, and sealers work best, so factor them into your cost and product decisions. You’ll weigh Climate considerations like freeze-thaw cycles, humidity, and UV exposure, plus Location impacts such as coastal salt spray or shaded northern walls.
Choose breathable masonry primer for damp regions, high-build acrylics for sun and heat, and tougher elastomeric coatings where movement and cracking occur. Match sealer type to moisture risk and traffic. Plan product lifespan into budgets and maintenance schedules.
- Coastal: salt-resistant finishes
- Humid: vapor-permeable primers
- Sunny: UV-stable paints
Eco-Friendly Paints and VOC Tips for Masonry
When you’re painting old brick, choose low‑VOC masonry paints or natural mineral options to cut down on fumes and long‑term exposure.
Look for products formulated for porous surfaces so they’ll adhere and breathe without trapping moisture.
Always guarantee good ventilation—use fans, open windows, and take breaks to limit inhalation.
Low-VOC Masonry Options
Choosing low-VOC masonry paints lets you refresh an old brick wall without filling your home or workspace with harsh fumes, and it helps minimize your environmental footprint. You’ll find eco friendly options labeled for masonry that balance durability and breathability, essential for brick.
Look for products specifying VOC reduction and water-based formulas to limit odors and toxic emissions. Prep properly, use a masonry primer if recommended, and ventilate during application. Replace gloss for matte or satin designed for masonry to avoid trapping moisture.
- Pick masonry-specific low-VOC paints
- Check third-party VOC certifications
- Follow manufacturer prep and curing steps
Natural Mineral Paints
If low-VOC water-based masonry paints don’t feel green enough, mineral paints offer a more natural alternative that still respects brick’s breathability. You’ll choose silicate or lime-based formulas that bond chemically to masonry, reducing peeling and trapping moisture less than conventional paints.
For historical preservation, these paints match older substrates and let you maintain authenticity while avoiding synthetic binders. They dry hard, resist algae, and often contain minimal VOCs.
Consider color psychology when picking hues—muted earth tones preserve character, while lighter tints brighten without overwhelming texture. Test small areas for absorption and appearance before committing to full coverage.
Proper Ventilation Practices
Because even low-VOC or mineral-based masonry paints can release fumes and particulates during mixing and application, you should prioritize good ventilation to protect your health and the wall’s breathability. Open windows and doors to create cross-breeze, and run ventilation fans to pull contaminants out.
Monitor indoor humidity; high moisture traps solvents and harms curing. Keep fans on during application and for several hours after, and avoid painting when humidity exceeds manufacturer recommendations.
Seal off other rooms to prevent spread. Use a respirator if ventilation is limited, and consider water-based, low-VOC options for reduced exposure.
- Open windows, cross-breeze
- Run ventilation fans
- Monitor indoor humidity
Project Checklist and Quick Timeline for Painting Old Brick
Before you pick up a brush, get organized with a clear checklist and realistic timeline that keep the job efficient and avoid costly delays.
Before you pick up a brush, organize a clear checklist and realistic timeline to keep the job efficient.
Start by evaluating brick condition, cleaning needs, and any mortar repairs.
Choose paint considering color psychology and respect for historical preservation if applicable.
Gather supplies: cleaner, masonry primer, paint, brushes, rollers, mask, tarp, and scaffolding.
Schedule:
Day 1 inspection and cleaning,
Day 2 repairs and drying,
Day 3 priming,
Day 4 painting first coat,
Day 5 touch-ups and second coat if needed,
Day 6 final inspection and cleanup.
Build buffer days for weather and unexpected repairs.
Frequently Asked Questions
Will Painted Brick Affect My Home’s Resale Value?
Yes, it can—buyers’ reactions vary. You’ll boost appeal with tasteful color options and thorough surface preparation; otherwise, you might deter purists. Consider neighborhood trends, neutral tones, and professional prep to protect value and attract buyers.
Can I Paint Brick That’s Been Previously Waterproofed?
Yes — but it’s tricky: like peeling tape, you’ll need to test adhesion, strip or etch the waterproofing, focus on brick surface preparation, and choose breathable coatings; paint color choices should suit texture and durability for lasting results.
How Long Before I Can Hang Shelves or Fixtures on Painted Brick?
You can hang shelves or fixtures after the paint fully cures—usually 7–14 days for latex, 14–30 days for oil-based. For shelf installation and fixture hanging, follow manufacturer cure times and use masonry anchors for secure support.
Will Painted Exterior Brick Change My Home’s Insulation or Moisture Levels?
About 50% of brick walls already limit air leakage, so painted exterior brick won’t drastically change insulation if you maintain breathability. You’ll preserve brick texture and boost paint durability, but avoid impermeable coatings to prevent moisture trapping.
Do Painted Brick Walls Require Different Smoke/Co Detector Placement?
No, painted brick walls don’t change smoke detector placement; you’ll follow standard smoke detector placement and fire safety considerations—ceiling mounting and spacing rules still apply, and you should avoid mounting over vents or in dead-air corners.
Conclusion
You’ve got the know-how now, so go decide: paint or preserve. Before you brush, inspect for moisture, efflorescence, and loose mortar—repair first, paint second. Choose breathable, low‑VOC masonry paint suited to your climate, and weigh DIY savings against pro expertise. One careful coat can transform a wall into a statement; don’t rush it—patience is paint’s best partner. Treat the brick with respect, and your work will last.