How to Paint on Stucco Walls Without Cracking
To paint stucco without cracking, start by cleaning, drying, and repairing any leaks, efflorescence, or loose material so the substrate’s stable. Use a breathable, high‑solids masonry primer tinted for color, then apply flexible elastomeric or acrylic stucco paint in thin, even coats with a thick‑nap roller and back‑brush into crevices. Work in mild, dry conditions and let each coat fully cure; follow these steps and you’ll avoid most failures — keep going to learn practical tips and troubleshooting.
Quick Answer: How to Paint Stucco Without Cracking?
If you want paint that won’t crack on stucco, start by fixing surface defects and choosing flexible, breathable products. You’ll patch cracks, remove loose paint, and wash away dirt so coatings adhere.
Pick elastomeric or acrylic stucco paint for stretch and weather protection, and use a breathable primer if needed.
Apply thin, even coats, letting each dry fully.
For best results, match the new finish to existing tones—color matching prevents noticeable repairs and UV issues.
Work in moderate temperatures, avoid rain, and inspect after curing so you catch any failures early.
What This Guide Covers and Who It Helps
This guide helps homeowners, renters, and DIYers who want a durable, crack-free paint job on stucco. You’ll get a clear scope of the process—from prep and patching to primers, paint selection, and application techniques.
No advanced skills are required, just basic tools, patience, and attention to surface detail.
Who Benefits Most
Whether you’re tackling a small patch or repainting an entire exterior, this guide helps homeowners, DIYers, and small contractors who want durable, professional-looking results on stucco. You’ll get practical steps for surface prep, crack repair, primer selection, and paint application that reduce failure risk.
If you care about longevity, weather resistance, or matching existing finishes, you’ll benefit. You’ll also learn to choose compatible paints, plan color schemes, and add tasteful decorative accents without compromising adhesion.
This guide suits anyone aiming for confident, cost-effective projects—whether maintaining rental properties, upgrading curb appeal, or finishing client jobs to a high standard.
Guide Scope Overview
Because stucco behaves differently than wood or siding, you’ll get focused, step-by-step instructions here that help you prepare, repair, prime, and paint for durable results. This guide covers surface assessment, crack repair, appropriate primers, breathable paints, application techniques, and maintenance tips. You’ll also find concise advice on color theory to choose finishes that hide imperfections and suit light exposure, plus notes on environmental impact when selecting low-VOC products.
| Section | Purpose | Quick Takeaway |
|---|---|---|
| Prep | Surface readiness | Clean, dry, sound |
| Repair | Fix cracks | Durable patching |
| Paint | Choose & apply | Breathable coatings |
| Maintain | Longevity tips | Periodic inspection |
Required Skill Level
If you’re comfortable with basic DIY tasks and can handle ladders and textured surfaces, you can successfully paint stucco with the right prep and tools. This guide helps homeowners and DIYers with moderate skills — not professional plasterers — who can follow step-by-step instructions, mix primers and paints, and repair small cracks.
You’ll learn surface cleaning, patching, choosing breathable products, and techniques that prevent cracking. It’s ideal if you want simple color coordination advice and subtle texture enhancement tips.
You don’t need advanced equipment, just patience, proper safety, and willingness to test samples before committing to a full wall.
How Stucco Differs From Smooth Walls
Although stucco and smooth drywall both serve as finished wall surfaces, they behave and accept paint very differently, so you’ll need to adjust your prep and product choices.
You’ll notice stucco’s texture soaks and hides color differently, affecting color customization and requiring more test patches. Its irregular surface demands thicker, flexible coatings and sometimes specialty primers to guarantee adhesion.
You’ll apply paint with brushes, rollers, or sprayers chosen for texture, and you’ll adapt artistic techniques—like layering glazes or dry-brushing—to work with relief rather than against it.
Expect longer drying times and plan for breathable, crack-resistant products.
Why Paint Cracks on Stucco
You’ll want to understand why cracks form before you paint so your work lasts.
Common causes include poor application, freeze-thaw cycles, and age.
While trapped moisture or leaks can worsen damage and paint failure.
Structural movement, like settling or shifting, also opens cracks that must be addressed rather than just covered.
Common Causes Of Cracking
When paint starts cracking on stucco, it’s usually because the surface or the coating itself can’t handle movement, moisture, or poor adhesion. You’ll spot different causes that affect finish longevity and appearance, especially if you’re doing color matching or applying decorative finishes. Consider these common issues:
- Thermal movement and settling: Stucco expands and contracts with temperature shifts and building settling, stressing rigid coatings.
- Poor adhesion or wrong primer: Old paint, dust, or incompatible primers let paint pull away from the substrate.
- Thick or improper application: Overly thick coats, fast-drying products, or inadequate curing cause surface tension and cracking.
Moisture And Water Damage
Moisture is one of the most common reasons paint fails on stucco, and it behaves differently than thermal movement or poor adhesion. You’ll see cracking where water has soaked the substrate, trapped behind coatings, or migrated from leaks.
Fix sources first: rooflines, flashing, and poor drainage. Allow stucco to dry fully and use breathable primers that let vapor escape; that improves paint durability.
Monitor humidity control during application and curing—high humidity prolongs drying and raises failure risk.
Use water-resistant base coats and proper sealants at joints. Regular inspections and prompt repairs prevent moisture-driven cracking before it compromises finishes.
Structural Movement Effects
Because stucco and the framing behind it shift with temperature, settling, and load changes, paint will crack where the substrate moves more than the coating can flex. You’ll see hairline or wider fissures where joints, corners, or repairs concentrate movement.
Address causes before repainting: stabilize framing, fix loose lath, and use flexible elastomeric primers and paints. Match color closely after repairs so touch-ups don’t stand out, and use texture smoothing techniques to blend patches into existing finish.
Consider control joints or mesh reinforcement to limit crack transfer.
- Inspect movement points.
- Repair and reinforce substrate.
- Prime with flexible coatings.
When to Repair Stucco Before Repainting
How do you know if your stucco needs repair before you repaint? Check for flaking, loose patches, and areas where color fading reveals the underlying base coat.
You’ll also want to confirm that texture matching is possible—small repairs should blend with existing patterns or you’ll see obvious patches after painting.
Repair before repainting when cracks exceed hairline size, when patches feel soft or damp, or when previous coatings peel.
Addressing these issues first prevents paint failure and wasted effort.
Plan repairs that restore rigidity and surface continuity so your new paint adheres evenly and the finish lasts.
Inspect Stucco: What to Look For
Before you pick up a brush, give the stucco a systematic inspection so you can spot problems that will affect paint adhesion and longevity. Walk the surface, looking for hairline cracks, loose patches, and previous paint failure. Note substrate soundness, texture consistency, and areas needing repair before color mixing decisions or tool maintenance prep.
- Cracks: measure width/depth; note patterns that suggest movement.
- Surface bond: tap for hollow spots and scrape to test adhesion.
- Contaminants: check for dirt, mildew, or old peeling paint that will prevent proper finish.
Record findings to plan repairs and supplies precisely.
Spot Moisture and Efflorescence Before You Paint
When you inspect stucco for painting, look for damp patches, salt-like white deposits (efflorescence), and dark streaks that indicate moisture intrusion. These signs mean you must find and fix the water source before priming or painting.
Probe suspect areas, let them dry fully, and remove efflorescence with a stiff brush and mild acid wash if needed. Test patches confirm stains won’t recur.
Only paint after confirming dryness and repairs. Once sorted, you can choose color schemes and apply artistic techniques confidently, knowing moisture won’t undermine adhesion or cause future blistering or staining on your finished surface.
Check Substrate Movement and Expansion Joints
Before you paint, identify any sources of substrate movement—like settling, thermal shifts, or vibrating equipment—that can crack your finish.
Walk the surface to locate existing expansion joints and determine where additional joints may be needed.
Choose sealants and coatings that allow joint flexibility so paint won’t split as the wall moves.
Identify Movement Sources
Because stucco cracks and paint fails where surfaces shift, you need to locate what’s moving before you paint. Walk the wall, press at corners and seams, and note gaps or bowing. Consider color matching touch-ups and eco-friendly paints for repairs so patched areas won’t stand out.
- Inspect adjacent materials (wood trim, metal flashing) for separate movement that transfers to stucco.
- Look for hairline cracks, stair-step patterns, or softened mortar indicating substrate movement.
- Check fixtures, doors, and windows for movement during operation; these often drive localized stucco stress.
Locate Expansion Joints
If you want your paint to last, locate the stucco’s expansion joints and note how the substrate moves at those seams. Walk the surface, tap corners, and mark joints. Record gap width and movement direction so you can plan sealant, color matching, and texture blending at shifts.
| Joint Type | Action |
|---|---|
| Control joint | Measure gap |
| Perimeter joint | Note substrate shift |
| Construction joint | Photograph movement |
| Isolation joint | Mark for treatment |
Use those notes to match paint and texture where needed, keeping finishes continuous yet aware of where materials will expand and contract.
Allow For Joint Flexibility
Now that you’ve mapped the joints and noted movement, plan for flexibility so paint and sealant can follow substrate shifts without cracking. You’ll use flexible sealants, backer rods, and proper joint widths to let stucco expand and contract, preserving finish, color selection, and texture enhancement choices.
Consider compatibility between sealant and paint, and test small areas.
- Choose elastomeric or silicone sealants rated for stucco movement.
- Install backer rods to control sealant depth and ensure elasticity.
- Match paint flexibility to sealant, trialing color selection and texture enhancement together for cohesive results.
Test Existing Paint Adhesion and Compatibility
Before you start priming or painting, check whether the existing finish will accept new paint by performing a simple adhesion and compatibility test.
Peel a small corner with tape or score and lift a 2×2 inch area; if paint flakes, you’ll need to remove loose coating and repair.
Peel back a small corner or lift a 2×2 inch patch—if it flakes, remove loose paint and repair.
Clean the test spot, let it dry, then apply a small patch of your chosen paint to evaluate color matching and texture blending against the stucco.
Observe for 24–48 hours for shrinkage, bubbling, or poor adhesion.
Repeat in several locations and note whether full surface prep or paint stripping is required.
Choose the Right Primer for Stucco
Before you paint, check how porous your stucco is so you know how much primer it’ll soak up.
Pick a masonry primer formulated for stucco to promote adhesion and resist efflorescence.
Apply the primer at the recommended thickness—too thin won’t seal, too thick will sag—so your topcoat performs well.
Assess Stucco Porosity
Because stucco varies from smooth and dense to coarse and highly absorbent, you’ll need to test its porosity before picking a primer. You’ll learn how much sealer the wall will drink and whether color matching or texture blending will need extra coats.
Do a simple water test in inconspicuous spots: a fast bead means low porosity; quick absorption means high porosity.
- Apply a few drops of water; time absorption over 30 seconds.
- Note texture: rough areas often need more product for even color matching.
- Record results to plan coats and any texture blending steps before priming.
Select Masonry Primer
Which primer will give your stucco the best adhesion and durability? You’ll choose a masonry primer labeled for stucco or cementitious surfaces, one that’s breathable to let moisture escape.
Pick acrylic or elastomeric formulations depending on movement and hairline cracking, and guarantee compatibility with your topcoat.
Use primer options that aid color matching when switching dramatic hues, and consider tinted primers to reduce coats.
For rough surfaces, select a primer that promotes texture blending so the finish looks uniform across patches and repairs.
Always follow manufacturer instructions and test a small area before committing to the whole wall.
Ensure Proper Primer Thickness
Once you’ve picked a masonry primer that’s breathable and compatible with your topcoat, you’ll need to apply it at the right thickness so it performs as designed. You’ll aim for even coverage: too thin and adhesion suffers, too thick and you trap moisture. Consider color selection early—tinted primer can improve topcoat opacity and reduce coats. Match primer to stucco pore size for texture matching so the finish stays uniform. Follow manufacturer spread-rate and use consistent strokes. Check for pinholes or pooling and recoat only after the recommended dry time. Proper thickness prevents cracking and ensures longevity.
- Measure spread-rate
- Tint primer when needed
- Inspect before topcoat
Pick Breathable Masonry Paints for Stucco
When you paint stucco, pick masonry paints that let moisture escape through the wall rather than trap it inside. You’ll want breathable coatings formulated for porous substrates so water vapor passes outward, preventing blistering and cracking.
Check product labels for masonry breathability ratings and water vapor transmission values. Apply thin, even coats and follow manufacturer guidance to preserve permeability.
Look for masonry breathability ratings and water‑vapor figures; apply thin, even coats per manufacturer guidance to maintain permeability
Avoid high-build, impermeable finishes that seal moisture in. If you’re unsure, test a small area and monitor for damp spots over several weeks.
Choosing the right breathable paint keeps stucco healthy and reduces long-term maintenance needs.
Elastomeric vs. Acrylic Masonry Paint: Which to Use?
Although both elastomeric and acrylic masonry paints protect stucco, they serve different needs. You’ll choose based on surface movement, appearance, and application style. Consider these points:
- Elastomeric: flexible, hides hairline flaws, good where movement occurs; use sparingly if you want tight color coordination because it can slightly change sheen.
- Acrylic: breathable, easier to touch up, better for crisp lines and detailed artistic techniques like stenciling or faux finishes that need stable surfaces.
- Practical tip: test patches for adhesion and color, match primers and sealers, and plan color coordination with trims and textures before committing.
How Paint Elasticity Prevents Stucco Cracking
Because stucco expands and contracts with temperature and moisture, paint elasticity matters: flexible coatings move with the substrate and absorb stresses that would otherwise open hairline cracks. You’ll choose paints labeled elastomeric or high-elasticity acrylics to maintain film integrity during daily and seasonal movement.
Elastic paint bridges small gaps, resists micro-tearing, and keeps water out, reducing freeze-thaw damage. When planning, check the weather forecast to apply coatings in stable conditions so elasticity cures properly.
Also consider your color palette only after confirming compatibility with elastic formulations, since some pigments can affect flexibility and long-term performance.
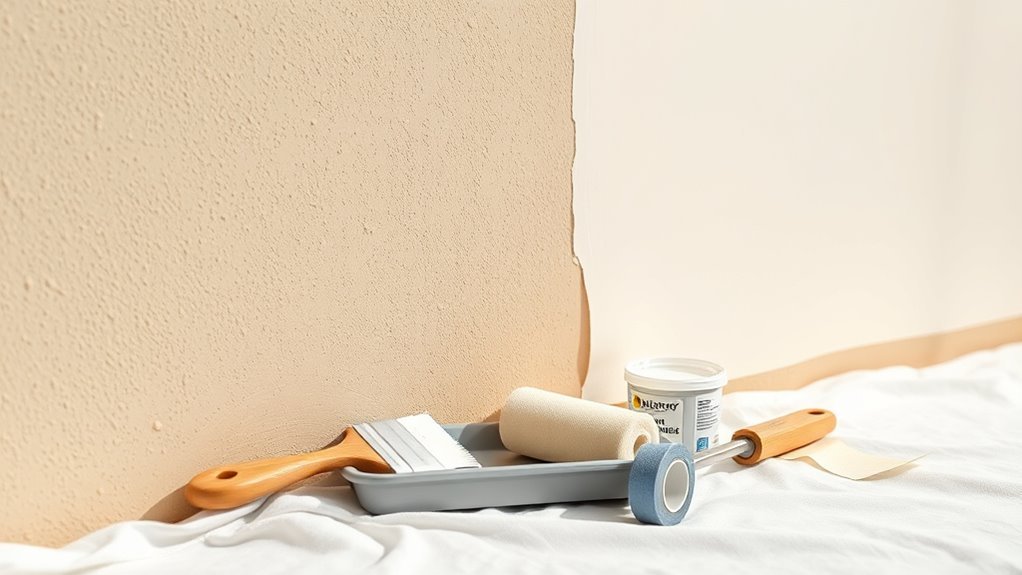
Tools and Materials for Textured Stucco
You’ll want the right brushes and rollers—stiff-bristled brushes for crevices and a thick-nap roller for the textured surface.
Choose a high-quality masonry primer to seal the stucco.
Then pick an exterior acrylic paint with good elasticity and breathability.
Using the proper tools and compatible primer/paint combo makes the job cleaner and helps the finish last.
Essential Brushes And Rollers
When painting textured stucco, the right brushes and rollers make the difference between a uniform finish and missed crevices, so choose tools built for texture. You’ll want sturdy, high-nap rollers and stiff-bristled brushes to work paint into grooves, helping textured finishes look consistent and aiding precise color matching at edges.
- 3/4″–1″ nap roller for deep texture—loads paint into valleys without clogging.
- Stiff-flagged nylon brush for cutting in and pushing paint into crevices.
- Small foam roller or masonry brush for touch-ups and tight spots.
Use quality tools to save time and avoid rework.
Primer And Paint Selection
If your stucco’s old paint is chalky or you’ve got repairs, start with a high-quality acrylic masonry primer that bonds to porous, textured surfaces and blocks stains. It’ll give the topcoat a uniform base and improve adhesion so you don’t end up peeling or patchy spots.
Choose a breathable exterior acrylic latex paint formulated for masonry to resist moisture and minimize color fading. Match finish and nap for texture matching: use thicker-bodied paints or texture additives to replicate original relief.
Pick fade-resistant pigments and manufacturer-recommended coats, and test a small section to confirm adhesion, coverage, and color before tackling the whole wall.
Best Rollers, Brushes, and Sprayers for Stucco
Because stucco’s rough, uneven surface grabs paint differently than smooth walls, choosing the right rollers, brushes, and sprayers makes a big difference in coverage and finish. You’ll want tools that help with color matching and texture smoothing while preventing overwork that causes cracking.
- 1.5–2″ nap roller covers — pick thick, durable nap for deep crevices; they hold more paint and blend texture.
- Stiff nylon/polyester brushes — use angled sash brushes for edges and to work paint into pits without shredding.
- Airless sprayer with adjustable tip — speeds coverage, delivers even coats; test to avoid drips.
Cleaning Stucco: Pressure Washing and Safe Alternatives
Although stucco stands up well to weather, you’ll still need regular cleaning to remove dirt, mildew, and pollen that hide in its texture. You should use a pressure washer cautiously—keep pressure low and maintain distance to protect stucco texture and underlying layers. For sensitive areas, use a soft-bristle brush with mild detergent or a bleach solution for mildew, rinse thoroughly, and let dry before painting. Check how cleaning affects paint sheen; scuffed or dulled areas may need light sanding and primer. Follow safety: eye protection, gloves, and avoid high-pressure nozzles near edges.
| Method | Strength | When to Use |
|---|---|---|
| Low-pressure wash | Gentle | General cleaning |
| Brush & detergent | Precise | Small stains |
| Bleach solution | Effective | Mildew cases |
| Avoid high-pressure | Damaging | Fragile stucco |
Repair Hairline Cracks and Surface Delamination
Start by identifying whether cracks are hairline, structural, or just superficial delamination so you know what fixes are appropriate.
You’ll need to prep and clean the area—remove loose material, dust, and salts—before any repair.
Finally, use repair products that’re compatible with stucco and paint (elastomeric sealant, polymer-modified patch, or stucco-specific cement) to guarantee a lasting bond.
Identify Crack Types
When you inspect stucco, focus on the crack’s width, depth, and movement—these cues tell you whether it’s a harmless hairline split or a sign of surface delamination that needs more work.
You’ll decide repair method by type: hairline cracks often only need flexible sealant and careful color matching to blend into the textured finish, while delamination requires removing loose material and bonding agents.
Look for moisture stains, hollow sounds, or spreading gaps.
Prioritize safety and stop if structural concern appears; consult a pro.
Use this quick checklist:
- Hairline: thin, non-moving, cosmetic.
- Delamination: hollow, spreading, moisture.
- Structural: wide, active, needs evaluation.
Prep And Clean
Before you paint, clean and prep the stucco so repairs bond and the finish looks uniform. Remove loose material with a stiff brush, rinse with low-pressure water, and let the surface fully dry.
For hairline cracks, widen slightly with a utility knife to guarantee adhesion, then clean out dust.
For delaminated patches, lift failing areas, mark margins, and remove back to sound substrate.
Match repaired areas to your color palette and use compatible texture techniques to blend new material into surrounding stucco.
Finish by wiping dust-free and inspecting under varied light so repairs read seamless before priming.
Use Compatible Repairments
Although small, hairline cracks and delaminated patches can let moisture and paint failure spread, so you’ll want to repair them with materials that match the stucco’s composition and texture. Use compatible patching mortar or acrylic-based fillers, feathering edges to blend with existing texture and avoid trapped stress. Match color matching pigment or prime before painting to guarantee uniformity, especially if you’ll apply decorative finishes later.
Follow these steps:
- Clean and remove loose material, then dampen substrate.
- Apply compatible filler, sculpt texture to match.
- Prime patched areas, test color matching before final decorative finishes.
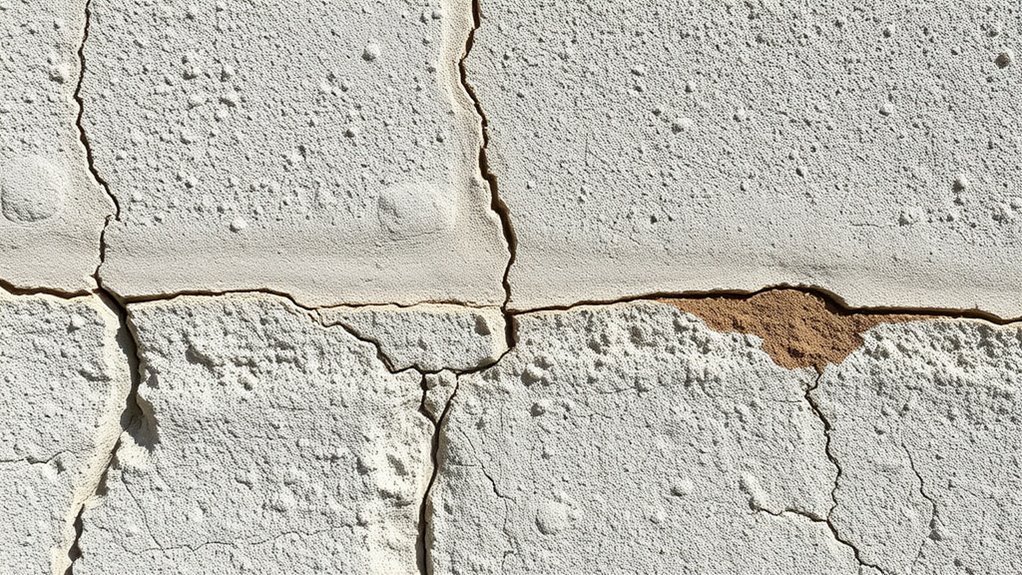
Patch Larger Cracks and Match Stucco Texture
If you’re dealing with larger cracks or holes in stucco, you’ll need a more robust approach than simple touch-up paint — clean out loose material, apply a compatible patching compound, and rebuild the texture so repairs blend with the surrounding surface.
Remove dust and undermined stucco, then dampen the area slightly. Use a cement-based or manufacturer-recommended product for crack patching, packing it firmly into cavities.
While compound is workable, recreate the stucco texture with a trowel, sponge, or stamping tool to match the existing stucco texture. Let cures fully before priming and painting to guarantee a durable, invisible repair.
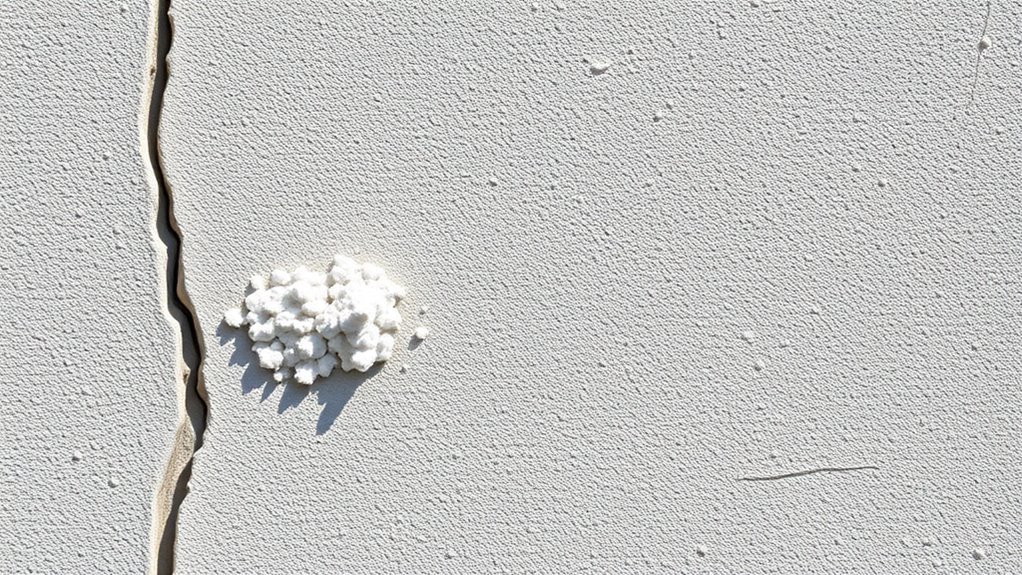
Treat Efflorescence, Salt, and Mold Spots
When you spot white powdery efflorescence, salt deposits, or dark mold spots on stucco, tackle them promptly to prevent staining and moisture damage. You’ll clean, treat, and stop recurrence so paint will adhere and last. Use Efflorescence removal mixes and appropriate cleaners, rinse thoroughly, and let the wall dry completely before painting to avoid trapped salts.
Spot efflorescence, salt, or mold on stucco promptly: clean, treat, dry thoroughly, then repaint to prevent damage.
For mold prevention, apply a biocide and correct moisture sources.
- Scrub deposits with a masonry cleaner and soft brush.
- Neutralize salts, rinse, and dry for 48–72 hours.
- Apply biocide, repair leaks, and monitor humidity.
Mask Trim, Windows, and Fixtures for Stucco Painting
Before you start rolling or spraying, protect all trim, windows, and fixtures so paint doesn’t splatter or seep into gaps. Tape edges with high-quality painter’s tape, cover glass with plastic sheeting, and secure fixtures with breathable masking film so moisture won’t be trapped.
When masking around textured stucco, press tape into crevices for a crisp line without damaging texture. Use trim paint or matched color for narrow borders if you want subtle color matching.
For visible repairs, feather edges to aid texture blending. Remove tape while paint is tacky to avoid peeling, and check seals before the next coat.
How to Apply Primer Evenly on Rough Stucco
After you’ve masked trim and fixtures, it’s time to lay down primer that will bond to the stucco’s rough texture and create an even base for topcoat paint. You’ll focus on surface preparation, choosing a primer suited to your substrate and color selection so the finish covers uniformly. Use a high-solids masonry primer, apply with a thick-nap roller, and back-brush into crevices. Keep a wet edge and work in manageable sections.
- Inspect and clean: remove dust, efflorescence, loose particles.
- Prime technique: roller plus brush for pores and edges.
- Drying: follow temperature and humidity guidelines.
Apply Paint to Minimize Stress on Textured Surfaces
Because textured stucco can trap thicker paint in crevices, you’ll want to apply coatings in thin, even passes that reduce buildup and surface tension. Start with a low-nap roller or soft-bristled brush, working horizontally then vertically to feather edges and avoid ridges.
Use light pressure and keep a wet edge to prevent lap marks. Choose paints that balance flexibility and adhesion so movement won’t crack films.
Pick colors that support overall color harmony while using lighter tones on peaks for subtle texture enhancement. Inspect as you go and touch up thinly rather than overloading any area.
Recommended Coat Counts and Drying Times for Stucco
When deciding how many coats to apply to stucco, aim for coverage without overbuilding. You’ll typically use one primer coat (if needed) and one or two finish coats, depending on texture and color matching needs.
Let each coat dry fully to the manufacturer’s recommendation—often 4–24 hours—before recoat; longer in cool or humid conditions. Test a small area to confirm adhesion and desired paint sheen before continuing.
Allow each coat to fully dry per manufacturer instructions—typically 4–24 hours—testing a small area first for adhesion and sheen.
- Primer: 1 coat, dry 12–24 hours.
- Base finish: 1 coat, dry 4–12 hours.
- Top finish: +1 coat if needed for color matching and sheen.
Use Elastomeric Paint Without Trapping Moisture
Wondering how to get elastomeric paint’s waterproofing benefits without trapping moisture? You’ll prep stucco by confirming it’s fully dry and free of efflorescence, then apply a vapor-permeable primer designed for elastomeric systems.
Work in thin, even layers so moisture can escape through the substrate; don’t seal joints or vents. Choose elastomeric formulas with eco-friendly pigments to reduce VOCs and guarantee long-term color stability—consider color psychology when picking tones, since lighter hues reflect heat and help drying.
Test a small area, monitor for blistering, and allow extended cure times in cool or humid conditions.
Manage Paint Thickness to Avoid Cracking
When painting stucco, you’ll want to keep each layer thin enough to flex without cracking. Apply multiple thin coats rather than one heavy coat so the paint cures evenly and bonds well.
That approach helps maintain a desirable overall thickness and long-lasting finish.
Optimal Paint Layer Thickness
How thick should each coat be to prevent cracking on stucco? You’ll aim for thin, consistent layers that respect the wall’s texture. Proper thickness helps with color matching and texture smoothing without trapping stress.
- Aim for 6–8 mils wet per coat—this dries evenly and reduces tension.
- Use a roller or sprayer set to a light pass to keep layers uniform across ridges.
- Test a small area, let it dry, then inspect for cohesion and color match before continuing.
Follow manufacturer wet-film guidelines and let each layer cure fully to avoid future cracks.
Multiple Thin Coats
Because stucco flexes and breathes, you’ll get the best results by building color and coverage with multiple thin coats rather than one heavy pass. You should apply light layers, letting each dry fully to prevent sagging and cracking. Thin coats improve adhesion, allow subtle color blending, and preserve texture techniques you’ve chosen. Work systematically, spot-check for coverage, and sand only if needed between layers. Patience pays: thinner layers move with the wall and resist stress.
| Coat | Purpose |
|---|---|
| 1 | Primer/seal |
| 2 | Base tint |
| 3 | Color blending |
| 4 | Texture techniques |
| 5 | Final touch-up |
Paint Around Expansion Joints and Control Seams
If your stucco has expansion joints or control seams, you’ll need to treat them differently than the field surface to guarantee a clean, durable finish. You should inspect seals, clean gaps, and choose flexible, paintable caulk to prevent cracking. Match color schemes and texture techniques to the surrounding wall so seams blend without hiding movement.
Follow this short checklist:
- Remove loose material, clean with a brush, and backer rod where needed.
- Apply a high-quality, elastic sealant, tooling it smooth to match texture techniques.
- Prime the sealed seam, then paint with compatible flexible exterior paint to preserve joints.
How Temperature and Humidity Affect Stucco Paint
When you paint stucco in extreme heat or high humidity, the coating can dry too fast or not cure properly, leading to poor adhesion, visible lap marks, or bubbling. You should monitor temperature and relative humidity because they change drying time and film formation.
Cooler, moderate humidity lets paint cure evenly, preserving texture techniques and preventing cracking. High humidity prolongs tackiness, attracting dirt and ruining crisp edges. Intense sun exhausts binders and causes flash drying.
Choose paint formulated for variable conditions and test small areas to see how color options behave on textured surfaces. Adjust application pace and layer thickness accordingly.
Best Seasons and Weather Windows for Exterior Stucco
You’ll get the best results when you paint stucco in mild weather—aim for an ambient temperature between about 50°F and 85°F so the paint can cure properly.
Watch humidity and dew points; don’t paint if the relative humidity is high or if dew will form on the surface overnight.
Also avoid very windy days or direct hot sun that can cause uneven drying and extra blowback of dust.
Ideal Temperature Range
Although stucco tolerates a range of conditions, painting it requires a narrow temperature window to cure properly: aim for daytime temperatures between about 50°F and 85°F (10°C–29°C), with nights not dropping below freezing. You’ll plan around mild seasons and stable forecasts so paint adheres and finishes like you expect.
Consider how color mixing affects drying times and how paint sheen changes appearance as it cures.
- Choose late spring or early fall days when temps stay steady.
- Avoid sudden heat spikes that speed drying and cause cracking.
- Postpone work if forecasts show overnight freezes.
Humidity And Dew Considerations
Because moisture in the air and on the surface directly affects paint adhesion and cure times, plan exterior stucco painting for drier stretches with low overnight dew.
You’ll monitor forecasts for relative humidity below about 70% during drying and avoid nights prone to dew formation that rewet fresh paint.
Choose mid-morning starts so surfaces warm and dry, and stop work if sudden humidity spikes or light rain are predicted.
Use fans or temporary covers for small areas if needed, but don’t force cure with heat.
Humidity control is about timing and modest interventions to protect adhesion and prevent blistering.
Wind And Sun Exposure
After you’ve planned around humidity and dew, check wind and sun patterns before picking painting days—both affect drying speed, spray drift, and surface temperature. You’ll avoid Wind damage and uneven curing by choosing calm, mild days.
Strong sun accelerates skin formation; excessive Sun exposure can blister paint on hot stucco. Aim for morning or late afternoon shade, and schedule when a 4–8 hour dry window is likely.
Consider local forecasts and microclimates around eaves or reflective surfaces.
- Pick low-wind (under 10 mph) windows.
- Avoid mid-day high Sun exposure.
- Paint in mild, stable temperatures.
Interior Stucco: Humidity and Ventilation Tips
When you’re painting interior stucco, controlling humidity and ensuring proper ventilation are essential to getting a smooth, durable finish. You’ll monitor interior humidity with a hygrometer and keep levels between 40–60% during prep, priming, and drying.
Use ventilation control—exhaust fans, open windows, and temporary air movers—to remove moisture and speed curing. Avoid painting after showers or cooking; schedule work during drier parts of the day.
If you must heat spaces, use low-humidity heaters and maintain consistent temperatures. Proper ventilation control and stable interior humidity prevent blistering, poor adhesion, and uneven drying for a long-lasting coat.
Address Structural Movement Risks Before Painting
Before you start painting, inspect the stucco for cracks and hairline separations that could signal movement.
If you find recurring or widening cracks, check for foundation settlement or shifting beneath the surface.
Fixing foundation movement and repairing structural cracks first will prevent paint failures down the line.
Inspect For Cracks
While a fresh coat of paint can transform stucco, you’ve got to inspect for cracks first to avoid sealing in structural problems. Walk the surface, note hairline versus wider gaps, and mark areas needing repair before you pick color choices or decide on paint sheen. Don’t assume small cracks are cosmetic.
- Look for patterning—horizontal, stair-step, or around openings—that suggests movement.
- Probe edges gently; loose stucco means removal and patching, not just repainting.
- Photograph and measure repeat cracks to monitor progression over weeks before painting.
Address Foundation Movement
If you spot cracks that follow a pattern or gaps that widen over time, don’t paint—address foundation movement first so your repairs last.
You should hire a structural engineer to assess foundation stability and identify shifting, settling, or soil problems. Fixes may include underpinning, piers, or soil stabilization; follow professional recommendations before any cosmetic work.
Also correct water drainage issues—regrade soil, extend downspouts, and repair gutters—to prevent further movement.
Once the foundation is stable and moisture sources are controlled, you can make durable stucco repairs and paint with confidence, avoiding recurring cracks and wasted effort.
Long-Term Maintenance to Keep Painted Stucco Intact
When you want your painted stucco to stay looking fresh for years, regular inspections and timely touch-ups are key. You’ll monitor for hairline cracks, biological growth, and failing caulk, and address moisture sources fast to preserve paint durability and substrate health. Keep records of original color codes for precise color matching later.
- Inspect quarterly for stains, cracks, blisters.
- Clean gently with low-pressure wash and appropriate detergent.
- Reseal joints and replace failed flashings promptly.
You’ll use breathable exterior paints, follow manufacturer recoat intervals, and schedule professional checks every few years to extend finish life.
Touch Up and Blend Repairs on Textured Stucco
After you’ve kept up with inspections and resealing, you’ll inevitably need to touch up small damaged areas on textured stucco to keep finishes uniform and water-tight. You’ll assess damage, clean the spot, and pick materials that aid texture matching and Color selection. Apply patching compound, recreate the texture with the right tools, then feather edges. Prime only repaired portions if needed, and use scuff sanding for a seamless bond before painting. Test a small swatch, let it cure, and compare in different light. Patience ensures repairs blend; document formulas for future touch-ups.
| Step | Tool | Tip |
|---|---|---|
| Inspect | Ladder | Note depth |
| Clean | Brush | Remove loose grit |
| Patch | Trowel | Match texture |
| Paint | Brush/roller | Blend edges |
Common Mistakes That Cause Stucco Paint to Peel
Because stucco’s porous, textured surface demands specific preparation and materials, common mistakes — like poor surface prep, wrong paint type, or trapping moisture — quickly lead to peeling. You can avoid that by knowing pitfalls tied to color psychology choices and historic finishes in historical architecture, but you must focus on technique, not trends. Check adhesion, moisture, and compatibility before painting.
Because stucco needs specific prep and breathable masonry paints, focus on technique—check adhesion, moisture, compatibility.
- Skipping thorough cleaning and failing to remove loose stucco and efflorescence causes weak adhesion.
- Using interior or low-perm paint traps moisture; pick breathable, masonry-grade coatings.
- Painting over damp substrates or sealed cracks invites blistering and peel.
Troubleshooting Persistent Cracking After Painting
Peeling often signals underlying issues that can also cause hairline or wider cracks, so once you’ve ruled out adhesion and moisture problems, focus on diagnosing why cracks keep reappearing.
Inspect substrate movement, hairline fracture patterns, and previous repair quality. Tap and sound-test for delamination.
Remove and repair failed patches with appropriate flexible stucco patch and reinforce with fiberglass mesh where movement concentrates. Match finish textures to blend repairs and prevent stress risers.
Reconsider color selection only after repairs; darker paints can hide defects but may worsen thermal cycling.
Repaint with elastomeric or flexible acrylic designed for stucco and monitor performance.
Cost and Time Estimate for a Typical Stucco Job
When you plan a typical stucco repaint or repair, expect costs and timelines to vary with scope, access, and materials chosen. You’ll want a clear cost estimate and solid time planning before starting.
Small touch-ups (patching, priming, paint) usually take a day or two and cost less.
Small stucco touch-ups—patching, priming, and painting—typically finish in a day or two and cost less.
Larger façades with scaffolding add days and higher material/labor costs. Budget for primer, elastomeric paint, sealant, and modest contingency.
- Small patch + paint: low cost, 1–2 days.
- Full wall repaint: moderate cost, 2–5 days.
- Repair + repaint: higher cost, 3–7 days.
When to Hire a Pro: Complexity and Risk Factors
If your stucco has major cracks, widespread delamination, or sits above difficult access like tall scaffolding or steep roofs, hire a pro—these issues increase safety risks and require specialized repair techniques and tools you probably don’t have. You should also call an expert if the job affects historical preservation, uses complex decorative techniques, or involves matching aged finishes. Pros assess subsurface damage, moisture intrusion, and structural concerns you might miss. Below is a quick risk/skill snapshot:
| Issue | Risk Level | Pro Needed? |
|---|---|---|
| Structural cracks | High | Yes |
| Moisture stains | High | Yes |
| Match finish | Medium | Often |
Quick Checklist Before You Start Painting Stucco
Before you lift a brush, run through a short, focused checklist so you don’t get halfway through the job and stop for fixes. Check surface soundness, repairing cracks or loose stucco so paint adheres and won’t crack later. Confirm moisture levels—don’t paint damp stucco. Choose breathable masonry primer and paint suited for stucco texture.
Pick your decorative finishes and final color schemes now so you won’t change mid-project. Gather tools: rollers with thick naps, masonry brushes, ladders, drop cloths, and safety gear.
- Inspect and repair substrate.
- Test moisture and adhesion.
- Finalize materials and colors.
Frequently Asked Questions
Can I Paint Stucco Over Old Lead-Based or Hazardous Paint Safely?
You can, but you shouldn’t DIY; hire certified contractors for lead paint removal and hazardous paint safety, or encapsulate per regulations. They’ll test, abate or seal properly, protecting you, occupants, and avoiding legal and health risks.
Will Painting Stucco Change Its Fire Resistance or Insulation Properties?
No, painting stucco won’t markedly change fire resistance or insulation; you’ll retain stucco texture if you use proper painting techniques. However, heavy insulating or combustible coatings could slightly alter performance, so choose fire-rated, breathable paints.
Can Colored Stucco Paint Fade Faster on South-Facing Walls?
Yes — you’ll see color fading faster on south-facing walls because increased sun exposure breaks down pigments. Use UV-resistant paint, lighter shades, and reflective coatings to slow fading and maintain color longer.
How Long After New Stucco Installation Should I Wait to Paint?
Wait about 28 to 42 days after new stucco installation before you paint; that curing period guarantees stucco texture stabilizes and paint adhesion is ideal, preventing premature peeling or cracking once you apply your finish coat.
Are There Eco-Friendly or Low-Voc Masonry Paint Options for Stucco?
Yes — you can choose eco friendly coatings and low VOC options for stucco; look for water‑based masonry paints, mineral lime or silicate formulations, and certified low‑VOC brands to protect your walls and indoor air quality.
Conclusion
You’ve got the basics to paint stucco without turning it into a cracking mess. Fix loose or damaged areas, use the right primer and elastomeric or flexible exterior paint, and follow dry, mild weather windows—these steps make a dramatic difference (seriously, like night and day). Take your time on prep, test a small area first, and call a pro if extensive structural cracks or moisture problems show up. You’ll end up with a durable, clean finish.