How to Paint Wall Behind Toilet Without Mess
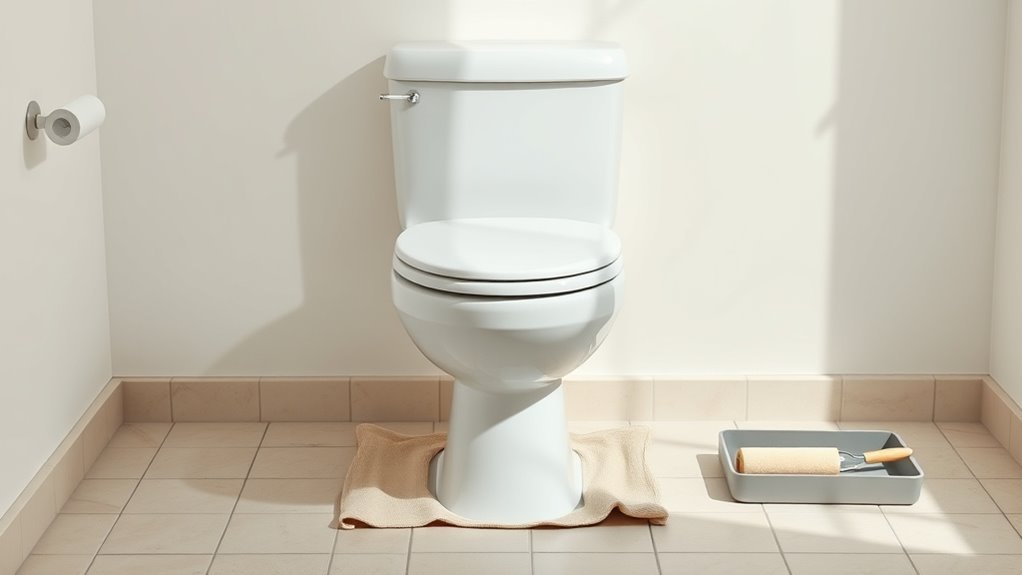
Prep thoroughly, mask carefully, and work top to bottom to paint the wall behind your toilet without mess. Turn off and protect plumbing, cover the bowl and base with plastic and drop cloths, and tape edges tightly around trim and fixtures. Use a small angled brush for cutting in behind the tank, then a mini roller for narrow vertical passes; remove tape while paint is tacky and ventilate to speed drying. Keep tools handy and follow simple touch‑up steps to finish—more tips follow.
Quick Checklist: Paint the Wall Behind a Toilet Without Mess
Before you start, gather everything you’ll need and clear the area so you can work quickly and cleanly: drop cloth, painter’s tape, a small brush and roller, a tray, a utility knife, cleaning solution, and gloves.
You’ll check wall texture to choose primer and nap size, note decorative accents to protect or remove, and turn off ventilation.
Tape baseboards, light switches, and toilet edges; cut in tight seams with the brush before rolling.
Keep a damp rag for drips and a trash bag for debris.
Work top to bottom, ventilate, and let primer dry fully before final coats.
What to Gather Before You Start Painting Behind a Toilet
Before you start, gather the right tools and supplies—paint, brushes or rollers, a small angled brush for edges, painter’s tape, and a tray.
You’ll also want protective materials like drop cloths, disposable gloves, and a mask to keep dust and fumes off you and your floor.
Having everything ready will save time and reduce the chance of mess.
Tools And Supplies
Gather the right tools and supplies so you’ll work cleanly and efficiently: a small angled brush and a mini foam roller for tight spots, painter’s tape, a disposable drop cloth or plastic sheeting, a mild cleaner and sponge, a putty knife and patching compound for repairs, a small paint tray, and latex or oil-based paint suited for bathrooms (moisture-resistant satin or semi-gloss).
Add sandpaper, a small bucket, and a lint-free rag. Choose primer if needed. Consider historical trends and color psychology when picking shades—lighter tones enlarge tight spaces; warm neutrals feel cozy.
Keep tools organized and within reach to avoid mistakes.
Protective Materials
While you’ll be focused on tight angles and drips, lay out protective materials to keep the floor, fixtures, and adjacent walls spotless. Gather a quality drop cloth or peel-and-stick floor film, painter’s tape for trim and decorative accents, and plastic sheeting to cover the tank and nearby shelving.
Use low-tack tape on painted wall textures to avoid damage, and removable adhesive pads to anchor protective film. Have a small foam roller tray, disposable gloves, and microfiber rags for quick cleanup.
Keep a utility knife and a damp sponge handy to trim coverings and wipe accidental spots immediately.
Choose the Best Paint Finish for Toilet Walls
Pick a semi-gloss if you want a durable, easy-to-clean surface that stands up to scrubbing.
If your bathroom sees a lot of humidity but you still want a softer sheen, choose a moisture-resistant eggshell.
Use matte only on walls with imperfections you want to hide, knowing it won’t be as washable.
Durable Semi-Gloss Finish
Why choose a semi-gloss finish for the wall behind your toilet? You want durability and easy cleaning where splashes and humidity occur. Semi-gloss stands up to scrubbing, resists stains, and reflects light to make small bathrooms feel brighter.
Pick eco-friendly paints with low VOCs so cleaning power doesn’t cost indoor air quality. Use creative color schemes—bold accents or soft contrasts—to highlight trim or artwork without sacrificing practicality.
Apply with a smooth roller and steady trim brush, sanding and priming beforehand for adhesion. The result is a resilient, low-maintenance surface that keeps your bathroom looking fresh longer.
Moisture-Resistant Eggshell
Because bathrooms face humidity and occasional splashes, moisture-resistant eggshell gives you a smart middle ground between flat and semi-gloss finishes. It hides minor wall imperfections better than glossy paints while still shedding moisture and standing up to gentle cleaning.
You’ll find eggshell easy to apply behind the toilet, letting you control sheen without drawing attention.
Choose low-VOC, eco-friendly finishes to reduce odors and toxins during and after painting.
Use eggshell if you want subtle Artistic accents—stenciling or soft color shifts work well.
Clean with mild soap; avoid abrasive scrubbing to keep the finish intact.
Matte For Imperfections
Though matte paint won’t repel moisture like eggshell or semi-gloss, it’s your best bet for hiding dents, seams, and uneven texture behind the toilet—so if your walls have imperfections you don’t want highlighted, choose matte.
You’ll appreciate how it minimizes glare and disguises flaws, letting you focus on color choice rather than surface prep. Use shades that suit color psychology to make the small space feel calm or spacious.
Pair matte with proper ventilation and a mildew-resistant primer. If you prefer eco-friendly paints, pick low-VOC formulas—matte finishes now come in washable, greener options that perform well.
Pick Paint Colors That Hide Stains and Splatters
When you pick paint for the wall behind your toilet, choose colors and sheens that mask common bathroom marks—think mid to deep neutrals, muted blues or greens, and warm greys that don’t show streaks or water spots.
You’ll favor satin or low-sheen eggshell for easy cleaning without highlighting flaws.
Consider color psychology: deeper tones feel calming and hide splatters, while cool hues reduce perceived grime.
Also weigh environmental impact by choosing low-VOC or no-VOC formulas that resist mildew.
Test swatches under bathroom lighting, wipe samples after drying, and pick the shade that blends practicality with the room’s mood.
When to Remove the Toilet Tank Lid?
If you’re prepping the wall behind the toilet for painting, remove the tank lid only when you’ll need direct access to the flush mechanism or to shut off the water at the fill valve—otherwise leave it in place to avoid accidental damage or splashes.
Only lift the lid if you must inspect or adjust internal parts, not for routine painting. Removing it invites accidental knocks, so set it on a padded, stable surface.
Avoid full toilet removal unless the job requires complete access; reserve toilet removal and any plumbing disassembly for major repairs.
Wear gloves and handle the lid gently to prevent chips or cracks.
How to Shut Off Water and Protect Plumbing Fixtures
Before you start painting, shut off the water and secure the plumbing so you don’t risk leaks or drips that ruin your work. Turn the shutoff valve clockwise, flush to drain the tank, and pat remaining moisture dry. Do a quick plumbing inspection for corrosion or loose fittings. Wrap fixtures with painter’s tape and a plastic bag; tape edges tightly to prevent splatter. Check seals after painting.
| Step | Action | Tip |
|---|---|---|
| 1 | Shut valve | Turn clockwise |
| 2 | Flush | Drain tank |
| 3 | Inspect | Look for leaks |
| 4 | Protect | Tape & bag |
| 5 | Reopen | Test for leaks |
This helps with Toilet maintenance and avoids surprises.
Clear the Area: Remove Accessories and Linens
Start by taking down towels and any linens so they don’t pick up paint splatter or dust.
Clear the countertop and shelves of toiletries and bottles to give yourself unobstructed access to the wall.
Put decorative items in another room or in a box to keep them safe while you work.
Remove Towels And Linens
Clear the area by taking down towels, bath mats, shower curtains, and any linens that might snag paint or attract dust. Remove everything from nearby towel storage and linen organization spots so fabrics don’t brush wet paint or collect splatters.
Fold or roll towels and place them in a sealed bin or another room; label the bin if you’ll reuse items before paint fully cures. For larger linens, hang them outside the work zone.
Keep a small, covered hamper handy for damp pieces. This minimizes rework and prevents ruined textiles while you paint behind the toilet.
Clear Countertop And Shelves
With towels and linens stored away, focus on countertops and shelves next so nothing nearby can catch drips or get in your way. Clear toothbrush holders, soap dishes, and decorative jars, placing them in a box or on a drop cloth elsewhere.
Wipe surfaces to remove dust so paint won’t bond to particles.
Check ceiling textures above the area for loose bits that could fall while you work.
Move small appliances and items away from any lighting placement to avoid accidental splatters or heat issues.
Keep frequently used items accessible but out of the room until painting and drying are complete.
Store Decorative Items Elsewhere
Before you begin painting, remove all decorative items and linens from the bathroom and stash them in another room or a labeled box so they stay dust-free and out of harm’s way.
Next, clear shelves, towel racks, and the tank top of decorative accents and small plants; wrap fragile pieces in paper or bubble wrap.
Take down wall art and store it flat or upright against a wall to avoid bending.
Label boxes by contents and room so you can return items quickly after paint dries.
Keeping everything out of the workspace prevents accidental splatters and makes cleanup faster and easier.
Mask the Toilet Bowl and Seat to Prevent Drips
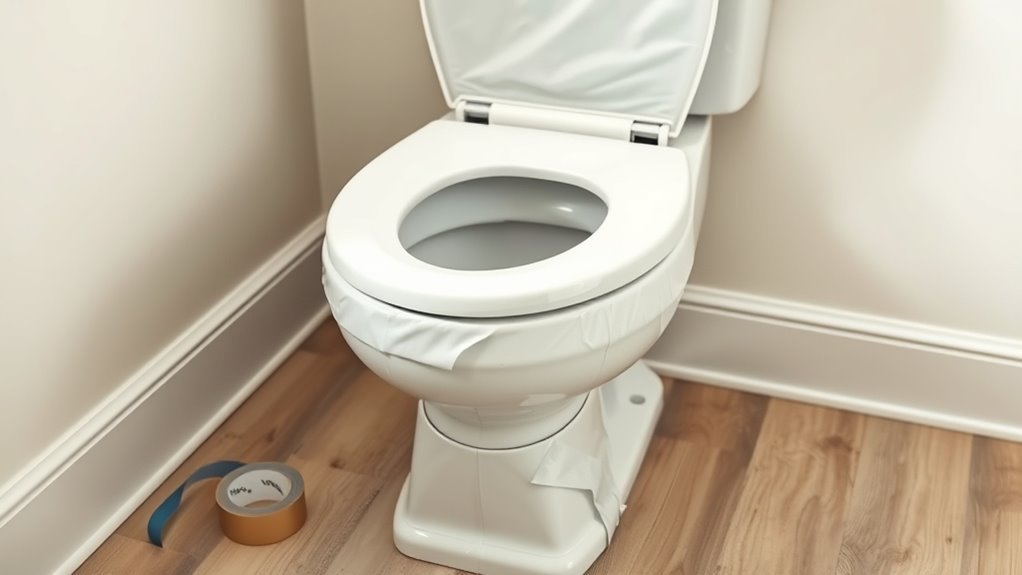
When you’re ready to paint, cover the toilet bowl and seat tightly to stop drips and overspray from ruining the porcelain. Use plastic sheeting or a painter’s bag and secure edges with low-tack painter’s tape so nothing shifts while you work.
Wrap the seat hinge area carefully to maintain toilet aesthetics and avoid sticky residue that could harm bathroom décor. If you remove the seat, label hardware and store aside; otherwise, mask tightly around bolts.
Check for gaps before painting, and replace coverings if paint builds up. Remove tape slowly when paint’s dry to prevent chipping.
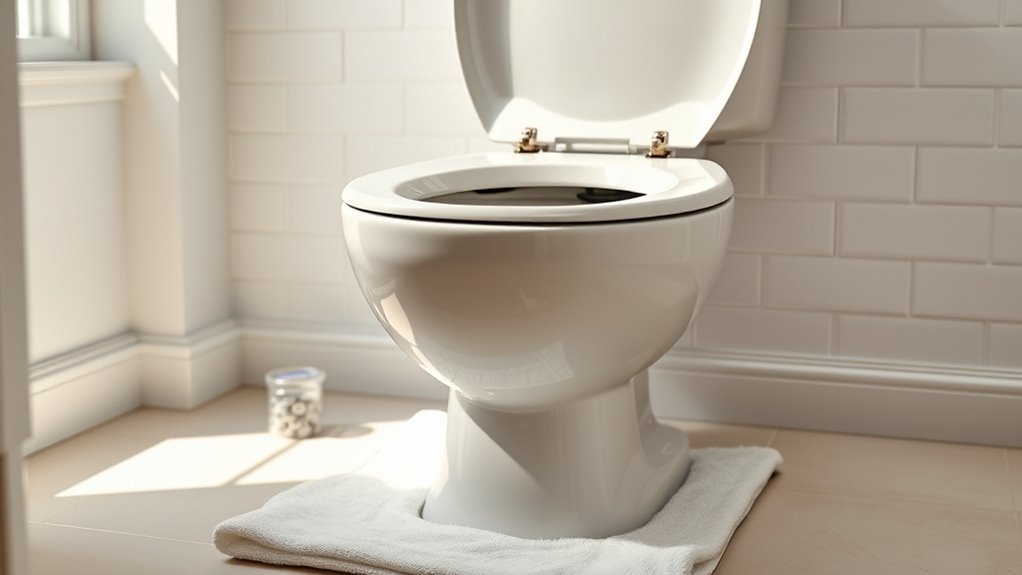
Protect the Floor Around the Toilet
Cover the floor around the toilet with a durable drop cloth or layered paper to catch drips, spills, and tracked paint. Secure edges with low-tack painter’s tape so it won’t shift when you move.
Trim openings to fit snugly around the base without blocking bolts or seals. Use heavier material near the wall if sanding alters wall texture and creates more debris.
Keep a small tray and absorbent rags nearby for quick cleanup of spills and paint fumes residue on tools.
Remove cloths promptly after paint cures to avoid trapping moisture under them and staining the floor surface.
Cover Exposed Pipes and Valves Without Trapping Moisture
If you’ve got exposed pipes and valves behind the toilet, protect them with breathable materials that keep paint off but still allow airflow so moisture can’t get trapped. Use lightweight mesh wrap or perforated foam and secure with painter’s tape, avoiding airtight plastic that creates moisture traps.
Remove loose debris and dry surfaces first, then cover fittings individually so you can still access shutoffs. Label valves for quick identification.
After painting, remove covers promptly and inspect for condensation. If you spot persistent dampness, switch to a more ventilated cover or consult a plumber to address underlying humidity issues.
Set Lighting for Tight Spaces
Choose bright, compact fixtures so you get clear light without crowding the space.
Position them to cast shadows that reduce glare and highlight the wall behind the toilet.
That way you’ll see imperfections while keeping the area comfortable and easy to work in.
Choose Bright, Compact Fixtures
While you’re working in a narrow bathroom, pick compact, bright fixtures that maximize light without crowding the space. You’ll want fixture selection that complements decor color and reflects natural tones to enhance paint behind the toilet.
Choose slim-profile sconces or recessed LEDs to keep sightlines clear and avoid bulky pendants that make the area feel tight.
Opt for fixtures with high CRI and warm-to-neutral temperature so colors read true against fresh paint.
Mount lights to illuminate walls and mirror evenly, and select finishes that tie into your decor color palette for a cohesive, uncluttered look.
Position Shadows To Reduce Glare
Because narrow bathrooms amplify glare, you’ll want to position lights so shadows fall where they reduce shine without creating dark corners. Aim fixtures at angles that cast subtle lighting shadows across glossy painted areas behind the toilet, softening reflections while keeping task areas visible.
Use adjustable sconces or directional LEDs to control beam spread; tilt them slightly downward and toward the wall to limit mirror bounce. Combine a low-level wall washer with a focused task light for balance.
Test placements at painting height so you see how glare reduction performs before finishing, and tweak angles until reflections are minimized and visibility remains good.
Clean and Degrease the Wall Behind the Toilet
Before you paint, thoroughly clean and degrease the wall behind the toilet so paint will adhere and look smooth. Grease, soap scum, and mildew can prevent proper bonding and cause peeling later.
Start by removing dust with a microfiber cloth, then apply a mild degreaser or TSP substitute with a sponge, scrubbing stains gently. Rinse well and let dry fully.
Treat any mildew with a diluted bleach solution, ventilating the room.
As you clean, consider color psychology and paint texture choices so cleaning reveals true tones and surface feel. Proper prep guarantees an even, long-lasting finish and easier application.
Repair Small Holes and Cracks Before Painting
Once you’ve cleaned the surface, patch every small hole and crack so your paint lays smooth and lasts longer. Use a quality spackling compound for hairline gaps, press firmly, then wipe away excess.
Bigger divots need a quick filler and a flat tool to level. Let repairs dry fully; moisture ruins adhesion.
Consider placement relative to decorative accents so fixes won’t show around trim. Also follow ventilation tips during drying to prevent mildew and speed curing.
- Apply spackle, press, remove excess.
- Fill larger holes, level with a putty knife.
- Dry well, ventilate, inspect before painting.
Sand and Feather Edges Behind a Toilet
Start by prepping the area: turn off the water, stuff the toilet bowl with a plastic bag or towel, and lay drop cloths to catch dust.
Use medium-grit sandpaper to smooth any rough edges around patched spots, working gently to avoid scratching nearby tiles or the tank.
Finish by feathering thin layers of joint compound outward from the repair, sanding between coats for a seamless blend.
Prep The Area
While the toilet’s still in place, sand any rough caulk or drywall joints behind it and gently feather the edges so new paint lays flat and invisible. You’ll clear dust, match wall textures, and prepare a seamless surface before paint mixing and application. Tape fixtures and floor, cover the tank with a cloth, and keep ventilation on.
- Remove loose debris with a vacuum and tack cloth to avoid grit under paint.
- Mask trim, baseboard, and adjoining walls with low-tack painter’s tape to protect finishes.
- Lay down drop cloths and secure edges to prevent slipping and catch stray drips.
Sand Rough Edges
Before you paint, sand any rough caulk or torn drywall behind the toilet so the new finish will sit smoothly. You’ll sand rough edges gently with fine-grit sandpaper, keeping the wall texture consistent. Wear a mask, work slowly, and wipe dust with a damp cloth. Check seams and corners for snags that’ll telegraph through paint. If texture varies, sand until blend feels level to the touch. Here’s a quick checklist:
| Tool | Grit | Purpose |
|---|---|---|
| Sandpaper | 120–220 | Smooth edges |
| Sponge | — | Remove dust |
| Light | — | Inspect texture |
| Gloves | — | Protect hands |
Feather With Joint Compound
Once you’ve smoothed the rough edges, apply a thin layer of joint compound to feather the repair into the surrounding wall so the patch disappears under paint. You’ll work outward from the center, using the feather technique to taper edges so they blend seamlessly. Keep the compound thin, let it dry fully, then sand lightly with fine grit. Repeat only if needed.
- Spread a thin coat with a drywall knife, extending several inches beyond the repair.
- After drying, sand gently to a smooth blend.
- Prime the area before painting to guarantee even finish and adhesion.
Choose the Right Primer for Bathroom Walls
Pick a primer formulated for bathrooms and you’ll cut through moisture, stains, and mildew before you paint. Choose a mildew-resistant, stain-blocking primer labeled for high-humidity rooms so paint adheres and resists peeling.
If you’ve upgraded bathroom ventilation, a quality primer works even better by drying more evenly. For older walls with soap scum or residue from toilet cleaning, clean thoroughly first so primer bonds properly.
Use a shellac or oil-based primer for severe stains; latex or acrylic for typical bathrooms. Read manufacturer instructions for recoat times and humidity limits to guarantee durable, mold-resistant results behind the toilet.
Apply Primer in Narrow, Awkward Spots
Now that you’ve selected the right primer, focus on how to get it into the tight spaces behind and beside the toilet without making a mess. Use a small foam roller or angled mini-roller to hug uneven wall texture, keeping strokes short and controlled. Mask plumbing and floor seams, and work top-down so drips won’t travel onto primed areas.
Think about color psychology only when choosing primer tint—warm or cool undertones affect final paint perception.
- Load lightly and blot excess on a tray.
- Use a narrow sash brush for creases.
- Wipe spills immediately with a damp cloth.
Cut In Clean Edges Behind a Toilet With a Brush
When you cut in behind a toilet with a brush, work from the top down and keep your strokes short and deliberate so paint doesn’t pool around pipes or on the floor. Position a small angled sash brush to follow the wall-to-floor line, angling bristles for control.
Use minimal paint on the brush, reload often, and feather edges to avoid visible overlaps. Choose creative color combinations that complement fixtures, and pick eco-friendly paint options to limit fumes in a tight space.
Wipe drips immediately with a damp rag, and step back frequently to inspect lines for consistent, clean edges.
Use Painter’s Tape Effectively Around Toilet Hardware
If you’re aiming for crisp lines and no paint on fixtures, apply painter’s tape carefully around the toilet base and any exposed hardware before you start rolling or cutting in. You’ll protect toilet aesthetics and simplify cleanup while respecting plumbing maintenance needs. Follow these focused steps:
- Press tape into seams and under bolts; trim flush to porcelain.
- Overlap strips slightly, then burnish edges with a plastic card to prevent bleed.
- Remove tape within 15–30 minutes of paint tackiness to avoid peeling, pulling slowly at a 45° angle.
This method keeps lines sharp and hardware intact, saving time and touch-ups.
Paint Behind the Toilet With a Mini Roller
Because space is tight and splatter is easy, use a mini roller to get smooth coverage behind the toilet without wrestling with a full-size tool. You’ll prep by cleaning, taping edges, and laying a rag under the tank.
Choose eco friendly paints for low odor and quick return-to-use; their finish still reflects color psychology, so pick a shade that makes the small space feel calm or bright.
Load the mini roller lightly, roll off excess, and work vertically from top to bottom in controlled strokes. Feather the edges to blend with taped lines.
Let dry between coats for even coverage.
Paint Tight Corners and Behind Flush Levers Without Mess
After you’ve smoothed the main area with a mini roller, focus on the tight corners and the space behind the flush lever where drips and missed spots hide. You’ll work carefully to protect hardware and keep edges crisp while thinking about color psychology to guarantee the small area complements the room.
After rolling, tackle tight corners and behind the lever—protect hardware, blend edges, and choose colors that complement the room.
Choose eco friendly paints to minimize fumes in confined spaces. Follow these precise steps:
- Use a small foam brush to dab paint into creases, blotting excess on a rag.
- Feather edges toward the roller-painted area for seamless blending.
- Wipe away any drips immediately with a damp cloth.
Use an Angled Brush for Precise Trim Work
When you need crisp lines where the wall meets trim, grab a quality 2–2.5 inch angled sash brush and work from the trim outward. The slanted bristles give you control to paint narrow edges without overcutting onto the wall.
Use an angled brush for precise trimming along baseboards, around toilet tanks, and near light switches. Load the brush sparingly, tap excess on the can, and use short, steady strokes that follow the trim profile.
Hold the brush at a slight angle and keep your free hand steady against the wall for support. Check your progress in good light and touch up as needed.
Avoid Drips When Loading Your Brush or Roller
If you want clean edges and no puddles on the floor, load your brush or roller deliberately. You’ll control coverage and avoid drips by using measured dips and tapping off excess against the tray.
Choose eco friendly paints with the right viscosity; thinner water‑based options reduce blobs but may need more passes. Think about color psychology when picking saturation—stronger colors show imperfections faster, so load lighter coats.
- Dip a third of the bristles or roller nap and tap, don’t shake.
- Wipe excess on tray ridges before moving.
- Recheck after a few strokes to catch drips early.
Painting Approach for Wall‑Mounted Toilets
Because wall‑mounted toilets leave more exposed plumbing and tight gaps, you’ll want a targeted painting approach that protects fixtures and gives a smooth finish. You’ll mask hardware, use small brushes for crevices, and choose rollers suited to wall textures so paint lays evenly. Keep paint storage sealed and nearby to maintain color consistency. Work top to bottom, removing drips immediately, and use light passes to avoid buildup around mounts. Emotional calm comes from neatness and control; a tidy job feels rewarding.
| Calm | Control | Pride |
|---|---|---|
| Prep | Mask | Brush |
| Care | Patience | Finish |
| Close | Seal | Admire |
Paint When the Toilet Meets a Tile Backsplash
As you paint where the toilet meets a tile backsplash, focus on clean shifts and proper masking to keep grout and tile edges crisp. You’ll protect tile with painter’s tape and a thin foam shield, brushing carefully along grout lines so paint won’t creep. Consider Toilet aesthetics and Bathroom feng shui by choosing a complementary color that balances the tile and fixtures. Work slowly, feathering edges for a seamless blend.
Paint carefully where the toilet meets tile—mask grout, feather edges, and choose a complementary color for balanced bathroom feng shui
- Tape tightly along grout, press edges with a fingernail.
- Use a small angled brush for control near tile.
- Remove tape while paint’s tacky for clean lines.
Protect and Repaint Baseboards Behind Toilets
Before you start painting the wall, clean the baseboard edges and mask them carefully so paint doesn’t creep onto trim or flooring.
If the trim is damaged or you want a sharper line, remove the baseboard or protect it with painter’s tape and a thin cardboard shield.
Finish with proper touch-up techniques—feather edges, use a small angled brush, and match sheen for a seamless repair.
Clean And Mask Edges
When you’re ready to repaint the wall behind the toilet, start by cleaning baseboards thoroughly and masking edges to protect trim and fixtures. You’ll want a tight seal so paint lines stay crisp and cleanup stays minimal. Consider color psychology and historical trends only when choosing touch-up shades for consistency with the room’s palette.
- Wash baseboards with a mild detergent, rinse, dry, and remove loose paint.
- Apply low-tack painter’s tape along the edge, pressing firmly to prevent bleed.
- Cover floors and fixtures with drop cloths, then trim tape with a utility knife for perfect corners.
Remove Or Protect Trim
If you can, remove the baseboards to repaint cleanly—pulling them off gives you full access to the wall and prevents paint buildup on trim. But if removal isn’t possible, protect the trim with tight tape and thinner masking to keep lines sharp.
You’ll handle trim removal gently: score caulk, pry with a trim tool, label pieces, and store screws or nails.
For paint protection, press tape edges firmly, use low-tack tape near fresh finishes, and apply thin strips of masking paper to cover profiles.
Work in small sections, keep a steady brush angle, and check tape edges before painting to avoid seepage.
Touch-Up Paint Techniques
Now that the trim is out or well protected, focus on touching up and repainting the baseboards behind the toilet to restore a clean, finished look. You’ll want neat edges, matching color, and consistent paint sheen for a professional result. Follow these steps:
- Clean and sand scuffs lightly, prime bare spots, then feather edges for subtle color blending so repairs vanish.
- Use a small angled brush and thin coats; let each dry to check sheen and coverage before adding another.
- Remove tape while paint’s tacky, inspect in good light, and touch tiny flaws with a careful stipple for seamless repair.
Handling Textured Walls Behind a Toilet
Because textured walls trap paint and brush strokes differently, you’ll need to adjust your prep and tools to get a smooth finish behind the toilet. Start by cleaning grime and removing loose texture; sand lightly to reduce high peaks.
Use textured wall techniques: a thick-nap roller or stippling brush helps reach crevices without overworking. Mask the toilet and floor carefully, and use a trim brush for edges.
Choose eco-friendly paints with good coverage to minimize odor and drying time. Work from top down, tapping rather than dragging, and inspect under varied light to catch missed spots.
How Many Coats You’ll Likely Need and Why
How many coats you’ll need depends on the surface type—smooth drywall usually needs fewer than textured or stained walls.
Check the paint can for coverage numbers (usually 300–400 sq ft per gallon) to estimate how much paint and how many coats you’ll use.
Wait the recommended dry time between coats so each layer bonds properly and you avoid tacky, uneven finish.
Surface Type Matters
Although the number of coats depends on paint quality and color, the surface you’re painting is the biggest factor in how many you’ll need.
Smooth drywall often needs fewer coats than textured walls because wall texture soaks up and hides paint differently.
Semi-gloss or satin paint sheen can require extra coverage to look uniform on rough surfaces.
Consider these common scenarios:
- New drywall — primed, smooth; expect one to two coats.
- Textured plaster — uneven absorption; plan for two to three coats.
- Previously painted glossy surfaces — scuff and prime; then apply two coats.
Paint Coverage Numbers
Expect to plan for two to three coats in most bathroom situations, since factors like color change, paint type, and wall porosity directly affect coverage.
You’ll need more coats when moving from dark to light shades or when choosing bold hues driven by color psychology to set mood.
Semi-gloss or satin often covers better than flat, but porous drywall soaks paint and may require primer.
Eco-friendly paints can behave differently; check manufacturer coverage rates and test a small area.
Count on one coat of primer plus one to two finish coats for reliable, even coverage behind the toilet.
Dry Time Between Coats
When you’re painting behind the toilet, plan on waiting long enough between coats for the first layer to dry to the touch and cure slightly—usually 2 to 4 hours for water-based paints and 6 to 8 hours (or more) for oil-based formulas—because rushing a second coat can trap solvents, cause bubbling, or create uneven sheen.
You’ll usually need two coats for good coverage; three if you change from dark to light or want richer color psychology effects.
Choose Eco friendly paints if odor or ventilation is a concern.
- Two coats for normal coverage.
- Three for drastic color shifts.
- Spot-check for uniform sheen.
Dry Time and Ventilating to Prevent Odors
Let the paint fully cure before you put the toilet back or close the bathroom. Typical latex paints need 24 hours to be dry to the touch and 48–72 hours to cure. Oil-based formulas can take longer.
Plan ventilation to speed drying and keep odors from settling in. Open windows, run an exhaust fan, and aim a box fan toward the doorway to move humid air out. These drying techniques cut cure time and improve odor control.
Keep humidity low with a dehumidifier if needed. Avoid using the room for long periods, and check paint manufacturer guidelines for safe reentry times.
Remove Painter’s Tape Cleanly Without Peeling Paint
When the paint’s dry to the touch, pull the tape back on itself at a 45-degree angle to reduce lift.
If any paint looks like it might peel, score the tape edge with a utility knife first.
Work slowly and peel backwards along the seam for the cleanest line.
Remove Tape At Angle
If you want crisp edges and no ripped paint, peel the tape back slowly at a 45-degree angle, pulling it toward the painted surface rather than straight up. You’ll reduce lift and keep your trim clean by using the proper Tape removal and angled technique.
Move steadily, don’t jerk, and stop if paint starts to lift.
- Pull slowly and steadily, keeping a low angle.
- Warm stubborn tape with a hair dryer, then resume the angled technique.
- Replace torn sections immediately to avoid dragging peeled paint across fresh areas.
Finish with care and inspect edges for touchups.
Score Edges First
Before you pull tape, score the paint along the tape edge with a utility knife so you don’t peel dried paint away with the tape. You’ll steady the knife, run a light pass along seams, and check for lifted paint. This prevents strips of finish coming up and helps preserve color blending at gradations. Score gently over different wall textures so you don’t gouge drywall or trim. Clean off crumbs, press tape back down, then remove tape per instructions. Quick table for reference:
| Task | Tip |
|---|---|
| Knife angle | 30° |
| Pressure | Light |
| Repeat passes | As needed |
| Cleanup | Brush crumbs away |
Peel Slowly Backwards
Because dried paint can lift with a quick yank, peel the tape slowly and back on itself at a low angle so you keep the bond between paint and wall intact. You’ll peel carefully to avoid tears, and use gentle removal to protect fresh edges. If paint tacks, warm the line with your hand or a hairdryer on low, then retry. Follow a steady pace and watch the seam as you go.
- Pull back at about 45° to 90° slowly.
- Stop if paint lifts; press tape back and score.
- Use steady tension, not force.
Fix Small Mistakes and Touch Up Splatters
When you notice small drips or uneven spots after the main coat dries, address them right away to keep the finish looking professional. You’ll lightly sand drips, feather edges, and use a fine brush for color blending so touch-ups disappear. Dab excess with a damp cloth, thin paint if needed, and stroke with the original direction to avoid paint streaks. Work in small sections, let each touch-up dry, then reassess. Visualize repair steps:
| Step | Action | Result |
|---|---|---|
| 1 | Sand | Smooth |
| 2 | Clean | Ready |
| 3 | Touch-up | Blend |
| 4 | Inspect | Perfect |
Clean Paint From Porcelain and Chrome Safely
If you get paint on porcelain, act fast and wipe gently with a damp microfiber cloth and a mild cleaner to lift spots without scratching the glaze.
For chrome fixtures, avoid abrasives and use a non-abrasive cleaner or rubbing alcohol on a soft cloth to prevent scratches.
I’ll cover safe cleaning solutions and techniques so you can remove paint without damaging porcelain or chrome.
Porcelain Spot Removal
Though porcelain and chrome look sturdy, paint splatters can bond quickly and stand out, so you’ll want to remove them carefully to avoid scratches or dulling the finish.
For porcelain cleaning and spot removal, start gentle: test mild soap and warm water, then try a soft cloth with isopropyl alcohol for stubborn bits. Work slowly, keeping edges wet.
- Soak a cloth in warm soapy water; blot and rub lightly.
- Use isopropyl alcohol on a soft cloth for dried paint; don’t scrape.
- Rinse, dry, and inspect; repeat gently until the spot is gone.
Chrome Scratch Prevention
Because chrome shows scratches easily, you’ll want to remove paint with methods that protect the finish: use soft, nonabrasive cloths, avoid metal tools or harsh scrubbing, and choose solvents that won’t pit the plating.
When paint lands on bathroom fixtures, blot excess immediately with a microfiber cloth. Test any solvent on an inconspicuous spot first to verify it won’t dull the shine.
Work gently in small circular motions, rinsing cloths frequently to avoid grinding particles that cause chrome scratches.
If paint dries hard, soften it with a recommended remover applied briefly, then wipe away and polish the area carefully.
Safe Cleaning Solutions
When paint lands on porcelain or chrome, act quickly and use gentle cleaners that dissolve the finish without scratching it. You’ll want eco friendly cleaning options to protect fixtures and indoor air while reducing paint odor control needs. Test any solution in an unseen spot, then blot—don’t smear—loosened paint.
- Use a damp microfiber and mild dish soap for fresh spots; rinse and dry promptly.
- Try white vinegar or rubbing alcohol on stubborn latex, applied sparingly, then rinse well.
- For chrome, wrap a soaked cloth, let sit briefly, then wipe gently; polish with a dry cloth.
When to Replace Caulk and How to Recaulk Neatly
If your caulk is cracked, peeling, discolored, or has gaps where moisture can get in, it’s time to replace it. Old caulk won’t seal properly and can lead to mold and water damage.
If caulk is cracked, peeling, discolored, or gapped, replace it to prevent leaks, mold, and water damage.
For caulk replacement, remove old material with a utility knife or caulk remover. Clean and dry the seam, and tape edges to protect surfaces.
Load a silicone tube into a caulking gun. Apply steady pressure for an even bead, then smooth with a wet finger or caulk tool for a neat recaulk.
Let it cure fully before painting or exposing to moisture to guarantee a lasting seal.
Repaint After Removing Limescale or Mold
Once you’ve removed limescale or mold and allowed the area to dry completely, you’ll want to prep the surface for repainting so the new paint bonds and the problem doesn’t return.
Clean remaining residue with a mild detergent, sand glossy spots, and apply a mildew-resistant primer.
Improve bathroom ventilation to prevent recurrence—run an exhaust fan or open a window during and after painting.
Check toilet plumbing for leaks that feed moisture into walls and fix any issues before finishing.
Then paint with a washable, mold-inhibiting latex.
Let coats dry fully between layers for long-lasting protection.
- Clean and sand
- Prime with mildew resistance
- Fix ventilation and plumbing
How Long to Wait Before Using the Toilet After Painting
After the paint has dried and you’ve fixed ventilation and plumbing, you’ll want to know how long to keep off the toilet to protect the finish and avoid inhaling fumes. Wait at least 24 hours before light use; 48–72 hours for full curing, especially around the toilet tank and behind the bowl. Keep the water shutoff available in case you need to address leaks. Open windows and run a fan. Don’t place towels or heavy items against the wall.
| Smell | Sight | Feel |
|---|---|---|
| faint | glossy | cautious |
| gone | matte | relieved |
| lingering | perfect | safe |
| gone | healed | satisfied |
Paint Behind a Toilet in a Rental Without Permanent Changes
When you’re painting behind a toilet in a rental, you’ll want to avoid anything that could be considered a permanent alteration or that risks damage—so focus on reversible, noninvasive methods like using temporary drop cloths, painter’s tape that peels cleanly, and water-based paint you can easily touch up later.
You can refresh the space without upsetting a landlord by choosing removable solutions and subtle decorating accents.
Consider ventilation options like a window fan or quiet exhaust to speed drying and reduce odor. Do this:
- Use removable painter’s tape and lightweight drop cloths.
- Apply water-based primer and paint.
- Add peel-and-stick accents for texture.
Protect Fixtures When Using Bold or Dark Colors
When you’re working with bold or dark paint, tape off fixtures like flush handles, light switches, and towel bars to keep clean lines.
Lay a drop cloth or plastic sheet over the toilet and floor to catch drips and spills.
Take a few extra minutes to secure edges so you don’t have to scrub dried paint later.
Tape Off Fixtures
If you’re using a bold or dark color, tape off fixtures carefully to keep crisp lines and avoid staining chrome or porcelain. You’ll protect edges around the tank, flush handle, and towel bars while preserving decorative accents and respecting wall texture changes.
Work slowly, pressing tape into crevices and smoothing seams to prevent bleed. Remove old or loose tape first, and use low-tack painter’s tape designed for delicate surfaces.
- Cut short strips for knobs and flush levers to follow curves precisely.
- Overlap tape at corners, pressing into grout or seams.
- Peel tape at a 45° angle once paint’s dry to the touch.
Use Drop Cloths
After taping off fixtures, cover the floor and surrounding plumbing with drop cloths to catch drips and stray splatters—especially important with bold or dark paint that shows every mark. Lay heavyweight canvas or recyclable paper; secure edges with painter’s tape so cloths don’t shift when you reach tight spots.
Drape extra material over the toilet tank and exposed pipes, tucking corners to avoid paint pooling. If you’re using eco-friendly paints, a light primer under dark shades reduces runs and makes cleanup easier.
For vintage decor touches, protect antique hardware separately and remove delicate items before you start.
Time‑Saving Tools and Shortcuts That Don’t Increase Mess
Because you want to save time without trading cleanliness, pick tools and shortcuts that confine paint and speed the job—trim brushes for edges, a slim roller with a guard for tight gaps, disposable mini-rollers, and painter’s tape that peels cleanly. You’ll also consider eco friendly paints that cut odor and dry fast, and match technique to wall texture to avoid splatter. Use these quick, tidy tactics to finish neatly.
Save time without sacrificing neatness: choose slim tools, disposable rollers, low‑tack tape, and fast‑dry eco paints.
- Mask fixtures and grout with low‑tack tape for precise lines.
- Use a pole‑less mini‑roller for reach behind the toilet.
- Keep damp cloths and a trim brush for instant touchups.
Hiring a Pro: What to Expect for This Small Job
When you hire a pro for this small job, expect a quick, focused visit: they’ll assess access around the toilet, protect fixtures, patch any blemishes, and apply paint with tools that minimize drips and overspray. You’ll get clear timing, short prep, and a tidy finish. Ask about Eco friendly paints and how they’ll handle caulk lines or decorative accents. Expect brief cleanup and a walkthrough to confirm coverage. Below is a quick checklist you can reference:
| Task | What to expect |
|---|---|
| Prep | Drop cloths, tape |
| Patching | Minor repairs |
| Paint choice | Low-VOC, Eco friendly paints |
| Technique | Brush, small roller |
| Cleanup | Wipe, vacuum |
Cost Estimate: DIY vs Pro for Painting Behind a Toilet
Now that you know what a pro will handle, compare the costs to decide if you should tackle the job yourself. You’ll weigh materials, time, and skill in a clear cost comparison.
DIY means paint, primer, tape, and maybe new caulk — low outlay but your time.
Hiring a pro raises labor considerations: hourly rates, travel, and cleanup, but they finish faster and may avoid mistakes that cost more.
- DIY: low material cost, higher time investment.
- Pro: higher upfront cost, predictable finish.
- Hybrid: you prep, pro paints — split costs and labor.
Common Beginner Mistakes and How to Avoid Them
Don’t skip surface prep—you’ll get poor adhesion and visible flaws if you paint over dirt or peeling.
Don’t overload the paint tray either, because excess paint leads to drips and a mess around the toilet.
We’ll cover simple fixes and routines that stop these common beginner mistakes.
Skipping Surface Prep
If you skip prepping the wall behind the toilet, paint won’t adhere properly and you’ll end up with peeling, uneven coverage, or stains showing through. You should clean, sand, and prime to safeguard against moisture and to respect any decorative accents or wall texture you want to preserve. Don’t assume new paint fixes flaws.
- Clean: remove grime, mildew, and soap scum so primer bonds.
- Sand & repair: smooth bumps, feather edges, and fill holes before painting.
- Prime: use a stain-blocking, moisture-resistant primer for bathrooms to guarantee even color and long-lasting adhesion.
Overloaded Paint Tray
Once your wall is prepped and primed, pay close attention to how much paint you pour into the tray. You shouldn’t overload it — too much causes drips, splatter, and wasted time cleaning the floor around the toilet. Pour a shallow pool, reload often, and keep a rag handy for edges. Good technique preserves toilet aesthetics and prevents paint from reaching grout or fittings. Also run bathroom ventilation to reduce drying time and fumes while you work.
| Problem | Fix |
|---|---|
| Overfill | Pour less |
| Drips | Wipe tray lip |
| Splatter | Use shallow load |
| Waste | Reload frequently |
Maintain the Painted Area to Resist Splashes and Stains
While you’re careful during painting, regular upkeep keeps the wall behind the toilet resisting splashes and stains long-term. You’ll combine practical cleaning with protective choices—use Eco friendly paints with washable finishes and consider Creative wall patterns that hide minor marks.
Follow a simple routine to prevent buildup and fading.
- Wipe weekly with a mild cleaner and soft cloth to remove splashes before they set.
- Install a discreet splash guard or trim behind the tank to block direct sprays.
- Ventilate after showers to reduce moisture, preventing mold and paint breakdown.
Refresh Touch‑Up Paint for Future Mess‑Free Fixes
When you want quick, mess-free fixes, keep a small jar of the original paint and a matching brush handy so you can spot-repair nicks and stains without repainting the whole wall. Store labeled samples so you’ll match sheens and undertones later, considering color psychology to maintain the calm or brightness you chose.
Clean the area, sand lightly, and apply thin layers, feathering edges for invisible blends. Use eco-friendly paints for low odor and easy cleanup—they reduce fumes and encourage prompt touch-ups.
Keep a damp cloth, painter’s tape, and a tiny tray nearby to prevent drips and speed the job.
Product Picks for Mess‑Free Painting Behind Toilets
You’ll want the right tools to keep paint off fixtures and get crisp coverage behind the toilet. Choose slim angled brushes for cutting in, a small foam roller for smooth touch-ups, and disposable trim brushes for tight spots.
Add protective accessories like a contoured drop cloth, painter’s tape, and a toilet skirt or plastic shield to catch drips.
Best Paint Brushes
Because tight corners and narrow gaps make the job tricky, choosing the right brush matters more than picking a paint brand when you’re painting behind a toilet. You’ll still consider eco friendly paints and whether paint sprayers suit other areas, but for this spot, brushes give control.
Pick angled, thin, and durable types that reduce drips and reach behind tight fixtures.
- 1–2″ angled sash brush — precise cutting-in, holds shape.
- Slim trim brush — fits narrow gaps, minimizes touch-ups.
- High-quality synthetic bristles — work with water-based and low-VOC paints, resist splaying.
Protective Accessories
Although the space behind a toilet’s narrow base seems impossible to shield, the right protective accessories make cleanup nearly effortless and keep paint off plumbing and floors. You’ll want a slim drop cloth, painter’s tape, foam guards, and a disposable tray to match Wall textures and Paint sheen choices. Use tape for crisp edges, foam to protect curved pipes, and a snap-on tray for tight reach. Choose low-lint cloths for textured walls. Below are quick picks:
| Accessory | Purpose |
|---|---|
| Slim drop cloth | Catch drips |
| Painter’s tape | Protect trim |
| Foam guards | Shield pipes |
| Disposable tray | Contain paint |
Tips for Bidets, Urinals, and Shared Bathrooms
When painting around bidets, urinals, or in shared bathrooms, plan for extra splash protection and faster-drying finishes so you don’t end up with stains or ghosting on fresh paint. Make certain bathroom ventilation is running to speed drying and reduce odors, and locate the toilet water shutoff in case you need to stop flow while covering fixtures.
Use waterproof masking and removable splash guards, work during low-traffic times, and choose stain-resistant paint.
- Cover floors and fixtures with disposable waterproof sheeting.
- Use fast-dry enamel or quick-curing latex for durability.
- Coordinate timing with users and post drying notices.
Document Prep and Paint Steps for Rentals or Warranties
Before you lift a brush, gather the paperwork and step-by-step notes you’ll need to protect your rental deposit or warranty. Photograph the wall and fixtures, timestamp images, and keep receipts for paint, primer, and any sealants. Note product names and VOC levels to address environmental impact concerns if your landlord asks.
Draft a short plan: prep, tape, prime, paint, dry times. Get written approval for color or fixture removal to avoid disputes. If you’re in a historically significant building, confirm any restrictions for historical preservation.
Store all documents together and share copies with your landlord or property manager.
Final Quick Checklist Before You Close Up and Clean
Once you’ve let the final coat cure, do a quick walk-through with your checklist to catch any missed touch-ups, remove tape carefully, and reclaim the room for use. Check for drips, thin spots, or roller marks and fix them now. Verify caulk seams around the toilet base and behind shelves.
After the final coat cures, inspect for drips, touch up thin spots, remove tape, and check caulk seams.
- Inspect edges near toilet accessories and recoat tiny flaws; remove protective coverings slowly.
- Confirm Bathroom ventilation works and windows close; moisture control prevents future peeling.
- Clean tools, dispose of waste, and reinstall fixtures—give surfaces a final wipe so the space’s ready.
Frequently Asked Questions
Can I Paint Behind a Toilet While Guests Are Staying Over?
Yes — you can, but you’ll need to guarantee toilet accessibility and consider temporary relocation for guests; work quickly, use low-odor paint, ventilate well, protect floors, and let surfaces dry to avoid inconveniencing anyone or creating a mess.
Will Painting Affect My Toilet’s Warranty or Service Agreement?
Generally no—painting won’t void your toilet’s warranty unless paint or paint fumes damage components or you alter plumbing. Check warranty terms for exclusions and keep fumes ventilated; document work and consult the manufacturer to avoid warranty implications.
Can I Use Spray Paint in the Bathroom for Faster Coverage?
A DIY neighbor once ruined a vent using spray paint; you shouldn’t. You can use spray paint for speed, but mask fixtures, cover surfaces, and guarantee strong bathroom ventilation so overspray and fumes won’t linger or damage finishes or vents.
How Do I Remove Stubborn Paint Smells With Pets Present?
You should ventilate well, keep pets out, and use pet safe cleaning products plus odor neutralizing techniques like baking soda, vinegar solutions, activated charcoal, or enzyme sprays; don’t use harsh solvents, and launder pet bedding promptly.
Is It Safe to Store Paint Cans in the Bathroom After the Job?
No, you shouldn’t store paint cans in the bathroom; it risks fumes, humidity damage, and spills. For paint storage and bathroom safety, keep cans sealed in a cool, dry, ventilated area away from pets and heat sources.
Conclusion
You’ve danced around tight corners and tucked every drop away—now step back and admire your handiwork. Like a quiet cloak, the new paint hides old stains and keeps splashes at bay, while your careful prep saved you hours of cleanup. Let the wall dry, replace the tank lid, and enjoy the refreshed bathroom that looks effortless because you planned for mess-free success. Small steps, big payoff—your toilet area’s reborn.