How to Paint Walls on Staircase (Safe Methods)
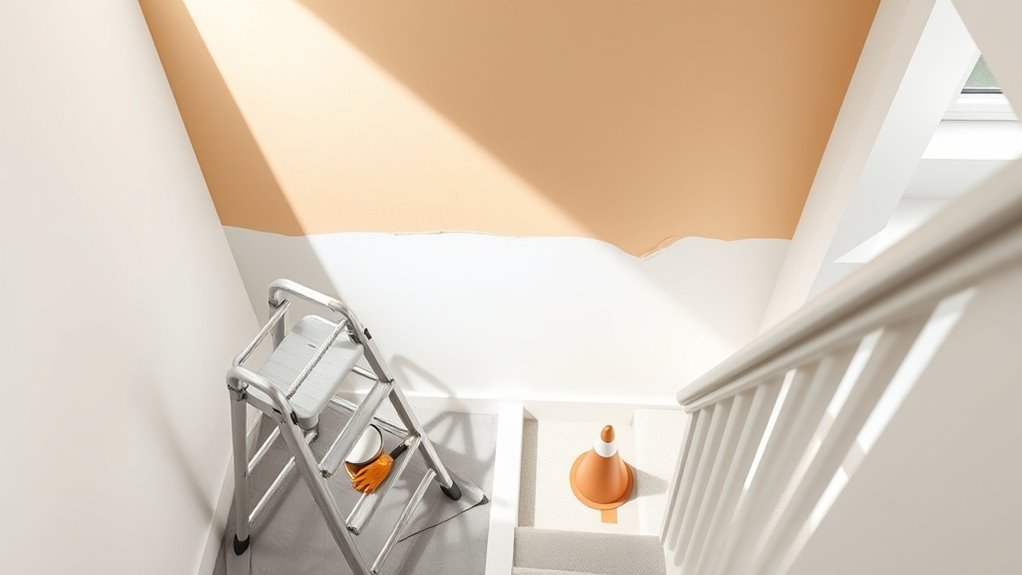
You’ll prep and protect first: clear debris, cover treads and banisters with non‑slip runners or paper, and mark hazards. Work top to bottom from a stable landing, using extension rollers, angled sash brushes, and pole‑mounted edgers to avoid ladders when possible. Patch, sand, and prime problem spots, control drips, and keep ventilation and bright task lighting. Use short strokes, move barriers as you go, and follow disposal rules — keep going for practical tips and tool choices.
When to Repaint and Safety Goals
If your staircase walls show scuffs, fading, or patchy coverage, it’s time to repaint—especially where foot traffic, hand contact, and dust build up more quickly. You’ll schedule repainting when wear becomes visible or when humidity and light have dulled finishes.
Set clear safety goals: stable footing, secure ladders, and adequate ventilation.
Choose Painting techniques that minimize drips and allow quick drying to reduce climb time.
In Color selection, favor tones that hide marks and improve visibility on steps without causing glare.
Plan work in stages, keep exits clear, and use protective gear to prevent falls and inhalation.
Best Paints and Finishes for Stairwell Walls
For stairwell walls you’ll usually pick an eggshell or satin finish for durability and a slight sheen that hides scuffs.
Choose a mold-resistant interior paint if the stairwell is damp or poorly ventilated.
Finish with an easy-clean protective coat to keep marks removable and maintenance simple.
Durable Eggshell Or Satin
Looking for a finish that hides scuffs but still reads soft? You’ll want an eggshell finish or a satin sheen for stairwell walls. Both resist light abrasion better than flat paints, making touch-ups easier where hands or furniture graze.
Choose eggshell if you prefer subtle warmth with moderate durability; pick satin for slightly higher sheen and easier cleaning without obvious shine.
Use quality acrylic latex formulas labeled for interior walls, and apply with consistent thin coats to avoid runs on angled surfaces. Let each coat fully dry before re-taping or using the stairs to guarantee a tough, even result.
Mold-Resistant Interior Paint
Worried about mildew creeping up a damp stairwell? Choose a mold-resistant interior paint that contains mildewcide or antimicrobial additives to aid mold prevention. You’ll want a breathable formulation that resists moisture without trapping it behind the finish.
Prioritize products labeled for high-humidity rooms and check independent test results when possible. Proper surface prep—cleaning, drying, and priming with a stain-blocking, mold-inhibiting primer—boosts paint durability and prevents recurring growth.
Apply according to manufacturer guidelines, maintain ventilation, and spot-treat early discoloration. With the right paint and routine care, you’ll keep stairwell walls cleaner, safer, and longer-lasting.
Easy-Clean Protective Coating
When your stairwell sees constant traffic and scuffs, choose an easy-clean protective coating that stands up to fingerprints, abrasion, and frequent wiping. You’ll want a finish that balances durability with aesthetics; semi-gloss or satin resists marks and cleans without harsh scrubbing.
Prep properly to ensure paint adhesion—clean, sand, and prime high-contact zones. Consider water-based polyurethane or a durable acrylic topcoat for long-lasting protection. Use cleaners compatible with the coating to avoid breakdown.
- Pick finishes rated for high-traffic areas
- Test adhesion on a hidden spot first
- Recoat sooner rather than later to maintain protection
Assess Your Staircase Layout and Hazards
Before you paint, walk the staircase to note traffic flow and where people naturally pass or pause.
Check the walls for cracks, peeling paint, stains, and uneven textures that’ll affect prep and finish.
Spot any safety hazards—loose railings, poor lighting, or tripping risks—and address them before you start.
Staircase Traffic Flow
How will people move through this space once you start painting—down the stairs, up with paint cans, or around drying sections? You’ll map traffic to prevent collisions, preserve staircase acoustics by minimizing clatter, and plan lighting optimization so workers see wet areas.
Mark routes and drying zones, and limit access during coating.
- Create one-way paths where possible to avoid passing on narrow treads.
- Use temporary barriers and clear signage to direct family or contractors.
- Schedule work during low-traffic hours and set up portable lights to highlight hazards and wet paint.
Existing Surface Conditions
Want to know what you’re really working with? Walk the stairwell and inspect walls, corners, and trim for old finishes, peeling, mildew, or patched areas. Note texture changes and measure height, landing size, and lighting for ladder placement.
Photograph spots needing repair so you can plan surface preparation—sanding, filling, and priming—before painting. Test a small patch to check paint compatibility with existing coatings; oil over latex or vice versa can cause failure.
Mark stubborn stains, damp patches, and previous touch-ups to address now. A clear record saves time and prevents surprises during the actual painting.
Identify Safety Hazards
Now that you’ve cataloged surface issues, take a careful look at the stair layout and any safety hazards that could affect how you’ll work. Note trip points, low ceilings, and narrow treads; plan routes and resting spots. Use hazard identification to record trouble spots and decide on safety equipment you’ll need.
- Mark loose railings, uneven steps, and slick surfaces.
- Measure clearance for ladders and platforms; note lighting gaps.
- Identify traffic patterns and where to block off work areas.
Address each item before painting. Clear debris, improve lighting, and set up barriers so you can work securely.
Plan Safe Access: Platforms, Stair Ladders, Scaffolds
Because you’ll be working on uneven steps and at varying heights, plan your access before you start so every platform, ladder, or scaffold is stable, level, and fits the stair layout. You’ll evaluate support points, secure guardrails, and position platforms to protect staircase aesthetics and enable precise color matching. Use non-slip feet and adjustable legs; test load capacity with tools and paint. Keep pathways clear and set reminders for partner-assisted moves. Don’t block exits.
| Access Type | Best Use |
|---|---|
| Platform | Long runs |
| Stair ladder | Narrow stairs |
| Mobile scaffold | Multi-level |
| Adjustable planks | Odd steps |
| Guardrails | Fall prevention |
Choose Ladder-Free Tools and Accessories
When ladders feel awkward on stairs, choose tools that let you work from footholds and the floor—extendable rollers, angled brushes, and pole-mounted edgers give you reach without balancing on steps. You’ll favor Ladder alternatives and simple Safety equipment to reduce risk.
Pick non-slip shoe grips, a compact tool caddy that clips to a railing, and protective eyewear. Use lightweight, ergonomic handles to cut fatigue.
Keep a microfiber cloth and small paint tray within reach so you don’t twist awkwardly. Prioritize tools that let you maintain three points of contact and avoid stepping up and down while painting.
- Non-slip shoe grips
- Tool caddy for railing
- Lightweight ergonomic handles
Extension Rollers, Poles, and Edgers That Work on Stairs
If you want safe, even coverage on a staircase without balancing on steps, choose extension rollers, poles, and edgers designed for reach and control.
Use a lightweight telescoping pole with a secure quick-lock and a swivel head to maintain contact on angled runs.
Pair with microfibre roller covers matched to your paint color and desired finish sheen to avoid lap marks.
Narrow edgers and flexible angled pads let you cut in from the landing without a ladder.
Test length and balance first, keep a tray on a stable platform, and work slowly to maintain steady pressure and clean lines.
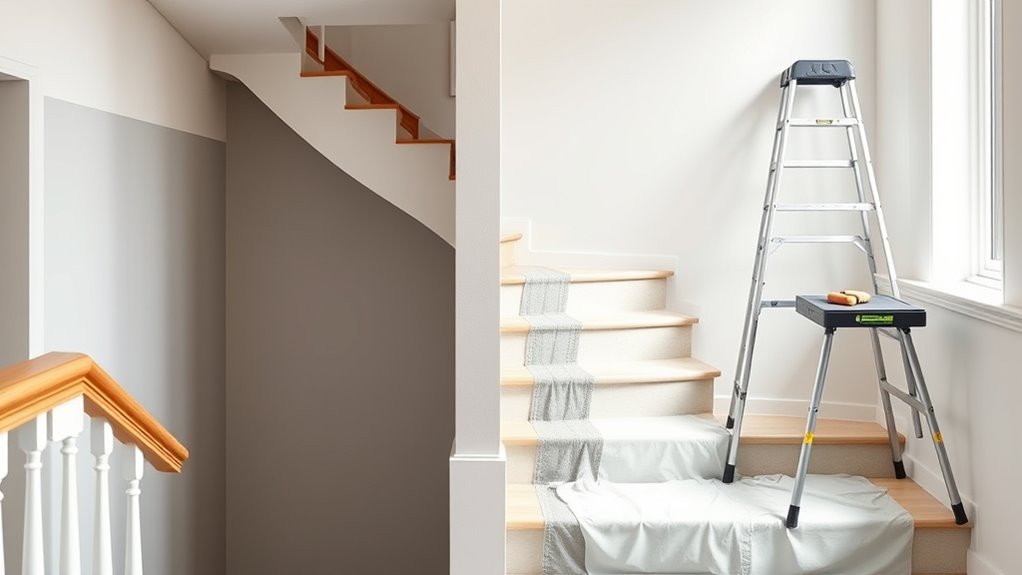
Protect Railings, Banisters, and Steps While Keeping Walkways Clear

Before you start painting, cover railings and banisters with painter’s plastic or wrap and secure it with painter’s tape so no drips touch the finish.
Lay rosin paper or drop cloths on each step and tape edges down to protect against spills and foot traffic.
Keep the center of the stairway clear and set up a narrow, well-marked work zone so people can pass safely without disturbing your coverings.
Cover Railings Securely
Although you want to move quickly, take a moment to protect railings, banisters, and stair treads with the right coverings so paint stays off hardware and people can still use the stairs safely. You’ll use a proper railings cover and temporary safety barriers to shield high-touch areas without blocking passage.
Secure lightweight drop cloths with painter’s tape and wrap banisters with plastic or fabric sleeves. Keep tape off finished surfaces. Check attachments frequently and replace any torn covers.
- Use low-tack tape and fitted railings cover
- Create clear safety barriers at top and bottom
- Inspect fastenings before each use
Protect Steps Effectively
Want to keep stairs usable while you paint? Protect steps by laying non-slip runner mats or painter’s plastic secured with low-tack tape along tread centers, leaving edges clear for foot traffic.
Wrap banisters and railings with breathable fabric or craft paper fastened with painter’s tape so decorative accents aren’t damaged.
Use removable corner guards where walls meet posts.
Mark taped zones with bright labels to guide users.
Choose coverings that match color coordination of the space to reduce visual disruption.
Check fastenings daily and replace so coverings stay secure, preventing slips and paint drips without blocking the walkway.
Maintain Clear Walkway
After protecting steps and banisters, keep the path clear so people can use the staircase safely while painting. You’ll want quick access to exits and steady footing; move tools and supplies to a single staging area. Label containers for Color mixing and secure lids to prevent spills. Organize Paint storage away from traffic and out of reach.
- Place drop cloths flat and tape edges to avoid tripping.
- Use a small cart or tray for brushes, rollers, and mixed colors.
- Mark wet areas with signs or cones so everyone avoids slippery zones.
Stay tidy and communicate plans so painters and household members stay safe.
Patch, Sand, and Prime Angled or Uneven Surfaces
Before you start painting, fix any cracks, gouges, or uneven drywall so the finish will lay flat on angled stair walls; use a putty knife and patching compound for holes, feather the edges, and let it fully dry. You’ll sand low spots smooth, match adjacent Wall texture, and wipe dust away. Apply a high-adhesion primer to seal patched areas so paint absorbs evenly and aids color coordination. Work in short sections along the slope, checking with raking light. Avoid heavy buildup that highlights angles.
| Step | Tool | Tip |
|---|---|---|
| Patch | Putty knife | Feather edges |
| Sand | Sandpaper | Use block |
| Prime | Roller | Thin coats |
| Inspect | Light | Look for low spots |
| Paint | Brush | Blend edges |
Mask Trim and Fixtures on Sloped Walls Fast
When you’re working on sloped stair walls, mask trim and fixtures quickly with a plan: run painter’s tape along the trim’s edge, press it down firmly with a putty knife or your thumb, and protect fixtures with low-tack plastic or paper held by tape tabs.
Work in short sections so tape stays aligned on the incline. Use small scissors to trim corners and remove bubbles. Position drop cloths to catch drips. Keep quality Masking tape on hand and several angled paint brushes for tight areas.
Remove tape while paint is tacky, pulling back at a 45° angle for clean lines.
- Fold tape ends to make pull tabs
- Use clips to secure plastic
- Label edged areas before painting
Work Top-to-Bottom: Safest Painting Sequence
Masking trim and fixtures on sloped walls helps prevent drips, but you’ll get the cleanest, safest results if you paint from top to bottom. Start at the landing and work downhill in manageable sections so wet edges don’t run onto finished areas.
Use a stable platform or scaffold; don’t balance on stairs. Keep your color mixing nearby so touch-ups match without extra trips up and down, and store extras in labeled, sealed cans for paint storage to avoid spills.
Move tools and drop cloths down as you finish each section, maintaining clear footing and reducing trip risks.
Brush, Roller, or Sprayer: What Minimizes Risk on Stairs?
When you’re on stairs, choose tools that keep you steady and accurate.
Use a brush for precise cutting in at edges and corners where balance matters.
Rely on a roller for larger flat sections since it lets you work from secure footing.
Brush Precision Near Edges
Because stair edges force you to work in tight, angled spaces, choosing the right tool — brush, roller, or sprayer — changes how much control you have and how much risk you take. For edge detailing, you’ll find a quality sash brush gives superior brush control so paint doesn’t creep onto treads or risers.
Work from top down, steady yourself on a stable step, and keep movements short. Mask where needed. Consider these quick tips:
- Use a 2–2.5 inch angled sash brush for corners and trim.
- Thin coats reduce drips and allow precise feathering.
- Keep a damp rag handy for instant corrections.
Roller Stability On Steps
How stable is a roller on a staircase, and can you use one without risking slips or uneven coverage? You can, if you prioritize roller stability: secure footing, non-slip shoes, and a short-handled paint roller to keep balance. Work one step at a time, brace against the wall, and use controlled strokes to prevent drips.
| Tool | Risk Level | Best Use |
|---|---|---|
| Short-hand roller | Low | Tight steps |
| Full roller pole | Medium | Wide runs |
| Brush | Low | Edges |
| Sprayer | High | Open landings |
| Pad | Low | Touch-ups |
Cutting In at Angled Ceilings and Risers
Although angled ceilings and stair risers can throw off your steady hand, cutting in clean lines is doable with the right approach. You’ll work slowly, brace yourself, and prioritize control over speed.
For Angled ceilings and Riser painting, pick a high-quality angled sash brush and steady your wrist against the wall or a small painter’s block.
- Start with minimal paint on the brush to avoid drips.
- Use short, controlled strokes following the angle, then smooth with a light pull.
- Keep a damp rag handy for quick corrections and a thin painter’s tape for tight edges.
Use Extension Poles to Keep Steady Coverage
When you want even coverage on stair walls without leaning over the treads, attach your roller to a sturdy extension pole and work from a steady stance on the landing or a lower step. Keep your feet planted shoulder-width apart and shift weight slowly as you reach.
Use extension poles with secure locking collars and a comfortable grip to reduce wobble. Roll in overlapping strokes, maintaining consistent pressure for steady coverage.
Pause to check for drips on lower steps before continuing. Move the pole in controlled arcs rather than jerky motions, and reload the roller evenly to avoid streaks and fatigue.
How to Paint From Stairs When You Need Two Hands Free
When you need both hands free on the stairs, strap on a secure tool belt so brushes and screws stay put.
Attach a telescoping pole to your roller or brush to reach high spots without leaning.
If you must set a ladder, use a step ladder hook to lock it to the stair rail for stability.
Secure Tool Belt
If you need both hands free on the stairs, strap on a sturdy tool belt so brushes, rollers, and a small paint tray stay within reach without constant trips up and down. Choose a secure tool belt with balanced pockets and an adjustable waist so weight won’t pull you off balance; wear proper footwear with good grip. Pack only essentials to avoid excess weight. Check fasteners before stepping onto stairs.
- Keep a small paint cup with lid
- Carry two brushes and a mini roller
- Include a utility knife and rags
Periodically shift items to maintain comfort and stability.
Use Telescoping Pole
You can save trips up and down the stairs by attaching your roller or brush to a telescoping pole, which lets you paint high or low while keeping both feet on solid steps. Extend the pole to reach corners and maintain steady pressure; a lightweight pole reduces fatigue.
Keep a small bucket or tray on a nearby landing or use wall mounted brackets to hold supplies at hand without bending. Move slowly, using controlled strokes and stepping only when necessary.
If you need two hands—for cutting in or stabilizing—rest the pole against the wall lightly, then switch to handheld tools safely.
Employ Step Ladder Hook
Although painting from stairs can leave your hands full, a step ladder hook lets you secure a small platform or paint tray to the stair banister so you can work with both hands free. You’ll attach the hook over the banister, check stability, and use the platform for rollers, brushes, or a cup for paint preparation.
Focus on ladder safety: test weight limit, keep the area clear, and wear non-slip shoes. Use the hook to position tools at a comfortable height so you don’t overreach.
Clean the hook and platform after use to avoid drips and maintain safe, tidy work.
Fixing Drips, Runs, and Uneven Coverage on Vertical Walls
Because drips and runs tend to show up on stairwell walls where paint pools or gravity pulls, you’ll want to catch them early and correct them cleanly to keep your finish looking professional.
For drip control, scrape dried runs with a razor or fine sandpaper, feathering edges until smooth. Wipe dust, spot-prime, then recoat lightly to restore coverage consistency.
For wet drips, blot excess with a brush or rag, level the film with long, even strokes, and avoid overworking. Check from below and across angles to make sure uniform sheen and color before moving to the next section.
Ventilation and Lighting for Enclosed Stairwells
When working in an enclosed stairwell, make ventilation and lighting priorities so you can keep air breathable and see every surface clearly. You’ll set up airflow and light before painting: position fans to promote air circulation, open windows or doors for natural ventilation, and install bright, shadow-free task lighting. Aim for consistent illumination on each riser and wall.
Prioritize ventilation and bright, shadow-free lighting in enclosed stairwells before painting to ensure breathable air and clear visibility.
- Use box fans or axial fans to push fumes out and draw fresh air in.
- Place portable LED work lights low and high to eliminate shadows.
- Keep ventilation running during and after painting until odors fade.
Cleanup, Disposal, and Avoiding Slip Hazards
Good ventilation and lighting make cleanup safer and more effective, so keep fans and lights running as you wrap up. You’ll use proper cleaning techniques: wipe drips, scrub brushes, and rinse rollers outdoors. Contain debris on drop cloths and sweep frequently to prevent slips. Follow disposal methods for paint cans, solvents, and used rags—seal and label cans, recycle where allowed, and take hazardous waste to a proper facility. Mark wet areas and use non-slip mats or tape on steps until completely dry. Refer to the quick checklist below for actions and responsible steps.
| Item | Action | Notes |
|---|---|---|
| Drips | Wipe immediately | Prevents buildup |
| Rollers | Rinse/filter water | Dispose per local rules |
| Rags | Seal in metal can | Avoid impromptu combustion |
| Steps | Mark & mat | Keeps stairs safe |
When to Call a Pro: Safety or Complexity Red Flags
If you see structural damage, extensive rust, severe water stains, or unstable railings, call a pro—these issues raise real safety and complexity concerns that go beyond painting.
You should seek Professional assistance when repairs, permits, or specialist tools are needed. Safety considerations mean you shouldn’t improvise fixes that risk falls or electrical hazards.
- Major structural cracks, sagging treads, or loose stringers
- Hidden mold, persistent leaks, or corroded metal supports
- Complex scaffolding needs, electrical work, or local code questions
Call a qualified contractor or inspector. They’ll assess risk, advise remediation, and keep the project safe.
Frequently Asked Questions
Can I Paint Stairwell Walls With Children or Pets in the House Safely?
Yes — you can, but you’ll need child proofing measures and pet safety precautions. Seal off work area, use low-VOC paint, supervise kids and pets, store tools and solvents securely, ventilate thoroughly, and clean spills immediately.
How Do I Prevent Paint Smell Lingering Long-Term in Stairwells?
Keep the nose to the grindstone: you’ll use ventilation techniques constantly, run fans and open windows, place odor absorbers like activated charcoal or baking soda, seal fresh paint with low-VOC formulas, and clean regularly to prevent lingering smell.
What PPE Is Necessary Beyond Gloves and Goggles?
You should wear protective clothing and a properly fitted respirator mask (N95 or respirator with organic vapor cartridges for strong fumes), a face shield, and slip-resistant footwear; you’ll also use a hard hat in cramped stairwell spaces.
Can I Use Wallpaper or Decals Instead of Paint on Stairs?
About 65% of homeowners pick nonpaint finishes; yes, you can use wallpaper options and decal applications on stairs, but you’ll need durable, washable materials, precise pattern alignment, and proper adhesive to resist foot traffic and humidity.
How to Touch up Scuffs From Moving Furniture After Painting?
You’ll clean scuffs, sand lightly, then apply matching paint with a small brush or sponge; feather edges. Use Touch up techniques like primer spot fixes. Next, set Furniture protection pads and recheck for missed spots afterward.
Conclusion
You’ve learned safer ways to paint stairwell walls—prioritize stable access, proper ventilation, and slip-free cleanup. Remember: falls are the leading cause of home-injury ER visits; stair-related falls account for a large share, so taking precautions matters. If you’re unsure about scaffold setup, awkward landings, or high ceilings, hire a pro. Follow the right paints, ladder-free tools, and cleanup steps to finish the job neatly without risking a preventable fall.