How to Prep an Exterior Wall for Painting Fast
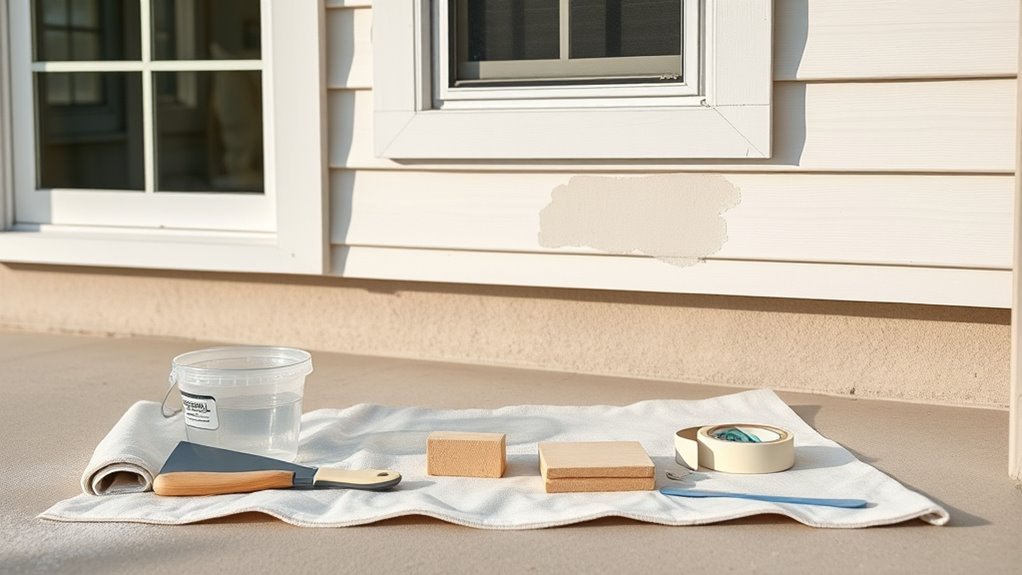
You can get an exterior wall ready for paint in a day by working fast and smart: clear the area, wash with a pressure washer or detergent, scrape and sand loose paint, fill small holes with exterior filler, then let everything dry before applying a quick-setting, low-VOC primer. Use a ladder safely, pick a warm, low-humidity day, and keep essential tools handy to speed the job. Follow the step-by-step timeline below to learn more.
Who This Guide Is For and How to Use It
Whether you’re a weekend DIYer tackling your first exterior paint job or a contractor looking for a quick refresher, this guide gives practical, step-by-step prep advice you can follow before you pick up a brush.
Practical, step-by-step exterior paint prep advice—perfect for DIYers and pros before you pick up a brush.
You’ll find concise instructions for evaluating substrates, removing loose material, and choosing primers and surface coating systems that suit your wall type.
Use the checklists to plan time, tools, and safety.
Tips on color matching and test patches help you avoid surprises.
Skip deep technical theory; follow the prioritized tasks, refer to photos for common issues, and adapt timings to weather and wall condition.
Quick Overview: Prepping an Exterior Wall in One Day
Want to get an exterior wall ready for paint in a single day? You’ll clear the area, wash the surface, sand or scrape loose paint, fill small holes, and let things dry before priming. Focus on efficient sequencing and safe ladders; consider color psychology when picking tones to ensure curb appeal. Use eco friendly materials where possible—low-VOC primer and recycled drop cloths—to cut fumes and waste. Quick tasks, done deliberately, keep you on schedule and improve final results.
| Task | Time | Result |
|---|---|---|
| Clear & wash | 1 hr | Clean surface |
| Sand & scrape | 2 hr | Smooth base |
| Patch | 1 hr | Even texture |
| Prime | 2 hr | Paint-ready surface |
Choose Tools You Need for Fast Exterior Prep
You’ll want the right mix of essential hand tools—putty knives, scrapers, wire brushes, caulking gun and sandpaper—to handle small repairs and surface prep.
Add a few power tools like a pressure washer, orbital sander, and oscillating multi-tool to speed up stubborn grime removal and smoothing.
I’ll walk you through choosing the best tools for efficiency and safety.
Essential Hand Tools
Although exterior prep can feel overwhelming, picking the right hand tools makes the job faster and cleaner. You’ll want a sturdy putty knife for scraping loose paint and filling cracks, a wire brush for rust and stubborn flakes, and a sanding block for feathering edges.
Use a caulk gun and exterior-grade caulk to seal gaps that affect exterior décor and landscaping highlights. Keep a utility knife, pry bar, and adjustable scraper for trim work.
Don’t forget sponges, buckets, and drop cloths to control dust and debris. Organize tools on a tote for quick access and efficient workflow.
Power Tools Selection
When speed and consistency matter, pick power tools that match the surface and scope of your job—an angle grinder with a flap disc for heavy flaking, a random-orbit sander for broad smoothing, and a power washer for loose dirt and old paint that won’t come off by hand.
You’ll choose based on siding type, paint condition, and nearby outdoor decor or landscaping tips that protect plants. Match power to control: variable-speed and dust collection help.
Prioritize safety gear and extensions for reach. Rent specialty gear if you’ll only use it once.
- Feel confident
- Save time
- Reduce rework
- Protect surroundings
Choose Safety Gear and When to Use It
Before you start prepping, pick the right personal protective equipment—gloves, eye protection, and a hard hat if needed—to protect against debris and chemicals.
Use a sturdy ladder with proper fall protection when working above ground level, and never lean or overreach.
If you’ll be sanding or using strong cleaners, wear a respirator and cover exposed skin with long sleeves or a barrier cream.
Personal Protective Equipment
What protective gear do you need and when should you wear it? You’ll protect yourself from dust, paint, and debris while working around garden landscaping and exterior lighting. Wear items as tasks demand: prep, sanding, scraping, pressure-washing, and painting.
- N95 respirator — when sanding old paint or using solvent-based cleaners; breathe safely.
- Safety glasses or goggles — during scraping, pressure washing, and trimming near lights.
- Chemical-resistant gloves — for cleaners, primers, and paint contact; avoid skin irritation.
- Durable work clothes and knee pads — for prolonged prep, crouching around beds and fixtures.
Follow manufacturers’ specs and replace damaged gear promptly.
Ladder And Fall Protection
Because most exterior painting puts you off the ground, you’ll need the right ladders and fall protection to stay safe and steady. Choose a ladder rated for your weight and tools; inspect rails, locks, and feet before each use.
Position ladders on firm, level ground, using a board or footing if landscaping tips recommend soft soil. Tie off the ladder at the top and maintain three points of contact.
For heights above one story, use a harness and anchor rated for fall arrest—this also helps when doing roof maintenance nearby. Never overreach; move the ladder instead.
Respiratory And Skin Safety
How do you protect your lungs and skin while working with paints, solvents, and dusty surfaces? You’ll pick gear based on tasks and paint formulations: N95 or respirators for dust, organic-vapor cartridges for strong solvents, and full-face if mist’s heavy.
Wear nitrile gloves, long sleeves, and disposable coveralls for splashes. Keep ventilation to reduce air pollution from fumes; use fans and work downwind.
Clean skin promptly with soap; don’t use solvents to wipe yourself. Trust your senses—if you cough, feel dizzy, or develop a rash, stop and seek fresh air or medical advice.
- Fear of breathing harmful fumes
- Anger at careless exposure
- Relief using proper respirators
- Pride in protecting your skin
Pick the Right Weather Window for Fast Drying
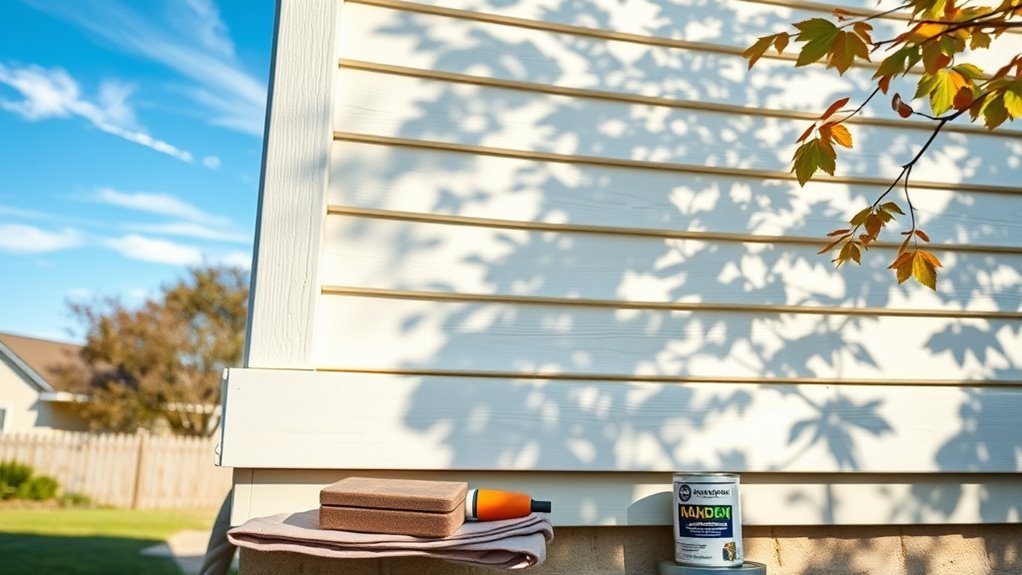
When you plan your painting day, choose consecutive hours of warm, dry weather so coats can dry quickly and cure properly; check weather forecasting for temperature, humidity, and wind trends before you start.
You’ll want daytime highs within your paint formulations’ recommended range and humidity below about 70% to avoid long tack times and blushing. Avoid windy days that blow dust or cause uneven drying.
If overnight temps drop, allow extra cure time. If conditions aren’t ideal, delay or use fast-drying primers/coatings designed for marginal conditions.
Planning like this speeds work and improves finish quality.
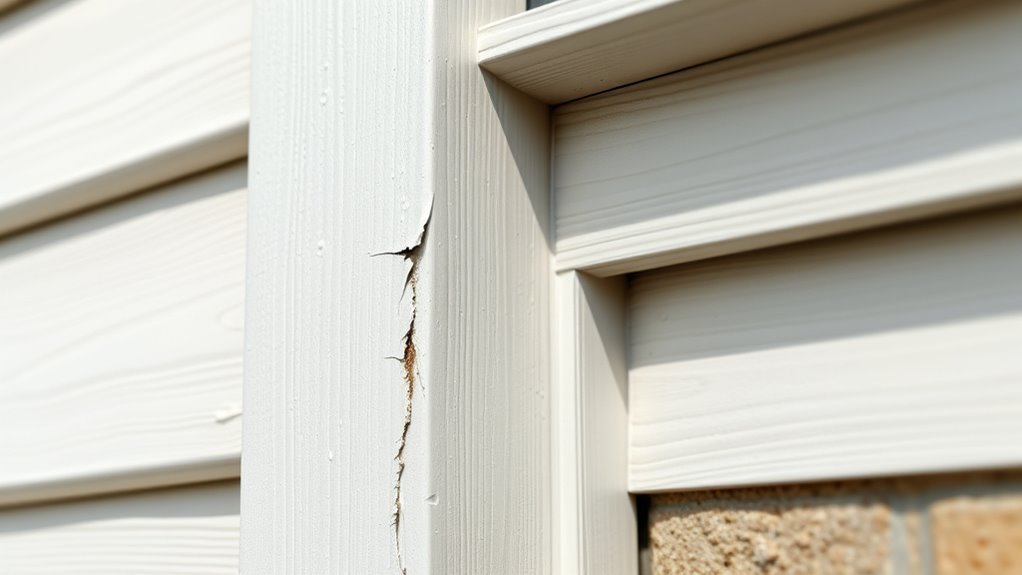
Quick Assessment: Identify Damage vs. Cosmetic Issues in 5 Minutes
Start by running a quick surface integrity check: tap or press for soft spots, loose paint, and cracks.
Do a moisture and stain test by feeling for dampness and noting discoloration that could signal leaks.
Finish with a fast structural flaw scan—look along trim, corners, and foundation lines for movement or settling that needs repair before painting.
Surface Integrity Check
Want to know if a wall needs repairs or just a cosmetic touch-up? Check surface integrity quickly: look for cracks, flaking, soft spots, and loose trim. Run your hand; feel paint texture changes and rough patches. Tap suspicious areas—hollow sounds mean delamination.
Note color theory implications: uneven fading or blotches may just need repainting, not structural fixes. Prioritize safety—use a ladder properly. Document damage with photos and mark spots to fix. Decide: skip minor scuffs, schedule patching for cracks, replace rotten sections.
This five-minute routine saves time and prevents unnecessary work later.
- Fear: visible cracks
- Relief: minor scuffs
- Urgency: soft spots
- Confidence: clean surface
Moisture And Stain Test
Because moisture can hide beneath paint and turn a small stain into rot, you should run a quick moisture and stain test before painting to decide if the issue is cosmetic or structural.
In five minutes you can perform moisture detection with a handheld moisture meter or a simple probe: press against suspect areas and compare readings to adjacent dry spots.
For stain identification, clean a small area with mild detergent and water; if the mark fades, it’s likely cosmetic. If moisture readings stay high or the stain returns, mark it for repair.
Record locations and readings so you’ll address true damage later.
Fast Structural Flaw Scan
Now that you’ve pinpointed moisture and surface stains, run a five-minute structural scan to separate minor cosmetic problems from actual damage that will affect paint adhesion and longevity.
You’ll do a quick structural assessment: walk the wall, tap suspect areas, check joints, and note sagging or cracks. Use a screwdriver for soft spots and a flashlight for hidden gaps. This flaw detection keeps small fixes from becoming costly repairs.
- Feel for soft or spongy boards.
- Tap for hollow sounds or delamination.
- Inspect seams and flashing for gaps.
- Photograph issues and prioritize urgent fixes.
Identify Paint Failure Versus Surface Dirt
When you inspect exterior walls, distinguish between paint failure and surface dirt by looking for permanence and pattern. You’ll rub suspect areas with a damp cloth; if grime lifts, it’s dirt.
Flaking, chalking, or bare substrate that won’t come off signals paint failure. Note patterns: streaks from gutters or uniform fading across facades imply different causes.
Document spots needing color matching so repaired patches blend, and mark areas requiring texture smoothing before repainting.
Prioritize cleaning first, then test a small repair to confirm failure. That keeps your prep efficient and prevents needless repainting over temporary surface contamination.
Spot Moisture Problems Before You Paint
How can you tell if moisture’s lurking behind that peeling paint? Look for bubbling, dark stains, soft spots, or mildew smell—signs that water’s won a foothold. Don’t guess; probe gently with a screwdriver and press for sponginess.
Address leaks, flashing, and poor ventilation before repainting so color theory and interior prep choices don’t mask failure. If moisture’s present, dry and repair thoroughly; paint won’t stick to damp surfaces.
- Bubbling paint that returns quickly
- Brown or dark streaks below trim
- Soft, crumbly substrate when probed
- Persistent mildew odor despite cleaning
How Prep Changes for Wood, Vinyl, Stucco, and Brick
Once you’ve fixed moisture issues, turn your attention to the substrate—wood, vinyl, stucco, and brick each demand different prep steps to guarantee paint adheres and lasts.
For wood, scrape loose paint, sand glossy areas, and prime bare patches. Treat rot and replace boards before painting.
For vinyl, clean with mild detergent, avoid sanding; use a polymer-based primer and select paints formulated for vinyl.
For stucco, remove loose material, patch cracks with cementitious filler, and use breathable masonry primer.
For brick, clean with a stiff brush or low-pressure wash, repoint mortar, and choose breathable masonry coatings for decorative finishes and historical preservation.
Exterior Prep Checklist: Wood Siding and Fence
Ready to get your wood siding and fence set for paint? You’ll clear debris, inspect for rot, and plan how the finish will tie into garden integration and overall curb appeal. Focus on surface prep: wash, sand, and replace damaged boards. Choose primers and paints that help with color matching to trim and outdoor plants.
- Remove peeling paint and loose nails — feel the relief of a clean canvas.
- Sand rough spots — imagine smooth strokes.
- Treat and replace rotten wood — protect memories.
- Plan paint lines near plants — respect garden integration.
Exterior Prep Checklist: Vinyl and Composite Siding
After you finish prepping wood, shift attention to vinyl and composite siding, which require different care. You’ll wash with a mild detergent, rinse thoroughly, and spot-treat stains; avoid harsh scrubbing that can damage profiles. Remove or cover outdoor furniture, and protect plants during garden maintenance. Check seams, caulk gaps with a paintable exterior caulk, and tighten loose panels.
| Task | Tip |
|---|---|
| Cleaning | Use soft brush, low-pressure wash |
| Repairs | Replace cracked panels, recaulk joints |
| Protection | Cover vents, shield landscaping |
Prime only if recommended by manufacturer; use flexible, exterior-grade paint and follow drying times.
Exterior Prep Checklist: Stucco and Textured Finishes
Before painting stucco or other textured finishes, you should inspect the surface for hairline and larger cracks so water won’t get behind the new coating.
Clean the walls with a gentle soft wash to remove dirt, mildew, and loose particles without damaging the texture.
Patch any loose or crumbling texture and allow repairs to cure fully before priming and painting.
Inspect For Cracks
When you inspect stucco or textured finishes for cracks, move methodically and look beyond obvious hairlines—small fissures can let moisture in and lead to bigger problems. You’ll probe edges, note patterns, and prioritize repairs to prevent crack expansion.
Check for loose texture and underlying rust or rot; document locations and widths. Consider paint compatibility when choosing fillers and primers so repairs bond and flex with the substrate.
- Feel for movement—you’ll sense active gaps.
- Photograph every defect for records.
- Mark urgent areas with bright tape.
- Plan repairs that match texture and finish.
Clean With Soft Wash
Since stucco and textured finishes trap dirt and biological growth, you’ll start with a soft wash to remove contaminants without damaging the surface. You’ll use low-pressure sprayers, a mild detergent or biocide, and soft-bristled brushes to loosen grime. Rinse gently and let surfaces dry before any primer or paint. Soft washing preserves exterior texture so subsequent color matching reads true. Check shaded and shaded-to-sun areas for residue that could alter hue. Use the table below to plan dwell time and rinse technique.
| Step | Purpose |
|---|---|
| Apply solution | Kill growth |
| Agitate gently | Remove dirt |
| Rinse/dry | Preserve texture and color matching |
Repair Loose Texture
How do you fix loose stucco texture without creating visible patches? You’ll want clean edges, matching mix, and careful blending so texture repair looks seamless. Remove crumbs, undercut edges, and dampen the area.
Mix a small batch matching grit and color, apply in thin layers, and mimic the original pattern with a sponge or brush. Feather each pass beyond the repair so transitions disappear.
Finish with a light sanding once cured, then prime spot-check before painting.
- Feel relieved seeing smooth, consistent walls.
- Feel proud of a flawless match.
- Feel confident tackling more repairs.
- Feel the satisfaction of lasting results.
Exterior Prep Checklist: Masonry and Brick Walls
Although masonry and brick look solid, they demand careful prep before you paint, or the finish won’t last. Inspect for cracked mortar, spalling bricks, and salt stains; tuckpoint where mortar’s missing and replace damaged bricks.
Cover nearby garden furniture and protect exterior lighting fixtures before you work. Mask vents, windows, and foundation lines with tape and breathable sheeting.
Apply a masonry-compatible primer to guarantee adhesion and block efflorescence, and let moisture levels drop to acceptable limits—use a moisture meter. If mildew’s present, treat with a biocide, then rinse.
Plan repairs, protection, and priming before painting begins.
Remove Dirt and Loose Debris in Minutes
With masonry repairs done and surfaces primed or prepped, it’s time to clear away dirt, cobwebs, and loose paint so your coating will stick. You want tidy walls that boost garden aesthetics and complement your landscaping design, so act fast with simple tools.
Use a stiff brush, handheld scraper, and a broom to remove flaky paint and debris. Sweep down ledges, corners, and eaves, collecting dust into a tarp or container. Be gentle on trim and plantings.
Brush, scrape, and sweep away loose paint and dust—collect debris carefully and protect trim and plants.
Finish by wiping residue with a damp cloth so paint adheres cleanly and your yard looks cared for.
- Relief
- Pride
- Excitement
- Confidence
Pressure Washing: Fast and Safe
Before you start, check the surface and nearby plants so you use the right pressure and avoid damage. You’ll pick a washer tip and distance that blast dirt without stripping paint.
Work top to bottom in overlapping passes, keeping the wand moving to prevent gouges. Rinse siding seams and trim thoroughly, then let walls dry before sanding stubborn spots.
Protect landscaping and cover vents and electrical fixtures. Pressure washing improves adhesion and reveals areas needing repair, helping your artistic techniques and color selection shine through once the wall’s ready for priming and painting.
Low-Pressure Wash for Delicate Surfaces
When you’re working on delicate siding or trim, choose a low-pressure setting that cleans without etching the surface.
Pick a gentle, paint-safe detergent that removes dirt and mildew but won’t strip finishes or harm plants.
Test a small area first so you can adjust pressure and soap concentration before you proceed.
Pressure Settings Guide
If your siding, trim, or decorative features show signs of grime but feel fragile to the touch, use a low-pressure wash to clean without causing damage. You’ll protect exterior color and preserve wall texture by choosing the right PSI and nozzle distance.
Start at 500–800 PSI, keep a 2–3 foot angle, and test a hidden spot. Move steadily; don’t linger. Adjust slightly upward only if grime persists.
- Feel relief seeing gentle results.
- Trust when paint-ready surfaces reveal themselves.
- Avoid heartbreak from blasted trim.
- Enjoy confidence before you paint.
Gentle Detergent Choices
Want a detergent that cleans without stripping paint or softening siding? Choose pH-neutral, biodegradable cleaners labeled safe for painted surfaces and vinyl. You’ll dilute per instructions, test a small area, and rinse gently with low-pressure spray.
Avoid bleach-heavy mixes that can fade exterior color or dull paint sheen. For mildew, use oxygenated cleaners rather than harsh chlorine; they lift growth with less risk.
If wood’s involved, pick wood-safe formulas that won’t raise grain. Always wear gloves and protect plants.
After cleaning, let surfaces dry completely before any primer or repainting to guarantee proper adhesion and true color.
Rapid Mildew and Mold Removal That’s Effective
Because mildew and mold can quickly undermine paint adhesion and spread across siding, you should remove them promptly and thoroughly before priming. You’ll act fast with a bleach solution (1:3 bleach to water) or a commercial mold remover, scrub with a stiff brush, rinse, and let surfaces dry.
Wear gloves, eye protection, and a mask. Test a small area for color psychology impacts on finishes, especially when working for historical preservation projects where pigments matter.
Don’t pressure-wash fragile trim. Follow with a mildewcide primer to stop recurrence.
- Fear of damage
- Relief at cleanliness
- Pride in preservation
- Confidence to paint
Quick Removal of Peeling or Flaking Paint by Hand
When paint is loose or flaking, start by scraping and sanding the affected areas to get down to a sound surface. Work systematically in small sections, using a stiff putty knife, paint scraper, and medium-grit sandpaper.
Wear a dust mask and eye protection, and wet the area lightly if dust is a concern. Collect chips and dispose of them safely, especially on older homes where historical paint techniques might mean lead use—test first if in doubt.
Finish with an eco-friendly cleaning rinse to remove dust and oils, then prime bare spots promptly to prevent re-flaking.
When to Use a Paint Stripper for Fast Removal
If the old paint won’t peel or there are thick, multiple coatings, you’ll want a faster method than sanding or scraping. A chemical or gel paint stripper can break down stubborn layers so you can remove them cleanly.
Before you apply one, test a small area and follow safety and disposal guidelines.
When Paint Won’t Peel
Why won’t that old paint lift after scraping and sanding? You’re frustrated because strong adhesion, multiple layers, or incompatible coatings keep paint bonded. Before stripping, consider color psychology—changing hue can revive curb appeal—and choose eco friendly paints for the next coat. Use a stripper when hand methods stall, especially on trim or flaking edges.
- Fear — you don’t want chemical damage to wood or siding.
- Relief — fast removal restores smooth prep and peace of mind.
- Urgency — weather windows force quicker action.
- Pride — a clean surface makes your new color pop.
Thick or Multiple Coatings
Because layers build up over years, you’ll often hit areas where sanding just won’t make a dent—thick, multiple coatings glue together and hide underlying problems—so reach for a chemical or gel stripper to speed removal and reveal a clean substrate for priming.
You’ll work faster than aggressive sanding and avoid uneven paint sheen from feathered edges. Test a small patch, follow safety and disposal rules, and use a plastic scraper or pressure rinse as recommended.
After stripping, inspect for rot, fill and sand only as needed, then prime to guarantee color consistency and proper adhesion before topcoats.
Speedy Sanding Techniques to Save Time and Get Adhesion
When you’re racing to finish a job without sacrificing adhesion, choose sanding methods that combine speed with consistent surface profile. You want edges feathered, flaking paint removed, and a keyed surface ready for primer.
Use handheld blocks for control on trim and corners; avoid aggressive abrading that ruins substrate. Keep grit moderate to scuff, not gouge.
Protect nearby garden landscaping and move plants indoors if needed—this isn’t just interior painting prep.
Clean dust between passes with a tack cloth so coatings bond. Stay methodical, keep materials close, and sand targeted areas rather than the whole wall.
- Relief
- Control
- Urgency
- Confidence
Use Power Sanders Without Damaging the Surface
If you want to speed sanding without harming siding or trim, pick the right sander, abrasive, and pace so you remove loose paint and create a consistent profile without gouging the substrate. You’ll choose orbital for flat areas, detail for corners, and random-orbit when you need speed with control. Match grit to condition, test on scrap, and keep the pad moving. Protect outdoor insulation edges and masked trim. Consider paint color selection impacts—lighter colors show defects, so sand thoroughly. Monitor dust, use extraction, and pace yourself to avoid burns or dips.
| Tool | Grit | Tip |
|---|---|---|
| Orbital | 80–120 | Even strokes |
| Detail | 120–180 | Tight corners |
| Random-orbit | 60–150 | Use extraction |
Rapid Patching for Small Cracks and Nail Holes
After sanding away loose paint and smoothing edges, you’ll want to knock out small cracks and nail holes before priming so the finish looks uniform. Work quickly: push a quality exterior spackling into gaps, level with a putty knife, and sand smooth when dry. Match filler texture to the wall so color selection and paint sheen read consistently.
Clean dust, then spot-prime patched areas to avoid flash. Trust small repairs to hold under topcoat if they’re flush and sealed.
- Relief: a seamless wall calms.
- Pride: neat patches feel professional.
- Speed: quick fixes save days.
- Confidence: uniform sheen completes the job.
Fast Options for Filling Larger Gaps and Defects
Need a faster fix for bigger tears and gaps? You’ll want fast-setting patching compounds, foam backer for deep voids, and fiberglass mesh to bridge irregular holes. Apply in layers, sand flush, then prime. Match texture before color matching so your paint finish looks seamless. For speed, use lightweight exterior patch and high-build primer.
| Material | Use | Dry Time |
|---|---|---|
| Fast patch | Gaps up to 1″ | 30–60 min |
| Foam backer | Deep voids | 10–20 min |
| Fiberglass mesh | Irregular holes | Immediate |
| High-build primer | Smooth finish | 1–2 hrs |
How to Repair Rotten Wood Quickly and Safely
First, identify rotten wood by probing soft spots, looking for dark discoloration, and checking for crumbling or hollow areas.
Once you’ve marked the damage, use safe removal methods like cutting out the rot with a chisel or oscillating tool while wearing gloves, eye protection, and a dust mask.
Dispose of infected wood and clean the surrounding area before treating or replacing the trimmed sections.
Identify Rotten Wood
How can you tell if wood is rotten before you start repairs? Look for soft spots, crumbling edges, and discoloration where moisture settled. Tap with a screwdriver; rotten wood gives and sounds dull. Check joints and trim for sagging or gaps that signal exterior damage, and smell for mustiness.
- Fear: seeing bulges where paint peels reveals decay.
- Urgency: soft fibers under pressure mean structural loss.
- Relief: finding localized rot lets you plan targeted fixes.
- Confidence: clear inspection notes keep your repairs efficient.
Document locations and sizes so you can prepare materials and next steps.
Safe Removal Methods
Once you’ve pinpointed rotten areas and documented their size, remove the damaged wood safely so repairs don’t spread the problem or risk injury. Wear gloves, goggles, and a dust mask; rot can hide mold and attract garden pests.
Cut out soft wood with a chisel or oscillating tool, working from sound to rotten material. Remove nails and debris, bagging contaminated scraps to prevent spreading spores or insects to outdoor furniture or storage.
Treat surrounding wood with a wood preservative, let it dry, then patch with epoxy or replacement boards. Inspect nearby trim and repeat if you find further decay.
Replace vs. Repair Siding Pieces: When and How
When you spot cracked, warped, or rotten siding, decide quickly whether to repair the damaged pieces or replace them entirely; making the right choice saves time and prevents bigger problems down the road. Inspect the siding material and how repairs will affect the final paint color match.
Patch small rot, nail loose boards, and seal gaps when the structure is sound. Replace sections when damage is widespread, water has compromised sheathing, or matching profiles is impossible. Consider moisture barriers and fasteners during replacement so paint adheres and lasts.
Patch small rot, secure loose boards, and seal gaps; replace sections when damage or moisture compromise the structure.
- Frustration relieved
- Pride restored
- Anxiety reduced
- Confidence renewed
Fast Fixes for Stucco Chips and Hairline Cracks
Start by evaluating the damage quickly so you can separate minor chips and hairline cracks from areas that need full repair.
Clean and prep the spots by removing loose material and wiping away dust or mildew.
Then patch with a suitable stucco filler and blend the texture so the repair disappears under paint.
Assess Damage Quickly
How badly is the stucco damaged? You scan the wall fast, noting chip size, depth, and surrounding soundness. Match repairs to your exterior color and planned paint sheen so fixes won’t shout after painting. Prioritize safety and speed: small chips, hairline cracks, deep gaps.
- Small chips: scrape loose bits, fill, smooth—satisfaction returns.
- Hairline cracks: widen slightly, inject flexible filler—relief follows.
- Deep or wide damage: cut back loose stucco, patch with mortar—confidence grows.
- Widespread distress: mark for professional evaluation—peace of mind wins.
Clean And Prep
Want a quick, durable fix? Start by removing loose stucco with a stiff brush and vacuum debris so new material bonds. Wash the area with a mild detergent, rinse, and let it dry completely; moisture ruins adhesion.
For hairline cracks, run a nylon brush into the crevice to clear dust before applying a concentrated primer or masonry sealer.
Protect nearby outdoor furniture and plants with drop cloths; move potted items out of the way. Trim overhanging foliage per basic landscaping tips to prevent future damage.
Work in small sections, checking that surfaces are clean and sound before your next step.
Patch And Blend
Once you’ve cleared and primed the area, patch stucco chips and hairline cracks quickly with a polymer-based patching compound or premixed stucco repair—apply it with a pointing trowel for chips and force a flexible acrylic caulk into hairline cracks, then feather the edges so the repair blends with the surrounding texture.
You’ll sand lightly when dry, check texture consistency, and touch up with primer. Match color matching samples and test paint sheen on a small patch so final results look seamless.
Quick, confident repairs prevent moisture damage and save time when you’re ready to repaint.
- Relief
- Confidence
- Pride
- Satisfaction
Quick Mortar Touch-Ups for Masonry Before Painting
Before you paint masonry, address cracked or missing mortar with quick touch-ups so the finish bonds evenly and looks professional. You’ll clear loose debris, wet the area lightly, and prepare a small mortar mixing batch to match texture and color.
Use a pointing trowel to press mix into joints, focusing on tight joint sealing and compacting for durability. Smooth excess flush with surrounding mortar, then brush once tacky to blend.
Let the repair cure per product directions—usually a few hours to a day—before sanding minor highs. These fast steps prevent paint failure and keep the wall uniform.
Prime Fast: Choosing a Quick-Dry Primer
After the mortar touch-ups set, you’ll speed the job by choosing a quick-dry primer that bonds well to masonry and accepts topcoat paint sooner. Pick a product labeled for masonry, fast cure, and good sealing so your paint goes on evenly.
After mortar cures, use a fast-dry masonry primer that bonds well and seals for even, quicker topcoats.
Consider color matching if you need fewer topcoats; a tinted primer can cut time. Look for eco-friendly primers to reduce fumes and allow quicker recoat windows indoors or near landscaping.
Apply with a roller for texture and a brush for edges, keeping weather and temperature within the primer’s specs.
- Relief — job done sooner.
- Confidence — even coverage.
- Pride — professional finish.
- Calm — low odor, safer choice.
Where to Use Bonding Primers for Better Adhesion
When you’re dealing with smooth, dense, or previously coated masonry that repels conventional primers, reach for a bonding primer to create a reliable bridge between the substrate and your finish coat.
You’ll use bonding primers on glazed concrete, tile, stucco sealed with old coatings, and glossy masonry where normal primers won’t stick. Clean and etch glossy spots first, then apply the bonding coat to restore surface adhesion before painting.
Use them on patches of repainted mortar, metal trims, and polymer-modified renders. They’re not for every surface, but they’re essential where the substrate resists standard primers.
Spot-Priming Versus Whole-Wall Priming: Save Time or Not?
You can save time by spot-priming small patched areas, especially when most of the wall already has good adhesion.
But spot-priming may show sheen or texture differences that make the repair noticeable unless you blend carefully.
For larger surfaces or uneven substrates, priming the whole wall is usually faster and gives more consistent results.
Spot Priming Pros
Wondering whether spot priming will actually save you time and effort? You can target stains, repairs, and high-contrast areas so color psychology works in your favor and final coats look balanced.
Spot priming uses less product, and eco friendly primers mean lower fumes and quicker re-entry. You’ll move faster on small jobs and reduce waste, but you must be precise.
- Relief — fix eyesores fast.
- Control — tame bold patches before topcoat.
- Savings — buy less primer.
- Satisfaction — see improvements immediately.
Spot priming rewards focused, careful work without committing to full-wall coverage.
Whole-Wall Efficiency
Which approach actually saves you time: spot-priming high-need areas or priming the whole wall? You’ll weigh speed versus consistency. Spot-priming trims labor when issues are isolated; whole-wall priming prevents uneven sheen and simplifies paint color selection. Factor environmental considerations: temperature, humidity, and waste from extra cans. Use this quick comparison:
| Method | Time | Best When |
|---|---|---|
| Spot | Shorter | Few localized flaws |
| Whole | Moderate | Large surface, color change |
If you’ll repaint soon or change color, whole-wall priming often saves rework despite initial time investment.
Mask and Protect Trim, Windows, and Fixtures Fast
Before you lay down drop cloths, block off trim, windows, and fixtures with proper masking so paint stays where it belongs. You’ll tape edges tightly, use painter’s film over glass, and wrap fixtures so splatters don’t mar your finish. Think like someone protecting garden decor from overspray and apply the same care you’d use for interior painting—neat edges matter.
Work quickly but accurately, pressing tape into corners and overlapping coverings. Remove loose tape laterally to avoid peeling fresh paint.
- Relief: clean lines soothe.
- Pride: crisp trim feels professional.
- Calm: protected windows reduce stress.
- Joy: preserved fixtures last longer.
Efficient Ways to Remove or Protect Hardware and Light Fixtures
Before you start painting, remove light fixtures and removable hardware carefully so you don’t damage wiring or finish.
If something can’t come off, cover it tightly with painter’s tape and a plastic bag or wrap to keep paint out.
Label screws and small parts so you can reinstall everything quickly.
Remove Fixtures Safely
When you’re ready to prep exterior walls, take time to remove or protect hardware and light fixtures so they don’t get damaged or interfere with painting. You’ll feel calmer and work faster when you handle fixture removal methodically. Turn off power, label wires, and keep screws in a labeled bag.
For bulky exterior fixtures, support weight while unplugging, and pass photos to remember placement. If a fixture can’t be removed, tape and wrap it securely.
- Cut power — don’t rush lightning-fast decisions.
- Label everything — avoid frustrating reassembly.
- Photograph — protect memory, prevent mistakes.
- Bag parts — keep hope, not chaos.
Protect Remaining Hardware
How will you keep the hardware intact while you paint? Start by evaluating which pieces stay: doorknobs, hinges, light fixtures. For removable items, take them off and store labeled parts and screws.
For fixed items, apply hardware protection—cover with painter’s tape, plastic, or adhesive film. Use hardware masking: wrap light fixtures with paper secured by tape, shield electrical panels, and tuck tape into hinge gaps.
For metal surfaces, avoid tape residue by alternating tape types or using low-tack options. Work methodically, replacing removed hardware after paint cures.
Photograph positions to ensure correct reassembly and preserve function and finish.
Best Tapes and Masking Materials for Quick Clean Lines
If you want crisp, professional-looking edges, choosing the right tape and masking materials makes all the difference. You’ll pick tape based on surface, exterior color contrast, and paint sheen to avoid bleed and tearing.
Use low-tack for delicate trims, high-adhesion for textured siding, and waterproof tape near gutters. Protect windows and fixtures with plastic sheeting and painter’s felt for an absorbent barrier.
Remove tape at a 45° angle while paint’s tacky for razor-sharp lines.
- Low-tack paper tape — gentle, satisfying peel
- High-adhesion tape — confident hold on rough surfaces
- Waterproof tape —安心, no seepage
- Plastic sheeting — fast, protective shield
Set Up Ladders and Scaffolding Faster and Safer
After you’ve taped and masked trim and windows, set up ladders and scaffolding with the same care to keep edges clean and workers safe. Start by inspecting ground for level, compact spots; use ladder feet pads or base plates for ladder stability. Angle ladders correctly and lock spreaders—have a helper spot the base every time.
For scaffolding assembly, follow manufacturer steps: secure guardrails, planks, and cross-bracing before climbing. Keep tools on tool belts or tethered to prevent drops. Recheck connections after moving sections.
Work methodically, don’t rush, and stop if anything feels unstable—safety speeds the job overall.
Use Extension Poles and Rollers to Speed Application Prep
When you need to cover large wall areas quickly and keep a consistent finish, extension poles and quality rollers are your best friends; they let you work from the ground, reduce ladder changes, and maintain even pressure across seams. You’ll attach the right nap roller for texture, adjust pole length for reach, and use smooth, overlapping strokes to avoid lap marks.
This speeds prep and protects delicate trim during historical preservation work, letting you focus on chosen color schemes without constant climbs.
- Relief: less strain, faster progress
- Confidence: steady, even coverage
- Pride: professional-looking finish
- Joy: finishing sooner
Estimate Paint and Primer Quantities to Avoid Delays
Because running out mid-job slows you down and raises costs, you should calculate paint and primer needs before you start. Measure wall area (height × width minus windows/doors), then factor coat count—usually two for paint, one for primer.
Calculate wall area and required coats (usually two paint, one primer) before you start to avoid costly interruptions.
Check manufacturer coverage per gallon and add 10–15% for waste and texture. If you need specific color matching, buy extra of that shade to avoid batch differences.
Note paint sheen choice affects coverage slightly; flatter hides better, gloss may need more coats.
Label leftover cans with date and location for touch-ups so you won’t pause mid-project.
Quick Surface Tests: Adhesion and Porosity Checks
If a wall feels powdery or flaky under your fingertips, run two quick tests to check adhesion and porosity before priming. You’ll tape a small square and peel to assess loose paint (adhesion), then dab a few drops of water to see absorption (porosity). Note surface texture changes and whether underlying tones affect color matching decisions. These fast checks save time and frustration, so you don’t prime over failed surfaces.
- Peel test: reveals stubborn flakes and forces action.
- Water test: shows absorbency and guides primer choice.
- Touch inspection: confirms texture problems you can’t ignore.
- Visual compare: ensures confident color matching.
Choose Fast-Drying Paint Formulas That Still Last
Having checked adhesion and porosity, you’ll want paint that dries quickly without sacrificing durability so your prep work doesn’t go to waste. Pick high-quality acrylic latex blends or fast-curing alkyd alternatives designed for exteriors; they resist UV and moisture while cutting dry time.
Match formulation to substrate—masonry, wood, or metal—so the binder bonds properly.
Consider color selection carefully: darker hues absorb heat and can speed cure, lighter tones reflect it.
Choose a practical paint sheen—satin or low-luster hides imperfections and sheds water better than flat while lasting longer.
Test a small area before full application.
Manage Multiple Surfaces in One Day Without Cross-Contamination
When you’re tackling siding, trim, and metal in one day, plan the sequence and tools to prevent cross-contamination: start with the cleanest surface and move to the dirtiest. Use dedicated rollers and brushes for each substrate, keep separate paint trays and labeled drop cloths, and change gloves or thoroughly clean tools between types.
You’ll protect finishes and make creative color combinations pop without smudges. Stick to designated containers for eco-friendly paint options and note substrate-specific primers.
Follow this simple order and you’ll feel confident, efficient, and proud of the result.
Follow this simple order and you’ll feel confident, efficient, and proud of the result—satisfaction guaranteed.
- Relief
- Confidence
- Joy
- Pride
Fast Cleanup Tips That Keep Your Worksite Tidy
Because a clean site speeds work and reduces mistakes, set up simple routines that keep messes from multiplying throughout the day. Start with designated bins for trash, recyclables, and reusable scraps so you don’t track debris across the yard.
Use drop cloth weights and quick-roll brushes to collect loose paint before it dries. Wipe tools on a rag between color changes to protect paint color schemes and avoid contamination.
Sweep frequently and hose down areas away from plants to preserve garden aesthetics.
End each shift by storing ladders and materials neatly; you’ll work faster and leave the site professional.
Troubleshoot Common Setbacks Quickly on the Job
When something goes wrong on site, you’ll want to do a quick damage assessment to prioritize repairs. Identify structural issues versus cosmetic damage, then choose fast material fixes that get you back on schedule.
Keep a compact kit of patching compounds, sealants, and touch-up tools so you can resolve most setbacks immediately.
Quick Damage Assessment
Although quick checks can’t replace a full inspection, you’ll want to run a rapid damage assessment before you prime or paint to catch issues that could ruin the finish. Scan for peeling, soft spots, and rust near garden furniture and outdoor lighting.
Tap suspect areas, sniff for mildew, and note water stains. Photograph problems and mark priorities so you don’t miss them during busy work.
- Panic-slow: deep rot that halts progress.
- Frustration: bubbling paint from trapped moisture.
- Relief: small cracks you can seal quickly.
- Confidence: clean, sound surfaces ready to paint.
Fast Material Fixes
If you spot a snag—bubbling paint, loose trim, or a dab of rot—you can usually fix it on the spot without derailing the job: scrape and sand bubbled areas, inject epoxy or use a wood hardener for soft spots, swap out or tack down loose trim with stainless fasteners, and deadhead rusted screws before priming.
Keep a compact kit: filler, patching compound, epoxy, wood hardener, caulk, sealant, sandpaper, and a few matching fasteners.
Protect nearby garden decor and interior painting openings with drop cloths.
Test patches quickly, prime repaired areas, then blend with matching paint for durable, neat results.
Ten Pro Time-Savers: Setups, Tools, and Shortcuts
Before you grab a brush, set up a few simple systems that’ll cut hours off the job. You’ll want a staging area with labeled buckets for primer, exterior color, and finish; keep sample chips and paint sheen notes visible so decisions’re quick.
Rollers, extension poles, a gas-powered washer, and quality scraper save time when used in sequence. Keep fasteners, caulk, and touch-up brushes in a grab-and-go kit.
- Label everything for instant grabs.
- Use color-coded tools to reduce mistakes.
- Pre-measure and mix paint for each wall.
- Chain tasks: wash, scrape, patch, then paint.
When Speed Hurts Durability: What Not to Skip
While rushing can shave hours off a job, cutting corners on key prep will cost you time and money later. You’ve got to remove loose paint, treat rot, and repair cracks properly; quick patching invites failure.
Preserve trim profiles and siding details if you’re involved in historical preservation—don’t sand away character to save minutes.
Clean surfaces thoroughly; soap and pressure washing remove contaminants that prevent adhesion.
Use primers suited to substrate and consider eco friendly materials where possible, but don’t skip specs for durability.
Take the essential steps now so your fast job doesn’t become a costly redo.
Budget-Friendly Shortcuts That Don’t Sacrifice Finish Quality
You can still save time and money without sacrificing a strong finish by choosing smart, low-cost shortcuts that preserve prep integrity. You’ll focus on essentials: targeted repairs, good cleaning, and quality tape.
Pair paint decisions with existing outdoor lighting and landscaping design so finishes look cohesive at dusk. Use a patch-and-sand approach on small defects, a pressure wash for grime, a quality primer on problem spots, and budget-friendly brushes for edges.
Pair paint choices with lighting and landscaping; patch and sand defects, pressure-wash grime, prime trouble spots, and tidy edges with good brushes.
- Patch small cracks, prime selectively.
- Pressure-wash high-traffic areas.
- Use angled brushes for neat trim.
- Coordinate color with lighting and plants.
How to Prioritize Areas If You Can’t Finish the Whole Wall
If you can’t finish an entire wall in one go, focus on the spots that matter most visually and structurally: around doors and windows, high-traffic sections, and areas where weather or rot has already started. Prioritize sealing gaps, scraping loose paint, and priming damaged zones so unfinished sections stay protected. Move or cover outdoor furniture, and use simple landscaping tips to keep debris off work areas. Budget time for visible façades first, then back corners. Use this table to set priorities and timing.
| Area | Action |
|---|---|
| Doors/windows | Seal & prime |
| High-traffic | Scrape & paint |
| Rot-prone | Repair |
| Hidden corners | Delay |
Rapid Inspection Checklist to Approve the Prep Before Painting
Before the first coat goes on, walk the perimeter and run this quick checklist to confirm prep is sound. You’ll trust your eye and tools: look for loose paint, sanding dust, and damp spots. Check trim seams, caulking, and make sure garden landscaping isn’t brushing wet surfaces. Confirm exterior lighting is off or shielded to avoid glare that hides flaws. Keep a trash bag and small tool kit handy to fix issues immediately.
- Loose paint scraped, surface solid and dust-free.
- Cracks caulked, trim edges crisp.
- No moisture or mildew present.
- Plants and lights cleared or protected.
Schedule Your One-Day Prep Around Drying Times
While planning a one-day prep, factor in realistic drying windows for caulk, primers, and patch compounds so you don’t trap moisture under paint. You’ll sequence tasks: do repairs and caulking first, then sand and wipe, prime areas needing bonding, and leave final sanding until primer cures. Check product labels for temperature and humidity limits; they affect your color selection and final paint finish. If time’s tight, prioritize priming high-moisture spots and leave noncritical cosmetic touch-ups for later. Trust the drying times—rushing ruins results.
| Emotion | Action |
|---|---|
| Calm | Plan |
| Confident | Wait |
| Pride | Finish |
Fast-Prep Kit: Tools and Supplies to Keep for Future Jobs
Now that you’ve scheduled repairs and respected drying times, build a compact fast-prep kit you’ll reach for every job. Keep it portable so carrying from garden landscaping tasks to exterior walls feels effortless. Include supplies that also suit interior wall preparation to save trips and money.
- Quality scraper, multi-bit screwdriver, and putty knife — restores surfaces fast.
- Dual-purpose cleaner, mildew remover, and resealable wipes — clean confidently.
- Folding sanding block, fine grits, and tack cloth — smooth seams quickly.
- Small drop cloths, painter’s tape, and reusable mask — protect finishes and breathe easier.
Store it near your tools for instant calm.
Quick Reference: Step-by-Step Timeline for a One-Day Prep Session
Start your day with a quick surface inspection to spot peeling paint, mildew, and damaged trim.
Then use fast cleaning steps—pressure rinse where safe and scrub stubborn spots—to get the walls ready.
Prioritize quick repairs like filling cracks and securing loose boards so paint goes on smoothly by evening.
Morning Surface Inspection
Want to catch problems before they slow you down? You’ll do a focused morning surface inspection to spot defects, note surface texture, and confirm color matching plans before any cleaning starts. Walk the perimeter, touch suspect areas, and mark issues for repair.
- See: scan for cracks, peeling, or blisters that scream “fix me.”
- Feel: run your hand to detect roughness or soft spots that need attention.
- Note: photograph trouble spots and annotate measurements for materials.
- Decide: prioritize fixes by severity so you tackle the worst first and keep momentum.
Rapid Cleaning Steps
Because a single-day prep session leaves little room for hesitation, move through cleaning with a tight, step-by-step timeline that prioritizes safety and surfaces most likely to hold paint.
Start by clearing nearby garden landscaping debris that could kick dirt onto walls. Put on goggles and gloves, wet surfaces lightly, then sweep loose dust and cobwebs top to bottom.
Apply a mild detergent solution or trisodium phosphate substitute to stubborn grime, scrubbing with a stiff brush. Rinse thoroughly and let dry while you mask trim and cover plants.
Finish by wiping window sills and treating areas used in interior wall preparation to guarantee adhesion.
Quick Repair Priorities
With cleaning done and surfaces dry, shift focus to fast repairs that will make the biggest difference in a single-day prep. You’ll prioritize fixes that stabilize materials, respect historical preservation, and keep landscaping integration intact.
Start with visible damage that lets moisture in; patch cracks, replace rotted trim, and secure loose siding. Use quick-setting fillers and proper fasteners. Protect plants while you work.
Finish by sanding rough spots and wiping dust so primer bonds. Trust your eye to triage—fix what’ll fail first and what the neighbors will notice most.
- Stop water intrusion immediately.
- Mend structural weak points.
- Smooth surfaces for adhesion.
- Shield plants and features.
Frequently Asked Questions
How Long Should Newly Repaired Stucco Cure Before Painting?
You should wait 7–28 days for newly repaired stucco to cure before painting, depending on patch size and weather considerations; guarantee thorough surface cleaning and that temperatures and humidity stay within manufacturer-recommended ranges during curing.
Can I Paint Over Water-Stained Brick Without Sealing?
No, you shouldn’t paint over water-stained brick without sealing. Studies show moisture ruins 30% of exterior finishes faster; seal first, then focus on color matching and choose brush selection carefully to guarantee even coverage and adhesion.
Do Elastomeric Coatings Require Different Prep Than Standard Paint?
Yes — elastomeric coatings need different prep. You’ll perform more intensive surface preparation: repair cracks, remove loose material, thoroughly clean and prime porous areas, and guarantee dry, sound substrate so the flexible coating adheres and performs.
Will Painting Over Mildew-Stained Areas Without Bleach Be OK?
No, you shouldn’t paint over mildew-stained areas without bleach; you’ll need mildew removal first. Use alternative cleaning like vinegar, hydrogen peroxide, or oxygen bleach, scrub thoroughly, rinse, then let the surface dry before painting.
How to Handle Lead Paint Risk on Older Exterior Walls?
Like a knight with a smartphone, you should treat lead paint removal seriously: don’t DIY high-risk stripping, seal and use dust containment, wear respirators, wet-scrape minimal areas, and hire certified pros for safe disposal and testing.
Conclusion
You’re ready to roll — rapid, reliable, and ready-made. With smart shortcuts, sensible safety, and a streamlined supply stash, you’ll sweep, scrub, seal, and sand so surfaces stay sturdy and show-ready. Pick proper weather, pace your painting around prompt drying, and prioritize problems that prevent primer and paint from performing. Keep a compact fast-prep kit and a simple schedule, and you’ll consistently create clean, confident, curb-appeal results.