How to Prep Wall for Paint – Beginner Friendly Guide
You’ll get pro-looking results by doing a few easy prep steps: clean walls with mild detergent, remove loose paint, fill holes and cracks, sand smooth, and prime bare or repaired areas. Check for leaks or damp spots and fix them before you paint. Mask trim, cover floors, and remove outlet covers for neat edges. Gather basic tools first and allow proper drying times; follow the next sections to learn practical tips and timing.
Why Prepping Walls Matters Before Painting
Because a smooth, clean surface determines how paint adheres and lasts, prepping your walls before painting saves you time, money, and frustration. You’ll remove grime, repair cracks, and smooth uneven wall texture so the finish looks professional and lasts longer.
Proper prep helps true color reveal, which matters for color psychology—hues read differently on patched or dirty surfaces. You’ll also avoid costly touch-ups and peeling caused by poor adhesion.
Investing effort up front means fewer mistakes, quicker drying, and a consistent sheen. That control delivers the *meant* mood and durability, so your refreshed room performs as you expect.
Quick Prep Workflow: Step-by-Step Checklist
Now that you know why prepping matters, follow this quick, practical checklist to get walls ready for paint without wasted time. You’ll inspect, clean, sand, fill holes, and lightly sand again. Consider color psychology when choosing tones and test small patches. Decide your paint finish early — it affects prep level and sanding needs. Work top-to-bottom, tape edges, protect floors, and remove dust with a tack cloth. Prime patched areas. Do final wipe, dry, and a quick walkaround to spot missed flaws. Then you’re ready to paint confidently.
| Step | Action |
|---|---|
| 1 | Inspect & mark |
| 2 | Clean & sand |
| 3 | Fill & prime |
| 4 | Tape & protect |
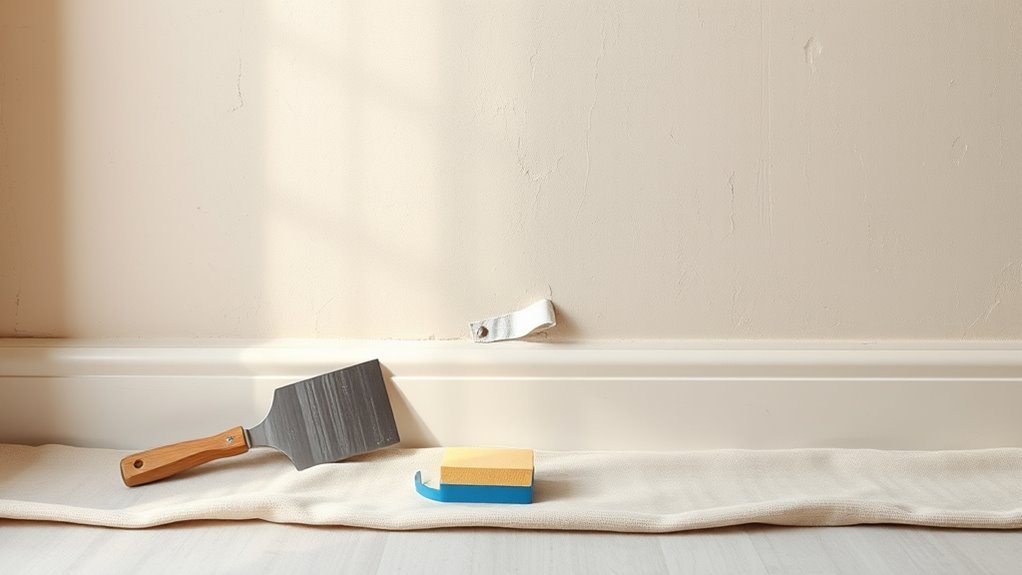
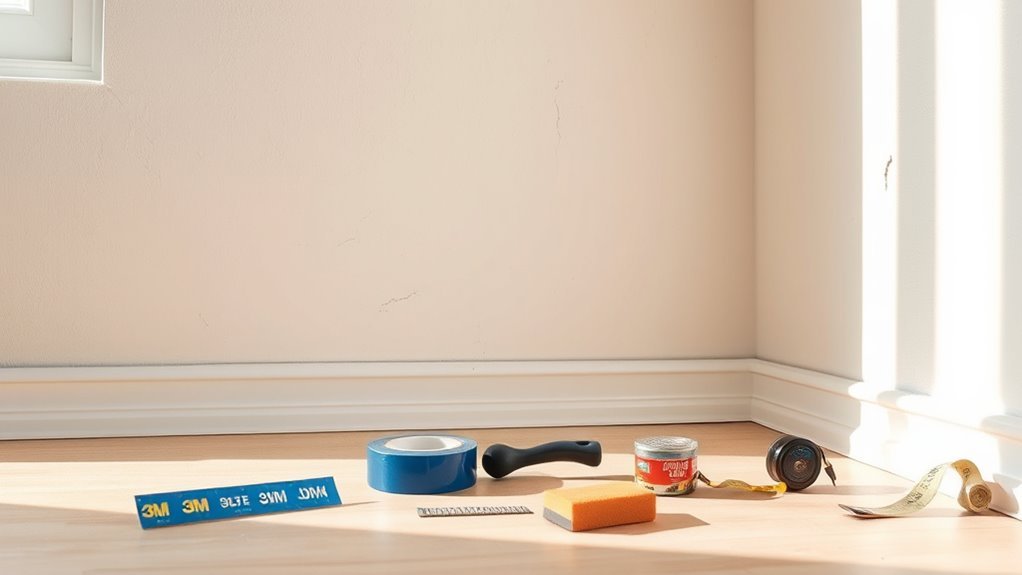
What Tools and Materials to Gather First
Before you start, gather the essential tools and materials so you don’t interrupt the job later: a variety of sandpaper (80–220 grit), sanding blocks or a pole sander, spackling compound and putty knives, a quality primer, painter’s tape, drop cloths or plastic sheeting, a vacuum or brush and tack cloth for dust removal, and the paint, rollers, brushes, trays, and extension poles you plan to use.
Also get safety gear—gloves, mask, goggles—and a small ladder.
Choose paint based on color psychology for the room’s mood and check labels for finish and paint durability to match traffic and cleaning needs before you begin.
How to Assess Wall Condition Quickly
Once you have your tools and materials ready, take a quick visual sweep of each wall to spot obvious problems—cracks, holes, peeling paint, stains, or warped drywall—and note their locations.
Next, run your hand lightly over surfaces to feel for rough patches, bumps, or loose paint. Check wall texture to determine whether sanding, scraping, or skim-coating is needed.
Tap small areas to find hollow spots from poorly attached drywall. Observe paint sheen under angled light; high gloss hides imperfections more than flat finishes.
Photographs and a simple checklist speed planning so you’ll know fixes and materials required.
How to Check for Moisture, Leaks, and Water Damage
Before you paint, check for brown or yellow stains and bubbling or peeling paint that can signal past or active water damage.
Use a moisture meter or press your hand to suspect areas to see if they’re damp, and don’t rely only on visual cues.
Inspect nearby fixtures—pipes, sinks, roofs, and windows—for leaks that could be the source.
Look For Stains
Want to avoid repainting over hidden problems? Check walls systematically for discoloration, spotting, or shadowy patches that signal past leaks or smoke. Inspect ceilings, corners, and behind furniture; use a bright light to reveal faint stains.
For fresh marks, blot moisture and trace upward to find the source. Note rusty streaks or moldy edges—those need attention before painting. Plan stain removal with appropriate cleaners or primers designed to block tannins and watermarks; apply stain prevention products where needed.
Document locations and severity so you can fix root causes first and guarantee a long-lasting, clean finish.
Test Wall Moisture
How can you tell if a wall’s dry enough to paint? First, feel for cool, damp spots and look for discoloration or bubbling.
Press a plastic sheet (6×6 inches) taped on all edges; check after 24 hours—condensation means moisture.
Use a moisture meter for drywall; under 12% is usually safe.
Trace stains back toward ceilings and corners to find leaks. Fix plumbing or exterior issues before priming.
Don’t paint over persistent dampness; paint will peel.
Consider how color theory and furniture arrangement will highlight repaired areas once the wall’s fully dry and primed.
Inspect Nearby Fixtures
Curious whether nearby fixtures are hiding a moisture problem? Start a quick fixture inspection around sinks, tubs, toilets, and exterior walls. Check for stains, soft drywall, peeling paint, and musty odors. Look under cabinets and behind appliances for puddles or corrosion.
- Turn off water, then inspect visible pipes and joints for drips.
- Run a paper towel along seals and grout to spot dampness.
- Use a moisture meter on suspicious spots to confirm elevated readings.
- Note findings, fix leaks, replace damaged drywall, and recheck after repairs.
Nearby fixtures often reveal leaks early—catch them before painting.
Test Old Paint Adhesion: Quick Methods
Start by checking old paint adhesion with a simple tape test: press a piece of strong tape to the wall, pull it off, and look for flakes. If the tape pulls up paint, you’ll want to scrape loose areas and sand the edges smooth before priming.
These quick checks tell you whether the surface needs more prep or is ready for a fresh coat.
Tape Test For Adhesion
Before you commit time and materials, check old paint adhesion with a simple tape test so you don’t end up painting over peeling or chalky surfaces. You’ll learn if paint bonds well before choosing finishes or considering color coordination and lighting effects.
Use strong tape on several spots, press firmly, then pull sharply.
- Choose inconspicuous areas near trim and mid-wall.
- Press 2–3 inches of high-adhesion tape, smooth out bubbles.
- Pull back at 180° in one quick motion; inspect for flakes.
- Repeat across the room; any flakes mean prep is required before repainting.
Scrape And Sand Check
When you suspect old paint might be loose, do a quick scrape-and-sand check to confirm adhesion before you start repainting. Use a utility knife or scraper to lift small sections; if paint flakes easily, it’s failing. Lightly sand a test patch—if surface powder remains, you’ll need to remove loose paint, prime, and choose a compatible paint finish. Consider color trends but don’t skip prep; new hues won’t last on poor adhesion. Quick table to guide you:
| Action | What to look for |
|---|---|
| Scrape | Flaking, chips |
| Sand | Powdery residue |
| Result | Prime or repaint as needed |
How to Identify Lead Paint Risks Safely
How can you tell if old paint might be a lead hazard? You’ll prioritize lead safety and limit paint toxicity risks by following clear checks and actions.
- Inspect age: homes built before 1978 likely used leaded paint.
- Look for chipping, chalking, or disturbed surfaces that raise dust hazards.
- Use EPA-approved test kits or hire a certified inspector for reliable results.
- If lead is suspected, avoid sanding, dry scraping, or DIY demolition that creates toxic dust; wet methods and containment reduce spread.
Take test results seriously and plan professional remediation when tests confirm lead presence.
How to Protect Floors, Furniture, and Fixtures
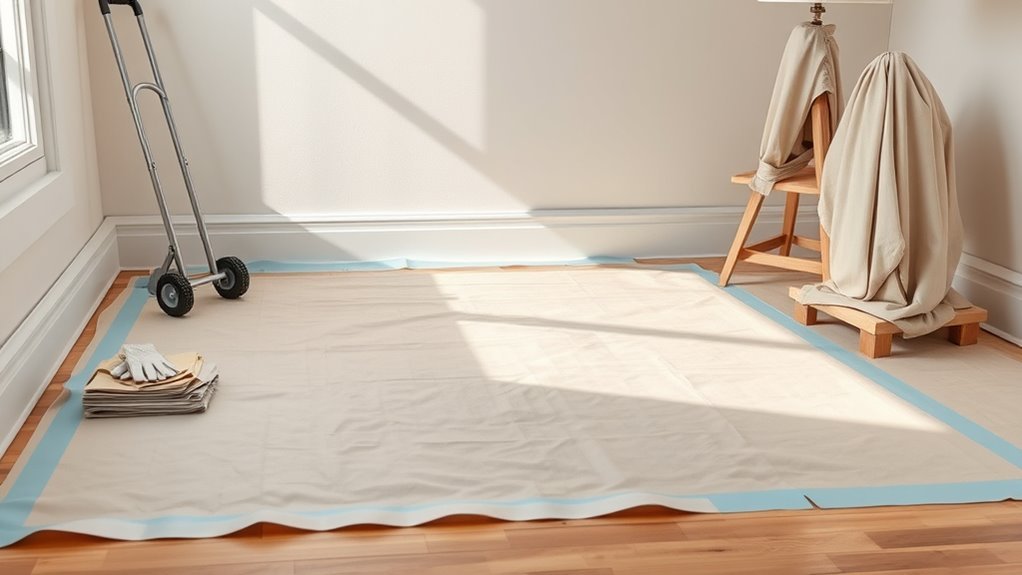
Wondering how to keep your floors, furniture, and fixtures safe from paint splatters and dust? Lay drop cloths, tape edges, and move small furniture to another room. For large pieces, wrap in plastic and elevate on blocks. Protect fixtures by removing switch plates and covering fixed items; save masking details for the next section. Check ceiling maintenance needs before painting to avoid debris; finish any wallpaper removal first so dust’s contained. Clean and vacuum surfaces after prep. Use this quick checklist:
| Task | Tip |
|---|---|
| Floors | Heavy-duty drop cloths |
| Furniture | Plastic wrap |
| Fixtures | Remove plates |
| Debris | Vacuum |
How to Mask Windows, Doors, and Fixtures
You’ll want to pick the right masking materials—painter’s tape for trim, plastic sheeting for large panes, and paper for smaller fixtures.
Remove or cover hardware and secure fixtures so paint won’t get on hinges, knobs, or electrical plates.
Press tape edges firmly and run a putty knife along seams to seal for crisp, clean lines.
Choose Proper Masking Materials
Ready to protect trim, glass, and hardware before you open a paint can? Choose masking materials that match your project’s scale and your color selection plans. You’ll also want to think about furniture arrangement to keep surfaces clear.
- Painter’s tape — clean removal, use narrow or wide depending on trim.
- Plastic sheeting — lightweight for windows; heavier for floors.
- Paper drop cloths — absorbent and easy to tape down.
- Masking film with adhesive — fast for doors and large fixtures.
Pick quality tape to avoid bleed, test a small area, and replace damaged coverings as you work.
Protect Hardware And Fixtures
Before you start painting, mask windows, doors, and fixtures so paint only goes where you intend. Cover doorknobs, hinges, and switch plates with painter’s tape and low-tack plastic for hardware protection. Remove easily detachable hardware and store it safely; wrap fragile pieces in paper.
Use plastic sheeting or drop cloths taped around window frames and door jambs for fixture safeguarding, keeping edges accessible for touch-ups. Secure coverings with tape that won’t peel finishes.
Check for gaps and press seams flat to prevent bleed-through. Label covered items so you can remove protection in the right order after paint dries.
Seal Edges For Clean Lines
After protecting hardware and covering large surfaces, focus on sealing edges so paint lines stay sharp and paint won’t bleed under coverings. You’ll improve edge sealing and preserve line crispness by masking carefully. Follow these steps:
- Clean edges, remove dust, and let surfaces dry.
- Apply quality painter’s tape pressed firmly along trim, window panes, and door seams.
- Use a putty knife to smooth tape and a small bead of caulk for gaps; wipe excess.
- Remove tape when paint is tacky, pulling at a 45° angle for crisp lines.
Check for touch-ups and keep tools handy for precise corrections.
How to Protect Trim, Ceilings, and Floors During Painting
While you mask and cover, focus on creating clean separation between painted surfaces and trim, ceilings, and floors so paint stays where it belongs; use sharp tape lines, drop cloths, and careful brush work. Consider color mixing and paint finishes when choosing tools and tape—glossier trim needs crisper edges.
| Area | Protection |
|---|---|
| Trim | 2” painter’s tape, light pressure |
| Ceiling | Upward-tack tape, angled brush |
| Floor | Overlap drop cloths, secure with tape |
| Corners | Use trim guard, feather strokes |
Work systematically: tape, protect, paint, and remove tape before full cure for best edges.
How to Remove Outlet Covers and Switch Plates Safely
Now that trim, ceilings, and floors are protected, remove outlet covers and switch plates so you can paint cleanly right up to the edges.
Prioritize electrical safety: turn off power at the breaker and test switches with a non-contact tester.
Use a screwdriver to loosen screws, keep them in a small container, and gently pull plates away.
- Turn off breaker and verify power is off.
- Unscrew plates carefully; note orientation.
- Label or photograph wiring if you’ll remove outlets.
- Replace plates after paint dries, restoring the breaker last.
Outlet removal is simple if you stay cautious and organized.
How to Tape Trim and Baseboards Like a Pro
Before you lay down tape, clean and sand the trim and baseboards so paint will stick evenly.
Use a high-quality painter’s tape and press it firmly along the edge to create a crisp line.
Work in small sections so you can adjust the tape and seal any gaps as you go.
Prep Trim Surfaces
When you’re protecting trim and baseboards, careful taping makes the difference between crisp lines and a messy cleanup. Gather painter’s tape, a sharp utility knife, and a small putty knife before you start.
Prep trim surfaces by cleaning dust, removing loose paint, and filling gaps so tape adheres well. Consider wall texture near trim and choose tape suited to edges; test a small area to avoid lifting paint when removed. Match your approach to the paint sheen to prevent bleed-through.
Follow these steps:
- Clean and sand.
- Fill and smooth gaps.
- Press tape firmly.
- Seal edges with a putty knife.
Apply Painter’s Tape
Want crisp paint lines that look professional? Start by cleaning trim and baseboards; dust and grease break tape seals. Measure and cut lengths, pressing tape edge firmly along trim where wall meets wood. Use a putty knife or your fingernail to burnish for a tight seal so paint won’t bleed.
Remove tape within an hour of paint becoming tacky to avoid peeling. Match tape choice to your paint finish—delicate for flat, stronger for glossy.
Consider color psychology when choosing wall hues, but keep trim neutral for contrast. Practice on a scrap board to perfect technique.
How to Clean Walls Before Painting (for Adhesion)
If you want paint to stick and look smooth, clean the walls thoroughly to remove dirt, grease, and chalky residue so primers and paints can bond properly. Start by dusting and vacuuming to remove loose particles. Test a small area to confirm cleaner won’t harm the existing paint or affect color theory considerations for your new scheme or desired paint finish.
Follow these steps:
- Wipe with a mild detergent solution and a microfiber cloth.
- Rinse with clean water and a sponge.
- Allow walls to dry completely.
- Lightly scuff glossy areas with fine-grit sandpaper before priming.
Best Cleaners for Grease, Nicotine, and Stains
Because grease, nicotine, and stubborn stains bond differently to surfaces, you’ll need targeted cleaners to remove them without damaging the wall or primer.
Because grease, nicotine, and stubborn stains bond differently, use targeted cleaners to protect walls and primer.
For grease, use a trisodium phosphate (TSP) substitute or degreasing dish soap diluted in warm water; scrub gently and rinse.
For nicotine yellowing, try a dedicated nicotine cleaner or a vinegar-baking soda paste—test first.
For ink and food stains, isopropyl alcohol or a commercial stain remover works well.
Rinse thoroughly and let dry before priming.
Proper cleaning preserves paint adhesion and influences final appearance; understanding color psychology and careful paint finishing improves long-term results.
How to Remove Mold and Mildew Safely
Though mold and mildew may start as small dark spots, you should treat them promptly to protect your paint and indoor air quality. Wear gloves, goggles, and a mask, ventilate the room, and test a hidden area first.
For safe mold removal and Mildew prevention, follow these steps:
- Mix one cup bleach with one gallon water for hard surfaces; use vinegar for porous areas.
- Scrub gently with a brush, avoiding sanding or dry brushing.
- Rinse, dry thoroughly, and use a fan or dehumidifier.
- Fix leaks and improve ventilation to prevent recurrence before painting.
How to Strip Loose or Flaking Paint
Start by walking the wall and identifying all flaking or bubbling paint so you know where to focus.
Use a scraper or a wire brush to remove loose paint until you reach a sound edge.
Smooth the area with sandpaper, wipe away dust, and apply a primer before repainting.
Identify Flaking Areas
Want to know where paint’s failing before you waste time sanding or priming? Walk the wall in good light and look for texture changes and dull spots that signal adhesion loss. Consider how color psychology affects perceived damage—darker colors hide flaws, glossy paint finish shows cracks more.
- Press gently with your thumb to find soft or powdery areas.
- Run a fingernail to detect edges that lift.
- Inspect around trim, windows, and moisture sources.
- Note bubbling, peeling, or flaking size and location for repair planning.
Mark flaking zones so you can target removal and prep efficiently.
Remove Loose Paint
How do you strip away loose or flaking paint without damaging the surface? You’ll work methodically: score edges, scrape gently, and sand only where needed to reveal solid substrate. Watch for color contrast to spot thin spots and hidden flakes. Use a stiff putty knife, wire brush, or oscillating tool for texture removal; avoid gouging. Clean dust as you go. If lead is possible, follow safety rules. Finish when only firmly adhered paint remains and edges are feathered for the next step.
| Tool | Action | Tip |
|---|---|---|
| Scraper | Remove flakes | Keep angle shallow |
| Brush | Knock loose bits | Work outward |
| Sand | Smooth edges | Low pressure |
| Vacuum | Clean dust | HEPA if needed |
Smooth And Prime
Once you’ve removed all loose paint and cleaned the surface, smooth remaining edges and apply primer to lock everything in place. You’ll want even progressions so your new paint finish looks professional and reflects your color theory choices accurately. Follow this concise sequence:
- Sand feathered edges with medium grit for a seamless blend.
- Scrape stubborn flakes, then vacuum and tack cloth to remove dust.
- Spot-fill gouges with lightweight filler; sand again once cured.
- Apply a bonding primer suited to substrate and desired sheen.
Let primer dry fully before topcoating to guarantee adhesion and uniform color payoff.
How to Remove Wall Texture: Methods and Tools
If your walls have a heavy texture that’s making painting or redecorating difficult, you’ll want to remove it before you proceed. Begin by identifying the texture and any decorative finishes so you choose a safe method.
If heavy wall texture hinders redecorating, identify the finish first to choose the safest removal method.
For small areas, score and wet-scrape with a spray bottle and wide scraper; protect floors and consider wall insulation behind plaster.
For larger jobs, use a chemical stripper suited to the finish or rent a handheld drywall sander with dust collection.
Always test a patch, wear PPE, and seal vents.
Repair gouges with joint compound, then prime before repainting.
When and How to Sand Walls for a Smooth Surface
After you’ve removed texture and repaired gouges, sanding smooths the surface so paint lays down evenly and hides imperfections. You’ll sand when seams, patches, or leftover texture feel rough and before priming. Light sanding removes high spots; medium grit evens patched areas. Keep dust down with a vacuum or damp cloth.
Consider color psychology when aiming for a sleek finish—smooth walls reflect light differently and affect perceived warmth or coolness.
- Inspect for bumps or ridges.
- Use progressive grits to blend patches.
- Feather edges to avoid visible transitions.
- Clean thoroughly before priming.
Sanding Sponges vs. Sandpaper: When to Use Each
While both sanding sponges and sandpaper remove roughness and blend patches, you’ll choose one over the other based on the surface, shape, and level of control you need. Use sanding sponges on contoured trim, corners, and drywall seams — they flex, grip, and reduce gouging when you’re shaping edges near areas affected by color psychology decisions or careful furniture arrangement.
Choose sandpaper sheets for large, flat walls where uniform abrasion is efficient and easier to track with a sanding block. Match grit to the job: coarse to remove bumps, fine to finish.
Always wipe dust before priming or painting.
How to Fill Nail Holes and Small Dents
Start by locating each nail hole or dent and clearing away any loose paint or debris so filler will adhere properly.
Use a lightweight spackling compound to fill the imperfections. Let it dry, then sand smooth with a fine-grit sponge or sandpaper.
Wipe the dust away and spot-prime before painting for an invisible repair.
Locate And Clear Holes
Before you apply primer or paint, find and clear every small hole and dent so the finished surface looks smooth and professional. Walk the room with good light and a small flashlight to spot imperfections.
Remove loose debris, old nails, or anchors; push drywall paper back into place. Widen tiny holes slightly so filler adheres. Check for plaster cracks that need backing.
Note areas requiring color matching later and mark them lightly—this helps with paint mixing decisions once repairs are dry. Keep a checklist to guarantee no spots are missed.
- Inspect
- Clear debris
- Mark spots
- Recheck
Fill, Sand, Paint
Once you’ve cleared and marked every blemish, you’ll fill nail holes and small dents with a lightweight spackling compound, smooth it flush, and sand it feather‑thin so the patched area disappears under primer and paint.
Apply spackle with a small knife, wiping excess; let dry fully. Sand with fine-grit paper, blending edges until seamless. Wipe dust, prime patched spots to equalize sheen and absorption, then paint.
Match finish and color carefully—color psychology affects mood, while interior design depends on consistent surface and hue. Test a swatch, view under room lighting, and touch up as needed for professional results.
How to Repair Medium Cracks and Seams
Have you found a hairline crack that’s grown wider or a seam where drywall tape is peeling? You’ll want a clean, level surface before painting so color psychology and furniture placement aren’t undermined by visible flaws. Follow these steps:
- Remove loose tape or joint compound, then vacuum dust.
- Apply a paper or fiberglass tape over the seam; press firmly.
- Spread thin coats of joint compound, feathering edges; let dry and sand smooth.
- Prime repaired areas to seal compound and ensure uniform paint absorption.
Test with a small paint patch before full repaint to confirm finish and color match.
How to Fix Large Holes and Damaged Drywall
If a hole’s bigger than a quarter or drywall’s crumbling around it, you’ll need to cut out the damaged area and install a proper patch so the wall’s structure and finish stay sound. You’ll remove loose paper, square the opening, fasten a backing or mesh patch, apply joint compound in layers, sand smooth, and prime before painting. Consider color theory when matching textures and hues so repairs disappear, and plan furniture placement to hide minor imperfections during the process.
| Step | Material | Time |
|---|---|---|
| Cut & clean | Utility knife | 15 min |
| Backing | Wood/mesh | 10 min |
| Compound | Joint compound | 24 hrs drying |
| Sand & prime | Sandpaper/primer | 30 min |
When and How to Replace Damaged Drywall Sections
Small patches work for many repairs, but you’ll need to replace whole drywall sections when damage is extensive, mold has set in, or the panel’s warped and won’t hold fasteners. You’ll do a Drywall replacement when structural integrity’s gone.
Small patches help, but replace entire drywall sections when damage, mold, or warping compromises structural integrity.
First, do Moisture testing to confirm active dampness or hidden leaks.
Next, cut out damaged area to nearest stud, remove insulation if soaked, and dry or replace framing.
Measure and hang new drywall, screw to studs, tape seams, and apply joint compound.
Finish with sanding, prime, and paint once dry. Proper prep prevents repeat failures.
How to Blend Repairs So They’re Invisible
After your patch has dried and been sanded smooth, you’ll want to match the existing texture using the right tool or compound so the repair reads as part of the wall.
When texture’s blended, feather the paint edges outward with thin coats and a light brush or roller to erase any hard lines. Take your time on those feathered strokes and check in different lighting to make sure the fix disappears.
Match Texture Techniques
When you patch a ding or hole, matching the surrounding texture is what makes the repair disappear, so you’ll want to study the existing pattern before you start. Use texture matching techniques and finish blending to keep repairs invisible. Choose the right compound and tools, and practice on scrap drywall first.
Follow these steps:
- Assess pattern (knock, observe light) and photograph for reference.
- Mix joint compound to the correct consistency for stipple, knockdown, or orange-peel.
- Apply and recreate texture with sponge, brush, roller, or trowel.
- Sand lightly after drying, then check for seamless finish blending before priming.
Feathering Paint Edges
Because paint can reveal edges even after a perfect texture match, you’ve got to feather the paint edges so the repair disappears into the surrounding wall. Work wet-on-wet: roll or brush from the repair outward, tapering pressure so paint thins at the perimeter.
Match paint sheen carefully—gloss differences betray repairs even with correct color. Use a small brush or sponge to blur brushstrokes, then lightly back-roll to unify texture.
Consider color theory: slightly warm or cool your touch-up to compensate for aging or lighting. Let coats dry fully between layers and inspect under the room’s light before declaring the job done.
How to Feather Compound Edges for Painting
If you want a smooth, invisible finish, feathering the edges of joint compound is essential — it blends the repair into the surrounding drywall so paint won’t show ridges or shadows. You’ll focus on feathering edges and wall blending by tapering compound thickness outward until it’s nearly paper-thin.
- Apply thin layers, extending each pass beyond the last.
- Hold the knife at a low angle to spread and taper.
- Let each coat dry, then lightly sand high spots with fine grit.
- Wipe dust, inspect in raked light, and repeat tiny fills until seamless.
How to Smooth Skim Coats for a Flat Finish
Before you sand, make sure the skim coat is fully dry, clean of dust, and free of high spots by running your hand across the surface.
Use a sanding block with fine-grit paper to level any imperfections, keeping your strokes light and even to avoid cutting through the skim coat.
Finish with a wipe-down using a tack cloth so the wall is perfectly smooth and ready for a flat paint.
Surface Preparation Steps
Though skim coating can seem fiddly, getting smooth, flat walls comes down to the right prep, the right mix, and steady application. You’ll remove loose paint, fill gouges, and clean dust so compound adheres.
Mix joint compound to creamy consistency; avoid lumps. Apply thin coats with a wide knife, feather edges, and let each layer set. Keep tools clean to prevent drag.
Consider color psychology when choosing finish sheen and plan budget planning for materials and patching supplies.
- Clean and degrease
- Fill holes and cracks
- Apply thin skim coats
- Inspect between coats
Final Sanding Technique
Once your skim coats have set and you’ve inspected for low spots, it’s time to sand for a truly flat finish. Grab a sanding block with 120–220 grit, use long even strokes, and keep the block flush to prevent waves.
Feather edges gently where coats overlap, recheck with raking light, and spot-fill any remaining imperfections. Wear a mask and follow ventilation tips—open windows and use a fan—so dust clears and color matching won’t be affected by airborne particles.
Clean the wall with a damp cloth, let it dry fully, then prime before final paint to guarantee uniform sheen.
How to Remove Wallpaper Before Painting
Want a smooth, paint-ready wall? Start wallpaper removal carefully to avoid damage. Score small sections, apply warm water or remover, and peel paper away.
After paper’s gone, tackle adhesive residue with a sponge and mild detergent or a commercial stripper. Repair any gouges, let dry, then sand lightly.
- Score and moisten sections for easier peeling.
- Peel slowly to minimize drywall damage.
- Clean adhesive residue thoroughly; repeat if needed.
- Patch, sand, and wipe dust before priming.
You’ll want a primer suited for previously covered walls to ensure paint adhesion and even finish.
How to Prep Textured or Popcorn Walls
If your walls have texture or popcorn finish, you’ll need a different prep approach than for smooth or papered surfaces. You’ll inspect for loose texture, dust, or asbestos risk before touching. For safe popcorn removal, get a test kit; if positive, hire a pro. Otherwise, gently wet and scrape, bag debris, then sand lightly. Clean textured walls with a soft brush and vacuum, spot-prime repairs, and use a thick-nap roller for paint. Follow moisture avoidance steps to prevent damage.
| Task | Tool | Tip |
|---|---|---|
| Inspect | Bright light | Look for loose bits |
| Remove | Scraper | Wet first |
| Clean | Vacuum | Use brush attachment |
How to Prep Plaster, Drywall, and Masonry (Differences)
Because plaster, drywall, and masonry take paint differently, you’ll change your prep steps for each surface. You’ll assess porosity, repair, and choose primers that suit texture and absorbency. Match existing color matching and consider paint sheen for durability and appearance.
Because plaster, drywall, and masonry absorb differently, adjust prep, repairs, and primers for texture and sheen.
- Plaster: clean, repair hairline cracks with lime or joint compound, sand lightly, use alkyd or high-adhesion primer.
- Drywall: tape seams, apply joint compound, sand smooth, use drywall primer-sealer to even absorbency.
- Masonry: wire-brush, remove loose mortar, fill gaps with mortar patch, use masonry primer/latex masonry paint.
- Test small area first.
How to Prep Exterior Walls Differently From Interior
When you prep exterior walls, you’ll factor in weather, surface deterioration, and tougher cleaning than for interiors. You’ll pressure-wash to remove mildew, chalk, and loose paint, then repair cracks and replace rotten trim.
Use exterior-grade fillers and caulk, sand rough spots, and allow full drying time after rain. Choose primers and paints rated for UV and moisture resistance.
Think about color psychology for curb appeal and heat reflection when selecting hues. Mask and cover landscaping, and plan for ladders or scaffolding.
Decorative techniques like faux finishes need tougher topcoats and proper surface bonding to last outdoors.
How to Spot-Prime vs. Fully Prime Walls
Although spot-priming saves time and paint on small repairs, you should choose it only when issues are localized and the surface has uniform porosity and color. Otherwise, a full prime will give more consistent adhesion and hide.
Spot-priming saves time and paint for localized, uniform surfaces; otherwise a full prime ensures consistent adhesion and hide
You’ll decide based on visible damage, previous finish, and desired outcome. Consider color psychology when changing tones—full priming prevents unexpected undertones.
Think about wall texture: rough or patched surfaces often need full prime for even sheen.
Quick checklist to decide:
- Small nail holes or scratches — spot-prime.
- Large stains or mismatched color — full prime.
- Varied porosity — full prime.
- Uniform surface and limited fixes — spot-prime.
How to Prime Different Wall Conditions
Now that you’ve decided between spot-priming and full priming, you’ll match primer type and technique to specific wall conditions so the finish looks and performs right. For new drywall use drywall primer; for glossy surfaces sand then use bonding primer; for patched areas spot-prime with an acrylic primer. Use color matching when switching primer color to avoid extra coats. When tinting primer, do paint mixing carefully to keep consistency. Refer to the quick guide below to choose approach and tools.
| Condition | Primer Type | Tip |
|---|---|---|
| New drywall | Drywall primer | Roll evenly |
| Glossy finish | Bonding primer | Sand first |
| Repairs/patches | Acrylic spot-prime | Feather edges |
| Previously painted | Latex primer | Test adhesion |
Choose Primer for Stains and Tannins
If you’ve got stains or tannin-rich wood, pick a primer that specifically blocks seepage so discoloration won’t come back through the finish.
You’ll want a stain-blocking, oil-based or shellac-based primer to seal tannin bleed effectively.
Apply it according to the label before topcoating for reliable results.
Block Stain Seeping
How do you stop dark mineral stains from seeping through fresh paint on concrete block? You’ll treat block stain from water damage before priming.
Clean the surface with a masonry cleaner, rinse, and let it dry fully.
Use a stain-blocking masonry primer designed for mineral salts; it locks residues and prevents reappearance.
Apply two coats where stains were worst.
Test a small area, then topcoat with a quality exterior or masonry paint.
- Scrub and neutralize
- Dry thoroughly
- Prime with masonry stain blocker
- Apply two coats and test first
Seal Tannin Bleed
Why’s tannin bleed so stubborn? You’ll notice brownish streaks from wood or knotty areas that reappear through paint if you don’t act.
For reliable surface sealing, choose a stain-blocking primer labeled for tannin bleed or oil-based shellac primer. Clean and dry the area, sand glossy spots, then apply primer per instructions—usually one coat locks stains; a second coat helps on heavy tannin bleed.
Let primer cure fully before topcoating. Test a small patch first.
Proper primer selection and application prevents discoloration, saves repainting time, and guarantees your finish stays true without stain bleed returning.
Choose Primer for New Drywall
Which primer you pick for new drywall makes a big difference in coverage, adhesion, and the final look, so choose one formulated for raw drywall or joint compound. You’ll want a primer that seals paper, evens porosity, and boosts paint durability while letting you control color psychology later with your topcoat choices.
Pick a primer made for raw drywall—seal paper, even porosity, and ensure strong adhesion for your topcoat choices.
- Use a high-build drywall primer for uniform sheen.
- Pick a low-VOC option for indoor air quality.
- Get a stain-blocking primer if there are spots.
- Choose tinted primer when shifting from dark to light.
Apply per label, sand light if needed, then topcoat.
Choose Primer for Glossy or Previously Painted Walls
Check the sheen of the existing finish—high-gloss surfaces need more sanding or a deglosser before priming.
Pick a primer formulated for glossy or previously painted walls, such as a bonding or adhesion primer, to guarantee the topcoat sticks.
If you’re unsure, test a small area to confirm the primer grips and hides the old sheen.
Surface Gloss Assessment
Wondering if your walls need special prep before priming? You’ll assess gloss to pick the right approach for glossy or previously painted walls. Check sheen and adhesion, then decide sanding or deglossing. Consider color psychology when planning finish and how wall texture affects appearance.
- Clean surface: remove dust, grease, and loose paint.
- Light test: rub a fingernail—shine means higher gloss.
- Sand or etch: dull high-gloss areas to promote primer bond.
- Patch and smooth: fill chips so texture is consistent before priming.
This prep guarantees primer adheres and final color reads as intended.
Primer Type Selection
How should you pick a primer for glossy or previously painted walls? You’ll want a high-adhesion primer for glossy finishes and a stain-blocking or bonding primer for tricky surfaces. Consider paint sheen and whether you need color matching to cover dark tones. Prep by sanding glossy areas; clean, let dry, then prime.
| Surface Type | Recommended Primer |
|---|---|
| High-gloss | Bonding primer |
| Semi-gloss | High-adhesion |
| Flat paint | All-purpose |
| Stained walls | Stain-blocking |
| Dark color | Tint for color matching |
How Many Coats of Primer Do You Need?
Curious about how many primer coats you’ll need? You usually need one coat for fresh drywall or similar surfaces.
Dark-to-light color contrast might require a second coat to fully block the old color.
Glossy or repaired spots absorb differently; if coverage looks uneven, add another coat.
Don’t confuse primer count with paint sheen choices—those are separate.
- Fresh drywall: 1 coat
- Dark color to light: 2 coats
- Stains or repairs: spot-prime, then 1–2 coats
- Uneven absorption: add another coat
Check coverage after drying; you’ll save time by fixing spots early.
Which Primer Sheen to Pick (and Pricing Tradeoffs)
Once you’ve confirmed primer coverage, pick a sheen that matches your paint plan and budget—primers come flat, eggshell, satin, and semi-gloss, and each affects appearance, durability, and price.
You’ll choose flat for minimal texture, eggshell or satin for living areas, and semi-gloss where scrubbability matters. Higher sheen usually costs more but can reduce topcoat needs in high-traffic zones.
Consider color matching needs: a tinted primer with the right sheen improves final color and coverage.
Match brush selection to sheen—stiffer brushes for semi-gloss, softer for flat—to get smooth application and avoid lap marks.
How to Sand and Re-Clean After Priming
After the primer’s fully dry, you’ll want to lightly sand the surface with fine-grit paper to knock down any imperfections and feather the edges.
Don’t press hard—just smooth enough to create a uniform base for your topcoat.
Finally, remove all sanding dust with a vacuum and a tack cloth so the finish will adhere cleanly.
Lightly Sand Primer
Lightly sanding primer smooths imperfections and gives your topcoat something to bite into, so grab a fine-grit sanding block or 220–320 grit sandpaper and work the surface with gentle, even strokes. You’ll refine edges, remove nibs, and help with color matching by ensuring an even base for your finish.
Consider paint sheen — different sheens show flaws differently, so sand accordingly. Then re-clean the wall before painting.
- Sand lightly in long, overlapping strokes.
- Keep pressure even; don’t gouge.
- Check for uniform texture and repaired spots.
- Prep for final cleaning and painting.
Remove Sanding Dust
Because sanding leaves a fine film that will ruin your finish if left behind, remove all dust before you paint by vacuuming, wiping, and tack-clothing the surface.
After sanding primer, run a vacuum with a brush attachment over the wall, then wipe with a damp microfiber cloth to lift remaining grit.
Check corners, trim, and any crevices where wall texture traps particles.
Use a tack cloth for a final pass to capture stubborn dust.
Let the wall dry completely so you don’t trap moisture under paint.
Clean surfaces guarantee consistent paint sheen and prevent texture or imperfections from showing.
How to Mask and Protect Fixtures During Painting
When you’re ready to paint, masking and protecting fixtures keeps your work neat and prevents costly cleanup later. Cover doorknobs, outlets, light switches, and hardware with low-tack painter’s tape, plastic sheeting, or paper to block splatters and drips. Use fixture masking and fixture protection to avoid paint on metal and plastic.
Follow this quick plan:
Follow this quick plan: protect fixtures, tape seams, cover surfaces, and inspect thoroughly before painting.
- Turn off power, remove plates, and tape edges.
- Wrap light fixtures and vents with plastic secured by tape.
- Use drop cloths and tape baseboards and trim.
- Inspect taped areas, press seams, and repair gaps before painting.
Remove coverings only after paint cures to prevent smudges.
How to Set Up an Efficient Painting Workflow (Tools & Staging)
Once fixtures are masked and protected, set up a workflow that keeps tools, materials, and staging organized so you can move quickly and avoid interruptions. Start by arranging drop cloths, ladders, and lighting to create clear work zones.
Use trays and a rolling cart to keep paint, rags, and solvents handy. Label cans for color coordination and group brushes by purpose—cutting-in, trim, and rollers—so you grab the right tool without thinking.
Choose brush selection based on surface and paint type. Keep a waste bin nearby and a wet-edge plan to maintain consistent coverage and minimize touch-ups.
How to Prep for Accent Walls and Feature Areas
How do you get an accent wall to look intentional, not accidental? You plan placement, prep surfaces, and define edges before painting. Use these steps to nail accent wall techniques and tidy feature area accents:
- Choose the wall with natural focus and check for damage or stains.
- Clean, sand, and fill holes; prime if needed for even coverage.
- Tape crisp borders with quality painter’s tape; protect floors and adjacent walls.
- Test color swatches in different light, then apply thin, even coats.
Finish by removing tape carefully and touching up edges for a professional, deliberate result.
Estimate Time and Materials for Prep
Before you start taping or sanding, map out the job room-by-room so you can estimate time and materials accurately. Measure wall square footage, note trim length, and list repairs.
Factor drying times, number of coats, and extra time for priming or textured surfaces. Count tape rolls, sandpaper grits, putty, primer, and paint gallons using coverage rates.
Consider furniture repositioning when scheduling—moving items adds time and helpers. If changing hues, budget time to test swatches and apply color theory to pick undertones.
Tally tools: brushes, rollers, trays, ladders. Add 10–15% contingency for waste or unexpected fixes.
Common Prep Mistakes and How to Avoid Them
Estimating time and materials gives you a clear roadmap, but even the best plans can be undone by common prep mistakes—skipping surface cleaning, using the wrong primer, or rushing repairs are frequent offenders. You’ll avoid problems if you follow a checklist and stay methodical.
Key errors and fixes:
- Not cleaning surfaces — wash, degrease, and dry before priming.
- Wrong primer or skipping it — choose one that suits substrate and desired paint sheen.
- Poor patching — sand smooth, feather edges, and use proper filler.
- Ignoring color matching — test swatches under real light before rolling.
How Proper Prep Saves Money and Extends Paint Life
When you take time to clean, repair, and prime surfaces properly, you’ll cut long-term costs by preventing premature peeling, staining, and frequent touch-ups. You’ll save on materials and labor because a stable base needs fewer topcoats and resists damage longer.
Proper prep helps coverage, so trending choices from paint color trends look consistent instead of patchy, avoiding costly repainting. It also protects your investment when you pick hues informed by color psychology—selecting timeless tones reduces how often you change colors.
Spend time on prep once, and you’ll extend finish life, reduce maintenance, and lower total project expense.
Frequently Asked Questions
Can I Paint Over Wallpaper Without Removing It if It’s Well-Adhered?
Yes — you can paint over well-adhered wallpaper, but you’ll risk future Wallpaper removal issues. You should do thorough Surface cleaning, prime with a strong sealer, and use quality paint to minimize bubbling and peeling later.
How Do I Prep Walls in a Rental to Avoid Losing My Security Deposit?
Smooth, small scuffs swept; seal, sand, scrub. You’ll patch holes with proper wall patching, apply painter’s tape for tidy tape application, match original paint, document condition, and get landlord approval to avoid deposit deductions.
Are There Low-Voc Primers That Also Block Stains Effectively?
Yes — you can find low VOC primers that also block stains. You’ll want to choose low VOC primers labeled as stain blocking primers (oil-modified or advanced water-based), and follow manufacturer instructions for best results.
What’s the Best Way to Prep Walls in High-Humidity Bathrooms Long-Term?
Seal leaks, improve ventilation, install exhaust fans; clean surfaces, repair drywall, use moisture mitigation primers. You’ll reduce humidity, prevent mold, choose mold-resistant paints, and maintain airflow so walls stay dry, durable, and mold-free long-term.
Can I Use a HEPA Vacuum During Sanding for Lead-Safe Cleanup?
Yes — you should use a HEPA vacuuming unit during sanding; it captures lead dust and helps achieve Lead safe cleanup when paired with wet-wiping and disposable containment, reducing airborne hazards and improving overall jobsite safety.
Conclusion
You’ve learned the steps to get walls ready for paint, so don’t skip prep — it’s the backbone of a lasting finish. Take time to clean, patch, sand, and prime; these small actions act like insurance for your paint job, saving time and money down the road. Tackle moisture and repairs first, gather the right tools, and follow a checklist. With solid prep, your paint will look better and last longer.