How to Prepare Old Walls for Painting the Right Way
Start by evaluating the wall type—drywall, plaster or lath—and check for peeling, cracks, moisture or mold. Remove loose paint, repair holes and hairline cracks, and replace badly damaged sections. Clean grease, smoke or mildew stains and let surfaces dry. Prime with a stain-blocking or appropriate acrylic primer, match texture where needed, then pick a sheen for the room. Do these steps and you’ll avoid rework—and keep going to learn specific repair and priming tips.
Quick Prep Checklist: Assess, Repair, Clean, Prime
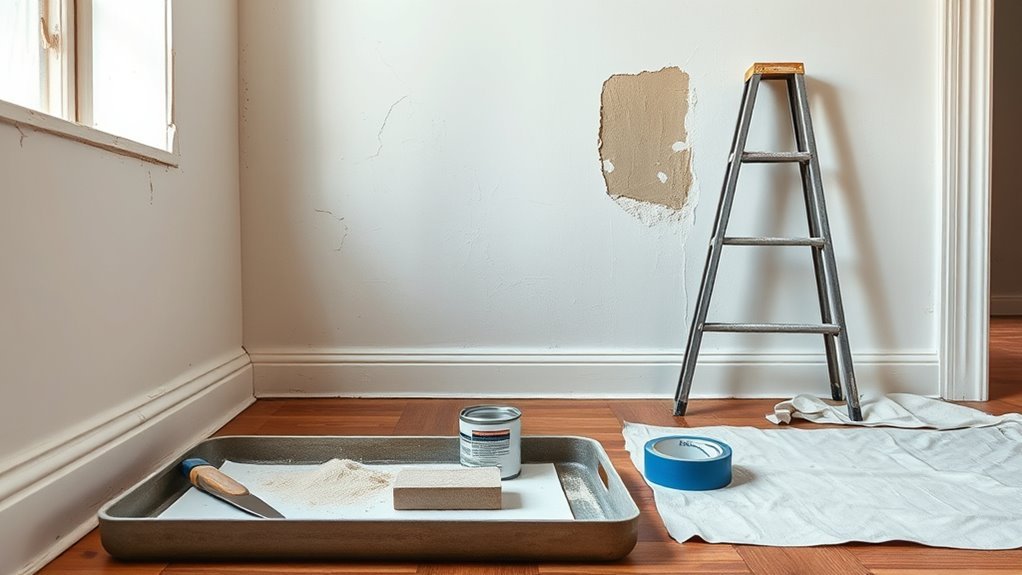
Before you open a can of paint, take a few minutes to assess, repair, clean, and prime the wall so your finish lasts. You’ll scan for cracks, loose plaster, mold, and old finishes that need stripping; note any historical wall finishes that require gentler treatment.
Patch and sand imperfections, remove dust and grease, and address moisture sources before priming. Choose a primer suited to the substrate and to your chosen palette—remember color psychology when selecting undertones so the topcoat reads true.
Work methodically, use appropriate tools, and don’t skip curing times; good prep makes the rest straightforward.
Why Proper Wall Prep Prevents Peeling and Rework
Because paint only bonds to a clean, stable surface, prepping your walls stops common causes of peeling and saves you from costly rework. You remove loose old finish, dirt, grease, and chalky residue so the new wall paint adheres evenly.
Surface prep also fixes moisture stains, flaking edges, and uneven spots that create weak bonds. By sanding, filling cracks, and priming appropriately, you create a uniform substrate that resists lifting and blistering.
That reliability means fewer touch-ups, longer-lasting results, and confidence that your work won’t peel away after you finish. Proper prep is prevention, not an optional extra.
Identify the Wall Material: Drywall, Plaster, or Lath
When you start prepping old walls, the first step is figuring out what material you’re dealing with—drywall, plaster, or lath—since each requires different repair and priming methods. You’ll inspect seams, nail patterns, and thickness: drywall is smooth with joint tape; plaster is harder, often with hairline cracks; lath shows wood strips or metal mesh when exposed.
Match products to the wall surface—lightweight joint compound for drywall, cementitious patch for plaster, and backing repairs for lath. Confirm material compatibility between filler, primer, and paint to avoid adhesion problems.
Label zones so you apply correct techniques.
Spot Paint Failures: Peeling, Flaking, Blistering
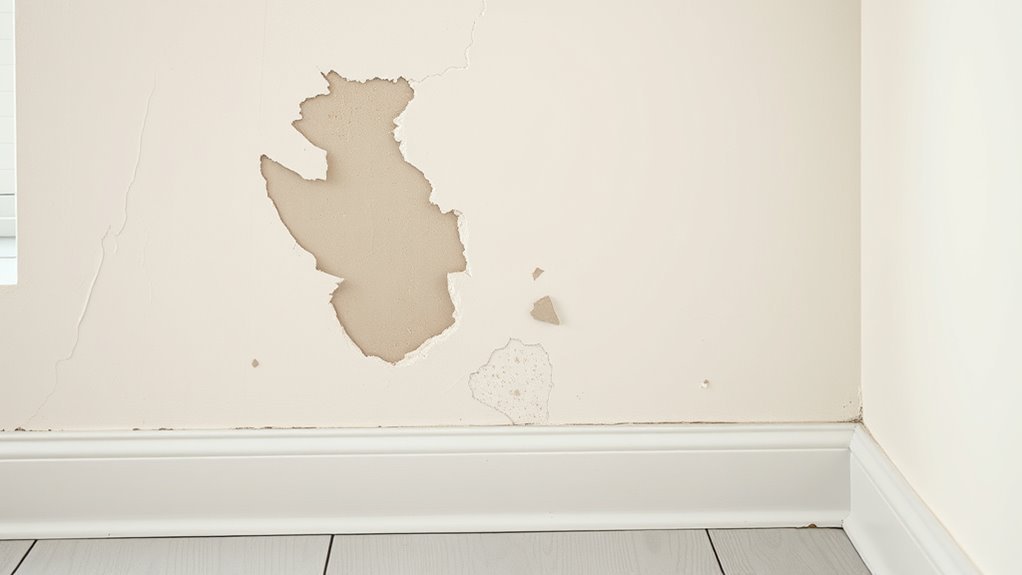
When you spot peeling, flaking, or blistering paint, first figure out what’s causing it—moisture, poor adhesion, or old incompatible coatings.
Once you know the cause, remove loose paint, sand edges, and address the underlying issue (fix leaks or prime with the right primer).
Only after those repairs should you repaint to make sure the new finish lasts.
Identify Failure Causes
Before you start scraping and repainting, pinpoint why the paint failed—peeling, flaking, and blistering each have different triggers and fixes. Check for moisture, poor adhesion, incompatible primers, or layers tied to historical wall styles. Consider how color psychology led past choices that hid problems. Test adhesion, inspect for rising damp, and note past coatings.
| Failure Type | Likely Cause | Quick Check |
|---|---|---|
| Peeling | Poor adhesion/old oil over latex | Scratch test |
| Flaking | Multiple brittle layers | Tap for flakes |
| Blistering | Trapped moisture/heat | Probe for softness |
Document causes before repairs.
Fix Surface Properly
If you’ve identified peeling, flaking, or blistering, tackle each spot with the method that matches its cause: remove loose material, dry and neutralize moisture sources, and prepare a sound feathered edge for new paint. You’ll strip loosened paint, sand to firm edges, and treat mold or efflorescence so new coats adhere.
Consider how color psychology affects patch visibility and match sheen to surrounding historical wall textures.
Follow this checklist before repainting:
- Scrape and vacuum loose fragments.
- Apply fungicide or salt neutralizer where needed.
- Sand feathered edges and fill gaps.
- Prime with a compatible bonding primer.
Check Walls for Moisture, Stains, and Mold
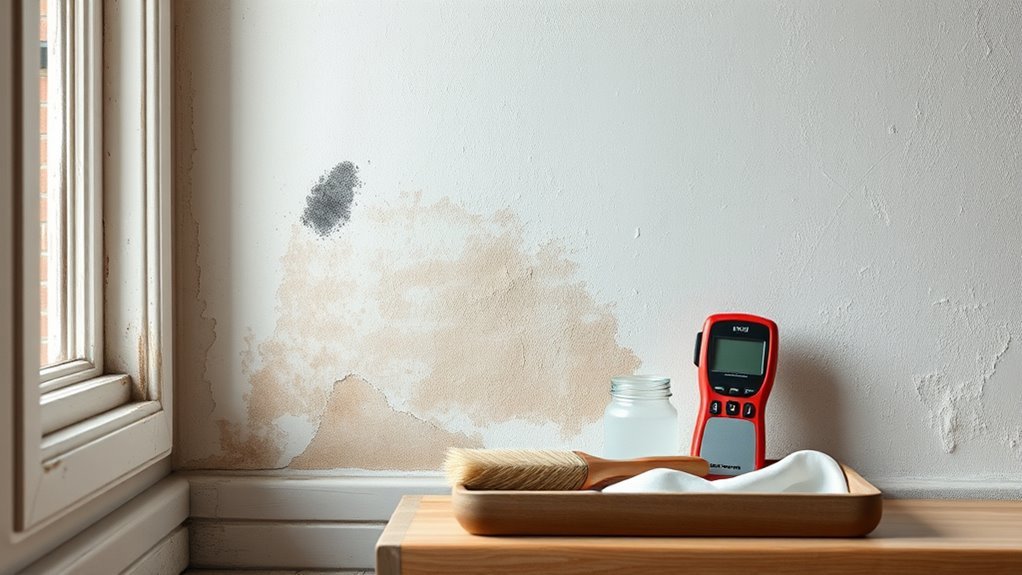
Wondering whether your walls are truly ready to paint? Check for damp spots, peeling, or discoloration; moisture invites mold and ruins finish. Use a moisture meter or press your hand—cool, damp areas mean a problem.
Address leaks, improve ventilation, and let walls dry fully before priming. For stains or mold, clean with a mildew cleaner or diluted bleach, rinse, and dry; stubborn areas may need specialized treatments.
If you removed wallpaper, make certain adhesive is gone and surfaces are sealed so paint color matching stays true. Prime stained or repaired zones to prevent bleed-through and ensure an even topcoat.
Test for Lead Paint: DIY Kits vs. Professional Testing
After you’ve fixed moisture issues and cleaned stains, test your walls for lead paint so you know what safety steps to take next. You’ll choose between quick DIY kits and thorough professional lead testing.
DIY kits are affordable and fast but can miss low levels. Pros use certified swabs, lab analysis, or XRF for accuracy. Consider age of home, occupancy, and budget when deciding.
- DIY kits: instant results, low cost
- Professional testing: precise, more expensive
If results are positive, follow containment protocols. Keep records of tests for future work or resale.
Essential Tools and PPE for Prepping Old Walls
Before you start scraping or sanding, make sure you’ve got the right personal protective equipment—respirator, gloves, eye protection, and a disposable coverall if lead is a concern.
Gather essential prep tools like scrapers, sandpaper or a sander with dust collection, putty knives, a wire brush, and a good vacuum.
With the proper PPE and tools ready, you’ll work safer and more efficiently on old walls.
Personal Protective Equipment
When you’re prepping old walls, proper personal protective equipment (PPE) keeps you safe from dust, lead, mold, and chemical exposure. At minimum, that means a respirator rated for particulates (and lead if present), chemical-resistant gloves, eye protection, and disposable coveralls.
Use safety gear and protective clothing every time—don’t skip PPE for quick jobs. Choose fit-tested respirators and durable gloves. Protect bystanders and ventilate the area.
- NIOSH-approved respirator (P100 or appropriate)
- Chemical-resistant gloves (nitrile or neoprene)
- Impact-rated safety goggles
- Disposable coveralls with hood and boot covers
Inspect, replace, and dispose of contaminated PPE properly.
Essential Prep Tools
Although you might be enthusiastic to start scraping and sanding, gather a compact kit of essential prep tools first so you work safely and efficiently. Collect a sturdy putty knife, multi-tool scraper, sanding block with varying grits, hand sander, and wire brush for loose paint.
Keep painter’s tape, drop cloths, and a reliable vacuum nearby to control dust. Use a moisture meter and patching compounds for repairs.
Wear gloves, goggles, respirator — PPE matters. Finally, bring paint chips or swatches to test color psychology and follow current paint color trends when choosing finishes for each room.
Clear the Room and Protect Floors and Fixtures
Ready to start? Clear the room so you can move freely and judge wall color under true lighting effects. Remove furniture or center it and cover with drop cloths. Tape off trim, sockets, and fixtures, and protect floors with layered paper or plastic sheeting. Keep walkways clear and roll up excess covering as you go.
- Move small items to another room or sealed boxes.
- Use low-tack painter’s tape on baseboards and switches.
- Lay overlapping floor protection and weight edges with scrap wood.
- Cover light fixtures with plastic bags secured gently.
This prevents spills, guarantees accurate color perception, and speeds cleanup.
Remove Loose Paint and Flaking Areas Safely
Curious where to start? You’ll begin by inspecting the surface for loose paint, bubbling, and flaking. Work in small sections, scoring edges with a utility knife, then use a scraper or stiff brush to remove insecure material. Wear a mask, goggles, and gloves; contain debris with drop cloths.
If you suspect lead, stop and test before proceeding. Sand feathered edges smooth for a clean changeover. Wipe away dust with a damp cloth and allow to dry.
Addressing failing paint ensures your new color psychology choices and wall decoration plans adhere to a stable, long-lasting surface.
Degloss Glossy Paint So Primer Will Stick
If your old paint has a glossy finish, you’ll need to degloss it so primer can adhere properly.
You can sand the surface or use a chemical deglosser, depending on the size of the job and the finish.
Whichever method you choose, finish by thoroughly cleaning and rinsing the wall so no residue interferes with priming.
Sand Glossy Surfaces
Want your new primer to actually stick? You’ll sand glossy surfaces to improve paint adhesion by creating a slightly rough texture. Use fine-grit sandpaper and work evenly until shine dulls.
Clean dust thoroughly before priming.
- Choose 220–320 grit for minimal removal
- Sand by hand or with a sanding block for control
- Wipe with a damp cloth, then dry completely
- Check for glossy spots and repeat if needed
Be gentle around edges and trim to avoid gouges. Proper sanding saves time: primer bonds better to a keyed surface, reducing peeling and ensuring a longer-lasting finish.
Use Chemical Deglossers
When sanding isn’t practical or you’re dealing with multiple small glossy areas, reach for a chemical deglosser to dull the finish so primer will grab. These solvent-based liquids break down the paint’s hard surface without removing material, letting you wipe the sheen away quickly before priming.
You’ll apply with a rag, work in manageable sections, and follow product directions and ventilation warnings. Deglossers perform a light form of chemical stripping that alters gloss rather than removing layers.
Use proper PPE, avoid pooling, and allow adequate dry time so primer bonds. Don’t skip a quick surface check before priming.
Clean And Rinse
Why start with a thorough clean? You need to remove dirt, grease, and loose gloss so primer grips and your new wall color looks true. Deglossing plus rinsing evens the paint sheen and prevents peeling.
Follow these steps before priming:
- Wash walls with a mild detergent solution, scrubbing stains and oily spots.
- Use a commercial deglosser where paint is glossy, following instructions.
- Rinse thoroughly with clean water to remove residue and detergent.
- Allow walls to dry completely—24 hours if possible—before sanding lightly and applying primer.
Clean and rinse first, and your paint job will last and look professional.
Sand Surfaces for Adhesion Without Overdoing It
Before you grab the sandpaper, remember that sanding aims to improve paint adhesion, not to remove every imperfection. Focus on dulling glossy finishes, knocking down loose paint, and feathering edges around chips.
You’ll assess wall texture and paint sheen to decide grit: start with 120–150 for glossy spots, 180–220 for light scuffing. Sand gently in long strokes, follow contours, and avoid creating gouges.
Use a sanding block or pole sander for even pressure. Wipe dust with a damp cloth or vacuum before priming.
If texture is delicate, test a small area first to prevent damage.
Repair Small Holes and Nail Pops in Drywall
Although small holes and nail pops might seem minor, you should fix them now so your primer and paint lay smooth and last longer. Patch holes with joint compound, using a backing for larger gaps, and sand once dry. Sink protruding nails and replace damaged drywall where needed.
After patching, prime patched spots to avoid sheen differences when you start wallpaper removal or finalize paint color selection.
- Remove loose debris and dust
- Apply compound in thin layers
- Sand lightly between coats
- Prime patches before topcoat
Work efficiently so repaired areas blend seamlessly with the rest of the wall.
Fix Hairline Cracks and Plaster Shrinkage
If small hairline cracks or fine shrinkage appear in older plaster, you can fix them quickly to prevent moisture intrusion and keep paint from crazing. Clean dust and any loose plaster, and remove old wallpaper residues during wallpaper removal so fillers adhere.
Use a flexible acrylic patching compound, force it into cracks, smooth flush, and let it dry fully. Lightly sand and wipe clean before priming with a stain-blocking primer.
Match texture subtly to surrounding plaster. Choose paint color selection after repairs so you can see how light and texture affect the finish, then apply your topcoat.
Replaster or Skimcoat Badly Damaged Areas
If a section of plaster is crumbling or has large voids, you’ll first assess how deep and widespread the damage is to decide between spot repairs or full replastering.
Pick a compatible plaster or skimcoat compound and the right setting time for your wall material so the patch bonds and cures properly.
Prep the area by removing loose material, dusting and dampening the surface, then apply the skimcoat in thin, even layers for a smooth finish.
Assess Damage Extent
When you’re evaluating old plaster for replastering or skimcoating, focus on identifying areas that won’t hold paint or patching compounds—crumbling edges, deep cracks, and sections that flex when pressed are clear signs of underlying failure.
You’ll map damage, prioritize repairs, and note locations that affect appearance or structure. Consider how repairs will blend with creative color palettes or preserve historical wall styles when planning scope.
- Tap walls to find hollow spots
- Measure crack length and width
- Mark areas with moisture or mold
- Photograph patterns for reference
Decide whether localized skimcoating or full replastering is necessary.
Choose Proper Materials
Having mapped and photographed the worst areas, you’ll choose materials that match the damage and your finish goals: use bonding plaster or a full replaster mix where sections are loose, deep-cracked, or structurally compromised.
Reserve thinset or joint-compound-based skimcoats for surfaces that are sound but rough or uneven. Pick plaster blends rated for interior use and compatible with lath or masonry substrate.
Factor in finish: a smooth replaster suits high-sheen paints, while textured skimcoats pair with matte. Consider color psychology when selecting final hues and choose eco-friendly paints to minimize VOCs after repair and before topcoat.
Prep And Apply Skimcoat
Because the surface needs a uniform base, you’ll start by cleaning and priming the damaged areas before mixing your skimcoat or replaster. Remove loose plaster, dust, and contaminants so the new compound bonds properly.
Mix to manufacturer consistency and apply thin, even layers, feathering edges to minimize texture variation. After drying, sand lightly and check for low spots.
- Fill deep hollows first, then skim entire area
- Use a broad knife and maintain steady pressure
- Match finish texture to surrounding wall for seamless repair
- Prime before painting to aid color matching and adhesion
Repair Water‑Damaged Plaster and Stained Patches
If your plaster shows water damage or dark stains, you’ll need to address both structural issues and discoloration before painting. Small soft spots can hide active leaks or mold that’ll ruin a fresh finish.
Cut away loose plaster, probe soft areas, and open cavities to find the source. Replace or sister damaged lath or drywall, dry thoroughly, and apply patching compound for a smooth surface.
Cut away loose plaster, inspect soft spots, repair or replace damaged lath or drywall, dry thoroughly, and patch smooth.
Treat visible water stains with a stain-blocking primer once the area’s stable. Consider professional mold treatment if contamination is extensive.
Finish by sanding, cleaning dust, and rechecking firmness before priming and painting.
Treat Mold and Mildew Before Priming
Once you’ve stabilized and repaired water‑damaged areas, address any mold or mildew before priming to prevent spores from ruining new paint. You’ll want to remove active growth, neutralize spores, and choose treatments compatible with substrate and historical preservation goals. Follow safe steps and consider eco friendly options when possible.
- Test a small area for colorfastness and substrate reaction.
- Use a detergent solution or a vinegar/sodium bicarbonate mix for light growth.
- Apply a fungicidal wash or hydrogen peroxide for persistent mold, then rinse.
- Allow full drying and re‑inspect before applying a mold‑blocking primer.
Clean Grease, Smoke, and Grime for Even Coverage
Before you prime, scrub away surface grease so paint will stick evenly and won’t peel later. Use a degreasing cleaner or trisodium phosphate substitute and rinse thoroughly.
If walls smell of smoke, deodorize with a specialized cleaner or an odor-sealing primer after cleaning.
Remove Surface Grease
How do you get old walls to hold paint evenly? Remove surface grease by degreasing before priming. You’ll need proper cleaners and a system so paint, cleaning brushes, and finish cooperate. Follow these steps:
- Wipe with a mild detergent solution, rinse, then dry.
- Use trisodium phosphate for stubborn spots; ventilate the room.
- Test a small area to ensure no residue remains before priming.
- Sand glossy patches lightly so primer bonds.
After cleaning, let walls cure fully.
Choosing colors comes last; greasy residues can alter sheen and adhesion, so don’t skip this prep.
Deodorize Smoke Residue
Why does smoke leave a lingering smell and sticky film on walls, and how can you remove it so paint will stick and finish evenly? You’ll neutralize odor and dissolve residue using trisodium phosphate alternatives, odor absorbers, and repeated rinsing. Test small areas, protect wall insulation, and consider methods compatible with historical preservation. After cleaning, let surfaces dry thoroughly, then prime with a stain-blocking sealer.
| Step | Purpose |
|---|---|
| Clean with TSP substitute | Removes tarry film |
| Odor neutralizer | Eliminates smoke smell |
| Stain-blocking primer | Ensures even paint adhesion |
Work methodically to avoid damage and trapped odors.
Choose the Right Patching Compound for the Job
Which patching compound suits your wall’s damage and the paint finish you want? You’ll choose based on hole size, texture, and how the repair will accept finish coats. Remember color coordination and paint color theory when matching topcoats over patched areas.
- Use lightweight spackle for hairline cracks and small nail holes.
- Choose vinyl or premixed patch for medium dents that need sanding.
- Opt for setting-type joint compound for deep holes or reshaping profiles.
- Pick exterior-grade or waterproof patch for damp-prone surfaces.
Match sheen and primer choices so the patched area takes paint like the surrounding wall.
Feather and Blend Repairs So Seams Disappear
You’ll want to feather the patch edges smoothly so they blend into the surrounding wall without a ridge.
Match the joint texture by using the same tool and motion the original finish had, working outward from the repair.
Once the texture and edges align, seams will disappear under primer and paint.
Feather Edges Smoothly
Want the repair to vanish once paint goes on? You’ll feather edges so gradual blending disappears and paint looks seamless. After any wallpaper removal and settling on paint color selection, sand the patch edge gently, apply thin coats of joint compound, and scrape levels with a wide blade. Work outward to thin the material.
- Sand between coats with fine grit for a gradual slope
- Apply feathering strokes with a wide drywall knife
- Keep compound thin near original surface to avoid ridges
- Prime patched areas to equalize sheen before painting
Take your time; smooth edges make the repair invisible.
Blend Joint Texture
After feathering the patch smooth, match the wall’s texture so the repair vanishes under paint. You’ll assess surrounding texture—knockdown, orange peel, or stipple—then replicate it using the right tools: brush, sponge, roller, or spray.
For precise texture blending, practice on scrap drywall until patterns align. Apply thin layers, build gradually, and let each dry before refining.
For seams, blend joint repair compound out beyond the patch to blur edges; feather with a wide knife and lightly texture to match. Sand minimally; paint a small test area to confirm the blend before completing the full repaint.
Sanding Tips for a Smooth, Paint‑Ready Surface
Because old walls often hide uneven patches and loose paint, sanding is the step that makes your finish look professional. You’ll remove flaking, feather edges, and smooth repairs so paint adheres evenly. Use progressive grits, keep dust down, and test a small area if historical wall finishes might react.
Remember color psychology only after surfaces are stable — sanding won’t change hue but affects final sheen.
- Start with 80–100 grit for rough spots
- Finish with 120–180 grit for skim coats
- Vacuum and tack cloth between passes
- Wear a mask and use a dust-collection sander
Select Primers by Surface and Problem
When you’re prepping old walls, choosing the right primer matters as much as your sanding—pick primers based on the surface (drywall, plaster, masonry, or wood) and the specific problem you’re solving (stains, adhesion, or efflorescence).
For drywall and plaster, use a high-quality acrylic primer for even surface sealing and paint grip.
On wood, choose an oil-based or bonding primer to block knots and improve adhesion.
Masonry needs a breathable masonry primer that resists moisture and efflorescence.
For adhesion problems, pick a bonding primer.
Match primer selection to material and issue so paint bonds and lasts.
How to Prime Stains, Tannin Bleed, and Water Marks
Once you’ve chosen the right primer for the surface, address visible stains, tannin bleed, and water marks before painting so they don’t reappear through the topcoat. You’ll clean surfaces, sand glossy spots, and test hidden areas behind vintage wallpaper or textured ceilings for bleed.
Use a stain-blocking primer on affected zones and let it fully cure. Follow with a light sand and inspect for any show-through.
- Clean with mild detergent and rinse
- Sand glossy or bubbled paint gently
- Apply primer in thin, even coats
- Reinspect after curing; repeat if needed
Block Stains and Odors With Shellac or Stain Primer
If stains or lingering odors could ruin your finish, reach for a shellac-based or stain-blocking primer to stop them at the surface. You’ll seal nicotine, water marks, pet odors, and tannin bleed so topcoats adhere and colors stay true.
Apply in thin, even coats, ventilate well, and follow drying times. Test a small area before painting to confirm odor elimination and color coordination with your chosen topcoat.
Once dry, plan furniture placement to avoid scuffs while the room cures. Proper sealing saves time and keeps your new paint looking fresh and smelling clean.
When to Use Oil‑Based vs. Latex Primers
When choosing a primer, you’ll weigh oil-based primers’ superior stain-blocking and adhesion on tough surfaces against latex primers’ faster drying, easier cleanup, and lower odor.
Use oil when sealing severe stains, tannin bleed, or glossy surfaces that need strong adhesion.
Pick latex for drywall, previously painted walls in good condition, or when you need quick turnaround and easier cleanup.
Oil Primer Advantages
Because oil-based primers bond to slick, stained, or previously painted surfaces better than many latex primers, you’ll reach a more durable foundation for paint in challenging situations. You’ll choose oil primer when you need superior stain blocking, adhesion on glossy finishes, or compatibility with certain topcoats.
It’s also useful in historical preservation projects where paint layers and color matching require stability. Consider these advantages:
- Excellent adhesion to oil, varnish, and glossy surfaces
- Strong stain and tannin blocking for water or smoke damage
- Smooth sealer that aids precise color matching
- Durable base for high-traffic areas
Latex Primer Benefits
Although oil primers suit tough, stained, or glossy surfaces, latex primers give you faster drying, easier cleanup, and better flexibility on drywall and previously painted walls, making them the go-to choice for most interior jobs.
You’ll choose a latex primer when you want quick recoats, fewer fumes, and simple soap-and-water cleanup. It helps bridge hairline cracks and improves wall adhesion on chalky or repaired areas.
Use latex over properly sanded and sealed surfaces; avoid it on severe stains or high-moisture spots where oil or specialty primers perform better. Match primer to problem, not just convenience, for durable results.
How to Apply Primer for Even Absorption
If your old walls have bare spots, stains, or uneven porosity, start by choosing a high-quality primer formulated for masonry or drywall so it soaks in evenly. Then work in small, consistent sections using a roller and brush to maintain a wet edge and avoid lap marks. You’ll see consistent absorption and a uniform base that respects color psychology and paint color trends when topcoating.
Follow these steps:
- Cut in corners and edges with a nylon brush.
- Roll interior panels with a nap suited to the surface.
- Keep strokes overlapping and don’t press too hard.
- Let primer dry fully before sanding or recoating.
Prep or Replicate Wall Texture Before Priming
Before you prime, check the wall’s existing texture so any repairs match the surrounding surface.
If you need to patch, feather joint compound smoothly into the old texture to avoid visible seams.
Get the texture right now so the primer and paint finish look consistent.
Match Existing Texture
When you’re prepping a wall, matching the existing texture is key to making repair areas disappear once you prime and paint. You’ll assess the pattern—knockdown, orange peel, popcorn—then choose matching tools and compound.
For projects involving historical preservation, use gentle techniques and low-VOC, eco-friendly paints to protect surfaces and authenticity.
Practice on scrap drywall to mimic texture before touching the wall. Keep repairs subtle so seams don’t telegraph through finish.
- Identify texture type closely
- Test blends on scrap pieces
- Use appropriate trowels, brushes, or sprayers
- Sand and blend edges lightly before priming
Feather Joint Compound
Although matching texture often calls for specialized tools, you can use feathering with joint compound to subtly blend repairs into the surrounding wall before priming. You’ll apply thin layers of Feather joint compound, tapering edges so the repair fades into existing wall texture. Work wet-sanding lightly between coats, wipe dust, and inspect from different angles. Aim for consistency in tool angle and pressure to replicate texture. Prime when smooth and matched. Use flexible timing—compound must fully dry. Keep edges feathered to avoid a paint-visible patch.
| Step | Tip |
|---|---|
| Apply | Thin coats |
| Sand | Lightly between coats |
| Prime | After full cure |
Masking and Edge Prep for Crisp Paint Lines
To get crisp paint lines on old walls, you’ll want to mask and prep edges carefully so paint won’t bleed or lift later. Clean, sand, and prime edges where old paint flakes or texture varies.
Consider color contrast and use pattern masking when boundaries meet wallpaper or trim.
When edges meet wallpaper or trim, mind color contrast and use pattern masking for seamless boundaries.
- Clean edges with mild detergent, rinse, dry.
- Use high-quality painter’s tape, press down firmly.
- Seal tape edges with a thin coat of primer or the base color.
- Remove tape at a 45° angle while paint is tacky, not fully dry.
These steps keep lines sharp and prevent peeling.
Choose Paint Sheens That Hide or Show Imperfections
If you want to minimize visible flaws, pick flatter sheens for walls and glossier finishes for trim and high-wear areas where durability matters. You’ll choose Finish sheen based on room use and Imperfection concealment needs. Flat or matte hides texture; eggshell balances washability and softness; satin adds durability with mild sheen; semi-gloss and gloss highlight defects but resist scuffs. Use the table to compare.
| Sheen | Concealment | Best for |
|---|---|---|
| Flat | High | Ceilings, low-traffic walls |
| Eggshell | Moderate | Living rooms |
| Satin | Low-Moderate | Kitchens, bathrooms |
Final Inspection Checklist Before Painting
Before you open a can of paint, do a final walk-through to catch missed repairs, dust, or adhesion problems so you won’t interrupt the job later. Check lighting, trims, and historic details so color coordination respects the room and historical preservation guidelines. Confirm surface dryness and that spackling is sanded smooth. Guarantee tools and drop cloths are ready.
- Inspect for loose plaster, cracks, or flaking paint.
- Test small patch for primer adhesion.
- Verify trim and fixtures are masked or removed.
- Review your color swatch in different light.
Only start when everything’s fixed, clean, and approved.
Quick Fixes If Flaws Show After the First Coat
When imperfections show through the first coat, don’t panic—you can usually fix them quickly without stripping the whole surface. Lightly sand any raised drips or rough spots, wipe dust with a damp cloth, and spot-prime exposed areas. Use thin, even touch-ups rather than heavy layers to avoid texture differences.
If flaws are widespread, consider a full second coat applied consistently. Reevaluate paint color selection if stains bleed through; a tinted primer can help. Keep color psychology in mind—darker hues hide flaws better, while light neutrals reveal surface issues—so adjust approach to finish and sheen accordingly.
Maintenance Tips to Keep Newly Painted Old Walls Fresh
Because freshly painted walls look best with minimal wear, you’ll want a simple maintenance routine to protect your work: dust weekly, spot-clean marks promptly with a mild detergent and soft cloth, and avoid harsh scrubbing that can remove paint or sheen.
Fresh paint lasts when you dust weekly, spot-clean gently with mild detergent and a soft cloth, and avoid harsh scrubbing.
Keep in mind wall color psychology when choosing touch-up paint so repairs blend and preserve mood. Honor historical wall finishes by using appropriate cleaners and techniques for vintage surfaces.
Follow these quick habits:
- Use microfiber cloths and a soft brush for dusting.
- Test cleaners in an inconspicuous spot first.
- Store leftover paint for future touch-ups.
- Address moisture sources immediately.
Frequently Asked Questions
Can I Paint Over Wallpaper Without Removing It First?
You can, but you shouldn’t usually; painting over wallpaper often hides issues. You’ll need proper prep: repair seams, apply primer or wallpaper removal techniques if needed, and use a high-build primer before painting over wallpaper for best results.
How Long Should I Wait After Priming Before Painting?
Measure twice, cut once: you’ll usually wait 24 hours after priming before painting. For proper priming duration and waiting period, follow primer instructions—some fast-dry primers need only 1–4 hours, others require up to 24.
Will New Paint Hide Uneven Texture or Bumpiness Completely?
No, new paint won’t completely hide uneven texture or bumpiness; you’ll need proper texture concealment techniques like skim coating or sanding first. Good paint coverage helps, but it won’t erase major surface flaws on its own.
Can I Paint When Indoor Humidity Is High or During Winter?
You can paint during winter, but high indoor humidity can ruin adhesion and drying; you’ll want humidity below 50% and temperatures per paint specs, use heaters or dehumidifiers, and wait if surfaces feel damp or cold.
How Do I Safely Dispose of Lead‑Contaminated Dust and Old Paint Chips?
You’ll treat lead dust disposal seriously: follow safety cleaning procedures, wet-wipe surfaces with HEPA-filter vacuuming, double-bag chips in heavy plastic, label waste, avoid sweeping, and contact local hazardous-waste services for proper disposal.
Conclusion
You’ve done the work: assessed, repaired, cleaned and primed—so your older walls are ready. It’s no coincidence that careful prep saves you from peeling paint, surprise stains, and extra coats; the same attention that fixed a stubborn crack will catch hidden moisture or mold before it returns. Keep an eye on sheen choices and do quick spot repairs after the first coat, and your fresh finish will stay crisp far longer.