How to Properly Paint a Wall With a Roller
You can get smooth, even walls by prepping, priming, then cutting in edges with an angled brush before you roll. Load a quality roller one-third full, use a W-pattern to lay paint, and finish with light, parallel strokes while keeping a wet edge to avoid lap marks. Work in small sections, reload often, and let coats dry fully between applications. Keep tools clean and inspect under different light for touch-ups—keep going to pick up pro tips and tricks.
What Roller Painting Solves (Why Roll vs Brush)
Although a brush handles trim and corners, a roller gives you faster, more even coverage on large flat surfaces. You’ll cover more square footage with less fatigue, reduce visible brush strokes, and blend wet edges smoothly.
Knowing paint roller history helps you appreciate design improvements that cut application time. Choose nap length for surface texture and weigh roller material comparison: synthetic covers latex well and resists shedding, natural fibers hold oil-based paints better, and foam suits glossy finishes.
Use the right roller to minimize passes, avoid splatter, and achieve a consistent finish that a brush alone can’t match.
Quick Workflow: Prep → Cut-In → Roll → Finish
Start by prepping the surface so it’s clean, dry, and patched for a smooth finish.
Then cut in crisp edges with a brush before you roll to keep lines neat.
Finally, use overlapping passes with the roller for even coverage and a uniform look.
Prep The Surface
Before you pick up the roller, clear the area, repair any holes or cracks, and clean the wall so paint will adhere evenly. You’ll sand rough spots, patch imperfections, and wipe dust away so color contrast reads true and paint durability improves. Use primer where needed, let repairs cure, and remove outlet covers. Tape only where necessary; avoid over-taping. Check for stains and apply stain-blocking primer. Protect floors and furniture.
| Task | Purpose |
|---|---|
| Sand | Smooth surface |
| Patch | Repair holes |
| Clean | Remove dust |
| Prime | Improve adhesion |
| Protect | Prevent mess |
Cut-In Clean Edges
Want crisp, professional-looking corners? You’ll tape trims and drop cloths, then load a quality angled brush with minimal paint for precise edge control. Hold the brush steady, paint a thin line along trim and ceiling, and feather outward to avoid ridges.
Work in short sections, keeping a wet edge so overlaps blend. Remove excess paint from the brush between strokes to prevent paint bleeding under tape. If you use painter’s tape, press edges firmly and peel while paint is tacky.
Clean brushes promptly. These steps set clean borders so your subsequent roller work looks seamless.
Roll For Even Coverage
With your edges clean and brushwork still tacky or just set, pick up the roller and load it evenly—roll it in the tray until the nap is saturated but not dripping.
Work in manageable sections, using an overlapping “W” pattern to distribute paint, then smooth with light, parallel passes to remove lines. Maintain a wet edge to avoid lap marks, blending freshly rolled areas into adjacent ones.
Check coverage from different angles and touch thin spots quickly. Keep extra mixed paint covered for consistent color mixing, and follow roller storage tips—wrap the roller in plastic if pausing, or clean per label when finished.
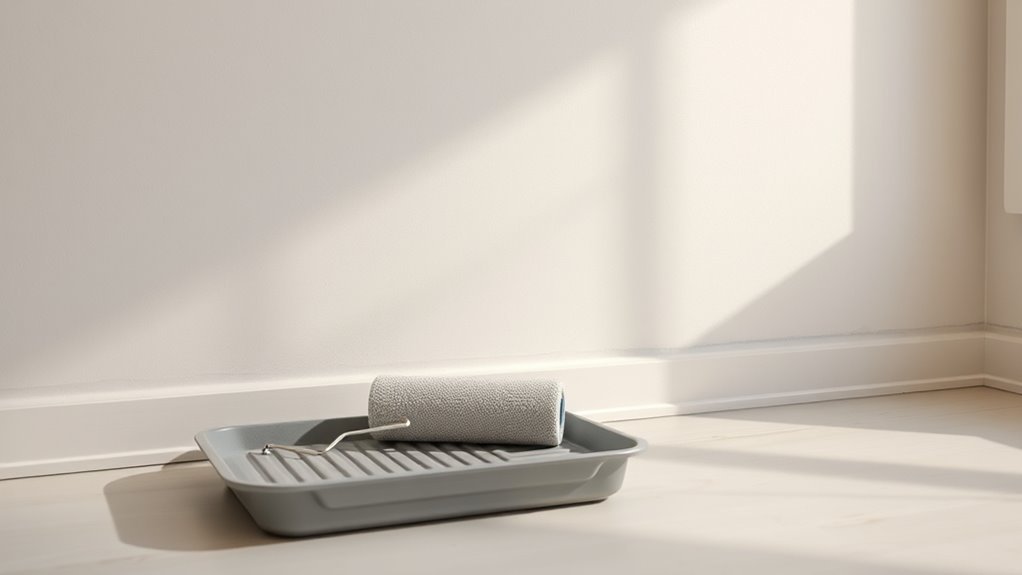
Essential Roller Tools You Need
When you’re ready to roll, gather a handful of essential tools that’ll make the job faster and give you a smoother finish. You’ll need a sturdy roller frame, a quality roller cover, an angled brush for cutting in, a paint tray with a liner, extension pole, painter’s tape, drop cloths, and a bucket grid.
Don’t forget gloves and a sponge for quick cleanup. Consider color psychology when planning accents or trims so tools match your plan.
Keep implements clean—regular roller maintenance extends life and prevents lint or dried paint from ruining your finish.
Choosing the Right Roller Nap for Wall Texture
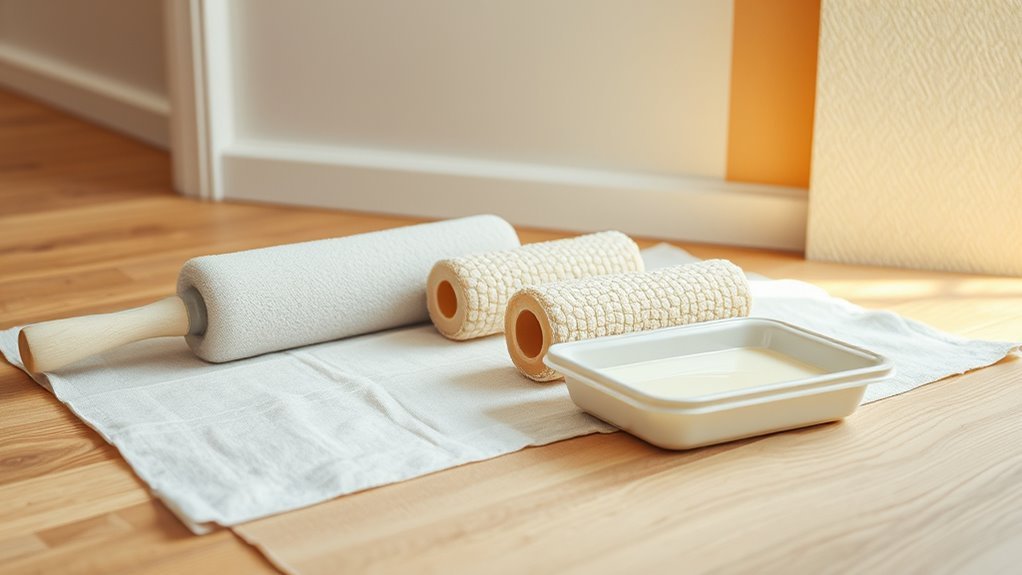
You’ll pick a roller nap based on how smooth or textured your wall is. Use a short nap for smooth surfaces, a medium nap for light texture, and a long nap for heavy texture.
Choosing the right nap helps the paint cover evenly and reduces roller marks.
Smooth Surface Nap
Although it might seem minor, picking the right roller nap makes a big difference in how smoothly paint lays on your wall and how much texture it leaves behind. For smooth surfaces, choose a short nap to minimize wall texture and keep paint sheen consistent. You’ll get fewer roller marks and a cleaner finish on primed drywall or smooth plaster.
| Surface | Recommended Nap |
|---|---|
| Smooth drywall | 1/4″ |
| Primed plaster | 3/16″ |
| Light imperfections | 3/8″ |
| Satin/eggshell sheen | 1/4″ |
Light Texture Nap
If your walls have slight imperfections or a subtle orange-peel finish, pick a light texture nap—typically 3/8″ to 1/2″—to help hide flaws without creating heavy stipple. You’ll get even coverage while preserving a subtle texture variation that looks intentional.
Use a quality synthetic roller for latex paints and maintain a light pressure to avoid lines. Test on a small area to confirm color matching and finish before committing.
Roll in a “W” pattern, then fill in, keeping edges wet to blend. Clean the nap thoroughly after use to maintain its performance for future touch-ups.
Heavy Texture Nap
When a wall has pronounced texture—stucco, popcorn, or deep orange-peel—you’ll want a heavy nap roller (3/4″ to 1 1/4″) to push paint into crevices and avoid bare spots.
You’ll choose a thicker nap for rough finishes and compare it to lighter options in a texture comparison to match pile height with surface depth. Load the roller generously, roll in multiple directions, and inspect for missed pockets.
After painting, follow roller maintenance: clean thoroughly, remove trapped debris, and store dry to preserve nap integrity. That prevents shedding and guarantees consistent coverage on future textured walls.
Selecting a Roller Frame and Extension Pole
Before you start rolling, pick a sturdy roller frame and an extension pole that match the size and reach of your job. Choose a frame that holds the nap snugly and spins smoothly; a locking mechanism prevents wobble.
Match roller width to wall size—9″ is typical for walls, 4″ for trims.
Pick an adjustable pole that extends comfortably to ceiling height without flex.
Consider quick-release frames for easy roller maintenance and faster color mixing shifts between trays.
Test the setup for balance and reach before painting so you work efficiently and reduce fatigue.
Best Paints for Roller Application
When choosing paint for a roller, you’ll want to match the paint type to the surface and roller nap for proper adhesion and ease of application.
Consider sheen and finish—flat and eggshell hide imperfections while satin and semi-gloss are easier to clean but show texture.
Also check pigment concentration and coverage so you get good hide with fewer coats.
Paint Type Compatibility
Although rollers handle many finishes, you’ll get the best results by matching roller nap and technique to the paint’s formula. You’ll choose water- or oil-based paints based on surface, cleanup, and durability, and consider how paint color affects coverage needs.
Match roller height to texture: short nap for smooth, medium for slight texture, long for rough. Test a small area to confirm absorption and spread.
- Latex: easy cleanup, fast dry
- Acrylic: durable, good adhesion
- Alkyd/oil: smoother laydown, slower dry
- Primer: improves bonding on tricky surfaces
- Specialty: stain-blocking or mildew-resistant options
Sheen And Finish
Color and finish affect not just appearance but how a roller lays paint and hides imperfections, so pick a sheen that matches your goals.
You’ll prefer flatter sheens for living areas since sheen variations like matte or eggshell mask texture and require fewer coats.
Satin and semi-gloss work well in trim or kitchens where durability matters; your roller technique should be smoother to avoid highlighting lap marks.
Consider washability and light reflection when comparing finish options, and choose a high-quality roller nap suited to the sheen.
Test a small area to confirm how the roller and paint interact before committing.
Pigment And Coverage
Because pigment concentration and formulation determine how reliably a roller lays down a coat, pick paints labeled for high opacity and good hide to minimize passes and touch-ups. You’ll want pigments that resist fading and binders that boost paint durability, especially on high-traffic walls.
Consider how color mixing affects coverage: deep hues often need more coats. Test samples on your wall, roll a small section, and note hide and finish.
Use a quality roller nap matched to texture to maximize transfer.
- Choose high-opacity formulations
- Test sample swatches
- Mind color mixing for saturation
- Match roller nap to texture
- Prioritize durability and washability
How Much Paint and Primer for Roller Painting
When planning roller painting, estimate coverage first so you know how much paint and primer to buy. Measure wall area (height × width), subtract windows/doors, and divide by the paint’s stated coverage per gallon.
Factor primer separate from finish—primer often covers differently. Account for two coats for color changes or to boost paint durability; lighter over darker may need extra.
Consider color psychology when choosing finish sheen; matte hides flaws but may need more paint.
Buy a little extra (10–15%) for touch-ups. Keep receipts and batch numbers so you can match color later without guessing.
Inspecting and Repairing the Wall Before Painting
Now that you’ve figured out how much paint and primer to buy, turn your attention to the wall’s condition before you start rolling. Inspect for cracks, holes, uneven wall texture, or loose paint. Fixing problems now *guarantees* your new paint color looks smooth and lasts.
- Feel the surface for rough spots.
- Scrape flaking paint and sand edges.
- Fill holes and hairline cracks with spackle.
- Sand repaired areas until they’re flush.
- Wipe dust away with a dry cloth.
Prime patched spots if texture or porosity changed, so the finish blends and the paint color reads consistently.
Removing Grease, Stains, and Mildew From Walls
Before you start rolling, identify whether marks are grease, ink, smoke, or mildew so you can pick the right cleaner.
For grease and most stains, use a degreasing solution or trisodium phosphate substitute and rub gently.
For mildew, scrub with a diluted bleach or a commercial mildew remover and rinse well.
Let the wall dry completely before priming or painting.
Identify Stain Types
How can you tell what’s causing a mark on your wall, and why does it matter for removal? You’ll inspect color, texture, and location to guide stain removal and confirm paint compatibility later.
Common clues:
- Yellowish near ceilings: nicotine or cooking grease
- Dark spots in corners: likely mildew (see next section for treatment)
- Oily sheen: fresh grease or handprints
- Rust-colored streaks: metal bleed or water stains
- Ink or marker: pigment-based, needs stronger solvent
You’ll test a small area with mild detergent, then escalate cleaners based on the clue. Proper ID prevents wasted effort and protects the finish you’ll repaint.
Mildew Removal Steps
If you identified dark, musty spots in corners or near windows, treat them as mildew and remove them before painting. Wear gloves and a mask, then vacuum loose spores.
Mix one part bleach to three parts water or use a commercial mildew remover. Apply solution with a sponge, scrub stubborn areas, rinse thoroughly, and let dry completely.
For grease or stains, degrease with trisodium phosphate or a kitchen cleaner before spot-priming.
Protect nearby garden decor and outdoor furniture restoration projects from splashes.
After cleaning, seal affected spots with a mildew-resistant primer to prevent recurrence and guarantee paint adhesion.
When to Prime and How to Prime for Even Coverage
When your wall shows stains, patching, drastic color changes, or porous drywall, you should prime it first to guarantee even paint coverage and true color payoff. Priming seals surfaces, hides repairs, and assures your chosen hue reflects color psychology as meant to, even with eco friendly paints.
Follow these steps so your roller job looks professional:
- Clean and sand patched areas until smooth.
- Choose a primer type: stain-blocking, bonding, or tinted.
- Apply a thin, even coat with a roller; back-roll for uniformity.
- Let primer dry fully per label instructions.
- Lightly sand and wipe before painting.
Protect Floors, Trim, and Fixtures Without Mess
Before you start rolling, cover floors completely with drop cloths or plastic sheeting so paint can’t soak through or track across rooms.
Use painter’s tape to snugly tape off trim and baseboards for crisp edges.
Unscrew or shield light fixtures and vents to keep them paint-free and make cleanup easier.
Cover Floors Completely
Although you’re enthusiastic to roll, cover the floors completely so paint never reaches them — that means taping along baseboards, overlapping drop cloths, and protecting vents and fixtures. You’ll work faster and cleaner if you prep methodically: clear furniture, sweep, and plan routes so you don’t step on covers.
Stash supplies like Color mixing tools and cans in a sealed tote for paint storage, away from traffic.
- Lay canvas drop cloths, overlapping seams
- Secure edges with low-tack tape
- Protect vents with plastic and tape
- Elevate furniture on blocks
- Keep a trash bag handy for used rags
Tape Off Trim
If you want crisp lines and zero splatter on baseboards, trim, or fixtures, take a few careful minutes to tape them off properly. Use painter’s tape rated for delicate surfaces so you won’t strip fresh wallpaper removal edges or peeled paint.
Press tape firmly along trim, sealing edges with a putty knife for tight lines. Cover nearby floors and rugs with drop cloths; add plastic sheeting for furniture protection and weigh corners down.
Remove outlet and switch covers, mask hardware, and overlap tape at corners. Peel tape while paint is tacky-dry for the cleanest edge and minimal touchups.
Protect Light Fixtures
You’ve already taped trim and covered floors, so now protect light fixtures the same way to keep paint off bulbs, shades, and wiring. Remove or cover nearby wall art, switch off power, and use simple materials to shield fixtures without fuss.
Quick steps:
- Turn off power and remove bulbs.
- Drape a plastic bag over shades; secure with painter’s tape.
- Wrap pendant lighting with lightweight drop cloths.
- Use masking paper for wall-mounted fixtures and frame edges.
- Keep a small brush handy for touch-ups near lighting fixtures and protected wall art.
Work methodically so paint stays on the wall, not the fixtures.
Tape Trim for Sharp, Clean Edges
When you want crisp lines where paint meets trim, masking tape is your best friend—apply it carefully along the edge, press it down firmly, and paint up to the tape for sharp, clean results. Use edge tape for delicate surfaces and choose low-tack tape on fresh trim. Seal the tape edge by running a fingernail or putty knife to prevent bleed. Remove tape while paint is tacky to avoid peeling. Clean any residue and touch up with a small brush.
| Tape Type | Surface | Use |
|---|---|---|
| Low-tack | Fresh trim | Prevent peel |
| Medium | Painted trim | General use |
| High-tack | Rough | Strong hold |
| Specialty | Delicate | Clean lines |
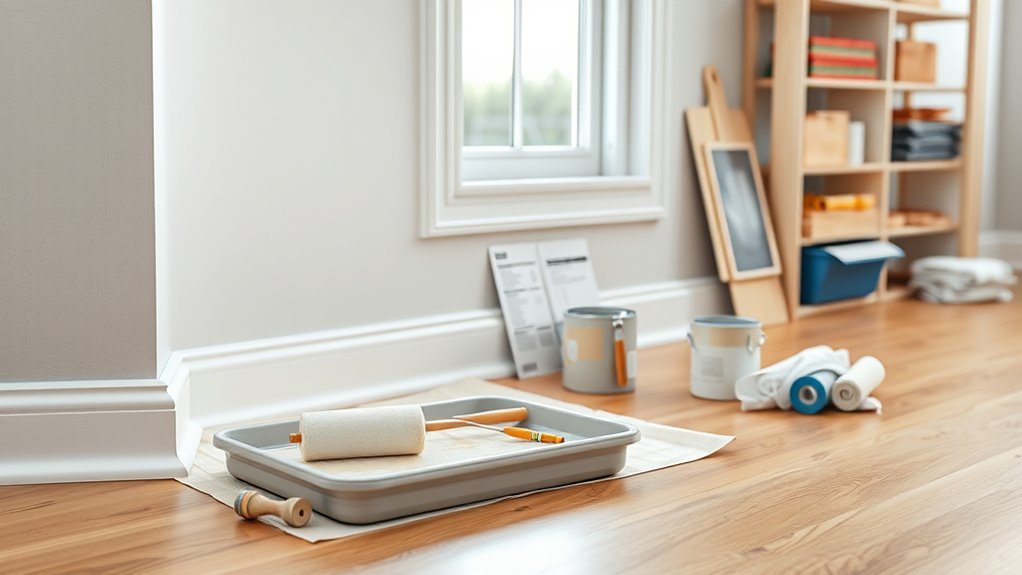
Set Up an Efficient Roller Station
Before you roll, lay out a compact station with everything within arm’s reach: a loaded roller tray, an extra roller cover, a small angled brush for edges, a lint-free cloth for drips, and a trash bag for used tape and liners. Organize tools so you won’t interrupt work or contaminate paint. Keep color mixing notes and spare test pots nearby.
Before you roll, set a compact station: tray, spare cover, edge brush, cloth, and waste bag within reach.
Prioritize roller maintenance items and a damp rag for quick touchups.
- Tray with grid
- Clean roller covers
- Edge brush
- Color swatches
- Waste bag
This setup saves time, reduces spills, and keeps finishes consistent.
Load a Roller Evenly Without Splatter
If you load the roller correctly, you’ll get smooth coverage without splatter or wasted paint. Dip only a third of the nap into the tray, roll back and forth on the grid, and reload before the roller thins out. Tap the roller’s edge lightly to avoid drips, and keep a steady wrist speed to prevent flicks.
Check for even saturation by holding the roller up to light; blot excess on the tray. When switching hues after color mixing, clean or change rollers to avoid contamination.
For short breaks, follow proper roller storage—wrap in plastic to keep it ready.
The No-Lap Rolling Technique
When you use the no-lap rolling technique, keep a wet edge so each pass blends into the last.
Overlap short strokes slightly and work quickly so seams disappear.
Maintain consistent pressure on the roller to avoid stripes and uneven coverage.
Maintain Wet Edge
Keeping a wet edge means you roll each section so the paint stays tacky where it overlaps, which prevents visible lap marks and gives you a seamless finish. You’ll work systematically, keeping pace so edges don’t dry before you blend. Remember color psychology affects perception—lighter tones show flaws more—so maintain consistency. Regular roller maintenance keeps nap clean for even lay-in.
- Start at one corner and work across
- Reload roller frequently but avoid drips
- Keep strokes parallel and continuous
- Watch drying conditions: heat, breeze
- Step back often to spot missed wet areas
Overlap Short Strokes
After you’ve kept a wet edge, switch to overlapping short strokes to eliminate lap marks and get a uniform finish. Work in a controlled grid, rolling about 6–8 inches per stroke and slightly overlapping each pass so paint blends seamlessly.
Keep the roller loaded evenly to avoid buildup; pause to reload before it drags. Watch for color mixing issues when touching up sections—blend new paint onto still-wet areas to match tone.
Practice good roller maintenance between coats: clean thoroughly, spin out excess water, and store properly so nap stays intact. This technique gives a smooth, consistent wall without obvious seams.
Roll Consistent Pressure
Although it takes practice to get right, rolling with consistent pressure is the key to a no-lap finish. You’ll control sheen and avoid streaks by steady hand force, smooth overlap, and balanced paint load. Mind how color mixing on the tray affects coverage; don’t overwork blended shades.
- Start with light even strokes
- Keep the roller loaded, not dripping
- Maintain a wet edge at all times
- Pause to re-roll high spots gently
- Store the roller properly between sessions (roller storage tips: wrap in plastic)
Practice short sections, keep tempo, and trust the rhythm.
Working in Sections for Consistent Coverage
When you work wall by wall in manageable sections, you keep the paint wet at the edges so new passes blend smoothly and you avoid lap marks. Divide the wall into 3–4-foot areas and finish each before moving on.
Load your roller evenly, overlap each stroke by about 50%, and watch for thin spots as you go. If you’re mixing color, stir thoroughly and keep a small reference can for touch-ups so batches match.
For pauses under 15 minutes, rest the roller on a clean tray; for longer breaks, wrap it in plastic for roller storage to prevent drying.
Cut in Corners and Edges With Brush + Mini-Roller
Start by taping and cleaning corners and trim so your edges are neat and paint will adhere.
Use an angled brush to cut in along ceilings and trim, then follow immediately with a mini-roller to smooth the brushed line.
Finish by blending the mini-roller area into your main roller section for an even, invisible join.
Prep Edges Carefully
Before you roll, cut in the edges and corners with a quality angled brush and follow up with a mini-roller to blend the brushstrokes into the field paint; this gives you a clean, consistent edge and prevents lap marks.
Prep edges carefully: inspect seams, remove dust, and decide where to use painter’s tape vs. freehand. Good edge detailing saves touch-ups.
- Clean edges and remove loose paint
- Use painter’s tape on trim or irregular surfaces
- Lightly sand glossy spots for adhesion
- Load the brush properly, work in short strokes
- Follow with a mini-roller to feather and blend
Brush Then Mini-Roller
If you cut in the corners and edges with a quality angled brush and then follow up with a mini-roller, you’ll get crisp lines and a seamless shift to the field paint. Use confident brush techniques: steady wrist, short strokes, feather the paint toward the center. Choose mini roller selection wisely—nap suited to your paint and surface. Load the roller lightly to avoid drips. Work section by section, maintaining a wet edge. Use the brush to define, the mini-roller to soften the transition.
| Feeling | Result |
|---|---|
| Control | Precision |
| Calm | Clean |
| Pride | Finished |
Blend With Roller
When you’ve defined corners and edges with a steady angled brush and softened them with a mini-roller, use a full-sized roller to seamlessly blend those areas into the main wall field. You’ll keep paint wet, match nap and pressure, and use overlapping W-patterns for even color blending. Work quickly to avoid lap marks; feather edges where brush strokes meet roller texture.
For consistent roller blending, maintain a wet edge and reload as needed.
- Match roller nap to wall texture
- Work from cut-in zones outward
- Use light, even pressure
- Keep a wet edge to prevent seams
- Step back and inspect color blending
Maintain a Wet Edge to Prevent Streaks
Although you can move fast, keep a consistent wet edge across the wall so new paint blends seamlessly into still-wet sections; that prevents lap marks and streaks by avoiding overlaps of dried paint.
Work in manageable sections, rolling toward the wet edge and back-rolling lightly to blend. Watch for drying caused by heat or breeze and slow your pace if needed.
Maintain even paint distribution — poor color mixing at the tray or an overloaded roller causes uneven texture.
When pausing, wrap your roller in plastic for short roller storage to keep it tacky and ready, preventing hard edges when you resume.
How Many Coats You Need and Why
Deciding how many coats you need starts with whether you used primer or you’re painting over existing color. Primer evens out porous surfaces and can cut the number of paint coats you’ll need.
Coverage per coat depends on the paint’s quality and color depth. Check the manufacturer’s spread rate and inspect after the first coat to see if a second is necessary.
Primer Versus Paint
Because primer bonds to the wall and paint provides the color and finish, you’ll usually need at least one coat of primer on bare or repaired surfaces before applying paint. Primer evens porosity, hides stains, and boosts paint durability so your finish lasts. You’ll save money and get truer color, important if color psychology matters for a room’s mood.
Use primer when switching from dark to light, painting new drywall, or repairing patches.
Quick tips:
- Prime raw drywall and fresh plaster
- Spot-prime patched areas
- Skip primer only on well-sealed previously painted walls
- Choose stain-blocking primer for marks
- Match primer type to paint
Coverage Per Coat
How many coats do you really need? Start by evaluating paint color and surface: dark or bold colors usually need two or more coats; lighter, high-quality paints may cover in one.
Apply a full first coat, let it dry fully, then inspect under good light for streaks or thin spots. Texture and previous finish affect coverage—glossy surfaces often require extra coats or primer.
Between coats, practice proper roller maintenance: clean or wrap rollers to prevent dried edges and lint.
Aim for thin, even coats rather than thick ones; that gives better coverage, durability, and a smoother final finish.
Proper Dry Times Between Coats
When you wait the right amount of time between coats, your finish will dry evenly and resist drips, tackiness, and peeling. You should check the paint can for recommended recoat times, but temperature and humidity matter. Cooler or humid conditions extend dry times; good ventilation speeds them.
Consider color psychology when choosing finish sheen—glossier surfaces may show flaws and need longer cure before touching.
Maintain roller maintenance to avoid lint or debris between coats. Follow this quick checklist:
- Read manufacturer’s recoat window
- Test a small patch for tackiness
- Keep room ventilated
- Avoid heavy coats
- Clean roller between uses
Tips for Painting Ceilings With a Roller
After letting your wall coats cure properly, shift your focus upward—painting a ceiling with a roller calls for different angles, tools, and rhythm. Position an extension pole, use a nap suited to your ceiling finish, and cut in edges first. Work in overlapping strokes, keep a wet edge, and check light for missed spots. Mind your Ceiling color under varied lighting. Clean rollers promptly and follow proper Roller storage to extend life.
| Step | Tool | Tip |
|---|---|---|
| 1 | Pole | Secure grip |
| 2 | Roller | Even pressure |
| 3 | Brush | Neat edges |
| 4 | Ladder | Stable |
| 5 | Light | Reveal flaws |
Painting Textured or Popcorn Walls With a Roller
Need to tackle a textured or popcorn wall? You can get even coverage if you prep and pick the right roller. For a textured wall or popcorn finish, use a deep-nap roller, work in small sections, and avoid pressing too hard. Keep these tips in mind:
- Choose a 3/4″–1.5″ nap roller for deep texture
- Clean loose debris first to prevent clumping
- Load the roller evenly; don’t oversaturate
- Roll in multiple directions to reach crevices
- Use a brush for edges and stubborn nooks
Move steadily, let coats dry fully, and inspect under good light for missed spots.
Rolling Glossy and Semi-Gloss Finishes Successfully
For glossy and semi-gloss finishes you’ll want spotless, sanded surfaces and a tack cloth to remove dust before you start.
Use a high-density foam or short-nap roller and load it evenly to avoid lap marks and stippling.
Work quickly with consistent pressure and back-roll any shiny spots for an even sheen.
Surface Preparation Essentials
While glossy and semi-gloss paints give a sleek, durable finish, they show every imperfection—so you’ll need to smooth and clean the surface thoroughly before you roll. You’ll prep to maximize color contrast and paint durability.
Start by inspecting for dents, peeling, or mildew. Sand glossy spots and feather edges for an even profile. Remove dust and grease; a TSP solution helps. Prime bare or repaired areas to guarantee adhesion.
- Scrape loose paint
- Sand glossy surfaces
- Clean with degreaser
- Fill and sand imperfections
- Prime high-contrast or repaired spots
Now the wall’s ready for rolling.
Roller Technique Adjustments
Now that the surface is smooth and primed, adjust your rolling technique to suit glossy or semi-gloss finishes, which reveal every stroke and texture. Use a light, consistent roller grip and avoid pressing hard; too much pressure shows ridges.
Choose a high-density nap to minimize stipple and inspect paint viscosity—thinner mixes level better, thicker ones can drag. Roll in a “W” pattern, then fill without overworking; keep a wet edge to prevent lap marks.
Back-roll once with very light passes for uniform sheen. Clean tools promptly to preserve nap and maintain flawless results.
Using Extension Poles and Ladders Safely
When you’re painting high or hard-to-reach spots, extension poles and ladders let you work comfortably and safely—if you use them correctly. You’ll want proper safety gear and check ladder stability before climbing. Keep three points of contact, face the ladder, and don’t overreach.
Use an extension pole with a secure roller attachment and a comfortable grip to reduce fatigue.
Attach a secure roller to a comfortable extension pole to reduce fatigue and improve reach during painting.
- Inspect ladder feet and lock mechanisms
- Wear slip-resistant shoes and eye protection
- Keep tools on a belt or tray, not in your hands
- Extend poles incrementally; avoid full extension when possible
- Have a spotter for tall jobs
Avoiding Roller Marks, Stippling, and Texture Issues
If you want a smooth, professional-looking finish, the trick is controlling pressure, overlap, and paint load so the roller lays down an even coat without dragging or leaving ridges.
Work in consistent W-patterns, overlap each pass about 50%, and avoid pressing hard at edges.
Use a high-quality nap suited to your wall texture and keep rollers clean—roller maintenance prevents fuzz and uneven fibers.
Match paint color selection to lighting to hide minor texture, but don’t rely on darker shades to mask poor technique.
Finish each section while paint is wet to blend seams, and replace rollers when they show wear.
Fixing Drips, Runs, and Uneven Spots Mid-Job
Ever notice a drip or run forming after you’ve rolled a section? Act quickly: blot runs with a brush or roller tip, then smooth with light, overlapping passes while paint is wet.
Prevent uneven sheen from rushed color mixing or poor roller storage habits. Use these quick steps:
- Blot excess paint with a lint-free cloth.
- Lightly feather edges with a nearly dry roller.
- Re-roll the whole panel for uniform sheen.
- Touch small gaps with a brush, not excess paint.
- Keep a clean tray and proper roller storage to avoid contaminants.
Work patiently; fixes blend best while paint stays wet.
When to Replace a Roller Cover During a Job
As you work, watch the roller’s nap and the finish it leaves; replace the cover when you see matting, shedding, or stipple that won’t level. If texture changes or lint appears, swap covers to avoid flaws that extend paint drying time or force rework.
Consider roller cover lifespan: synthetic covers handle many coats, natural fibers excel with oil-based paints but wear faster. Also change covers when color buildup reduces coverage or when the roller feels slick with old paint.
Don’t wait for obvious problems—small defects compound. Keep a fresh cover handy and swap promptly to maintain a consistent finish.
Cleaning Rollers, Trays, and Brushes Correctly
Before you put tools away, clean rollers, trays, and brushes promptly so dried paint doesn’t ruin them. Rinse water-based paint until clear; use solvent for oil-based. Work methodically to protect nap and ferrules; good roller maintenance extends life and performance. Keep excess paint out of drains.
Clean tools promptly—rinse water-based paint until clear, use solvents for oil-based, and protect roller nap and ferrules.
- Remove excess paint by scraping roller and brushing tray.
- Rinse under warm water until runs clear.
- Use solvent only when label recommends it.
- Comb brushes with a wire brush to remove trapped paint.
- Dry and reshape tools before storing to avoid odors and clumping.
Avoid cross-contaminating paint when doing any paint color mixing.
Storing Partially Used Paint and Tools Overnight
If you’re pausing work overnight, seal partially used paint and tools to keep them usable. Pour leftover paint back into its original can, scraping edges to preserve color mixing consistency, and smooth the surface before sealing the lid tightly.
For trays and rollers, wrap in plastic wrap or aluminum foil to prevent skinning; you can also stand rollers upright in a sealed bag.
Label cans with date and mixture notes for future touch-ups. Store cans upright in a cool, dry place away from heat sources.
Proper paint storage and simple wrapping will save cleanup time and preserve finish quality.
Painting Around Outlets and Switches Neatly
Once you’ve sealed and labeled your cans and wrapped your rollers, move on to cutting in around outlets and switches so your finish looks professional. You’ll want clean edges without paint in sockets.
After sealing cans and wrapping rollers, cut in carefully around outlets and switches for clean, professional edges.
Turn power off, perform switch cover removal, and use outlet masking or small painter’s tape strips.
Work with a steady angled brush, feathering paint into the roller-applied field.
- Turn breaker off before touching covers
- Remove plates with a screwdriver carefully
- Apply outlet masking precisely
- Cut in with an angled sash brush
- Reinstall covers after paint dries
Check edges and touch up tiny gaps for a neat result.
Ventilation, Odor Control, and Ideal Drying Conditions
While painting, keep windows and doors open and run fans to move fresh air through the room so fumes dissipate and drying speeds up. Position a box fan near an open window to push air out, and use cross-ventilation for steady flow. Wear a mask if ventilation is limited.
Monitor humidity and aim for 40–60% relative humidity and 50–70°F (10–21°C) for best drying. Good airflow preserves indoor air quality and speeds cure time. Avoid blocking vents.
Wipe spills promptly and dry damp areas to aid mold prevention. Allow full drying between coats to ensure an even, durable finish.
Eco-Friendly, Low‑VOC Options for Roller Painting
Because paint choice affects indoor air and long-term health, pick low‑VOC or zero‑VOC formulas and eco‑certified products whenever you can. You’ll reduce odor, protect vulnerable occupants, and still get smooth roller coverage. Look for VOC free formulations labeled by trusted certifiers and consider eco-friendly alternatives like plant‑based binders.
- Choose certified zero‑VOC or low‑VOC paints
- Test samples in a small area for coverage
- Use microfiber rollers to minimize waste
- Seal and store leftovers properly to avoid emissions
- Clean tools with biodegradable cleaners
Follow label instructions and ventilate while painting to keep air quality safe.
Cost-Saving Techniques That Preserve Finish Quality
A few smart choices can shave costs without sacrificing a professional finish. Plan color psychology to limit expensive accent paints—use neutral bases and strategic accents to achieve impact with less product.
Buy quality roller covers that match your paint type; they hold more paint and cut application time. Practice roller maintenance: clean covers promptly, store them properly, and replace worn naps to avoid texture defects that force touch-ups.
Mix leftover paint for primers or test patches. Work in sections and maintain a wet edge to reduce rework. These steps lower material waste and labor, keeping results crisp and budget-friendly.
Common Beginner Mistakes and How to Avoid Them
Saving money on tools and technique helps, but even careful painters run into avoidable errors when they’re first learning to use a roller. You can avoid common mistakes by preparing properly, practicing even strokes, and watching for texture issues. Pay attention to color mixing and how it affects final tones; test samples first.
Even careful painters make avoidable roller mistakes—prepare, practice even strokes, test colors, and watch texture.
- Overloading the roller — causes drips and streaks.
- Skipping primer — leads to uneven absorption.
- Rolling too fast — creates splatter and lap marks.
- Ignoring edges — produces visible gradual changes.
- Neglecting texture techniques — yields inconsistent sheen.
Follow these points, correct habits early, and your walls will look much neater.
Advanced Tips for a Professional-Smooth Finish
When you want a truly professional-smooth finish, focus on surface preparation, roller selection, and a controlled application rhythm. You’ll sand and prime seams, choose nap length for texture, and keep a wet edge while rolling in consistent, overlapping strokes. Mind drips, feather edges, and light pressure to avoid texture. Use color contrast intentionally for crisp transitions and plan decorative patterns before painting to prevent overworking the area.
| Task | Tip | Outcome |
|---|---|---|
| Prep | Sand/prime | Smooth base |
| Roller | Choose nap | Even texture |
| Technique | Wet edge | Seamless finish |
Inspecting the Finished Wall and Final Touch-Ups
After the paint’s dried to the recommended time, walk the room with strong light and look for thin spots, drip marks, or texture inconsistencies so you can catch issues before they set. Inspect edges, corners, and areas around fixtures. Address problems promptly with a small brush or roller, matching wall texture by lightly stippling.
Clean tools and seal cans for proper paint storage.
- Scan for sheen variations
- Feather touch-ups into surrounding paint
- Sand tiny drips once cured
- Match roller nap to original texture
- Label and store leftover paint upright
Confirm uniform coverage before declaring the job complete.
Frequently Asked Questions
Can I Roller Paint Over Wallpaper Without Removing It?
You can paint over wallpaper, but it usually isn’t ideal. You’ll need thorough surface preparation, repairing seams and priming; consider wallpaper removal for best results, otherwise paint adhesion and durability might suffer despite proper prep.
How Long Before I Can Hang Pictures on a Newly Painted Wall?
Wait 24–48 hours before hanging lightweight pictures; heavier frames need 7–30 days as paint’s drying time and curing process finish. For example, Sarah waited a week before hanging a heavy mirror and avoided damage.
Will Roller Painting Reduce Existing Wall Odors Permanently?
No — roller painting alone won’t permanently remove odors. You’ll need odor elimination steps like cleaning, sealing stains with odor-blocking primer, then applying paint; paint sealing helps trap smells but won’t eliminate deep-source odors permanently.
Can I Mix Different Paint Brands in One Roller Job?
Yes—you can mix brands if formulas match; don’t assume every paint blends. Check paint mixing compatibility (same base: water or oil), sheen, and drying times for roller compatibility to avoid adhesion, color, or texture problems.
How Do I Match a Paint Sheen on a Small Repair Patch?
You’ll sheen match by testing small swatches, using the same sheen level and brand when possible, then feather edges to blend the patch. Use light sanding, thin coats, and identical finish paint to guarantee patch blending.
Conclusion
Rolling a wall’s faster and smoother: you can cover about 150–300 square feet per hour with a roller versus far less with a brush, so it’s a real time-saver. With proper prep, the right nap, and steady technique, you’ll cut in neatly, roll evenly, and touch up like a pro. Avoid common mistakes, use an extension pole, and inspect under good light—small fixes now save big headaches later.