How to Remove Black Mould From Painted Walls
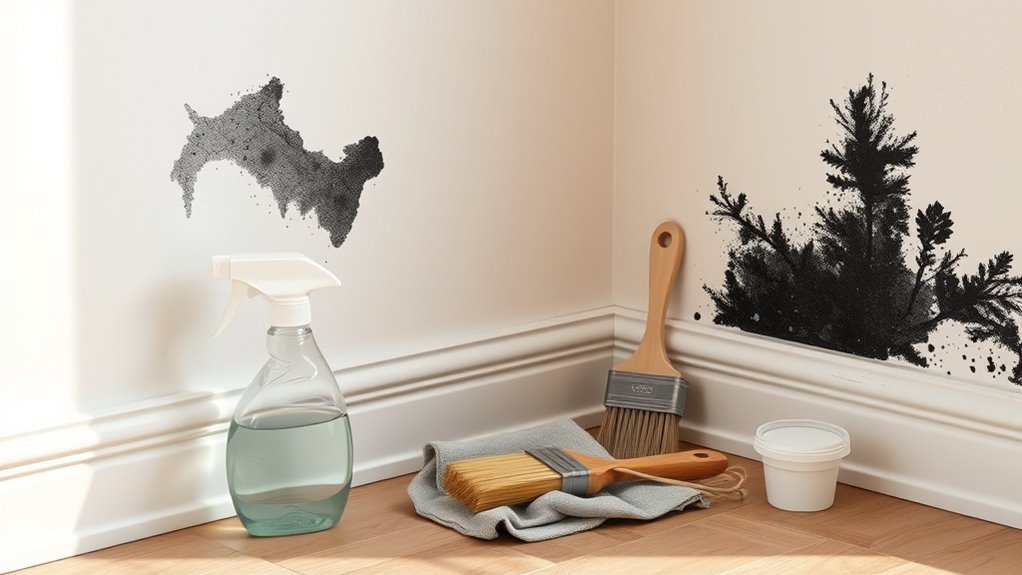
You can remove black mould from painted walls safely by first identifying it (fuzzy, musty, or smudges) and wearing an N95, gloves and goggles. Seal the area, mix a cleaner like diluted bleach (1:10), hydrogen peroxide, or vinegar for gentle spots, spray, wait, then wipe and dry thoroughly. Dispose of contaminated rags in sealed bags and fix the moisture source to prevent return. Keep going for step‑by‑step safety, cleaning, and repainting tips.
Who This Guide Helps and What You’ll Fix
If you’ve noticed dark, fuzzy patches on painted walls or smell a musty odor, this guide helps you identify, safely remove, and prevent common surface black mould in living spaces. It’s aimed at homeowners, renters, and DIYers dealing with small to moderate growth on non-porous painted surfaces rather than structural or hidden infestations.
You’ll learn to distinguish surface mould from stains, dispel mould myths, and decide when to tackle cleanup yourself or call a pro. Practical tips cover safe cleaning, ventilation, and simple painting techniques to restore affected areas without spreading spores or damaging finishes.
Identify Black Mould vs. Stains?
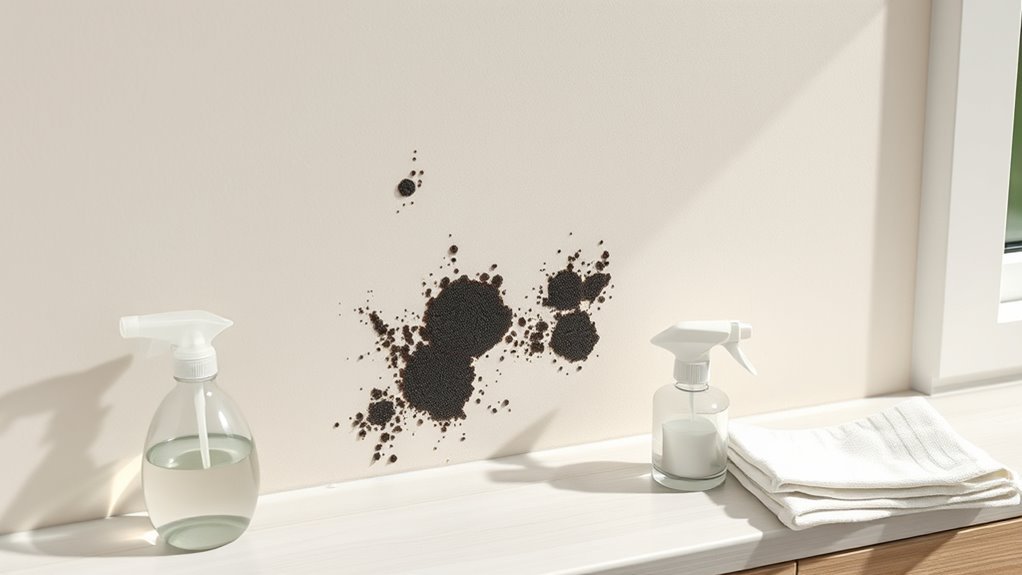
Before you start cleaning, you’ll want to make sure those dark patches are actually mould and not just a stain from water, soot, or paint discoloration. Check texture: black mould often has fuzzy or spotty growth and may smear when rubbed; paint stains sit flat and don’t smear.
Smell: musty odors suggest mould. Location matters: mould favors damp, poorly ventilated areas; paint stains follow leaks or dirty hands.
Test a small area with diluted bleach—mould lightens or dissolves, whereas many paint stains remain unchanged. If unsure, consider a professional test before large-scale removal.
Assess the Size and Severity of a Mould Patch
Once you’ve confirmed the dark patches are mould, measure the affected area and note how deep it goes so you can decide whether it’s a DIY job or needs a pro.
Check if mould covers less than one square metre and sits on surface paint—often manageable yourself—versus extensive growth, crumbling drywall, or hidden spread behind fixtures, which needs a specialist.
Record odours, moisture sources, and any health symptoms.
Don’t fall for mould myths that downplay spread or recommend unproven cures.
Also consider paint compatibility before treating: some paints trap spores or react to cleaners, so test a small patch and consult product guidance.
Quick: Remove Small Black Mould Spots in 5 Steps
If you spot a few small black mould patches, start by gathering basic safety gear like gloves, a mask, and goggles.
Mix a gentle cleaning solution, then spot-clean the mould with a cloth or soft brush.
Rinse and dry the area thoroughly to stop regrowth.
Gather Safety Gear
Because mould spores spread easily, you’ll want to gear up to protect yourself before you touch a treated area. Follow basic safety protocols: ventilate the room, keep others and pets away, and work in short bursts to limit exposure.
Put on protective equipment—an N95 or higher respirator, goggles that seal, and disposable gloves. Wear long sleeves and remove or wash clothing after.
Use shoe covers or clean footwear before leaving the area. Have a trash bag ready for contaminated disposable items.
If you have respiratory issues or widespread mould, get a professional assessment rather than doing it yourself.
Prepare Cleaning Solution
Now that you’re protected, mix a gentle, effective cleaner for small black mould spots. Combine one part white vinegar with three parts water in a spray bottle for a safe baseline.
For stubborn patches, use a teaspoon of mild dish soap. Test the solution on an inconspicuous area to confirm paint compatibility before treating visible mould.
Label the bottle and shake gently to blend. Use soft-bristled brushes or microfiber cloths as your tools—these cleaning techniques minimize paint damage while lifting spores.
Prepare only enough solution for immediate use; discard leftovers after the job to maintain effectiveness and safety.
Spot Clean And Dry
Ready to tackle that small patch of black mould? Start with proper surface preparation: remove dust and loose paint with a dry cloth, then ventilate the area.
Wear gloves and a mask.
Apply your prepared cleaner to a cloth or soft brush, working outward from the stain using gentle cleaning techniques to avoid paint damage.
Rinse the spot with a damp cloth, blotting rather than scrubbing.
Dry the wall thoroughly with a fan or hairdryer on low to prevent recurrence.
Check after 24 hours; if discoloration persists, repeat once.
Once gone and dry, consider touch-up paint or improved ventilation.
Essential Safety Gear to Protect You From Spores
Before you start cleaning, make sure you’ve got the right respirator or mask to keep spores out of your lungs.
Put on protective clothing that you can wash or discard, plus eye protection and gloves to stop spores from touching your skin or eyes. These simple barriers cut your exposure and make cleanup safer and more effective.
Respirator Or Mask
Why wear a respirator? You’ll disturb mould spores when cleaning, so respirator safety matters.
Choose a respirator or N95 mask rated for particulate protection, checking the seal and fit before work.
Mask filtration blocks airborne spores; replace disposable masks after heavy use or if they get damp.
Don’t rely on bandanas or surgical masks—they won’t filter fine particles.
Breathe slowly and avoid touching your face while wearing the mask.
Store a spare mask nearby and dispose of used filters safely.
If you have respiratory issues, consult a doctor before tackling mould remediation.
Protective Clothing
Because mould spores can cling to clothing and skin, wear protective gear that keeps them off you and out of your home. Put on disposable coveralls or washable work clothes you’ll launder immediately; choose tightly woven fabric or impermeable material marked for protective clothing use. Tuck pants into socks and zip cuffs to limit gaps.
Avoid cotton if you’ll handle damp areas—synthetic fibers resist absorption better. Use dedicated shoes or disposable boot covers and remove them before entering clean areas.
After work, remove garments carefully to avoid shaking spores loose, bag contaminated items, and wash or dispose of them per clothing safety practices.
Eye And Hand Protection
When you’re tackling mould, protect your eyes and hands—spores and cleaning chemicals can irritate or injure them quickly. Wear snug-fitting goggles for reliable eye protection; they keep splashes and airborne particles out without fogging if you pick anti-fog lenses.
Use disposable nitrile gloves for most jobs and thicker chemical-resistant gloves for bleach or fungicides. Change gloves if they tear or get contaminated, and avoid touching your face.
After cleaning, remove gloves carefully, wash your hands thoroughly, and disinfect any reusable gloves. Proper eye protection and hand safety cut infection risk and let you work confidently and effectively.
Contain the Area to Stop Spores Spreading
Before you start scrubbing, seal off the room to keep mold spores from drifting into the rest of your home. You’ll protect air quality and limit contamination by creating a simple containment zone. Close doors, tape plastic sheeting over doorways, and cover vents. Turn off HVAC to avoid spreading spores through ductwork.
- Wear a mask and gloves before entering.
- Hang plastic from ceiling to floor, taping edges airtight.
- Cover vents and smoke detectors with plastic.
- Use a window fan facing out to direct airflow outside.
Keep containment in place until cleanup finishes and surfaces dry.
Choose Cleaning Solutions Safe for Painted Walls
As you pick a cleaner, focus on products that remove mold without stripping paint or leaving stains; gentle, pH-neutral solutions and diluted household cleaners usually work best on painted surfaces. You’ll test cleaners in an inconspicuous spot for paint compatibility, wear gloves and eye protection, and ventilate the room. Use soft cloths or nonabrasive sponges to avoid scuffing. For stubborn patches, repeat short applications rather than soaking. Keep a record of what worked for future Cleaning safety. Visualize options:
| Cleaner | Texture |
|---|---|
| pH-neutral cleaner | Light liquid |
| Diluted soap solution | Soapy foam |
| Vinegar mix | Thin spray |
Why Bleach Usually Damages Paint
When you spray bleach on painted walls it can strip the finish, leaving dull or uneven patches. Harsh chemicals also leave residues that can react with paint binders and cause ongoing breakdown.
That’s why you’ll usually get better, longer-lasting results with milder, paint-safe cleaners.
Paint Finish Degradation
Although bleach kills mould, it also strips and weakens many paint finishes, so you’ll often see fading, chalking, or blistering after use. You should weigh immediate mould removal against long-term paint durability and follow mould prevention steps to limit repeat treatments.
Bleach oxidizes pigments and breaks binders, so coatings lose adhesion and protective properties. If you must use strong cleaners, test a hidden spot first and avoid repeated applications.
Consider gentler alternatives or repainting with mould-resistant products when damage is significant.
- Test small area
- Rinse thoroughly
- Limit frequency
- Use protective coatings
Chemical Residue Effects
You’ve already seen how bleach can strip pigments and weaken binders, but the leftover chemicals themselves also harm paint over time. When you bleach a wall, chemical residue stays lodged in microscopic pores and on the surface. That residue effects continued breakdown by attracting moisture, promoting microcracks, and accelerating pigment fading.
Over weeks to months, you’ll notice chalking, loss of gloss, and flaking where the residue concentrated. Rinsing helps but often leaves trace salts that keep drawing humidity. To protect finishes, neutralize and rinse thoroughly, test a small patch first, or use milder mould removers designed to avoid persistent chemical residue.
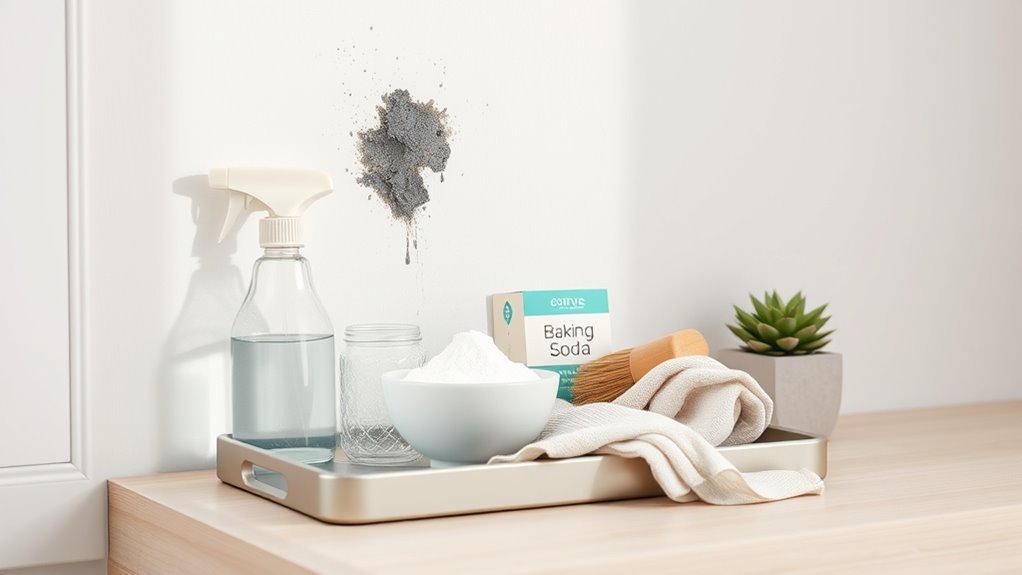
Make a DIY Mould Cleaner (Recipe and Ratios)
Before you mix anything, gather simple ingredients and the right protective gear so you’ll work safely and get reliable results. You’ll make an effective, gentle cleaner:
1 cup water,
1 cup white vinegar,
1 tablespoon dish soap,
1 teaspoon baking soda.
Combine vinegar and water in a spray bottle, add dish soap, then sprinkle baking soda on stubborn spots before spraying. Let sit 10–15 minutes, scrub gently, rinse and dry.
Don’t assume all online tips are true—Mould myths circulate widely; follow DIY safety principles, ventilate the room, and test a small painted area first to avoid damage.
Tools and Materials for Safe Mould Cleaning
Before you start, make sure you’ve got the right protective gear—gloves, an N95 respirator, and goggles—to keep spores off your skin and out of your lungs.
Gather the cleaning solutions and tools you’ll need, like your DIY cleaner, spray bottle, scrub brush, and absorbent cloths.
Plan for containment and safe disposal by sealing waste in bags and keeping the work area ventilated.
Protective Gear Essentials
When handling black mould on painted walls, wear the right protective gear to keep yourself safe and prevent spreading spores. At minimum, that means an N95 or P100 respirator, non-vented goggles, rubber gloves, and disposable coveralls or long sleeves you can wash immediately.
Don’t rely on casual items you’d wear for gardening tips or while reading cooking recipes—use purpose-made gear. Fit the respirator properly, seal goggles, and choose chemical-resistant gloves.
After work, bag disposables and launder reusables separately.
- Respirator (N95/P100)
- Non-vented goggles
- Chemical-resistant gloves
- Disposable coveralls
Cleaning Solutions Needed
Because mould likes damp, neglected spots, you’ll want the right cleaning solutions and tools on hand before you start scrubbing. Gather bleach or hydrogen peroxide, a mild detergent, and a commercial fungicide for stubborn areas. Use soft brushes, sponges, and microfiber cloths as cleaning tools, plus a spray bottle and bucket. Match treatment to mold types; stains may need different strengths.
| Item | Purpose | Notes |
|---|---|---|
| Bleach | Disinfect | Dilute 1:10 |
| H2O2 | Safer alternative | 3% solution |
| Detergent | Clean surface | Mild, non-abrasive |
| Fungicide | Persistent mold | Follow label instructions |
Disposal And Containment
Contain and dispose of mouldy materials carefully to prevent spores spreading. You’ll seal contaminated rags, sponges, and loose paint chips in heavy-duty plastic bags, tie them tightly, and label for disposal.
Use a HEPA vacuum after debris removal, and clean tools with a bleach solution that won’t harm paint compatibility.
Wear PPE and change it before leaving the area to aid mould prevention.
For porous items you can’t clean, double-bag and discard.
Finally, ventilate while you work and transport waste promptly to an outdoor bin to stop spores returning indoors.
- Seal and label waste
- HEPA vacuum
- Clean tools safely
- Double-bag porous items
Prepare the Wall and Surrounding Area
Before you start scrubbing, clear the area and protect everything you don’t want damaged by cleaner or spores: move furniture, cover floors and nearby items with plastic sheeting, and tape drop cloths at baseboards.
Check the wall texture and paint sheen to choose suitable tools and cleaners; glossy paints resist mild scrubbing, while flat surfaces absorb more moisture.
Open windows and run a fan for ventilation.
Put on gloves, eye protection, and an N95 mask.
Isolate the room by sealing doorways with plastic.
Lay out waste bags and a spray bottle with your chosen solution before you begin treatment.
Clean Small Mould Spots Without Stripping Paint
Start by evaluating the painted surface for flaking, porosity, and how deep the mould has set so you know whether the paint can stay.
For small, surface-level spots you can try gentle methods like a damp microfiber cloth with mild detergent, or a diluted vinegar solution applied and blotted rather than scrubbed.
Work carefully and test a hidden area first to make sure the cleaner won’t strip or discolor the paint.
Assess The Surface
If the mould covers only a small area, you can usually remove it without stripping the paint by first evaluating the surface to determine how deep the staining and damage go. Check visual cues, gently press the area, and note any peeling or soft spots.
Consider surface texture and paint compatibility before proceeding so you don’t worsen adhesion.
- Inspect edges for blistering or lifting paint.
- Feel for softness indicating substrate damage.
- Note glossy vs. porous finishes for cleaning choices.
- Test a hidden patch to confirm paint compatibility and stain depth.
Document findings before cleaning.
Gentle Cleaning Methods
When the mould is confined to a small spot and the paint’s intact, you can remove it with gentle cleaning that won’t strip the finish. Wear gloves and a mask, ventilate the room, and test an inconspicuous patch.
Mix mild detergent or diluted white vinegar (1 part vinegar to 3 parts water) and apply with a soft cloth or sponge—don’t scrub hard. Blot excess moisture, rinse with a damp cloth, and dry thoroughly to prevent regrowth.
Ignore common mould myths and cleaning myths that demand harsh chemicals. If stains persist or return, consider a repaint with mould-resistant primer and address humidity sources.
Treat Stubborn or Large Mould Stains
Because large or deep mould colonies can resist simple wiping, you’ll need stronger methods and a bit more elbow grease to fully remove them without damaging paint. Start by testing a small area for paint compatibility and choose products that support mould prevention afterward.
Wear gloves and a mask, ventilate, and gently scrape with a plastic scraper.
Use a diluted bleach or commercial mould remover per instructions, working top to bottom.
- Spot-test and note paint compatibility.
- Apply cleaner, wait the recommended time.
- Agitate with a soft brush; avoid wire tools.
- Repeat treatment until staining lifts, then restore ventilation.
Rinse and Dry Painted Walls Without Damage
After treating mould, rinse the wall with clean water to remove residue without scrubbing paint off; use a soft sponge, working top to bottom, and change water often.
After treating mould, rinse gently with clean water using a soft sponge—work top to bottom and change water often.
Blot excess moisture with lint-free cloths, then allow air circulation—open windows and run a fan or dehumidifier to speed drying.
Check for tackiness; if paint feels soft, stop and let it dry more slowly.
Once dry, inspect under good light for any gloss changes that affect paint sheen.
If you plan touch-ups later, note color matching needs now so you can match finish and avoid noticeable patches.
When You Must Repaint and How to Prep Surfaces
If mould has stained or damaged the paint or keeps returning despite cleaning, you’ll need to repaint.
Start by scraping loose paint, killing any remaining spores, and sanding and priming the surface so the new coat bonds properly.
Pick a mould-resistant primer and paint designed for high-humidity areas to reduce future growth.
When To Repaint
When mould has been killed and the surface feels sound, you still may need to repaint to seal stains, restore finish, and prevent regrowth. You’ll repaint when stains remain, the finish looks patchy, or you want long-term mould prevention; choose primers and paints for paint compatibility with existing coatings and mould-resistant formulas.
Follow these steps before painting to guarantee adhesion and effectiveness:
- Remove any loose paint and ensure the area is dry.
- Apply a stain-blocking primer compatible with your topcoat.
- Use mould-resistant or anti-microbial paint for high-risk areas.
- Maintain ventilation to reduce future mould growth.
Preparing The Surface
1 clear step before repainting is to make the surface structurally sound and free of contaminants so your new finish will adhere and the mould won’t return.
Inspect for bubbling, peeling, or soft plaster; remove damaged paint and replace rotted drywall.
Clean remaining mildew with appropriate cleaners, rinse, and let fully dry—moisture undermines paint durability and encourages recurrence.
Sand glossy edges for a smooth blending shift.
Vacuum and wipe dust away so primers and topcoats bond properly.
Seal repaired areas with a compatible primer to lock in repairs and support long-term mold prevention before you apply your chosen finish.
Choosing Mold-Resistant Paint
Why choose mold-resistant paint, and what difference will it make in a problem area? You’ll reduce mold growth recurrence and protect surfaces when you repaint after removing black mould. Choose high-quality, mildew-resistant formulations that improve paint adhesion and include antimicrobial agents.
Prep thoroughly: clean, dry, sand, and prime with a stain-blocking primer.
- Clean surfaces with a fungicide solution and let fully dry.
- Sand glossy spots to improve paint adhesion.
- Apply a mold-killing primer to seal stains and spores.
- Use a mold-resistant topcoat rated for high-moisture rooms.
Repaint only when humidity is controlled.
Pick Mould‑Resistant Primer and Paint That Work
Because paint choices can make a big difference, pick primers and paints labeled mould- or mildew-resistant to help stop spores from returning after you’ve cleaned the wall.
Choose a high-quality primer that seals porous surfaces, blocks stains, and creates a uniform base for topcoat adhesion.
For finished coats, use paints formulated for damp areas; they combine mould prevention with paint durability so finishes last longer and resist spotting.
Apply per manufacturer instructions, ensuring proper drying times and ventilation.
Recoat if recommended, and keep records of product names so you can match future touch-ups and maintain long-term protection.
Remove Mould From Trim, Baseboards, and Corners
When you tackle mould on trim, baseboards, and corners, work systematically from top to bottom and use small tools so you don’t spread spores or damage finishes. Wear gloves and a mask, protect floors, and test any cleaner on an inconspicuous area to preserve paint safety.
Use a soft brush and cotton swabs to loosen growth, then wipe with a mild detergent or diluted bleach solution. Dry thoroughly and monitor for recurrence.
Use a soft brush and cotton swabs to loosen mold, wipe with mild detergent or diluted bleach, then dry and monitor.
- Vacuum with HEPA attachment before wet cleaning.
- Spot‑clean seams and joints with swabs.
- Repaint only after full drying.
- Replace severely damaged trim.
Tackle Mould in Bathrooms and Kitchens
After handling trim and corners, turn your attention to bathrooms and kitchens, where moisture and heavy use make mould more likely and faster to spread. You’ll wear gloves and a mask, remove surface grime with detergent, then treat affected paint with a diluted bleach or commercial fungicide per instructions.
Scrub gently to avoid damaging finish; this supports Paint preservation. Don’t fall for Mould myths like blaming paint alone—moisture and organic residues matter.
Rinse, dry thoroughly, and repaint with mould-resistant paint if needed. Inspect regularly, address leaks promptly, and clean grout and seals to stop small spots becoming big problems.
Prevent Mould Return With Ventilation Fixes
If you want mould to stay gone, fix the ventilation that lets damp air linger. You’ll focus on airflow optimization and humidity control to keep painted walls dry. Improve exhausts, use fans, and make natural cross-ventilation routine.
- Install or upgrade extractor fans in moisture-prone rooms.
- Run fans during and after showers or cooking for 10–20 minutes.
- Open windows briefly to create cross-breezes when outdoor conditions allow.
- Use a hygrometer and set a dehumidifier to maintain relative humidity below 50%.
These steps reduce condensation, prevent mould spores settling, and keep finishes healthier.
Identify and Fix Common Moisture Sources
Fixing ventilation is only part of keeping mould away—you also need to find and stop the sources that create the moisture in the first place. Check for leaks: inspect roofs, flashing, and plumbing joints; repair or replace faulty seals immediately.
Fix ventilation, but also find and stop moisture sources—inspect roofs, flashing, and plumbing; repair faulty seals promptly.
Look for rising damp at skirting boards and fix external drainage or damp-proof courses.
Address condensation by insulating cold surfaces and sealing gaps around windows and doors.
Monitor basements and crawlspaces for groundwater intrusion and improve exterior grading.
These targeted steps support mould prevention and effective moisture control so painted walls stay dry and resist future mould growth.
Use Dehumidifiers and Fans Effectively
When you run a dehumidifier and position fans strategically, you’ll cut indoor humidity and speed drying on painted walls before mould can take hold. You’ll set the dehumidifier to maintain 40–50% RH and follow Dehumidifier maintenance: clean filters and empty or plumb the reservoir.
Use Fan placement techniques to direct air across damp surfaces, not at people. Combine devices after showers or leaks, and monitor with a hygrometer. Adjust settings during humid weather.
Stay alert for condensation returning; persistent dampness means fix ventilation or sources. Consistent use prevents mould regrowth and protects paint finishes.
- Clean filters regularly
- Aim airflow across walls
- Run until RH stabilizes
- Monitor and adjust
Eco‑Friendly Mould Cleaners (Recipes, Pros & Cons)
Lowering humidity and directing airflow will limit mould, but you’ll still need effective cleaners for the spots that appear. Use eco friendly ingredients like white vinegar, baking soda, and tea tree oil for gentle DIY solutions: spray diluted vinegar, scrub with baking soda paste, or mix a few drops of tea tree oil with water.
Pros: non-toxic, inexpensive, and less corrosive to paint. Cons: weaker than bleach on heavy infestations, may need repeated applications, and tea tree scent can linger. Test a hidden area first, wear gloves and a mask, and ventilate while you clean.
Dispose of Mouldy Materials and Contaminated Rags Safely
Because mould spores can keep spreading long after you’ve cleaned the surface, you should remove and dispose of heavily infested materials and any rags or brushes you used right away.
Because mould spores linger, immediately remove and safely dispose of heavily infested materials and used cleaning items.
Seal mouldy items in heavy-duty plastic bags, double-bag if needed, and label them as contaminated materials.
Follow local disposal procedures for hazardous waste if mould is extensive.
Don’t shake or brush debris into the air; wipe tools with detergent, then seal or discard.
Wash hands and clothes separately after handling.
- Bag and seal items immediately
- Label contaminated materials
- Check local disposal procedures
- Clean or discard tools and rags
Monitor Treated Areas and When to Repeat Treatment
After you’ve cleaned and dried the area, check it regularly for new spots, dampness, or musty smells over the next few weeks so you can catch any recurrence early. Inspect treated surfaces weekly at first, then monthly.
Note any mould growth or wall discoloration and mark locations to compare over time. If stains or musty odors return, repeat cleaning with the same approved solution and allow thorough drying.
Address persistent damp sources—leaks, poor ventilation—before retreating. If repeated treatments don’t stop visible regrowth or spreading discoloration, consider professional assessment to prevent deeper damage.
Cost to Remediate Mould on Painted Walls: Repair vs Replace
Regular checks will tell you whether simple re-cleaning will do or if the problem demands more extensive work, and that matters because costs can swing widely between repair and replacement.
You’ll weigh a cost comparison: small surface cleaning and spot priming costs far less than replacing drywall, treating behind walls, or hiring professionals.
Consider repair options based on extent, health risk, and time.
- DIY cleaning and repainting — low cost, limited scope.
- Localized drywall repair and encapsulation — moderate cost.
- Full drywall replacement and insulation check — high cost.
- Professional remediation and clearance testing — highest cost, safest option.
Frequently Asked Questions
Can Black Mould Cause Permanent Health Issues for Pets?
Yes — if exposed long-term, your pet can develop chronic respiratory risks and persistent pet allergies; you’ll see coughing, sneezing, worsening asthma or immune reactions, so address mold promptly and consult your vet for testing and treatment.
Will Mould Spores Spread Through My HVAC System?
Yes — mold spores can spread through your HVAC system. You’ll want to use proper HVAC filtration, seal ducts, and clean coils and filters regularly; otherwise spores can circulate, worsening contamination and health risks for occupants.
Can Wallpaper Hide Mould Behind It?
About 50% of indoor mould problems hide behind finishes, so no—you shouldn’t rely on wallpaper to hide mould behind it. When considering wallpaper removal, remember mould hiding techniques can mask growth; remove and inspect promptly for remediation.
Is Mould Insurance-Covered Under Homeowner Policies?
Usually, you won’t get full coverage: mould detection and remediation are often excluded unless sudden, covered damage caused it. You should document mould detection, file insurance claims promptly, and consult your policy and agent for specifics.
How Long After Treatment Is the Room Safe for Infants?
Within 24–48 hours after mould remediation, you can usually bring infants back; wait until surfaces smell fresh, air’s cleared, and remediation is complete. Prioritize infant safety by confirming ventilation, drying, and professional clearance.
Conclusion
You’ve learned how to spot, clean, and prevent black mould on painted walls — and funny enough, the very spot that showed up after that rainy weekend is often the easiest to fix. Don’t ignore small patches: tackle them with the right gear, eco cleaners, and safe disposal, and you’ll likely avoid costly repairs. Keep monitoring treated areas and repeat as needed; a little attention now can save you time, money, and headaches later.