How to Remove Marks From Painted Walls Easily
You can usually save a repaint by cleaning first: identify the paint finish, test a mild cleaner in an hidden spot, then work from least to more aggressive methods. Start with a damp microfiber and diluted dish soap, blot grease or ink, try baking soda paste or melamine sponge for stubborn scuffs, and use isopropyl alcohol sparingly on glossy paints. Fix peeling or mold before repainting, and keep testing so you don’t damage the finish—keep going to learn specific tips and fixes.
Quick Answer: When to Clean vs Repaint

If the mark looks like dirt, fingerprints, or scuffing, try cleaning it first; you’ll save time and money in most cases. You’ll test a small area with a mild cleaner because many cleaning myths exaggerate damage risks.
If the stain lifts, stick with cleaning—consider wall texture when choosing tools: soft cloths for smooth paint, soft-bristled brushes for textured surfaces. Repaint only when stains persist, paint flakes, or color mismatch is obvious.
Also repaint if repeated cleaning damages the finish. This approach keeps decisions practical: clean first, assess results, then decide whether repainting is truly necessary.
Identify Your Paint Type First
Before you start cleaning, identify your paint finish—flat, eggshell, satin, or semi-gloss—since each responds differently to scrubbing.
You can usually tell by looking for shine and by running your hand over the surface.
If you’re unsure, test a small hidden spot with water and a gentle cleaner to see how the paint reacts.
Paint Finish Identification
Since different finishes react differently to cleaning, you should identify your paint type before tackling marks. Look closely: flat or matte hides imperfections but can lift with scrubbing. Eggshel and satin handle gentle washing. Semi-gloss and gloss tolerate firmer cleaning near trim.
Run your fingernail to detect sheen and touch to feel texture. Note textured finishes that trap dirt and may need different tools. If you plan wallpaper removal later, know that underlying primer or wallboard affects cleaning choices.
Label the finish mentally or with a small note so you choose appropriate cleaners and avoid damage.
Test With Hidden Spot
When you’re ready to test, pick a hidden spot—inside a closet, behind a switch plate, or near baseboard trim—and try your chosen cleaner there first to see how the paint reacts. You’ll confirm durability and compatibility before treating visible areas.
Use these test techniques to be systematic:
- Clean a small area with mild soap and water, blotting gently.
- Try a magic eraser on a tiny patch for scuff removal.
- Apply rubbing alcohol on a cotton swab to check for sheen loss.
- Wait 24 hours to inspect for discoloration or finish change.
Hidden spots let you avoid surprises and protect your walls.
Test a Small Area Safely
Although you’re ready to tackle the mark, start by testing a small, inconspicuous area to confirm the cleaner won’t damage the paint. Choose a spot near baseboards, behind wall art, or behind furniture where damage will stay hidden.
Use the cleaner on a cotton swab or soft cloth and wait several minutes to check for discoloration, softening, or sheen changes. If the paint looks unchanged, proceed cautiously.
If it shows harm, stop and try a gentler method. Document what worked for each room to protect painted surfaces and keep your wall art and furniture protection plans effective.
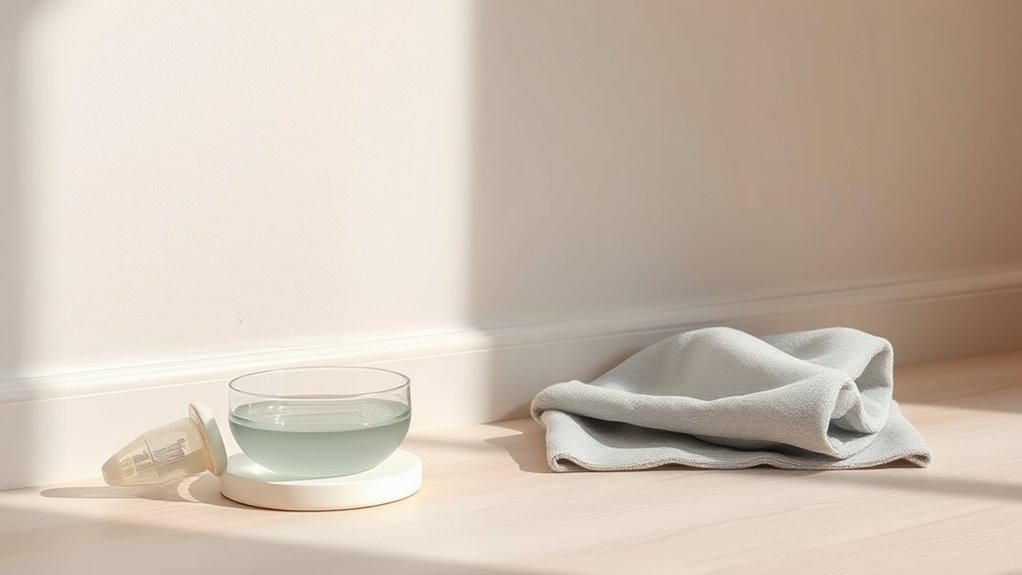
Essential Tools for Cleaning Painted Walls
Before you start scrubbing, gather a small kit of reliable tools that’ll make the job faster and safer. You’ll want items that protect finishes and help you assess marks without harming paint durability. Include gentle sponges, soft microfiber cloths, a soft-bristled brush, and a plastic scraper for stubborn spots.
Keep a small bucket for clean water and a separate one for rinse water to avoid spreading grime. If you’re unsure about color matching after spot cleaning, test in an inconspicuous area first. Store tools clean and dry so they’re ready when marks appear.
Keep a clean bucket for fresh water, a separate rinse bucket, and always test spot-cleaning in an inconspicuous area.
- Sponge
- Microfiber cloth
- Soft brush
- Plastic scraper
Mild Cleaners That Won’t Damage Paint
If you want to lift marks without stripping finish or changing color, stick to mild, pH-neutral cleaners you can rinse easily. You’ll get good results with diluted dish soap, gentle all-purpose sprays, or a mix of water and white vinegar for hard-to-remove smudges.
Try eco-friendly alternatives like castile soap or biodegradable cleaners when you prefer non-toxic options. Use soft cloths or sponges, work from least to most aggressive, and rinse thoroughly to prevent residue.
For stubborn areas, consider stain-specific solutions—test them first in an inconspicuous spot to confirm they won’t affect paint.
Cleaners and Tools to Avoid
When you’re trying to keep painted walls looking their best, steer clear of harsh chemicals and abrasive tools that can strip finish, dull color, or leave scratches; common culprits include bleach, ammonia, strong degreasers, rough scouring pads, and wire brushes.
You’ll also want to avoid products that trigger chemical reactions with paint binders or alter wall texture. Instead, don’t use:
- Oven cleaners or drain openers
- Industrial degreasers
- Steel wool or metal scrapers
- High-pressure washers
These can cause permanent damage, remove protective coatings, or embed grit. Test any new product discreetly before broader use.
How to Make a Safe Homemade Cleaner
Because harsh cleaners can harm paint, make a gentle homemade solution using ingredients you likely already have: warm water, a few drops of dish soap, and either white vinegar or baking soda for tougher marks.
Because harsh cleaners damage paint, use warm water, a few dish-soap drops, and vinegar or baking soda for tougher marks.
Mix small batches, test a hidden spot, and apply with a soft cloth, not a scrub brush. Rinse with plain water and pat dry.
For persistent stains, repeat gently or try a paste per the next section.
Avoid abrasive pads and strong solvents.
Keep your cleaning area fresh with Homemade air fresheners, and protect decor like DIY wall decals when spot-cleaning nearby.
Using Baking Soda Safely on Painted Walls

Before you use baking soda on a painted wall, test a small, hidden area to make sure the finish won’t dull or lift.
If it looks fine, mix baking soda with a little water to form a gentle paste that’s easy to control.
Apply the paste with a soft cloth, rub lightly, then rinse and dry the spot.
Test A Small Area
Curious if baking soda will harm your paint? You should always test a small area first to protect wall textures and assess paint durability. Pick an inconspicuous spot, then follow these steps:
- Wipe dust away with a dry cloth.
- Dab a damp cotton swab to confirm no immediate finish change.
- Apply a tiny pinch of baking soda on a damp cloth and rub gently for 10 seconds.
- Wait 15 minutes, then inspect for discoloration or sheen loss.
If the test shows no damage, you can proceed cautiously elsewhere. If you see changes, stop and choose a milder method.
Make A Gentle Paste
If your spot test showed no damage, make a mild baking soda paste by mixing one part baking soda with two parts water until it reaches a creamy, toothpaste-like consistency.
Apply the paste with a soft cloth or sponge, using light circular motions to target marks without scrubbing aggressively. Rinse the cloth frequently and wipe away residue with a damp microfiber to avoid grit lingering on the paint.
Work gently, testing any pressure as you go to prioritize surface protection. After cleaning, dry the area with a soft towel.
Repeat once if needed, then wait before treating adjacent spots.
How to Use Vinegar Safely on Painted Walls
When using vinegar on painted walls, dilute it and test a small, hidden patch first so you don’t damage the finish or discolor the paint. You should wear gloves if you have vinegar allergies or skin sensitivity, and ventilate the room.
Use a soft cloth and mild 1:4 vinegar-to-water mix. Follow these steps:
Use a soft cloth and a mild 1:4 vinegar-to-water mix for gentle cleaning—test first and rinse afterward.
- Blot marks gently; don’t scrub hard.
- Rinse area with plain water after cleaning.
- Dry with a microfiber cloth to avoid streaks.
- Store leftover solution safely—follow vinegar storage tips and keep it labeled away from children.
Stop immediately if paint softens or color shifts.
Commercial Stain Removers Worth Trying
You can try several commercial stain remover types—magic erasers, mild degreasers, and specialty paint-safe cleaners—to tackle different marks.
Read the label for compatibility with your paint finish and test in an inconspicuous spot first.
Use gentle pressure and follow the product instructions to avoid removing paint while removing stains.
Commercial Stain Remover Types
Although store-bought products won’t fix every mark, they can save you time and effort for most common stains—you’ll just need the right type for the job. Choose cleaners that match paint sheen and surfaces; some prioritize gentle action for Historical wall finishes, others target grease or ink. Eco-friendly options exist if you’re cautious about fumes.
- Mild all-purpose cleaners — everyday dirt and fingerprints.
- Magic eraser-style foam — scuff marks, test first.
- Solvent-based stain removers — ink, marker, grease.
- Specialty restorers — textured or aged finishes.
Always test a hidden spot before treating visible areas.
How To Use Products
Now that you know which commercial cleaners suit different stains and finishes, learn how to apply them safely and effectively.
First, test in an inconspicuous spot for colorfastness—this matters for modern and historical paint restoration.
Follow label instructions: dilute when directed, use soft cloths or sponges, and work from bottom upward to avoid streaks.
Wear gloves and ventilate the room; choose eco-friendly solutions when possible to reduce fumes and surface residue.
Rinse thoroughly with clean water and dry gently.
If marks persist, repeat once or switch to a milder product to protect the finish and paint integrity.
When to Use a Magic Eraser (And When Not To)
When a stain looks stubborn but the paint is washable, reach for a Magic Eraser—it’s great on scuffs, crayon, and grease—but test a small, hidden spot first because it can dull or remove delicate finishes. You’ll want to weigh paint compatibility and surface age before scrubbing. Use gentle pressure; don’t overwork one area.
- Check paint type: satin and semi-gloss tolerate more than flat.
- Test: scrub a hidden spot for 10 seconds.
- Protect trim: tape edges to avoid accidental abrasion.
- Stop if sheen changes or paint thins; switch to mild detergent.
If unsure, consult manufacturer guidance.
How to Remove Pencil Marks
For light pencil marks, you can usually start by gently erasing with a soft vinyl or white eraser so you don’t damage the paint.
If smudges remain, try a mild stain-removing solution—like diluted dish soap or a baking soda paste—on a soft cloth and test a hidden spot first.
Work lightly and rinse the area with a damp cloth to avoid leaving residue.
Gentle Erasing Techniques
Although pencil marks are one of the easiest blemishes to fix, you’ll want to use gentle erasing techniques to avoid scuffing the paint. A soft vinyl eraser or a clean, white art eraser usually does the trick. You should test in an inconspicuous spot, especially on textured patterns or near wall art.
Work lightly, angle the eraser, and avoid circular scrubbing. Follow these steps:
- Lightly rub with a soft vinyl eraser.
- Brush away crumbs with a microfiber cloth.
- Repeat gently if needed; stop when ghost marks remain.
- Touch up tiny spots with matching paint if necessary.
Stain-Removing Solutions
If gentle erasing doesn’t fully lift pencil marks, reach for mild stain-removing solutions that won’t harm paint. Test a cotton swab with diluted dish soap or a magic eraser on an inconspicuous spot to protect wall texture. Gently rub small areas, working outward until the mark fades.
For stubborn graphite, try a paste of baking soda and water applied lightly, then wipe clean. Avoid harsh solvents that strip finish or mimic wallpaper removal techniques; those can ruin paint.
Rinse with a damp cloth and pat dry. Repeat sparingly, and always test first to preserve your painted walls.
How to Get Crayon Off Without Scrubbing
When crayon ends up on your painted walls, you don’t have to scrub until the paint thins—try gentle, nonabrasive methods that lift wax and pigment without damage. For effective crayon removal and stain prevention, act quickly and use safe tools.
When crayon marks appear, use gentle, nonabrasive methods—act quickly with safe tools to lift wax and pigment.
- Warm soapy water: blot with a microfiber cloth to soften wax.
- Cooking oil: rub lightly, then wipe with mild detergent to remove residue.
- Hairdryer: heat briefly to loosen wax, then blot with paper towel.
- Baking soda paste: apply gently, rinse, and pat dry.
Test first in a hidden spot to protect finish.
Removing Marker and Ink Stains
How do you tackle fresh marker or ink without damaging the paint? Blot excess ink gently with a clean cloth—don’t rub. Test a small spot with isopropyl alcohol or a diluted dish soap solution to verify the finish and wall texture tolerate it.
Apply sparingly, work outward, and blot repeatedly until the stain lifts. For stubborn marks, try a white eraser or a melamine sponge with light pressure; avoid sanding.
If the pigment persists, consider targeted art restoration techniques: color-matching touch-up paint rather than aggressive cleaning to preserve sheen and avoid harming the surrounding surface.
How to Lift Grease and Cooking Splatters
First, you’ll want to identify what kind of grease you’re dealing with—cooking oil, splattered sauce, or old baked-on film—since that affects which cleaner will work best.
Use mild, safe solutions like diluted dish soap, white vinegar, or a commercial degreaser formulated for painted surfaces.
Gently scrub with a soft cloth or non-abrasive sponge, testing a small area first to avoid damaging the paint.
Identify Grease Type
Want to know what you’re dealing with before you clean? You should identify grease type by observing sheen, smell, and residue so you protect wall color and respect paint durability. Light cooking mist wipes differently than heavy oil splatter. Check these cues:
- Fresh mist — faint sheen, mild odor, easy smear.
- Sticky oil — darker, tacky, attracts dust.
- Burnt-on splatter — crusty, matte, may alter pigment.
- Unknown residue — test a small hidden spot first.
You’ll choose techniques based on these observations, avoiding harsh actions that strip pigment or harm finish.
Safe Cleaning Solutions
While you might be tempted to grab the strongest cleaner, start with mild, paint-safe solutions that lift grease without stripping color or sheen.
You can use a mix of warm water and a few drops of dish soap for fresh splatters; it cuts oil yet’s gentle on paint.
For older deposits try a paste of baking soda and water applied briefly, then rinsed.
Vinegar diluted with water works on lighter residues but test first.
Consider eco friendly options like castile soap or plant-based degreasers.
DIY solutions save money and reduce harsh chemicals—always blot, don’t soak, and spot-test first.
Gentle Scrubbing Techniques
Once you’ve pretreated stains with a mild solution, use gentle scrubbing to lift grease and cooking splatters without damaging the paint. You’ll protect textured finishes and preserve paint sheen by choosing the right tools and pressure. Use a soft sponge or microfiber cloth, test a small area, and work outward from the stain.
Follow these steps:
- Blot excess grease, don’t rub.
- Apply mild degreaser diluted per instructions.
- Lightly scrub in circular motions with minimal pressure.
- Rinse with clean water and pat dry to avoid streaks.
Repeat once if needed; avoid abrasive pads.
Tackling Fingerprints and Hand Smudges
If fingerprints and hand smudges are marring your painted walls, you can usually remove them quickly with the right gentle cleaner and a soft cloth; you’ll blot first, then wipe in small circles. For fingerprint removal and hand smudge cleaning, dampen a microfiber cloth with diluted dish soap or a mild all-purpose cleaner, test a hidden spot, then clean gently. Rinse with a damp cloth and dry to prevent streaks. Use minimal pressure to protect paint.
| Area | Cleaner | Tip |
|---|---|---|
| Light | Soap mix | Blot first |
| Stubborn | Mild cleaner | Test spot |
| Finish | Dry | Avoid rubbing |
Erasing Scuff Marks From Shoes and Furniture
Because scuffs from shoes and furniture typically sit on the paint surface, you can often remove them without repainting by using gentle abrasives or targeted cleaners and a soft cloth. Start with the least aggressive method and work up only as needed.
You’ll treat shoe scuffing and minor furniture scratches similarly: test in a hidden spot, then proceed carefully. Try these steps:
- Wipe with warm, soapy water and a soft cloth.
- Use a melamine sponge gently for stubborn marks.
- Apply a small amount of baking soda paste or non-gel toothpaste.
- Finish with a damp cloth and dry, inspecting for residual marks.
How to Remove Water Rings and Drip Marks
Start by spotting where the water rings or drips came from so you can fix the leak before cleaning.
Use gentle cleaning methods—like a damp cloth, mild soap, or a baking soda paste—to lift marks without damaging paint.
Once it’s clean, stop future drips by repairing leaks, improving ventilation, or adding drip guards.
Identify Water Ring Source
When you spot a water ring or drip mark, trace it back to its source before you clean so you don’t repeat the job. Check above the stain for plumbing, roof leaks, condensation from AC units, or a nearby window that lets rain in.
Identify the water source and note the stain origin so you can fix the cause first. Inspect ceilings, pipes, and exterior seals. Consider timing and weather patterns. Document findings with photos. Prioritize repairs or temporary containment.
- Map the leak path.
- Check nearby fixtures.
- Look for soft spots.
- Schedule repairs.
Gentle Cleaning Techniques
Once you’ve stopped the leak and let the wall fully dry, you can remove water rings with gentle, controlled cleaning so you don’t damage the paint. Test a hidden area to check how your cleaning method affects wall texture and paint color.
Start with a soft sponge dampened in plain water, blotting outward from the ring. If residue remains, mix mild dish soap with water, rinse the sponge, and gently wipe.
For stubborn drip marks, try a paste of baking soda and water applied lightly, then rinse. Dry with a microfiber cloth and inspect; repeat gently if needed.
Prevent Future Drips
After you’ve removed the existing rings and stains, take steps to prevent future drips so you don’t repeat the same cleanup. You’ll protect finishes and avoid patchwork that ruins paint color matching or forces wallpaper removal. Inspect sources—pipes, vents, windows—and fix leaks promptly. Seal joints and use drip trays where needed. Consider breathable waterproofing in humid areas.
- Check ceilings, plumbing fixtures, and window seals regularly.
- Install gutters, diverters, or splash guards to channel water away.
- Use mildew-resistant primer and proper topcoat for moisture-prone rooms.
- Keep humidity controlled with ventilation or dehumidifiers.
Treating Mold or Mildew Spots on Painted Walls
If you spot small patches of mold or mildew on painted walls, act quickly to prevent staining and spread. Wear gloves and a mask, ventilate the room, and test a hidden area first.
Mix one part bleach with three parts water or use a commercial mildew-resistant cleaner. Apply gently with a soft cloth or sponge, then rinse and dry thoroughly.
Mix one part bleach to three parts water or use a mildew cleaner; gently wipe, then rinse and dry thoroughly.
For porous paint, consider repainting with mold prevention primer and mildew resistant paint.
Fix moisture sources—leaks, poor ventilation, or condensation—to stop recurrence.
Monitor treated areas and repeat cleaning promptly if any new growth appears.
Removing Lipstick and Makeup Smears
First, identify whether the stain is fresh, oily, or set-in so you pick the right approach.
Start with gentle spot cleaning using a soft cloth, mild soap, and water to avoid damaging the paint.
If the mark won’t budge, move to tougher removers like rubbing alcohol or a commercial stain remover, testing an inconspicuous patch first.
Identify Stain Type
When you spot a reddish, smudged streak near a light switch or mirror, you’re usually looking at lipstick or other makeup transfer; these stains tend to be waxy or oily and sit on the paint’s surface rather than soaking in.
You’ll want to identify stain type quickly so you choose the right removal method, and consider Stain symbolism and Wall color psychology if appearance matters.
Check these clues:
- Texture: waxy residue vs powdery dust.
- Shine: oily smears reflect light.
- Color transfer: vivid pigments vs muted tones.
- Paint finish: matte hides marks, gloss shows them.
Gentle Spot Cleaning
Now that you can spot lipstick or makeup by texture and shine, you’re ready to remove it without harming the paint. Test a hidden spot first to check wall texture sensitivity and avoid paint peeling. Blot excess with a soft cloth—don’t rub.
Mix mild dish soap with warm water, dampen a microfiber cloth, and gently dab the stain from edges inward.
For oily residues, a small amount of isopropyl alcohol on a cotton swab works; retest first. Rinse with plain water and pat dry.
If residue remains, stop and consider gentler methods to prevent surface damage.
Tough Stain Removal
Although gentle spot cleaning works for light smudges, tougher lipstick and makeup stains need a targeted approach you can trust. Start by blotting excess product; don’t rub or you’ll spread color into the wall texture. Test a mild detergent solution in an inconspicuous area. Use these steps:
- Apply dish soap and water, blotting gently with a microfiber cloth.
- For oily lipstick, try a small amount of isopropyl alcohol, dabbing carefully and rinsing.
- Rinse with clean water, pat dry to avoid water marks.
- Finish with stain prevention: consider a washable paint or protective coating to reduce future issues.
How to Clean Pet Nose and Paw Marks
Spotting a cluster of nose and paw marks on a painted wall? You’ll clean gently to avoid paint damage.
Start by wiping with a soft, dry microfiber to remove loose dirt; note pet behavior so you can prevent repeat smudges.
Begin by wiping with a soft, dry microfiber to lift loose dirt, and note pet habits to prevent future smudges.
Mix mild dish soap with warm water, dampen a cloth, and rub in light circular motions.
Rinse with a clean damp cloth, then dry.
For stubborn oils, try a small amount of diluted vinegar, testing first in an inconspicuous spot.
Consider allergy considerations—wash hands and launder any cloths used to remove dander and residues.
Getting Adhesive Residue and Tape Glue Off
When tape leaves sticky residue on your painted wall, you can usually remove it without damaging the paint. Try gentle solvents like rubbing alcohol, white vinegar, or a specialized adhesive remover, testing first in an inconspicuous spot.
For the tape itself, peel slowly at a low angle and use a cloth with your chosen solvent to lift any remaining glue.
Gentle Solvent Options
If tape residue or sticky adhesive won’t come off with soap and water, try a gentle solvent designed to dissolve glue without stripping paint. You’ll want to balance chemical safety with effectiveness, and consider eco friendly solutions where possible. Test any product in an inconspicuous spot first.
Try these options gently, using a soft cloth and light pressure:
- Rubbing alcohol (isopropyl) — mild, evaporates quickly.
- Goo gone or citrus-based adhesive remover — formulated for paint.
- Vinegar solution (diluted) — natural, low-toxicity alternative.
- Commercial citrus solvent pads — convenient, biodegradable choices.
Wipe residue away, then rinse and dry.
Removing Sticky Tape
Got tape residue clinging to your painted wall? You can remove it without harming paint. For sticky tape removal, warm the area with a hair dryer, peel gently, then dab remaining adhesive with rubbing alcohol or a paste of baking soda and oil. Test first in an unseen spot. Work slowly, rubbing lightly in circles, then wipe clean with a damp cloth and dry.
| Tool | Action | Tip |
|---|---|---|
| Hair dryer | Warm adhesive | Low heat |
| Fingernail | Peel edge | Slow motion |
| Alcohol | Dissolve glue | Blot, don’t rub |
| Oil paste | Lift residue | Gentle pressure |
| Soap water | Final clean | Dry thoroughly |
How to Remove Wax and Candle Drips
Wondering how to get candle wax off painted walls without damaging the finish? You can remove cooled candle wax and wall residue gently.
First, harden wax with ice in a plastic bag, then chip off flakes with a plastic scraper.
Harden the wax with ice in a bag, then gently chip away flakes using a plastic scraper.
Next, soften remaining film with a hair dryer on low and blot with a clean cloth.
Finally, wipe the spot with a mild dish soap solution and dry.
- Use ice to harden.
- Scrape gently with plastic.
- Heat briefly to lift residue.
- Clean with mild soap and dry well.
Lifting Soot and Smoke Discoloration
After you’ve handled wax drips, you’ll often notice soot or smoke stains that need a different approach. You’ll start by dry-cleaning with a soft brush or vacuum using a brush attachment to lift loose soot—don’t rub or you’ll spread it.
For deeper soot removal, mix warm water with a few drops of dish soap or a trisodium phosphate substitute, test a hidden spot, then gently wipe with a microfiber cloth.
For stubborn smoke stains, use a solution of vinegar and water or a commercial cleaner labeled for smoke; rinse, blot dry, and repeat until the discoloration fades.
Fixing Paint That’s Flaking or Peeling
Start by spotting all the areas where paint is flaking or peeling so you know what needs attention.
Scrape away loose paint with a putty knife, then sand the edges smooth for a clean shift.
Prime the bare spots and repaint to restore a uniform finish.
Identify Flaking Areas
If paint’s flaking or peeling, walk the room and scan each wall carefully so you can spot loose edges, bubbling, or areas where paint’s lifted from the substrate. You’ll assess how widespread the problem is and note variations in wall texture and signs that affect paint durability. Pay attention to corners, trim junctions, and near windows or plumbing.
- Mark perimeter of affected zones with painter’s tape.
- Measure patch sizes to prioritize repairs.
- Photograph patterns to track progression.
- Note environmental clues like moisture stains or sun exposure that explain why flaking started.
Remove Loose Paint
How will you remove the loose paint without making the problem worse? Use a putty knife at a low angle to lift flakes gently, working from undamaged paint toward the edge to avoid widening separation.
Collect debris and dust with a soft brush so you can assess underlying adhesion and any color contrast that reveals old layers.
For uneven wall texture, work carefully to preserve pattern; small scrapers or sanding sponges help smooth edges without gouging.
Remove only obviously loose material—don’t chase well-adhered paint.
After cleanup, wipe the area clean and let it dry fully before the next repair step.
Prep And Repaint
Now that you’ve removed loose paint and cleaned the area, prep the surface for repainting so the new coat will stick and look seamless. Sand edges until smooth, feathering into surrounding wall texture so seams disappear. Wipe dust, let dry, and apply a bonding primer to bare spots.
Protect nearby light fixtures and trim with tape and drop cloths. Choose matching paint sheen and apply thin, even coats, allowing proper drying between layers.
- Sand and smooth edges
- Clean and prime bare areas
- Mask light fixtures and trim
- Paint thin, even coats
Small Stain Fixes for Flat (Matte) Paint
Want to get rid of small scuffs and fingerprints on flat (matte) paint without leaving shiny spots? You can often fix marks without repainting by working gently. Test a hidden area to check wall texture and how the finish responds.
Use a soft dry microfiber cloth first, then a damp sponge with mild dish soap for stubborn spots; blot, don’t scrub. For grease, try a small dab of baking soda paste, rub lightly, then rinse.
Avoid aggressive cleaners that cause paint removal or shine. If a spot won’t lift, feather the edges and spot-prime before repainting.
Cleaning Eggshell and Satin Finishes
Although eggshell and satin finishes are more durable than flat paints, they still need gentle care to avoid sheen loss or streaks. You’ll treat Eggshell sheen and Satin durability similarly: use mild cleaners and soft tools, test a hidden spot, and work top to bottom.
- Mix warm water with a few drops of dish soap.
- Use a microfiber cloth, wrung nearly dry, wiping gently in a circular motion.
- Rinse with plain water and blot dry to prevent streaks.
- For stubborn marks, try a melamine sponge lightly, avoiding heavy scrubbing to preserve finish.
Best Approach for Semi‑Gloss and Gloss Paint
If you’ve been careful with eggshell or satin, you’ll find semi-gloss and gloss are even more forgiving—these finishes resist moisture and wipe clean more easily, but their high sheen also highlights streaks and residues.
If you’re careful with eggshell or satin, semi-gloss and gloss are even easier to clean—though they show streaks.
You’ll start with a soft microfiber and diluted mild detergent, testing a hidden spot. Use gentle, straight strokes and dry immediately to prevent water spots.
For scuffs, a magic eraser works lightly; don’t over-scrub or you’ll dull the sheen.
If you’re tackling wallpaper removal near glossy trim, protect painted areas.
For textured wall cleaning, avoid harsh scrapers and stick to soft, controlled wiping.
Remove Stains From Textured Paint
When stains mar textured paint, you’ll need a different approach than for smooth walls because crevices trap dirt and cleaning liquids can pool. Start by dry-cleaning loose grime with a soft brush or vacuum with a brush attachment.
You’ll then tackle spots carefully to avoid damage and encourage stain prevention.
- Test a mild detergent solution on an inconspicuous area.
- Blot stains with a microfiber cloth, working outward and avoiding scrubbing.
- Use a soft-bristled brush for textured grooves, rinsing frequently.
- For persistent marks, apply a paste of baking soda and water briefly, then rinse.
Dry thoroughly to prevent residue and recoat if needed.
Cleaning Baseboards and Trim Without Streaks
Gather a soft cloth, a mild cleaner, a small brush, and a bucket of clean water so you’ve got the right tools and materials on hand.
Use streak-free techniques like wiping with the grain, rinsing the cloth frequently, and finishing with a dry microfiber to prevent lines.
I’ll show simple steps that keep trim and baseboards spotless without streaks.
Tools And Materials
Before you start, assemble a small kit of the right tools and materials so cleaning baseboards and trim is quick and streak-free: a soft microfiber cloth, a small angled brush or old toothbrush for crevices, a gentle all-purpose cleaner or diluted dish soap, a magic eraser for scuffs, a bucket of clean water for rinsing, and a pair of nitrile gloves to protect your hands.
Choose supplies that respect color matching and wall texture to avoid damage. Essential items:
- Microfiber cloths (several)
- Small angled brush
- Mild cleaner and bucket
- Magic eraser (light touch)
Keep extras for touch-ups.
Streak-Free Cleaning Techniques
Want streak-free baseboards and trim every time? You’ll prep by dusting, testing a small area for wall texture response, and choosing a gentle cleaner to protect paint durability. Work top-to-bottom with a microfiber cloth and a flat brush for grooves. Rinse frequently and blot—don’t drag—to avoid streaks. Dry immediately with a clean, lint-free towel.
| Tool | Action | Tip |
|---|---|---|
| Microfiber | Wipe | Use damp, not soaked |
| Soft brush | Detail grooves | Follow grain direction |
| Mild cleaner | Clean | Test first |
| Towel | Dry | Blot quickly |
| Bucket | Rinse | Change water often |
Removing Marks Near Outlet Covers and Switches
When marks gather around outlet covers and light switches, they’re especially noticeable and need a careful touch to avoid damaging the paint or the electrical fixtures. You’ll focus on outlet cover maintenance and switch plate aesthetics while keeping safety first: turn power off if you’ll remove plates.
- Unscrew plates, clean gently with a damp cloth and mild detergent.
- Use a magic eraser sparingly on painted edges to lift scuffs.
- Dry thoroughly before reattaching to prevent moisture near wiring.
- Replace cracked plates and touch up paint with a small brush for a seamless finish.
Handle fixtures gently and test switches after.
How to Protect Walls During Moving or Play
How do you keep your walls unscuffed during a move or while kids play? Use protective runners, cardboard panels, or moving blankets to shield high-traffic areas and corners. Tape soft bumpers to furniture edges and door frames to prevent dents.
Protect walls during moves and play with runners, panels, moving blankets, and soft bumpers on edges.
For play zones, install washable wall panels or clear wall protectors at child height; they preserve wall texture and let you test impact before repainting.
Choose paints with higher paint durability and consider semi-gloss trim for easier cleaning.
When moving, lift rather than slide furniture and pad items that contact walls. Inspect and spot-touch any chips promptly to avoid larger repairs.
Quick Daily Habits to Prevent Buildup
You can stop stains before they start by wiping spills immediately with a soft cloth or sponge.
Make a quick dusting routine—weekly pass with a microfiber cloth or duster prevents grime buildup.
These small habits save time and keep your painted walls looking fresh.
Wipe Spills Immediately
Because small spills can set quickly, wipe them up as soon as they happen to keep stains from bonding to paint. You’ll stop most marks before they need stain removal and keep wall protection intact by acting fast. Use a soft cloth and gentle pressure; avoid harsh scrubbing that strips finish. Blot, don’t smear, and rinse the cloth often.
For sticky messes, dampen the cloth with mild soap solution, then dry.
- Blot spill immediately.
- Use mild soap if needed.
- Rinse and change cloth frequently.
- Dry area to prevent residue.
These steps save time and preserve painted surfaces.
Regular Dusting Routine
After wiping up spills, make daily dusting a simple habit so dirt doesn’t settle into paint and create stubborn marks. You’ll skim walls with a microfiber duster or soft cloth, working top to bottom to catch dust before it embeds.
Pay attention to high-touch areas and edges near trim where grime builds. For textured surfaces, use a brush attachment on low vacuum to pull debris from crevices without harming wall texture.
If you’re planning wallpaper removal later, keep dust minimal to avoid adhesive issues. A minute or two each day prevents buildup, reduces cleaning effort, and preserves your painted walls.
Spot‑Cleaning Routine for High‑Traffic Walls
When walls near doorways and hallways collect fingerprints, scuffs, and food splatters, establish a quick spot‑cleaning routine so marks never set in. You’ll evaluate wall texture and paint durability to choose cleaners and tools that won’t damage finish. Tackle spots promptly, test cleaner in a hidden area, then proceed systematically.
- Blot spills immediately with a microfiber cloth and water.
- Use mild detergent diluted, apply gently with circular motions.
- Try a magic eraser lightly on stubborn scuffs, avoiding matte paints.
- Rinse, dry, and monitor for repeat marks to adjust frequency.
How to Blend Touch‑Ups So They’re Invisible
If you want a repaired spot to disappear, match the paint’s sheen and color, feather the edges, and blend thin layers until the repair reads as part of the wall.
Start by cleaning and lightly sanding the area, then apply primer if the patch absorbs differently.
Use a small brush or mini roller to lay on thin coats, working outward from the center to avoid hard lines.
Check color matching under the room’s usual light and adjust mixes sparingly.
Replicate the surrounding wall texture with stippling or a texture tool before paint cures.
Let each layer dry fully for seamless integration.
Choosing the Right Touch‑Up Paint and Finish
Before you start touching up, make sure you match the paint color exactly so the patch won’t stand out.
Pick the same sheen as the surrounding wall—flat, eggshell, satin, or semi-gloss—to keep light reflecting evenly.
Always test the paint on a hidden spot first to confirm the color and finish blend in.
Match Paint Color Exactly
Because even a tiny shade difference shows up on a repaired spot, you’ll want touch-up paint that matches both color and finish precisely. You’ll sample from hidden areas, note wall texture, and avoid confusing wallpaper removal residue with discoloration. Follow these steps to nail the match:
- Test small swatches from stored cans or color-matched mixes.
- Compare swatches in natural and artificial light at different times.
- Feather edges on an inconspicuous patch to check blending with existing wall texture.
- Label leftover paint with room, date, and sheen for future touch-ups.
Work patiently—accurate matching saves obvious repairs.
Select Appropriate Sheen
Wondering which sheen will hide your repair best? You’ll want to focus on sheen selection: flatter finishes mask imperfections, while higher sheens highlight texture and edges.
For small scuffs, eggshell or satin often blends without drawing attention. For trim or high-traffic areas, semi-gloss cleans easier but may reveal touch-up spots.
Do a gloss comparison mentally: the closer the finish reflects light like surrounding paint, the less noticeable the repair.
Match both paint color and sheen level when buying touch-up paint, and feather edges lightly when applying so the repaired area catches light similarly to the original surface.
Test On Hidden Area
When you’ve matched the color and sheen as closely as possible, try the paint on a hidden spot—behind a door, inside a closet, or under a baseboard—to see how it really looks once it dries. You’ll confirm color, sheen, and adhesion against your wall texture before committing.
Use small brushes and compatible painting techniques to mimic your original application. Evaluate in different light and after drying.
- Apply a tiny patch.
- Check finish match.
- Assess blend with texture.
- Observe after 24 hours.
If it passes, proceed; if not, adjust formula or technique and retest.
Prep Steps Before Touching Up Paint
Before you start touching up paint, clear the area and assess the damage so you know what tools and materials you’ll need. Remove loose debris, move furniture, and lay down drop cloths.
Check whether marks sit on top of paint, on wallpaper, or follow wall texture patterns that affect blending. If wallpaper removal’s required nearby, plan for matching paper or a full patch that won’t show seams.
Gather matching paint, small brushes, cleaner, and painter’s tape. Note lighting and color shifts at different times of day so touch-ups match.
Keep a damp cloth and trash bin within reach for quick cleanups.
Sanding and Priming Small Damaged Spots
Now that the area’s cleared and you’ve gathered supplies, sand and prime any small damaged spots so your touch-up blends smoothly with the surrounding paint. Lightly sand the nick until edges are feathered, matching the wall texture without over-sanding. Clean dust, then apply a stain-blocking primer thinly to avoid buildup. Let it dry fully before painting for reliable adhesion and true color matching.
- Sand edges with fine-grit paper.
- Remove dust with a damp cloth.
- Apply primer sparingly; thin coats work best.
- Allow full cure before testing paint.
This preps spots for seamless, long-lasting repairs.
Feathering Technique for Seamless Touch‑Ups
Although you’ve prepped the spot, feathering is what makes the touch-up disappear into the surrounding finish. You’ll blend paint outward with thin, tapered strokes so edges vanish and texture stays consistent.
Use a small brush or mini roller, load lightly, and start at the center of the repair. Work outward in overlapping, progressively lighter strokes, lifting pressure as you reach the original paint.
Keep a damp cloth handy to remove excess. Let each thin layer dry before adding another.
This Feathering technique guarantees Seamless touch ups that match sheen and texture without obvious patches.
Match Paint Color Without a Sample
Want to match paint without a sample? You can, with patience and observation. Use color matching tricks and shade blending to recreate the hue from surrounding walls.
- Evaluate paint finish and lighting; matte reads differently than satin.
- Take a clear photo near the wall in natural light for reference.
- Bring small paint swatches to the store and compare on a white card.
- Blend tiny amounts on a test board, letting each dry before adjusting.
Work in thin layers, testing as you go. Trust gradual shade blending rather than big jumps to avoid noticeable repairs.
Quick Fixes for Stubborn Stains That Resurface
Once you’ve matched the color and feathered in touch-ups, you might still see stubborn stains reappear over time; addressing them quickly prevents larger repairs.
Even after careful touch-ups, stubborn stains can return — tackle them promptly to avoid bigger repairs.
When a mark resurfaces, test a mild cleaner on an inconspicuous spot to safeguard wall texture. Use a magic eraser or diluted dish soap for scuffs, working gently in circular motions.
For grease or set-in stains, try a paste of baking soda and water, rinse and blot dry.
If stains persist and paint won’t hide them, consider targeted repainting or, in extreme cases, wallpaper removal before refinishing to ensure an even finish.
Safety Tips for Cleaning Chemicals and Ventilation
Because cleaning chemicals can give off fumes and irritate skin or eyes, take precautions before you start. You’ll follow basic chemical safety and ventilation tips to protect yourself and your home.
Open windows and run fans; read labels; wear gloves and eye protection; test cleaners on an inconspicuous patch first.
Keep children and pets away while you work and for the recommended dwell time.
Store products upright in original containers with caps tight.
If you feel dizzy or nauseous, leave the room and get fresh air; call poison control for exposures.
Dispose of unused chemical waste per local guidelines.
How to Prevent Future Marks in Kids’ Rooms
If you want to keep painted walls looking fresh in kids’ rooms, set up simple habits and safe boundaries now. Choose durable paints and finishes to boost paint durability; satin or semi-gloss wipes clean easier.
Assign play zones with washable mats and art stations so markers and crayons stay contained. Teach kids to use paper or easels and store supplies in labeled bins.
Consider wall textures that hide minor scuffs—subtle orange peel or eggshell can be forgiving. Use felt pads on furniture and a regular quick-spot routine: a damp cloth for spills, gentle cleaner for stubborn marks.
Protecting Walls in Pet‑Friendly Homes
When you share your home with pets, plan ahead to protect painted walls from scratches, stains, and tail or paw marks. Choose paint with high paint durability and consider finishes that resist scuffs; smoother wall texture hides fewer marks but is easier to wipe. Create pet zones and train jumping or scratching behaviors away from walls. Use easy‑clean barriers like washable decals or low-profile chair rails.
- Trim nails regularly.
- Place scratch posts near tempting walls.
- Use washable, durable paints in high-traffic areas.
- Wipe spots immediately with gentle cleaner to prevent staining.
Budget Supplies for Long‑Term Wall Care
Protecting walls from pet wear doesn’t have to mean expensive supplies; you can outfit your home for long-term care on a budget. Start with a soft eraser sponge and mild detergent for quick mark removal, and keep a small stain kit in a closet.
Use removable hooks and clear bumpers to protect wall art from scuffs and prevent frames from shifting. Apply felt pads and corner guards for furniture protection to stop scratches and rub marks at baseboards.
Stock a touch-up paint pen matched to your wall color, plus microfiber cloths and a gentle multi-surface cleaner for regular upkeep.
When to Call a Professional Cleaner or Painter
Because some stains, water damage, or extensive scuffing go beyond spot fixes, you’ll want to call a pro when DIY attempts won’t restore the finish or could make things worse. You should contact a cleaner or painter if you notice structural staining, peeling paint, mold, or uneven color after touch-ups. They’ll assess damage, recommend repairs, and advise on wall art rehanging or furniture protection during work.
When stains, water damage, or mold go beyond spot fixes, call a pro to assess, repair, and protect your walls.
Consider hiring pros when:
- Stains penetrate primer or drywall
- Water damage affects multiple areas
- Mold or persistent odors exist
- Textured finishes need matching
A pro saves time and prevents costly mistakes.
Seasonal Wall‑Care Checklist
As seasons change, plan a quick wall‑care routine to catch problems early and keep paint looking fresh. Each season, inspect walls for marks, scuffs, and moisture spots; note differences where wall texture varies.
Dust and vacuum baseboards and corners, then spot‑clean with a mild detergent solution, testing an inconspicuous area first.
In humid months, check for mold or peeling that harms paint durability and address ventilation.
In dry, high‑traffic seasons, touch up scuffs and consider a protective finish if needed.
Keep a simple kit—soft cloths, magic eraser, mild cleaner, touch‑up paint—to act promptly when issues appear.
Troubleshooting Common Cleaning Failures
When cleaning doesn’t remove a mark, don’t assume the product or paint is to blame—you likely need a different method or gentler touch. Assess the mark type, test solutions in an inconspicuous spot, and consider recent outdoor weather effects that may have baked stains or softened coatings.
Check wall texture for grease traps or porous spots that need different cleaners. Try these steps:
- Blot first, then gently rub with a soft cloth and mild detergent.
- Use a magic eraser lightly; don’t over-scrub textured surfaces.
- Try a solvent test in a hidden area.
- If unsure, consult a pro before repainting.
Final Cleaning Checklist Before Repainting
Before you lay down primer or paint, give the walls a final, systematic cleaning so the new finish will adhere evenly and look professional. Start by dusting ceilings, crown molding, and baseboards, then vacuum loose debris from corners.
Wipe walls with a mild degreaser, paying attention to high-touch areas and any uneven wall texture. Rinse with clean water and blot with microfiber towels.
Fill holes, sand smooth, and remove sanding dust thoroughly. Tape off trim and cover floors.
Allow the surface to fully dry—wait for complete paint drying conditions (temperature and humidity) before priming or painting.
Frequently Asked Questions
Can Cleaning Remove Nicotine Stains From Walls Without Repainting?
Yes — you can often remove nicotine stains without repainting if you use proper nicotine removal solutions and wall cleaning techniques; you’ll scrub gently, rinse thoroughly, and repeat as needed, though stubborn stains may still require repainting.
How Do I Safely Clean Walls With Wallpaper or Vinyl Coverings?
You should test a hidden spot, use mild detergent and soft cloths, avoid soaking seams, and consult wallpaper removal guidance when adhesive loosens; for vinyl wall cleaning, use gentle cleaners and squeegee moisture away to prevent damage.
Will Frequent Spot-Cleaning Change Wall Sheen Over Time?
Like gentle sanding, frequent spot-cleaning can dull finish: you’ll gradually change wall sheen if you scrub often or use harsh cleaners. Adjust cleaning frequency, use mild solutions and soft cloths, and you’ll preserve sheen longer.
Can I Use Steam Cleaners on Painted Interior Walls?
Yes — you can use steam cleaning on painted interior walls cautiously; test a hidden area first, keep steam light to avoid paint lift, and adapt technique for delicate wall texture to prevent damage or sheen changes.
How Should I Store Leftover Touch-Up Paint Long-Term?
Like burying treasure, you’ll seal leftover touch-up paint tight: pour into smaller airtight jars, label with date/color, remove air (plastic wrap or stick), store upright in a cool, dark place for paint storage and long term preservation.
Conclusion
You’ve got options: clean, spot-treat, or repaint. Treat your paint type like a map — test a small area first. Use gentle cleaners and the right tools, and call a pro if stains won’t budge or paint peels. Keep seasonal care up like changing filters, and troubleshoot stubborn marks calmly. Like a reliable friend who won’t let you down, these steps’ll help your walls look fresh without panic — and if needed, repaint with confidence.