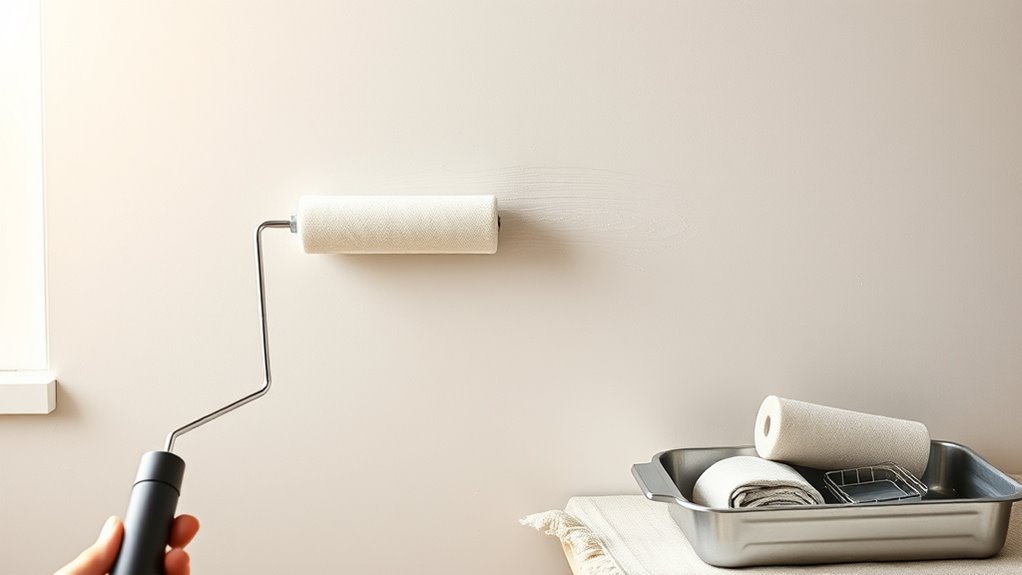
How to Use a Roller to Paint a Wall Smoothly
Pick the right nap for your wall—short for smooth surfaces, longer for texture—and choose foam for glassy finishes or woven naps for heavier paints. Load the roller evenly, tap off excess, and use a loose “W” or “M” pattern, then fill in with steady, overlapping strokes while keeping a wet edge. Cut in with an angled brush before rolling and fix drips while tacky. Keep tools clean and replace worn covers, and you’ll learn tips to refine your technique.
Quick Method for a Smooth Roller Finish
When you’re ready to roll, load the roller evenly and start with a “W” or “M” pattern to spread paint without leaving streaks. Then fill in the gaps with overlapping passes while keeping a light, consistent pressure.
You’ll work quickly across small sections, blending edges before paint skins over. Adjust speed for different wall textures, using slower strokes on rough surfaces to avoid missed pockets.
Keep the roller moving in the same direction for a uniform sheen. Inspect frequently and perform basic roller maintenance—cleaning and storing properly—to prevent dried fibers or debris from marring the finish and prolong roller life.
Choose the Right Roller Nap for Your Wall
Wondering which roller nap will give you the smoothest result? You’ll choose based on surface texture and the paint color’s finish.
Smooth walls and satin or gloss paints need shorter naps for minimal texture. Rougher walls benefit from thicker naps to hide imperfections.
Also consider roller durability—higher-quality naps last longer and shed less, preserving finish consistency.
- 1/4″ nap: best for very smooth surfaces
- 3/8″ nap: versatile for light texture
- 1/2″ nap: handles medium texture well
- 3/4″ nap: works on rougher plaster
- Premium nap: improved roller durability and fewer fibers on the wall
Foam Roller vs Woven Nap: When to Use Each
Although both foam rollers and woven-nap rollers apply paint, they serve different jobs: use foam for ultra-smooth finishes and thin coatings (like gloss or semi-gloss) and pick woven nap when you need sturdier coverage on textured surfaces or with thicker paints.
You’ll choose foam when minimizing roller marks matters; it hugs flat drywall and gives a glassy look.
Woven-nap excels at holding and releasing more paint, bridging slight texture and speeding work.
Consider texture differences and material durability: foam can tear on rough surfaces, while woven fibers resist wear and tolerate heavier use.
Match roller to surface and paint.
Pick Roller Size for Walls and Detail

Now that you’ve matched the roller type to the surface and paint, pick the right roller width and nap length to speed work and control detail. You’ll choose wider rollers (9–18″) for large flat walls and narrower (4–6″) for trim, corners, and tight spots.
Nap length depends on texture: short for smooth, medium for light texture, long for rough. Match roller choice to your paint color selection—lighter shades hide fewer marks, so use smoother naps.
Maintain performance with basic roller maintenance: clean thoroughly, store dry, and replace worn covers to keep edges crisp.
- 9–18″ for large walls
- 4–6″ for detail
- Short nap for smooth
- Medium/long for texture
- Clean and replace regularly
How Paint Sheen Changes Roller Choice
When you’re choosing a roller, consider the paint’s sheen because it changes the nap you’ll need.
Higher-gloss paints are smoother and often need a denser, shorter nap to avoid texture and show brush or roller marks.
Match sheen to nap so you get an even, professional finish.
Sheen Affects Nap
Because sheen changes how much texture shows, you’ll pick a different roller nap depending on the finish you’re using. You want a nap that hides imperfections with flatter sheens and one that minimizes texture with higher sheens. Consider roller durability for repeated use, and match nap to surface type.
- Flat/eggshell: shorter nap for minor texture, better coverage.
- Satin: medium nap balances smoothness and hiding power.
- Semi-gloss: shorter nap to reduce roller marks.
- High-gloss trim: very short nap; avoid extra texture.
- Rough or textured surfaces: long nap to reach crevices and improve coverage while preserving roller durability.
Gloss Requires Denser
Although higher-gloss paints reflect more light and expose every roller imperfection, you’ll want a denser, tighter-knit roller cover to lay the finish smoothly. When you choose for a gloss sheen, pick higher roller density to minimize stipple and texture.
Dense covers hold less air and distribute paint evenly, so you can avoid visible lap marks and roller marks on reflective surfaces. Work in consistent passes, maintain a wet edge, and reload sparingly to keep application uniform.
Test a small area first to confirm the combination of paint and roller density gives the smooth, mirror-like result you expect.
Tools and Supplies to Gather First
Before you start rolling, gather a few essential tools and supplies so the job goes quickly and looks professional. You’ll want items that support color blending, efficient coverage, and easy roller maintenance. Have everything ready so you won’t interrupt your wet edge or risk uneven tones.
Before rolling, gather quality tools—roller, tray, paint, brush, tapes—so coverage is smooth and color blends evenly.
- Quality roller frame and medium-nap cover
- Tray, liners, and a grid for even loading
- High-quality paint and a small mixing paddle
- Angled brush and painter’s tape for edges
- Microfiber cloths and a small bucket for cleaning
Organize these nearby so you can work steadily and keep a smooth finish.
Prep the Wall: Clean, Fill, and Sand
Before you roll, clean the wall to remove dust, grease, and cobwebs so paint will stick evenly.
Patch holes and cracks with filler, let it dry, then sand smooth to blend repairs with the surface.
Getting the wall clean and even now will make your roller work produce a flawless finish.
Clean Surface Thoroughly
When you’re getting ready to roll paint on a wall, clean the surface thoroughly so the finish will stick and look smooth. You’ll remove dust, grease, and cobwebs before tackling repairs or primer application. Good surface preparation speeds adhesion and prevents bumps under the roller.
Start with a dry dusting, then wash problem areas with mild detergent, rinse, and let the wall fully dry. Use a vacuum or tack cloth for final dust pickup. Skip heavy cleaners that leave residue; test a hidden spot if unsure.
- Dust and cobweb removal
- Grease spot washing
- Rinse and dry thoroughly
- Vacuum or tack cloth
- Inspect for missed areas
Fill And Sand
Once you’ve cleaned the wall, patch any holes, cracks, and dents with spackling or joint compound so the surface reads flat under the roller. Let repairs dry fully, then sand with fine-grit paper until seams and edges vanish. Wipe away dust with a damp cloth so primer and paint adhere evenly.
Match sanding direction to existing texture patterns to avoid creating visible strokes. Feather edges to blend patched areas into the surrounding surface. Inspect under raking light for missed imperfections.
Clean and check your tools as part of roller maintenance so you’re ready to apply paint smoothly and consistently.
Protect Trim, Floors, and Fixtures Without Tape
If you want crisp edges without the mess of tape, you can protect trim, floors, and fixtures using simple tools and steady technique. Use a thin-edged brush to cut close to trim, apply a plastic shield for straight lines, and drape cloths over floors.
Trim protection and fixture masking keep paint off surfaces without adhesive. Work methodically from top to bottom and keep a damp rag handy for quick cleanup.
- Use an angled brush for corners
- Slide a metal or plastic shield along trim
- Cover fixtures with plastic bags
- Lay canvas drop cloths on floors
- Wedge foam under doors to block splatter
Cut In Edges Before You Roll
Before you start rolling, tape and protect trim and floors so you won’t have to fix splatters later.
Grab a steady angled brush and cut in a 2–3 inch strip along corners, ceilings, and trim with smooth, confident strokes. That clean edge makes rolling faster and keeps the finish crisp.
Tape And Protect Trim
When you’ve taped off baseboards, window and door trim, and any hardware, you’ll protect those surfaces from splatters and get a crisp edge where your roller stops. Now press tape edges firmly and cover nearby floors and furniture with drop cloths so paint won’t seep or spatter. Think of this as simple Decorating tips and Tool maintenance combined: clean tools before taping, and replace torn tape. Follow these quick steps:
- Use painter’s tape rated for delicate surfaces.
- Burnish tape edge with a plastic card.
- Overlap drop cloths at seams.
- Mask doorknobs and hinges.
- Remove tape while paint’s tacky.
Use A Steady Brush
After you’ve secured the tape and drop cloths, grab a high-quality angled brush and cut in the edges so your roller never has to chase tight corners.
Work in manageable sections, load the brush lightly, and use smooth strokes to lay a consistent bead of paint along trim and corners.
Keep brush control by resting your wrist against the wall for a steady hand, and blend each cut-in into the adjacent area before it skins.
Wait briefly if needed, then roll up to the brushed edge to marry textures.
Clean and re-tip the brush often to maintain crisp lines.
Load a Roller Evenly Without Splatter
If you want an even coat without a mess, load the roller by rolling it through the paint tray’s shallow well and then back across the ridged grid to remove excess. You’ll control drips and splatter, preserve your chosen paint color’s consistency, and reduce cleanup time when you follow a simple rhythm.
Good roller maintenance keeps naps even and fibers from shedding.
Good roller care preserves nap and prevents stubborn fiber shedding for smoother, cleaner results.
- Dip just enough for one panel
- Roll slowly across the grid
- Tap off drips before lifting
- Keep tray close to reduce swinging
- Wipe edges between color changes
Work deliberately and check coverage often.
Get the Right Paint Depth in the Tray
Pour just enough paint into the tray to coat the roller without overfilling—too much paint makes it hard to control saturation.
Roll slowly through the shallow well and up the ribbed area so you load the roller evenly.
Check the roller as you go and stop when it’s fully saturated but not dripping.
Load Roller Evenly
Wondering how much paint the roller should pick up? You want an even load for consistent texture patterns and smooth coverage. Dip the roller into the tray’s shallow end, roll on the slope to distribute paint, and avoid dripping.
Good roller maintenance starts here: clean roller before use and check nap for clumps. Follow these quick steps:
- Press roller gently into the tray well to pick up paint evenly.
- Roll back and forth on the ridged area to remove excess.
- Aim for a damp, not saturated, nap.
- Replace roller if fibers are matted.
- Keep a rag handy for edge cleanup.
Avoid Overfilling Tray
Because the tray holds your flow control, you should keep paint shallow—about a quarter to a half inch in the well—so the roller picks up enough without getting saturated.
When you pour, go slowly and watch tray filling to avoid spill and paint overflow down the sides. Stop before the angled ridged area is submerged; that section’s for loading evenly and removing excess.
If you need more, add small amounts and stir gently. Clean drips immediately to prevent pooling.
Check Roller Saturation
How full should the tray be so your roller grabs just the right amount of paint? You’ll aim for a shallow pool in the well and a thin coating on the ramp. Load the roller evenly, test by rolling on scrap, and watch for drips or dry patches. Adjust depth for roller texture and desired paint adhesion.
- Dip roller lightly, then roll on ramp.
- Look for smooth, even coverage on scrap.
- Avoid dripping or heavy beads.
- Refill a little at a time if patchy.
- Match depth to nap length for consistent adhesion.
Use the “W”/“M” Rolling Technique
When you start rolling, form a loose “W” or “M” on the wall without lifting the roller so the paint spreads evenly across a broad area. Then fill in the shape with parallel strokes to even out the coat.
You’ll cover a wide section quickly, minimizing visible seams and helping texture patterns blend naturally. Keep strokes overlapping slightly and work back into wet edges to avoid lap marks.
If you need to pause, rest the roller in roller storage wrapped in plastic to prevent drying. Practice the motion to build rhythm so your coverage stays smooth and consistent across the wall.
Keep Pressure and Speed Consistent
After you’ve laid down the “W” or “M” and evened the coat, keep your hand pressure and rolling speed steady to maintain a uniform finish across the wall. You’ll get better Pressure consistency and Speed control by staying mindful of rhythm and feel. Practice short sections, note any splotches, and adjust before drying.
- Maintain even wrist pressure without digging in
- Move at a steady pace; don’t rush or stop frequently
- Rest occasionally to avoid pressing harder from fatigue
- Watch for shine differences that signal uneven coverage
- Use your arm, not just the wrist, for smoother motion
How Much Overlap to Leave Between Passes
Wondering how much overlap to leave between passes? Aim for about 25–50% overlap: each new stroke should cover roughly a quarter to half of the previous one. That consistency prevents visible seams and minimizes color contrast from uneven coverage.
Keep your roller slightly loaded but not dripping; reload before coverage thins to maintain even pigment. Watch edges—softly feather the last few inches to blend.
Regular roller maintenance between sessions (cleaning or wrapping to keep nap free) preserves performance and prevents streaks. Practicing this overlap with steady pressure gives smooth, uniform walls without excessive touch-ups.
Work Top to Bottom to Avoid Lap Marks
Start at the ceiling so each pass blends into the wet edge below it. Keep your roller loaded enough to maintain that wet edge as you work downward.
When you overlap strokes, feather them together to eliminate lap marks.
Start From The Ceiling
Why paint from the ceiling downward? You’ll prevent drips and overlapping marks by working top to bottom, keeping edges consistent during ceiling painting and wall progression.
Start the roller on the ceiling line and move downward in controlled strokes. Keep your roller loaded evenly and inspect it often—roller maintenance matters to avoid streaks. Work one section at a time, finishing each before moving down.
- Cut in the ceiling edge first
- Roll from ceiling to mid-wall
- Reload evenly, remove excess paint
- Check roller nap for debris
- Blend overlaps immediately
This approach yields a smoother, more professional finish.
Maintain A Wet Edge
If you keep a wet edge as you roll from top to bottom, you’ll prevent lap marks and get an even finish. Work steadily so each pass overlaps before paint skins; that keeps tone uniform despite subtle color mixing as paint blends. Watch drying times, adjust pace, and do prompt roller maintenance to avoid drag or lint. If a section starts to dry, feather the edge quickly or recoat while wet. Stay calm, steady, and focused — the wall will look professional.
| Heart | Breath | Hands |
|---|---|---|
| Hope | Steady | Skilled |
| Pride | Calm | Clean |
Blend Overlap Strokes
Keep rolling from the top down and overlap each pass by about a third to blend strokes smoothly and avoid lap marks. You’ll use blending techniques and overlap precision to keep edges invisible. Work steadily, keeping the roller loaded but not dripping.
When you reach the bottom, lift and return to the top, starting inside the previous wet area so layers merge. Check under varied light to spot lap lines and rework them immediately while paint’s wet.
- Keep a consistent speed and pressure
- Maintain a wet edge at all times
- Reload before the roller thins out
- Feather edges with light, even strokes
- Fix lap marks promptly
Feather Edges to Blend Cut-In and Rolling
When you cut in around trim and corners, feather the wet edge with a light, barely-there stroke so the rolled paint can blend seamlessly into it. You want consistent edge blending between the brush and roller areas; use a slightly damp brush and a soft touch to avoid ridges.
After cutting in, roll toward the cut line while the edge is wet, working in short laps to merge textures. Paint gradation minimizes visible shifts and keeps sheen uniform.
Check your work from several angles, and if you spot a line, lightly re-feather with the brush before the paint skins over.
Handle Corners, Narrow Strips, and Trim
Because corners, narrow strips, and trim demand more control than open walls, approach them with a steady hand and the right tools. You’ll use a brush for corner detailing and a small roller or angled brush for trim, keeping paint off adjacent surfaces. Work from the edge inward, maintaining a wet edge so narrow striping blends with rolled areas. Take your time on joints and shadow lines.
- Choose a sash or angled brush for precision
- Load brush sparingly to avoid drips
- Use a 4″ mini roller for narrow strips
- Keep overlap minimal and feather edges
- Clean edges with a damp cloth immediately
Use an Extension Pole the Right Way
Pick an extension pole that’s sturdy, the right length, and compatible with your roller frame so you don’t wobble or lose control.
Attach the roller securely—lock it in place and give it a quick tug to be sure it won’t come loose.
Keep the pole angled slightly toward the wall and use smooth, even strokes to maintain consistent pressure and coverage.
Choose The Right Pole
How long or short should your pole be to reach every corner without tiring you out? Pick a pole that balances reach and control so you can paint evenly and protect your shoulders.
Consider weight, grip, and extension locks; lighter poles reduce fatigue and help with roller maintenance by minimizing wobble. Match pole length to ceiling height and your stance.
- Measure ceiling height before buying
- Choose a comfortable grip material
- Prefer twist-locks for quick adjustments
- Match pole to roller size for stability
- Test balance with a loaded roller indoors
Also think about paint color visibility when selecting extension reach.
Attach Roller Securely
Want your roller to feel like an extension of your hand? Attach the roller frame to the pole firmly: slide the threaded end into the frame, tighten the connector, and twist to lock. Check that the coupler seats fully so the roller won’t wobble when you reach high spots.
Balance weight by testing a short stroke before painting; adjust connection if it shifts. Keep a spare roller and paint color notes near your roller storage to avoid mix-ups between coats.
When you’re done, detach, clean, and store components dry—secure attachments last longer and save time on future jobs.
Maintain Proper Angle
When you extend the pole, keep the roller at about a 15–20° angle to the wall so paint spreads evenly without dripping. You’ll control coverage and avoid splatter by maintaining that proper angle and checking roller tension so the nap contacts the surface uniformly. Adjust your wrist, not the elbow, for small corrections and pause to rebalance if the pole twists.
- Start vertical, then tilt to 15–20° for even lay-in.
- Keep light forward pressure; don’t overload the roller.
- Watch roller tension; replace or retighten if loose.
- Use smooth, overlapping strokes from top to bottom.
- Re-check angle after each section.
Avoid Roller Stipple and Unwanted Texture
If you want a truly smooth finish, start by picking the right roller nap and loading it properly—too thick a nap or an overloaded roller will leave obvious stipple and texture.
You should use a shorter nap for smooth surfaces and a quality woven cover to minimize lint. Roll with even pressure, avoid pressing hard, and overlap passes slightly for consistent coverage.
Keep strokes consistent and finish each section with a light, unbroken roll to blend edges. Inspect in good light for texture concerns and address small defects immediately.
These habits are key to effective stipple prevention and a flat, uniform wall.
How Often to Reload Your Roller
You’ll want to reload your roller frequently enough to keep coverage even across each coat. How often depends on the roller’s nap and how much paint it soaks up plus the paint’s viscosity.
Thicker paints and high-absorption rollers need more reloads. Watch for thinning coverage or drag and reload before you start a new pass.
Frequency Per Coat
How often should you reload your roller to keep coverage even and avoid lap marks? You’ll reload more frequently on rough surfaces or heavy paint. Match frequency to paint texture and maintain a wet edge. Good roller maintenance also minimizes splotches and uneven sheen.
- Start each coat with a fully loaded roller for consistent coverage.
- Reload when paint trail thins or you see streaking.
- For textured walls, reload every 3–5 passes.
- For smooth walls, you can stretch to 6–8 passes before reloading.
- Wring excess back into the tray—don’t overload, and keep naps clean.
Roller Absorption Rate
Think of roller absorption rate as the roller’s hunger for paint—how quickly it soaks up product and needs reloading. You’ll watch absorption rate vary with roller porosity: dense naps hold less, high-porosity naps gulp more. Reload when coverage thins or texture changes. Check edges frequently and keep a rhythm: load, roll, blend. Use this quick reference:
| Roller Type | Porosity | Reload Interval |
|---|---|---|
| Smooth foam | Low | 15–20 ft² |
| Short nap | Medium | 10–15 ft² |
| Long nap | High | 6–10 ft² |
Adjust for surface texture and your pace.
Paint Type Impact
Because different paints vary in viscosity and pigment load, you’ll need to reload your roller more often with thicker, heavily pigmented formulas than with thin, low-viscosity ones.
You should monitor coverage, texture, and how the roller drags. Higher pigment and body improve paint durability but demand frequent reloading to avoid lap marks. Your color selection affects how many coats and reloads you’ll need—deep colors often need heavier application.
- Check roller saturation every 8–12 square feet.
- Watch for thinning or streaks.
- Reload before edges dry.
- Use thicker naps for textured walls.
- Note manufacturer spread rate for consistency.
Troubleshoot Roller Marks and Streaks
When you see roller marks or streaks on a freshly painted wall, don’t panic—these flaws usually come from uneven pressure, improper loading, or letting the paint start to dry between passes.
Check roller maintenance first: replace worn naps, clean debris, and make certain the frame spins smoothly. Re-load evenly—don’t overload the center or drag an almost-dry roller. Maintain a wet edge and use consistent pressure, finishing each section with light, even strokes.
Consider paint color choices; very dark or glossy paints show streaks more. If marks persist, lightly sand once dry and re-roll with a properly loaded, quality roller.
Fix Drips, Runs, and Paint Pooling
If a drip, run, or pool appears, act quickly while the paint’s still tacky. You’ll smooth small defects with a damp brush or soft roller, blending edges into surrounding paint color.
For larger runs, lift excess with a clean brush using gentle brush techniques, then feather the area. Let it level briefly; don’t overwork.
If pooling persists, wipe excess with a lint-free cloth and rebalance nearby paint.
Sand only when fully dry and repaint sparingly to match texture.
- Remove excess immediately
- Feather edges toward wet paint
- Use light, controlled strokes
- Wipe pooling with cloth
- Sand and retouch when dry
When a Second Coat Is Needed and How to Apply It
You’ll often need a second coat when the first looks thin, shows roller marks, or the color isn’t even.
Wait the paint manufacturer’s recommended drying time and check that the surface is fully dry and dust-free before you touch up.
When you’re ready, roll the second coat with the same technique and light pressure, keeping wet edges to blend smoothly.
When A Second Coat
Although one coat can sometimes cover light colors, you’ll usually need a second to achieve full, even coverage—especially over dark paint, new drywall, or patched areas. You’ll spot thin areas, visible texture patterns, or roller marks that a second pass fixes.
Keep roller maintenance in mind: a clean, intact nap gives consistent laydown. Apply the second coat in the same direction as the first, using light, even pressure and proper overlap. Check edges and corners with a brush.
- Inspect for thin spots and sheen differences
- Use consistent strokes and overlap
- Maintain a wet edge
- Blend seams carefully
- Keep roller clean between uses
Proper Drying Time
Because paint needs time to form a stable film, wait the manufacturer’s recommended drying time before deciding on a second coat. Check sheen, touch-dry versus recoat times, and how temperature/humidity affect curing. Use proper painting techniques to avoid sealing in tackiness. Consider color coordination: darker undercoats may need longer to hide through. If coverage looks thin or streaky, plan a second pass; if uniform, skip it.
| Condition | Action |
|---|---|
| Touch-dry but soft | Wait full recoat time |
| Uneven coverage | Second coat likely needed |
| Cool/humid room | Extend drying time |
Applying The Second Coat
If the first coat has dried to the manufacturer’s recoat time and coverage still looks thin or streaky, it’s time to apply a second coat. You’ll confirm color matching under the same light, sand any raised texture, and verify the surface is clean.
Use the same roller nap and technique to maintain finish consistency. Don’t overload the roller; work in sections and maintain a wet edge.
After finishing, follow proper roller storage to keep the nap reusable or dispose of it per instructions.
- Check for missed spots
- Sand and dust lightly
- Maintain a wet edge
- Use consistent roller nap
- Clean or store roller properly
Drying Times and How Humidity Affects Paint
When you roll paint onto a wall, drying time depends on the paint type, film thickness, temperature, and especially humidity, so plan your schedule around those factors to get smooth, even results. You’ll monitor humidity effects because high moisture slows the drying process and can cause tackiness or poor sheen. Low humidity speeds curing but can raise brush marks. Keep windows or fans on, use a dehumidifier if needed, and wait the manufacturer’s recoat time. Below is a quick reference to guide expectations.
| Condition | Effect |
|---|---|
| High humidity | Slower drying |
| Low humidity | Faster drying |
| Warm temps | Speeds drying |
| Cold temps | Slows drying |
Clean and Store Rollers for Reuse
Now that you’ve waited the proper drying time, don’t let a dirty roller ruin your next coat—cleaning and storing rollers properly saves money and keeps future finishes smooth.
Rinse excess paint, then use water for latex or mineral spirits for oil-based paint. Work fibers until water runs clear, spin or squeeze out moisture, and let the nap dry fully.
- Rinse thoroughly after each job
- Use recommended Cleaning tips for your paint type
- Spin or wring to remove trapped paint
- Store covers in a breathable bag or wrap loosely
- Follow Storage solutions: hang or lie flat
When to Replace a Roller Cover
How do you know it’s time to retire a roller cover? Check for uneven nap, loose fibers, or persistent lint that alters paint finish. If your roller leaves streaks or blobs despite proper roller maintenance and cleaning, swap it out.
Change covers when they no longer hold paint evenly or when previous paint color contaminates a new coat, risking tint shifts. Disposable covers are cheap; keep a fresh one when switching hues.
Also replace if the core is cracked or the seam pops. Replacing timely preserves touch-ups and ensures consistent coverage and a smooth final wall.
Speed Tips for Painting Larger Rooms
Because larger rooms demand more planning and momentum, set yourself up to work fast: prep thoroughly, organize tools within reach, and map your painting sequence so you keep a steady pace without backtracking. You’ll use efficient painting techniques and adjust for different wall textures to maintain speed without sacrificing finish.
Move systematically from top to bottom, and keep a wet edge. Use a roller extension and multiple loaded rollers to reduce trips to the tray.
- Plan walls in zones and follow a logical route
- Keep spare covers ready for quick swaps
- Use consistent roller pressure and strokes
- Match nap to wall textures
- Bring a helper for cutting in
Using a Small Roller for Trim and Baseboards
Wondering how to get crisp, even coverage on trim and baseboards without brush marks? Use a small 4–6 inch nap roller to follow profiles and maintain consistent Trim detail. Roll a thin, even coat, then back-roll along edges to remove excess.
Hold a steady angle where trim meets wall to prevent paint overlap. For Baseboard coverage, work in short sections, keep a loaded roller but not dripping, and smooth out seams before they skin over.
Touch up tight corners with a small angled brush only when needed. Clean roller nap thoroughly between coats to avoid texture buildup.
Eco-Friendly Paints and Roller Options
When you want a healthier home and a smaller environmental footprint, choosing low-VOC or zero-VOC paints and natural-fiber or recycled rollers makes a big difference. You’ll reduce fumes and support eco friendly innovations while keeping finish quality.
Look for brands emphasizing sustainable sourcing and transparent ingredients. Natural-fiber nap lengths suit most walls; recycled synthetic blends resist shedding.
Seek brands with transparent, sustainably sourced ingredients. Choose natural-fiber naps for walls or recycled blends to prevent shedding.
Clean tools promptly to extend life and avoid disposables. Consider washable drop cloths and refillable paint cans if available.
- Choose certified low/zero-VOC paints
- Prefer natural or recycled roller covers
- Verify sustainable sourcing claims
- Use reusable accessories
- Maintain and clean rollers properly
Quick Checklist to Inspect a Professional Finish
Choosing eco-friendly paints and quality rollers sets you up for a great finish, but you’ll still want a quick checklist to confirm the job looks professional.
Walk the room in daylight to spot streaks, laps, or missed spots. Check edges and corners for clean lines and consistent coverage; touch up where nap marks or roller bands show.
Verify color mixing was uniform—no shade shifts between batches. Run your hand lightly to assess wall texture; bumps or drips need sanding and recoat.
Inspect trim and outlet covers for paint on hardware. Address flaws now for a durable, showroom-quality result.
Frequently Asked Questions
Can I Use a Roller on Wallpapered Walls Safely?
You can, but you shouldn’t unless the wallpaper’s securely glued and primed; otherwise remove it first. Choose roller types carefully—smooth nap for sealed surfaces, thicker nap only for textured backing — and test a small area first.
How Do Rollers Perform With Textured or Popcorn Ceilings?
Rollers work poorly on textured or popcorn ceilings; you’ll miss crevices and create uneven coverage. You’ll likely need texture removal first, then use specialized roller accessories like thick-nap covers and extension poles for better reach and consistency.
Is It Safe to Paint Over Nicotine-Stained Walls With a Roller?
Yes — you can paint over nicotine-stained walls with a roller, but you’ll need to clean nicotine residue and use a stain-blocking primer so paint adhesion’s reliable; otherwise the new coat may yellow or peel prematurely.
Can I Roller-Paint Exterior Walls or Siding the Same Way?
You can, but don’t assume exterior siding behaves like an interior wall; weather, texture, and primer needs differ. You’ll use a paint roller for broad coverage, but choose exterior paints, rollers, and techniques suited to siding.
Are Specialty Primers Needed for Metal or Plastic Surfaces Before Rolling?
Yes — you’ll need a metal primer for bare metal and specific plastic surface prep products for plastics; you’ll clean, sand, and use recommended primers or adhesion promoters so your roller-applied paint bonds and lasts.
Conclusion
You’ve got the tools and techniques to get a smooth roller finish, and with the right nap, size, and speed you’ll cut time and touch-ups. Fun fact: professionals say using a quality roller and proper technique can reduce visible imperfections by up to 60%, so your effort really pays off. Keep a small roller for trim, choose eco-friendly options if desired, and use the checklist to make sure the surface looks professional.