How to Use Paint Primer on Walls (Easy Guide)
You’ll save time and get truer color when you prime first: clean and repair walls, sand glossy spots, then apply a primer that matches your paint type (latex for drywall, oil or shellac for stubborn stains). Use a brush for edges and a roller for large areas, let each coat dry fully, sand lightly if needed, and spot‑prime stained or porous areas again. Keep a second coat handy for dark colors, and below you’ll find step‑by‑step tips and troubleshooting.
What You’ll Learn: When and Why to Prime Walls

When should you prime your walls? You’ll learn to prime before painting to improve adhesion, block stains, and create an even base. You’ll use primer when switching between high-contrast colors to prevent bleed-through and guarantee true color contrast.
You’ll also prime patched or porous areas so paint covers uniformly. For textured surfaces, primer aids texture enhancement by filling tiny crevices and promoting consistent sheen.
You’ll pick a primer suited to the wall material and the finish you want. Following these guidelines, you’ll get smoother application, truer final hues, and longer-lasting results without unnecessary rework.
Do You Need Primer? When Priming Is Essential
You’ll need primer any time the surface is porous, stained, repaired, or when you’re switching between very different paint types.
Some materials—bare drywall, fresh plaster, repaired drywall, and raw wood—almost always require a coat, while glossy or previously painted surfaces may need sanding plus a bonding primer.
Also match primer to your topcoat (oil vs. latex) and choose stain-blocking or high-build primers when the situation calls for it.
When To Prime
Need to block stains, cover dark colors, or guarantee paint sticks? You should prime before painting when stains bleed, when switching from oil to latex, or when moving to a much lighter shade—color psychology matters if you want true, consistent tones.
Prime patched drywall and porous surfaces to avoid uneven sheen and extra coats. If you’re using a specialty finish, prime first for better adhesion and durability.
Consider Environmental impact: choose low-VOC primers and only prime where necessary to reduce waste.
Prime when previous paint is glossy, damaged, or when mold has been treated. Otherwise, you can often skip priming.
Surfaces Requiring Primer
If a surface is porous, stained, previously unpainted, or has been repaired, prime it first to guarantee paint adheres evenly and hides imperfections. You should prime raw drywall, plaster, bare wood, and masonry because surface texture absorbs paint unevenly.
Old glossy paint and surfaces with tannin or water stains need sealing primer so new coats don’t peel or discolor. When you’re switching from dark to light, primer aids color matching and reduces the number of finish coats.
Also prime patched areas to blend sheen and porosity. Skipping primer on these surfaces risks poor adhesion, visible repairs, and uneven color.
Paint Type Considerations
When switching paints or tackling tricky surfaces, consider the primer as a bridge that helps your finish coat look and perform its best. You’ll need primer for drastic color changes, porous drywall, stains, or glossy surfaces. If you skip it, expect poor adhesion or uneven Color matching. Oil-to-latex switches, fresh drywall, and smoke-stained walls almost always require primer. Also prep by checking for old primer removal; failing to remove peeling primer ruins finish adhesion. Quick chart:
| Situation | Recommendation |
|---|---|
| Drastic color change | Use high-hide primer |
| Glossy surface | Sand and prime |
| Stained walls | Stain-blocking primer |
| New drywall | Paper-faced drywall primer |
Which Primer to Use for Walls: Latex, Oil, or Shellac
Although it might seem confusing at first, choosing between latex, oil, and shellac primers comes down to the surface you’re covering and the problem you’re solving. You’ll pick latex for drywall, patched areas, and moderate stains—it’s water-based, easy to clean, and won’t alter primer color much.
Use oil when sealing tannin-bleed or on glossy trim; it adheres stubborn surfaces and evens sheen. Reach for shellac for severe stains, smoke, or mildew; it seals aggressively and dries fast.
Consider surface texture: porous walls drink more primer, so you may need higher-build products for uniform coverage and fewer coats.
Match Primer to Paint and Wall Type (Quick Guide)
Now that you know how primer types tackle different problems, pair your primer to both the paint you’ll use and the wall material for best results. You’ll want consistent Color matching: latex primers generally pair with latex paints; oil or shellac primers suit stubborn stains or glossy surfaces.
Match adhesion and porosity—drywall, plaster, wood, and masonry each behave differently. Visualize outcomes:
- Smooth drywall with latex primer and latex paint for even sheen.
- Tacky, stained wood sealed with oil primer before water-based paint.
- Porous masonry sealed with a masonry primer prior to acrylic paint.
Choose primer types that complement your paint and substrate.
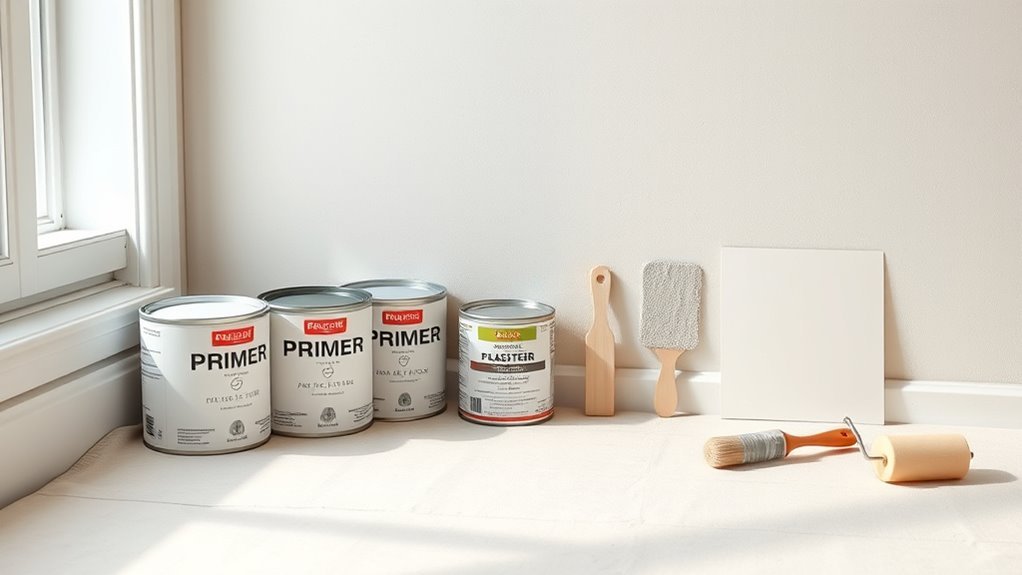
Tools and Supplies for Priming Walls
Before you start priming, gather the essential tools—roller, brushes, tray, extension pole—and the right paint and primer supplies like cans, stir sticks, and drop cloths.
You’ll also need surface prep materials such as sandpaper, spackle, primer-safe tape, and a good cleaner to remove dust and grease.
Having these on hand will streamline the job and help you get an even, lasting finish.
Essential Priming Tools
What tools do you really need to prime walls efficiently? You’ll grab a few essentials that speed work and protect finishes while considering color matching and primer durability.
A sturdy roller frame and nap cover for smooth, even coats; an angled sash brush for cutting in edges; and a quality roller tray or bucket with a grid for loading tools.
- Roller (18″ extension + appropriate nap)
- Angled sash brush (2–3″)
- Tray or bucket with grid
These items let you control application, reduce waste, and guarantee consistent primer durability for reliable topcoat results.
Paint And Primer Supplies
Ready to get hands-on? You’ll need primer, paint, trays, rollers, angled brushes, extension poles, and quality painter’s tape.
Choose primer type—stain-blocking, bonding, or tinted—to help with color matching and reduce coats.
Bring a small sample pot if you’ll test swatches against different wall textures.
Have rags, disposable gloves, and a mixing stick to blend tint evenly.
Use a funnel or pour spout to avoid spills.
Keep a paint can opener, stirrer, and drop cloths handy.
These supplies streamline priming, improve coverage, and make shifting to topcoat faster and more predictable.
Surface Prep Materials
Now that you’ve gathered your primers and application tools, focus on surface prep materials that let the primer stick and look uniform. You need the right items to remove grime, repair imperfections, and guarantee consistent adhesion for different primer types and eventual color matching. Gather sandpaper, patching compound, degreaser, and tack cloths.
Visualize the process:
- A sanding block smoothing glossy spots until dull and ready.
- A putty knife spreading lightweight spackle to erase dents and hairline cracks.
- A clean microfiber cloth wiping dust and degrease streaks before primer.
Use these supplies methodically for a flawless base.
How to Prepare Walls Before Priming
Before you slap on primer, take time to properly prepare the walls so the finish adheres evenly and lasts. Clear the room, remove outlet covers and switch plates, and protect floors with drop cloths.
Wash walls with mild detergent to remove grease and dust; rinse and let dry. Lightly sand glossy surfaces to promote adhesion, then clean sanding dust.
If old primer is peeling, perform primer removal to reach a stable base.
Test paint color in a small area for color matching before priming large sections.
Tape edges for clean lines, and make certain good ventilation while you work.
Repair Cracks, Holes & Stains Before You Prime
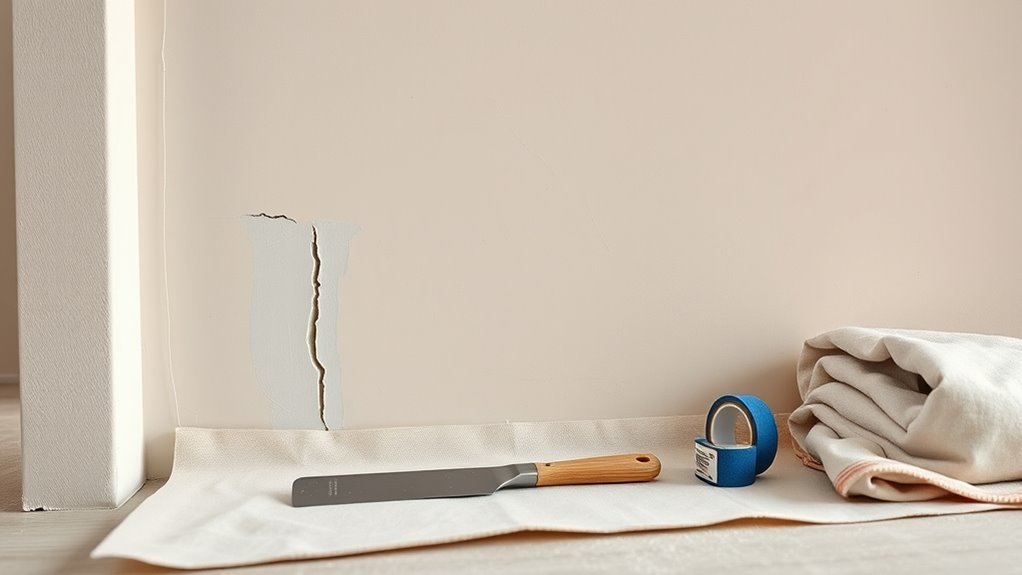
Before you prime, inspect the walls and mark any cracks, holes, or stained areas so you know what needs fixing. Patch cracks and holes with the right filler, sand smooth, and wipe away dust.
Treat and seal stains with a stain-blocking primer or appropriate cleaner so they don’t bleed through your new coat.
Assess Damage Areas
While you’re prepping to prime, take a careful walk around the room and mark every crack, hole, and stain so you can address them before the primer goes on. You’ll evaluate severity, substrate type, and whether stains are from water, smoke, or grease.
Note areas where color psychology will influence final choices—bright accents hide differently than neutrals. Consider eco-friendly options for cleaners and sealers.
Visualize fixes with a quick checklist:
- a hairline crack running along trim
- a dented spot near a doorknob
- a dark water stain on the ceiling
Record locations, sizes, and priority before you start repairing.
Patch Cracks And Holes
Start by cleaning the damaged area and removing any loose paint or debris so the repair materials can bond properly.
Next, widen hairline cracks with a utility knife, dust away residue, and apply a lightweight patching compound or spackling. Press firmly, smooth with a putty knife, and let it dry fully.
Sand the patch level, wipe clean, and prime small repairs before painting.
For larger holes, use mesh or a patch kit following manufacturer steps.
Consider color mixing only after patches are sealed to match finish.
Factor in budget planning when choosing kits and materials to avoid costly returns or rework.
Treat And Seal Stains
Once cracks and holes are patched and sanded, turn your attention to stains so they won’t bleed through primer and paint. You’ll assess stain type—water, smoke, or grease—then choose a stain treatment designed for that cause. Clean the area, let it dry, and apply a thin seal application product where needed.
For stubborn marks, repeat treatment and spot-prime.
- A yellowed water ring fading under a targeted seal application
- Dark smoke smudges lifted after a solvent-based stain treatment
- Grease softened, wiped away, then covered with a stain-blocking primer
Finish by inspecting for any residual bleed before full priming.
Protect Trim, Floors, and Fixtures Easily
Before you roll primer on the walls, cover trim, floors, and fixtures so paint won’t splash or seep where it shouldn’t. Lay down drop cloths or rosin paper, taping seams securely. Use painter’s tape along trim and around light switches, vents, and hardware, pressing edges for a clean line.
Remove or mask outlet covers and light fixtures; keep small items in labeled bags. If you’re changing colors based on color theory or interior design plans, protect samples and swatches from smudges.
Check tape adhesion after a few hours and replace any wrinkled sheets to prevent accidental primer stains.
Prime Walls With a Roller & Brush: Step‑By‑Step
Ready to roll? You’ll prep the wall, cut in edges with a brush, then use a roller to lay primer evenly. Choose primer types based on surface and desired color matching for smoother topcoat coverage. Work in sections: start at corners, move to large fields, blend edges before the primer skins over.
- A steady brush stroke along trim
- A loaded roller creating “W” patterns
- A feathered overlap to avoid lap marks
Allow recommended dry time, inspect for thin spots, and apply a second coat only if needed for full coverage and consistent color matching.
Priming Walls With a Spray Gun (Faster Method)
If you want to speed up priming large rooms or textured surfaces, switching from roller and brush to a spray gun will cut application time and give a very even finish. You’ll mask floors, trim, and fixtures, wear a respirator, and keep windows open.
Thin primer per the manufacturer and test spray pattern on cardboard. Maintain consistent distance and overlap passes by about 50% to avoid runs. Move steadily and work in sections, feathering edges to blend.
Clean the gun thoroughly after use. Check primer compatibility with your paint and surface to guarantee adhesion and uniform topcoat performance.
Drying Times: When to Sand or Recoat
Because primer cure depends on product type, temperature, and humidity, you should wait the manufacturer’s recommended time before sanding or recoating.
Check surface tackiness: it should feel dry, not gummy.
Light sanding smooths imperfections; heavy sanding removes too much primer.
When recoating, follow flash times to avoid peeling.
- Imagine a satin wall you can gently buff to smoothness.
- Picture a matte finish that soaks up color psychology, changing room mood.
- Visualize choosing eco-friendly options that dry cleanly and reduce odors.
Always test a small patch to confirm dryness before full sanding or applying paint.
When You Need a Second Primer Coat
When a first coat hasn’t sealed stains, shows the substrate through, or provides uneven coverage, you’ll need a second primer coat to guarantee uniform adhesion and color hold; apply it after the initial coat has fully dried and been lightly sanded if recommended. You’ll add another coat when color matching fails, rough patches remain, or texture blending is incomplete. A second coat evens tone, improves topcoat performance, and calms the stress of an imperfect first pass.
| Concern | Feeling | Result |
|---|---|---|
| Stains peek through | Frustration | Covered |
| Patchy tone | Unease | Evened |
| Rough texture | Worry | Smoothed |
| Poor match | Relief | Consistent |
Common Priming Mistakes and How to Avoid Them
Although priming seems simple, a few common mistakes can undo your work fast; knowing them helps you avoid wasted time and poor results. You’ll want to dismiss priming myths and primer myths that say you can skip prep or rush drying.
Prep the surface, fix stains, and choose the right primer for the substrate. Don’t over-apply or paint on tacky primer; that traps solvents and leads to peeling.
- A glossy patch left unscuffed repels primer.
- A damp wall prevents adhesion.
- Heavy roller marks make texture show through.
Follow instructions, wait proper dry times, and test a small area first.
How Primer Cuts Paint Coats and Boosts Durability
When you prime a wall first, you’ll usually need fewer paint coats because the primer evens out the surface and hides flaws.
Primer also creates a stronger bond between the wall and the paint, so each coat lasts longer. That means you save time and get a more durable finish with less paint.
Fewer Paint Coats
Because primer seals and evens out the surface, you’ll usually need fewer topcoats to get full coverage and a uniform finish. You save time and paint, and you avoid frustrating color matching issues when moving between patches.
If you’re repainting, proper primer removal from flaking areas ensures the new primer adheres and you won’t need extra coats later.
- Imagine one smooth swipe covering a wall instead of three.
- Picture fewer paint cans left half-full in the garage.
- Visualize a consistent color from corner to corner without touch-up stripes.
That efficiency also cuts labor and long-term maintenance.
Stronger Surface Bond
If you want your paint to stick and last, start with a quality primer that bonds to the wall and gives topcoats something solid to grip. You’ll improve adhesion by matching primer type to surface texture—smoother walls need low-build primers, rougher ones benefit from higher-build products that fill and level.
That stronger surface bond reduces the number of paint coats and prevents peeling, blistering, or uneven wear. Choose primers labeled for primer durability and follow drying times; proper curing creates a stable base that resists moisture and abrasion.
In short, a well-chosen primer saves effort and extends the life of your finish.
Quick Troubleshooting: Adhesion, Bleed‑Through, Uneven Coverage
Although primer usually solves most prep problems, you’ll still run into adhesion issues, bleed-through from stains, or patchy coverage — and each has a quick fix.
If paint peels, sand glossy spots, clean, and apply a bonding primer; think color matching and texture blending when repairing patched areas.
For stain bleed-through, use a stain-blocking primer; let it dry fully before topcoat.
If coverage looks uneven, add a second primer coat or use a higher-hide formula and thin, even strokes.
- Sand glossy patch to matte
- Spot-prime stains with sealant
- Roll in consistent, overlapping passes
Frequently Asked Questions
Can Primer Be Tinted to Color-Match My Paint Before Application?
Yes — you can tint primer to color-match your paint before application. You’ll get better coverage, reduce coats, and achieve truer color, but consult manufacturer limits and test a small area to guarantee adhesion and final shade.
Can I Use Primer Outdoors on Exterior Walls and Siding?
Yes — you can use primer outdoors on exterior walls and siding. You’ll guarantee exterior preparation is thorough, check primer compatibility with surfaces and finishing paint, and follow weather, drying times, and manufacturer instructions for best results.
How Should I Dispose of Leftover Primer Safely and Legally?
You should follow proper disposal: seal unused primer, check local environmental regulations, take hazardous or large quantities to a household hazardous waste facility, never pour down drains, and contact local authorities if you’re unsure about specific rules.
Will Primer Help With Mold or Mildew on Previously Damp Walls?
No, primer won’t fix active mold or mildew; you should remove contamination first. After remediation and drying, use a mildew-resistant primer to improve mildew resistance and support mold prevention, but address moisture sources too.
Can I Apply Wallpaper Over Primed Drywall or Painted Walls?
Yes — you can apply wallpaper over primed drywall or painted walls. You’ll need proper wall preparation, choose primer types compatible with wallpaper adhesive, guarantee smooth, clean, dry surfaces, and use a sizing or wallpaper primer for best results.
Conclusion
So you primed like a responsible adult—congratulations, you’ve paid for paint’s VIP undercoat. Now relax: primer keeps stains hiding, paint sticking, and your walls from melodramatic peeling. If you skipped it, don’t worry—your future self will show you passive-aggressive reminders in the form of bubbling and bleed‑through. Go ahead, slap on topcoat confidence and watch your walls behave like grown-ups. Sip coffee. Brag to friends. You earned predictable, respectable walls.