How Warm Should It Be for Exterior Painting?
You should only paint exterior surfaces when both air and surface temperatures stay within the paint maker’s recommended window—typically about 50–85°F (10–29°C)—so paint will flow, adhere, and cure properly. Check surface temps with an IR gun or by touch; avoid hot midday glare, freezing nights, dew, or high humidity. Warmer speeds drying but risks runs; colder slows curing and risks adhesion failures. Keep conditions stable and you’ll get a durable finish—keep going for practical tips and tools.
Quick Checklist: Can You Paint Today?
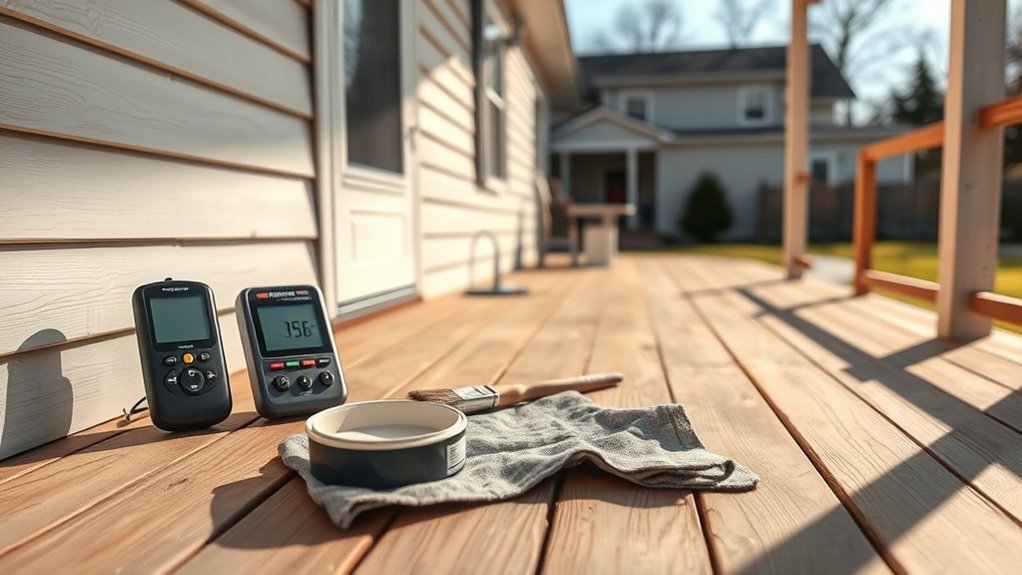
Before you grab a brush, run this quick checklist: check the temperature, surface temperature, humidity, wind, and recent precipitation to confirm conditions fall within the paint manufacturer’s recommended range.
Next, inspect the surface for moisture and contaminants; don’t paint if it feels damp or shows mildew.
Check forecasts for rain and rapid temperature drops that could ruin drying.
Consider how color selection affects drying—darker hues absorb heat faster—and remember extremes can harm paint durability.
Test a small patch during the planned application window.
If conditions stay steady and within limits, you’re good to proceed.
Ideal Temperature Ranges (Quick Reference)
You’ll want to aim for the ideal temperature window recommended by your paint manufacturer to guarantee proper adhesion and curing.
Know the minimum application temperature so paint won’t freeze or fail to bond, and be aware of high-heat risks like blistering and rapid drying.
Use this quick reference to pick the safest range for your project before you start.
Optimal Temperature Window
When painting outdoors, aim for a consistent temperature window so your paint cures properly and adheres well. Pick days when temperatures stay between 50°F and 85°F (10°C–29°C) for most latex and oil formulations.
Narrower midrange temperatures promote even drying and reduce brush marks. Avoid rapid swings from sun to shade or cold nights that can tack finish.
Check manufacturer guidelines for specialty coatings and adjust timing accordingly.
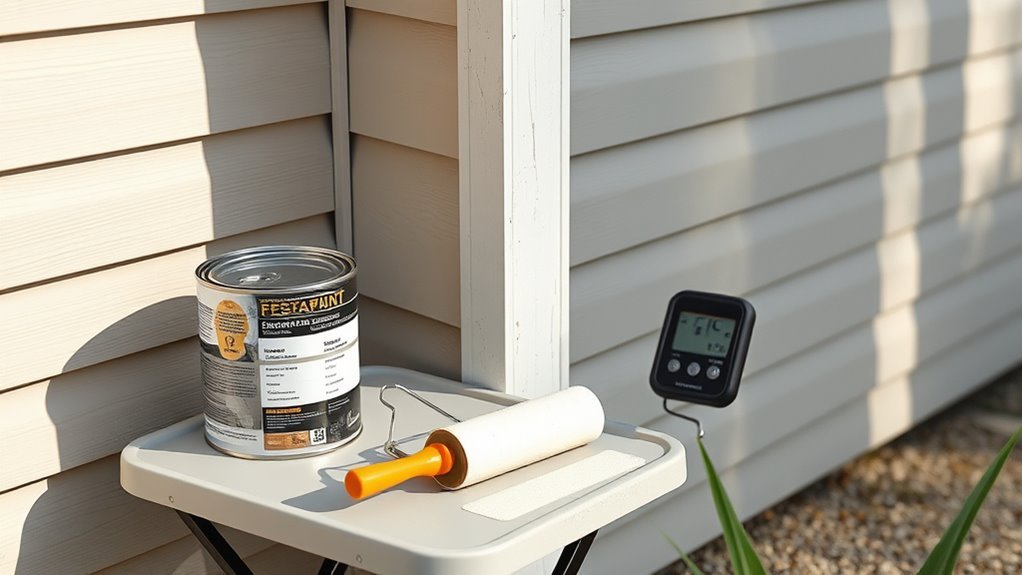
Store paint on-site in insulated containers to keep it within that window, and consider color options wisely since darker hues absorb more heat and can alter drying behavior.
Minimum Application Temperature
Although colder days can be tempting for quieter work, you should stick to the paint maker’s listed minimum application temperature to guarantee proper flow and adhesion. You’ll avoid poor color matching and adhesion failures if you wait for the recommended floor. Check product labels—some eco friendly paints have lower minimums, but they still need that threshold to cure. Plan jobs around nights and mornings that dip below the limit. Use a thermometer and keep surfaces dry. Quick reference:
| Condition | Minimum °F |
|---|---|
| Latex standard | 50 |
| Eco friendly variant | 45 |
| Oil / alkyd | 40 |
High-Heat Risks
Because extreme heat can quickly ruin a paint job, keep surfaces and ambient temperatures within the product’s recommended upper limits to prevent blistering, poor leveling, and rapid skinning. You’ll notice heat affects drying speed, adhesion, and final appearance — especially lighter paint color that reflects less heat and darker tones that absorb more.
Check surface texture: rough or porous surfaces dry unevenly and can trap heat, worsening defects. Work during cooler hours, use shade or misting responsibly, and follow manufacturer max-temp guidance to avoid callbacks.
- Avoid painting midday heat peaks
- Test a small area first
- Use cool tools and materials
- Monitor humidity and wind
Why Temperature Determines Paint Success
You’ll notice temperature controls how paint dries and cures, affecting adhesion and durability.
If it’s too cold, solvents won’t evaporate properly.
If it’s too hot, coatings can skin over before leveling.
Knowing the recommended temperature ranges for your specific paint helps you pick the right window to get a lasting finish.
Curing And Drying
When paint goes on a surface, temperature controls how solvents evaporate and resins cross-link, so the coating either dries into a durable film or stays soft and tacky. You’ll want good color matching and proper paint storage because temperature shifts can alter appearance and chemistry.
If it’s too cold, curing stalls; if it’s too hot, film forms too fast and traps solvents.
- Allow adequate dry time before recoating or exposure.
- Keep cans at stable temperatures during storage and use.
- Follow manufacturer cure-time guidance, adjusting for humidity.
- Test a small area to confirm hardness and adhesion before finishing.
Temperature Ranges For Paint
The practical effects of curing and drying point straight to temperature ranges: paint has narrow windows where solvent evaporation and chemical cross-linking proceed correctly, so you’ll need to match product specs to current conditions. You should follow manufacturer min/max temps for application and curing—you’ll often see a daytime range plus a required overnight minimum.
Work too cold and coatings won’t cure, trapping solvents and ruining paint durability; work too hot and rapid drying can cause brush marks, poor adhesion, or color shift that limits color options. Plan around forecasts, use heaters or wait for stable conditions to guarantee a durable, true finish.
Surface vs. Air Temperature: Which Matters Most?
Although air temperature gets most of the attention, surface temperature usually matters more for paint performance because it directly controls how the coating cures and adheres. You’ll want to think about both Surface temperature and Air temperature, but prioritize the surface since it dictates drying speed, adhesion, and risk of blistering.
Surface temperature, not just air temperature, controls paint curing, adhesion, drying speed, and defect risk.
If the surface’s too cold or hot, paint won’t behave as expected even when the air reads fine. Check conditions, plan timing, and pick products rated for the actual surface conditions you’ll face.
- Surface warms or cools faster than air
- Adhesion depends on surface state
- Drying rate ties to surface temp
- Risk of defects rises with mismatch
How to Measure Surface Temperature Accurately
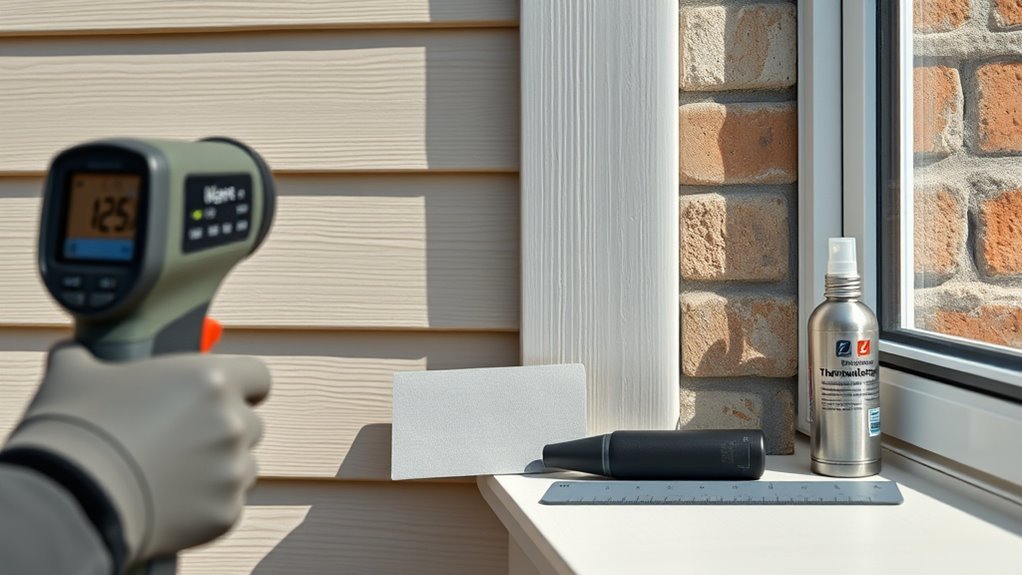
If you want reliable results, measure the actual surface temperature rather than assuming it matches the air; handheld infrared thermometers (IR guns) and contact thermometers are the go-to tools, each with pros and cons you should understand before painting. You’ll verify substrate warmth for proper surface prep and guarantee paint storage won’t bias measurements. Point IR guns from perpendicular distance, note emissivity settings, and average several spots. Use contact probes for detailed checks on trim. Record readings and time of day. Quick reference:
| Tool | Best for | Tip |
|---|---|---|
| IR gun | Fast scans | Adjust emissivity |
| Probe | Accurate contact | Wait for equilibrium |
| Combo | Versatile | Calibrate often |
Manufacturer Specs vs. Real-World Conditions
When manufacturers give temperature ranges and drying times, they mean ideal lab conditions—so you’ll need to adjust expectations for wind, humidity, sun, and the actual substrate temperature you measured earlier. You should treat labels as starting points, not guarantees.
Check surface temp, local dew point, and forecasted changes before you paint. Remember color matching can shift with temperature and light, so test samples outside.
Keep paint storage consistent with manufacturer recommendations to avoid viscosity changes. Use real-world observations to tweak drying windows, not the label alone.
- Verify substrate temperature, not just air temp
- Monitor humidity and wind
- Test color matching outdoors
- Follow paint storage rules
How Paint Type Changes the Temperature Window
Different paint chemistries give you different workable temperature ranges, so you’ll want to choose a product that matches your local conditions.
Pay attention to how humidity affects drying times for latex versus oil-based formulas, because slower curing can trap moisture or attract dirt.
Checking the manufacturer’s recommended window and understanding the chemical differences helps you avoid adhesion or finish problems.
Ideal Temperature Ranges
Because paint chemistry dictates drying and adhesion, you’ll see different temperature windows depending on whether you’re using acrylic, oil-based, or latex formulas. You should pick temperature ranges that suit the product and protect color matching and paint storage integrity. Aim for steady conditions rather than extremes.
- Acrylic: 50–85°F for best film formation and consistent hue.
- Latex: 45–90°F, avoid freezing during cure to preserve finish.
- Oil-based: 55–95°F, slower cure but tolerates warmer nights.
- Specialty coatings: follow manufacturer limits; primers often need warmer minimums.
Check labels and plan applications when temperatures stay within the recommended ranges.
Humidity And Drying
Although humidity often feels secondary to temperature, it directly alters drying times and lets you widen or narrow the safe temperature window for each paint type. You’ll notice high humidity slows solvent and water evaporation, so oil and latex need longer to set and can sag or attract dirt if rushed.
Low humidity speeds drying, which can hurt adhesion and color matching by locking in pigment before leveling finishes. Monitor dew point and choose slower- or faster-drying formulas as needed.
Adjust application thickness and watch paint texture; thinner coats dry more evenly, helping achieve consistent coverage and finish.
Paint Chemical Differences
Humidity affects drying, but the chemistry of the paint itself ultimately sets the safe temperature window you should work within. Different formulas cure at different rates, so you’ll choose products based on your climate and schedule.
Consider how pigments influence heat absorption during color selection and how binders affect paint durability.
- Water-based acrylics: flexible, tolerate cooler temps but need above-freezing conditions.
- Alkyds/oil-based: cure slower, require warmer nights for proper film formation.
- Elastomeric: handle temperature swings, great for cracking-prone surfaces.
- Specialty low-temp formulas: engineered to dry at lower temps, check manufacturer specs.
Latex Paint: Ideal Temps and Caveats
When you use latex paint outdoors, aim for surfaces and air temperatures between about 50°F and 85°F so the coating can level, cure, and bond properly. You should avoid painting in direct sun or extremes that will flash-dry the finish, harming adhesion and paint texture.
Paint latex outdoors when surfaces and air are about 50–85°F; avoid direct sun and extremes to ensure proper curing and adhesion
Lower temps slow curing; higher temps speed drying and can trap solvents. Check dew point—painting too close to it risks poor film formation.
For consistent Color matching, test small patches at the job site and view them once dry.
Store and condition cans to job temperature before use, and follow manufacturer minimum-temperature limits.
Oil and Alkyd Paints: Temperature Rules
If you’re using oil- or alkyd-based paints outdoors, work when air and surface temperatures sit between about 45°F and 90°F so the film can oxidize and harden properly. You’ll want to monitor dew point and avoid painting late-day when temperatures drop quickly. Good surface prep prevents adhesion failures and tacky finishes.
Consider Color selection carefully—darker hues absorb heat and may affect drying.
- Avoid painting below 45°F or when frost is expected.
- Keep substrates dry for at least 24 hours before starting.
- Stir thoroughly; solvents evaporate differently at extremes.
- Allow extended cure times in cool or humid conditions.
Enamel and Specialty Coatings: What to Know
Because enamel and specialty coatings often have different chemistries and performance requirements than standard latex or oil paints, you’ll need to check label specs for recommended temperature ranges, pot life, and recoat times before you start.
You should also verify surface prep and curing expectations; some enamels need warmer conditions to flow and harden properly.
If you work on restoration, match historical paint types for authenticity and test adhesion.
For modern projects, consider eco-friendly coatings that may have lower VOCs but different temperature tolerances.
Follow manufacturer guidance, plan for cooler evenings, and avoid applying when temperatures approach the minimum.
How Humidity Alters the Effective Temperature Range
You’ll notice that humidity directly affects how paint cures, often slowing solvent evaporation and lengthening tack and dry times.
When humidity’s high, you risk poor film formation, longer recoat intervals, and increased chance of blistering or mildew.
Plan your painting schedule around both temperature and humidity to avoid these issues.
Humidity’s Effect On Curing
Although temperature sets the baseline for paint curing, humidity can widen or narrow that usable range by speeding or slowing solvent evaporation and chemical reactions.
You’ll notice paint consistency change as moisture rises, thinning or preventing proper film formation; low humidity can make coatings dry too fast, high humidity slows crosslinking.
Primer adhesion depends on surface moisture and drying time, so you must adjust application windows.
Monitor both relative humidity and dew point to pick the best time to work.
- Check humidity before mixing and rolling.
- Avoid painting near dew point shifts.
- Use slower-drying formulas if needed.
- Allow extra cure time in damp conditions.
High Humidity Risks
If humidity climbs, it shrinks the practical temperature window for exterior painting by slowing solvent evaporation and delaying film formation, so you’ll see tacky finishes, poor adhesion, and longer cure times even within a normally acceptable temperature range. You should monitor humidity impact and dew point before painting; high relative humidity or a dew point near surface temperature raises failure risk. Plan work when humidity is lower, accelerate drying with airflow, or delay until conditions improve. Check labels for manufacturer humidity limits and use sealers when appropriate.
| Condition | Risk | Action |
|---|---|---|
| >75% RH | High | Delay |
| 50–75% RH | Moderate | Ventilate |
| <50% RH | Low | Proceed |
How Wind Affects Drying and Curing
When wind picks up, it speeds surface drying by carrying solvent and water away from the paint film.
But that same airflow can cause uneven curing, blistering, or premature skinning that traps solvent underneath.
You need to manage wind influence to protect paint adhesion and finish quality.
Apply during calmer periods, use windbreaks, and choose slower-evaporating formulations when breezes are expected.
Monitor tackiness and recoat windows closely.
- Work with forecasted wind speeds and timing.
- Set up temporary barriers or screens.
- Opt for longer open-time primers and topcoats.
- Avoid spraying in gusty conditions to prevent atomization drift.
Sunlight, Shade, and Radiant Heat Timing
Wind can change how fast paint skins over, and sunlight and radiant heat do much the same by speeding evaporation and raising surface temperature.
You’ll watch wet paint dry unevenly if one side bakes in full Sunlight exposure while another stays cool in Shade effects. Plan so surfaces warm gradually; avoid painting where radiant heat from roofs or pavement will spike temperatures later.
Work shaded areas first or use temporary covers to equalize conditions. Check manufacturer temperature ranges for surface—not air—temperatures, and pause if surfaces feel hot to the touch; rushed curing risks poor adhesion and blistering.
Morning vs. Afternoon Painting: Dew and Temps
Because morning air often holds dew and surfaces stay cooler, you should avoid painting exterior surfaces at first light until they’re dry and warm to the touch. Otherwise, solvent-based and latex coatings can cure improperly or trap moisture.
You’ll get better adhesion and finish if you wait for midday warmth but not peak heat. Ignore temperature myths that push dawn starts; rely on surface temperature and paint branding guidelines. Plan for afternoon windows when humidity drops.
Quick tips:
- Check surface with back of your hand, not just air temp
- Avoid painting right after rain or heavy dew
- Follow paint branding minimums
- Start when surfaces feel consistently warm
Drying Time vs. Curing Time: Temperature Impacts
If temperatures drop or rise outside the paint’s recommended range, you’ll see drying times change and curing slow or stall, since drying (solvent evaporation or film formation) is just the first step while curing (chemical crosslinking and full hardness) continues much longer and depends heavily on consistent heat and low humidity.
You’ll need to plan: lighter paint color may warm faster in sun, speeding surface drying but not curing. Cooler nights prolong tackiness and risk damage.
Choose brushes for smooth, thin coats to aid uniform solvent release; avoid heavy application.
Monitor temps for several days to ensure full cure before stress.
Minimum Temperatures That Cause Adhesion Failures
When temperatures fall below a paint manufacturer’s recommended minimum—typically between 35–50°F (2–10°C) for many exterior systems—you’ll start seeing adhesion failures like peeling, blistering, or lifting. This is because the substrate and coating can’t form a proper bond as the film doesn’t flow and wet the surface.
You should avoid painting in cold conditions; humidity and damp substrates worsen problems. Pay attention to surface preparation and paint storage to prevent issues.
- Cold slows film formation, reducing wetting.
- Dew or frost on the substrate breaks adhesion.
- Old cans stored in cold may gel or separate.
- Primer adhesion is especially sensitive.
Maximum Temperatures That Cause Blistering and Flash-Off
Although high heat can accelerate drying, it also raises the risk of blistering and poor flash-off by driving solvents to the surface too quickly. When surface temps exceed about 90–100°F (32–38°C) you’ll see trapped solvents form blisters as topcoat skins over wet layers.
That same rapid solvent migration undermines paint durability and can cause uneven gloss. At sustained temperatures above roughly 120°F (49°C) you’ll risk severe film defects and faster color fading from UV-heat synergy.
Work in cooler hours, use heat-tolerant formulations, and avoid direct midday sun to minimize blistering and poor flash-off.
How Temperature Affects Paint Viscosity and Application
Heat doesn’t just affect drying and blistering; it also changes how paint flows and sprays. When it’s warm, viscosity drops so paint runs easier, affecting application technique and atomization. You’ll notice thinner coats, faster leveling, and potential sagging if you don’t adjust.
Warm temperatures thin paint, altering flow and atomization—expect thinner coats, quicker leveling, and increased sag risk without adjustments.
Temperature also influences color consistency and can shorten paint shelf life if stored improperly before use. Manage temperature to preserve finish and avoid rework.
- Warm air thins paint, requiring slower passes.
- Cold makes paint thicker, causing poor coverage.
- Adjust spray pressure and tip size with temperature shifts.
- Store cans at stable temps to protect color consistency and shelf life.
Primer Temperature Rules and Special Care
Because primers set the foundation for your finish, you’ve got to follow specific temperature rules to guarantee adhesion, curing, and even film build. Check manufacturer min/max temps before starting primer application and don’t guess—use a reliable thermometer for temperature calibration at the substrate surface and nearby air.
Avoid applying during rapid shifts; dew, frost, or sun-heated surfaces ruin bonding. Store and condition primer to recommended temps so viscosity and catalysts perform correctly.
When dew point is close to surface temp, pause work. If you must adjust timing, ventilate and heat the work area gently rather than forcing quick cures.
Choosing Paint Formulas for Cold Climates
When you’re prepping for exterior painting in cold climates, pick formulations rated for low-temperature application and curing so the paint wets, levels, and adheres instead of wrinkling or failing to film. You’ll choose acrylics or specialty cold-weather alkyds that remain flexible and dry reliably at lower temps.
Consider Color selection carefully—darker tones absorb heat but can affect curing—and prioritize Surface preparation to remove frost, moisture, and loose material. Follow product limits for minimum temperature and dew point.
Use:
- Low-temperature acrylics
- Fast-setting additives
- Flexible binders
- Extended cure-time scheduling
Choosing Paint Formulas for Hot Climates
When you’re painting in hot climates, pick heat-resistant paints that won’t soften or sag under high temperatures.
Choose UV-stable pigments to prevent fading and chalking from intense sun exposure.
Also consider fast-drying formulations to reduce dust pickup and minimize heat-related application issues.
Heat-Resistant Paint Options
If your home sits in a hot climate, choosing a heat-resistant exterior paint will cut cooling costs and protect surfaces from sun damage. You’ll want formulations labeled for heat reflection and high-temperature adhesion; check color matching advice so lighter tones reflect more heat, and review paint warranties for performance in extreme heat.
Pick breathable elastomeric or acrylic blends for siding and masonry, and silicone-modified coatings for metal. Consider finish—flat hides imperfections, semi-gloss sheds dirt.
- Acrylic latex blends: durable, flexible
- Elastomeric coatings: bridge hairline cracks
- Silicone-modified: excellent water shedding
- Ceramic-infused: adds reflective properties
UV-Stable Pigments
Why should UV-stable pigments matter for homes in hot climates? You’ll want pigments that resist color fading and maintain pigment stability under strong sun. Choose formulas labeled UV-stable or lightfast; they keep exteriors vibrant longer and reduce repaint frequency. Consider additives and high-quality binders that protect pigments without altering finish. Inspect samples in direct sunlight before buying and prioritize proven outdoor pigments for your region.
| Benefit | What to look for | Result |
|---|---|---|
| Longevity | UV-stable label | Less color fading |
| Protection | Strong binders | Improved pigment stability |
| Cost-effectiveness | Durable pigments | Fewer repaints |
Fast-Drying Formulations
Because hot, dry conditions speed evaporation, you’ll want fast-drying exterior paints formulated to cure quickly without compromising film integrity. You should pick acrylics or alkyd hybrids labeled for high-temperature application, and test small sections to confirm color matching under bright sun.
Mind your paint storage: keep cans shaded and between recommended temperatures to preserve additives that control open time and adhesion. Apply thinner coats, work in the cooler morning or late afternoon, and follow manufacturer recoat intervals strictly.
- Choose formulations with heat-stable coalescents
- Avoid overly thick application
- Use quality brushes/rollers for even laydown
- Monitor humidity and surface temperature
Additives and Retarders for Temperature Extremes
When temperatures push paint beyond its comfort zone, you’ll want to reach for the right additives and retarders to keep application smooth and drying predictable.
In hot weather, slow-dry additives reduce tackiness and brush marks. In cool conditions, specialized retarders prevent skinning without overly delaying cure.
You should match additives to your product—latex, acrylic, or oil—and consider color selection since pigments can affect drying.
Maintain proper paint storage: keep cans at moderate temperatures and stir additives in thoroughly before use.
Test a small area for finish and adhesion, and follow manufacturer dosages to avoid weakening film performance.
Tools to Paint in Cool Temperatures
If temperatures dip, you’ll want the right tools to keep paint flowing and adhesion reliable. You’ll choose gear that minimizes temperature-related problems and consider color selection and paint sheen—warmer tones and glossier sheens can help cure faster.
Bring a simple kit to maintain quality and speed:
Pack a compact cold-weather painting kit to maintain speed, warmth, and consistent finish quality.
- Infrared thermometer for surface and ambient readings
- Portable, thermostat-controlled heater (vented for safety)
- Insulated paint bucket and roller covers to retain warmth
- Slow-releasing tack cloths and masks to manage condensation
Use tools that let you monitor temps, keep materials warm, and avoid rushing application—this preserves adhesion and finish in cool conditions.
Tools to Paint in Hot Temperatures
Just as you’d equip yourself to keep paint warm in cool weather, hot conditions call for gear that keeps materials stable, your workspace ventilated, and finishes from drying too fast.
Use insulated coolers or shaded bins for paint storage and keep lids tight to slow evaporation. Work with fast-evaporation extenders and select breathable tarps to shade surfaces.
Use fans and a misting system to lower ambient temperature without wetting paint. Carry a portable thermometer and moisture meter to monitor conditions.
For accurate color matching, check swatches in shaded, neutral light and rematch if temperature shifts affect appearance.
How to Warm Up Surfaces Safely Before Painting
Before you paint in cool conditions, warm the surface evenly so primers and paints can bond properly. You can use heat lamps at a safe distance and monitor temps to avoid scorching or blistering.
Alternatively, preheat with warm air—like from a forced-air heater or warm blowers—while keeping ventilation and flammable materials in mind.
Use Heat Lamps Safely
When temperatures dip, use heat lamps to raise a surface’s temperature quickly and evenly so paint will adhere and cure properly. You’ll position lamps to avoid hotspots and keep distance per manufacturer guidelines.
Monitor surface temp with an infrared thermometer, watching exterior textures for uneven warming that can affect paint sheen. Don’t leave lamps unattended; secure cords and protect flammable materials.
Aim for gradual preheat rather than blasting heat.
- Check lamp wattage and coverage before starting
- Maintain at least the recommended clearance from siding
- Use timers and thermostats to control run time
- Wear PPE and keep a fire extinguisher nearby
Preheat With Warm Air
Want a gentler way to warm siding and trim without open flames or concentrated hotspots? You can preheat with warm air using portable electric heaters or warm-air blower fans positioned safely at a distance. Aim for even, gentle airflow to raise surface temps into the manufacturer’s recommended range; avoid direct contact that can blister old paint.
Monitor temperatures with an infrared thermometer and adjust fan distance. When testing colors, keep color matching consistent by preheating before comparing paint swatches so tint appearance stays accurate.
Work in sections, allow surfaces to cool briefly before coating, and follow safety clearances and electrical guidelines.
How to Cool Surfaces Before Painting
How can you cool hot siding or trim quickly so paint adheres and finishes evenly? You’ll focus on surface preparation and paint storage to prevent flashing and poor adhesion. Cool surfaces faster to meet temperature windows and protect finish.
- Work in morning or late afternoon shade whenever possible to avoid peak heat.
- Mist surfaces lightly with a fine spray, then blot excess; don’t soak substrates or paint.
- Use portable fans to increase evaporative cooling and lower surface temp before coating.
- Keep paint cans shaded and chilled (not frozen) so material temperature matches cooled surfaces for consistent application.
Scheduling Multi-Day Projects Around Temp Swings
Because temperature swings can undo a day’s careful prep, plan each phase of a multi-day exterior paint job around the forecast and daily highs so you’re always coating within the paint’s recommended temperature window.
Check multi-day forecasts, scheduling primer, base coats, and topcoats on consecutive days with similar temps and humidity.
Match work to the paint color’s curing characteristics—darker colors absorb heat and dry faster.
Consider surface texture: rough or porous areas need longer open times and may demand warmer, stable days.
Build contingency days for delays and adjust start times to avoid peak afternoon heat or evening cooling.
Protecting Fresh Paint From Overnight Drops
If an unexpected overnight drop threatens your fresh exterior paint, act quickly to shield it—cold temperatures can stall curing, cause blistering, or make the finish tacky. You’ll want temporary protection that preserves film integrity and color matching while you avoid long-term fixes.
- Erect breathable tarps or frost cloth to trap radiant heat without trapping moisture.
- Run low-wattage heaters or heat lamps safely, keeping them off painted surfaces.
- Move canned samples indoors to improve paint storage and prevent thickening.
- Monitor temperature and humidity overnight; remove covers once temps stabilize to prevent condensation.
Tack Tests and Quick Adhesion Checks by Temp
When you need to confirm a fresh coat’s readiness, a simple tack test and quick adhesion check give immediate, temperature-sensitive feedback you can trust.
You press a clean finger or cloth lightly to a small painted area: if paint lifts, it’s too soft—often due to low temperature or high humidity slowing cure. Repeat tests at different times if temperature fluctuations occur during the day.
For adhesion, use a sharp blade to make a small X, then apply and peel tape; clean removal means poor adhesion.
Different paint formulations react differently, so consult manufacturer cure times and adjust testing accordingly.
Common Temperature-Related Failures and Fixes
Although temperature isn’t the only factor that affects an exterior finish, you’ll see most failures traceable to heat or cold. You’ll recognize issues from temperature fluctuations that reduce paint adhesion and paint durability. Address problems quickly: strip loose sections, sand feathered edges, prime with a temperature-tolerant primer, and repaint within recommended windows.
Temperature swings often drive exterior finish failures—strip loose paint, sand, prime with temperature-tolerant primer, and repaint within proper windows.
- Cracking: caused by rapid cooling; remove loose paint, fill cracks, use flexible topcoat.
- Blistering: from hot application; strip blisters, dry substrate, apply in cooler hours.
- Poor curing: due to cold nights; choose fast-curing formulations rated for low temps.
- Chalky fade: UV plus heat; clean, prime, and use high-UV acrylics.
Cost Tradeoffs: Wait vs. Use Weather Workarounds
You’ll need to weigh the cost of waiting for ideal temperatures against the expense and effort of weather workarounds like heaters, tents, or accelerants. Waiting can reduce rework and extend finish life, but it can also delay projects and cash flow.
Using workarounds gets you on schedule, yet may raise upfront costs and risk finish issues if not done properly.
Wait For Ideal Temps
If you can, wait for the ideal temperature window before painting exterior surfaces, because rushing into colder or hotter conditions usually raises costs or risks a flawed finish. You’ll save on rework, preserve color matching accuracy, and avoid compromised paint storage problems by timing the job.
Plan around consistent daytime highs and lows, not a single warm day.
- Monitor multi-day forecasts, not just one-day spikes.
- Schedule crew and materials when humidity is moderate.
- Keep cans rotated and off extreme heat or cold.
- Factor drying times into labor and containment planning.
Use Weather Workarounds
When conditions won’t wait for you, weigh weather workarounds against the cost of delaying the job. You can tent and heat small sections, use fast-curing coatings, or choose low-temp formulations to keep schedules moving.
Remember surface preparation still matters: dry, clean substrates ensure adhesion even when you rush.
Monitor humidity and temperature inside tents, and control ventilation to avoid solvent buildup.
Keep paint storage within recommended ranges to preserve viscosity and pot life.
Factor labor, equipment rental, and possible callback risk into your decision. Sometimes paying more now prevents expensive repairs later; sometimes waiting is wiser.
Safety Rules for Heating or Tenting Exteriors
Because heating or tenting an exterior creates confined, altered conditions, you need to follow strict safety rules to protect people, property, and paint quality. Keep vents and exits clear, monitor CO and VOC levels, and control temperatures to avoid overheating and paint odor buildup.
Watch for solar reflection that can amplify heat under tents and damage finishes.
- Use certified heaters and maintain clearances.
- Run continuous ventilation and gas detectors.
- Shield surrounding landscaping and surfaces from soot.
- Limit worker shifts, provide PPE, and post emergency plans.
Pro Tips: Reading Microclimates on Site
After following safe heating and ventilation protocols, start evaluating the site’s microclimates to predict how paint will cure and adhere.
Walk the perimeter at different times to note sun, shade, wind, and thermal mass.
Use simple tools—thermometer, infrared gun, and moisture meter—to gather microclimate insights that affect drying times.
Watch for cold spots near foundations, vents, or dense vegetation and plan site-specific adjustments like temporary windbreaks, localized heating, or adjusted application schedules.
Communicate observations with your crew, document conditions, and adjust tack times, film thickness, and recoat windows to match the actual on-site environment.
Further Resources: Manufacturer Guides and Weather Tools
If you want predictable results, lean on manufacturer guides and reliable weather tools to plan and execute exterior painting jobs. You’ll follow temperature and humidity specs, choose compatible primers, and match paint color recommendations to surface texture.
Use local forecast apps and desktop dew point calculators to avoid tacky finishes or poor adhesion.
- Check manufacturer datasheets for min/max temp and recoat windows.
- Use radar and hourly forecasts to avoid sudden rain.
- Calculate dew point relative to surface temperature before starting.
- Test a small area for color and texture under expected conditions.
These steps reduce risk and improve longevity.
Frequently Asked Questions
Can Paint Be Applied During Light Rain or Mist Without Failure?
You shouldn’t apply paint during light rain or mist; you’ll risk poor paint adhesion and premature failure. Consider weather considerations like humidity, surface wetness, and drying time, and wait for dry, stable conditions before painting.
Will Temperature Extremes Affect Paint Color Uniformity or Fading?
A historic house restoration showed fading where temperature extremes caused binder breakdown; you’ll see reduced paint durability and uneven color consistency if surfaces cycle between hot sun and freezing nights, so choose UV-stable, flexible formulations.
How Do Temperature Swings Overnight Affect Paint That Seems Dry?
Overnight temperature swings can rehydrate or shrink paint film, so you’ll see tackiness, reduced temperature stability, and weakened paint adhesion; you’ll want to avoid large swings until full cure to prevent blistering or peeling.
Can Nearby Concrete or Asphalt Heat Influence Paint Performance?
Yes — you’ll feel the sun’s backyard breath: concrete heat and asphalt influence can warm nearby surfaces, speeding drying, promoting blistering or uneven curing, so plan cooler application times, use proper primers, and monitor surface temps closely.
Are VOC Emissions or Drying Odors Increased at Higher Temperatures?
Yes — you’ll see higher VOC emissions and stronger drying odors as temperatures rise, because solvents evaporate faster; you’ll want good ventilation, choose low‑VOC paints, and avoid painting during extreme heat to minimize fumes and odors.
Conclusion
You’ve got the tools to decide whether today’s a paint day — don’t rush if temperatures or surface temps fall outside the manufacturer’s range. For example, a homeowner in Denver waited until afternoons hit 50–70°F and avoided early-morning dew; the paint cured evenly and the trim stayed flawless through freeze-thaw cycles. When you follow temperature guidance, measure surface temps, and use safe warming tactics, you’ll get a durable, professional-looking exterior finish.