Is a Quart of Paint Enough for One Wall?
You can often cover one small to medium wall with a quart, but it depends on surface texture, color change, and coats needed; a smooth, primed wall with a similar color might be fine with one quart for two thin coats, while textured or dark-to-light jobs usually need more. Expect some loss to rollers and touch-ups. Always test a sample strip and factor primer for big color shifts—keep going to learn how to measure and plan accurately.
Quick Answer: Will a Quart Cover One Wall?
Because coverage depends on the wall size and paint type, a quart will cover one small wall in many cases but not larger or heavily textured ones. You’ll usually get one coat on a modest 8×8 surface, assuming smooth drywall and standard latex.
If you’re doing color mixing or touch-ups, plan for extra. Textured surfaces, darker colors, or porous patches soak paint, so you’ll need more than a single quart.
Also remember paint drying reduces visible coverage—thin spots show until cured. Measure your wall, test a patch, and buy a bit more than the minimum to avoid mid-project runs.
How Paint Coverage Is Measured
When you shop for paint, coverage is usually given in square feet per gallon and tells you how much surface a single coat will cover under ideal conditions. Manufacturers test on smooth, primed drywall, so real-world results can vary.
You’ll read numbers like 350–400 sq ft/gal, but texture, porosity, and color changes affect yield. Deep colors or dramatic shifts may need extra coats despite claimed coverage; that’s where color psychology meets practical planning.
Also factor in trim, ceilings, and possible paint allergy reactions—use low-VOC formulas if sensitivity’s a concern. Always allow a margin rather than relying strictly on labels.
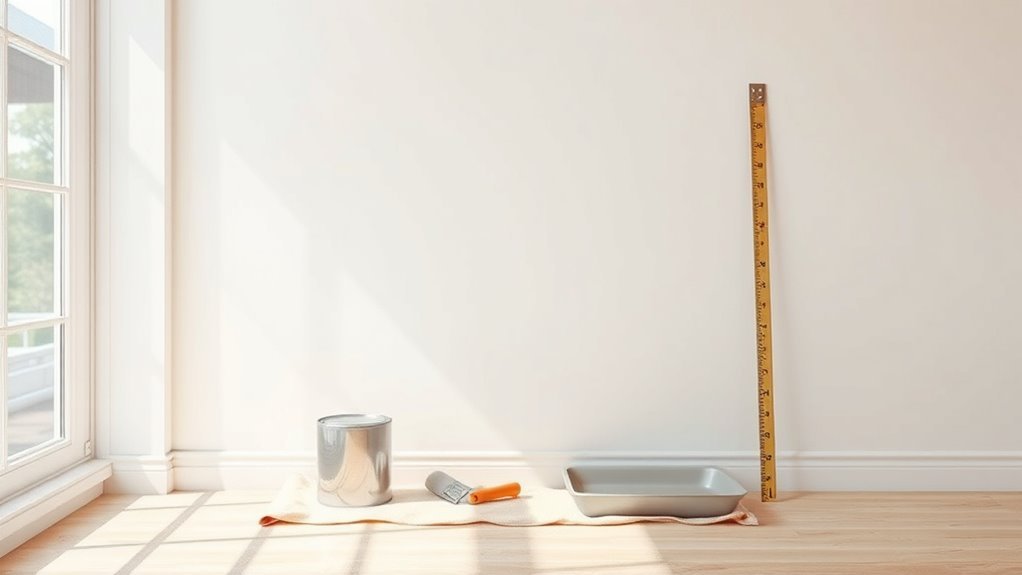
Measure Your Wall’s Square Footage Fast
First, grab a tape measure and record your wall’s height from floor to ceiling.
Then measure the width and multiply height by width to get the square footage.
That number tells you how much paint you’ll need based on the coverage rate.
Measure Wall Height
Before you figure paint coverage, measure your wall’s height precisely—stand straight, use a tape measure from floor to ceiling, and jot the number down in feet (or meters).
Next, check for baseboards, trim, or sloped ceilings that change usable height; measure to the top of trim if you’ll paint above it.
If you’re tall, have someone steady the tape for an accurate read. Record measurements cleanly so you avoid re-measuring.
Also note anything that affects paint choice: color psychology may guide tone height placement, and paint toxicity concerns can influence whether you mask ceilings or walls during application.
Calculate Width And Area
Once you’ve got the height, measure the wall’s width across the baseboard or floor line and multiply height by width to get square footage.
Now subtract windows and doors: measure each and deduct their areas to avoid overbuying.
Divide the net square footage by your paint’s stated coverage to see if a quart will do.
Remember surface texture affects coverage—rough walls use more paint—and primer needs factor in.
Consider color mixing needs if matching trims or blending shades; that can change required quantity.
Also account for paint durability recommendations for high-traffic areas, which might mean extra coats.
Subtract Doors and Windows From Area
Measure each door and window opening so you know their exact dimensions.
Subtract those opening areas from your wall’s total square footage before you calculate paint needs.
That adjusted area will give you a more accurate estimate of whether a quart of paint will cover the wall.
Measure Door And Window Openings
Because doors and windows don’t get painted, you’ll need to subtract their area from your wall total so you don’t overbuy. Measure each opening’s height and width, multiply to get square footage, and note whether trim will be painted or excluded—this affects Color matching and Brush selection for edges.
Use a tape measure and pencil to record dimensions on a sketch of the wall.
For arched or irregular openings, approximate to the nearest inch or break into rectangles and triangles.
Double-check your numbers before subtracting from the wall area. Accurate measurements prevent wasted paint and unnecessary trips to the store.
Subtract Opening Areas
After you’ve calculated the total wall area, subtract the square footage of each door and window so you don’t overbuy paint. Measure each opening, multiply width by height, and subtract that total from your wall area. That gives you the actual paintable surface, accounting for paint textures that change perceived coverage. Use the table below to track openings and avoid mistakes that complicate color matching.
| Opening | Width (ft) | Height (ft) |
|---|---|---|
| Door | 3.0 | 7.0 |
| Window1 | 4.0 | 3.0 |
| Window2 | 2.5 | 3.5 |
Adjust Paint Coverage Estimates
When you adjust your coverage estimate, subtract the total square footage of doors and windows from the wall area so you don’t buy more paint than you need. Measure each opening, add their areas, and deduct from the wall total.
That trimmed figure tells you how much surface truly needs coating and whether a quart covers it. Also account for texture and number of coats.
If you need color matching or custom paint mixing, factor in extra for samples and touch-ups.
Write down measurements, round up slightly for waste, and confirm the quart’s coverage on the can to avoid mid-project runs to the store.
Typical Quart Coverage by Paint Type
If you’re wondering how much a quart buys you, coverage varies a lot by paint type. Latex typically covers 90–100 sq ft per quart with one coat; it dries fast, supports color mixing, and gives good paint durability for interiors.
Acrylic and enamel might cover 80–100 sq ft but offer tougher finishes for trim or high-traffic areas.
Oil-based paints often cover 100–120 sq ft per quart with a smoother, more durable coat but slower drying.
Primer coverage is lower—about 50–75 sq ft.
Textured or dark-to-light gradations need extra coats, so plan accordingly to avoid shortfalls.
Convert Manufacturer Coverage: Gallons to Quarts
Manufacturer labels usually list coverage in square feet per gallon, so you’ll want to translate that into quarts to know how much to buy for a single wall.
A gallon equals four quarts, so divide the listed square-foot coverage by four to get per-quart coverage.
Adjust for paint color and paint sheen since darker colors or high-sheen finishes may need extra coats.
Estimate coats required, then multiply per-quart coverage by quarts needed.
- Check label: sqft per gallon.
- Divide by 4 = sqft per quart.
- Factor coats for color and sheen.
- Round up to account for touch-ups.
Real-World Examples by Wall Size
You’ll get a better sense of whether a quart will cover your project by looking at concrete examples.
Compare a small accent wall, a standard bedroom wall, and a large accent or feature to see typical coverage and coat counts.
That way you can judge if one quart will do or if you’ll need more.
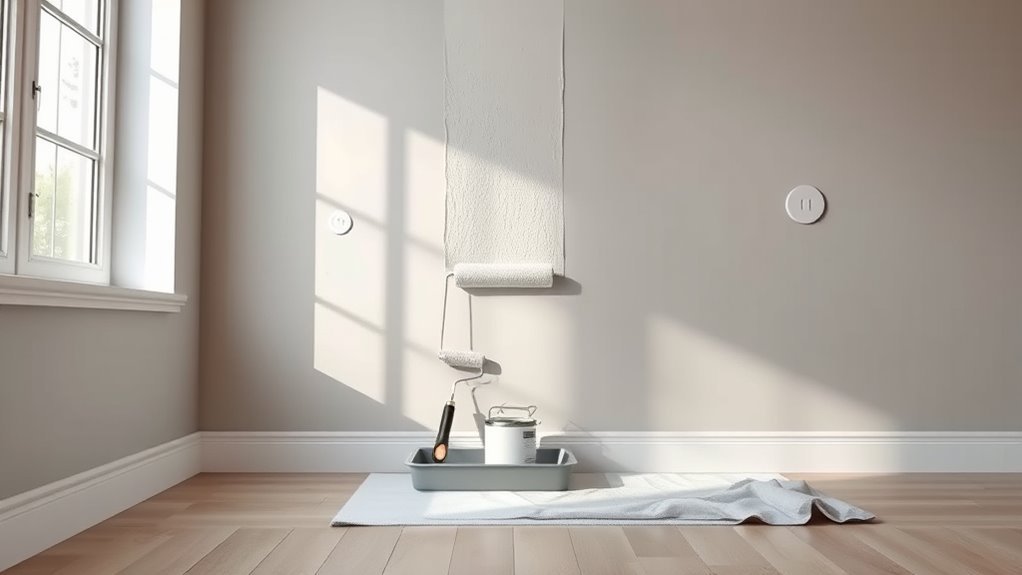
Small Accent Wall
Wondering how much paint you’ll need for a small accent wall? You can often cover a 4×8′ accent with a quart if you stick to light coats and smooth surfaces. Consider color coordination so the accent complements surrounding walls; test a swatch and note paint drying before committing to the full application.
Prep matters: clean, prime if needed, and sand minor imperfections to avoid extra coats.
- Measure area precisely to estimate coverage.
- Use high-quality paint for better hide and fewer coats.
- Allow full paint drying between coats.
- Save leftover quart for touch-ups and future tweaks.
Standard Bedroom Wall
How big is your bedroom wall and how many coats will it take? You’ll measure height and width, then calculate square footage to see if a quart covers one coat or two.
For a typical 10×12 room, one wall often needs two coats from a quart if you use lighter shades or porous surfaces; darker hues may demand more.
Consider color psychology when choosing tones—calming blues need less busy finishing than bold reds.
Also factor paint safety: use low-VOC formulas for bedrooms and ventilate while painting.
Accurate measurement and quality primer keep surprises minimal.
Large Accent Or Feature
Curious how much paint a large accent or feature wall will need? You’ll often need more than a quart for bold colors or textured finishes. Consider color psychology: deep hues need extra coats to avoid patchiness, and glossy trims demand careful work. Also factor paint durability for high-traffic areas; a single coat may not hold up.
- Measure wall area and subtract openings for accurate coverage.
- Test a sample patch to judge true opacity and required coats.
- Choose finish based on wear—satin or semi-gloss for durability.
- Buy slightly more than calculated to allow touch-ups.
How Many Coats Will You Need?
Because coverage varies with color, surface, and paint quality, you’ll usually need at least two coats to get an even, durable finish.
Start by evaluating the wall: primer may be required for raw drywall or drastic color changes. Lighter colors often need more coats over dark bases.
Begin by inspecting the wall: prime raw drywall or switch colors, and note that light shades may need extra coats over dark bases.
When using a quart, plan coat thickness and drying time so you don’t run short.
For tricky hues, consider paint mixing services or sampling swatches to aid color matching before full application.
Apply thin, even layers, sanding lightly between coats if needed.
Expect two coats typically; reserve a small amount for touch-ups.
When One Coat Is Enough
When can one coat do the job? You can skip a second layer when the surface is similar to the existing color, the paint has high coverage, and the finish and Paint durability meet your needs.
Consider Color combinations and contrast before deciding; subtle shifts often need only one pass.
- Smooth, primed drywall with matching base color.
- High-quality, high-hide paint labeled for single-coat coverage.
- Low-contrast Color combinations where uniformity isn’t critical.
- Areas with minimal wear where Paint durability and finish are acceptable.
Test a small patch first to confirm coverage and appearance.
When Two Coats Require More Than a Quart
If one coat won’t cut it—because the color contrast is strong, the surface is porous, or you’ve used a lower-hiding paint—you’ll likely need two coats and more than a quart to finish a typical wall.
Plan for extra paint when color mixing creates a deeper or more saturated shade that covers poorly. You’ll use more on trim edges and corners where absorption varies.
Also factor in paint durability: tougher finishes may require heavier application or primer plus two coats, increasing consumption.
Measure wall area, note prior color and finish, and buy a bit extra rather than risk running short mid-project.
How Wall Texture Affects Coverage
Although smooth walls let paint glide on and cover evenly, textured surfaces change how much paint you’ll need and how you apply it. You’ll find rough textures absorb more, so a quart might cover less area.
Use thicker application, back-roll after spraying, or stipple with a nap roller to reach crevices. Texture influences color mixing—darker tones and high-contrast mixes can hide irregularities better.
Also consider paint durability: textured areas face more abrasion, so choose tougher formulations. Assess texture before buying; test a small patch to confirm coverage and finish.
- Estimate extra coverage
- Choose proper tools
- Adjust color mixing
- Prioritize paint durability
How Existing Color Affects Coverage
If you’re painting over a dark or highly saturated hue, expect to use more coats to fully hide it.
Pay attention to any undertones in the old color—you might need a primer or tinted base to neutralize them.
Also note the previous paint’s sheen, since glossy surfaces can reduce adhesion and increase the number of coats required.
Existing Hue Contrast
When you paint over a dark or highly saturated color, you’ll usually need more coats — and more paint — than when covering a light, neutral shade. You’ll also want to take into account color psychology: bold backgrounds demand truer coverage to avoid visual fatigue, so plan for extra primer or coats.
Paint durability matters too; higher-quality formulas hide contrasts better and resist wear that could reveal old hues. Balance cost and performance based on the room’s use and lighting.
- Assess contrast level
- Choose quality for durability
- Use primer on strong hues
- Budget extra coats
Surface Undertones Matter
Alongside contrast and paint quality, the undertones in your current wall color can dramatically change how much paint you need. If warm yellowish or pink undertones show through, you’ll often need extra coats to neutralize them, especially when switching to cool tones.
You should test a small patch to see how many layers fully mask the hue. Undertones interact with color psychology—subtle warmth or coolness alters perceived brightness—so factor that into coverage expectations.
Also note that paint texture influences hiding power; rougher textures absorb more, requiring more paint.
Plan for a touch-up quart if undertones persist.
Previous Paint Sheen
Curious about how the old finish changes your coverage? You’ll notice sheen affects perceived color and absorption: glossy surfaces reflect more light, making new paint look lighter; flat sheens absorb more, deepening color.
For accurate color matching, sand glossy areas or use a bonding primer so the quart covers evenly.
Sheen also influences paint durability—higher sheens resist scuffs and may need fewer coats in high-traffic spots.
Consider these tips:
- Sand or degloss glossy old paint.
- Prime shiny or patched areas.
- Test a small swatch for color matching.
- Choose sheen for paint durability and ease of cleaning.
When to Prime and How It Changes Needs
If your wall has stains, patched areas, or a dramatic color change, you’ll want to prime before painting—prime seals porous spots, evens out absorption, and improves topcoat coverage so you use less paint overall.
You’ll prime when surface repairs, heavy stains, or big hue shifts would otherwise demand extra coats. Priming aids color matching by providing a neutral base, so your quart covers more predictably.
It also enhances paint durability by promoting adhesion and reducing peeling or uneven wear. For lightly previously painted, uniform walls you can often skip primer; otherwise plan for primer’s added cost and time.
Using Tinted or Bonding Primer With One Quart
When you’re working with a single quart, choosing a tinted or bonding primer can stretch coverage and cut down on topcoats. Tinted primer moves the base color closer to your finish so one coat of paint can cover better, while bonding primer improves adhesion on slick or repaired spots so the paint lays out smoothly.
You’ll save material and time if you match primer tint to your finish for better color matching and avoid multiple coats. Bonding primer boosts paint durability on tricky surfaces.
Consider surface porosity, dry time, and manufacturer coverage notes before deciding.
- Tint primer to your finish
- Use bonding on slick areas
- Check coverage specs
- Prioritize paint durability
Estimating Waste: Brushes, Rollers, and Spills
Because tools and accidents eat into your quart, factor in brush and roller pickup plus likely drips when estimating how much paint you’ll actually use. You’ll lose paint to nap absorption, brush loading, and wristful flicks during edging.
Choose a dense roller for even paint texture to reduce repeats; thinner nap soaks less. Wipe excess from brushes into the can and tap rollers to limit waste.
Protect floors and corners to avoid spills that ruin color psychology choices by forcing touch-ups. Budget an extra 10–20% beyond calculated wall coverage to cover tools, mishaps, and minor trims.
How to Test Coverage With a Sample Strip
Pick a discreet test spot on the wall where you can see true color and texture without affecting the room. Apply a vertical sample strip about 6–12 inches wide using the same brush or roller you’ll use for the whole wall.
After it dries, evaluate the coverage to see if one coat is enough or if you’ll need more paint.
Pick A Test Spot
Start by choosing a small, inconspicuous section of the wall—near a corner, behind furniture, or by a light switch—to apply your sample strip and judge real coverage. Pick a spot that sees typical light and represents the wall’s surface texture.
Test color matching against nearby trim and note how sheen reads in different light. Use your planned brush selection for the test so stroke pattern and coverage match the full job.
Record drying time and whether one coat hides the old color. After testing, step back and view from several angles to confirm satisfactory coverage before committing.
Apply A Sample Strip
When you’re ready, apply a vertical sample strip about 6–12 inches wide from baseboard to ceiling so you can see full coverage across the wall’s height.
Use steady, even strokes with a good-quality brush or mini-roller, maintaining the same pressure top to bottom.
Let the strip dry fully—follow the paint’s recommended wait time—so color blending becomes apparent against adjoining areas.
If the surface has imperfections, watch how the paint handles texture smoothing; adjust technique or tool if it pools or highlights bumps.
Label the strip with paint type and dry time so you can compare later without guessing.
Evaluate Coverage Results
After the strip has fully dried, inspect it from several angles and at different distances to judge how well the paint hides the old color and surface imperfections.
You’ll note if one coat suffices or if another’s needed. Check for streaks, thin spots, and how Color blending appears against edges. Smell for solvents and assess sheen consistency.
Consider Brush maintenance—cleaning or replacing tools can improve application and coverage. Based on your observations, decide whether a second coat, a primer, or a different finish is warranted.
Record results to estimate total quarts needed for the whole wall.
- Note opacity
- Check texture
- Evaluate edges
- Plan next steps
Spot Painting: Approach and Tips
If a small scuff or patchy area is all that needs attention, spot painting lets you refresh the wall without repainting the whole surface. Start by cleaning and sanding the spot, then feather edges so touch-up paint blends.
Test on an inconspicuous area to match sheen and color; consider color mixing if your original batch faded. Use a small brush or mini-roller for even application, apply thin coats, and let each dry fully before evaluating.
Store leftover paint properly—seal the can, label it, and keep it in cool, dry paint storage for future touch-ups to guarantee consistent results.
Using a Quart for an Accent Wall
Wondering whether a quart will cover your accent wall? You can often paint one small wall with a quart if the surface is smooth and you’re using a similar existing color. Consider color psychology when choosing a bold hue; darker, saturated tones may need more coats.
Account for paint drying between coats and plan time accordingly. Use a sample area first to confirm coverage.
- Measure wall square footage accurately.
- Choose finish and test coverage.
- Allow full paint drying before recoat.
- Keep touch-up supplies handy for edges and imperfections.
Combining a Quart With Leftover Paint
You can stretch that quart further by mixing it with leftover paint from other cans—just match sheen and similar tones to avoid surprises.
When you combine small amounts, pour into a clean bucket and stir thoroughly to guarantee uniform color and finish.
Use color matching tools or swatches to check the blended hue against the wall under real light.
Keep track of ratios so you can recreate the mix if needed.
If covering a patched or stained area, consider primer selection first; prime stubborn spots before applying the blended paint to ensure adhesion and consistent absorption across the wall.
Matching Colors Between Quarts and Leftovers
Matching colors between a quart and leftover cans starts with a careful visual and technical check: hold swatches or peel a small sample card and compare them under the same light the wall gets, then mix a small test batch to confirm the blended hue.
You’ll match sheen and base, note batch codes, and stir thoroughly.
Test a 12×12″ patch and watch as paint drying can slightly shift the tone.
Keep brushes clean to avoid contamination—Brush maintenance prevents cross-color streaks.
If the sample reads right after drying, document proportions for full mixing.
How to Stretch a Quart Without Hurting the Finish
To stretch a quart without ruining the finish, you’ll first prepare the surface by cleaning, patching, and sanding so paint adheres evenly.
Then thin the paint slightly with a manufacturer-approved extender to improve flow without sacrificing coverage.
Finish with several thin, even coats rather than one heavy pass to keep the sheen and durability consistent.
Prepare The Surface
Before you think about thinning or stretching paint, get the wall ready so every drop counts — clean off dirt, grease, and flaking paint, sand rough spots smooth, and fill holes or cracks with spackling so the surface accepts a thin coat evenly. You’ll prime glossy or stained areas to improve adhesion and maintain paint durability.
Scuff-sand trim and protect floors. Test a small patch to confirm color mixing won’t reveal underlying tones. Work methodically so a thinner film still hides well.
- Clean and degrease
- Patch and sand
- Prime targeted spots
- Test color and coverage
Thin With Extender
Once the wall’s prepped and spot-primed, you can carefully thin paint to stretch that last quart without wrecking the finish. Mix manufacturer-recommended latex extender in small increments, testing for consistency and color blending on a scrap board. Keep additions minimal — too much extender weakens paint durability. Stir thoroughly, let rest, then retest. If shade shifts, adjust with tiny touch-ups from the original quart rather than more thinner. Track proportions so you can replicate the mix.
| Step | Action | Tip |
|---|---|---|
| 1 | Add 5% extender | Measure precisely |
| 2 | Test sample | Check color |
| 3 | Record mix | Preserve durability |
Apply Thin Coats
If you want to make a quart cover more surface without sacrificing the finish, apply several thin, even coats instead of one thick layer. You’ll control build, avoid drips, and improve leveling by waiting between coats for proper paint drying.
Stir thoroughly to guarantee consistent color mixing before you load the brush or roller. Work in small sections, feathering edges so each coat blends smoothly.
- Prep surface and patch imperfections.
- Use a high-quality brush or small roller.
- Apply light, uniform passes; avoid heavy loading.
- Allow full dry time; inspect and repeat as needed.
Best Rolling and Brushing Techniques
While rolling covers large areas quickly, brushing gives you control for edges and trim, so use both to get a seamless finish.
Start with a high-quality nap roller for even coverage, loading it evenly to avoid drips.
Cut in with a synthetic brush, feathering strokes to blend into rolled sections.
Work in small sections, maintaining a wet edge to prevent lap marks and preserve color harmony across the wall.
For trim, use short, controlled strokes and inspect for brush marks.
Clean tools immediately to maintain paint durability.
Practice consistent pressure and stroke direction for a professional-looking result every time.
When (and When Not) to Thin Paint
Although thinning paint can make roller and brush application smoother, you shouldn’t do it unless the job or product calls for it. You check the label and consider surface porosity before you add solvent.
Paint mixing matters: too much thinner weakens coverage and affects sheen. Thin only for sprayers or unusually thick batches, and keep samples for color matching since dilution can change tint perception.
Too much thinner ruins coverage and sheen—only dilute for sprayers or very thick batches, and keep color samples.
If you must thin, add small amounts, mix thoroughly, and test a patch for adhesion and opacity.
- Read manufacturer thinning recommendations.
- Use measured additions during paint mixing.
- Test a small area first.
- Keep records for color matching.
Tools That Improve Quart Efficiency
To stretch a quart farther, pick the right tools: high-quality roller covers grab and release paint more evenly, precision angled brushes make edges neat with less overlap, and paint tray accessories keep your load consistent.
You’ll work faster and use less paint when each tool reduces waste and touch-ups. Let’s look at how each one pays off on a single wall.
High-Quality Roller Covers
When you pick a high-quality roller cover, you’ll cover more surface with less paint because the nap, fiber blend, and density control how much paint the roller holds and releases. You’ll get smoother coverage, truer paint colors, and improved paint durability by matching roller nap to surface texture and using dense, lint-free fibers.
A good cover reduces double-coating and waste, helping a quart stretch farther. Clean and store covers properly to preserve performance.
Choose synthetic blends for latex and natural for oil-based products.
- Match nap to wall texture
- Prefer dense, lint-free fibers
- Use synthetic for latex
- Clean and store covers
Precision Angled Brushes
You’ve already seen how the right roller cover saves paint; precision angled brushes pick up where rollers leave off by letting you cut in tightly and control paint thickness along edges and corners. You’ll use a 2–2.5″ angled sash brush for corners and trim, improving coverage so you waste less. Practice steady pressure to avoid drips; proper brush maintenance and occasional paint mixing keep bristles responsive and color consistent. Work in short strokes, feathering paint into the rolled area. Below is a quick comparison:
| Task | Brush Size | Tip |
|---|---|---|
| Corners | 2″ | Light pressure |
| Trim | 2.5″ | Steady stroke |
| Touch-ups | 1″ | Thin layer |
Paint Tray Accessories
Although a quart stretches farther with smart tools, pairing it with the right paint tray accessories will help you load, distribute, and conserve paint more efficiently. You’ll get smoother roller coverage, control drips, and maintain consistent Color mixing to match touchups.
Use liners to reduce waste and keep Paint durability high by preventing contamination. A grid speeds loading and removes excess, while a small well lets you reserve a thin pour for edging.
Pair these with a quality brush rest to avoid reloading.
- Tray liners
- Metal grid
- Small pour well
- Brush rest
Common Mistakes That Waste a Quart
If you rush prep, pick the wrong finish, or slather on thick coats, a quart can disappear fast. You’ll waste paint by skipping primer, ignoring color psychology (which might force extra coats), choosing glossy paint finishes that need more careful application, or letting rollers absorb too much. Measure, sand, and tape carefully. Use thin, even coats and a good roller to stretch coverage.
| Mistake | Fix |
|---|---|
| No primer | Spot-prime or use tinted primer |
| Thick coats | Apply thin layers |
| Wrong finish | Match finish to surface |
| Poor tools | Use quality rollers |
| Bad color choice | Test swatches first |
Cost Comparison: Quart vs. Gallon
Compare the sticker price of a quart to a gallon to see which gives you the best value for your wall.
Calculate the cost per square foot based on coverage so you can tell whether buying a gallon saves money or leaves you with excess.
Don’t forget to budget for touch-ups, primer, and any unexpected extra coats so your total cost isn’t underestimated.
Quart Versus Gallon Price
When you’re weighing whether to buy a quart or a gallon, the sticker price alone doesn’t tell the whole story: quarts cost less up front but usually carry a higher price per square foot.
You should factor in color matching and paint durability—quarts are handy for touch-ups and test patches, while gallons suit full coats and longer wear.
Compare how often you’ll repaint and whether a perfect color match matters.
- Buy a quart for small fixes and testing.
- Choose a gallon for full-wall coverage.
- Consider durability needs over time.
- Factor in matching future touch-ups.
Cost Per Square Foot
Because quarts carry a smaller upfront cost but often a higher price per square foot, you should calculate coverage before deciding which to buy. Compare advertised coverage: quarts list square footage per coat, and gallons multiply that by four or more quarts.
Divide cost by coverage to get true cost per square foot. Factor in color psychology—premium pigments for bold hues may raise price but reduce coats—plus paint durability ratings that affect long-term value.
If you need touch-ups or experiment with color, quarts can save money despite higher per‑square‑foot cost; for whole walls, gallons usually win on value.
Budgeting For Extras
You’ve already looked at cost per square foot, so now factor in the extras that affect your final bill: primer, brushes/rollers, tape, patching compound, and the likelihood you’ll need more than one coat.
Decide if a quart’s savings outweigh buying a gallon to avoid repeat trips. Include primer and consider paint color psychology—some hues need extra coats.
Account for brush maintenance, quality rollers, and replacement tape. Compare total cost: quart(s) plus supplies versus one gallon.
- Primer and patching materials
- Brushes, rollers, and maintenance tools
- Extra coats for color coverage
- Time and trip costs
Should You Buy a Quart or a Gallon?
Wondering whether to buy a quart or a gallon? You’ll weigh coverage, cost, and purpose.
A quart suits sampling colors, testing color theory in your space, or touching up small areas.
A gallon’s better if you’re covering an entire wall, matching sheen, or ensuring consistent paint durability across a surface.
Consider surface texture and how many coats you’ll need; rough walls eat more paint.
Also factor in future touch-ups—leftover quart may not match if reformulated.
If budget or storage limits you, buy a quart for trials, then upgrade to a gallon once you’re sure.
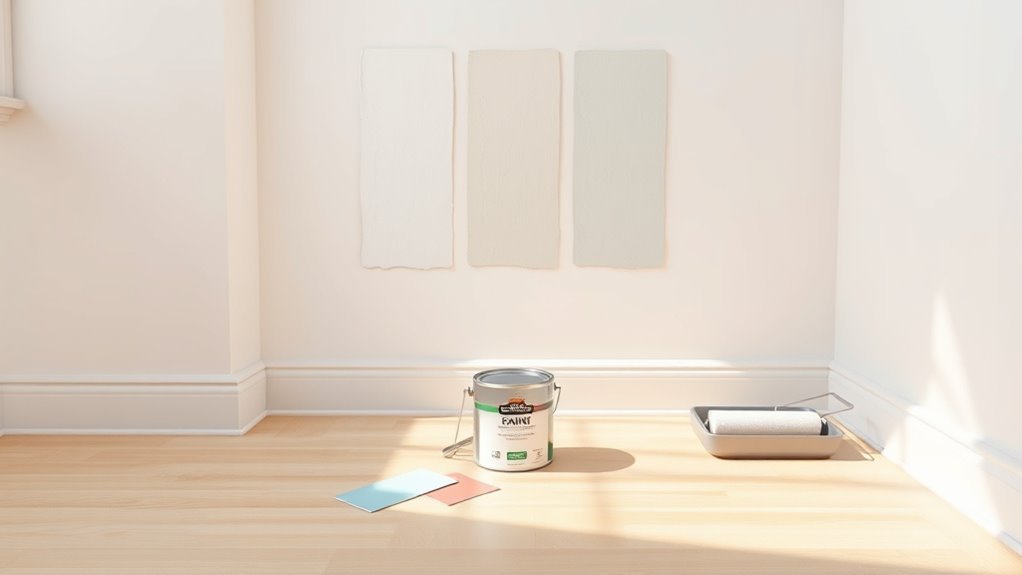
Best Quart-Size Brands and Finishes
When you’re choosing a quart, focus on reputable brands like Benjamin Moore, Behr, and Sherwin-Williams for consistent coverage and color accuracy.
Compare finishes—eggshell and satin hide imperfections well, while semi-gloss and gloss are tougher to clean and better for trim.
I’ll outline which brands do best in each finish and how that affects coverage and durability.
Top Quart Paint Brands
Looking for the best quart-size paints for touch-ups or small projects? You want brands that balance color psychology with paint durability so your accent choices stay vivid and resist scuffs.
Choose a trusted line, match tint accuracy, and pick the right base for the surface.
- Benjamin Moore — consistent tints, excellent durability.
- Sherwin-Williams — color selection supports mood planning, reliable coverage.
- Behr — affordable, durable options for high-traffic areas.
- Farrow & Ball — premium pigments for strong color psychology effects, good longevity.
Test samples first to guarantee true color and finish performance.
Quart Finish Comparisons
Now that you’ve reviewed top quart brands, it helps to compare finishes—sheen affects appearance, durability, and how colors read on your wall. You’ll find flat hides imperfections and minimizes glare but isn’t as washable; eggshell balances subtle sheen with easier cleaning; satin boosts durability for high-traffic spots.
Semi-gloss and gloss highlight trim, resist scuffs, and speed cleanup. When sampling quarts, note how color mixing shifts hue, intensity, and test small areas to watch paint drying changes. Pick a finish based on room use, lighting, and desired look so a quart delivers the outcome you expect.
Project Time: How Long a Quart Job Takes
If you’re painting a single standard wall with a quart of paint, plan on about two to three hours for prep and one to two hours for actual painting and cleanup, depending on surface condition and whether you need a primer coat.
You’ll spend time on color mixing if you’re tinting or matching, and you’ll account for paint drying between coats.
Work efficiently: patch, sand, tape, then roll. Expect two coats for even coverage.
- Prep: 30–90 minutes
- Primer (if needed): 20–40 minutes
- Painting: 30–60 minutes per coat
- Cleanup: 15–30 minutes
Storing and Preserving Leftover Quart Paint
A quart of leftover paint can save you a trip to the store later—store it right and it’ll last for years. Seal the can tight, wipe the rim, and press a layer of plastic wrap under the lid to cut air exposure.
Label the can with room, date, and batch number to simplify future color matching.
Keep cans upright in a cool, dry place away from freezing or heat to preserve paint durability.
For long-term storage, transfer to smaller airtight containers as levels drop to reduce trapped air.
Before reuse, stir thoroughly and strain if needed.
Eco-Friendly Disposal and Recycling
When you can’t use leftover quart paint, dispose of it responsibly to protect waterways and soil—many communities offer hazardous-waste drop-off events or paint-recycling programs that accept latex and oil-based paints.
You should check local recycling programs for schedules and accepted types, never pour paint down drains or onto ground, and follow label guidance for proper disposal methods.
Consider solidifying small amounts with cat litter or commercial hardeners before disposal if allowed.
If permitted locally, solidify small amounts of paint with cat litter or a commercial hardener before disposal.
You can also donate usable paint to community groups or reuse it for touch-ups and crafts.
- Locate municipal recycling programs
- Use hazardous-waste drop-offs
- Solidify small quantities
- Donate usable paint
Troubleshooting Poor Coverage After a Quart
You’ve handled leftover paint responsibly, but sometimes a quart still won’t cover a wall evenly. First check application: thin coats, cheap rollers, or insufficient stirring can cause streaks.
Inspect the wall—stains, glossy patches, or porous drywall demand more product or primer. Consider color mixing issues: small tint differences between batches or unevenly mixed quart contents produce visible variations. Test a hidden patch before more work.
Improve adhesion and longevity by using a compatible primer and proper technique to boost paint durability. If problems persist, buy a sample-sized can of matching paint or consult a pro.
Quick Checklist: Is a Quart Enough?
Since space and finish matter, use this quick checklist to decide if a quart will do. You’ll assess coverage needs, wall size, and finish choices so you don’t run short mid-project. Consider previous color, substrate condition, and sheen to predict coats.
Since space and finish matter, use this quick checklist to see if one quart will cover your wall without surprises.
- Measure wall area and compare to quart coverage (usually ~100 sq ft).
- Check color contrast: light over dark may need extra coats.
- Inspect surface: porous or patchy walls absorb more paint.
- Decide paint sheen: gloss/semi-gloss often needs thinner coats than flat.
Use this checklist to estimate whether a single quart will suffice.
Final Buying Checklist and Next Steps
Now that you’ve checked coverage, color contrast, surface condition, and sheen, gather the final items before heading to the store and map out the next steps. Bring measurements, sample swatches, and your preferred finish noted.
Decide if one quart covers the wall or if you’ll need more. Consider color psychology—how the hue affects mood—and pick a test patch. Buy primer, brushes, rollers, tape, and a small respirator to limit paint fumes.
Plan prep: clean, sand, and spot-prime. Test the swatch, confirm coverage after drying, then purchase full quantity if results match expectations.
Frequently Asked Questions
Can a Quart Cover a Closet or Pantry Interior?
Yes — a quart usually covers a closet or pantry interior, but you’ll check size and surface texture. For color matching and primer use, prime stained or porous areas first to guarantee even coverage and true color.
Will a Quart Be Enough for Painting Trim Around One Wall?
Yes — it’ll likely suffice, and coincidentally your leftover quart might match the trim color perfectly if you’ve prepped well. You’ll want good color matching and paint durability, so test a small area before committing.
Can a Quart Cover Ceiling Touch-Ups From a Wall Project?
Yes — a quart can cover small ceiling touch-ups from a wall project, but you’ll want to check color matching and finish options first; blend carefully, test a swatch, and keep extra for future repairs.
Is a Quart Suitable for Painting Built-In Shelves or Cabinets?
Yes—you can. Imagine a small ship (your quart) refitting tiny islands (shelves); you’ll pick Color options and Finish types wisely, sand and prime, apply thin coats, and you’ll sail away with neat, lasting cabinets.
Can Low-Voc Quarts Have Different Coverage Than Standard Paints?
Yes — low-VOC quarts can vary in coverage compared to standard paints; you’ll find eco friendly formulations may sacrifice some paint durability or require extra coats, so expect variable spread rates and check manufacturer specs before buying.
Conclusion
Yes — a quart might just save your life (or at least your wall’s dignity). If your wall’s small, primed, and you’re using high-quality paint, a quart can cover it with one thin coat. But don’t gamble: measure square footage, subtract doors/windows, and pick paint suited for the surface. If coverage’s skimpy, grab another quart or a sampler. Play it safe — your future self will thank you (and so will your freshly finished room).