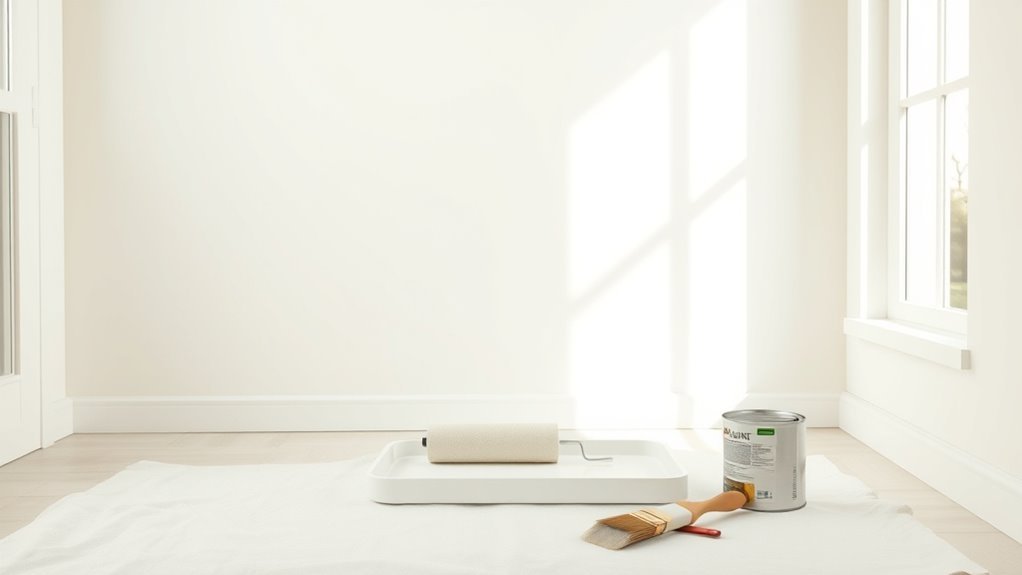
Is Latex Paint Bad? Pros and Cons Explained
Latex paint isn’t bad — it’s a practical, low-odor choice for most jobs. You’ll get fast drying, easy soap-and-water cleanup, good color retention, and flexible films that resist cracking. It’s great for walls, ceilings, and many exteriors, though oil-based finishes beat it for extreme abrasion, stain-blocking, or high-heat tasks. Prep and primer matter for longevity, and VOCs are lower in modern formulas; keep going to see when latex shines or falls short.
Quick Answer: Is Latex Paint a Good Choice?
Wondering if latex paint’s the right pick? You’ll find it’s a practical, versatile choice for most interior and exterior jobs. It dries fast, cleans up with water, and resists yellowing, so colors stay truer—use color psychology to boost mood or space perception.
Low-VOC formulas with eco-friendly additives cut fumes and environmental impact, letting you paint without lingering odors. Durability’s good for walls and trim, though heavy-duty surfaces may need specialty coatings.
If you want easy application, quick turnaround, and safer indoor air, latex is usually the smarter, modern option.
How Latex Differs From Oil Paint
You’ll notice latex paint dries much faster than oil, so you can recoat sooner and finish jobs quicker.
Cleanup is simpler with soap and water for latex, while oil paint needs solvents and can leave stronger odors.
Those differences affect project timing, ventilation needs, and your choice of workspace.
Drying Time Differences
How fast do latex and oil paints dry differently, and why does it matter for your project? You’ll notice latex dries in about 30 minutes to an hour for touch-dry, fully curing within weeks.
While latex dries quickly, oil can take days to weeks to harden. That faster latex drying speeds up recoating and lowers dust attraction, but it gives you less open time for color mixing or smoothing brush marks. Conversely, oil’s slow dry lets you blend easily and change details.
Consider humidity, temperature, and recommended paint storage to preserve drying characteristics—store sealed cans cool and stable to maintain usable open time.
Cleanup And Odor
Faster drying affects cleanup and smell as much as it does recoating: latex paint cleans up with soap and water and releases far fewer VOCs, while oil-based paint needs solvents like mineral spirits and gives off stronger odors that linger.
You’ll find latex easier for quick projects and safer for indoor work. Use these cleaning tips and odor control tactics to minimize hassle and health risks.
- Rinse brushes immediately with warm soapy water.
- Use odor-absorbing bowls of vinegar or baking soda.
- Ventilate well and run fans during and after painting.
- Store rags and solvents in sealed containers.
Types of Latex Paint and Common Uses
You’ll mostly run into two kinds of latex paint: water-based interior paints that dry fast and clean up with soap and water, and exterior acrylic latex made to resist weather and UV.
For indoor walls and ceilings you’ll want the water-based formulas for low odor and easy touch-ups.
For siding, trim, and outdoor structures pick exterior acrylic latex for durability and flexibility.
Water-Based Interior Paints
Curious which latex paints suit different rooms? You’ll find water-based interior paints dry fast, resist yellowing, and clean up with soap and water. They’re great for walls, ceilings, trim, and high-traffic spaces; you’ll appreciate easy color mixing and straightforward paint storage.
Choose finishes—flat, eggshell, satin, semi-gloss—based on durability needs. Low-VOC options keep indoor air safer while providing good coverage. Apply with quality brushes or rollers, and follow manufacturer drying times for best results.
- Living rooms: eggshell for subtle sheen and washability
- Kitchens: satin for moisture resistance
- Bathrooms: semi-gloss for scrub ability
- Bedrooms: flat or low-sheen for smooth appearance
Exterior Acrylic Latex
When you need durable, weather-ready paint for siding, trim, or exterior masonry, exterior acrylic latex is a top choice because it combines acrylic resins with water-based carriers to resist fading, cracking, and mildew. You’ll get flexible adhesion and easier cleanup than oil-based options. Consider color mixing for consistent batches and test paint texture for desired sheen and coverage. It suits wood, vinyl, stucco, and concrete, and tolerates temperature swings. Maintain by cleaning and recoating when film shows wear. Choose high-quality acrylic for longevity and mildew resistance, and match primer and finish to substrate for best results.
| Feature | Benefit |
|---|---|
| Durability | Weather resistance |
| Cleanup | Water-based |
| Texture | Smooth to rough options |
| Uses | Siding, trim, masonry |
Performance Overview: What to Expect From Latex Paint
Although it’s water-based, latex paint delivers durable, fast-drying coverage that’s easy to work with, and you can expect good color retention, moderate stain resistance, and simple cleanup with soap and water.
Although water-based, latex paint gives durable, fast-drying coverage with good color retention and easy soap-and-water cleanup
You’ll find it adapts to color mixing and texture techniques, so you can achieve smooth walls or subtle finishes without specialty solvents. Expect mild odor during application, reasonable touch-up ease, and flexible curing that resists minor cracking.
For best results, prime porous surfaces and follow recommended dry times. Typical performance includes predictable sheens and good adhesion to prepared substrates.
- Dry time
- Coverage
- Cleanability
- Finish options
Durability: How Well Latex Holds Up on Walls and Trim
Because latex forms a flexible, water-based film, it stands up well to everyday wear on both walls and trim, and you’ll see fewer cracks and chips than with brittle oil-based paints.
You’ll still choose quality finishes for high-traffic areas; satin or semi-gloss on trim resists stains and is easier to clean.
Proper surface prep and primer matter more than hype around paint branding.
Also expect slight fading over years in direct sun—keeping original color swatches helps with color matching later.
Recoat when needed; latex peels less if applied correctly, so maintenance stays straightforward and predictable.
Scratch and Abrasion Resistance: Latex vs Oil
You’ve already seen that latex’s flexibility helps it resist cracking and peeling, but scratch and abrasion performance tells a different part of the story. You’ll notice oil-based paints generally offer harder surfaces that resist scuffs better, while latex can gouge under heavy contact.
Consider finish, traffic, and exposure—high-gloss latex improves abrasion resistance but may still lose paint color fading faster in sun than some oils. Also factor allergies: latex allergies can limit your choices indoors, pushing you toward low-VOC oil alternatives.
Consider finish, traffic, and exposure—high-gloss latex resists abrasion but may fade faster; allergies may push low-VOC oils.
Quick checklist:
- High-gloss latex improves durability.
- Oil paints resist scratches best.
- Sun speeds paint color fading.
- Latex allergies affect product choice.
Adhesion: Will Latex Stick to Your Surface?
When deciding if latex will stick, look at the surface material, its porosity, and how well it’s been prepped. You’ll get better adhesion on clean, dry, and lightly sanded surfaces. Glossy or oily substrates need deglossing or a bonding primer.
Porous surfaces absorb latex readily but may need a sealer to avoid blotching. Pay attention to paint texture—thin, satin sheens behave differently than heavy-bodied primers.
If you plan color mixing, verify compatibility: some tints alter binder ratios slightly, affecting grip. Test a small patch before committing to full coverage to confirm adhesion and finish.
Moisture Resistance: Are Bathrooms Safe for Latex Paint?
You can use latex paint in a bathroom, but you’ll need to take into account how well it handles high humidity and repeated steam.
Without proper ventilation, mold and mildew are more likely to appear on painted surfaces. Make sure you choose a moisture-resistant finish and keep fans or windows running to reduce risk.
Bathroom Humidity Tolerance
Because bathrooms see quick swings in temperature and lots of steam, you’ll want to choose latex paint formulated for high-humidity spaces rather than ordinary interior latex. You’ll get better durability and less peeling while keeping air quality acceptable if you pick low-VOC formulations, which also reduce environmental impact.
- Pick semi-gloss or satin for faster drying and easier wiping.
- Use mildew-resistant additives or paints labeled for baths.
- Make certain there’s good ventilation—use exhaust fans during and after showers.
- Prime with a moisture-blocking primer for improved adhesion and longevity.
Mold And Mildew Risk
Although latex paint resists moisture better than oil-based options, it’s still vulnerable to mold and mildew in consistently damp bathrooms. So you should take specific precautions to keep surfaces dry and clean.
You can choose mildew-resistant latex formulations and apply a quality primer to limit moisture penetration. Wipe splashes promptly, repair grout or caulk breaches, and launder damp shower curtains to reduce substrate dampness.
For existing spots, clean with appropriate antifungal cleaners and repaint only after full drying. Good maintenance and targeted mold prevention reduce mildew growth risk, keeping painted surfaces durable and healthier over time.
Proper Ventilation Needs
Mold prevention is only part of the story; proper ventilation determines how well latex paint holds up in a bathroom over time. You should guarantee airflow to limit condensation, reducing mold and peeling.
Choose mildew-resistant latex, follow paint branding guidance, and avoid overdoing color mixing that hides defects.
Install and run an exhaust fan during and after showers, and open windows when possible.
- Use a rated exhaust fan sized for the room.
- Run the fan 20–30 minutes post-shower.
- Wipe wet surfaces promptly to prevent pooling.
- Follow manufacturer instructions and paint branding recommendations.
Heat and Temperature Limits of Latex Paint
When you expose latex paint to extreme temperatures, both heat and cold can undermine its performance. You should check manufacturer specs for heat resistance and temperature limits before applying.
High heat can soften film, reduce adhesion, and accelerate fading. Prolonged sun on exterior walls may cause chalking or blistering.
Freezing temps during curing can prevent proper film formation, leading to cracking or poor durability.
Apply paint within recommended ranges—typically above 50°F (10°C) and below about 90–100°F (32–38°C) for many formulas—and avoid rapid temperature swings.
Proper timing and storage help maintain finish and longevity.
Indoor Air Quality: VOCs and Off‑Gassing From Latex Paint
You should know that “low‑VOC” latex paints still release some volatile organic compounds, and manufacturers list VOC levels so you can compare products.
Those emissions spike during and right after painting but certain compounds can off‑gas at low levels for months or even years.
I’ll explain what typical VOC numbers mean and how to minimize long‑term off‑gassing in your home.
VOC Levels Explained
VOCs—volatile organic compounds—are the main chemicals you should watch for when evaluating indoor air quality after painting with latex paint. You’ll notice VOC levels vary by product, color, and drying conditions. Choose low‑ or zero‑VOC labels to reduce immediate exposure, ventilate while painting, and wait before reoccupying rooms.
Monitor symptoms like headaches or irritation, and prefer reputable brands with certified testing.
- Pick low‑VOC or zero‑VOC paints.
- Ventilate during and after application.
- Check manufacturer VOC levels on technical data sheets.
- Use air purifiers with activated carbon for faster reduction.
Long-Term Off‑Gassing
After you’ve picked low‑ or zero‑VOC paint and aired out the space, be aware that some chemical emissions can linger for months or even years.
You’ll still get slow off‑gassing from binders, preservatives, and additives, which can affect indoor air quality long after painting.
If you or family members have latex allergies, monitor symptoms because low‑VOC doesn’t eliminate all irritants.
Reduce exposure by increasing ventilation, using air purifiers with activated carbon, and letting painted items cure outdoors when possible.
Check product safety data sheets for components and follow manufacturer cure times to minimize paint toxicity risks over the long term.
Environmental Impact: Disposal and Recycling for Homeowners
When leftover latex paint piles up, it can still harm soil and waterways if you toss it in the trash or pour it down drains, so you should treat disposal thoughtfully. You’ll reduce risk by letting small amounts dry (kitty litter or commercial hardeners), avoiding drains, and checking local hazardous-waste events.
Consider donating usable paint to community programs instead of throwing it out. Remember older homes may have lead-based paint concerns, and stored cans can be affected by indoor humidity, so label and store properly.
Donate usable paint to local programs; watch for lead in older homes and label/store cans to prevent humidity damage.
- Dry small quantities safely
- Use hazardous-waste drop-offs
- Donate usable paint
- Recycle empty cans
Clean‑Up and Maintenance of Latex‑Painted Surfaces
Once you’ve handled leftover cans responsibly, keeping latex‑painted surfaces looking good is straightforward with the right habits.
You’ll clean spills and smudges promptly with mild soap and water, avoiding harsh solvents that break down finish.
For touch‑ups, wipe the area, sand lightly, and feather new paint into surrounding edges to mask color blending and maintain uniform sheen.
Watch paint thickness during application: too thick causes drips, too thin reduces coverage.
Recoat only after surface is clean.
Regular dusting and gentle washing preserve longevity, and prompt repairs prevent small flaws from becoming larger problems.
Drying vs Curing: Timelines for Latex Paint
You’ll notice latex paint seems dry to the touch long before it’s fully cured. Factors like temperature, humidity, and coat thickness affect both touch-dry times and the longer curing process.
You’ll want to treat a freshly painted surface gently until it’s fully cured. If you need faster results, you can speed curing with thinner coats, better ventilation, and warmer, drier conditions.
Drying Time Factors
Although latex paint feels dry to the touch within an hour or two, it isn’t fully cured—drying removes surface moisture, while curing is the chemical process that hardens the film, which can take days to weeks.
You’ll notice drying speed varies with humidity and temperature fluctuations; warm, dry air speeds evaporation, while cold or humid conditions slow it. Airflow and film thickness also matter: thinner coats dry faster. Follow manufacturer recommendations and wait between coats.
- Humidity: higher slows drying.
- Temperature: extreme swings impede consistency.
- Air circulation: improves evaporation.
- Coat thickness: thicker films prolong drying.
Curing Vs Touch-Dry
How long will paint actually be ready for heavy use? You’ll see latex drying on the surface within an hour or two, feeling dry to the touch and ready for light handling.
Don’t confuse that with the curing process: full hardening and chemical bonding can take days to weeks depending on temperature, humidity, and coat thickness.
During curing, the film gains durability, stain resistance, and adhesion strength, so avoid scrubbing or placing heavy objects too soon.
Plan projects knowing touch-dry is short-term convenience, while true cure determines when the finish will stand up to regular wear.
Speeding Up Cure
Now that you know touch-dry isn’t the same as fully cured, you can take steps to speed up the curing process so the finish stands up to heavy use sooner. You’ll improve latex paint durability and maintain latex colorfastness by controlling conditions and handling.
- Increase ventilation and air flow to remove moisture and accelerate curing.
- Raise temperature moderately (above 50°F/10°C) to help polymer crosslinking.
- Apply thinner coats; each cures faster and reduces trapping moisture.
- Allow longer between coats if humidity is high; use dehumidifiers when possible.
Follow manufacturer cure times to avoid tacky or weakened finishes.
Which Finish Should You Choose?
When you pick a finish, think about durability, appearance, and where the paint will be used; each sheen performs differently in real-world conditions. You’ll choose flat for low-traffic walls to hide flaws, eggshell for subtle sheen in living spaces, satin for washable surfaces like trim and kids’ rooms, and semi-gloss or gloss for doors and cabinets.
Consider color matching between finishes—sheen changes perception—and explore texture options if you want depth or to mask imperfections. Match finish to function: easier cleaning where needed, matte where glare bothers you, and higher sheen where you need toughness and moisture resistance.
Coverage and Hiding Power: How Many Coats Needed?
After you pick the right finish, the next question is how much paint you’ll actually need to get solid, even coverage. You’ll often need one to three coats depending on pigment strength, surface porosity, and whether you’re covering a dark color.
Color blending can mask minor inconsistencies, but strong contrasts usually need extra coats. Texture variations on walls affect hiding power—smooth surfaces cover easier than rough ones.
Plan primer for drastic shifts or porous substrates. Consider sample patches to judge hiding before full application.
- Test sample patch
- Prime when switching hues
- Count coats after drying
- Adjust for texture
Color Stability and Long‑Term Fading of Latex Paint
Because sunlight, humidity, and airborne pollutants all affect pigments over time, you’ll notice some latex paints fade or shift color faster than others. You should pick formulations with proven pigment stability—high-quality pigments and UV-resistant binders slow color fading.
Lighter, less saturated shades tend to hold up better than deep, vibrant hues that show fading and chalking sooner. Proper surface prep, primer selection, and correct sheen help preserve appearance by improving adhesion and reducing moisture intrusion.
Interior rooms with low UV exposure will retain color longer, while exterior applications need specialty fading-resistant latex or periodic touch-ups to maintain look.
Cost Comparison: Latex, Oil, and Specialty Paints
Although price tags vary by brand and formulation, you’ll usually pay less per gallon for latex than for oil-based or specialty paints. You can stretch your budget with latex, though color matching near glossy or specialty finishes may cost extra.
Latex paint usually costs less per gallon than oil or specialty paints, though matching glossy finishes can add expense.
Oil paints often need fewer coats due to greater paint thickness, but they start pricier and require solvents.
Specialty coatings (industrial, high-heat, antimicrobial) command the highest rates.
- Latex: lower upfront cost, easy touch-ups.
- Oil: higher price, thicker coats, durable.
- Specialty: premium cost, niche performance.
- Hidden costs: primers, disposal, and color matching fees.
Best Tools and Techniques for Latex Paint
Before you grab a can, make sure the surface is clean, dry, and sanded so latex paint will adhere properly.
Use quality brushes and rollers to get smooth, even coverage without streaks or lint.
Apply with the right techniques—proper loading, consistent pressure, and correct drying times—to get a durable, professional finish.
Proper Surface Preparation
When you prepare a surface properly, your latex paint will adhere better, cover more evenly, and last longer. Clean, dry, and smooth surfaces matter: remove grease, chalking, mildew, and loose flaking with detergent, trisodium phosphate, or mildew cleaner.
Sand glossy spots and fill cracks; prime bare or stained areas. Keep color mixing consistent and label batches; match tints before priming. Practice good paint storage—airtight containers, cool locations, and minimal airspace—to preserve mixed paint for touch-ups.
Follow these key steps:
- Clean and degrease thoroughly.
- Sand and remove loose material.
- Spot-prime problem areas.
- Label, mix, and store mixed paint properly.
Quality Brushes And Rollers
If you want smooth, even coverage and fewer brush marks, choosing the right brushes and rollers matters as much as your prep work. Pick synthetic-bristle brushes for latex; they hold shape, resist swelling, and give cleaner edges.
Use a high-density foam roller for ultra-smooth finishes or a short-nap roller for light texture options on walls. For rough surfaces, choose longer naps to reach crevices.
Match brush size to trim and roller width to panel size to work efficiently. Keep tools clean between coats for accurate color matching and consistent finish; proper care extends tool life and performance.
Correct Application Techniques
Having the right brushes and rollers sets you up to apply latex paint correctly, but technique makes the finish. You’ll prep surfaces, stir thoroughly for even color mixing, and keep edges sharp with steady strokes. Work wet edges and don’t overload tools. Clean tools promptly and follow proper paint storage to preserve quality between coats.
- Use a high-quality angled brush for trim, synthetic nap roller for walls.
- Cut in before rolling, keeping a 2–3 inch wet border.
- Apply thin, even coats; sand lightly between coats if needed.
- Label and seal cans; store upright in cool, dry place.
Prep Steps to Make Latex Paint Perform Like a Pro
Before you open a can, prepare the surface so the paint can stick, smooth, and last—clean dirt and grease, sand glossy finishes, patch holes, and remove loose paint or mildew.
Before opening a can, prep surfaces: clean grease and dirt, sand glossy spots, patch holes, and remove loose paint or mildew.
Next, test small areas for adhesion and color matching under the room’s lighting; note how paint branding affects sheen and coverage.
Mask trim, vents, and hardware, and protect floors with drop cloths.
Sand between coats for smoothness and wipe dust with a tack cloth.
Maintain recommended temperature and humidity during application and drying.
Store mixed paint properly, label cans with brand, formula, and date for future touch-ups.
When and Why to Use a Primer With Latex Paint
Once you’ve prepped the surface, decide whether a primer will improve adhesion, hide stains, or block tannins—because not every job needs one, but many benefit from it. You’ll choose primer when bare drywall, patched areas, or stubborn stains could telegraph through latex paint.
Primers also help when switching between sheen levels or covering darker colors. If you’re sensitive, look for low-VOC, hypoallergenic, or labeled options to reduce latex allergies risk; many brands offer eco friendly options.
Match primer type to substrate and finish for best durability and fewer coats.
- Adhesion
- Stain blocking
- Color change
- Patch work
Painting Metal, Plastic, and Glossy Surfaces With Latex
When you’re painting metal, plastic, or glossy surfaces with latex, proper surface prep is essential—you’ll need to clean, sand, and remove any grease or flaking.
Use a primer formulated for slick substrates to guarantee adhesion and prevent peeling.
Also pick a latex paint labeled compatible with the substrate or designed for high-adhesion applications.
Surface Preparation Essentials
If you want a durable finish on metal, plastic, or glossy surfaces, proper preparation is essential and usually determines whether latex paint will stick and last. You’ll clean, degloss, and sand to create bite, choosing abrasives that roughen without gouging. Consider eco friendly options for cleaners and low-VOC primers to limit fumes.
Test paint texture on a scrap to confirm adhesion and final feel. Follow this quick checklist:
- Clean thoroughly with mild detergent or eco cleaner.
- Remove rust or old loose coating.
- Scotch-brite or fine sand for dulling glossy finishes.
- Wipe with solvent-free tack cloth before painting.
Priming For Adhesion
Because latex needs a solid bridge to stick to slick materials, you’ll almost always want a primer formulated for the substrate before painting metal, plastic, or glossy surfaces. You’ll sand, clean, and apply a bonding primer so latex clings and resists peeling. Primer also evens out surface porosity, helping color mixing appear true and controlling final paint sheen. Pick primers rated for metal or plastic; follow flash times and recoat windows.
| Substrate | Primer Type | Dry Time |
|---|---|---|
| Metal | Rust-inhibitor | 1–2 hrs |
| Plastic | Adhesion promoter | 30–60 mins |
| Glossy | Deglosser + primer | 1 hr |
Choosing Compatible Paint
Want the best results on metal, plastic, or glossy surfaces? You’ll need compatible latex, proper prep, and sometimes a specialty primer or bonding agent to stick and resist chipping. Consider surface-specific primers, deglossing, and scuff-sanding; on plastic, use an adhesion promoter.
If you prefer Eco friendly alternatives, look for low-VOC latex formulations and primers labeled for plastic or metal. Remember historical paint types (oil-based enamels) adhered differently; modern latex needs different prep.
Here’s a quick checklist:
- Clean thoroughly
- Scuff or sand gloss
- Use appropriate primer
- Choose low-VOC, compatible latex
Exterior Uses: Is Latex Right for Siding and Trim?
When you’re choosing paint for siding and trim, latex is often the smart pick: it dries fast, resists cracking and chalking, and holds up well to sunlight and moisture so your exterior needs less maintenance.
You’ll find latex adheres to most modern substrates, breathes enough to prevent trapped moisture on wood, and cleans up with water.
For historic homes, match historical paint appearance by selecting high‑quality latex formulas designed to mimic traditional sheens. Also consider eco friendly formulations to reduce VOCs and odors.
Test on a small area for adhesion and color, and follow proper surface prep for best longevity.
When Oil‑Based Paint Is the Better Choice
If your project calls for extreme durability, a super-smooth finish, or painting over problematic surfaces, oil-based paint can be the better choice. You’ll prefer oil when you need a hard, long-lasting coat on trim, floors, or metal, or when smoothing out textured finishes for a sleek look.
Consider oil for furniture with heavy wear or for sealing stains and tannins that latex might struggle with. Note environmental trade-offs—oil isn’t as eco-friendly as water-based alternatives. Evaluate ventilation and cleanup needs before choosing.
For heavily used furniture or stain-prone wood, choose oil—expect tougher cleanup and poorer environmental impact.
- Trim and moldings
- Floors and high-traffic wood
- Stain-blocking tasks
- Metal and rusty surfaces
Debunked: Common Misconceptions About Latex Paint
Although latex paint is often dismissed as weak or temporary, that reputation doesn’t match modern formulations—today’s water‑based paints offer durability, color retention, and stain resistance that rival many oil-based options.
You might hear paint myths claiming poor adhesion, short lifespan, or limited finish choices. Myth busting shows those aren’t universal: proper surface prep, primer, and choosing quality latex correct most issues.
You can expect easier cleanup, lower VOCs, and faster recoat times versus oil. Still, know situations where oil performs better (high-heat, heavy wear).
Trust evidence over anecdotes and match product to task for best results.
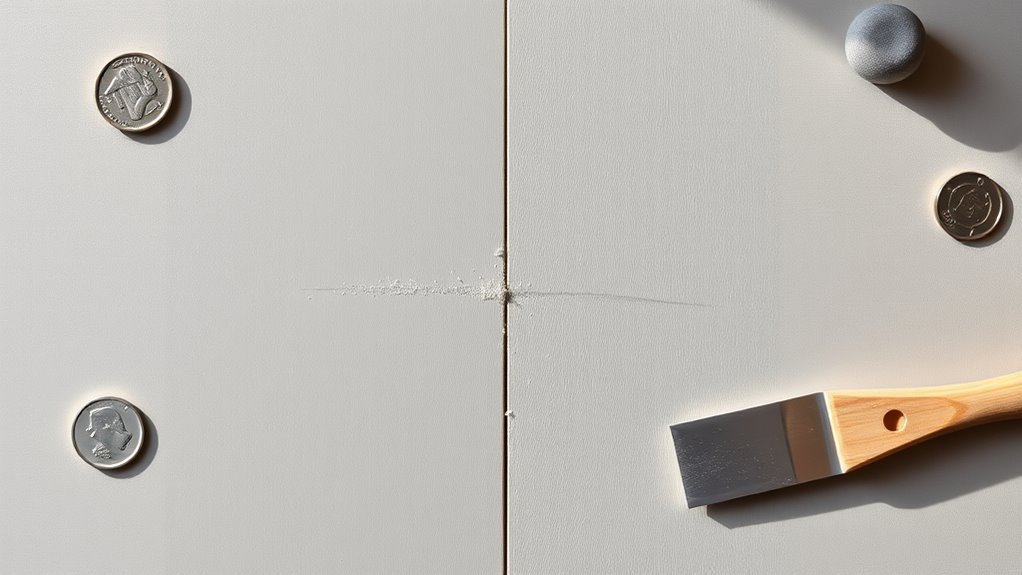
Troubleshooting: Fixing Blistering, Peeling, and Chalking
Now that you know latex paint often performs well, you’ll still run into common surface problems like blistering, peeling, and chalking—and they’ve straightforward fixes. Inspect affected areas, scrape loose material, sand to sound edges, and clean residue. Prime bare spots, then repaint with compatible latex.
Keep paint cans sealed to prevent contamination—proper paint storage preserves binders and prevents bad color mixing later. For persistent chalking, use a high-quality exterior primer.
If blistering returns, check substrate adhesion and moisture sources before repainting.
- Remove loose paint
- Sand and clean
- Prime exposed areas
- Seal cans for storage
How Humidity and Temperature Affect Latex Performance
You’ll notice humidity and temperature directly change latex paint’s drying time, so you’ll need to adjust your schedule for tacky, slow, or overly fast set times.
Those same conditions can also compromise film integrity, increasing the risk of blistering, cracking, or poor adhesion.
Knowing how to control or accommodate temperature and moisture helps you avoid these problems.
Drying Time Changes
How long will your latex paint take to dry? You’ll notice humidity and temperature speed or slow drying, affecting color mixing and paint texture as pigments settle.
In warm, dry conditions, solvents evaporate faster; in cool, humid air, drying drags. That changes work time, recoat intervals, and final feel without touching film integrity.
- Warm + low humidity: faster drying, shorter recoat windows.
- Cool + high humidity: extended tackiness, longer wait times.
- Moderate conditions: predictable drying, balanced texture.
- Rapid shifts (day/night): uneven drying, possible minor visual differences.
Film Integrity Risks
Wondering what humidity and temperature do to the paint film? You’ll see how extremes stress latex: high humidity delays curing, trapping moisture that can cause film cracking later; heat can skin over the surface while the body remains soft, inviting surface peeling. You should control conditions during and after application to avoid flaws.
| Condition | Risk | Visual cue |
|---|---|---|
| High humidity | Slow cure | Blotchy sheen |
| Low temp | Brittle film | Fine cracks |
| High temp | Rapid skin | Flaking/peeling |
Monitor weather, use proper ventilation, and follow manufacturer guidelines.
Health Tips for Sensitive Occupants Using Latex Paint
Because even low-VOC latex paints can trigger symptoms in people with asthma, chemical sensitivities, or compromised immune systems, take precautions before, during, and after painting. You should disclose latex allergies to contractors, limit exposure by keeping sensitive occupants away, and plan short sessions.
Ventilate continuously with fans and open windows until odors vanish. Wear a certified mask and nitrile gloves when mixing or cleaning brushes. Store paint sealed and labeled; follow paint storage dates to avoid breakdown that raises irritants.
Clean surfaces and launder clothing promptly to remove residues.
- Schedule & notify
- Ventilate well
- Use PPE
- Secure storage
Low‑VOC and Zero‑VOC Latex Paint Options to Consider
After taking precautions for sensitive occupants, you’ll want to pick paints that minimize airborne irritants—low‑VOC and zero‑VOC latex options considerably reduce odors and chemical exposure compared with conventional formulas.
You can choose reputable brands labeled low‑VOC or zero‑VOC and check third‑party certifications for verification. These eco friendly alternatives cut indoor pollution during and after painting, helping allergy sufferers and children.
Don’t fall for Latex paint myths that claim zero‑VOC equals zero emissions forever; additives and pigments can still off‑gas slightly. Still, selecting low/zero‑VOC latex and ventilating well gives you a safer, practical compromise for most interiors.
Specialty Latex Formulas: Mold‑Resistant and Washable Paints
When you’re tackling high‑humidity rooms or homes with recurring mildew, mold‑resistant and washable latex paints give you targeted protection and easier upkeep. You’ll reduce microbial growth with antimicrobial additives and get scrubbable finishes for stains.
Consider latex allergies when choosing formulations; low‑VOC, antimicrobial options still vary in sensitizing ingredients. Also, balance performance with paint color selection since pigments can affect opacity and required coats.
Pros: durability, easier cleaning, and improved indoor air.
Cons: specialty additives may cost more and some hues need extra coverage.
- Reduced mold growth
- Scrubbable surfaces
- Watch for allergens
- Higher cost
How to Choose the Right Sheen for Each Room
If you want a finish that balances appearance with durability, pick the sheen based on each room’s use and light exposure.
For high‑traffic areas like kitchens and hallways, choose satin or semi‑gloss for wipeability; bathrooms benefit from semi‑gloss for moisture resistance.
Bedrooms and living rooms suit eggshell or matte to hide imperfections and soften light.
For trim and doors, use semi‑gloss for durability and easy cleaning.
Test samples under real light before committing, since sheen affects perceived color and paint color mixing.
If you or family have latex allergies, ventilate well and use low‑VOC formulations to reduce irritants.
Cost‑Saving Tips That Don’t Sacrifice Durability
You can save money without sacrificing how long your paint job lasts by choosing durable, budget-friendly materials like mid-grade latex and quality primers.
Do the prep work yourself—cleaning, patching, and sanding properly prevents premature wear and reduces how often you’ll need to repaint.
And keep up simple maintenance, like spot-cleaning and touch-ups, to extend the finish for years.
Smart Material Choices
Looking for ways to cut painting costs without ending up on a fast track to repaint? You can choose smart materials that deliver durability without breaking the bank. Understand latex chemistry to pick formulations with better binders, and check paint pigments for opacity—higher pigment load can reduce coats.
Choose quality primers where adhesion matters and mid-range topcoats for wear resistance. Match sheen to room use to hide flaws and minimize maintenance. Finally, buy from reputable brands with consistent batches; consistency avoids wasted paint.
These choices save money over time while keeping finishes durable and attractive.
- Pick binder-focused latex blends
- Favor high-pigment options
- Use mid-range durable topcoats
- Buy consistent-brand batches
Prep And Maintenance
When walls and trim get prepped right and you keep up with simple maintenance, your latex paint will last far longer and cut repainting costs.
Start by cleaning surfaces, sanding glossy spots, and using quality primer to prevent peeling. Address stains and moisture before painting so repairs don’t force early touchups.
For cost savings, buy only needed quantities and use proper paint storage to preserve leftover paint—seal cans, store upside down, and keep a consistent temperature. Label mixes clearly after any color mixing to reproduce shades later.
Regularly wash surfaces and fix chips promptly to extend finish life.
Signs It’s Time to Repaint Latex Surfaces
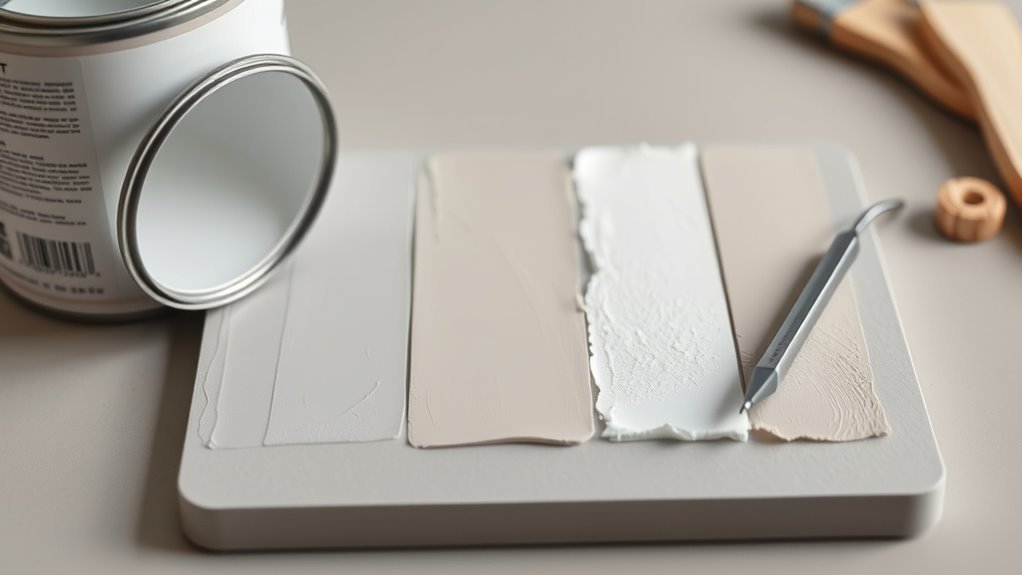
Although latex paint holds up well, it isn’t indestructible, and there are clear signs that it’s time to repaint. You’ll spot fading from sun exposure, especially if poor color mixing or inadequate paint storage weakened pigments.
Although durable, latex paint fades and fails—sun, poor mixing, or bad storage reveal when it’s time to repaint.
Peeling, cracking, or chalking means adhesion failed. Mildew or stains that cleaning won’t remove call for fresh coating. If walls look dated or uneven despite touch-ups, a full repaint restores uniformity.
- Fading or uneven color
- Peeling, cracking, or chalking
- Persistent mildew or stains
- Dated or patchy appearance
Act when these signs appear to prevent further damage.
Real Projects Where Latex Paint Worked Well
Noticing those signs makes you want examples of where latex paint actually shines — and there are plenty. You’ll see it on interior walls in humid rooms where quick drying and low odor matter.
Use it for trim and ceilings; it levels well and supports precise color mixing for coordinated schemes. Kids’ rooms benefit from easy cleanup and durable finish.
Outdoors, it performs on properly primed siding in mild climates. You can choose eco friendly options with lower VOCs without sacrificing coverage.
For DIY touch-ups and big-room repainting alike, latex is a practical, cost-effective choice.
Projects Where Latex Underperformed and Why
If you expect latex paint to perform miracles everywhere, you’ll run into limits on certain jobs — especially high-heat surfaces, unsealed metal, and floors with heavy wear. You’ll notice failures where adhesion, durability, or finish mattered most.
Poor color mixing or incompatible primers left blotchy hues; water-based binders softened under constant heat; untreated metal rusted through paint; and smooth paint texture wore thin on factory floors.
Learn from these weak spots so you pick specialty coatings next time.
- High-heat areas
- Unprimed metal
- Heavy-traffic floors
- Surfaces needing precise color matching
Quick Decision Checklist: Is Latex Paint Right for You?
You’ve seen where latex falls short, so now let’s figure out quickly whether it’s right for your job. Use this checklist: consider surface, durability needs, drying time, Color psychology for mood, and Eco friendly options if indoor air matters. Ask: will the surface flex? Need heavy scrubbing? Want low odor?
| Question | Latex good? | Action |
|---|---|---|
| Interior walls, quick dry | Yes | Use water-based latex |
| High-moisture or heavy wear | Maybe | Choose high-quality formula |
| Health/eco priority | Often | Pick low-VOC, eco friendly options |
If most answers fit, latex works.
Buyer’s Guide: Key Label Terms to Check on Latex Cans
When you’re standing in the paint aisle, focus on a few key label terms that tell you how the latex will perform. Check VOC levels for indoor air quality and any historical context about formulation changes. Note sheen—flat, eggshell, satin—since color psychology and light reflectance affect mood.
Look for coverage (sq ft/coat) and recommended coats to judge cost and labor. Verify durability/washability ratings for high-traffic areas.
Check coverage (sq ft/coat) and recommended coats, and confirm durability/washability for high-traffic areas.
- VOC content
- Sheen and light reflectance
- Coverage per coat
- Durability/washability
These labels cut guesswork so you pick paint that fits space, budget, and style.
How to Plan Your Latex Painting Project
Now that you know how label terms like VOC, sheen, and coverage shape your choices, start planning the painting project by mapping out scope, timeline, and materials. List surfaces, measure areas to estimate gallons, and schedule work in weather-appropriate windows.
Choose primers and finishes, plan color mixing samples on poster board, and test light at different times. Create a tool checklist—rollers, brushes, trays, tape—and set up safe paint storage for leftovers, labeled with date and tint.
Budget for prep: patching, sanding, and masking. Allow drying and cure time between coats to guarantee a durable, even finish.
Frequently Asked Questions
Can Latex Paint Be Used on Kitchen Cabinets Without Sanding or Priming?
You can, but you shouldn’t; Painting techniques and Surface preparation matter. If cabinets are glossy or dirty, sand or degloss and prime for adhesion and durability; otherwise latex may peel or show brush marks over time.
Is Latex Paint Safe for Children’s Toys and Play Furniture?
Want safe finishes for kids’ playthings? You can use latex paint with child safety in mind, choosing low-VOC, labeled non toxic properties and sealing with a clear topcoat; always cure fully and ventilate during application.
How Long Should I Wait Before Hanging Heavy Items on Newly Painted Walls?
You should wait at least 24–48 hours before hanging heavy items; follow painting techniques and drying times guidelines, let paint cure 7 days for full strength, and use proper anchors to avoid damaging freshly painted walls.
Can Latex Paint Be Applied Over Wallpaper Without Removal?
You can, but you shouldn’t unless wallpaper adhesion is excellent; you’ll risk bubbling and poor finish. You’ll avoid full paint removal by priming with a strong bonding primer and repairing loose seams before applying latex paint.
Are There Special Storage Tips to Keep Leftover Latex Paint Usable?
Like sealing a treasure chest, you should store leftovers in airtight storage containers, label and date cans, keep them cool and upright, avoid freezing or heat, stir occasionally—these steps preserve paint durability and usable life for future touch-ups.
Conclusion
You’ll find latex paint is a solid, versatile choice for most indoor jobs—about 80% of professional painters prefer it for drywall and trim because it dries fast, cleans up with water, and resists yellowing. That statistic shows you’re likely choosing a proven option. Still, weigh trade-offs like lower solvent-based adhesion on glossy oil finishes. If you follow prep steps and pick the right sheen, latex will save you time and give durable, attractive results.