Should I Sand My Walls Before Painting? Expert Tips
You don’t always need to sand before painting; check the surface first for gloss, peeling, bumps, or patched areas that will show through a new coat. Lightly scuff glossy or varnished surfaces with fine sandpaper for better adhesion, and sand patches smooth. Clean dust and grease thoroughly, prime where needed, and wear protection while sanding. Skip heavy sanding on matte or clean walls and instead spot-test adhesion—keep going to learn practical checks and quick fixes.
Do You Need to Sand Your Walls?
Do you always need to sand your walls before painting? You don’t always have to, but knowing sanding benefits helps you decide.
If walls are glossy, peeling, or uneven, light sanding evens texture and improves primer and paint grip. For clean, matte surfaces, you can often skip aggressive abrasion and focus on cleaning and minor repairs as part of wall preparation.
Test a small area: if paint adheres and finish looks smooth, sanding isn’t required.
Prioritize targeted sanding over blanket sanding—it’s quicker, reduces dust, and gives you better results without unnecessary work.
When Sanding Matters for Paint Adhesion
You’ll want to sand when the surface texture will affect how the paint lays down, since rough or uneven areas can show through.
If you’re repainting a glossy finish, lightly sanding is essential to give the new paint something to grip.
And anytime there’s peeling, gouges, or patched spots, sanding smooths those repairs so the paint adheres evenly.
Surface Texture Importance
When paint meets a wall, the surface texture decides how well it sticks and how the finish looks, so you should assess the existing texture before grabbing sandpaper. You’ll notice texture impact immediately: smooth drywall needs light scuffing, while textured plaster may require targeted sanding to improve adhesion and surface aesthetics. Match your sanding to the texture—don’t overdo it.
| Texture type | Sanding approach |
|---|---|
| Smooth drywall | Light scuff |
| Eggshell | Fine grit |
| Knockdown | Spot sand |
| Orange peel | Blend edges |
| Plaster | Gentle touch |
Glossy Finish Preparation
If your wall has a glossy finish, sanding becomes much more important because shiny surfaces resist paint adhesion more than matte ones.
You’ll scuff the sheen with fine-grit sandpaper (220–320) or a sanding sponge to create a uniform tooth for primer. Clean the wall of dust and grease first; proper surface preparation boosts primer and topcoat bonding.
After sanding, wipe with a damp cloth and let dry before priming. For high-gloss or enamel, consider a deglosser if you prefer chemical etching over abrasion.
Sanding guarantees even coverage and longer-lasting paint on glossy walls.
Damaged Area Repair
Assess damaged spots before sanding so you focus effort where it matters most: loose paint, dents, cracks, and gouges need different fixes to guarantee new paint adheres and looks smooth. You’ll remove loose material, fill cracks with proper crack filling compound, and sand only after repairs. For gouges or deep dents, layer filler, sand between coats, and consider texture matching to blend repairs. Prime repaired areas to seal differences. Use appropriate grit and feather edges into surrounding paint so the finish reads uniform.
| Issue | Fix |
|---|---|
| Loose paint | Scrape & sand |
| Small dents | Putty & sand |
| Cracks | Crack filling |
| Gouges | Layer filler |
| Texture | Texture matching |
How to Inspect Walls to Decide on Sanding
Start by walking the room and checking for surface imperfections like bumps, peeling, or rough patches that will show through new paint.
Gently press or scrape areas to assess paint adhesion and note any flaking or powdery spots.
Also inspect for moisture damage—stains, soft drywall, or mold—that must be fixed before you sand or repaint.
Check For Surface Imperfections
Before you decide whether to sand, walk the room and scan the walls at different angles and lighting—natural light and a bright handheld lamp reveal dents, drips, and texture differences that a casual glance will miss.
Use simple inspection techniques: run your hand over the wall to feel bumps, hold a straightedge to find waves, and mark nail holes, peeling spots, and paint drips.
Note areas with patching compound that’s uneven or ridged. Catalog visible surface flaws and prioritize fixes by size and location.
That list helps you decide where sanding, spot-smoothing, or skim-coating will make the biggest difference.
Assess Paint Adhesion
How well is the existing paint sticking to the wall? You’ll perform a quick adhesion testing routine: press a fingernail or tape strip to suspect areas, then pull sharply. If paint flakes or peels, you’ll need sanding or removal.
Do a visual surface analysis under good light, looking for bubbling, cracking, or glossy spots that resist new paint. Test multiple spots across each wall—corners, trim interfaces, and midpanels—to map adhesion consistency.
Minor loose edges can be sanded and feathered; widespread failure means full prep. Record results so you can plan sanding scope and product choices.
Look For Moisture Damage
Wondering whether moisture could be the reason your paint’s failing? Check for discoloration, peeling, bubbling, or soft spots—signs that warrant moisture detection.
Run your hand over suspect areas; dampness or a musty smell signals active problems. Use a moisture meter for precise readings, and compare results across the wall to map wet zones.
Trace issues to leaks, poor ventilation, or rising damp before you sand. Document findings as part of a damage assessment, noting severity and location.
Fix sources, dry the wall fully, and only then sand and prime to guarantee a lasting repaint.
Surfaces That Usually Need Sanding
While you don’t have to sand every wall, certain surfaces benefit from it to guarantee paint sticks and looks even: glossy finishes, patched areas, bare wood, and any rough or flaking spots.
You’ll prep differently depending on sanding techniques and wall materials, so match grit and pressure to the task. Focus on adhesion, smooth shifts, and removing loose particles.
Common candidates include:
- Glossy or enameled surfaces that need scuffing for bonding.
- Patches, joint compound, or repaired drywall that must blend seamlessly.
- Bare wood, peeling paint, or flaky areas that require leveling before priming.
Surfaces That Can Skip Sanding
If your walls are already clean, smooth, and covered with flat or eggshell paint in good condition, you can usually skip sanding and move straight to cleaning and priming as needed.
You can also often avoid sanding textured surfaces if texture is intact and adhesion’s solid.
Previously painted painted brick, concrete walls, metal surfaces, and ceiling tiles may not need sanding—just de-grease and prime.
With wood paneling, assess finish; varnished panels usually need scuffing, not aggressive sanding.
After wallpaper removal or in high traffic areas, inspect for damage and use targeted repair techniques rather than blanket sanding.
How Paint Finish Affects Sanding Needs
Because different finishes change how paint adheres and how visible imperfections are, the existing sheen tells you whether you need to sand: glossy and semi-gloss surfaces usually need scuffing or light sanding to create tooth for the new coat.
Satin and eggshell often only require a mild scuff or thorough cleaning, and flat paints can typically be recoated with minimal abrasion unless they’re chalky or peeling.
Consider these quick guidelines to match prep techniques and sanding methods to finish and texture difference:
- Gloss/semi-gloss: aggressive scuffing for adhesion factors and paint layering.
- Satin/eggshell: light scuff, check surface compatibility.
- Flat: minimal abrasion, focus on finish durability.
Latex vs Oil Paint: Prep Differences
If you’re switching between latex and oil, you’ll need to adjust how much you scuff the surface and which primers will stick.
You’ll also watch for primer compatibility—some oil-based primers bond better to glossy surfaces while latex primers work differently.
And remember oil paints dry much slower than latex, so tackiness and sanding windows change accordingly.
Surface Scuffing Needs
How rough should you make the surface before repainting? You’ll focus on scuffing more than aggressive sanding for latex over oil. Proper surface preparation preserves wall maintenance and helps new paint adhere.
- For latex over latex: light scuff with fine-grit (220) to remove sheen and clean dust.
- For latex over oil: scuff more firmly with medium-grit (150–180) and degrease; you’re creating tooth without exposing drywall.
- For oil over any: you’ll need solid abrasion to break glossy film; clean thoroughly afterward.
Always wipe with a tack cloth, let dry, and inspect before painting.
Primer Compatibility Issues
Now that you’ve addressed scuffing and surface cleanliness, consider how primer choice affects adhesion when switching between latex and oil paints.
You’ll pick primer types based on the topcoat: oil-based primers bond well under oil paint and block stains, while high-adhesion latex primers suit latex topcoats and flexible substrates.
If you’re converting from oil to latex, use a bonding primer formulated to bridge surfaces; going from latex to oil often needs a degloss and oil-compatible primer.
Always perform adhesion testing on a small area to confirm compatibility before full application, preventing peeling and costly repainting.
Drying Time Considerations
Because drying times differ sharply between latex and oil paints, you’ll need to plan prep and scheduling differently to get a smooth, durable finish.
You should sand and remove dust with enough lead time so surfaces don’t trap moisture or tackiness. Consider these points:
- Latex dries fast to the touch but needs longer for full paint curing; wait at least 24 hours before light sanding or recoating.
- Oil paint stays workable and tacky longer; allow 48–72 hours before sanding and up to a week for substantial curing in low humidity.
- Temperature and ventilation affect drying time—adjust your timeline accordingly.
Dealing With Glossy and Enamel Finishes
When your walls have a glossy or enamel finish, you’ll need to break that sheen before new paint will adhere properly; light sanding or a chemical deglosser is usually required to create a tooth for the primer.
You’ll assess glossy finishes and enamel surfaces for cleanability, chips, and existing topcoat type. Deglossers remove gloss quickly without heavy abrasion, while fine-grit sanding improves primer grip.
Inspect glossy or enamel surfaces for cleanliness, chips, and topcoat type; degloss or fine-sand to improve primer adhesion.
After either method, clean thoroughly to remove dust or residue—surface preparation you can’t skip.
Use a bonding primer formulated for slick surfaces to maximize paint adhesion and prevent peeling, then paint as instructed.
Scuff-Sanding vs Full Sanding: When to Choose
Which approach makes sense depends on the condition of your walls: scuff-sanding is a quick, light abrasion that gives new paint something to grip when the surface is mostly intact, while full sanding removes old finish, smooths imperfections, and’s necessary when you’ve got peeling paint, heavy texture, or uneven patches.
You’ll weigh scuff sanding benefits against full sanding drawbacks and pick the least invasive option that guarantees adhesion and appearance.
- Choose scuff-sanding for sound, intact surfaces to speed prep and reduce dust.
- Choose full sanding for adhesion issues, patchwork, or heavy texture.
- When unsure, test a small area first.
Choosing Sandpaper Grit for Wall Prep
Start by matching grit to the task: lower numbers cut faster but leave rougher scratches, while higher numbers smooth without removing much material.
Use coarse grits (60–80) only for heavily damaged or plastered areas, then move up to medium (100–150) to blend.
Finish with fine grit (180–220) so your primer or paint bonds evenly and you don’t see sanding marks.
Grit Selection Basics
Pick the right sandpaper grit and you’ll ease prep time while getting a smooth, paint-ready surface. You’ll match grit types to the job: finer for smoothing, medium for light scuffing, and avoid overworking surfaces.
Use proper sanding techniques to keep edges even and avoid swirl marks.
- Choose a medium grit to remove gloss and scuffs before priming.
- Use fine grit between coats for a flawless finish and better adhesion.
- Reserve very fine grit for delicate touch-ups and final smoothing.
Stick to these basics and you’ll prep efficiently, minimize repairs, and get consistent paint results.
When To Use Coarse
When you’re dealing with rough patches, peeling paint, or thick texture, reach for a coarse grit to remove material quickly and level the surface for priming.
Use 40–80 grit on problem areas, moving with firm, even pressure to avoid gouging. Hold a sanding block or orbital sander flat to maintain an even plane.
Test an inconspicuous spot first, then vacuum debris and wipe with a damp cloth. For drywall compound ridges or stubborn adhesion, repeat with the same coarse grit until smooth.
Pair these sanding techniques with proper safety gear—mask and eye protection—to control dust and stay safe.
Finishing With Fine
Finish sanding with a fine grit to smooth imperfections and create the best surface for primer and paint to bond.
You’ll want a light touch so you don’t over-sand; fine finishes depend on even, consistent strokes. Choose 220–320 grit for painted drywall and 180–220 for patched areas. This surface treatment reduces visible scratches and helps primer sit evenly.
- Sand gently across the repair, blending edges.
- Wipe with a damp cloth to remove dust before priming.
- Inspect under good light; repeat lightly if you spot ridges.
You’ll get a professional-looking paint job when you finish correctly.
Hand Sanding vs Power Sanding: Pros and Cons
Although both hand and power sanding remove imperfections, choosing between them depends on your surface, timeline, and comfort with tools. You’ll use hand sanding for small spots, delicate trim, and precise surface preparation with basic sanding tools and materials. Power sanding speeds big jobs, boosting sanding efficiency but needs dust control and safer sanding safety practices. Match sanding techniques to the job: start coarse, finish fine. Choose appropriate sanding materials and protect yourself. If unsure, test a small area to compare finish and effort before committing to full-room sanding.
| Method | Best Use |
|---|---|
| Hand sanding | Small areas |
| Power sanding | Large surfaces |
| Tools | Sanding materials |
Wet Sanding: When It Helps (And When Not)
Wet sanding can give you a super-smooth finish on glossy paints or between coats because it minimizes dust and clogging.
You should avoid it on soft drywall paper, heavily textured surfaces, or where moisture can damage the substrate.
We’ll cover when wet sanding beats dry sanding and when it’s just more trouble than it’s worth.
When Wet Sanding Works
When you’re dealing with glossy finishes, oil-based paints, or visible flaws from brushstrokes and drips, wet sanding can be the right move because it smooths without clogging the sandpaper or raising dust the way dry sanding does.
You’ll notice wet sanding benefits quickly: a glassy, even surface ready for topcoat. Use proper wet sanding techniques—fine-grit paper, lubricant, gentle pressure.
Follow a simple plan:
- Soak and lubricate, then test a small area.
- Sand with light, even strokes, keep surface wet.
- Wipe, inspect, and repeat until smooth.
You’ll get professional results without dust.
When To Avoid WetSand
You’ll get great results with wet sanding in the right situations, but it’s not the best choice for every job.
Avoid wet sanding when surface compatibility is poor — porous drywall, unstable fillers, or delicate trim can absorb water and fail.
Consider wetsanding drawbacks like drying issues and finish types that react poorly to moisture.
If you lack proper technique or correct tool selection, you’ll damage edges or create gouges.
Environmental factors such as cold, high humidity, or limited ventilation worsen problems.
Weigh wetsanding benefits against risks; choose dry sanding or spot-sanding when compatibility, conditions, or skill aren’t ideal.
Repair Dents, Nail Holes, and Peeling Paint First
Before sanding, fix dents, nail holes, and any peeling paint so your finish goes on smooth and lasts longer.
You’ll make paint preparation easier and avoid trapped flaws by addressing surface damage first. Use these repair techniques in order:
- Clean, scrape loose paint, and fill deep dents with a patching compound; let it cure.
- Use lightweight spackle for nail holes, sand flush once dry for an even surface.
- Feather edges of peeled areas, prime bare spots, and check for adhesion before topcoating.
Do these steps before sanding so you don’t grind in debris or uneven patches into your final finish.
Primer Rules: When Primer Can Replace Sanding
After repairing holes and peeling paint, consider whether primer can stand in for sanding on certain surfaces. You can skip light sanding when surfaces are clean, glossy-only, or previously painted with similar sheen; choose proper primer types and apply per instructions. Oil-based or adhesion primers bond glossy finishes; shellac blocks stains; bonding primers tackle slick surfaces. Primer benefits include sealing, improving adhesion, and hiding imperfections so you don’t overwork the wall. Don’t rely on primer for rough patches or loose paint. Assess surface condition, pick the right primer, and test a small area before committing to avoid peeling or adhesion failures.
| Surface | Recommended Primer | When to Sand |
|---|---|---|
| Glossy latex | Bonding primer | Light scuffing only |
| Stained areas | Shellac primer | Not if sealed |
| Bare drywall | Latex primer | No sanding needed |
Using Deglossers and Liquid Sanders Safely
Wondering whether a liquid deglosser can replace sanding for your project? You can, sometimes, but deglosser application demands care.
Use these steps to stay safe and effective:
- Wear gloves, eye protection, and a respirator; ventilate the room to reduce fumes and follow the product label for liquid sander safety.
- Test a small area to confirm adhesion and avoid overusing solvent; wipe residue with a clean rag and allow full dry time.
- Combine light abrasion with deglosser for glossy surfaces; avoid using on heavily damaged paint that needs stripping.
Chemical Strippers: When They’re Appropriate
If a deglosser or light sanding won’t remove thick, flaking, or lead-containing paint, a chemical stripper may be the right tool.
When sanding or a deglosser fail, use a chemical stripper to safely remove thick, flaking, or lead paint.
You’ll choose a product based on substrate and paint age; gel, paste, or solvent options suit different surfaces. Apply per instructions, let dwell, then scrape or wipe away residues.
Chemical stripping methods speed removal where sanding would be slow or risky, and they’re effective for intricate trim.
After stripping, rinse and neutralize as directed to prep the wall.
Thoughtful surface preparation techniques guarantee a clean, sound base for primers and new paint.
Safety Gear and Dust-Control Tips
Before you sand, gear up with a proper respirator, goggles, and gloves to protect your lungs, eyes, and skin.
Use plastic sheeting and a vacuum with a HEPA filter to contain and capture dust as you work.
When you’re done, wipe surfaces with damp cloths and dispose of sanding debris and used filters according to local hazardous-waste rules.
Personal Protective Equipment
One essential step you shouldn’t skip is equipping yourself with proper personal protective equipment—gloves, safety glasses, a NIOSH-rated dust mask or respirator, and a disposable coverall—to keep dust and contaminants off your skin and out of your lungs while sanding.
Use eye protection and dust mask every session. Gloves usage prevents irritation and keeps grip steady. Follow ventilation tips to lower airborne particles and protect paint health.
- Check fit and certification for safety gear.
- Replace disposable items when saturated.
- Combine PPE with cleanup methods and safe sanding techniques.
Contain And Capture Dust
When you sand, contain and capture the dust at its source so it doesn’t settle on furniture, vents, or your lungs. Use a sander with a built-in vacuum or attach a shop-vac hose to collect particles as you work.
Seal doorways and vents with plastic sheeting and painter’s tape to prevent migration. Work from top to bottom and pause often to empty filters so suction stays strong.
Wear a fitted respirator and goggles, and consider tack cloths for final passes. These dust containment methods plus regular filter checks create effective cleanup strategies and reduce airborne hazards while you sand.
Clean-Up And Disposal
1 simple routine makes post-sanding cleanup faster and safer: collect dust at the source, dispose of it properly, and decontaminate your tools and workspace.
You’ll wear a respirator and goggles, wet-wipe surfaces, and run a HEPA vacuum to minimize airborne particles. Consider cleanup methods that separate waste and prevent recontamination.
- Sweep up large debris with a damp mop or HEPA vacuum.
- Bag fine dust in heavy-duty plastic, seal, and follow local disposal options.
- Wipe tools and surfaces with damp cloths, launder clothing separately, and ventilate until dust clears.
Follow local regs for lead or hazardous waste.
Sanding Around Trim, Outlets, and Fixtures
| Item | Purpose |
|---|---|
| Tape | Trim protection |
| Plugs | Outlet coverage |
| Paper | Detail sanding |
| Mask | Fixture masking |
| Blend | Finish matching |
Time and Cost Tradeoffs: Sanding vs More Coats
After you’ve sanded carefully around trim, outlets, and fixtures, you’ll need to decide whether to spend more time sanding or just add extra coats of paint to achieve a smooth result.
You’ll weigh sanding benefits against quick layering: sanding improves adhesion and paint quality, boosting long term durability, while extra coats may hide flaws short-term.
Consider cost analysis and time efficiency in your project timeline. Think about surface condition, desired finish, and skills.
Balance immediate labor versus future maintenance.
Decide with this quick checklist:
- Sand for prep and longevity.
- Add coats for speed.
- Combine both when needed.
Common Sanding Mistakes and Fixes
While sanding can make your paint job look professional, it’s easy to slip into a few common mistakes that create more work later.
You’ll over-sand and thin drywall or wood—use a light touch and a soft block.
Skipping dust cleanup ruins adhesion; vacuum and tack cloth before priming.
Don’t skip dust cleanup — vacuum thoroughly and wipe with a tack cloth before priming for proper adhesion.
Using the wrong grit wastes time: start coarse for flaws, finish with fine for feathering.
Relying solely on power tools can gouge; balance hand and power sanding.
Ignore edges and you’ll get visible seams—blend connections carefully.
Learn proper sanding techniques to avoid these common errors and save time overall.
Quick-Touch-Up Workflow Without Full Sanding
Need a quick fix without breaking out sandpaper for the whole room? You can still get neat results using simple touch up techniques and targeted quick repairs.
Follow a short workflow that keeps things tidy and fast:
- Clean the area, scrape loose paint, and apply lightweight filler to dents.
- Feather the filler edges with a damp sponge, let dry, then prime only the repaired spot.
- Match paint, use a small brush or mini-roller, and blend outward with thin coats until seamless.
You’ll avoid full sanding, save time, and still leave the wall looking professionally finished with minimal fuss.
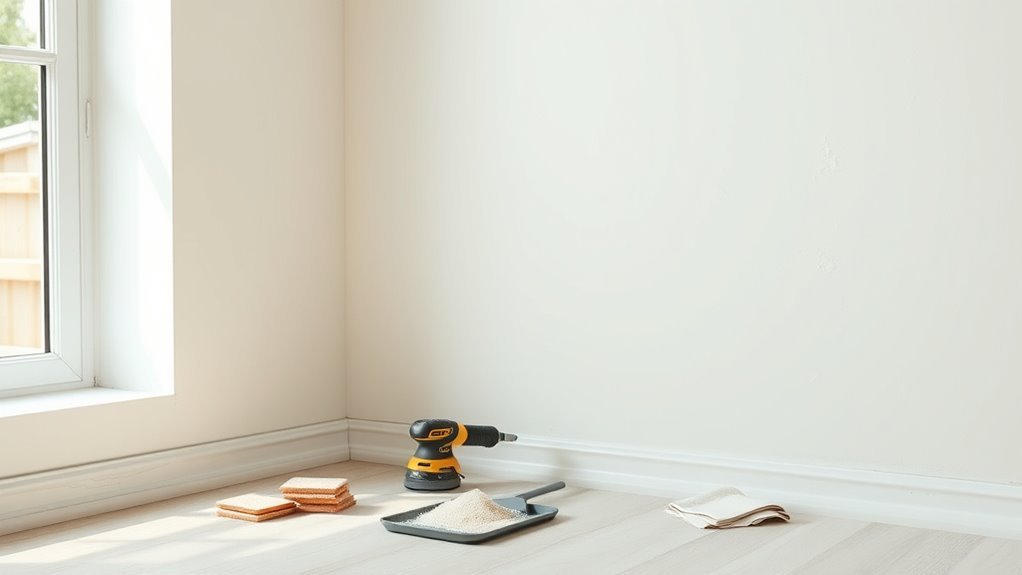
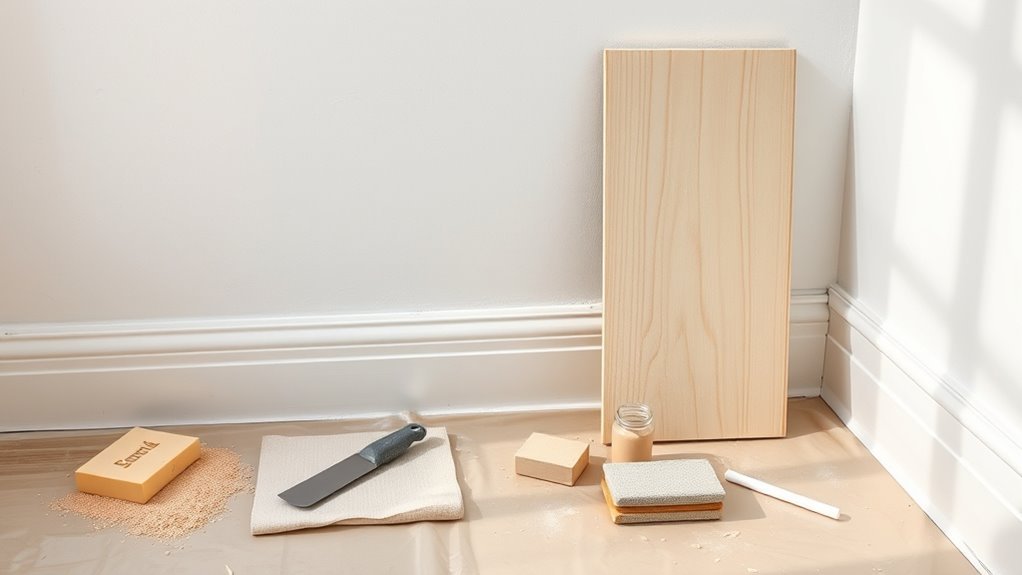
Tools and Accessories for a Professional Finish
You’ll want the right sanding tools—sandpaper in various grits, a sanding block, and a pole sander—to get smooth, even surfaces.
Don’t forget finishing accessories like tack cloths, spackle knives, painter’s tape, and quality brushes or rollers for clean edges.
With a simple checklist you’ll move efficiently and avoid common finish problems.
Essential Sanding Tools
Even if your walls look sound, getting a professional finish starts with the right sanding tools: sandpaper in multiple grits, sanding blocks or a palm sander, a drywall pole sander for ceilings, and a good vacuum or tack cloth to remove dust.
You’ll use these to practice proper sanding techniques and guarantee thorough wall preparation. Choose grits: coarse for repairs, medium for smoothing, fine for final skim.
Keep tools clean and replace worn pads. Use a respirator for dust.
Follow this simple kit:
- Assorted sandpaper grits
- Sanding block/palm sander
- Drywall pole sander and vacuum
Finishing Accessories Checklist
A few key finishing accessories will make your painted walls look truly professional, so gather them before you start the final coat.
You’ll want a set of accessory essentials: angled sash and trim brushes for edges, a high-quality mini roller for smooth touch-ups, and a trim pad for tight spots.
Keep painter’s tape, a flexible putty knife, and spackle handy to fix imperfections.
Have lint-free cloths and a tack cloth for dust removal, plus a small paint tray and stir sticks.
These finishing touches let you correct flaws and crisp lines, giving a polished, long-lasting result.
How to Test Paint Adhesion Before Repainting
Wondering whether the existing paint will hold your new coat? You can quickly check for adhesion failure with simple paint adhesion tests so you don’t repaint over peeling areas.
- Score a small grid (6×6) with a utility knife, press tape over it, then pull sharply; loose squares mean poor adhesion.
- Scrape suspicious spots with a putty knife; stubborn paint stays, flaky paint indicates failure.
- Clean a patch with solvent, let dry, then apply a touch-up; if the new paint peels after curing, you’ve confirmed adhesion problems.
Address failed spots by sanding, priming, and ensuring surface cleanliness before repainting.
Room-Specific Tips (Bathrooms, Kitchens, Living Rooms)
When rooms have different moisture, heat, and traffic levels, you should tailor your sanding and prep for each space: in bathrooms and kitchens focus on removing failing gloss or mildew stains and scuffing glossy surfaces for better adhesion; in living rooms prioritize smoothing minor imperfections and feathering edges where repairs meet intact paint. Target bathroom moisture by using mildew cleaners and light sanding; tackle kitchen grease with degreaser then medium-grit sanding; address living room texture by skim, sand, and blend.
| Room | Issue | Sanding focus |
|---|---|---|
| Bathroom | bathroom moisture | Scuff, clean |
| Kitchen | kitchen grease | Degrease, sand |
| Living room | living room texture | Smooth, blend |
When to Call a Pro for Surface Prep
If your walls show widespread damage, stubborn stains, or old lead-based paint, call a pro—these issues need specialized tools and know-how to guarantee a safe, durable finish.
You’ll want professional services when the job risks health or structural problems, or when time and finish quality matter.
Consider pros over DIY prep alternatives in these cases:
- Extensive water damage, mold, or crumbling drywall that needs repair and drying.
- Historic homes with lead or multiple old coatings requiring testing and containment.
- High-end finishes or large jobs where consistent surface prep affects the final result.
Quick Checklist: Decide Whether to Sand and Next Steps
Start by walking the room and making a quick list of visible issues—peeling paint, glossy finishes, nail pops, patchy spots, or rough texture—and decide whether sanding will address them.
Next, prioritize: fix structural damage, fill holes, scrape loose paint, then decide grit and method for sanding.
Prioritize repairs: fix structural damage, fill holes, scrape loose paint, then choose sanding grit and method.
Consider sanding benefits: better adhesion, smoother finish, and reduced visible repairs.
If walls are glossy or patchy, sand; if only dirty, clean and prime.
Plan protective measures, dust control, and primer/paint choice as part of wall preparation.
Finish with a small test spot before committing to full-room sanding.
Frequently Asked Questions
Will Sanding Remove Mildew or Mold Stains on Walls?
No — sanding won’t reliably remove mildew or mold stains; you should treat mildew removal first with a fungicidal cleaner, let it dry, then sand for smoothness to aid stain prevention and better paint adhesion afterward.
Can I Sand Painted Wallpaper Without Damaging It?
You can, but you’ll need a gentle touch like stroking a sleeping cat: use fine-grit sanding techniques, light pressure, and test an inconspicuous area first, since aggressive sanding will ruin delicate wallpaper textures and adhesive.
Does Humidity Affect Sanding Effectiveness or Drying After Sanding?
Yes — humidity levels matter: you’ll find sanding techniques work better in low, dry air because dampness clogs abrasives and softens surfaces, and you’ll need longer drying times after sanding when humidity’s high to avoid patching issues.
How Soon Can I Paint After Using a Chemical Deglosser?
Like wiping a window, you can paint after a chemical deglosser benefits surface quickly; wait the product’s recommended drying time—usually 15–60 minutes—so your painting timeline stays reliable and adhesion isn’t compromised.
Will Sanding Affect Fire-Retardant or Acoustic Wall Panels?
Yes—sanding can harm fire retardant properties and acoustic panel integrity, so you shouldn’t sand without checking manufacturer guidance; you’ll likely need gentle cleaning, specialized primers, or professional advice to preserve safety and sound performance.
Conclusion
You don’t always have to sand, but when you skip it you risk paint that peels, chips, or looks dull — a false economy. Before you start, inspect, test adhesion, and focus sanding where surfaces are glossy, patched, or rough. In moist rooms or high-traffic areas, give prep extra attention. If it feels overwhelming, call a pro. Think of sanding as giving your walls a fresh handshake with paint: necessary for a lasting, confident finish.