Should You Paint Walls or Cabinets First?
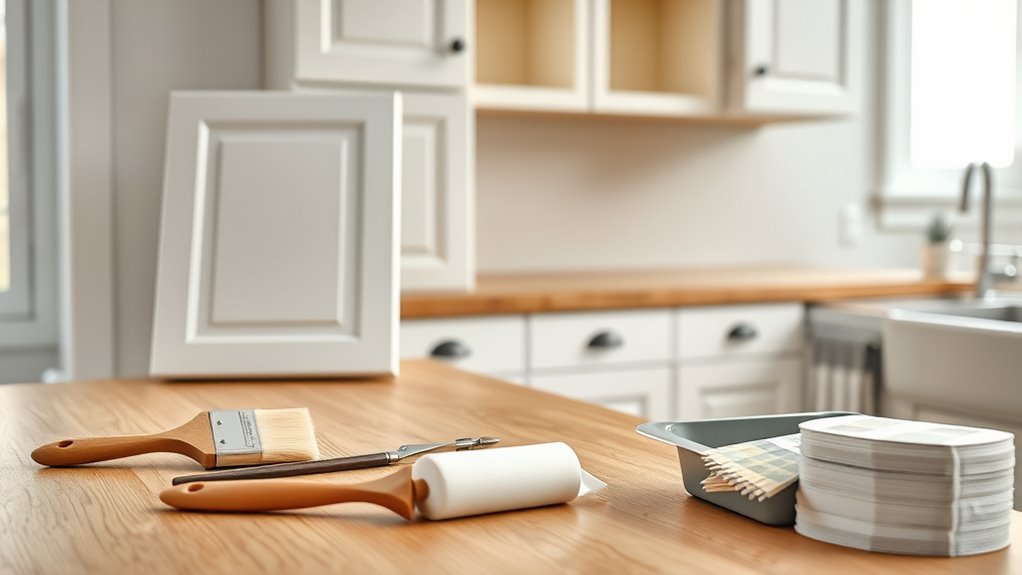
You should usually paint cabinets first for cleaner lines and less mess, especially in small or tight kitchens where drips and splatters are a real headache; remove hardware, clean, sand, and prime cabinets so you can focus on crisp edges and avoid smudging fresh walls. Paint walls first if you want a brand-new backdrop or you can stage cabinets elsewhere. Follow a simple prep plan and tips below to pick the best order for your project.
Which Search Intent and Format This Guide Serves (Informational How‑To)
Because you’re looking for practical, step-by-step advice rather than opinions or product reviews, this guide serves an informational how-to intent: it tells you which surface to paint first, explains why, and walks you through the process so you can make confident choices and avoid common mistakes.
You’ll get clear guidance matching search intent for homeowners and DIYers, with actionable painting techniques and sequencing tips. You won’t find brand comparisons or lengthy theory—just concise steps, prep checklists, and troubleshooting for common issues.
Follow this format to decide sequence, reduce rework, and finish your project efficiently and confidently.
Quick Answer: Paint Cabinets or Walls First?
For a quick rule, paint cabinets first if you’re tackling a full kitchen—then do walls and finish with trim and touchups to catch any drips.
If your priority is fresh walls or a color change, paint walls first and protect the cabinets.
Either way, plan trim and final touchups last so edges look clean.
Paint Cabinets First
If you want the least mess and the cleanest lines, paint the cabinets first. You’ll protect walls from drips, achieve sharper edges, and control sheen for cabinet colors that pop.
Plan around hardware removal and curing time so doors won’t stick.
- Sand, prime, and wipe surfaces thoroughly.
- Remove hardware, label doors, and paint in a ventilated area.
- Use spray or brush techniques suited to your finish choice.
- Reinstall after proper drying to prevent smudges.
Painting cabinets first aligns with current design trends favoring bold cabinetry; it gives you precise control over the room’s focal points.
Paint Walls First
When you paint the walls first, you’ll cut down on touch-ups and make it easier to get even coverage without worrying about masking every cabinet edge.
You’ll set the room’s backdrop, so color selection feels intentional and lets you test lighting across surfaces.
Painting walls before cabinets simplifies workflow: you can roll large areas quickly, address problem spots, and let paint cure while planning cabinet finishes.
That order also highlights texture contrast between smooth cabinetry and painted drywall, helping you choose sheen and technique.
You’ll still protect floors and hardware, but starting with walls often saves time and reduces mistakes.
Trim And Touchups
After you’ve handled the walls, focus on trim and touchups to tie the room together—this is where you decide whether to finish cabinets first or paper over any remaining wall imperfections.
You’ll pick trim styles that complement cabinets, then use precise touchup techniques so edges look seamless.
Follow this quick checklist:
- Sand and prime trim before final paint to guarantee adhesion.
- Caulk gaps for a crisp junction between wall and trim.
- Use a small brush for cabinet edges, matching sheen and color.
- Inspect in daylight, spot-correct with feathering touchup techniques for invisible fixes.
Decision Criteria: When Order Matters (Space, Scope, Finish)
Think about the room size and your workflow: in a small kitchen you’ll want a clear plan so drying paint and moving tools don’t clash.
Consider the paint type and finish too, since high-gloss cabinet paint needs different prep and curing time than matte wall paint. Those two factors usually decide whether you tackle cabinets or walls first.
Room Size And Workflow
Because space shapes how you move and stage work, room size and workflow determine whether you should paint walls or cabinets first.
You’ll assess room layout and prioritize workflow efficiency to minimize trips, masking, and rework.
Consider these steps:
- Small kitchen: paint cabinets first to reduce drips near walls and keep pathways clear.
- Large open area: paint walls first since you can stage cabinets away from wet surfaces.
- Tight corners: stagger tasks to avoid wet edges and allow drying without blocking movement.
- Phased work: plan zones so painters don’t block access, keeping project time and disruption down.
Paint Type And Finish
Paint choice and finish directly affect whether you should paint walls or cabinets first, since different coatings dry, cure, and resist overspray differently.
You’ll pick finishes based on use: high-sheen, durable cabinet coatings dry faster and resist scuffs, so paint cabinets first if they handle more wear.
Matte or eggshell wall paints can tolerate light overspray and touch-ups, simplifying sequencing.
Consider paint durability for surfaces exposed to grease or traffic, and match color selection to lighting and trim.
Plan application order around curing times and sanding needs so one surface’s work won’t damage the other.
How Paint Type Affects the Painting Order
When choosing the order of walls versus cabinets, the type of paint you’re using matters because different formulations dry, cure, and handle overspray differently.
You’ll plan order around drying time, paint durability, and color compatibility to avoid mistakes. Consider:
- Water-based latex: fast dry, easier cleanup, paint on walls first if cabinets are already installed.
- Oil-based: longer cure, tougher finish—paint cabinets first to protect edges.
- Alkyd waterborne: blends traits—sequence depends on project timing.
- Specialty coatings: require manufacturer guidance; follow recommended sequencing.
Pick the order that minimizes touch-ups and respects manufacturer cure times.
Choosing Finish: Sheen and Practical Effects
If you want durable, easy-to-clean surfaces in high-traffic areas, go with a satin or semi-gloss; they resist scuffs and wipe clean without showing brush marks as much as high-gloss does.
When choosing finish, consider sheen options for walls versus cabinets: flat or eggshell hides imperfections on walls, while semi-gloss or gloss highlights cabinet details and holds up to frequent cleaning.
Think about practical effects—how light reflects, how stains show, and how touchable surfaces age.
Consider how light plays, stains reveal, and frequently touched surfaces will wear over time.
Match finish to function: pick lower sheen where you want softness, higher sheen where you need durability and easy maintenance.
Prep Checklist: Cabinets vs. Walls
Start by prepping cabinets first so you can remove doors, label hardware, and sand or clean surfaces without worrying about drips on freshly painted walls.
While the cabinets are off, tape and cover wall areas, outlets, and floors to protect them from dust and splatter.
That way you’ll keep wall finishes intact while you focus on detailed cabinet work.
Prep Cabinets First
Prep your cabinets before you tackle the walls so paint drips, sanding dust, and hardware removal don’t contaminate freshly finished surfaces.
You’ll work smarter if you prep cabinets first: clean, remove doors/drawers, label pieces, and assess cabinet materials so primers and paints adhere properly and support color coordination with your walls.
- Clean all surfaces with degreaser.
- Remove hardware, hinge screws, and magnetic catches.
- Sand lightly and spot-prime based on cabinet materials.
- Label doors/drawers for reassembly and test color swatches.
Doing this prevents cross-contamination and makes final installation seamless.
Protect Wall Surfaces
1. You’ll want solid wall protection before you paint cabinets to avoid drips, scuffs, and stray brush marks. Start by removing hardware and covering outlets, then tape edges where cabinets meet walls.
Use high-quality painter’s tape and overlap with plastic sheeting or drop cloths—this keeps dust and paint off finished walls during surface preparation. If walls are freshly painted, add foam protection to prevent abrasion.
Keep a damp cloth and small brush handy for quick touch-ups. Work methodically from top to bottom so you catch spills early and maintain clean lines between cabinet faces and wall surfaces.
Protect Surfaces: Masking and Drop‑Cloth Strategy
Before you open a can of paint, map out which surfaces need protection and pick appropriate masking tape and drop cloths so you don’t create extra work later.
You’ll use masking techniques and drop cloth options to prevent drips and dust. Prioritize high‑traffic areas and trim, then work outward. Consider material and durability when choosing covers.
- Use painter’s tape for clean edges.
- Choose canvas for reuse or plastic for cheap coverage.
- Secure edges with low‑tack tape to avoid damage.
- Fold and weight drop cloths to stop slipping.
Check seams and replace soiled covers as needed.
Painting Cabinets First: Tools and Technique
When you paint cabinets first, having the right tools—screwdrivers, sandpaper, primer, quality brushes or a mini roller, and a paint sprayer if you have one—makes the job smoother.
Start by removing hardware and doors, clean and sand surfaces, then prime, paint, and reattach once dry.
Follow a clear, step-by-step technique to keep edges sharp and finishes even.
Tools You’ll Need
You’ll want a compact but complete toolkit to tackle cabinets first: sandpaper and a power sander for prep, a deglosser or TSP for cleaning, quality brushes and foam rollers for smooth coverage, a high-quality spray gun if you plan to spray, painter’s tape and drop cloths to protect surrounding areas, and appropriate respirators and gloves to stay safe.
Use these tool recommendations to support common painting techniques and efficient work. Consider:
- Sanding and cleaning kit
- Brushes, rollers, and/or spray gun
- Protective gear and tape
- Hardware removal tools and storage trays
Keep tools organized and ready.
Step-By-Step Technique
Now that your tools are gathered and organized, set up a clear workspace and tackle cabinets in a systematic order: remove doors and hardware, label each piece, and lay doors flat on protected sawhorses or a work table.
Keep drawer fronts and hinges grouped in labeled trays so reassembly stays straightforward. Sand surfaces, clean residue, and apply primer evenly.
Between coats, respect manufacturer-recommended drying times and lightly sand for adhesion. Roll or brush thin, even coats; use a fine foam brush for crevices.
Test color selection with small panels before full application. Reattach hardware only after complete curing to avoid smudges.
Painting Walls First: Tools and Technique
Because painting walls first sets the room’s tone, gather the right tools—high-quality rollers, angled brushes, a sturdy pole, painter’s tape, drop cloths, and a good roller tray—before you begin; having them ready speeds the job and improves the finish.
Choose color selection and finish types up front so you match cabinets later. Prep by cleaning, patching, and sanding for adhesion.
Work top-down: cut edges, roll large areas, blend overlaps. Follow this compact checklist:
- Tape trim and protect floors.
- Cut ceilings and corners first.
- Roll walls in sections with a wet edge.
- Inspect and touch up before cabinet work.
Avoid Drips: Walls Next to Cabinets
If you paint the cabinets first, you’ll reduce the chance of drips running onto fresh wall paint.
Put painter’s tape and a thin foam shield along the cabinet edges to protect the walls while you work.
That way you can touch up any small drips on the cabinets without ruining the wall finish.
Paint Cabinets First
Start by painting the cabinets before the walls to prevent drips from ruining freshly finished paint on vertical surfaces.
You’ll find painting cabinets first helps control drips, lets you focus on cabinet colors, and improves paint durability with careful priming and topcoats.
Follow clear steps:
- Clean and sand cabinet surfaces thoroughly.
- Prime edges and hinges to boost paint durability.
- Apply thin, even coats and inspect for drips.
- Let cabinets fully cure before rolling adjacent walls.
Protect Wall Edges
1 simple precaution will save you lots of touch-ups: tape and shield the wall edges next to your cabinets before you roll. You’ll prevent drips and splatters that ruin clean cabinet lines.
Use painter’s tape along the cabinet-face junction, press it firmly for reliable edge sealing, and add a thin foam guard or cardboard to catch stray rollers.
For best wall protection, remove hardware and cover countertops so paint won’t lap onto surfaces.
Work in short sections, smooth the tape after painting, and pull it off while paint is tacky to avoid peeling. This saves time and keeps finishes crisp.
Avoid Drips: Cabinets Next to Walls
When you’re painting walls next to cabinets, work from the wall toward the cabinet edges so paint drips don’t run onto the cabinetry; hold the brush or roller at a slight angle and finish each stroke away from the cabinet face to control excess paint.
You’ll protect wall protection and respect cabinet alignment by prepping carefully. Follow these steps:
- Tape cabinet edges flush with painter’s tape to seal gaps.
- Lay thin plastic or paper over cabinet faces for spill defense.
- Use a slim brush for tight seams, loading minimally to avoid drips.
- Wipe any runs immediately with a damp cloth before they set.
When to Sand and Scuff in the Sequence
Because proper adhesion matters more than order alone, sand and scuff surfaces early—after cleaning and before any primer or paint goes on—so the finish will bite and lay smooth.
You’ll start with coarser grit to remove imperfections, then step down to finer grits for an even tooth; these sanding techniques prevent peeling and promote uniform coverage.
Use abrasive pads or fine-grit sandpaper for cabinet faces and light sanding blocks for walls.
Scuffing methods like Scotch-Brite pads work on glossy surfaces without damaging substrate.
Do this room-by-room as you prep, keeping dust controlled so subsequent coats adhere cleanly.
Scheduling Dry Time and Curing Between Coats
Although paint may feel dry to the touch within an hour, you should wait the manufacturer’s recommended recoat time—and often longer in high humidity or low temperatures—so each layer has time to cure enough to accept the next without trapping solvents or causing adhesion issues.
Use these tips to schedule drying and curing between coats:
- Track curing times on a calendar and note temperature/humidity.
- Use drying techniques like fans and dehumidifiers to shorten open time safely.
- Lightly sand only after recommended cure to promote adhesion.
- Allow extra cure for high-traffic surfaces before handling or reinstalling items.
Removing and Reinstalling Hardware: Timing Guide
If you want clean, professional results, remove cabinet and door hardware before priming and painting so you can coat edges and avoid drips on metal finishes.
Plan removal by labeling pieces and bagging screws so reinstalling matches original placement. Remove knobs, hinges, and catches after sanding and before priming; leave parts you’ll replace detached until final coat cures.
When reinstalling, wait until paint is dry to the touch and partially cured to avoid marring. Test installation techniques on one door to confirm alignment.
Consider hardware styles and whether new mounting holes or fillers are required before final fitting.
Small Kitchens and Tight Spaces: Best Order
When you’re working in a small kitchen or tight space, start by painting the largest fixed surfaces first—walls and ceiling—so you can move and mask cabinets, appliances, and trim without worrying about wet paint getting damaged.
This lets you focus on color coordination and space optimization while minimizing touch-ups.
- Clear countertops and protect floors to create workable zones.
- Paint ceiling, then walls to set the background tone.
- Mask cabinet faces and appliances; paint exposed trim next.
- Finish cabinet fronts last to avoid drips on fresh walls.
Work sequentially, keep tools compact, and you’ll save time and reduce mistakes.
Full Remodel Workflow: Walls and Cabinets
Moving from tight-space tactics to a full remodel, plan the walls and cabinets together so each step protects the other and keeps the schedule tight.
Start by locking finishes and a palette—use color psychology to set mood and coordinate cabinetry with wall tones.
Demo, rough trades, and drywall come first; prime walls while cabinet boxes are prepped offsite or masked.
Install cabinets after walls are finished when possible to avoid scuffs, but allow touch-up time.
Sequence lighting and hardware installation after paint cures.
Coordinate contractors around cure times and design trends to guarantee finishes look cohesive and last.
Common Mistakes That Force Rework (And Fixes)
A few predictable mistakes—mismatched schedules, poor surface prep, and unclear finish decisions—are what usually force costly rework on wall-and-cabinet projects.
You’ll avoid delays and extra coats if you recognize common pitfalls and apply effective strategies early.
- Skipping proper cleaning: grime hides adhesion problems; deep-clean and degrease first.
- Ignoring drying times: paint overlaps and tackiness ruin edges; wait recommended cure periods.
- Using wrong primers: adhesion fails between surfaces; pick primers matched to substrate.
- Poor masking and protection: paint splatter forces sanding and repainting; tape and cover thoroughly.
Plan, communicate, and follow product instructions.
Quick Checklist to Choose the Right Order
Mistakes that force rework are usually avoidable if you pick the right painting order up front. Use this checklist to decide: assess cabinet condition, consider color coordination with walls, estimate project timing, and confirm access and ventilation. Prioritize the surface that minimizes masking and touchups. If cabinets are stronger focal points, paint them first; if walls set the room tone, paint walls first. Communicate steps with helpers and schedule drying windows.
| Emotion | Decision | Action |
|---|---|---|
| Relief | Less rework | Paint priority set |
| Confidence | Clear plan | Stick to timing |
| Pride | Finished look | Enjoy results |
Frequently Asked Questions
Can I Paint Cabinet Interiors Separately From Exteriors?
Yes — you can paint cabinet interiors separately from exteriors. You’ll choose a complementary cabinet color and possibly a different paint finish for durability inside. Prep, prime, and mask carefully so edges stay clean and professional.
Will Wallpaper Affect the Paint Order Decision?
Coincidentally, if your wallpaper types are delicate you’ll want walls done first; if durable or removable, you can paint cabinets first. You’ll consider design considerations, seams, and pattern alignment so finishes don’t clash later.
Do HVAC or Ventilation Changes Impact Paint Drying Times?
Yes — ventilation effects and humidity levels matter: if you improve HVAC or boost airflow, paint dries faster and more evenly; if ventilation’s poor or humidity’s high, you’ll slow drying, tackiness, and possible finish problems, so plan accordingly.
Should I Prime New Drywall Before Cabinet Painting?
Yes — prime new drywall before cabinet painting. For example, a contractor sealed a kitchen’s drywall to avoid blotchy finish; drywall preparation and primer benefits guarantee uniform adhesion, prevent stains, and let your cabinet paint look smooth and durable.
How Do Pets or Children Change Preparation Steps?
You’ll add pet proofing strategies and child friendly techniques: secure vents, move pets/kids away, use low-VOC paints, lock supplies, tape off low areas, cover floors, create barriers, and schedule drying when nobody’s around.
Conclusion
Think of your room as a blank canvas and the cabinets as its frame: painting cabinets first lets you steady the edges, while painting walls first gives you a clean backdrop. Choose based on space, paint type, and how tidy you need the finish to be—small rooms favor cabinets first, full remodels usually put walls first. Whichever path you pick, follow the checklist so paint, sheen, and masking align, and your painted picture hangs true.