What Do I Need to Paint Walls? Tools & Materials
You’ll need paint (one quart–gallon depending on room), primer for dark colors or stains, two rollers with appropriate nap covers, a 2–3″ angled brush for trim, painter’s tape, drop cloths, a small tray, spackling or joint compound and putty knives for repairs, sandpaper, scrapers, PPE (goggles, mask, gloves), and a stable ladder. Add a sprayer for big jobs, plus cleaning supplies and labeled storage for leftovers — keep going and you’ll get tips on setup, techniques, and troubleshooting.
Quick Shopping Checklist for a Single-Room Paint Job
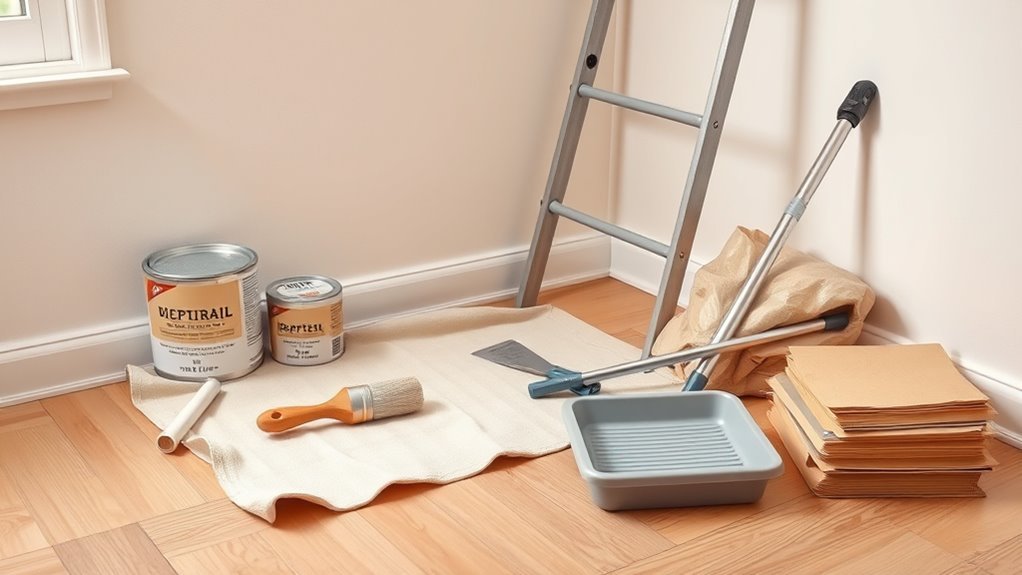
Start with a compact list of essentials so you don’t make extra trips: a quart or gallon of your chosen paint, primer (if covering dark colors or stains), two rollers with covers, a 2–3″ angled brush for trim, a small roller tray, painter’s tape, drop cloths, a putty knife and spackling for holes, sandpaper (120–220 grit), and basic cleaning supplies—rags and a mild degreaser.
You’ll also grab a sturdy ladder, a stir stick, extension pole, and disposable gloves.
Match tools to your paint color decision and check wall texture—smooth, orange peel, or popcorn—so you pick the right roller nap and prep methods.
What You’ll Accomplish Before You Start Painting
Before you open a can of paint, you’ll assess the walls for cracks, holes, and texture so you know what prep work is needed.
You’ll also gather the brushes, rollers, tape, and primer you’ll actually use.
Finally, you’ll protect floors and furniture with drop cloths and tape so nothing gets ruined.
Assess The Surface
Think of evaluating the surface as a quick inspection that tells you what prep work’s needed and how your paint will perform.
Walk the room, feel for roughness, bumps, cracks, peeling, or chalky residue. Test for dampness and mold, and note areas where previous coats flake—these affect surface condition and paint adhesion.
Push on trim and baseboards to check stability. Mark repairs: sanding, filling holes, scraping loose paint, and priming stained or porous spots.
Measuring the worst areas helps estimate time and materials later. A clear assessment prevents surprises and guarantees a smooth, lasting finish.
Gather Necessary Materials
Gather the right tools and supplies so you won’t pause mid-job—drop cloths, quality brushes and rollers, painter’s tape, a tray, sandpaper, patching compound, primer, your chosen paint, and any specialty items like a pole or angled brush for trim.
You’ll match paint types to wall finishes, plan surface preparation and repair techniques, and choose eco friendly options when possible. Organize tools for efficient workflow and note cleanup essentials before you begin.
Observe safety measures—ventilation, gloves, goggles. Prioritize what to buy, borrow, or rent so you start confident and finish efficiently.
- Inventory supplies
- Select paint type
- Prep checklist
- Safety kit
Protect Floors And Furniture
Covering floors and furniture prevents costly stains and keeps your work area tidy, so lay out drop cloths or plastic sheeting and secure edges with painter’s tape. You’ll protect baseboards, rugs, and upholstery—use weighted edges and tapes safe for surfaces. For furniture covering, drape plastic or cloth and move small pieces out; for floor protection, overlap sheets and create walk paths. Practice wall masking around trim and outlets to keep clean lines. This surface preparation saves cleanup time and prevents damage. Check adhesive compatibility, smooth wrinkles, and replace coverings if paint accumulates.
| Drop cloth | Tape rolls | Plastic sheeting |
|---|---|---|
| Weigh edges | Low-tack | Overlap seams |
| Move furniture | Mask trim | Replace when soiled |
Tools by Room and Surface (Walls, Bathrooms, Kitchens)
Each room and surface calls for a slightly different kit, so pick tools that match the job: standard walls need rollers and an angled brush. Bathrooms require moisture-resistant materials and mildew-fighting cleaners, and kitchens benefit from degreasing solutions and high-adhesion primers.
Assess wall surface types and wall texture considerations before buying nap sizes or scrapers. For bathrooms, prioritize bathroom moisture control, bathroom ventilation, and moisture resistant options. For kitchens, focus on kitchen durability, kitchen color schemes, degreasers, and wall paint compatibility with surfaces.
Consider wall surfaces and textures before choosing nap or scraper sizes; prioritize moisture-resistant options for bathrooms and degreasers and durable paints for kitchens.
Choose primers, brushes, rollers, and caulkers that suit each room’s demands.
- Rollers
- Angled brushes
- Primers
- Scrapers
Essential PPE for Wall Painting
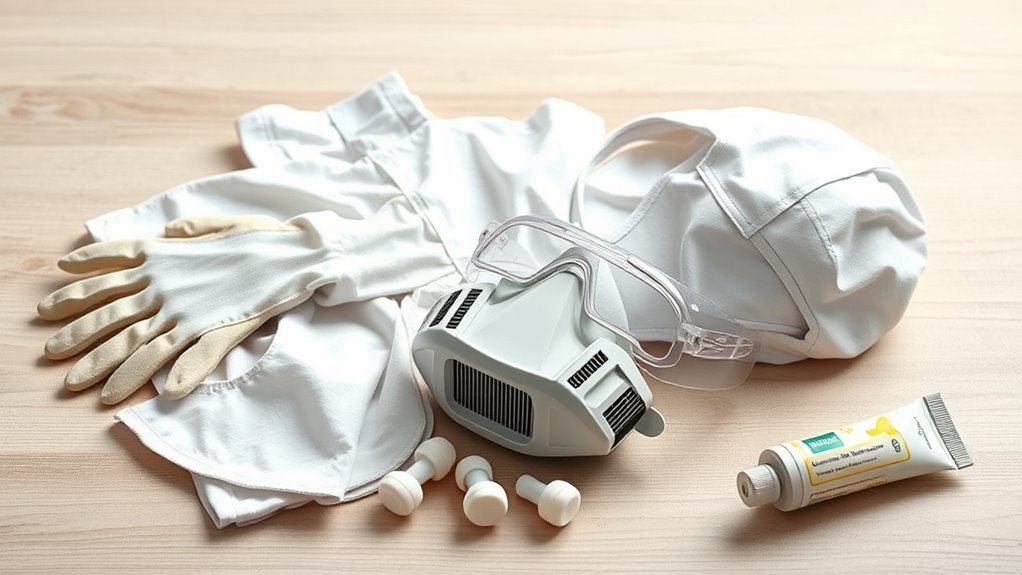
Before you start rolling or cutting in, think about protecting yourself: painting stirs up dust, fumes, and splatters that can irritate eyes, skin, and lungs.
Wear safety goggles to keep droplets and dust out of your eyes. Use dust masks or a respirator rated for paint fumes when sanding or using solvent-based products.
Put on protective gloves to shield your hands from chemicals and prolonged moisture exposure.
Don coveralls or old clothing that fully covers your arms and legs to avoid skin contact and make cleanup easier.
Choose PPE that fits well and replace disposable items when contaminated or damaged.
Safety for Working at Height and Ladders
When you work at height, make sure the ladder is on firm, level ground and locked before you climb.
Wear the right PPE—non-slip shoes, a hard hat if needed, and gloves—to protect yourself if you slip or bump into surfaces.
Climb facing the ladder, keep three points of contact, and don’t overreach while painting.
Secure Ladder Placement
Choose a stable, level spot and set your ladder so its feet sit firmly on solid ground; avoid soft soil, slippery surfaces, or clutter that can shift under load.
You’ll guarantee ladder stability and practice ladder safety by checking angle, securing the top, and removing nearby hazards. Follow these steps:
- Place ladder at a 4:1 angle (one foot out for every four feet up).
- Lock spreaders and inspect rungs for damage before climbing.
- Tie or hook the ladder top to a sturdy anchor to prevent lateral movement.
- Keep three points of contact and don’t overreach.
Proper Personal Protective Equipment
One essential step is to wear the right personal protective equipment so you stay safe while working at height and using ladders.
Choose PPE types for the job: safety goggles or face shields to guard eyes from splatter, respiratory masks when fumes are present, and hearing protection if tools are noisy.
Wear protective gloves and pick coveralls options that resist paint and protect skin protection.
Use non slip footwear to prevent falls.
Follow ventilation tips to reduce inhalation risk.
Inspect gear before use, fit masks properly, and replace damaged items so you stay protected throughout the job.
Safe Climbing Techniques
After gearing up with proper PPE, you’ll need to focus on safe climbing techniques for working at height and using ladders.
Inspect your climbing gear and perform a quick ladder inspection before mounting. Practice balance techniques and maintain height awareness to anticipate shifts. Strengthen grip strength for steady holds and use proper body positioning to keep your center over the ladder.
- Check ladder condition, locks, and footing for ladder safety.
- Wear appropriate climbing gear and non-slip shoes.
- Use three points of contact, avoid overreaching, and move the ladder as needed.
- Plan tasks to minimize time aloft for fall prevention.
Brushes to Buy for Wall Painting (Types & Uses)
A few well-chosen brushes will make painting walls faster and give you a smoother finish, so pick tools that match your paint type and the surfaces you’ll tackle.
Choose synthetic bristles for latex and natural fibers for oil-based paints. Use angled brushes for cutting in along edges and flat brushes for filling small flat areas.
Keep detail brushes for corners and trim brushes for baseboards and door frames. Wide brushes speed coverage on larger sections, while smaller sizes give control.
You can pair brushes with foam rollers for consistent texture, but don’t rely on rollers for precise edging.
Choosing Rollers and Nap Lengths

When you pick a roller, match the nap length to the wall texture—short naps (1/4″–3/8″) for smooth surfaces, medium naps (1/2″–3/4″) for lightly textured walls, and long naps (1″–1½”) for rough or popcorn finishes—so you get even coverage without excess splatter.
Choose roller types that suit your paint: synthetic for latex, natural for oil. Use a lint-free sleeve and a quality frame. Load evenly, roll in a W pattern, then fill.
Choose the right roller: synthetic for latex, natural for oil. Use a lint-free sleeve, quality frame, and load evenly in a W pattern.
- Short naps: smooth, minimal texture
- Medium naps: standard walls, good balance
- Long naps: heavy texture, deep coverage
- Care: clean, store properly
Rollers vs Paint Sprayers : When to Upgrade
If you’ve got the hang of choosing the right roller and nap, you might wonder whether it’s worth switching to a paint sprayer for bigger jobs.
You’ll weigh rollers advantages like low cost, easy cleanup differences, and predictable finish quality against sprayers disadvantages such as overspray, complex cleanup, and higher user skill requirements.
Consider efficiency comparison and application speed: sprayers beat rollers on large project size but need masking and practice.
Think cost considerations and versatility aspects—sprayers handle trim and textured surfaces if you invest more, while rollers stay economical for small rooms.
Choose based on scope, budget, and comfort.
Primer Types and When to Prime Walls
Because primer creates the base coat that paint bonds to, you’ll want to pick the right type for the surface and problem you’re solving; choose based on primer benefits and primer compatibility.
Choose a primer that suits the surface and issue—match type to benefits and compatibility for proper paint bonding.
Consider primer applications, primer coverage, and primer durability to prevent stains, hide imperfections, or seal new drywall.
Match primer selection to material—oil-based for tannin bleed, shellac for strong stains, latex for general use.
Use proper primer techniques: thin coats, sanding between, and correct drying times.
Think about primer finishes only as they affect topcoat behavior.
- Assess surface
- Test adhesion
- Apply thin coats
- Sand for smoothness
Choosing Wall Paint Finishes (Flat to Gloss)
Pick the right sheen for each room by balancing appearance, durability, and maintenance needs.
You’ll choose flat finishes for low-traffic areas where hiding imperfections matters, while satin sheen or eggshell finish work well in living spaces for subtle light reflection and easy cleaning.
Use gloss finishes on trim and high-touch spots for maximum durability factors and crisp lines.
Consider color impact: shinier sheens intensify hues and reveal texture.
Match application techniques—rollers for flat, smooth strokes for gloss—to finish choice.
Prioritize aesthetic appeal alongside maintenance needs to get the look and longevity you want.
Paint Types: Latex, Oil, and Specialty Options
When you’re choosing paint, the base—latex, oil, or a specialty formulation—determines how it looks, how it performs, and how you’ll apply and maintain it.
You’ll weigh latex paint benefits like easy cleanup and lower environmental impact considerations against oil paint durability and richer finishes.
Specialty finishes options—metallic, textured, enamel—serve accents or high-traffic needs.
Consider color selection strategies, finish sheen differences, paint drying times, application techniques comparison, mixing paint ratios for tints, and cost effectiveness analysis before buying.
- Latex: quick drying, low VOCs, easy tools.
- Oil: durable, longer cure, tougher cleanup.
- Specialty: decorative, specific use.
- Prep: key for adhesion.
Calculating Paint Coverage and How Much to Buy
Start by measuring the room’s walls and subtracting areas for windows and doors so you know the exact square footage to cover. Use a paint calculator or coverage estimator with your wall dimensions and note surface conditions—porous walls need more paint. Consider paint sheen and color selection; darker or high-sheen finishes may require extra coats. Check paint brands for stated coverage per gallon and follow mixing ratios if tinting. Buy enough for primer plus two coats, adding 10–15% for touch-ups.
| Item | Tip |
|---|---|
| Wall dimensions | Measure precisely |
| Coverage | Check label |
| Sheen | Affects coats |
| Surface | Adjust amount |
Tools for Cutting In Edges and Corners
Cutting in cleanly depends on the right tools: a high-quality angled sash brush for precise edgework, a trim brush for narrow corners, and a steady-edged edger or painter’s tape when you need extra protection.
You’ll want cutting tools that include angle brushes and corner brushes for tight joins, precision applicators for smooth lines, and edge guides to keep paint off trim.
Blade scrapers remove drips and old paint before you cut in. Choose brushes with firm bristles and comfortable handles so you control strokes.
Maintain tools cleanly for consistent results.
- Angle brushes
- Trim brushes
- Corner brushes
- Edge guides
Best Painter’s Tapes and Where to Use Them
Because clean lines depend as much on tape choice as on steady hands, pick a painter’s tape matched to the surface and paint type.
You’ll choose among painters tape types: delicate-paper for freshly painted or wallpapered surfaces, general-purpose for trim and baseboards, and high-adhesion for rough or exterior surfaces.
Use proper tape application techniques: press edges firmly, overlap slightly at corners, and remove tape at a 45° angle while paint is tacky to avoid peeling.
For textured walls, use a flexible tape that conforms.
Test a small area first so you don’t damage finishes or leave residue.
Drop Cloths, Sheeting, and Floor Protection Options
You’ll want sturdy canvas drop cloths for heavy-duty protection and a few sizes so you can cover floors and furniture without gaps.
For quick, lightweight coverage or to protect walls and trim during messy jobs, use plastic sheeting and secure it with painter’s tape or clips.
Combine both materials where needed—canvas under high-traffic areas and plastic for vertical surfaces—to keep paint off everything you want to keep clean.
Canvas Drop Cloth Options
When you’re prepping a room for painting, choosing the right canvas drop cloths, plastic sheeting, or floor protection can make cleanup easier and prevent costly stains.
Canvas cloths are durable, reusable, and absorbent, while plastic sheeting and paper options offer lightweight, disposable coverage for quick jobs.
Choose canvas types by drop cloth thickness and absorbency levels to match the job. Consider reusable options and eco-friendly materials if you want longevity and lower waste.
Balance durability factors with budget choices and size considerations so you cover floors and furniture without excess. Care for cloths to extend life and performance.
- Inspect seams
- Match thickness
- Wash and dry
- Store flat
Plastic Sheeting Techniques
Plastic sheeting gives you quick, inexpensive coverage for walls, floors, and furniture during painting projects. You’ll choose thickness: 1–2 mil for light dust, 4–6 mil for heavy-duty protection.
Tape edges with painter’s tape, overlap seams by a few inches, and weight floor edges with rosin paper or tack strips to prevent slipping. For furniture, loosely drape and secure corners to allow ventilation.
During plastic sheet application, avoid trapping sharp objects under the film. When painting’s done, do a careful plastic sheet removal to contain debris and paint drips; fold inward, roll gently, and dispose or recycle per local rules.
Surface Prep Tools: Scrapers, Sandpaper, Sanding Blocks
A clean, smooth surface makes paint stick and look its best, so start by removing loose paint, dust, and imperfections with the right tools: scrapers for old or peeling coatings, sandpaper to dull glossy finishes and feather edges, and sanding blocks to keep surfaces even.
You’ll choose scraper types for paint thickness and substrate, apply sanding techniques from coarse to fine, and match abrasives to surface finishes. Keep tools sharp and clean — tool maintenance preserves performance.
Work systematically, wear a mask, and finish with tack cloths.
- Select blade and handle ergonomics
- Progress grits logically
- Use flat sanding blocks
- Clean and store tools
Patching Supplies: Spackling, Joint Compound, Putty Knives
You’ll want to pick the right compound—spackling for small holes and lightweight repairs, joint compound for larger patches and seams.
Use a range of putty knife sizes so you can smooth tight spots and feather edges easily.
Before you apply, clean and slightly sand the area, then follow thin, even layers and allow full drying between coats.
Choosing The Right Compound
When prepping walls, choosing the right patching compound can save you time and give a flawless finish—so know which product fits the job.
You’ll weigh compound types and application techniques: spackling for small holes, lightweight joint compound for skim coats, all-purpose for mixed repairs, and fast-setting for urgent jobs.
Match compound to wall material and dry time, and sand between coats for smoothness. Use the correct amount and don’t overwork the patch. Test a small area if unsure.
Choose quality for less cracking and easier sanding.
- Spackling
- Lightweight joint compound
- All-purpose compound
- Fast-setting compound
Proper Putty Knife Sizes
For most patching jobs, pick putty knives by blade width and flexibility so you use the right tool for the job: narrow knives (1–2 inches) handle small spackling and tight spots, medium blades (3–4 inches) work for typical drywall repairs and smoothing joint compound, and wide knives (6–12 inches) are best for skim coats and feathering edges.
Stiff blades are good for scraping and heavy compound, while flexible blades give a smoother finish on thin applications.
Match putty knife types to task: rigid for removal, flexible for finishing.
Consider putty knife materials—stainless steel resists rust, carbon steel stays stiffer; handles affect control.
Prep And Application Tips
Start by gathering the right spackling, joint compound, and putty knives so you can work efficiently and avoid redoing patches.
You’ll inspect holes, remove loose debris, and choose material based on size: spackling for small dents, joint compound for larger repairs.
Use proper putty knife widths and keep edges clean for smooth feathering.
Follow drying times, sand lightly, and wipe dust before priming.
These prep techniques and application strategies will make paint adhere and reduce visible seams.
- Clean and enlarge edges for adhesion
- Apply thin layers, build as needed
- Sand between coats, remove dust
- Prime before painting
Repairing Drywall and Fixing Holes
Patch the hole, smooth the surface, and your paint will look professional instead of amateurish.
You’ll tackle drywall patching by cleaning edges, applying a patch or mesh, and spreading joint compound in thin layers. Sand between coats until seams disappear.
For small nail or screw holes, use spackling; for larger damage, cut a square, insert a backing, and secure a replacement piece.
Keep a drywall knife, sanding block, and primer handy.
After hole repair, prime bare spots to seal porous compound and guarantee even sheen.
Take your time—proper prep prevents visible flaws after painting.
Mold, Mildew, and Stain-Blocking Products
Before you paint, you’ll want to tell mold and mildew apart — mold often looks fuzzy or dark and can smell musty, while mildew is usually powdery and lighter.
Treat any growth with a proper cleaner and let the surface dry completely.
Then use a stain-blocking primer to seal stains and prevent bleed-through so your finish stays clean.
Identifying Mold Vs. Mildew
Wondering whether that dark spot on your wall is mold or mildew? You’ll want quick identification tips to decide on surface treatment and removal techniques.
Note mold characteristics: fuzzy, darker, and deeper staining; mildew growth appears powdery, white or gray.
Consider health risks—mold can worsen allergies and needs prompt action. Use prevention methods like fixing leaks and improving ventilation.
Check paint compatibility before repainting; some paints resist regrowth better.
Follow safe removal techniques: isolate area, scrub with cleaner, dry thoroughly.
If growth persists, consult a pro to assess extent and recommend proper remediation.
Choosing Stain-Blocking Primer
Which primer should you pick when stains, mold, or mildew are a concern? You’ll want a stain-blocking primer labeled for mold and mildew resistance.
Assess stain types—water, smoke, tannin, or rust—then choose a primer formulated for those specific issues. Oil-based and shellac primers block severe stains best; water-based acrylics work for milder discoloration and are easier to clean.
Primer benefits include sealing porous surfaces, preventing bleed-through, and creating a uniform base for paint adhesion.
Apply per instructions: clean and dry surfaces, treat active mold, spot-prime stubborn areas, then coat the whole wall for consistent protection.
Caulks and Sealants: What to Buy and How to Apply
When you’re sealing gaps around trim, windows, or baseboards, choosing the right caulk makes the job last and look professional. You’ll learn caulk types and select based on paint compatibility and moisture resistance.
Do surface preparation: clean, dry, and remove old sealant for best adhesive qualities. Apply steady sealant application with a caulking gun, smooth with a damp tool, and follow caulking techniques for neat beads. Maintain joints: inspect and replace per caulk maintenance guidance.
- Silicone — best moisture resistance
- Acrylic latex — paint compatibility
- Hybrid — strong adhesive qualities
- Butyl — flexible sealant application
Mixing, Straining, and Thinning Supplies
Before you start painting, you’ll want the right stirring and mixing tools so pigments and additives are evenly blended.
Use strainers to catch lumps and debris, and keep thinners on hand to adjust viscosity for your application.
With those supplies ready, your paint will go on smoother and finish more consistent.
Stirring And Mixing Tools
Even if your paint looks uniform in the can, proper stirring, straining, and thinning will guarantee consistent color, texture, and flow on the wall.
You’ll use basic stirring techniques and respect mixing ratios to avoid streaks or poor adhesion. Choose a sturdy paddle or drill mixer for large volumes, and a long-handled stick for touch-ups.
Work slowly, scraping the can sides and bottom to reincorporate pigments and binders. Check viscosity before you pour. Clean tools immediately to prevent buildup.
Recommended tools:
- Drill-mounted paint mixer
- Wooden stirring stick
- Deep-mix paddle
- Graduated measuring cup
Strainers And Thinners
If you want smooth, clog-free application, use strainers and the right thinners to remove lumps and adjust viscosity for your tool. You’ll want quality paint strainers for buckets and a few graded filters for sprayers.
Follow mixing techniques: stir thoroughly, screen before loading, and test consistency. Use recommended thinning ratios from product labels—don’t guess—matching application methods (brush, roller, sprayer).
Consider drying times when thinning; faster solvents speed cure but may alter finish. Review product recommendations for brand compatibility and ventilation needs.
Observe safety precautions: gloves, mask, proper disposal, and work outdoors or with fresh air.
Paint Trays, Liners, and Tray Alternatives
While a roller tray seems simple, choosing the right tray, liner, or alternative will save you time and reduce cleanup hassles.
You’ll pick between reusable trays, disposable liners, and creative tray alternatives depending on project size and paint type. Consider capacity, stability, and how often you’ll paint.
- Plastic reusable tray: durable, easy to rinse for multiple jobs.
- Disposable liners: fast swap-out, minimizes solvent use for cleanup.
- Cardboard or paper pans: cheap single-use for small jobs or trims.
- Bucket grid or pour-can lid: space-saving alternative for rolling directly from a can.
Extension Poles vs Ladders for High Walls
When you’re tackling high walls, choose between extension poles and ladders based on safety and stability first.
Think about reach and efficiency—poles keep you on the ground while ladders give closer access but require caution.
Also consider surface access quality, since poles can miss tight spots that a ladder lets you address directly.
Safety And Stability
Because tackling high walls changes the risks and reach required, choosing between extension poles and ladders comes down to safety, stability, and the specific job.
You should follow safety protocols, perform a risk assessment, and check equipment stability before starting. Maintain tool maintenance routines, inspect surface integrity, and set up protective barriers.
Know emergency procedures and ladder safety basics if you use steps.
- Inspect ladder feet, locks, and rails for stability.
- Check pole joints, grips, and paint trays for wear.
- Secure drop cloths and barriers to protect floor and bystanders.
- Plan escape routes and review emergency procedures.
Reach And Efficiency
One key factor in deciding between extension poles and ladders is how they affect your reach and overall efficiency on high walls.
You’ll weigh paint elevation needs: poles let you maintain consistent brush technique and steady paint application without climbing, improving wall coverage and reducing fatigue when using ergonomic tools.
Ladders give access for detailed color selection work but demand strict ladder safety and mindful workspace organization to avoid trips.
Plan efficient prep so tool storage is close and accessible, switching quickly between roller, brush, and tray.
Choose the method that balances speed, precision, and safe, organized workflow.
Surface Access Quality
Although poles and ladders both let you reach high walls, they give you very different surface access quality: you’ll choose based on safety, reach, and the finish you want.
Poles keep you grounded and steady for long runs, aiding surface preparation techniques like sanding and caulking.
Ladders let you work closer to detail, which helps with wall texture considerations and careful cutting in.
Consider mobility, control, and fatigue when deciding.
Use the right head and extension length for poles, or a stable ladder with a platform for paint drums.
Balance convenience with precision and safety.
- Reach control
- Stability
- Finish precision
- Safety
Lighting and Inspection Tools to Spot Flaws
When you inspect walls, proper lighting makes hidden flaws obvious and saves you time on fixes later. You’ll use lighting techniques and inspection methods to improve flaw detection and surface evaluation. Pick varied light sources—work lights, flashlights, and handheld lamps—and inspection tools like magnifiers or laser levels. Move light at low angles to reveal bumps, dents, and poor fill. Record locations to prioritize sanding and patching. Use consistent inspection methods before priming and between coats to catch adhesion issues early.
| Tool | Best Use | Tip |
|---|---|---|
| Work light | Broad wash | Diffuse to avoid glare |
| Flashlight | Low-angle raking | Walk slowly |
| Magnifier | Small defects | Inspect up close |
| Laser level | Flatness check | Combine with straightedge |
Organizing and Storing Paint During Multi-Day Jobs
If your paint job spans several days, set up a simple system to keep cans, rollers, and touched-up mixes organized and ready. You’ll want clear labeling, sealed containers, and a dedicated staging area that protects floors and keeps colors sorted.
Use airtight lids and plastic wrap over roller trays to prevent skinning. For multi day organization, store partially used cans on a level shelf, grouped by room and sheen.
Consider paint storage solutions like portable caddies or shelving bins so tools travel with cans.
- Label cans with room, date, and mix notes
- Seal lids; cover trays
- Use caddies for tools
- Shelf by room and sheen
Clean-Up Essentials: Solvents, Soap, and Waste Disposal
Because cleanup keeps your tools working and your workspace safe, know which solvents and soaps to use and how to dispose of waste properly.
You’ll choose water for latex paints and mineral spirits or paint thinner for oil-based products; follow label guidance and ventilate when using stronger cleaning solvents.
Use mild dish soap and warm water for general cleaning, and nitrile gloves to protect your skin.
Contain rags and used solvent in sealed metal cans to prevent unexpected combustion.
Don’t pour solvents or paint down drains — follow local hazardous waste disposal rules or take leftovers to a household waste facility for proper waste disposal.
Cleaning and Storing Brushes, Rollers, and Sprayers
Clean your brushes, rollers, and sprayers immediately after use to prevent paint from hardening and ruining the tools.
Rinse with the appropriate solvent or soap until the water runs clear, then reshape bristles and spin or shake out excess moisture.
Let everything dry fully in a well-ventilated area before storing in a dry, protected place to maintain their shape and performance.
Clean Immediately After Use
Wash tools right after you finish painting to keep them in good shape and ready for the next job.
Use appropriate cleaning supplies and paint solvents, follow safety precautions, and protect surfaces while you work.
Rinse brushes and rollers until water runs clear, removing excess paint for brush maintenance and roller care.
Dispose of solvent waste properly and follow local waste disposal rules.
Organize tools as you clean for easier access later and choose storage solutions that prevent damage.
- Use correct cleaning supplies.
- Handle paint solvents safely.
- Employ basic drying techniques.
- Maintain tool organization.
Proper Drying And Storage
Once you’ve rinsed away paint and removed excess product, you’ll want to dry and store your brushes, rollers, and sprayers properly to keep them performing well.
Shake or spin rollers to remove water, blot brushes with a clean cloth, and air-dry items flat or hanging to maintain shape. Use simple drying techniques like fan-assisted airflow for faster results, but avoid heat that can warp bristles or seals.
For storage solutions, wrap brushes in paper or use protective caps, keep rollers in plastic sleeves, and store sprayer parts disassembled and lubricated in labeled containers.
Regular care saves time and money.
Reusing Leftover Paint Safely and Labeling Tips
Keep leftover paint usable and safe by sealing cans tightly, storing them upright in a cool, dry place, and labeling each with the room, color mix (including any tints or brands), and the date you opened it.
Seal cans tightly, store upright in a cool dry spot, and label with room, color mix, brand, and open date.
You’ll extend paint lifespan and handle paint safety better if you note paint types (latex, oil) and any solvents used.
Before reuse, stir and inspect for mold, separation, or odd odor; discard if compromised. When sharing or donating, include that label info.
- Record room, brand, and tint.
- Note open date.
- Store upright, away from heat.
- Check before reuse.
Cost Breakdown: Budget Buys vs Upgrade Tools
You’ll want to balance cost and performance when choosing tools, so we’ll look at budget-friendly essentials, midrange value picks, and premium upgrade tools.
Start with the basics that get the job done without breaking the bank, then consider midrange options that save time and improve finish.
If you paint often or want pro results, upgrade tools can be worth the investment.
Budget-Friendly Essentials
Although you can tackle a paint job on a shoestring, spending a bit more on a few upgrade tools often saves time and reduces frustration.
You can still stick to budget paint and pick up good rollers or trays at a thrift store, but prioritize tools that improve quality.
Buy a decent angled brush, a sturdy roller frame, quality painter’s tape, and a plastic drop cloth.
Replace disposable items as needed; inexpensive false economy costs time.
Balance savings with longevity so your results look professional without blowing the budget.
- Angled brush
- Roller frame
- Painter’s tape
- Drop cloth
Midrange Value Picks
A few smart upgrades—like a better roller cover, a higher-quality angled brush, and a reusable tray—give you noticeably smoother results without the price of pro-grade gear.
For midrange brush options look for tapered synthetic filaments that hold paint and maintain shape. Invest in quality roller covers and user-friendly paint trays to speed application.
Consider affordable paint sprayers for quick coverage, and pick versatile tool kits that include essential sanding tools and durable caulking options.
Choose efficient ladder choices and reliable drop cloths for safety and cleanliness. Top off with effective wall primers to improve adhesion and finish.
Premium Upgrade Tools
When you’re weighing premium upgrade tools, think regarding where extra cost actually buys better performance—longer-lasting brushes, pro-grade sprayers, sturdier ladders, and precision sanders—versus budget buys that get the job done but wear out faster.
You’ll choose premium brush options and high quality rollers for smoother coverage, and advanced sprayer features when speed matters. Specialty paint types and premium paint brands pair best with efficient mixing tools.
Pick ergonomic tool designs and durable ladder options for safety and comfort. Invest in professional grade drop cloths and heavy duty painter’s tape when protection and crisp lines justify the upgrade.
- Brushes
- Rollers
- Sprayers
- Accessories
Eco-Friendly and Low-VOC Product Options
Because you’re choosing paints for indoor spaces, pick low-VOC or zero-VOC formulas to reduce odors and improve air quality; these water-based options release far fewer harmful chemicals than traditional solvent-based paints.
Look for certified eco friendly paints with clear VOC ratings and third-party labels. Choose low VOC options for primers and sealers too, so undercoats don’t negate your effort.
You’ll want mildew-resistant, washable finishes for kitchens and bathrooms; check ingredient lists for heavy metals or formaldehyde.
Buy small sample cans to test color and performance. Proper ventilation and timed curing help maintain indoor air quality while you paint.
Common Mistakes That Need Extra Tools to Fix
If you slip up on prep or application, you’ll often need more than a brush to fix it—things like drips, roller marks, flashing, or poorly feathered edges usually require specialty tools and corrective steps to correct.
You’ll also face issues from inadequate surface prep, lack of primer, mismatched colors, incorrect brushwork, or poor tape application. Insufficient ventilation or improper ladder use creates safety and drying problems, while unprotected furniture and neglecting clean up make restoration harder.
Equip yourself for fixes: sanding, scraping, specialty rollers, and touch-up brushes; plus cleaners, respirators, color-matching tools, and drop cloth clamps.
- Sandpaper and block
- Paint scraper
- Color-matching kit
- Respirator and ventilator tools
Pro Tips for Arranging Tools for Efficient Workflow
Set up your workspace so everything you need is within reach and organized by task: cleaning and prep, cutting in, rolling, and touch-ups.
You’ll group tools for tool organization—drop cloths, cleaners, trays, brushes, rollers, and touch-up kits—so tool accessibility is instant.
Plan a workspace layout that supports efficient workflow: zones for dirty/clean, staged paint, and waste.
Use task prioritization to sequence prep, paint, and finish, reducing backtracking.
Apply workflow optimization by keeping spare rollers and a labeled caddy.
That process streamlining saves time, improves time management, and helps you finish rooms faster with fewer interruptions.
When to Call a Pro Instead of DIY
Once you’ve organized tools and optimized your workflow, you’ll know which painting tasks you can handle quickly and where you might hit snags that cost time or risk poor results.
You should weigh DIY limitations against hiring professional painters when project complexity, wall conditions, or safety risks escalate. Do a frank skill assessment and factor time considerations and budget constraints before deciding.
Consider these triggers:
- Extensive drywall repair, mold, or uneven wall conditions.
- High ceilings, scaffolding, or hazardous materials needing safety measures.
- Tight deadlines where DIY would overrun time considerations.
- Complex finishes or scope beyond your skill assessment.
Final Quick Checklist and Next Steps
1 final sweep will save you time and headaches—confirm your supplies, inspect surfaces, and review safety measures before you paint.
Check paint quantity, brushes, rollers, trays, tape, drop cloths, patching compound, and sandpaper. Test your primer and color on a small area.
Confirm paint amount, brushes, rollers, trays, tape, drop cloths, patching compound, and sandpaper—plus test primer and color first.
Set up ventilation, secure ladders, and wear masks and gloves. Outline a realistic project timeline with prep, drying, and cleanup windows.
Keep cleanup supplies handy and a trash bag for debris. Take before photos, label leftover paint, and store tools properly.
These final tips help you start confidently and finish efficiently.
Frequently Asked Questions
Can I Paint Plaster Walls That Are Still Curing?
You shouldn’t paint plaster walls that are still curing; you’ll trap moisture and ruin the finish. Wait until plaster curing completes, do thorough wall preparation, then prime and paint for durable, even results.
How to Transport Paint Cans Safely in a Car?
You strap paint cans upright, seal lids tightly, and place them in a sturdy box or on a non-slip mat; use towels to cushion, secure with seatbelts, avoid heat, and drive gently to preserve car safety.
Are Any Tools Banned on Airplanes for Moving Between Homes?
Yes — you can’t carry certain tools in carry-on luggage: airplane regulations list prohibited items like box cutters, large screwdrivers, hammers, and some paint-related tools; check airline and TSA rules, and pack them in checked baggage securely.
Can Pets Be Kept in the House While Painting?
Yes, you can keep pets inside while painting, but prioritize pet safety: use low-VOC paint, limit exposure, employ ventilation tips, keep pets out of work areas, guarantee surface protection, and monitor for respiratory signs or stress.
How Long Before Hanging Artwork After Painting?
You’ll want to wait 24–48 hours for paint to fully cure, and coincidentally that gives you time to plan hanging tips and artwork placement; use proper anchors, measure heights, and step back to adjust before drilling.
Conclusion
You’ve got the basics, the safety gear, and a plan — now it’s time to start. Envision this: you tape, sand, and prime a tired bedroom over a weekend, using just a roller, angled brush, drop cloth, and respirator; by Sunday evening the room’s refreshed and the trim’s neat because you followed the checklist. If a stubborn stain or tricky ceiling shows up, you’ll already know when to pause and call a pro.