
What Grit for Sanding Walls Before Painting? Guide
You should start with 80–100 grit to remove heavy defects or old paint, then move to 120–150 grit to smooth scratches and blend edges, and finish with 180–220 grit for a paint-ready surface. Use a sanding block on flats, a detail sponge in corners, and an orbital sander for large areas; keep motion even, change paper when clogged, and wipe dust between passes. Keep going to learn tips for joint compound and feathering edges.
Quick Grit Sequence for Prepping Walls
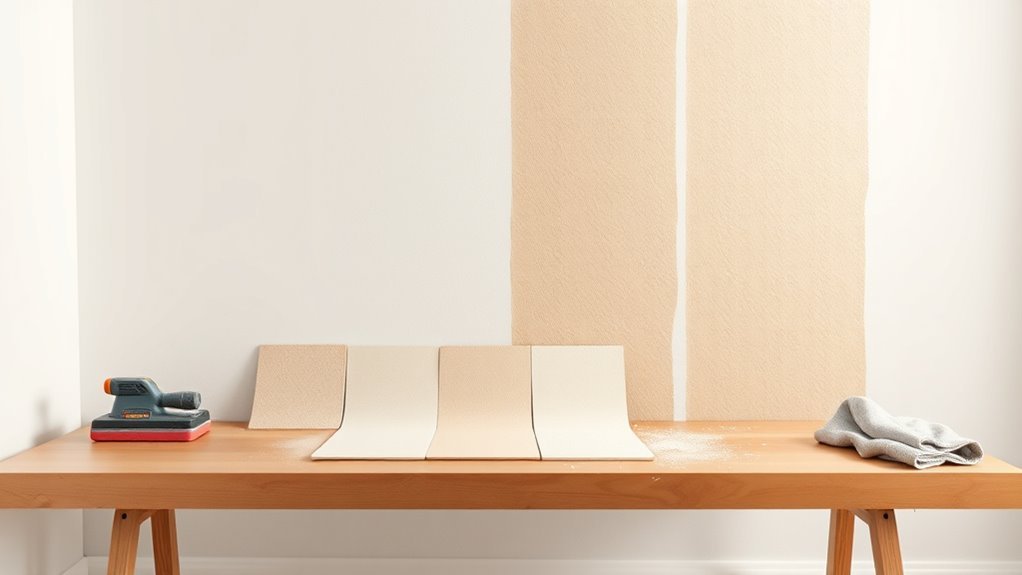
Start with a coarse grit and work toward fine: begin with 80–100 grit to remove imperfections and old paint buildup, follow with 120–150 grit to smooth scratches and feather edges, then finish with 180–220 grit for a paint-ready surface.
You’ll choose sanding techniques to match the damage: use a sanding block for flats, a detail sponge for corners, and orbital sanders for large areas.
Your grit selection depends on surface condition and desired finish; test a small patch first.
Pick grit based on the surface and finish you want — always test a small patch first.
Keep motion even, change paper when clogged, and wipe dust between passes so primer and paint adhere properly.
Grit Ranges Explained: Coarse, Medium, Fine
When you pick sandpaper, think in three clear bands: coarse (40–100 grit) removes material fast and tackles heavy flaws.
Medium (120–150 grit) evens surfaces and blends repairs.
Fine (180–220+ grit) refines the finish for priming or painting.
You’ll choose coarse grit for gouges or thick texture, then switch to medium grit to smooth joints and blend patches using proper sanding techniques.
Finish with fine grit to minimize scratches that harm paint adhesion.
Match grit numbers to task, use the right sanding tools, and avoid common sanding mistakes for effective surface preparation and consistent results.
What Grit Gives a Smooth Wall Finish Before Painting?
After you’ve used coarse grit to remove major defects and medium grit to blend joints and patches, you’ll finish sanding with a fine grit to get a smooth wall ready for paint.
Choose 180–220 grit for painted drywall and 220–320 for a silkier finish on primed surfaces. Use light pressure and long, even strokes so your sanding techniques don’t create swirl marks.
Check surface texture by running your hand and correcting low spots with targeted sanding. Wipe dust frequently, re-evaluate under good light, and stop when the wall feels uniformly smooth and ready for primer or paint.
What Grit for Sanding Joint Compound?
Before you start sanding joint compound, make sure the area is dry, secure, and free of dust so you’re working on a stable surface.
Pick the right sandpaper—start with 120–150 grit for shaping, then move to 180–220 grit for smoothing toward a paint-ready finish.
Finish by wiping or vacuuming the dust and checking for low spots before priming or painting.
Preparing The Surface
If you’ve just finished applying joint compound, you’ll want to sand it with the right grit to get a smooth, paint-ready surface without gouging the drywall.
You should inspect for surface imperfections, let the compound fully dry, and choose sanding techniques that minimize dust and prevent over-sanding. Work light, test an inconspicuous spot, and keep edges feathered.
- Confirm compound is completely dry before sanding
- Use a sanding block for even pressure
- Start with gentle strokes to find low spots
- Clean dust frequently to reveal flaws
- Feather seams to blend with surrounding drywall
Choosing Sandpaper Grit
Now that your compound is dry and feathered, pick the right sandpaper grit to match how much material you need to remove and the finish you want.
You’ll learn grit types: coarse for heavy removal, medium for shaping, fine for smoothing.
Consider grit selection with grit compatibility—use progressive steps to avoid sanding errors and scratch marks on varied surface textures.
Adjust sanding pressure and choose sanding techniques (circular or straight) for consistent results.
Factor sandpaper durability for abrasive life and grit applications for joint compound versus plaster.
Always prioritize sanding safety: dust control, eye protection, and proper ventilation.
Finishing And Cleanup
When you’re ready to finish sanding joint compound, choose fine-grit papers (120–220) to remove tool marks and blend edges without gouging the surface. Work progressively from coarser to finer grits to prevent visible scratches.
Use light pressure, keep the sander moving, and inspect seams under angled light to spot imperfections. Adopt finishing techniques that leave a smooth, paint-ready wall.
- Sand with the grain of compound application
- Feather edges with 150–220 grit
- Vacuum dust between passes
- Wipe walls with a damp cloth before priming
- Dispose of or store used paper properly for cleanup tips
Grit for Feathering Edges of Patched Areas
Because feathering blends the patch into the surrounding wall, you’ll want a grit that removes the high edge without digging a new trench. Use 120–150 grit for initial feathering techniques to knock down ridges smoothly, then switch to 180–220 grit for final edge blending to soften transitions.
Hold the sanding block flat and work outward from the patch in light passes, checking frequently. For drywall compound, stay finer; for wood filler you can start slightly coarser.
Finish by wiping dust and inspecting under angled light. This approach preserves contour while creating a seamless surface ready for priming.
What Grit After Patching Nail Holes and Dings?
After the filler dries, you’ll want to feather the patch edges with a medium-fine grit to blend them into the surrounding wall.
Then finish with a finer grit to smooth the surface and remove any sanding scratches before priming.
This two-step approach gives you a virtually invisible repair and a paint-ready finish.
Feathering Patch Edges
- Start with 120–150 grit for shaping
- Blend outward with 180–220 grit
- Light pressure near the edge
- Inspect under raking light
- Recoat thinly if needed
Final Smooth Sanding
Once you’ve feathered and blended patch edges so they disappear into the surrounding wall, it’s time to finish nail holes and small dings with a fine sanding pass.
Use 220- to 320-grit sandpaper by hand or with a soft sanding block to avoid gouges; orbital sanders are overkill for tiny defects. Light, even strokes level the filler without roughening surrounding paint.
Wipe dust with a tack cloth, inspect under raking light, and repeat minimally if needed. These sanding techniques help you achieve seamless wall preparation, ensuring primer and paint lay down smoothly and hide repairs effectively.
What Grit to Use Between Skim-Coat and Resanding?
Which grit should you use between applying a skim coat and resanding? You’ll typically start with 120–150 grit to level ridges, then move finer as you refine.
Match grit to skim-coat hardness and desired surface textures, and use proper sanding techniques to avoid glazing or gouging. Work light, check progress, and clean dust before finishing.
- Start at 120–150 grit for initial smoothing
- Use 180 grit to refine and remove scratches
- Finish at 220 grit for a paint-ready surface
- Employ light pressure and sanding blocks
- Wipe and inspect between steps for consistency
Which Grit Sequence Prevents Over-Sanding Plaster?
You should start sanding plaster with a coarser grit to knock down high spots without wasting effort.
Then move to a medium grit to even out the surface and remove the coarse scratches.
Finish with a fine grit to smooth the plaster without stripping too much material.
Start With Coarse Grit
When you begin sanding plaster, start with a coarse grit to remove high spots and joint compound quickly while keeping a light touch so you don’t dig into the plaster. Follow with progressively finer grits—such as 80 to 120, then 150 to 220—to blend edges and avoid over-sanding.
You’ll use coarse grit only to level and knock down ridges, not to finish. Focus on even pressure, short passes, and checking your progress often. These sanding techniques prevent gouging and save time.
- Use a sanding block for control
- Sand with the grain of compound
- Keep motion light and consistent
- Inspect often under good light
- Vacuum dust between passes
Progress To Medium Grit
After knocking down high spots with a coarse grit, move to medium grits to refine the surface without stripping away plaster—usually 100 to 150 grit works best.
You’ll blend uneven areas, soften edges, and remove coarse scratches left by heavier papers. Use steady pressure and long, even strokes; changing grit too abruptly risks gouging or over-sanding.
Adopt grit selection strategies that step down progressively and match abrasive aggressiveness to damage level. These wall preparation techniques preserve plaster integrity while creating consistent tooth for primer.
Check frequently by touch and sight, and stop when transitions appear smooth and uniform.
Finish With Fine Grit
If you want a smooth, paint-ready finish without wearing through plaster, finish with fine grits—typically 180 to 220—working progressively from your medium grit so each step removes only the scratches left by the last.
You’ll appreciate fine grit benefits: reduced visible scratches, easier priming, and uniform surface smoothness. Don’t skip steps or press hard; that causes dips. Use light, even passes and check frequently. Keep a clean sanding block and change abrasive when clogged.
- Start with 120–150 medium grit
- Move to 180 fine grit
- Finish with 220 ultra-fine
- Sand lightly, steady pressure
- Wipe dust between steps
What Grit Is Safest for Thin Plaster Over Lath?
Because thin plaster over lath is fragile, you should pick a gentle abrasive to avoid cracking or removing whole sections of the finish.
Use 220- to 240-grit sandpaper for light smoothing; it preserves plaster durability while knocking down dust nibs and minor imperfections. For slightly rougher spots, start with 180-grit, test a small patch, and proceed cautiously.
Always sand lightly, with the grain of any trowel marks, and keep pressure even. Hand-sanding with a soft block helps control force; avoid aggressive power sanding.
These sanding techniques minimize damage and maintain the thin plaster’s integrity before priming.
What Grit Reduces Visible Scratches Under Flat Paint?
You’ll want to know sandpaper grit numbers so you can pick the right progression to remove scratches without overworking the surface.
Start with a medium grit to level imperfections, then finish with a fine 220–320 grit to minimize visible scratches under flat paint.
Those final polishing steps with the finest grit and light pressure are what keep flat finishes looking smooth, not scuffed.
Sandpaper Grit Numbers
For walls that’ll be finished with flat paint, choose sandpaper grit that removes flaws without leaving scratches the matte finish will highlight; generally, 220–320 grit gives the best balance, with 220 for minor repairs and 320 for final smoothing before priming or painting.
You’ll select grit based on surface condition and use proper sanding techniques. Match sandpaper types (aluminum oxide for drywall, garnet for fine work) to task, work evenly, and keep pressure light to avoid gouges.
Finish by inspecting under angled light and re-sanding any visible scratches before moving on.
- Start with coarser only if needed
- Progress to 220–320 grit
- Use light, even strokes
- Keep paper clean
- Test a small area first
Final Polishing Steps
Aim for a final pass with very fine sandpaper—320 to 400 grit—to knock down any faint scratches that flat paint will highlight. Then follow with a light hand and even strokes so you don’t create new marks.
You’ll use proper sanding techniques to blend surface textures and hide minor wall imperfections while preserving paint adhesion. Choose grit selection and sanding tools based on drywall or plaster, and finish with a soft sanding block or fine abrasive pad.
These preparation methods guarantee consistent final finishes. Inspect under raking light, touch up problem spots, and avoid over-sanding to maintain an even substrate.
Which Grit Removes Brush Marks Without Gouging Drywall?
Wondering which sandpaper grit will take out brush marks without digging into drywall? You’ll usually start with 220–320 grit for gentle brush mark removal, balancing smoothing and protecting the paper face.
Use a sanding block, light pressure, and long strokes to avoid gouges. For edges or small drips, hand-sand with a finer sheet. Keep dust low and inspect frequently so you stop before over-sanding.
Use a sanding block with light, long strokes; hand-sand edges and drips with finer grit and check often.
- 220–320 grit for main smoothing
- 320–400 for delicate finishing
- Soft sanding block for even pressure
- Light, consistent strokes to prevent gouging
- Hand-sand drips and edges carefully
What Grit to Use for Light Scuffing of Painted Walls?
When you need to scuff painted walls lightly before repainting or applying a new finish, choose a fine abrasive like 220–320 grit (or a dedicated fine scuff pad) to knock down sheen without cutting into the paint film.
Use a sanding block or pole sander and work with even, circular or crosshatch strokes to avoid visible streaks. Keep pressure light, check frequently, and clean dust with a tack cloth.
These light scuffing techniques save effort and prevent damage while improving adhesion.
Follow basic wall preparation tips: repair chips first, sand feathered edges, and wipe surfaces before priming or painting.
What Grit Creates the Ideal “Tooth” for Primer Adhesion?
For primer to grab, you want a grit that creates a subtle “tooth” without roughening the wall too much. Aim for a mid-range grit—usually around 120–150—to balance enough abrasion for adhesion with a smooth finish that won’t show through paint.
Test a small area so you can adjust if your surface needs slightly coarser or finer sanding.
Optimal Grit For Adhesion
Although you don’t need aggressive sanding to get primer to stick, choosing the right grit is important: select an ideal grit that creates a subtle tooth without damage.
You’ll usually use 120–150 grit on drywall and light old paint; 180–220 grit works for delicate finishes. Use consistent pressure, sand with the grain, and remove dust before priming.
Combine simple adhesion techniques like tack cloths and light scuffing to improve bonding. Avoid over-sanding glossy surfaces; instead, degloss gently.
- 120–150 grit for bare drywall
- 180–220 grit for smooth old paint
- Light, even pressure
- Dust-free surface before primer
- Use tack cloths and scuffing
Balancing Coarseness And Finish
If you want primer to bite without leaving visible scratches, aim for a grit that creates a fine, consistent “tooth” — typically around 120–150 for new drywall and 180–220 for previously smooth painted surfaces.
You’ll judge grit selection by balancing coarseness and finish: coarser grits remove imperfections fast but risk visible scratches; finer grits smooth too much and reduce adhesion.
Use progressive sanding techniques—start coarser to flatten, finish with the recommended grit for adhesion.
Keep pressure even, sand with the grain where applicable, and clean dust before priming. That gives primer a consistent surface to bond to.
What Grit to Use Before Applying Primer?
When you’re prepping walls for primer, choose a grit that evens the surface without leaving deep scratches—usually 120–150 for drywall and 100–120 for previously painted surfaces with minor imperfections.
You’ll pick grit types based on wall texture and sanding methods: finer for smooth walls, slightly coarser to remove glossy paint.
Use proper sanding tools and sanding techniques to avoid sanding errors, and focus on surface preparation to improve paint adhesion.
Control dust with a vacuum or mask while sanding.
- Grit selection tied to wall texture
- Sanding techniques for even finish
- Sanding tools and methods
- Dust control tips
- Avoid common sanding errors
Which Grit to Use Between Primer Coats and Topcoats?
How smooth should the surface be between primer coats and topcoats? You want a dull, even surface—no gloss, no ridges—to promote paint adhesion. Use grit selection tips: start with 220–320 primer coat grit for light leveling, then 320–400 for final topcoat sanding. Practice gentle sanding techniques and follow wall prep strategies to avoid over-sanding. Maintain sanding safety: wear a mask and avoid pressure that exposes substrate. Use fine sanding for a consistent surface finish and better paint adhesion. Quick reference:
| Step | Grit |
|---|---|
| After primer leveling | 220–320 |
| Before topcoat | 320–400 |
| Touch-ups | 400+ |
What Grit to Use Between Coats of Latex Paint?
Because latex paints raise tiny nibs and dust between coats, you’ll want to sand lightly to smooth the surface without cutting through the film. Use 220–320 grit for most latex paint touch-ups; this sanding technique preserves the paint finish while improving paint adhesion.
Focus on wall preparation: remove visible wall defects and feather edges, keeping pressure gentle. Choose sanding tools like a foam sanding block or fine-grit abrasive pad and a vacuum for dust control. Your sanding method should refine surface texture, not strip layers.
- 220–320 grit for latex paint
- Light, even sanding technique
- Foam block or abrasive pad
- Address wall defects first
- Clean and vacuum before recoating
Which Grit to Use Between Coats of Oil-Based Paint?
Why sand between coats of oil-based paint? You’ll remove dust nibs and tiny runs, promoting adhesion and a smooth oil-based finish.
After the first coat dries fully, use fine sandpaper—320 to 400 grit works well—to gently scuff the surface texture without cutting through the film.
After the first coat dries, gently scuff with 320–400 grit sandpaper—avoid cutting through the film.
Light, even pressure prevents uneven spots; wipe with a tack cloth to lift dust before recoating.
For higher-build primers or slight imperfections, step to 220–320 grit briefly, then finish with 320–400.
Test an inconspicuous area if you’re unsure; the goal is uniform adhesion and a consistently smooth finish.
What Grit Range Removes Glossy Finishes Effectively?
If you need to strip gloss quickly, start with coarse grits like 80–120 to cut through the sheen.
Move to medium grits (150–220) to smooth scratches left by the coarse paper, and finish with finer grits (320–400) if you want a satin-ready surface.
I’ll walk you through choosing the right sequence for your paint type and tools.
Coarse Grit Options
When you need to knock down a glossy finish quickly, reach for coarse grits in the 60–100 range; they remove sheen and old paint fast but leave noticeable scratches that require progressive smoothing.
You’ll choose coarse grit types like 60, 80, or 100 depending on how tough the surface is. Use proper sanding tools—orbital sanders for large areas, sanding blocks for control, and abrasive sheets for edges.
Wear protection and check progress often to avoid gouging. After using coarse grit, plan follow-up passes with finer grits to refine the surface before priming.
- 60 grit: heavy removal
- 80 grit: balanced cut
- 100 grit: lighter roughening
- Orbital sander: speed
- Sanding block: precision
Medium Grit Choices
Choose medium grits in the 120–180 range when you want to remove remaining gloss after a coarse pass without over-sanding the substrate.
You’ll pick specific medium grit types—like 120, 150, or 180—based on how much sheen you must dull and the wall material.
Use 120 for faster dulling on stubborn gloss, 150 for general smoothing, and 180 when you need a gentler touch before priming.
For medium grit applications, work with light, even pressure and keep sanding until the surface looks uniformly matte.
Clean dust between steps to guarantee proper primer and paint adhesion.
Finishing Grit Steps
Although you’ve already dulled the surface with medium grits, finishing steps in the 220–320 range are what you’ll use to remove remaining glossy spots and create a consistently smooth, paint-ready finish.
You’ll focus on light pressure, even strokes, and proper sanding techniques to avoid overworking the wall. Grit selection matters: start coarser if gloss persists, then progress to finer papers to refine the surface.
Clean dust between passes and inspect under raking light. Finish with a tack cloth before priming.
- Start with 220 if needed
- Move to 320 for final smoothing
- Use a sanding block
- Light, even strokes
- Wipe and inspect
What Grit Works Best for Sanding Wood Trim Before Painting?
For most wood trim, start with 120- to 150-grit sandpaper to remove old finish and smooth minor imperfections, then finish with 180- to 220-grit for a fine surface that paint will adhere to without showing scratches. You’ll focus on wood trim sanding to improve paint adhesion; use a sanding block for flat areas and hand-sand profiles gently. Feather edges where trim meets surfaces. Clean dust with a tack cloth before priming. Avoid over-sanding delicate moldings.
| Task | Grit |
|---|---|
| Remove finish/smooth | 120–150 |
| Final finish | 180–220 |
| Touch-ups | 220–320 |
What Grit Is Best for Prepping Trim That Meets Painted Walls?
When prepping trim that meets painted walls, aim for a slightly finer approach than for standalone trim: you want smooth edges without damaging adjacent paint.
For trim sanding use 120–180 grit to remove imperfections and dull gloss so new coats bond. Light feathering into the wall prevents visible junctions and helps paint adhesion.
Work with the grain, use a sanding block for flat sections, and a detail sponge for tight spots. Clean dust thoroughly before priming or painting.
- Start with 120–150 grit for rough spots
- Blend edges with 180 grit
- Use a sanding block
- Feather into the wall
- Wipe dust for better paint adhesion
Which Grit Is Best for Hand-Sanding Curved Corners?
For hand-sanding curved corners you’ll want a fine grit (220–320) to catch detail without scuffing the profile.
Use flexible sanding tools or folded sandpaper so you can follow the curve smoothly.
Work with light pressure and feather around edges to blend into flat surfaces.
Fine Grit For Detail
If you’re hand-sanding curved corners, choose fine grits that remove minor imperfections without rounding the profile further. You’ll favor 220–320 grit for paint prep, enjoying fine grit benefits like smoother edges and minimal material loss.
Use steady pressure, short strokes, and your fingertips to follow contours. Employ fine grit techniques: keep the paper flat enough to avoid sharp digs, check progress often, and rotate the sanding pad for even wear.
- Start with 220–240 grit on light defects
- Move to 320 grit for final smoothing
- Sand with the grain where possible
- Use a sanding block sparingly
- Inspect under good light
Flexible Sanding Tools
Having covered fine grits for detail, let’s look at flexible sanding tools and which grits work best on curved corners. You’ll want flexible sanding pads or sponges that conform to profiles; they prevent gouges and follow contours. For hand-sanding curved corners, start with 120–150 grit to remove imperfections, then finish with 220 grit for a smooth surface before priming. Use light pressure and short strokes, changing sanding techniques as the curve tightens. Replace pads when clogged to avoid scratching. Practice on scrap trim to match grit progression to your curve’s radius and material.
| Tool | Recommended Grit |
|---|---|
| Soft sponge | 120–220 |
| Thin pad | 150–220 |
| Finger block | 180–220 |
| Micro-sanding wrap | 220 |
Feathering Around Edges
When you’re feathering paint back into curved corners, choose a sanding grit that smooths the shift without digging a visible edge: start with 120–150 grit to remove high spots, then move to 180–220 grit for refined edge feathering and final blending techniques.
Use a flexible sanding block or folded paper for control. Work light, follow the curve, and check by touch. Protect adjacent surfaces and clean dust before priming.
- Start 120–150 grit for leveling
- Follow with 180–220 grit to refine
- Use flexible block for curves
- Light pressure for blending techniques
- Wipe dust, inspect edge feathering
What Grit to Use With a Sanding Block vs a Power Sander?
How do you choose the right grit for a sanding block versus a power sander?
You’ll pick coarser grit (80–120) on a power sander for fast material removal, using lower sanding pressure and sweeping motions to avoid gouges.
For a sanding block, choose finer grit (120–220) to control detail and feather edges; you’ll apply steadier sanding pressure and use deliberate sanding techniques.
Grit selection depends on surface damage, desired finish quality, and sanding efficiency.
In a tool comparison, the power sander boosts speed but risks over-sanding; the block offers precision.
Match grit and technique to balance efficiency and finish quality.
Which Grit and Tool Combo Speeds Up Large-Room Sanding?
Want to finish a large room fast without wrecking the walls? Use a medium-fine grit (120–150) on a random-orbit power sander for general smoothing, switching to 180–220 for final feathering.
You’ll cut time with the right sanding techniques: keep the sander moving, use light pressure, and overlap passes. For corners and trim, hand-sand or use detail attachments.
- Random-orbit power sander with 120–150 grit for bulk
- Follow with 180–220 grit for final smoothness
- Keep sander moving; avoid dwell marks
- Use vacuum dust collection to speed cleanup
- Hand-sand edges and corners for control
Which Grit Works Best With Sanding Screens for Drywall?
For sanding drywall with screens you’ll usually want a range from 80 to 220 grit, with 100–150 being the sweet spot for joint compound.
Use coarser (80–100) to knock down high spots and heavy texture, then switch to 120–150 for smoothing seams and feathering edges.
Finish with 180–220 only if you need an ultra-smooth surface before priming.
Best Grit Range
When you’re sanding drywall with sanding screens, the sweet spot is usually between 80 and 120 grit — coarse enough to remove joint compound and knock down high spots, yet fine enough to leave a smooth surface ready for priming or a final skim.
You’ll find these best grit options balance speed and finish. Use grit selection tips: start coarser for heavy ridges, then move finer for smoothing.
Stick with 80–100 for initial shaping and 120 for final passes. Keep pressure light, test a small area, and replace screens when clogged to maintain consistent results.
- 80 grit: heavy shaping
- 100 grit: general smoothing
- 120 grit: final touch
- Light pressure: avoids gouges
- Replace when clogged
When To Use Each
Often a simple rule will do: use coarser screens (80–100 grit) to quickly remove excess joint compound, high ridges, or stubborn tape bumps, then switch to 120 grit for smoothing and final blending before priming.
You’ll begin with 80–100 grit when shaping, leveling seams, or correcting major imperfections; work steadily and avoid gouging. Move to 120 grit for feathering edges and creating a uniform surface.
For very light scuffing between coats use 150–180 grit. Proper grit selection ties to your sanding techniques: hold the screen flat, use even pressure, and inspect frequently so you stop at the ideal smoothness.
What Grit to Use When Smoothing Joint Tape Ridges?
Want the smoothest joint tape ridges without over-sanding? You’ll start by letting the joint compound fully dry, then use gentle sanding techniques to level ridges without cutting the tape.
Begin with a light touch, scan for high spots, and finish with a finer abrasive to blend connections. Keep dust down and reapply thin compound where needed.
- Use light, controlled strokes
- Begin with a modest abrasive, not aggressive
- Focus on feathering edges, not removing material
- Clean dust before inspecting
- Touch up with thin joint compound if gaps remain
Which Grit Numbers Correspond to Coarse, Medium, and Fine for Walls?
After you’ve smoothed tape ridges and touched up low spots, pick the correct grit ranges for the rest of the walls: coarse generally means 40–80 grit for heavy material removal or stripping old texture, medium is about 100–150 grit for leveling and initial smoothing, and fine runs from 180 up to 220 (or 240 for final sanding before paint) to blend seams and create a paint-ready surface.
Use coarse grit with aggressive sanding techniques and appropriate sanding tools, switch to medium grit for even surface preparation, then finish with fine grit to maximize paint adhesion.
Proper grit selection improves sanding efficiency across varied wall textures.
What Grit to Use When Removing Wallpaper Adhesive Residue?
When you’re tackling wallpaper adhesive residue, start with a coarse grit to knock off the bulk without burning through the drywall.
After the glue’s mostly removed, switch to a medium grit to even out scratches and then finish with a fine grit for a smooth, paint-ready surface.
This progression protects the wall while saving you time and effort.
Start With Coarse Grit
If you’re dealing with stubborn wallpaper adhesive, start with a coarse grit to cut through the gummy residue quickly and efficiently. You’ll use effective sanding techniques and smart grit selection to remove glue without gouging the wall.
Work gently but firmly, test an inconspicuous spot, and switch abrasive methods if the surface reacts.
- Choose 60–80 grit for thick, uneven adhesive
- Use a sanding block or orbital sander for control
- Keep the pad moving to avoid dips
- Vacuum or wipe residue frequently to monitor progress
- Reassess grit selection as adhesive thins and surface evens
Finish With Fine Grit
Once the stubborn adhesive has been knocked down with coarse grit, switch to a finer abrasive to smooth remaining residue and prepare the wall for priming or painting.
You’ll choose grit selection based on wall textures and adhesive stubbornness—typically 120–220 grit for final passes.
Use appropriate sanding tools, like a sanding block or orbital sander with dust extraction, and control sanding speed to avoid gouging.
Employ sanding techniques that emphasize even pressure and overlapping strokes.
Focus on surface preparation to maximize paint adhesion and finish quality.
Combine wet sanding where appropriate, follow dust control practices, and inspect with strong lighting.
Which Grit Is Ideal for Feathering and Blending Repaired Areas?
Because feathering and blending repaired areas require smooth changes, choosing the right grit is essential to avoid visible edges and uneven texture.
You’ll typically start with 120–150 grit to level filler, then move to 180–220 grit to feather into surrounding paint. Use light pressure and circular motions; feathering techniques and blending tips help hide shifts.
Finish with a final pass of 320 grit if you need ultra-smooth surfaces before priming. Keep sanding consistent and check under good light to avoid low spots.
- Start 120–150 grit
- Feather with 180–220 grit
- Light pressure
- Final 320 grit pass
- Inspect under light
What Grit to Use When Removing Stain Bleed-Through?
First, you’ll assess how bad the bleed-through is—light tannin stains need a gentler touch than heavy water or smoke marks.
Use medium-grit sandpaper (around 120–150) to remove surface stains, then switch to finer grits to smooth the area before priming.
After sanding, apply a stain-blocking primer to seal any remaining discoloration before repainting.
Identify Bleed Severity
If stain bleed-through is faint, you can get away with light sanding; heavier, well‑set bleed needs more aggressive grit and sometimes chemical treatment.
You’ll begin with bleed identification by inspecting daylight, feeling texture, and testing a small sanded patch. Use severity assessment to classify spots as light, moderate, or severe so you pick the right approach.
Document locations and note substrate type; this guides whether to try sanding alone or add stain-blocking products.
Prioritize safety: ventilate and wear a mask when sanding old stains.
- Inspect in daylight
- Run a fingertip test
- Sand a trial patch
- Record severity levels
- Decide on treatment options
Sanding And Priming
When you tackle stain bleed-through, choose sandpaper grit based on how deep the stain sits and the surface you’re prepping: start with 80–120 grit for old varnish or deep tannin stains on wood, using controlled sanding techniques to remove the top layer without gouging.
For drywall or lightly stained areas, 120–180 grit smooths without overworking the paper.
After sanding, vacuum and tack cloth thoroughly.
Spot-prime with a stain-blocking primer, then apply full primer application to the whole wall for uniform adhesion.
Let primer cure fully before topcoats to prevent reappearance of discoloration.
What Grit to Use Before Washing Walls Prior to Painting?
Although you don’t need heavy sanding before washing, a light grit like 120–150 will knock down loose paint and rough spots without scarring the surface, making washing more effective and helping paint adhesion.
You’ll use gentle sanding techniques to smooth high spots, feather edges, and remove chalky residue; this minimal approach supports proper wall preparation without creating deep scratches.
After sanding, wipe or wash to remove dust so primer and paint bond well. Focus on even pressure and inspect as you go to avoid overworking the surface.
After sanding, wipe or wash away dust so primer and paint bond—use even pressure and inspect to avoid overworking.
- Use 120–150 grit for light scuffing
- Feather edges of peeled areas
- Avoid aggressive sanding
- Clean dust thoroughly
- Inspect before priming
Which Grit Is Safe on Textured Walls and Popcorn Ceilings?
When you tackle textured walls or popcorn ceilings, you’ll need to be careful about how aggressive your sanding is.
Use fine grits (220–320) or a light hand with a sanding sponge to avoid flattening texture or creating visible patches.
For popcorn ceilings, consider avoiding sanding altogether and use spot-scraping or consult a pro, since material may be fragile or contain asbestos.
Sanding Popcorn Ceilings
If you’re planning to sand a popcorn ceiling, start by evaluating the texture—and whether it contains asbestos—before you touch a sander.
You’ll choose sanding techniques that prioritize safety precautions, dust control, and appropriate grit selection. For intact texture, avoid aggressive removal; instead focus on light scuffing to improve adhesion.
When removing texture, test material compatibility and consider containment. Prepare the surface by patching and priming after sanding.
Use respirators, plastic sheeting, and a vacuum with HEPA filtration.
- popcorn ceiling assessment
- sanding techniques: light to medium grit
- texture removal planning
- dust control measures
- surface preparation steps
Textured Wall Precautions
Because textured finishes are fragile, you should choose sanding grits and techniques that remove high spots without flattening or tearing the texture.
You’ll test a small, inconspicuous area first, use light pressure, and prefer hand-sanding over aggressive power tools.
For popcorn ceilings or knockdown textures, work slowly and follow sanding technique tips: feather edges, avoid gouging, and vacuum frequently to see progress.
Wear a mask and eye protection, and cover floors and furniture to contain dust.
Textured wall care also means repairing damaged areas with compatible compound rather than over-sanding, preserving the finish’s appearance and depth.
Safe Grit Selections
Although you’ll want to remove high spots and smooth rough edges, stick to fine grits—120 to 220—so you don’t flatten or tear textured finishes like popcorn or knockdown; use 120–150 for light leveling and 180–220 for final smoothing, always working gently and testing a small area first.
Choose safe material choices like soft sanding blocks, fine-grit discs, and dust-capturing pads. Use gentle sanding techniques, light pressure, and short strokes following texture direction. Wear protection and control dust. Test patch and adjust grit if texture changes.
- 120–150 for light leveling
- 180–220 for final smoothing
- Soft sanding blocks
- Dust-capture attachments
- Patch-test first
Which Grit to Use When Prepping Masonry or Concrete Interior Walls?
Wondering what grit will give you a smooth, paint-ready finish on masonry or concrete interior walls?
For masonry surface preparation, start with 80–100 grit to remove loose mortar, efflorescence, and uneven patches without digging into the substrate.
Follow with 120–150 grit to level minor imperfections and feather edges of repairs.
For final smoothing before priming, use 180–220 grit for a consistent texture that accepts primer and paint.
Use concrete sanding techniques like a pole sander or orbital with dust control, work in small sections, and test a patch first to verify you’re not over-smoothing or leaving visible scratches.
What Grit Is Appropriate for Sanding Metal or Radiators on Walls?
When you’re prepping metal surfaces or radiators on walls, match the grit to how much material you need to remove: coarse grits (60–80) for heavy rust and old paint, medium (120–150) for feathering and smoothing, and fine (220–320) for final finish.
Use a wire brush or 80-grit to strip corrosion first, then step up grits to avoid scratches that show through paint.
Finish with a tack cloth and a fine grit to guarantee good adhesion for primer and paint.
Surface Preparation Level
Metal surfaces like radiators need a different sanding approach than drywall: you’ll typically start with 120–180 grit to remove rust, old paint edges, and surface imperfections. Then move to 220–320 grit for smoothing before priming or repainting.
You’ll assess surface preparation level by checking for dents, flaking, and glossy areas; adjust grit accordingly. Maintain sanding safety and dust management: use a mask, eye protection, and tack cloths. Light final sanding with 320 grit improves adhesion without overworking the metal.
- Inspect for remaining imperfections
- Use coarser grit for pitting
- Feather edges of old paint
- Final pass with fine grit
- Clean thoroughly before priming
Rust And Paint Removal
After you’ve smoothed and feathered the surface, tackle rust and stubborn paint with progressively coarser grits to remove material quickly. Then refine with finer paper for a clean finish.
For metal or radiators, start with 80–120 grit to handle heavy corrosion and initial paint stripping, using a wire brush or orbital sander where safe. Move to 180–220 grit to blend scratches and prep for primer, ensuring edges are smooth.
For delicate areas, hand-sand with 240–320 grit to avoid gouging. Always clean residues and treat exposed metal with a rust inhibitor before priming and repainting.
Finishing Grit Choice
Because radiators and other wall-mounted metal can be thin and easily scored, you should finish with progressively finer grits—typically moving from 180–220 to 320–400—to remove sanding marks and feather edges without over-thinning the surface.
You’ll use appropriate finishing techniques and sandpaper types to protect contours and heat-safe coatings. Work gently, test in a hidden area, and switch to hand sanding for tight spots.
Clean dust before priming and use corrosion-resistant primer on bare metal. Match grit to paint sheen to avoid visible scratches.
- Start 180–220, then 320–400
- Use fine-grit hand sanding
- Choose rust-resistant primer
- Test in inconspicuous spot
- Clean thoroughly before priming
Which Grit Helps When Removing Caulk or Sealant Residue?
Wondering which grit will actually lift old caulk or sealant without gouging the drywall? For caulk removal and sealant scraping, start with a firm but not aggressive approach: use 80–120 grit to break and level stubborn residue, especially on cured silicone or heavy bead.
Move to 150–180 grit to refine edges and feather connections into the wall. Hand-sanding with a sanding sponge lets you follow contours and avoid gouges; power sanders risk overcutting.
Clean the dust, inspect the seam, and repeat lightly if needed. Finish with 220 grit only if the surface already feels smooth and even.
Which Grit to Use if You Accidentally Over-Sand a Patch?
How badly did you sand the patch? If you’ve gone too deep, don’t panic. Rebuild the surface, use finer grit to blend, and follow careful sanding techniques to avoid redoing the whole area.
For patch repair, feather edges and restore profile before priming.
- Assess depth and texture first
- Fill low spots with joint compound
- Sand filler with 120–180 grit to shape
- Blend perimeter with 220 grit for smooth connection
- Clean dust, prime high-absorbent areas
You’ll restore a consistent surface if you correct depth, match texture, and finish with a proper primer before painting.
Which Grit and Method Reduce Swirl Marks From Orbital Sanders?
If you’ve smoothed a patch and still see swirl marks from an orbital sander, you can remove them with the right grit progression and technique.
Use sanding techniques that start coarser then move finer: 120 → 180 → 220 grit selection strategies minimize visible scratches.
Keep even sanding pressure and move in overlapping, random directions with orbital sander tips to avoid gouges.
Check sanding material types—soft spackle vs. joint compound—then adjust pressure and grits.
Practice surface preparation methods to level edges before finishing.
Control dust with vacuums or masks as part of dust control measures to see true results and prevent rework.
Which Grit Works Better on Plaster vs Modern Drywall?
Which grit you pick depends on whether you’re working with dense, old plaster or newer, softer drywall. You’ll adjust grit selection and sanding techniques to match material: use coarser grit sparingly on plaster, finer grits on drywall to avoid gouging.
Consider sanding tools that give control and protect edges. Prioritize surface preparation so paint adheres and defects disappear without over-sanding.
- Plaster differences: start 80–120 grit, finish 180–220
- Drywall specifics: start 120–150 grit, finish 220–320
- Sanding techniques: light passes, feather edges
- Grit selection: match abrasive to hardness
- Sanding tools: handblock or pole sander for control
What Grit to Use for Stripping Old Paint From Walls?
When you’re stripping old paint from walls, start with a coarse grit to remove layers quickly, then step down to finer grits to smooth the surface without leaving deep scratches.
You’ll typically use 60–80 grit as the best grit for aggressive paint stripping, then move to 120–150 grit for surface prep. Match grit selection to wall textures and existing finish.
Use 60–80 grit for aggressive stripping, then finish with 120–150 grit to prep and smooth for painting.
Use proper sanding techniques and appropriate sanding tools — orbital sanders for flats, hand sanding for edges. Control debris with dust control measures and a vacuum.
Proper progression improves paint adhesion and overall finish quality without damaging substrate.
What Grit Choices Minimize Dust While Prepping Walls?
Choosing the right sandpaper grit can greatly cut down dust while you prep walls, so pick coarser grits only where needed and lean toward finer grits and lower-removal methods elsewhere.
You’ll usually start with 120–150 for light leveling, move to 180–220 for smoothing, and finish with 320+ for minimal abrasion.
Pair grit choices with dust control techniques and basic sanding safety tips: use slower speeds, damp-sanding for small repairs, or hand-sanding where practical.
Limit aggressive grit to problem spots, not whole walls, to reduce airborne particles and cleanup.
- Start 120–150 for minor leveling
- Smooth with 180–220
- Finish 320+ to minimize dust
- Use hand or damp sanding when possible
- Avoid aggressive grit across entire surfaces
Dust Control & PPE for Coarse, Medium, and Fine Sanding
Because coarse sanding throws the most dust, you should match dust-control methods and PPE to grit: use a vacuum-equipped sander or HEPA shop vac for 40–80 grit work, wear a fitted N95 or P100 respirator and eye protection, and seal the room to limit spread;
for medium (120–180) sanding combine a vacuum or tack cloth with a disposable respirator or N95 and safety glasses;
for fine (220+) and finish sanding, prefer hand-sanding or a low-speed orbital with a dust bag, use a basic particulate mask if ventilation’s good, and always protect floors and vents.
You’ll prioritize dust management and safety gear. Keep filters clean, change disposable masks, and ventilate between passes.
Which Sandpaper Types Pair Best With Which Grits?
Dust and PPE choices affect how aggressive you can be with sanding, but the abrasive itself determines how the grit performs on drywall, plaster, and painted surfaces.
Dust control and PPE limit sanding aggressiveness, but the abrasive type ultimately dictates grit performance on surfaces.
You’ll choose sandpaper selection based on material and desired finish; grit compatibility guides which type works best. Use open-coat abrasives for paint dust, closed-coat for plaster smoothing, and foam-backed sheets on contours.
Match coarser grits to tougher abrasives and finer grits to gentler types to avoid gouging.
- Aluminum oxide: 60–180 grit, durable for multiple passes
- Silicon carbide: 220–400 grit, slick for paint feathering
- Garnet: 100–150 grit, great on new drywall
- Ceramic: 36–80 grit, for heavy removal
- Foam-backed: 120–320 grit, contours and touch-ups
Which Grit to Avoid When You Want Faster Paint Adhesion?
Why would you pick a very fine grit when you need paint to grab quickly? You shouldn’t. Ultra-fine grit types polish instead of keying the surface, reducing adhesive properties and primer adhesion. Use coarser options for rough wall textures to promote mechanical bite. Focus on proper sanding techniques, appropriate sanding tools, and dust control to avoid contamination. Keep finishing touches light—don’t over-smooth before priming. Consider paint compatibility when selecting grit; some paints tolerate smoother surfaces, but faster adhesion usually needs tooth.
| Grit to avoid | Why |
|---|---|
| 400+ | Polishes surface |
| Super-fine | Lowers primer adhesion |
Which Grit Choices Minimize Sanding Time Without Loss of Finish?
Want to cut sanding time without sacrificing the finish? You’ll balance grit selection and sanding efficiency to preserve finish quality while prepping wall texture for paint adhesion.
Choose coarser grit materials only to remove flaws fast, then a finer grit for final surface preparation. Use the right sanding tools and dust control to work quicker and cleaner; changing grits wisely avoids rework.
Prioritize grit selection that matches wall texture and condition so you don’t over-sand.
- Start with appropriate coarse grit for damage
- Follow with one fine grit for uniformity
- Use power sanding tools when safe
- Employ effective dust control
- Inspect finish quality before priming
Which Sanding Techniques Pair With Each Grit for Best Results?
Although the right grit sets the plan, pairing specific sanding techniques with each grit lets you work faster and get a smooth, paint-ready surface without overworking the wall.
You’ll match sanding techniques to grit selection: start coarse with circular motions and controlled sanding pressure to remove defects, then switch to medium with cross-grain strokes for texture smoothing.
Finish with fine grit using light pressure and long, even passes for final surface finish.
Choose sanding tools that suit each stage, keep dust management active with vacuums or tack cloths, and balance speed with care to protect surface durability during paint preparation.
Which Common Sanding Mistakes Relate to Choosing the Wrong Grit?
Pairing the right grit with proper technique speeds your work, but picking the wrong grit creates common problems that undo those gains.
You’ll notice uneven surfaces, visible scratches, and clogged paper when your grit selection doesn’t match the job. Wrong grit forces you to over-sand, wasting time and damaging profiles.
It also hides flaws or leaves too-smooth areas that primer won’t grip. Use correct sanding techniques and re-evaluate grit selection if results look off.
- Deep scratches from too-coarse grit
- Surface glazing from too-fine grit
- Wasted effort re-sanding
- Uneven texture from inconsistent grits
- Poor paint adhesion due to wrong prep
Final Checklist: Grits, Tools, and Safety for Wall Prep
1 clear checklist keeps your wall prep on track: confirm the grits you’ll need for each stage, gather the right sanding pads and sandpaper (from coarse for compound shaping to fine for final smoothing), and make sure you’ve got the proper tools—sanding block, pole sander, vacuum sander or orbital sander—plus replacement abrasive and dust-collection attachments.
Check grit selection against surface types and wall materials, review sanding techniques for seams and feathering, and plan project timing to allow dust settling and tack clothing.
Prioritize dust control, paint compatibility, finishing processes, tool maintenance, and safety precautions like masks, goggles, and ventilation.
Frequently Asked Questions
Can I Sand and Paint in High-Humidity Environments Without Changing Grit Choice?
You can, but humidity effects can alter drying and clog sandpaper, so adjust sanding techniques and timing; you’ll use similar grits but sand slower, clean frequently, and wait for lower humidity or use dehumidifiers for reliable paint adhesion.
How Does Paint Sheen Affect Final Sanding Grit Selection?
Imagine polishing a mirror or dulling a stone: you’ll choose finer grits for high-sheen surfaces and slightly coarser for mattes. Sheen types dictate prep; finish durability improves when grit matches sheen and substrate.
Are Specialty Abrasive Blends Worth Different Grit Numbers?
Yes — you’ll find specialty abrasives can outperform standard grits for specific sanding techniques, delivering longer life and cleaner cuts; you’ll pay more, but they’re worth it when finish quality and efficiency matter.
Can Primer Type (Stain-Blocking vs. Standard) Change Sanding Grit Needs?
Want flawless coverage? Yes — primer type can change sanding grit needs: you’ll adjust sanding techniques before primer application, using finer grits for stain-blocking primers to smooth bleed-prone areas and slightly coarser grits for standard primers.
How Should Grit Choices Differ When Repainting Versus First-Time Painting?
When repainting, you’ll use finer sanding techniques—120–220 grit—to scuff existing finishes; for first-time painting on raw wall materials, start coarser—80–120 grit—to smooth imperfections, then finish with finer grits for proper adhesion.
Conclusion
You’ve got the right grits, tools, and safety steps to prep walls like a pro, so don’t skip stages or rush—think of sanding as tuning an instrument: the finer the touch, the sweeter the result. Start coarse for shaping, move through medium for smoothing, and finish fine for that flawless paint grip. Wear a mask, clean dust, and inspect lighting. Follow the sequence, and your painted walls will look polished and professional.
