Best Paint Finish for Board and Batten Walls and Exterior Siding
For board-and-batten and exterior siding, choose a high-quality 100% acrylic latex in satin or semi-gloss for the best mix of durability, washability, and UV and mildew resistance. Satin gives a balanced, low-reflective sheen that hides minor flaws while staying easy to clean; semi-gloss is tougher for trim and high-contact areas. Prep, prime, and seal joints to avoid peeling. Keep maintenance regular, and you’ll extend lifespan—keep going to learn specific tips and product picks.
Quick Answer Best Paint Finish for Board and Batten Walls and Exterior Siding
For board and batten walls and exterior siding, go with a satin or low-luster eggshell for the best balance of durability and subtle sheen.
You’ll get easier cleaning and better hide for imperfections than with flat finishes, while avoiding the high gloss that highlights flaws.
This choice gives long-lasting protection without looking overly shiny.
Direct recommendation summary ()
When you want durable, low-maintenance protection with a clean look, choose a high-quality exterior acrylic latex in a satin or semi-gloss sheen for board-and-batten and most exterior siding.
It resists moisture, hides brush marks, and makes cleaning easy while still highlighting the trim’s profile.
- What paint finish for board and batten: satin or semi-gloss
- Use acrylic latex for exteriors
- Prioritize UV and mildew resistance
- Prep and prime joints
- Clean with mild detergent regularly
Why Paint Finish Matters for Board and Batten and Exterior Siding
Your choice of finish affects how long the boards last, how the wall looks, and how much upkeep you’ll need.
Interior board-and-batten can get away with softer, lower-sheen paints for touchability and hiding imperfections, while exterior siding needs tougher, more weather-resistant finishes.
Also factor in climate and substrate—harsh sun, moisture, or composite materials call for different primers and topcoats than mild climates and natural wood.
How finish affects durability, appearance, and maintenance
Finish choice shapes how board-and-batten walls perform and look over time, so pick one that matches your climate, traffic, and style goals.
A higher-sheen finish resists scrapes and sheds dirt, boosting longevity and easing cleaning, while a matte or satin hides imperfections and offers a softer look but needs gentler care.
Choose based on wear, exposure, and desired maintenance routine.
Differences between interior board-and-batten and exterior siding requirements
You’ll find that interior board-and-batten and exterior siding face very different demands, so the paint systems you choose should reflect that.
Interior walls need softer sheens for washability and low-VOC formulas for comfort, while exterior siding requires UV-resistant, flexible coatings that resist moisture and mildew.
Choose primers and topcoats rated for each environment to guarantee longevity and easier upkeep.
Environmental and substrate considerations (climate, wood vs. composite)
Because climate and substrate change how paint performs, choosing the right finish for board-and-batten and exterior siding starts with where and what you’re coating.
In humid, sunny, or freeze-thaw regions you’ll want breathable, mildew-resistant coatings.
For raw wood pick a flexible, penetrating alkyd or advanced acrylic; for composites choose durable, non-porous acrylics or elastomeric finishes to prevent peeling and fading.
Overview of Paint Finish Types
You’ll choose from flat/matte, eggshell, satin, semi-gloss, and gloss when picking a finish for board and batten.
Each level of sheen affects durability, washability, and how the wood’s profile shows light and shadow.
I’ll outline what each finish does so you can match performance to the look you want.
Flat/Matte
When you want a soft, non-reflective look that hides wall imperfections, flat (also called matte) paint is a smart choice for board and batten; it delivers a chalky, velvety finish that minimizes light bounce and makes seams and small flaws less noticeable.
You’ll appreciate its smooth, uniform appearance on textured wood, though it’s less durable and harder to clean than glossier options.
Eggshell
If flat gives you that soft, non-reflective look but feels too fragile for a high-traffic space, eggshell offers a practical middle ground.
You get low sheen that subtly reflects light, hides minor imperfections better than satin, and cleans up more easily than flat.
Use eggshell on board and batten where you want durability without obvious gloss, especially in living areas and hallways.
Satin
Because satin balances a soft sheen with good durability, it’s a go-to for board and batten where you want a bit more washability than eggshell without obvious gloss.
You’ll find satin hides minor imperfections while resisting scuffs and moisture better than flatter sheens.
Use it on walls and trim when you want easy cleaning, subtle depth, and a refined, low-reflective look that still reads polished.
Semi-gloss
Semi-gloss offers a crisp, durable finish that stands up to heavy use and frequent cleaning, making it ideal for the raised battens and trim on board and batten walls.
You’ll get better moisture resistance and easier wipe-downs than with lower sheens, plus defined edges that highlight architectural lines.
Use it where durability and a cleanable surface matter most.
Gloss
When you want maximum shine and the most pronounced reflection, gloss delivers a hard, mirror-like surface that really makes battens pop.
You’ll get exceptional durability and washability, resisting scuffs and moisture on trim and battens. Gloss highlights imperfections, so prep must be meticulous.
Use gloss where you want sharp contrast and easy cleaning, typically on trim, doors, and accent battens.
Specialty finishes (elastomeric, masonry, exterior stains)
If your board-and-batten sits on an exterior surface or over uneven substrates, specialty finishes like elastomeric coatings, masonry paints, and exterior stains give you options beyond standard sheens.
You’ll choose based on flexibility, breathability, texture, and maintenance needs. Consider these benefits and trade-offs:
- Elastomeric: bridges hairline cracks
- Masonry paint: resists alkalinity
- Exterior stain: shows wood grain
- Durability: varies by product
- Application: prep-sensitive
Recommended Finishes by Use Case
For each setting you’ll want a finish that matches wear, maintenance, and material needs.
In high-traffic interiors choose durable, washable sheens; for low-traffic rooms and accent walls you can opt for softer, more matte looks.
For exteriors and historic projects the substrate and preservation goals will guide whether you use tougher acrylics for fiber cement and composites, traditional oil-based or breathable paints for wood, or period-appropriate finishes for restorations.
Interior board and batten high-traffic rooms
Because high-traffic interior spaces see constant wear, you’ll want a finish that balances durability with easy maintenance.
Choose satin or semi-gloss for board and batten: they resist scuffs, clean well, and highlight trim lines without being overly shiny.
Use a high-quality acrylic latex paint and consider an eggshell on upper walls only if you need slightly softer sheen while keeping trim glossy for protection.
Interior board and batten low-traffic rooms and accent walls
When you’re working with low-traffic rooms or creating an accent wall, you can prioritize mood and texture over maximum durability; choose eggshell or satin for walls to get a soft, elegant look that still cleans up easily, and use semi-gloss on battens if you want crisp contrast and added protection.
Pick muted or bold colors to enhance depth, and finish with careful caulking for clean lines.
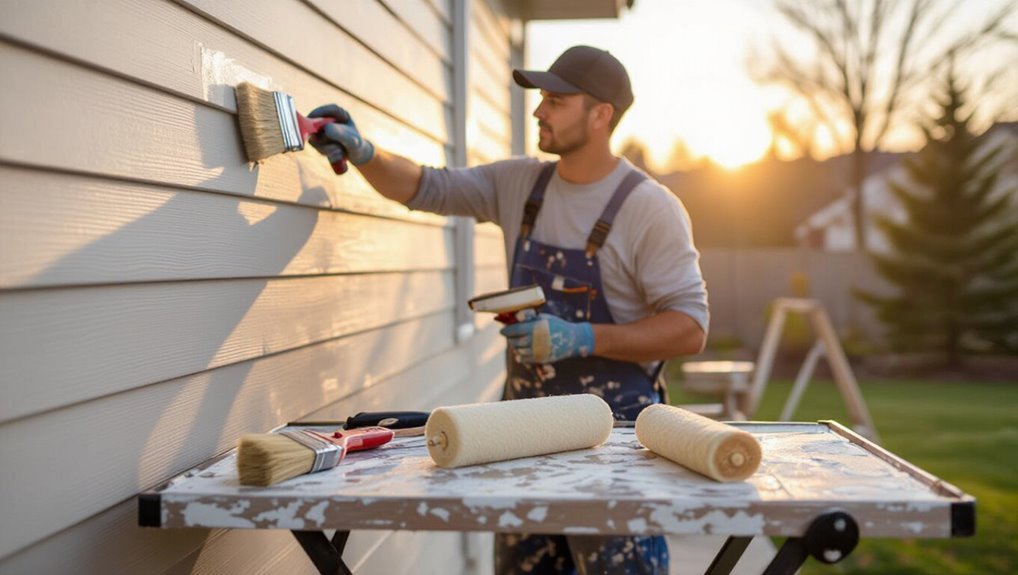
Exterior siding wood board and batten
Although exterior board and batten faces harsh weather, you can choose finishes that balance protection and appearance by matching sheen and formulation to the use case.
For exposed walls, pick 100% acrylic latex with satin or semi-gloss for durability and washability.
For trim and battens, use semi-gloss for impact resistance.
In sun-exposed areas, choose high UV-resistant formulas and quality primers.
Exterior siding fiber cement, composite, and engineered wood
If you’ve handled paint choices for wood board and batten, you’ll find similar priorities apply to fiber cement, composite, and engineered wood sidings—durability, UV resistance, and proper sheen for maintenance.
Choose high-quality acrylic latex or 100% acrylic coatings with mildew inhibitors. Use satin or low-luster finishes to hide imperfections and ease cleaning.
Follow manufacturer prep and primer recommendations for adhesion and warranty compliance.
Historic or restoration projects
Because preservation work often demands matching original appearance and longevity, choose paints that respect a building’s historic character while protecting its fabric.
Use breathable, oil-modified or high-quality acrylic paints compatible with existing substrates and historic coatings.
Match original sheen—often matte or low-sheen—to maintain authenticity.
Prioritize conservation-approved products, reversible treatments when possible, and testing small areas before full application to avoid damage.
Comparison Table of Finishes for Board and Batten and Exterior Siding
You’ll get a quick side-by-side look at how common finishes compare on durability, washability, sheen, touch-up ease, primer needs, and ideal locations. Below is a simple snapshot to help you pick the right finish for board and batten or exterior siding. Use it as a starting point, then match specifics to your climate and traffic.
| Finish | Typical Use | Key Trait |
|---|---|---|
| Satin | Board & batten, trim | Balanced durability and washability |
| Semi-gloss | Exterior siding, trim | Higher sheen, easier touch-ups |
Durability, washability, sheen level, touch-up ease, recommended primer, ideal locations
When choosing a finish for board-and-batten or exterior siding, consider how each option balances durability, washability, sheen, touch-up ease, primer needs, and ideal placement so you can pick the best fit for the surface and traffic level.
Gloss and semi-gloss offer highest durability and washability; satin balances sheen and touch-ups; eggshell hides imperfections but is less washable.
Use a high-quality exterior primer for bare or repaired wood.
Step-by-Step Guide to Choosing and Applying the Right Finish
Start by evaluating your substrate and its condition—wood, composite, primed, or previously painted—so you can pick the right sheen and compatible primer and paint type (acrylic, oil, or hybrid).
Then prep the surface with cleaning, sanding, caulking, and flashing before choosing application techniques tailored to board and batten detail, like brush, roller, or sprayer.
Follow each step in order to guarantee proper adhesion, a uniform finish, and long-lasting protection.
Step 1 Assess substrate and condition (wood, composite, primed, previously painted)
Before choosing a finish, inspect the substrate closely so you know whether you’re dealing with raw wood, composite material, primed surfaces, or previously painted walls.
Check for rot, mildew, loose or peeling paint, and moisture. Note texture, grain, and any previous coatings.
Document repairs, sanding needs, and primer compatibility so you can select appropriate preparation, primer, and paint for lasting adhesion.
Step 2 Choose sheen based on location and desired look
Although sheen won’t change a color, it dramatically affects how your board and batten reads in a room, so choose it based on traffic, lighting, and the look you want.
Use matte for low-reflection, hiding flaws in cozy spaces; satin for easy cleaning in moderate-traffic areas; semi-gloss or gloss for trim, high-traffic zones, or moisture-prone spots where durability and washability matter.
Step 3 Select compatible primer and paint type (acrylic, oil-based, hybrid)
Now pick a primer and paint system that work together and suit your walls’ material and use: water-based acrylics dry fast and clean up easily, oil-based paints offer durable, leveling finishes for trim, and hybrids (alkyd in water) give oil-like toughness with water cleanup—so match primer type to your substrate (shellac or oil-based primers for knots and stains; latex for bare drywall or primed wood) and choose the paint chemistry that balances durability, adhesion, and VOC needs for the room.
Select stain-blocking or bonding primers for problem surfaces, and prefer acrylic topcoats for exterior siding and high-moisture interiors.
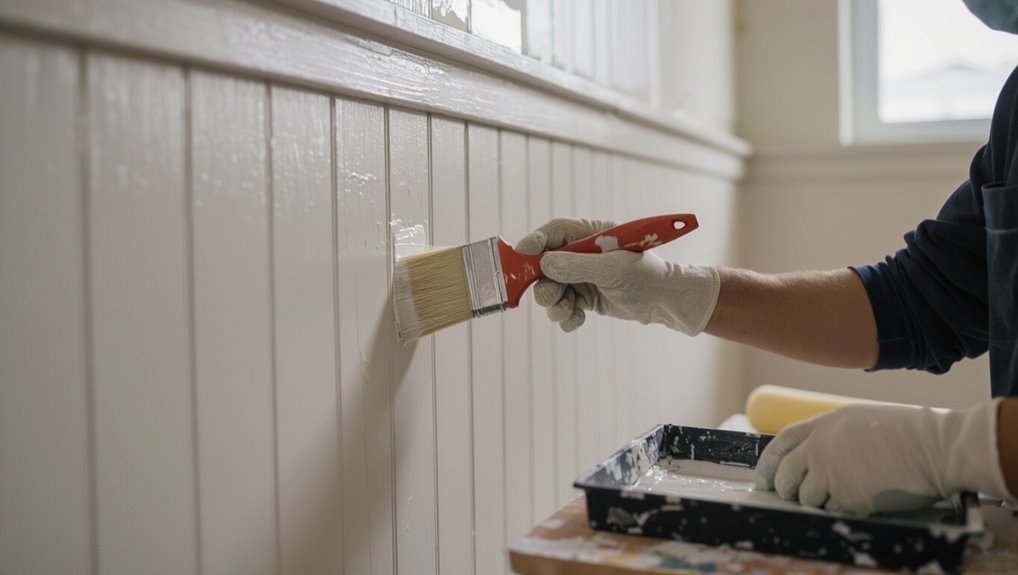
Step 4 Prepping the surface (cleaning, sanding, caulking, flashing)
Get the surface ready so your paint can stick and look its best: clean dirt and mildew with a mild detergent solution, sand glossy or rough spots to feather edges and remove loose paint, and fill gaps and nail holes with paintable caulk or wood filler—then flash any areas prone to moisture with appropriate flashing tape or trim to prevent future water intrusion.
Inspect for rot, replace damaged boards, wipe dust, and allow full drying before priming.
Step 5 Application techniques for board and batten detail (brush vs. roller vs. sprayer)
Because the right application method affects both finish quality and project time, you’ll want to weigh brush, roller, and sprayer options before you start painting board and batten.
Use a brush for crisp edges and tight seams, a roller for flat board faces and speed, and a sprayer for uniform coverage on large areas—combine methods to control drips and guarantee clean battens.
Step 6 Drying, curing, and second coat timing
After you’ve applied paint with the right tools, timing your drying, curing, and second coat becomes the next priority to guarantee a durable, uniform finish on board and batten.
Check manufacturer’s recoat window, monitor temperature and humidity, and touch a discreet spot to confirm surface dryness.
Wait full cure before heavy use; apply second coat evenly within recommended timeframe to avoid adhesion problems.
Step 7 Maintenance schedule and touch-up methods
When you finish painting, set a simple maintenance schedule and learn quick touch-up techniques so your board and batten stays looking fresh without major recoats. Inspect annually (or biannually in high-traffic or damp areas), clean as needed with mild soap and water, and address chips or scuffs promptly by lightly sanding the damaged spot, priming exposed wood, and feathering on matching paint within the manufacturer’s recoat window.
You should note finish-specific care—satin hides imperfections better, while gloss benefits from gentle polishing—and keep spare mixed paint for precise color matches.
Common Problems and Mistakes to Avoid
Don’t pick a sheen that’s too shiny or too flat for the room, because it can either highlight flaws or wear poorly.
Make sure you use the right primer and don’t skip prepping the surface—poor prep leads to peeling and mildew.
And avoid overusing high-gloss on textured siding, which will call out every imperfection.
Using too high or too low sheen for the space
Pick a sheen that matches the room’s function and light levels, because too high or too low a finish can make board and batten look wrong—glossy paint exaggerates every imperfection and draws attention to seams, while flat finishes can make trim disappear and look dull against light-catching walls.
Choose eggshell or satin for balanced reflectivity, high gloss only for durable trim, and flat for low-traffic ceilings.
Skipping primer or using wrong primer
Sheen choices matter, but primer matters even more for board and batten—skip it or use the wrong type and you’ll get poor adhesion, visible stains, and uneven coverage no finish can hide.
You should select a primer suited to the substrate—wood, MDF, or previously painted surfaces—and to exterior conditions. Proper primer seals, evens porosity, blocks tannins, and guarantees long-lasting paint performance.
Poor preparation leading to peeling and mildew
If you skip proper surface prep or rush through cleaning and sanding, paint won’t bond well and you’ll invite peeling and mildew on board-and-batten walls.
You should remove dirt, loose paint, and mildew with appropriate cleaners, dry thoroughly, and sand smooth.
Seal gaps and use compatible primer.
Take time now so finish adheres, resists moisture, and lasts longer without unsightly deterioration.
Overuse of high-gloss on textured siding causing highlight of imperfections
When you coat textured siding in high-gloss paint, imperfections jump out instead of blending in; the sheen magnifies bumps, brush marks, and uneven seams, making walls look less finished.
You should choose lower-sheen options like satin or eggshell to hide flaws, improving depth without glare.
Test on a scrap, address major defects first, and apply thinner, even coats for a cleaner result.
Best Practices and Pro Tips
When planning your board and batten finish, match the sheen and color to the architectural style so the trim enhances rather than fights the design.
For exterior work, pay attention to weatherproofing—proper flashings, high-quality caulk, and sealed trim will prevent moisture problems.
Use mid to low sheens and the right tools (angled brushes, quality rollers, and tape or trim guides) to hide seams, emphasize crisp lines, and keep battens clean.
Matching finish to architectural style and color choice
Because your home’s architectural style and color palette set the tone, choose a paint finish that reinforces those cues rather than fighting them.
Use low-sheen or satin for Craftsman and traditional homes to emphasize depth without glare.
Pick a subtle gloss on trim for Colonial crispness, and a matte finish for modern, minimalist facades.
Test samples in natural light before committing.
Weatherproofing details for exterior board and batten (flashings, caulks, trim)
1 clear line of defense—proper weatherproofing—makes exterior board-and-batten last through rain, wind, and freeze-thaw cycles, so you should detail flashings, choose compatible caulks, and install trim that sheds water rather than traps it.
Flash head and sill with corrosion-resistant flashing, back-prime and gap-seal battens with paintable silicone or polyurethane caulk, and slope trim, drip-edge, and joints to direct water away from seams.
Selecting colors and sheen to hide seams and imperfections
If you want seams and minor surface flaws to fade into the background, choose mid-tone, low-contrast colors and a matte or satin sheen—these reduce light reflection and mask texture variations better than high-gloss finishes.
Stick to hues that minimize shadowing (muted greys, warm tans, soft blues), avoid stark two-tone contrasts, and test samples in different daylight to confirm seams become less noticeable.
Tools and techniques for crisp lines and clean battens
A few well-chosen tools and steady technique will get you razor-sharp lines and dust-free battens every time: a quality angled sash brush for cutting in, a 2–3″ foam roller for smooth face coats, painter’s tape rated for delicate surfaces, a sharp utility knife for scoring tape, and a compact trim router or sanding block for prepping edges.
Work wet-edge to wet-edge, press tape firmly, cut along tape before removing, and sand between coats for flawless seams.
Cost, Lifespan, and ROI Considerations
You’ll want to compare upfront costs and expected lifespan when choosing a finish, since cheaper options often need repainting sooner.
Spending more on premium exterior paint can pay off if it resists weathering and reduces labor frequency.
Factor the finish’s durability into your long-term maintenance budget to calculate true ROI.
Comparative cost of finishes and expected lifespan
When weighing finishes for board-and-batten, consider both upfront cost and how long the finish will hold up before you’re repainting or refinishing.
Low-cost paints need more frequent touch-ups (5–7 years), while higher-quality acrylics and elastomerics last 10–20 years.
Factor labor, surface prep, and maintenance.
Over time, fewer recoats often offset higher initial prices, improving your long-term return.
When paying more for premium exterior paint is worth it
Wondering whether splurging on premium exterior paint pays off? You’ll save time and money when higher-quality coatings resist fading, chalking, and mildew longer than budget options.
For exposed board-and-batten or harsh climates, premium formulas often extend repaint cycles and preserve substrate integrity.
Choose premium when longevity, warranty, and fewer touch-ups outweigh initial sticker shock for a better long-term return.
Impact of finish on long-term maintenance costs
Because the right finish reduces how often you repaint, it directly lowers your long-term maintenance costs and improves the return on your paint investment.
Choosing satin or semi-gloss for board and batten sheds dirt, resists mildew, and stands up to weather better than flat.
You’ll save on labor, materials, and touch-ups, stretching each coat’s lifespan and lowering total lifecycle expenses.
Product Recommendations and How to Read Labels
When choosing paints and primers for board and batten, check labels for UV resistance, recommended mil thickness, and any warranty information so you know how the product will hold up.
Look for specific interior and exterior recommendations—like durable acrylic latex for exteriors and stain-blocking primers for interiors—and note stated wear or moisture ratings.
I’ll list widely recommended products next and explain how their labels match the needs of your walls.
What to look for on paint and primer labels (UV resistance, mil thickness, warranty)
If you want your board and batten to stay crisp and protected, start by learning how to read paint and primer labels—those few lines tell you about UV resistance, recommended mil thickness, and warranty coverage.
Check for explicit UV or fade resistance, specified dry film mil (DFT) or coverage per coat, and warranty terms—what’s covered, duration, and requirements for surface prep or recoat to keep claims valid.
Examples of widely recommended interior and exterior products ()
As you compare products, focus on a short list of proven options—interior acrylic-latex paints with a semi-gloss or satin finish for trim and battens, exterior 100% acrylic latex paints with built-in UV inhibitors for siding, and high-hide primers (stain-blocking and adhesion-promoting) that match the substrate.
Choose reputable brands, check VOC, coverage, and warranties.
- Benjamin Moore Regal Select
- Sherwin-Williams SuperPaint
- Behr Premium Plus Ultra
- Zinsser Bulls Eye 1-2-3 Primer
- KILZ Premium Exterior Primer
FAQ
Got questions about sheens, touch-ups, or exterior protection?
You’ll find answers on which finish to use in kitchens and baths, whether semi-gloss works on both battens and siding, how to touch up narrow battens without brush marks, when elastomeric is really needed, and how finish affects repainting frequency.
Read on for concise, practical guidance.
What sheen is best for board and batten in a bathroom or kitchen?
Which paint sheen should you pick for board and batten in a bathroom or kitchen?
You’ll want a moisture-resistant, washable finish—typically satin or semi-gloss. Satin hides imperfections while resisting humidity; semi-gloss offers superior durability and easier cleanup on trim and high-touch areas.
Choose satin for a softer look, semi-gloss where frequent cleaning or splashes occur.
Consider ventilation and lighting when deciding.
Can I use semi-gloss on both interior battens and exterior siding?
Yes—you can use semi-gloss on both interior battens and exterior siding, but weigh durability, appearance, and prep requirements first.
Semi-gloss resists moisture and cleans easily indoors, highlighting trim and imperfections.
Outdoors, it offers good weather resistance but needs proper primers and surface prep to avoid peeling.
Match color and maintenance expectations, and choose high-quality paint formulated for exterior or interior use accordingly.
How do I touch up paint on narrow battens without visible brush marks?
If you’ve decided on semi-gloss for both trims and siding, you’ll want a tidy touch-up routine for those narrow battens so brush strokes don’t stand out.
Use a small high-quality angled brush, thin the paint slightly, and work from the center outward in one smooth pass.
Lightly feather edges, blend into surrounding finish, and allow full drying before evaluating repeat coats.
Is elastomeric paint necessary for all exterior board and batten?
Do you need elastomeric paint for every exterior board-and-batten job? Not necessarily.
You’ll want elastomeric if your siding has hairline cracks, significant movement, or sits in severe weather; it bridges gaps and adds waterproofing.
For stable, well-sealed wood or fiber cement, high-quality exterior acrylics often suffice.
Match product to substrate, climate, and maintenance preferences.
How often should exterior siding be repainted based on finish?
Whether you choose elastomeric or a high-quality exterior acrylic, the paint finish you pick affects how often you’ll need to repaint.
Flat and matte hides flaws but typically needs repainting every 5–7 years. Satin and semi-gloss are more durable, lasting 7–12 years with proper prep.
Elastomeric can stretch and protect longer—expect 10–15 years on well-maintained siding.