What Happens if You Use Interior Paint on Exterior?
If you use interior paint outside, you’ll get faster fading, chalking, and peeling because interior formulas aren’t built for UV, moisture, or temperature swings. The binders and additives that help with scrubbability indoors break down under sun and rain, so you’ll need frequent recoats and repairs that wipe out any initial savings. You may also trap moisture, invite mildew, or damage wood and masonry. Keep going and you’ll learn how to avoid and fix these problems.
What Search Intent Does This Satisfy? (Informational)
What information are people looking for when they search about using interior paint on exterior surfaces?
You want clear, practical answers: whether interior paint will endure weather, adhere to siding, resist moisture and UV, and how it compares to exterior formulations.
You’re asking about safety, cost trade-offs, prep steps, and expected lifespan when you choose interior paint for exterior applications.
You’re weighing safety, costs, prep, and lifespan when using interior paint outdoors — know the risks and limits
Your intent is informational — to decide if it’s a temporary fix, understand risks like peeling or mildew, and learn what conditions might make it workable.
You expect concise guidance so you can plan properly without guessing or damaging surfaces.
Quick Answer: Can You Use Interior Paint Outside?
You can use interior paint outside in a pinch, but it won’t hold up like exterior paint because it lacks the durability and weather resistance needed for sun, rain, and temperature swings.
You’ll also face adhesion problems unless you thoroughly prep the surface and choose a product that bonds well to exterior materials.
Expect higher long-term maintenance—more frequent touch-ups or repainting—if you skip proper exterior-grade coatings.
Durability And Weather Resistance
Although interior paint might seem like a quick fix, it won’t hold up well outdoors: its binders and additives aren’t formulated to resist UV rays, moisture, temperature swings, or abrasion, so it will chalk, peel, and fade far sooner than exterior paint designed for those stresses.
You’ll reduce paint longevity and could increase environmental impact by needing frequent recoats and cleanup.
Consider factors that affect outdoor performance:
- UV exposure — breaks down pigments and binders.
- Moisture cycles — cause swelling, blistering, and mold.
- Temperature fluctuation — leads to cracking and loss of flexibility.
Choose exterior formulations for real durability.
Adhesion And Surface Prep
Durability issues like fading and blistering often start with poor adhesion, so surface prep matters as much as the paint formula.
You’ll need to assess surface compatibility before painting: clean, remove loose material, sand glossy areas, and prime porous or previously stained surfaces.
Interior paints won’t tolerate dirt, chalking, or uneven porosity outdoors, so skipping prep risks peeling.
Use proper application techniques—consistent thickness, appropriate brush or roller, and suitable drying conditions—to promote bonding.
A quality exterior primer designed for the substrate bridges gaps between interior paint and outdoor conditions, but even then adhesion remains less reliable than with true exterior systems.
Long-Term Maintenance Needs
Because interior paint wasn’t formulated for UV, moisture, and temperature swings, you’ll face more frequent touch-ups and repairs if you use it outside.
Expect higher maintenance frequency: fading, peeling, and chalking show up sooner, so you’ll be repainting more often than with exterior-grade coatings.
Consider cost implications: labor, materials, and prep add up over time, often exceeding the saved upfront expense.
Plan for proactive upkeep and monitor problem spots.
- Inspect quarterly for peeling, blistering, and color loss.
- Touch up or strip and recoat as issues escalate.
- Budget recurring labor and replacement costs.
Decision Checklist: When It’s Acceptable and When It Isn’t
When you’re deciding whether to use interior paint outside, weigh the location, exposure, and expected lifespan of the finish—interior paints can work for protected, low-traffic areas but won’t hold up where moisture, sunlight, or temperature swings are significant.
Ask: is the surface sheltered (porch ceiling, under-eave trim)? Will it face direct sun, rain, or freeze/thaw?
Consider maintenance tolerance and budget—interior paint risks include faster fading, peeling, and mildew, while exterior paint benefits are durability and weather resistance.
If the spot is temporary, movable, or hidden, you might accept interior paint; otherwise choose exterior-grade coatings.
Why Interior and Exterior Paints Are Formulated Differently
Now that you’ve weighed where and how long a finish needs to last, it helps to understand why manufacturers make interior and exterior paints differently. You’ll see formulation differences because environments demand different properties.
Paint chemistry changes binders, additives, and pigments so coatings handle moisture, dirt, and temperature swings. Consider three core contrasts:
Paint chemistry tweaks binders, additives, and pigments so coatings withstand moisture, dirt, and temperature swings.
- Binders and flexibility — exterior binders resist cracking; interior binders prioritize scrub resistance.
- Additives and mildewcides — exteriors include more biocides and UV stabilizers; interiors focus on low odor and stain resistance.
- Pigment and film thickness — exterior formulas emphasize weatherproof opacity and toughness.
How UV Exposure Breaks Down Paint Binders
If sunlight hits a painted surface for long enough, ultraviolet (UV) radiation starts breaking the polymer chains in the paint’s binder. You’ll see the effects as chalking, fading, and loss of adhesion.
When you use interior paint outside, UV degradation accelerates binder breakdown because interior formulations lack UV stabilizers and protective pigments. The weakened binder no longer holds pigment particles or adheres to substrate, so paint powdering and flaking follow.
You’ll notice color washout and reduced durability long before moisture issues appear. Recoating becomes harder since new paint can’t bond to a compromised film, shortening the finish’s lifespan.
How Moisture and Humidity Damage Interior Paint Outdoors
UV damage weakens the paint film, but moisture is what really exposes those weaknesses outdoors: rain, humidity, and condensation attack the binder and substrate in ways interior formulations weren’t made to handle.
You’ll see moisture impact quickly: swelling, blistering, and loss of adhesion as water breaks polymer links. Humidity effects promote mildew and staining on softer interior resins.
You can mitigate some problems, but interior paint won’t resist persistent wetting or damp cycles.
Consider these typical outcomes:
- Blistering and peeling where water pushes film off wood or metal.
- Mildew growth staining softer binders.
- Flaking and reduced cohesion leading to failure.
Temperature Swings and Coating Flexibility Problems
When you use interior paint outside, the film can stay less flexible and brittle in shifting temperatures.
That reduced flexibility raises the risk of cracking as the surface expands and contracts.
Repeated thermal movement puts stress on the coating and shortens its lifespan.
Reduced Film Flexibility
Because exterior surfaces expand and contract far more than interior ones, an interior paint’s film can crack, craze, or pull away as temperatures swing. You’ll notice this most where joints and corners flex.
Reduced film flexibility means the coating can’t stretch with substrates, degrading film performance and lowering paint flexibility against cyclic movement. You’ll see premature splitting, loss of adhesion, and moisture entry where the film fails.
To minimize problems, consider proper products and detailing:
- Use flexible exterior-grade coatings where movement is expected.
- Prepare surfaces and seal joints with compatible elastomeric sealants.
- Monitor and repair early signs of loss of cohesion.
Increased Cracking Risk
Although interior paints can look fine at installation, temperature swings on exterior surfaces will quickly expose their limited flexibility and lead to cracking.
You’ll notice hairline fractures as coatings can’t expand and contract with daily and seasonal changes. That deterioration compromises adhesion, lets moisture penetrate, and accelerates substrate damage.
For effective cracking prevention, choose exterior-grade formulations designed to flex and shed water. Proper surface prep and correct film thickness also help maintain paint longevity.
If you skip those steps, you’ll face faster failure, more frequent repainting, and higher long-term costs—exactly what you hoped to avoid when choosing a cheaper interior product.
Thermal Movement Stress
Cracking from limited flexibility is only part of the problem; temperature swings put a different kind of stress on coatings that interior paints aren’t built to handle.
You’ll notice bonds failing when surfaces expand and contract with daily thermal expansion cycles. Interior formulas lack additives to absorb stress factors, so paint delaminates, blisters, or flakes.
- Rapid heating: expands substrate faster than paint can flex.
- Night cooling: contraction creates tensile stress at the film-substrate interface.
- Repeated cycles: fatigue accumulates, accelerating failure.
You should use exterior-grade coatings engineered to tolerate thermal movement and resist those stress factors.
How Mildew and Mold Grow on Interior Paint Outside
When you put interior paint outside, its softer, less moisture-resistant film can trap humidity and organic debris, creating the exact conditions mildew and mold need to start growing.
You’ll notice spores land on dirt, pollen, and wood tannins; the paint’s poorer adhesion and breathability let moisture linger, so colonies establish under the film.
Shade, poor drainage, and cool temperatures speed growth.
For mildew prevention, clean surfaces, remove organic residues, and improve ventilation before painting.
If growth appears, use proper mold treatment—clean with appropriate biocides, rinse thoroughly, and replace the paint with a breathable, exterior-grade coating.
Typical Lifespan: Interior vs Exterior Paint
After addressing mildew risks, you’ll want to contemplate how long paint will actually last outdoors versus inside.
You’ll notice interior paint lifespan is shorter when exposed: thinner binders, less UV and moisture resistance mean fading, chalking, and peeling can appear in months to a few years.
Exterior paint longevity is engineered for years—often 5–15 years depending on quality, surface prep, and climate.
Exterior paint is built to last — typically lasting 5–15 years, influenced by paint quality, prep, and local climate.
Consider:
- Exposure: sun and moisture cut interior paint lifespan dramatically outdoors.
- Formulation: exterior paint longevity comes from UV stabilizers and flexible binders.
- Maintenance: regular upkeep extends either finish but can’t fully compensate for wrong paint choice.
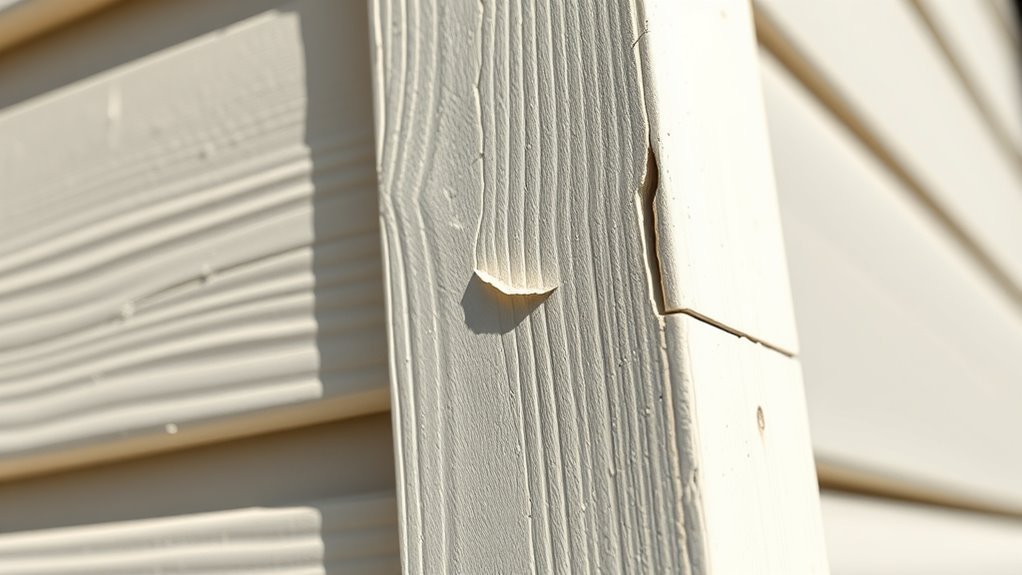
Signs Your Exterior Finish Used Interior Paint
Because interior paints aren’t built for sun, moisture, or temperature swings, you’ll spot telltale failures sooner than you expect: rapid fading, powdery chalk on the surface, soft or gummy spots after rain, and paint that flakes or peels in large sheets rather than tiny raised cracks.
You’ll notice uneven sheen and dirt that won’t wash off, signs that the paint formulation lacks exterior binders and UV blockers. Reduced paint longevity becomes obvious within a season: color loss, brittleness, and repeated touch-ups.
If mildew appears where it shouldn’t, or coats feel powdery, you’ve probably got interior paint exposed outdoors.
Inspecting Peeling, Cracking, and Blistering
If you see paint lifting, cracking into pieces, or bubbling under the surface, start a focused inspection to determine how far the damage goes and what’s causing it.
Check exterior areas for peeling surfaces and note where blistering paint appears most. Use this quick checklist to guide you:
- Examine edges and overlaps for loose flakes and underlying moisture.
- Tap and probe suspect spots to gauge adhesion and substrate integrity.
- Record location, size, and pattern to trace causes like poor adhesion or trapped damp.
You’ll document the problem clearly, decide if spot repairs will work, and plan for proper remediation.
Spotting Fading and Chalking Early
Watch for subtle color loss on sunny walls and trim, since early fading is often the first sign interior paint can’t handle outdoor UV.
Rub a fingertip over painted surfaces to check for a chalky residue that indicates surface powdering. If you notice either, it’s usually caused by weather-induced paint breakdown and means you should assess and replace the coating soon.
Early Color Loss Signs
When paint starts losing its color, you’ll usually notice small, uneven patches where hues look washed out compared to surrounding areas. These early signs often precede chalking, which shows up as a powdery residue you can rub off with your fingers.
You should check exposed trims, sun-facing walls, and north sides for subtle fading. Early detection helps you assess color degradation and estimate reduced paint longevity.
Look for:
- Uneven tone near edges and corners.
- Dull, less saturated panels under sunlight.
- Soft haloing where pigments thin.
If you spot these, plan a spot test and protective measures promptly.
Surface Powdering Detection
After spotting early color loss, check for surface powdering by rubbing a clean white cloth over small, inconspicuous areas—chalky residue on the cloth signals paint breakdown. You’ll perform a quick surface assessment: note texture, amount of residue, and affected areas. Record powdering indicators and frequency to decide if repainting or stripping is needed. Use this simple table to log observations.
| Area | Residue | Texture |
|---|---|---|
| Siding | Light | Smooth |
| Trim | Heavy | Rough |
| Eave | None | Intact |
Keep monitoring monthly; consistent powdering means the interior formula’s failing outdoors.
Weather-Induced Paint Breakdown
Because sunlight, moisture, and temperature swings accelerate paint breakdown, you should scan exterior surfaces regularly for early signs like uneven fading and a dusty, chalky film; spot these early to protect paint longevity.
Check for texture changes, loose granules, and color loss, since environmental factors dictate how fast interior paints fail outside. Take notes and act when you see trouble.
- Inspect: touch surfaces for powdery residue and compare shaded versus sunlit areas.
- Record: photograph problem spots and dates to track progression.
- Respond: clean, prime, and use proper exterior coatings to restore protection.
Adhesion Failure on Trim and Siding
If you use interior paint on exterior trim and siding, you’ll often see it peel, flake, or lift within months because it isn’t formulated to withstand sunlight, moisture, or temperature swings; the binders and flexible additives that keep exterior coatings adhered and elastic are missing or insufficient in interior formulas.
You’ll notice edges lifting around joints and nailheads, compromising trim protection and reducing siding longevity. Once adhesion fails, water intrusion accelerates paint loss and promotes further detachment.
To avoid rework, choose exterior-grade products, prepare surfaces properly, and use primers designed for outdoor adhesion so your trim and siding stay sound longer.
Wood Risks When Using Interior Paint Outside
When you coat exterior wood with interior paint, the finish won’t protect the grain from moisture, UV, or seasonal movement the way an exterior formulation will.
You risk trapped moisture, reduced paint adhesion, and accelerated wood rot because interior paints lack flexible binders and mildewcides. Expect cracking, peeling, and hidden decay over time.
To mitigate immediate problems you can prep better, but interior products remain inadequate for long-term protection.
- Poor flexibility → cracking with expansion/contraction
- Weak adhesion → peeling and blistering
- Moisture entrapment → promotes wood rot
Choose exterior-grade coatings for durability and proper protection.
Metal Risks: Rust Under Interior Paint
Even though interior paint may look fine at first, it won’t stop moisture and oxygen from reaching metal surfaces, so rust can start under the film and spread unseen. You’ll find bubbling, flaking, and accelerated corrosion when interiors are used outside because they lack proper rust prevention and durable metal coatings. To protect metal, use primers designed for corrosion resistance and topcoats rated for exterior exposure. Inspect regularly and address blisters immediately to avoid hidden failures. Below is a quick comparison to help you decide.
| Surface | Risk | Recommendation |
|---|---|---|
| Bare metal | High | Use rust-inhibiting primer |
| Interior-painted metal | Higher | Recoat with exterior metal coatings |
| Properly coated metal | Low | Maintain and inspect routinely |
Masonry and Stucco Problems With Interior Paint
Because interior paints aren’t formulated to handle wet walls, they’ll trap moisture within masonry and stucco, leading you to see peeling, efflorescence, and spalling as salts and water push the film off the substrate.
You’ll notice accelerated masonry damage and visible stucco deterioration when vapor can’t escape. Don’t expect interior formulations to bridge hairline cracks or resist alkaline salts.
Instead, you’ll face staining and flaking that shorten the coating’s life and mask deeper issues. Address underlying dampness and choose breathable, exterior-grade products.
Common consequences include:
- Salt crystallization lifting paint.
- Surface blistering and flake loss.
- Accelerated substrate decay.
Doors and Window Frames: Common Failures
When you use interior paint on exterior doors and window frames, you’ll often see peeling start at the edges where weather and movement break the bond.
You may also notice swelling from trapped moisture that makes trim stick or crack the finish.
Fastener corrosion can leave rusty stains and accelerate paint failure if you don’t use exterior-grade materials.
Paint Peeling Around Edges
One common spot you’ll notice paint peeling is around doors and window frames, where edges and joints face constant movement and moisture.
You’ll see peeling paint at seams, corners and along trim where interior formulas can’t flex or bond. Expect faster edge deterioration if you skip proper adhesion steps.
To address failures, focus on these practical actions:
- Clean and sand edges, removing loose paint and contaminants.
- Use exterior-grade primer and flexible caulk at joints before painting.
- Choose paint labeled for exterior use and allow full cure between coats.
Acting early prevents recurring peeling and preserves finishes.
Moisture-Related Swelling
If exterior moisture gets past paint or seals, it forces wood and composite door and window frames to swell, warp, and bind, causing sticking sashes, cracked glazing, and gaps that let more water in.
You’ll notice doors that jam and windows that won’t close squarely as moisture absorption increases in improperly protected profiles.
Interior paint accelerates paint deterioration, so coatings fail to repel water and let repeated wet-dry cycles deform the substrate.
You should inspect joints and repaint with appropriate exterior products; otherwise swelling will recur, hardware will strain, and energy loss or rot can follow as the frame geometry degrades.
Fastener Corrosion Staining
Because metal fasteners exposed to moisture and incompatible coatings corrode, you’ll often see rusty streaks and dark halos spreading from screw and nail heads on doors and window frames.
You notice staining where paint fails to seal around fastener types like steel screws, galvanized nails, or stainless options. That staining undermines appearance and can indicate hidden rust that expands joints.
To address it, you should identify the fastener, remove rust if possible, and repaint with proper exterior-grade coatings compatible with corrosion prevention.
Prioritize replacing corroded fasteners and using sealant to block moisture.
- Inspect fastener types
- Replace rusted pieces
- Apply corrosion prevention
Failures in the First 6 Months After Painting Outside
When you spot peeling, blistering, or rapid color fade within the first six months after painting outside, it usually means the paint job failed to handle weather, surface prep, or product mismatch. You’ll notice poor paint performance when moisture, UV, or dirt attack thin interior formulations. Incorrect application techniques—too thick, wrong temperature, no primer—speeds failure. Act quickly: document, remove loose film, and choose proper exterior-grade products. Expect warranty limits if you used interior paint outdoors.
| Symptom | Likely Cause |
|---|---|
| Peeling | Adhesion failure |
| Blistering | Moisture under film |
| Fading | UV breakdown |
| Chalky | Poor binder stability |
Long-Term Maintenance Headaches From Interior Paint Outdoors
If you use interior paint outdoors, you’ll face ongoing issues like peeling and flaking that force frequent touch-ups.
The color will fade faster in sun and weather, so your siding or trim won’t stay vibrant for long.
You’ll also increase moisture retention and mold risk, meaning more cleaning and repairs down the road.
Peeling And Flaking
Although interior paints can look fine at first, they’ll start peeling and flaking once exposed to sun, moisture, and temperature swings, leaving you with constant maintenance headaches.
You’ll notice bubbling, edge lift, and large chips as the bond breaks—peeling causes include poor adhesion, moisture penetration, and flexible expansion.
To manage flaking prevention, you’ll need proper exterior formulations, primers, and surface prep; otherwise you’ll sand and repaint repeatedly.
- Inspect surfaces for adhesion issues.
- Use exterior-grade primer and paint.
- Address moisture sources and seal gaps.
If you ignore this, expect frequent touch-ups and growing repair costs.
Faster Color Fading
Because interior paints aren’t formulated to resist UV and weathering, they’ll lose their color far faster outdoors than true exterior coatings.
You’ll notice fading, chalking, and washed-out hues within months, not years. Poor color retention forces more frequent touch-ups and full repaints, raising costs and hassle.
Interior binders and pigments break down under sun exposure, so paint longevity collapses compared with exterior products designed with UV stabilizers and durable resins.
If you want surfaces that keep their look, use coatings made for outside conditions.
Otherwise expect accelerated fading and shorter intervals between maintenance cycles.
Moisture And Mold Risk
Color loss isn’t the only problem you’ll face—interior paints also let moisture and mold become long-term headaches when used outside.
You’ll notice interior formulas often trap moisture, causing moisture buildup beneath the finish. That damp environment invites mold growth, staining siding and degrading wood. To limit damage you must act swiftly and plan maintenance.
- Inspect surfaces regularly for peeling or damp spots to catch moisture early.
- Repaint with exterior-grade products that allow breathability and aid mold prevention.
- Remove mold with appropriate cleaners, dry thoroughly, and repair underlying leaks to prevent recurrence.
Cost: Initial Savings vs Replacement Costs
When you paint exterior surfaces with interior paint to save money up front, you’ll likely face higher long-term costs from faster deterioration, peeling, and more frequent repainting.
You’ll enjoy initial savings, but those gains often disappear when wood, siding, or trim need earlier attention.
Interior formulations lack UV and moisture protection, so you replace or strip failing coatings sooner, increasing labor and materials.
Factor in repeat painting cycles and potential substrate repairs; replacement costs can surpass any short-term budget relief.
Choosing proper exterior paint may cost more initially but usually lowers lifetime expense and maintenance headaches.
Why Quick Patch Jobs Fail: Risks of a One-Day Fix
If you slap interior paint onto an exterior surface without proper cleaning and sanding, it won’t bond and will peel quickly.
You’ll also be gambling with the weather—moisture, temperature swings, and UV exposure can ruin a same-day patch.
Quick fixes save time now but often force you into a larger, costlier repair later.
Poor Surface Preparation
Skimping on surface prep is the fastest way to watch a fresh paint job peel, blister, or fail within months.
You’ll think a quick wipe and slap of interior paint saves time, but inconsistent surface texture and contaminants ruin paint adhesion. Follow basic prep steps and don’t cut corners.
- Clean: remove dirt, mildew, and loose material.
- Sand/prime: even out texture and seal porous spots.
- Repair: fix cracks and gaps before painting.
If you skip these, your one-day fix becomes a year of touchups and expense. Proper prep protects finish longevity.
Weather-Related Failures
Because weather changes so quickly, a one-day exterior paint job can be doomed before it even dries. You might slap interior paint on a siding patch and call it done, but sudden rain, sun, or temperature swings trigger weather deterioration you didn’t plan for.
Interior formulas lack UV inhibitors and flexible binders, so cracking, peeling, and discoloration appear fast, shortening paint longevity dramatically. If you rush, moisture trapping and improper curing invite mold and substrate damage.
Take time: choose exterior-grade products, watch forecasts, and allow proper drying between coats. That prevents repeated touch-ups and saves effort in the long run.
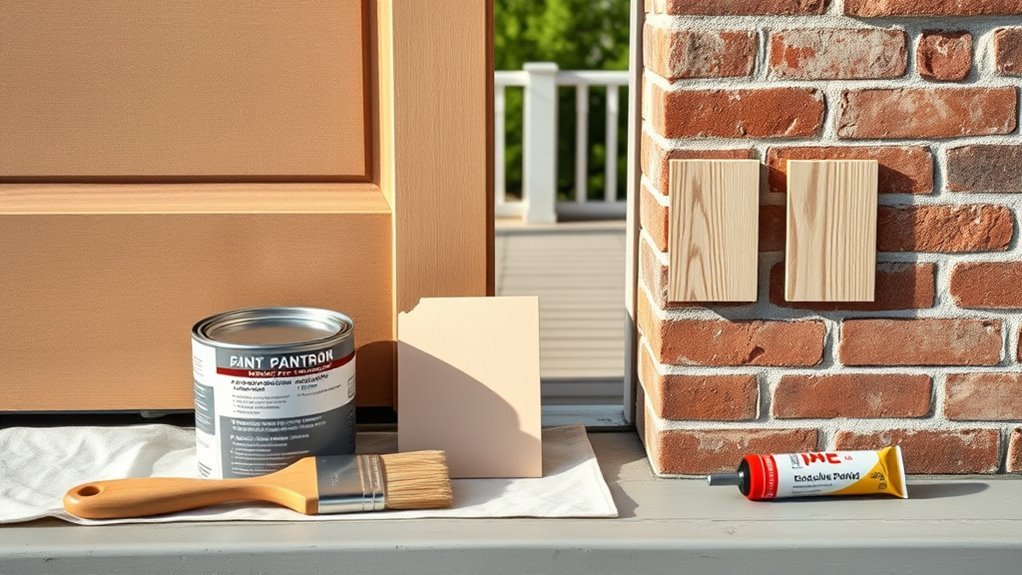
How to Test Whether Exterior Paint Contains Outdoor Additives
When you want to confirm that a can of paint is suited for outdoor use, run a few simple tests that reveal UV stabilizers, mildewcides, and weatherproofing agents without needing a lab.
You’ll perform quick paint testing to check for outdoor additives by observing behavior under stress.
- Dry rub test: apply a dried smear to a damp cloth; mildewcide-rich paint resists staining and odor.
- Sun fade check: brush a swatch on cardboard, expose to sun 48 hours; UV-stable paint keeps color longer.
- Water bead test: spray cured film; weatherproof formulas bead and shed water rather than soak in.
How to Tell Paint Type From the Can Label
Start by reading the product description on the can — it usually states whether the paint is meant for interior, exterior, or both.
Look for usage icons or labels that show outdoor suitability, and note the listed resin type (like acrylic or alkyd) and percentage of solids to gauge durability.
Those three details will tell you if the paint can handle exterior conditions.
Locate The Product Description
Labels tell you almost everything you need to know about a paint’s designated use, so check the can before you buy or apply it.
Read the product description closely: it names specified surfaces, weather resistance, and whether it’s for interior or exterior.
Look for terms comparing paint formulations or listing product alternatives if you need different performance.
Note VOCs, dry time, and substrate prep.
If the description is vague, consult the manufacturer’s tech sheet online.
Use the label to decide suitability, not assumptions.
- Surface/type
- Weather/performance
- Specs/alternatives
Check For Usage Icons
Look for small icons or symbols on the can that instantly tell you where the paint should go—interior, exterior, or both—and what surfaces it fits.
You’ll spot usage icons for walls, trim, metal, or masonry; they’re shorthand for designated paint types and save you reading dense text.
If a can shows an indoor room symbol only, don’t assume exterior durability.
Look for combined icons when you need versatile paint.
Use these symbols to compare products quickly and to avoid buying the wrong formula.
They’re the fastest cue on the label for matching job requirements and weather exposure.
Read The Resin And Solids
Icons give you a quick read, but the fine print tells the full story—so now check the resin and solids listed on the can.
You’ll learn whether the formula suits outdoor exposure by spotting resin types (acrylic, alkyd, epoxy) and noting the solid content percentage. Higher solids usually mean better film thickness and durability outdoors.
- Compare resin types for UV, moisture, and flexibility resistance.
- Read the solid content—higher percentages favor exterior longevity.
- If label’s vague, contact manufacturer or choose a product explicitly rated for exterior use.
Quick Field Test for Paint Durability
Before you commit a full coat, do a quick field test to check how the interior paint will hold up outside.
Pick a small, inconspicuous area, apply two thin coats, and label the date.
Over the next week expose the patch to direct sun, rain, and shade; note any blistering, peeling, or color shift.
Over the next week, expose the patch to sun, rain, and shade; watch for blistering, peeling, or color shift.
Use a tape adhesion test and a gentle scrub with a damp cloth to assess film toughness.
Photograph daily and record conditions.
This field test gives immediate feedback on paint durability and helps you decide if that interior formula can tolerate exterior stresses without long-term failure.
Interpreting Test Results and Next Steps
You’ll compare the field test results against your durability expectations to see if the interior paint held up.
If the paint failed on adhesion, fading, or moisture resistance, you’ll plan remedial actions like sanding, priming, or switching to an exterior-grade product.
If results are acceptable, you’ll still schedule periodic inspections to catch any future issues early.
Evaluate Durability Results
When you review the test data, look for patterns in cracking, peeling, fading, and adhesion rather than fixating on a single metric; those trends tell you whether the interior paint can survive exterior stresses.
You’ll compare durability testing results to expected paint longevity, noting failure modes and timelines. Use the following to prioritize findings:
- Time-to-failure — when cracking/peeling begins under UV, moisture, freeze-thaw.
- Degree of degradation — percentage loss of gloss, color shift, adhesion strength.
- Environmental correlation — which conditions accelerated failure (sun, salt, humidity).
From these you’ll judge suitability and decide whether further testing or replacements are warranted.
Plan Remedial Actions
Having identified the failure patterns and timelines in your durability review, outline targeted remedial actions that address the specific modes of degradation you observed.
Prioritize quick fixes (cleaning, patching, recoat) for aesthetic failures and structural repairs for adhesion or blistering.
Select remedial strategies tied to root causes: improve surface prep, use primers, enhance ventilation, or replace failed substrate sections.
When repainting, choose proper paint alternatives—exterior-grade acrylics, elastomeric or oil-based systems—matching climate and substrate.
Document actions, expected lifespan, and monitoring checkpoints.
If failures persist after remediation, plan for full stripping and professional consultation.
Can You Topcoat Interior Paint With Exterior Paint?
Curious whether you can topcoat interior paint with exterior paint? You can, but you must check paint compatibility and choose proper topcoat options. If the interior layer is fully cured and clean, exterior coatings can add weather resistance.
Consider these steps:
Consider these steps to ensure proper adhesion and compatibility before applying an exterior topcoat over interior paint.
- Confirm paint compatibility: check manufacturer data sheets for solvent/binder match and adhesion info.
- Lightly scuff and clean the surface to promote mechanical adhesion without stripping the interior coating.
- Test a small area to verify no reaction, blistering, or color change before full application.
When in doubt, use primer or consult the paint maker for best results.
Preparing Surfaces Painted With Interior Paint
Start by inspecting the interior-painted surface for loose paint, dirt, or gloss that could prevent a new coat from sticking. You’ll need careful surface preparation: wash, sand glossy areas, and scrape or abrade failing spots. Test patch adhesion to confirm paint compatibility before full work. Repair cracks and fill holes so the finish bonds uniformly.
| Task | Tools | Target |
|---|---|---|
| Cleaning | Mild detergent, sponge | Remove dirt/grease |
| Sanding | 120–220 grit | Dull gloss for adhesion |
| Repair | Putty, scraper | Smooth substrate |
Finish only when the surface is dry and stable.
Best Primers to Use Over Interior Paint Outdoors
Once the surface is clean, sanded, and repaired, pick a primer formulated to bridge interior paint and outdoor conditions. You’ll want primers that promote adhesion and block moisture, choosing based on substrate and existing finish.
Consider these primer types and application techniques:
- Bonding primer — for slick interior finishes; roll or brush, then back-roll for even coverage.
- Oil-based blocking primer — for stains and tannins; apply thin coats, allow longer dry times.
- Acrylic exterior primer — flexible and breathable; spray for large areas, touch up with brush.
Follow manufacturer recoat windows and use proper ventilation and drying conditions.
Exterior Paint Types That Will Bond to Interior Coatings
When you need durable adhesion over interior coatings outdoors, oil-based exterior paints are a reliable choice because they bond well to many existing finishes.
Consider using an alkyd-compatible primer to bridge water-based interiors with solvent-based exteriors for improved grip.
For high-traffic or moisture-prone areas, epoxy exterior coatings can provide exceptional adhesion and long-term protection.
Oil-Based Exterior Options
If your interior coating is oil-based or cured to a hard, glossy finish, choose exterior oil-based or alkyd-modified exterior paints—they’re formulated to bond to older oil films and withstand weathering.
You’ll get oil based benefits like toughness, adhesion, and water resistance when you prep properly. Follow these focused application techniques: clean, sand lightly, and use a compatible solvent wipe.
- Select high-quality oil or alkyd-modified exterior enamel for durability.
- Apply thin, even coats; allow full flash time between coats.
- Monitor temperature and humidity; avoid painting in extremes for ideal cure and adhesion.
Alkyd Primer Compatibility
Because alkyd primers bond well to cured oil-based interiors, you’ll get a reliable base for exterior topcoats on previously painted surfaces.
You should choose alkyd when adhesion and weather resistance matter; alkyd benefits include strong bonding to glossy or aged oil coatings and improved solvent tolerance during application.
Match primer types to substrate: use stain-blocking alkyd primers on tannin-prone wood, and general-purpose alkyd primers on metal or trim.
Prep by cleaning and scuffing glossy interiors before priming.
Once primed, select an exterior topcoat compatible with alkyd primers to guarantee lasting performance and reduced peeling risks.
Epoxy Exterior Coatings
- Prep: clean, sand, remove contaminants.
- Product: choose a marine or industrial exterior epoxy.
- Technique: mix accurately, apply within pot life.
When You Must Strip to Bare Substrate
When old paint is peeling, blistered, or failing across large areas, you’ll need to strip down to the bare substrate to guarantee a reliable exterior coating; doing anything less risks adhesion problems and rapid re-failure. You’ll assess substrate preparation needs, choose appropriate stripping techniques, and confirm sound material before recoating. Remove all loose coatings, contaminants, and mill scale; check for rot or corrosion. After stripping, dry and clean the surface, then prime promptly. The table below summarizes common conditions and actions.
| Condition | Recommended Action |
|---|---|
| Peeling paint | Strip to substrate |
| Rusted metal | Strip and treat |
Tools and Materials for a Durable Exterior Repaint
Start with a compact kit that covers preparation, protection, and application so you won’t be hunting tools mid-job. Gather quality exterior primer, weather-resistant paint, caulk, and cleaners.
Choose brushes, rollers, and an airless sprayer suited to paint type; practice paint application techniques on scrap. Use sanders, scrapers, and a pressure washer for surface preparation methods, plus rags and tack cloths.
Protect with drop cloths, painter’s tape, and safety gear. Plan for touch-up supplies and leftover sealed paint.
Keep a checklist:
- Prep and protection
- Application tools
- Cleanup and touch-ups
Timing and Weather Windows for Repainting Outdoors
Pick your repaint window based on temperature, humidity, and recent weather patterns, because paint needs consistent conditions to cure properly.
You’ll plan timing considerations around daily highs and lows, avoiding freeze-thaw cycles and extreme heat that hinder adhesion. Check forecasts for clear stretches—wet or windy weather can ruin a fresh coat.
Aim to paint when surfaces are dry for at least 24–48 hours and humidity stays moderate. Morning starts let solvent-based paints off-gas before evening cools.
Monitor local weather conditions the week before and after application so you won’t trap moisture or force premature failure.
How to Prevent Recurring Failures After Repair
If you want repairs to last, address the root cause before repainting and match materials and methods to the exterior conditions.
You should apply proper repair techniques and preventive measures so the same problems don’t return. Clean, dry, and stabilize substrates; use compatible primers and exterior-grade coatings; and follow manufacturer curing times.
Check for underlying moisture, rot, or poor flashing and fix those first. Document what you did and inspect after the first season.
- Use repair techniques: strip, patch, prime, and seal.
- Install preventive measures: flashing, ventilation, and drainage.
- Monitor and touch up early.
When to Call a Professional Painter or Contractor
Once you’ve stabilized the substrate and applied proper repairs, know when the job is beyond DIY so you don’t repeat work or risk damage.
Call a professional painter or contractor if surface failure recurs, moisture issues persist, or large areas need stripping and priming.
Seek someone who follows professional standards, carries proper tools, and documents a clear project assessment.
You’ll want contractors who can diagnose underlying causes, recommend compatible exterior coatings, and provide timelines and cost estimates.
If safety (heights, lead paint) or structural concerns arise, hire pros immediately to guarantee durable, code-compliant results and avoid costly callbacks.
Warranty and Insurance Implications of Using Interior Paint Outside
Because interior paint isn’t formulated for UV, moisture, and temperature swings, using it outdoors can void manufacturer warranties and complicate insurance claims.
Using interior paint outdoors risks warranty voids and may complicate insurance claims due to UV, moisture, and temperature exposure.
You should know warranty implications and how insurance coverage may respond if damage follows. Inspect product labels and your policy, document what you used, and report issues promptly.
- Check warranty: manufacturers often exclude exterior use, so coverage for peeling or failure is denied.
- Review insurance coverage: insurers may deny claims tied to improper maintenance or nonstandard materials.
- Keep records: receipts, photos, and communications help dispute denials and show you acted in good faith.
Case Studies: Mistakes and How They Were Fixed
When homeowners used interior paint on exterior trim, they often saw rapid peeling, mildew, and faded color within a season.
In one case study, you learn they stripped loose coat, cleaned mold, primed with exterior primer, and applied proper exterior acrylic, fixing paint failure.
Another homeowner’s case study shows chalking and blistering; you sanded, replaced rotten wood, then used breathable exterior paint to prevent recurrence.
You’ll see that most fixes follow the same steps: remove failed layers, repair substrate, use appropriate primer and exterior-grade topcoat.
These repairs took time but restored protection and appearance when you followed correct materials and methods.
Eco and Safety Tips When Repainting Outside
If you want durable results without harming yourself or the environment, plan your repainting with safer products and responsible practices. You’ll choose eco friendly materials like low-VOC exterior paints and recyclable drop cloths, minimize waste, and follow safety precautions to protect skin and lungs.
Work when weather’s mild to reduce runoff and avoid spraying before rain. Dispose of leftovers at hazardous-waste sites and clean brushes with minimal solvent. Wear gloves, goggles, and respirator as needed.
Work in mild weather, avoid spraying before rain, dispose leftovers properly, clean brushes sparingly, and wear gloves, goggles, and a respirator.
- Pick low-VOC, durable exterior paint.
- Follow disposal and cleanup rules.
- Use PPE and monitor weather.
Frequently Asked Questions
Will Interior Paint Off-Gas More on a Covered Porch Versus Fully Exterior Areas?
Yes — you’ll likely notice higher off gassing concerns on a covered porch because reduced airflow traps fumes; you’re also risking paint durability since interior formulas weren’t built for weather, moisture, or UV exposure outdoors.
Can Interior Paint Void My Home Insurance for Weather-Related Damage?
Right off the bat, you could risk insurance implications: if poor weather resistance from interior paint causes damage, your insurer might deny claims. Don’t cut corners—you’ll want contractor-quality exterior paint to avoid trouble.
Do Homeowner Association Rules Restrict Using Interior Paint Outdoors?
Yes — your HOA can restrict outdoor paint choices; you’ll need approval for paint durability and color fading concerns, and they’ll enforce specific colors, finishes, and maintenance standards to keep the community’s appearance consistent.
How Does Interior Paint Affect Historic Preservation Guidelines?
You’ll likely violate historic paint preservation standards because interior paint effects differ from approved exterior finishes, causing moisture trapping, accelerated deterioration, and appearance changes; preservation boards won’t approve improper products and may require costly corrective restoration.
Are Lead-Testing Requirements Different When Interior Paint Is Used Outside?
No — testing rules still apply: you’ll treat exterior-used interior paint as potential hazard, since lead exposure risks persist and paint durability may mask flakes; you’ll follow local lead-testing regulations and document results accordingly.
Conclusion
If you slap interior paint on the outside, don’t expect it to miraculously become weatherproof — it’ll peel, fade, and act like sunscreen that forgot SPF. You might get away with it on a covered porch for a season, but rain, sun, and temperature swings will turn your walls into a flaky, sad billboard of regret. Spend the little extra now, or prepare for repeat repairs that’ll haunt your weekends.