What to Paint on a Wall? Creative Wall Ideas
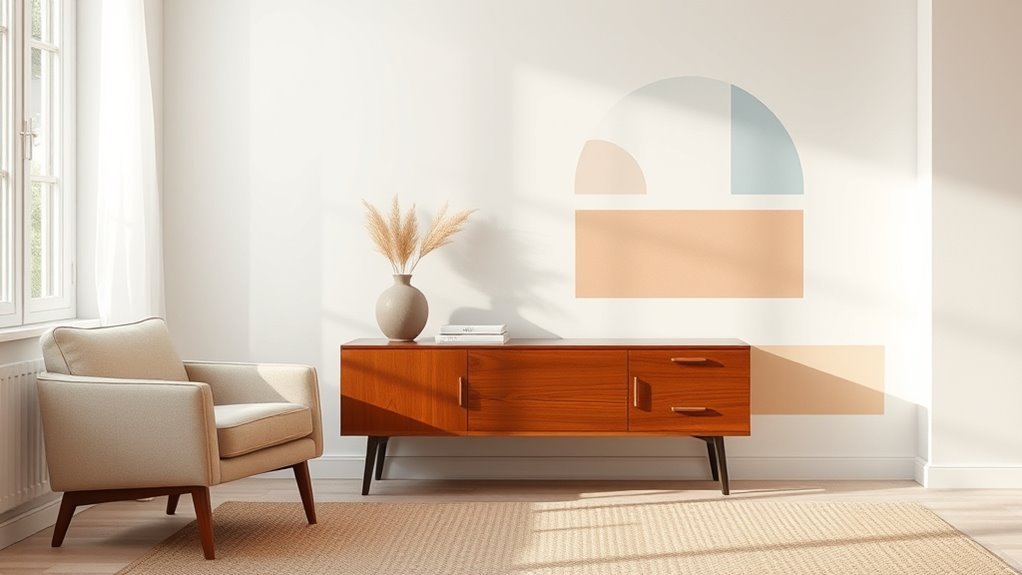
Think about how you use the room and pick a wall treatment that supports it: a bold accent wall or mural for energy, muted all-over tones for calm, or stripes and bands to change perceived height or width. Match colors to your light, furniture, and fabrics, test samples at different times of day, and choose durable, washable paints for high-traffic areas. Keep scale and pattern in mind, and skim ahead to find practical tips, palettes, and when to call a pro.
What Readers Mean When They Ask “What to Paint on a Wall
When readers ask “what to paint on a wall,” they’re usually not wondering about every possible color—they want a clear starting point that fits their space, taste, and lifestyle.
You’re looking to match wall preferences to daily routines, lighting, and furniture, so pick hues that support how you live.
Consider practical needs—durability, mood, and scale—alongside design inspirations like photos, travel, or fabric swatches.
Test samples on the wall and live with them for days. That process helps you rule out fleeting trends and choose a direction that feels intentional, usable, and true to your home.
How to Decide: Bold, Subtle, or Decorative?
Think about how you use the room—high-energy spaces can handle bolder choices, while calm areas suit subtle tones.
Match your wall idea to the existing palette so it feels intentional with furniture and accents.
Also ask yourself how long you want the look to last, since bold treatments demand more commitment than decorative or muted options.
Consider Room Function
Because the room’s purpose guides how your walls should feel, decide whether you want bold energy, subtle calm, or decorative charm before picking colors or patterns.
Consider wall purpose: a playroom needs lively hues and durable finishes, a bedroom benefits from muted tones that promote rest, and a home office calls for focus-enhancing contrasts.
Think about room atmosphere you want to create—energizing, tranquil, or inspiring—and match scale and texture accordingly.
Use accent walls sparingly in high-energy spaces, soft gradients in restful rooms, and decorative motifs where people linger.
Prioritize function over trend so the design supports daily use.
Match Existing Palette
Once you’ve settled on the room’s function and mood, match your wall choices to the existing palette so everything feels intentional.
You’ll weigh bold, subtle, or decorative approaches against furniture, textiles, and fixtures to maintain color harmony and design balance.
Choose a dominant hue for cohesion, an accent for pop, or a soft neutral to recede. Test samples in different light and live with them for days before deciding.
- Pick a dominant color that echoes big pieces.
- Use an accent wall for controlled contrast.
- Layer neutrals to support varied textures.
- Add pattern sparingly to preserve balance.
Assess Long-Term Commitment
Decide how permanent you want your walls to feel before picking a look, since bold choices demand more upkeep and commitment than subtle or decorative treatments.
You’ll weigh bold murals, textured plaster, or dramatic colors against easy-to-change options like accent stripes or removable wallpaper.
Think about your long term vision: will you live with this style for years or swap frequently?
Factor in maintenance considerations—touch-ups, cleaning, and potential repainting costs.
If you’re uncertain, choose reversible approaches that mimic a strong effect without permanent alteration.
That way you preserve flexibility while achieving personality today and adaptability tomorrow.
Match Your Wall Design to the Room’s Function
Think about how the room will be used and choose artwork that supports that purpose—storage-friendly pieces or instructional prints work well in busy areas, while serene art suits relaxation spaces.
Pick colors that shape mood: calming blues for bedrooms, energizing yellows for home offices or kitchens.
Matching function with art and color makes the room feel intentional and more comfortable to use.
Functionally Driven Artwork
Match the art to how you use the room: lively, energetic pieces suit kitchens and playrooms, while calm, tactile works—like fabric panels or muted landscapes—fit bedrooms and reading nooks.
You’ll prioritize a functionality focus so artwork supports activity, storage, or acoustics without sacrificing artistic balance. Choose durable, washable materials where mess happens; add magnetic or chalkboard elements for interaction; use sound-absorbing textiles in busy areas; pick low-reflective, soft pieces for restful spaces.
Consider scale, placement, and maintenance to keep form and function aligned.
- Durable surfaces
- Interactive features
- Acoustic textiles
- Scaled placement
Mood-Enhancing Color Choices
When you pick colors with the room’s purpose in mind, they’ll do more than decorate—they’ll shape how people feel and behave in the space.
Choose mood boosting hues that support activity: soft blues for focus in a study, warm yellows to energize a kitchen, and muted greens to calm a bedroom.
Consider contrast and saturation to tune intensity; high contrast boosts alertness, low saturation soothes.
Factor in lighting and furnishings so colors read correctly. Test samples at different times of day.
Focal Wall vs. Painting All Walls: Which to Choose?
Curious whether to make one wall pop or wrap the whole room in color? You’ll weigh focal points against immersive color. A single focal wall emphasizes art or furniture; all walls alter mood and flow through color psychology.
Consider scale, function, and how bold you want the room to feel.
- Contrast: Use one wall for drama without overwhelming the space.
- Cohesion: Paint all walls for a unified, calming environment.
- Flexibility: Focal walls let you change accents easily.
- Impact: Full-room color makes a stronger emotional statement; choose based on use and style.
Pick Paint Color by Room Lighting (Practical Tips)
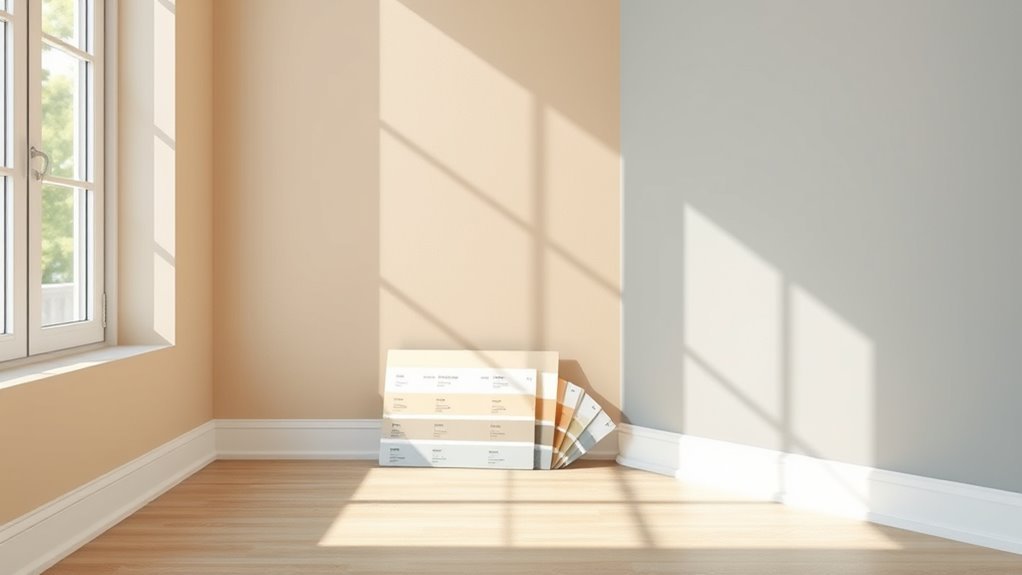
After deciding whether to highlight one wall or color the whole room, think about how light will change those choices—natural and artificial light can make the same swatch read warm, cool, or flat.
When choosing a feature wall or full-room color, remember light—natural and artificial—can shift any swatch’s temperature.
Check paint samples at different times: morning sun, midday, and evening with your lamps. North-facing rooms suit warmer tones to counter cool light; south-facing spaces can handle cooler hues.
Use lighting effects strategically—dimmer switches, bulb temperature, and fixture placement—to tweak perceived color.
Consider color psychology: calming blues for bedrooms, energizing yellows for kitchens.
Test big swatches on the actual wall before committing.
Pattern Scale for Walls: How Big Should It Be?
How big should a wall pattern be to fit your space and style? You’ll judge pattern proportions by room size, ceiling height, and furniture scale.
Smaller rooms suit finer repeats; large rooms handle bold, oversized motifs. Aim for scale balance so patterns don’t overwhelm or disappear. Consider viewing distance and focal points.
- Match motif size to wall area—large walls = larger repeats.
- Use furniture as a reference—patterns should relate to sofa or bed proportions.
- Test samples at eye level to assess visual weight.
- Mix scales—pair a dominant large pattern with smaller accents for harmony.
Budget-Friendly to Premium Wall Ideas (By Tier)
Whether you’re rejuvenating a rental on a shoestring or commissioning a statement wall, understanding budget tiers helps you choose solutions that look intentional, not cheap.
Start with budget friendly ideas: peel-and-stick murals, DIY stencils, accent color blocks, and thrifted frames arranged gallery-style.
Kick off with wallet-friendly focal walls: peel-and-stick murals, DIY stencils, bold color blocks, and thrifted gallery frames.
Mid-tier upgrades include custom wallpaper panels, professional paint finishes, molding trim, or a textured plaster accent you can afford with modest spending.
For premium options, commission an artist mural, install artisan wood paneling, marble-effect plaster, or integrated lighting and shelving for a bespoke focal wall.
Match tier to lifespan and resale goals for smart, stylish choices.
Low-Skill Wall Ideas That Still Look Pro
You can create striking walls without advanced skills by using simple geometric patterns and faux finish techniques.
Start with painter’s tape for clean shapes or a sponge and glaze for textured looks.
With basic tools and a little practice, you’ll get pro results quickly.
Simple Geometric Patterns
While you don’t need advanced skills to make a big impact, simple geometric patterns give any wall a crisp, modern look with minimal effort; straight lines, basic shapes, and a steady hand (or some painter’s tape) are all it takes to achieve a pro finish.
You’ll love how geometric shapes create rhythm and how color contrasts add depth. Plan with a sketch, measure carefully, and tape clean edges.
Try these approachable patterns:
- Diagonal stripes in two contrasting hues.
- Large overlapping circles for playful rhythm.
- Rectangular blocks in a grid for structure.
- Chevron bands for dynamic movement.
Faux Finishes Techniques
If you want a high-end look without hiring a pro, faux finishes deliver texture and depth with simple tools and techniques.
You can mimic faux wood with glaze and a graining tool, or create concrete textures by layering gray tones and dragging a trowel.
For marble effects, use thin veining and soft blending. Metallic finishes shine with subtle glazing and brushed highlights.
Use color layering to build richness, and achieve weathered looks by sanding and washing back layers.
Try sponge painting for mottled depth or rag rolling for soft, linear texture—both are low-skill, high-impact.
How to Paint a Single-Color Accent Wall (Step-by-Step)
1 straightforward accent wall can change a room’s mood instantly, and painting it yourself is easier than you think.
You’ll begin with color selection—pick a hue that complements furniture and lighting. Next, focus on wall preparation: clean, patch holes, sand, and prime for even coverage. Tape edges and protect floors.
- Measure and mark the chosen wall.
- Clean, patch, sand, and prime thoroughly.
- Use tape for crisp edges; roll paint in W motions.
- Apply two thin coats, remove tape while paint’s tacky, touch up as needed.
Stand back and enjoy the new focal point.
Step-by-Step: Create a Geometric Accent Wall
When you’re ready to move beyond a single-color accent, a geometric wall adds modern interest with surprisingly simple steps; you’ll plan the design, measure and tape precise shapes, then paint each section for crisp, professional results. You’ll sketch geometric shapes, pick two or three accent colors, and prep the wall. Tape carefully along drawn lines, seal edges with base color, then paint shapes one at a time. Remove tape when paint’s dry to the touch. Finish with touch-ups and a clear sealer if needed for durability.
| Shape | Size | Color |
|---|---|---|
| Triangle | Large | Bold |
| Hexagon | Medium | Neutral |
| Stripe | Thin | Accent |
| Diamond | Small | Pop |
Step-by-Step: Easy Ombré Wall Technique
Start by choosing a simple gradient scheme—two or three related shades—and gather a roller, brushes, paint tray, painter’s tape, and a couple of containers for mixing.
You’ll tape edges, prime the wall, and mark horizontal bands. Mix intermediate tones to create smooth ombre color blends.
Work wet-on-wet across each band, feathering with a dry brush to merge seams. Use gradient techniques like cross-rolling and light vertical strokes for even shifts.
Finish with a clear sealer for durability.
- Tape and prime
- Mark bands
- Blend wet-on-wet
- Feather and seal
Step-by-Step: Beginner-Friendly Statement Mural
After mastering an ombré wall, you can shift focus to a bold statement mural that still feels manageable for a beginner.
Start by sketching a single large motif—geometric shape, word, or silhouette—on tracing paper and transfer it to the wall with graphite. Gather paints, brushes, rollers, and tape.
Block off areas with tape, prime sections, then apply base coats. Use simple mural techniques like layering and controlled color blending with a dry brush or sponge to soften edges.
Remove tape, touch up outlines, and seal with matte varnish. Step back, tweak contrasts, and enjoy your confident focal piece.
Nature-Inspired Walls: Forests, Skies, Botanicals
If you want a wall that brings the outdoors in, nature-inspired designs—forests, skies, and botanicals—offer instantly calming, versatile options you can tailor to any room.
You can paint forest murals with tree silhouettes and wildlife silhouettes for a cozy study, or soft sky gradients above a bed for restful vibes.
Botanical patterns and leaf motifs work well as accent walls, using floral accents and earthy tones.
Consider nature textures and seasonal scenes to keep things fresh.
Pick a focal point and repeat motifs subtly so the room feels cohesive and alive.
- Forest murals with tree silhouettes
- Sky gradients for ceilings
- Botanical patterns and leaf motifs
- Wildlife silhouettes and floral accents
Abstract & Color-Field Walls for Modern Rooms
When you want a bold, modern statement, abstract and color-field walls give you clean, emotional impact with minimal fuss.
You’ll explore abstract techniques and color field inspiration to craft large planes of hue that anchor a room. Emphasize texture layering and modern contrasts to add depth without clutter.
Use artful shifts between tones and minimalist expressions to keep focus, while dynamic shapes introduce movement. Choose energetic palettes for punch or muted ones for calm; maintain visual rhythm with repeating forms and consider spatial awareness to position fields for balance.
This approach feels fresh, refined, and boldly contemporary.
Typographic Walls: Picking Fonts and Placement
Think about font pairing principles to make contrasting typefaces feel intentional rather than chaotic.
Use scale and hierarchy to guide the eye—larger weights for main phrases, smaller for supporting lines.
Then plan placement and alignment so your text reads naturally within the room’s architecture.
Font Pairing Principles
Although fonts might seem like small choices, they shape how people read and feel about your typographic wall. You’ll pick font combinations that balance readability factors with creative typography, ensuring context relevance and cultural significance guide choices.
Aim for design consistency to support visual hierarchy without crowding the message. Consider emotional impact and audience engagement when mixing artistic styles, and test contrasts, weights, and spacing.
- Pair a neutral serif with a bold sans for contrast.
- Limit families to two to maintain consistency.
- Prioritize legibility at viewing distance.
- Respect cultural nuances in letterforms and tone.
Scale And Hierarchy
After you’ve settled on complementary fonts, scale and hierarchy determine how viewers read and move through your typographic wall. You’ll use scale proportions to make primary messages dominant—big, bold type for headlines—and secondary text smaller to support the story.
Establish a clear visual hierarchy so eyes land where you want: contrast weight, size, and spacing to guide attention. Don’t overwhelm with too many dominant elements; keep a few focal points.
Test viewing distances and adjust proportions for legibility. When your hierarchy is intentional, the wall communicates quickly and gracefully, turning type into a functional, expressive feature.
Placement And Alignment
When you plan placement and alignment, you decide how type anchors the space and how viewers move through the wall. Position, grid, and edge alignments turn isolated words into a coherent composition.
You’ll choose placement strategies that suit sightlines, furniture, and natural light. Use alignment techniques to create rhythm and balance: align left for direction, center for focus, right for contrast, and justify for blocky vistas.
Test sizes and spacing physically. Consider breathing room and overlap carefully. Sketch several layouts at full scale, then adjust weight and color until the wall reads clearly from designated viewpoints.
- Left-align for flow
- Center for emphasis
- Right for tension
- Justify for structure
Faux Finishes: Fake Wood, Concrete, and Marble
Faux finishes give you the look of wood, concrete, or marble without the cost, weight, or installation hassle of the real materials.
You can create faux wood planks with grain tools and glaze, try faux concrete for an industrial feel using texture techniques and muted pigments, or layer veins and washes to achieve convincing faux marble.
Focus on color blending to match room tones, and test finish types—matte for subtlety, satin for depth, gloss for drama.
Practice on panels, seal properly, and vary brushwork to avoid repetition.
These approaches let you customize durable, budget-friendly surfaces.
Stripes & Bands: Vertical, Horizontal, and Mixed Layouts
If you want to make a room feel taller, wider, or more dynamic, stripes and bands are one of the simplest tools to use; vertical stripes lift the eye, horizontal bands widen a space, and mixed layouts let you combine both effects for tailored impact.
You’ll plan using layout techniques that consider wall dimensions and choose paint finishes for sheen and durability. Use striped patterns or banded designs with contrasting colors and subtle color variations to control mood.
Tips:
- Measure walls precisely before marking.
- Test color variations on samples.
- Use crisp tape for clean edges.
- Balance scale with furniture.
Pattern Repeats: Polka Dots, Chevrons, Trellis Ideas
Pattern repeats like polka dots, chevrons, and trellis motifs give a room rhythm and personality. You can use scale, spacing, and color contrast to make them feel playful, bold, or refined.
You’ll try polka dot patterns for playful arrangements, varying dot size and spacing to shift mood. Chevron designs add movement; align peaks for drama or soften with muted tones.
Trellis motifs bring a classic lattice; use thin lines for elegance or chunky bars for modern flair. Combine repeating shapes with thoughtful color combinations and subtle texture contrasts to reinforce geometric styles without overwhelming the space.
Accent Motifs: Borders, Panels, and Frame Moulding
After you’ve experimented with repeats like polka dots and chevrons, borders, panels, and frame moulding offer a way to contain and highlight those patterns or create entirely new focal points.
You can use artistic borders and border designs to guide sightlines, mix panel styles for depth, and apply frame techniques to elevate motif ideas. Choose color contrasts and texture combinations for impact, add decorative accents for detail, and keep visual continuity with modern patterns.
Try these approaches:
- Thin painted artistic borders to define space.
- Raised panel styles for shadow and depth.
- Simple frame techniques to showcase art.
- Mixed texture combinations for subtle contrast.
Kid-Friendly Walls: Playful Murals & Washable Paint
When you design kid-friendly walls, think playful murals and durable, washable paint as a team: murals spark imagination while tough finishes keep maintenance simple. You can paint playful characters—animals, astronauts, or story scenes—that grow with your child, using muted palettes for longevity.
Add interactive elements like chalkboard panels, magnet strips, or height charts so kids engage directly with the surface. Choose low-VOC, scrubbable paints and test for stain resistance.
Plan mural placement away from furniture scuffs and at reachable heights for drawing or cleaning. Your walls should invite creativity, handle spills, and stay fresh without constant repainting.
Small-Space Tricks: Make Tiny Rooms Feel Larger
You can make a tiny room feel taller by painting vertical stripes that draw the eye upward.
Choose light-reflective paint to bounce natural and artificial light around the space.
Hang one oversized, minimalist artwork to create a focal point without cluttering the room.
Vertical Stripes For Height
Although bold patterns can feel risky, vertical stripes are one of the simplest tricks to make a small room read taller: they draw the eye upward, elongate walls, and create a sense of height without changing the floor plan.
You can use narrow or wide bands, subtle tones or high-contrast pairings. Try color combinations that suit your mood and add texture contrasts—matte with gloss, or painted stripes beside fabric panels—to keep depth.
Consider these approaches to apply stripes confidently:
- Thin, close-set stripes for subtle height.
- Wide stripes for bold drama.
- Tone-on-tone for elegance.
- Accent a single wall only.
Light Reflective Paint
Stripes lift a room by guiding the eye up; light-reflective paint makes small spaces feel open by bouncing light around the room.
You’ll choose finishes that enhance light play—satin or eggshell for subtle sheen, high-gloss where you want a stronger bounce.
Paint the ceiling a slightly lighter reflective tone to blur edges and raise perceived height.
Pair reflective surfaces like gloss-trim or mirrored accents sparingly so they amplify rather than overwhelm.
Keep patterns minimal to avoid visual clutter; a single soft hue with sheen yields depth without distraction.
This strategy brightens, widens, and simplifies compact interiors efficiently.
Oversized Minimal Art
A single, oversized piece of minimal art can open a tiny room by giving the eye one clear focal point to rest on, which reduces visual clutter and creates a sense of spaciousness.
You’ll choose an oversized canvas with minimalist designs to anchor the space, using abstract shapes and bold colors sparingly. Hang it opposite the primary sightline and keep surrounding walls neutral.
Balance scale with low-profile furniture and reflective accents.
Consider:
- Single oversized canvas above sofa or bed.
- One abstract shapes composition in muted palette.
- Accent wall with bold colors framed by white space.
- Low furniture to emphasize verticality.
Bedroom Walls: Calming Palettes & Headboard Alternatives
When you want your bedroom to feel restful, choose a calming palette—muted blues, soft greens, warm greys, or dusty mauves—to anchor the space and set the mood.
When creating a restful bedroom, anchor the space with a calming palette of muted blues, soft greens, warm greys, or dusty mauves
You’ll blend calming colors with paint finishes that suit your bedroom themes: matte for cozy, eggshell for subtle sheen.
Try headboard alternatives like painted focal panels, built-in shelves, or upholstered wall strips.
Use wall textures—venetian plaster, beadboard, or textured paint—to add depth.
Pick one or two accent colors for bedding and art.
For mural inspiration, consider soft landscapes or abstract washes that support soothing designs without clutter.
Living Room Walls: Statement Looks That Don’t Overwhelm
You can make a living room feel intentional without overpowering it by choosing one textured accent wall—think plaster, wood slats, or woven panels—to anchor the space.
Pair that with soft tonal colorblocking on adjacent walls to create depth and continuity without high contrast.
Keep furniture and accessories restrained so the walls read as a cohesive, calming statement.
Accent Wall With Texture
Although bold color grabs attention, textured accent walls add depth without shouting, letting you create a focal point that feels curated rather than overpowering.
You can mix textured finishes and wall materials to craft tactile surfaces that invite touch and offer visual depth. Use creative layering and paint techniques to balance texture with the room’s scale, and try mixed media elements for subtle contrast.
Consider these approaches:
- Venetian plaster for soft sheen and sculpted feel.
- Reclaimed wood panels arranged horizontally or chevron.
- Textured paint plus thin plaster stencils.
- Fabric-wrapped panels for warmth and acoustics.
Soft Tonal Colorblocking
Textured walls invite touch and depth, but if you want a softer statement that still reads as intentional, tonal colorblocking will give your living room structure without shouting.
You’ll pick two or three related shades within soft palettes, then block them in geometric bands or offset rectangles to shape seating areas and sightlines.
Keep contrast low so the divisions read as calm architectural moments rather than bold statements.
Use trim and furniture finishes to reinforce color harmony, and test samples at different times of day.
This approach feels modern yet gentle, helping your room look curated without competing with decor.
Kitchen & Dining Walls: Durable Paints and Backsplashes
When planning kitchen and dining walls, pick finishes that stand up to splashes, heat, and frequent cleaning so your space stays fresh with minimal upkeep.
Choose wall finishes that resist splashes, heat, and frequent cleaning to keep kitchen and dining spaces looking fresh.
You’ll balance kitchen durability and dining aesthetics by choosing easy-clean paint finishes and smart color selection. Consider durable backsplashes and practical maintenance tips to protect high-use zones. Match textures to style without sacrificing function.
- Semi-gloss or satin paint finishes for scrubbable walls.
- Tile, stainless, or glass backsplash options behind stoves and sinks.
- Contrasting color selection to define dining areas.
- Sealed grout and washable trim for straightforward maintenance tips.
Hallway & Stairwell Walls: Vertical Storytelling Tips
In narrow hallways and stairwells you’ll want to maximize vertical flow so the eye moves naturally up and down the space.
Create sequential narratives with a clear starting point, middle, and finish—think framed photos, murals, or a themed color progression.
Use scale and rhythm to pace that story, alternating large focal pieces with smaller accents to keep movement steady.
Maximize Vertical Flow
Because hallways and stairwells naturally draw the eye up and along, you can use vertical arrangements to tell a clear visual story that guides movement through your home.
You’ll enhance vertical flow with deliberate scale, rhythm, and contrast, using dynamic layering of art, moldings, and lighting. Keep sightlines clear so each element leads to the next without clutter.
- Place larger pieces low, smaller higher to elongate the wall.
- Use slim sconces or picture lights to create upward motion.
- Repeat motifs (frames, colors) at intervals for steady rhythm.
- Add narrow ledges or rails for rotating displays that keep momentum.
Create Sequential Narratives
Take the vertical flow you’ve set up and arrange pieces so they read like chapters—each artwork, molding, or light should lead the eye to the next and build a clear storyline as you move through the hallway or stairwell.
You’ll choose narrative techniques that pace reveals: a bold focal piece, then subtler fragments that echo motifs, guiding curiosity upward or along the corridor.
Use consistent color cues and recurring shapes as storytelling methods to link scenes.
Position elements at anticipated sightlines—landings, turns, and eye level—to guarantee each segment resolves and propels the next, creating a cohesive, engaging progression.
Use Scale And Rhythm
Think about scale and rhythm as the heartbeat of your vertical story: vary the size and spacing of artworks, moldings, and lights so your eye moves naturally from one moment to the next.
You’ll use scale techniques to anchor focal points and rhythm patterns to guide shifts. Aim for contrast—large sculptural pieces against slim picture frames—and repeat elements to create cadence.
Balance visual weight so stairs feel intentional, not cluttered.
- Start with a dominant piece at eye level.
- Repeat a motif every few steps.
- Alternate big and small frames.
- Use lighting to emphasize pauses and flow.
Outdoor & Entry Walls: Weatherproof Paint Options
When you’re choosing paint for outdoor and entry walls, prioritize durability and proper finish—these surfaces face rain, sun, temperature swings, and constant contact, so the right weatherproof paint prevents peeling, fading, and moisture intrusion. You’ll want mildew-resistant latex for siding, high-hide acrylic for trim, and satin or semi-gloss on entry walls to balance outdoor durability with entry aesthetics. Prep, primer, and proper application matter as much as product choice.
| Type | Best Use | Finish |
|---|---|---|
| Acrylic | Siding | Matte/Flat |
| Latex (mildew-resistant) | Entry doors | Semi-gloss |
| Epoxy/Enamel | High-contact | Satin/Gloss |
Combining Paint and Wallpaper on a Wall
You can create a bold accent wall by pairing a vivid paint color with a complementary wallpaper pattern to make one area pop.
Plan the layout so the painted section highlights focal points while the wallpaper provides texture and interest.
Use a clean, seamless pattern shift at the joint to keep the look intentional and polished.
Bold Accent Wall
Want a statement wall that feels both dramatic and intentional? You can mix paint and wallpaper to create a bold accent wall that highlights bold patterns and smart color contrasts.
Choose one dominant wallpaper panel and surround it with a complementary painted field to frame it and amplify impact. Balance scale and texture so the room feels cohesive, not crowded.
Practical tips:
- Pick a wallpaper pattern as focal point.
- Use paint to extend or contain the design.
- Match paint undertones to wallpaper hues.
- Keep adjacent walls neutral to let the accent sing.
Install carefully for a polished, intentional look.
Seamless Pattern Transition
If you’re combining paint and wallpaper on the same wall, plan the shift so the eye glides from one surface to the other without a jarring break.
You’ll start by choosing wallpaper whose scale and color echo the paint, then test samples together under room lighting.
Create seamless textures by matching sheen and tactile finishes, or add a thin painted band to bridge motifs.
Align motifs carefully so pattern flow continues logically; trim edges cleanly and use high-quality adhesive.
Stand back as you work, adjust alignment, and finish with crisp connections that look intentional rather than patched.
Use Stencils & Templates to Speed Complex Designs
When tackling intricate patterns, stencils and templates let you replicate complex shapes quickly and consistently. This allows you to focus on color and placement instead of freehand precision.
You’ll use stencil techniques and enjoy template benefits that boost design speed and artistic efficiency. These creative shortcuts help tame complex patterns while keeping wall artistry fresh and providing design inspiration for layered looks.
Practice alignment and paint pressure to avoid bleed-through.
- Plan repeats for rhythm.
- Test on scrap for color.
- Secure templates for crisp edges.
- Vary scale to add interest and depth.
Tools & Materials Checklist for Wall Projects
A few essential tools and materials will keep your wall project running smoothly and help you avoid costly mistakes. You’ll gather tools essentials and review material types, paint finishes, and wall prep steps. Include safety gear, brushes, rollers, tapes, drop cloths, and primers. Consider design elements, texture options, and application techniques while you follow basic color theory and project planning. Use the checklist below to stay organized and efficient.
| Item | Purpose |
|---|---|
| Drop cloths | Protect floors |
| Painter’s tape | Clean edges |
| Primer | Surface prep |
| Rollers & brushes | Application techniques |
| Safety gear | Protect you |
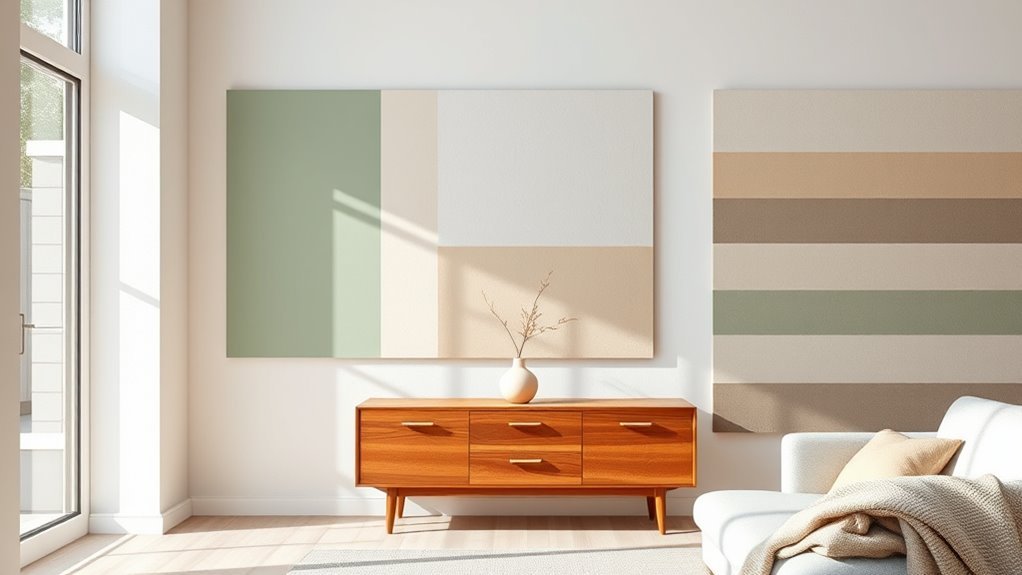
Color Pairings Cheat Sheet: Neutrals, Accents, Contrasts
Now that you’ve gathered your tools and prepped your surfaces, it’s time to pick colors that make the room sing.
Use neutral palettes as your calm base, then layer accent techniques and contrast strategies to create focus.
Consider paint finishes and texture options to add depth, and apply color psychology to set mood aligned with design themes.
Choose color combinations that balance warmth and coolness.
- Pair warm neutrals with a cool accent for subtle drama.
- Use matte and gloss finishes to highlight architectural features.
- Add textured paint or wall panels for tactile interest.
- Limit palette to three hues for cohesion.
How to Test Paint Samples and Mock Up Designs
Before you commit, test paint samples on the actual walls and in different light so you see how color shifts through the day; pick several swatches and tape 6×6-inch samples at eye level.
Observe morning, noon, and evening light, noting how color psychology affects mood—cool tones calm, warm tones energize.
Observe morning, noon, and evening light; note how cool tones calm and warm tones energize mood.
Try full-scale mockups with poster board or a painted 2×2-foot panel to judge texture and paint application techniques like brushing or rolling.
Photograph samples at different times for comparison. Live with the samples for a few days, then decide, adjusting hue, sheen, or layout before buying gallons.
Fixing Common Problems: Bleed, Streaks, Uneven Coverage
If you want crisp lines, start by sealing edges and using painter’s tape correctly to prevent paint bleed.
When coverage looks thin or streaky, apply thin, even coats and let each one dry fully before adding the next.
I’ll show quick fixes for uneven coverage and tips to touch up without redoing the whole wall.
Prevent Paint Bleed
One simple step can save you a lot of touch-up work: stop paint from bleeding under tape and along edges before you start rolling or brushing.
Use proper paint tape and thorough wall prep to guarantee crisp lines. Seal tape edges, remove dust, and let primer dry fully. Test a small area to confirm adhesion.
- Press tape firmly with a plastic card to seal edges.
- Apply a thin coat of primer or sealant along the tape to block bleed.
- Paint away from the tape line, not toward it.
- Remove tape while paint is tacky for clean edges.
Fix Uneven Coverage
When you notice thin spots or patchy streaks after the first coat, address them quickly to avoid sanding and extra coats later.
You’ll first let the paint dry fully, then inspect under good light to map trouble areas. Thin spots often mean inconsistent paint application; reapply thin, even layers rather than heavy globs.
Use a high-quality roller and brush, maintain a wet edge, and feather strokes to blend. For small defects, lightly scumble or stipple to match texture.
Consider smoothing techniques like light mist sanding between coats to level fibers. Repeat modest touch-ups until coverage looks uniform.
Maintenance: Cleaning and Touch-Up Tips for Painted Walls
Although paint’s job is to protect and beautify your walls, everyday scuffs, fingerprints, and stains still show up — and you can handle most of them with the right products and techniques.
Do a regular wall inspection, use appropriate cleaning tools for wall cleaning, and practice surface preparation before touching up. For paint upkeep and wall longevity, address stains promptly with mild cleaners for stain removal.
When rejuvenating color, match sheen and pigment for a seamless paint refresh. Use careful touch up techniques to blend repaired spots.
- Clean with soft sponge, mild soap.
- Sand and prime tiny chips.
- Match paint and sheen.
- Feather edges when blending.
When to Hire a Pro vs. DIY for Complex Wall Art
After you’ve cleaned, repaired, and touched up painted walls, you’ll face choices about more ambitious projects like murals, textured finishes, or intricate stenciling.
Decide pro vs. DIY by weighing your design vision against required artistry skills and complex techniques. If the look demands precision, large scale, or specialty tools, hire a pro to save frustration and avoid costly mistakes.
Choose DIY when you’ve practiced skills, have time investment to learn, and your project costs stay low.
Get quotes, review portfolios, and plan timelines. That way you protect results, budget, and the integrity of your creative wall idea.
Eco-Friendly Paint Choices and Low-VOC Options
Because the paint you choose affects indoor air quality and the planet, pick low-VOC or natural options to reduce toxins and environmental impact. You’ll protect family health and still get great color while considering eco friendly brands and sustainable materials.
Choose low‑VOC or natural paints to protect indoor air, family health, and the planet while enjoying great color.
Focus on natural pigments and check certifications.
- Choose certified low-VOC paints for immediate low voc benefits and fewer fumes.
- Seek eco friendly brands using sustainable materials and transparent sourcing.
- Prefer natural pigments to minimize chemical additives and improve environmental impact.
- Consider health considerations like allergy reduction, ventilation needs, and disposal methods for safe painting.
Inspo Gallery: 12 Ready Themes to Jump-Start Your Wall Design
Now that you’ve narrowed paint options with health and sustainability in mind, you can focus on the fun part: picking a design that matches your lifestyle.
Explore 12 ready themes to jump-start your wall design: modern geometrics, botanical murals, minimalist neutrals, vintage gallery, coastal calm, industrial accents, bold color blocks, textured plaster, kids’ playful scenes, monochrome photography, Scandinavian hygge, and global patterns.
Each theme suggests wall art styles, color palettes, and simple execution tips so you can adapt trends to your space.
Use these ideas as a springboard—mix elements, follow current design trends, and personalize for lasting impact.
Frequently Asked Questions
Can I Paint Over Wallpaper Without Removing It First?
Yes — you can paint over wallpaper without removing it first, but you’ll need to assess wallpaper types, prep seams, and choose wall texture options to guarantee adhesion, prevent bubbling, and achieve a smooth, lasting finish.
How Do I Prepare Plaster or Lime Walls for Paint?
Think of the wall as an old ship you gently ready for voyage: you’ll clean, repair cracks, sand for even plaster texture, apply a breathable lime application primer, then let it cure before painting for lasting results.
What Paint Finish Is Best for High-Humidity Rooms?
Use semi-gloss or satin finishes; they’re moisture resistant options that clean easily and resist mildew. You’ll pick lighter colors like soft blues, greens, or warm neutrals as color recommendations to keep the room bright and airy.
Can I Use Spray Paint for Large Interior Walls Safely?
Yes — you can, and coincidentally I once sprayed a mural while my neighbor painted the same color; you’ll need proper ventilation, masks, drop cloths, and to compare spray paint safety and wall paint types for fumes, adhesion, and finish.
How Long Should Painted Walls Cure Before Hanging Art?
You should wait about two weeks for paint curing before hanging wall art; you’ll get best adhesion after 24–48 hours for light items, but full cure (for heavier frames or adhesive hooks) needs 10–14 days to avoid damage.
Conclusion
Now you’ve got the tools to choose a wall design that fits your space and style—remember, less is more until you’re ready to go bold. Trust your gut, test samples in different light, and match the wall to the room’s purpose. If a project feels too big, call a pro; otherwise, roll up your sleeves and have fun—Rome wasn’t built in a day, but your perfect wall can start today.