Why Is My Paint Not Sticking to the Wall?
If your paint isn’t sticking, it usually means the surface is dirty, oily, damp, too smooth, or coated with an incompatible finish, so the new film can’t bond. You’ll see peeling, flaking, bubbling, or paint that rubs off; quick tape, scrape, or solvent tests confirm weak adhesion. Fix by cleaning, drying, sanding, and using a compatible primer—or address moisture, salts, or substrate damage first—and keep going to learn how to correct each cause.
What “Paint Not Sticking” Actually Means
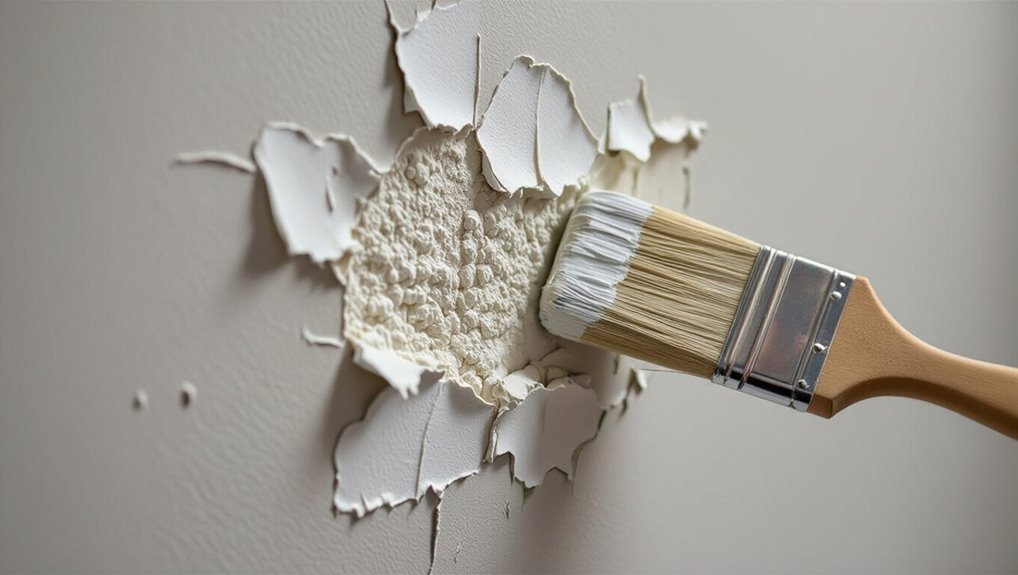
What does “paint not sticking” look like? You see peeling, flaking, or blotchy patches where paint lifts from the wall instead of forming a uniform film.
You might notice poor paint adhesion at edges, bubbling, or areas that rub off on your hand. This signals a mismatch between paint and substrate — surface compatibility issues like glossy finishes, contaminants, or incompatible primers.
You’ll also find pinholes, crawling, or fast early wear in high-touch spots. Recognizing these signs helps you target causes rather than overpainting.
Address the underlying adhesion and compatibility problems before applying more coats.
Quick Tests for Paint Adhesion
How can you quickly tell whether paint will hold up? You’ll run simple adhesion testing and inspect surface conditions before repainting. Try a tape pull, scrape, and bend test to gauge bond strength. Note where paint flakes or powder forms.
| Test | What to watch for |
|---|---|
| Tape pull | Paint lifts cleanly |
| Thumb press | Paint flexes or cracks |
| Scrape | Coating peels easily |
| Solvent wipe | Finish softens or dissolves |
| Bend test | Cracking at edges |
Record results, target failed spots for prep, and only proceed when adhesion testing shows stable grip.
How Dirt, Grease, and Contaminants Stop Paint From Sticking
Because contaminants form a barrier between the paint and the surface, even a perfectly mixed formula won’t bond properly. Dirt, grease, oil, wax, and residues create low-energy films that repel coatings, prevent wetting, and lead to poor adhesion, bubbling, or premature peeling.
You’ll face adhesion challenges when surface contaminants stay on the wall. Use targeted cleaning techniques—degreasers, trisodium phosphate, and microfiber wiping—for effective residue removal.
Consider environmental factors like humidity and airborne dust during cleaning and paint application. Preparation tips include testing with solvent, rinsing thoroughly, and treating stains before priming to guarantee reliable wall treatment and long-lasting finish.
Why Glossy or Smooth Surfaces Repel Paint
Why does paint slide off shiny surfaces so often? You’re facing glossy surfaces that offer little surface texture, so paint adhesion can’t grab.
Smooth finishes reject coatings unless you change the surface profile or use a compatible primer for better primer effectiveness.
Smooth, glossy surfaces resist paint unless you alter the profile or apply a compatible bonding primer first.
Choose preparation and application techniques that include scuffing, cleaning, and using bonding primers matched to paint formulation.
Work in suitable environmental factors—temperature and humidity affect curing and tack.
Apply thinner, even coats and allow full dry times.
If you skip prep or mismatch products, paint will bead or peel because adhesion depends on profile, chemistry, and proper technique.
How Damp Walls Cause Peeling or Flaking
If your walls are damp from leaks, rising groundwater, or high indoor humidity, that moisture can migrate through the substrate and lift paint.
When water reaches the paint layer, it breaks the bond between coating and wall, causing peeling or flaking.
Moist conditions also encourage mold growth and salt efflorescence, which push paint off the surface and make adhesion problems worse.
Moisture Penetration Sources
When damp gets into walls from leaks, rising ground moisture, or high indoor humidity, it breaks the bond between paint and substrate and leads to peeling or flaking.
You should identify moisture sources: roof, plumbing, window leaks, poor flashing, and capillary rise from foundations.
Condensation from temperature differences and ventilation gaps worsens humidity effects, especially in bathrooms, kitchens, and basements.
Track damp with a moisture meter, infrared camera, or visual cues like staining and efflorescence.
Fix leaks, improve drainage, add vapor barriers, and boost ventilation before repainting.
Addressing the source stops recurring damage and guarantees new paint lasts.
Paint Bond Failure
Because moisture undermines the adhesive layer between paint and wall materials, damp walls often cause paint to peel, bubble, or flake as the bond weakens and releases. You’ll see loss of cohesion when water alters the paint surface and interferes with adhesion chemistry. Addressing dampness and preparing the substrate restores bonding. Inspect for soft spots, test adhesion, and let surfaces dry fully before repainting. Use compatible primers to re-establish adhesion chemistry and improve long-term performance.
| Issue | Cause | Fix |
|---|---|---|
| Peeling | Damp substrate | Dry, prime |
| Blistering | Trapped moisture | Ventilate, repair |
| Flaking | Weak bond | Strip, recoat |
| Soft spots | Saturation | Replace material |
Mold And Salt Efflorescence
Although you can’t always see it at first, mold growth and salt efflorescence both eat away at paint adhesion on damp walls, causing coatings to peel, flake, or powder off.
You’ll notice fuzzy stains or white, powdery deposits where moisture migrates through masonry.
Address the source: fix leaks, improve ventilation, and dry the substrate before repainting.
For mold prevention, clean with mildew removers and apply mold-resistant primer.
For salt removal, brush or wash deposits, then allow full drying; use a barrier primer to block salts.
Skip painting over active dampness—you’ll waste materials and invite recurring failure.
Old Paint Failure: How to Spot and Stabilize It
How can you tell if old paint is failing—and what can you do to stabilize it? Look for flaking, chalking, cracking, blistering, or areas where paint peels with light scraping; these old paint characteristics signal loss of adhesion.
Test by tapping and using a knife to probe loose edges. Remove all loose material, clean surface of dust and grease, and sand glossy patches to create a keyed profile.
Use a compatible primer designed for the existing coating and substrate to bridge layers and reduce paint compatibility issues. Spot-treat stains or rust, allow full cure time, then repaint with appropriate products for lasting adhesion.
How Incompatible Primer and Paint Affect Adhesion
After you’ve stabilized failing paint, the next common cause of adhesion problems is a mismatch between primer and topcoat. You need correct primer selection because paint compatibility hinges on chemistry: oil over water or incompatible binding agents will repel instead of bond.
Consider surface texture and environmental factors—humidity or temperature can alter curing and reduce adhesion science’s effectiveness.
Check product integrity and labels; expired or separated primers won’t bind. Use proper application techniques for even coverage and avoid thin spots.
When you pair compatible systems and control conditions, the primer truly creates the substrate the topcoat needs to stick.
Why Skipping Sanding Ruins Paint Grip
If you skip sanding, paint has nothing to bite into and will slide off smooth or glossy surfaces instead of forming a mechanical bond. You reduce adhesion by leaving glossy sheen, old coatings, or contaminants intact.
Proper surface preparation includes cleaning, deglossing, and using appropriate sanding techniques to roughen microscopic peaks so primer and paint can key in. Use fine to medium grit depending on substrate, feather edges at repairs, and remove dust before coating.
Skipping these steps forces paint to rely solely on chemical adhesion, which often fails on shiny or previously painted walls, causing peeling and flaking sooner.
How Temperature and Humidity Affect Paint Bonding
Surface conditions don’t stop at sanding—environmental factors like temperature and humidity play a major role in whether paint will properly bond. You must monitor temperature effects because paint cures chemically; too cold slows curing and reduces adhesion, too hot speeds drying and can trap solvents. Watch humidity impacts: high humidity prevents proper film formation and promotes blistering, while very low humidity causes quick skinning and poor flow. Use climate control or wait for ideal conditions to guarantee a strong bond.
| Condition | Risk | Action |
|---|---|---|
| Low temp | Slow cure | Heat room |
| High humidity | Blisters | Dehumidify |
| High temp | Poor flow | Cool area |
Substrate Problems: Plaster, Drywall, and Wood Issues
When you’re prepping plaster, drywall, or wood, know that the substrate itself often causes adhesion failures—crumbling plaster, powdery drywall compound, and tannin-rich or oily wood can all prevent paint from sticking.
You should assess plaster types for hardness and porosity, check drywall conditions for dust, soft spots, or tape failure, and evaluate wood treatment history for oils, sealers, or resin bleed.
Address surface textures by sanding, cleaning, or priming to match paint compatibility.
Consider environmental factors like moisture and prior contamination.
Test small areas after prep so you confirm adhesion before committing to full coats.
Soluble Salts and Efflorescence That Ruin Adhesion
You’ll often see paint failure where soluble salts have migrated to the surface in predictable patterns, leaving powdery residues that prevent adhesion.
To stop this efflorescence you’ll need to identify moisture sources, remove salts with proper cleaning, and use a salt-blocking primer.
Addressing salt migration and sealing the substrate first will save you from repeated peeling and flaking.
Salt Migration Patterns
Because salts dissolve in moisture and travel through porous materials, they often show up where you least expect them—and they wreck paint adhesion.
You’ll see salt crystallization effects as whitish powders, blisters, or flaking when moisture migration patterns carry dissolved salts to the surface. Wetting, drying, and vapor pressure drive salts along capillaries; they accumulate at evaporation points and force coatings off as crystals grow.
You can identify migration by tracing damp spots, checking mortar joints, and noting seasonal shifts. Addressing underlying water sources is essential before repainting, since removing visible salts alone won’t stop recurring damage.
Efflorescence Prevention Steps
Salt migration leaves telltale salts on surfaces, but stopping efflorescence for good means treating both the salts and the moisture pathways that bring them.
First, dry and brush away loose salts, then test for ongoing moisture. Fix leaks, improve drainage, and add exterior vapor barriers so you cut off water that transports salts.
Use a masonry-compatible salt remover and let the wall fully dry before priming. Apply a breathable, salt-resistant primer and finish with coatings designed for masonry.
These efflorescence treatments address efflorescence causes by removing salts and eliminating moisture routes, preserving adhesion and paint life.
Fast Fixes to Try Before You Repaint
If paint’s peeling or sliding, try a few quick fixes before stripping everything down: assess surface types and pinpoint adhesion challenges caused by dirt, grease, or moisture.
Wipe and degrease, rinse, and dry thoroughly. Lightly sand glossy spots, use appropriate repair techniques for small blisters, and spot-prime with products matched to paint qualities.
Consider environmental factors—temperature and humidity—before repainting.
Follow basic preparation methods: remove loose flakes, feather edges, and clean dust.
Use proper application tips: thin coats, correct roller/brush, and adequate dry time.
For stubborn areas, consult product recommendations for adhesion-promoting primers.
Step-by-Step Surface Prep for Reliable Adhesion
Preparation matters: when you want paint to stick, follow a clear, sequential surface-prep routine so each step builds proper adhesion.
You’ll start with surface cleaning to remove dirt, grease, and loose finish. Next perform a texture assessment and inspect wall conditions for cracks, blistering, or efflorescence.
Address environmental factors—humidity and temperature—before working. Use repair techniques like patching, sanding, and deglossing, then consider coating methods that suit the surface.
Finish with adhesion testing in a small area before full application. Keep paint selection in mind so your prep matches the product’s needs.
- Clean thoroughly
- Assess texture
- Repair defects
- Control environment
- Test adhesion
Choosing the Right Primer and Paint for Tough Surfaces
Now that your surface is prepped, you’ll want to pick a primer and paint that suit the material and condition.
I’ll explain the surface prep steps that still matter before priming, the primer types that bond to slick or chalky substrates, and paint options formulated for high-adhesion.
With the right combo, you’ll stop wondering why paint won’t stick.
Surface Preparation Steps
Because tough surfaces demand more than any off-the-shelf paint, you’ll need a primer and paint system matched to the material and condition of the substrate.
Prepare by evaluating wall conditions and surface types, then choose cleaning techniques to remove grease, mildew, and loose coating.
Repair strategies (fill cracks, sand glossy areas) guarantee adhesion.
Consider environmental factors that affect drying times and select paint types and coating systems compatible with application methods.
Match finish options to use and durability needs.
- Clean thoroughly for best adhesion
- Repair and sand damaged spots
- Match coating systems to substrate
- Mind temperature and humidity
- Test application methods first
Primer Types Explained
Primer choice makes or breaks paint adhesion on tough surfaces, so you’ll want to match the primer to both the substrate and the topcoat.
You’ll pick shellac for stain blocking and fast drying, oil for metal or glossy surfaces, and acrylic for general masonry and drywall. Each type delivers primer benefits like improved adhesion, moisture resistance, and uniform absorption.
Consider primer applications: sealing porous concrete, bonding to slick plastics, or covering smoke stains.
Read product labels for compatibility with your finish paint and surface. Apply per instructions—proper primer choice and technique prevent peeling and extend your paint’s life.
Paint For High-Adhesion
When you’re tackling slick, weathered, or oil-contaminated surfaces, choosing a high-adhesion system—both primer and topcoat—makes the difference between a durable finish and constant touch-ups.
You’ll focus on surface preparation first: clean, degloss, and etch as needed. Pick primers labeled for adhesion or bonding, then match with flexible, high-adhesion paints formulated for that substrate.
Apply thin, even coats and follow recommended recoat times.
- Use solvent cleaners for oils
- Sand or scuff glossy areas
- Select bonding primer for plastics/metal
- Test adhesion with a small patch
- Follow manufacturer drying/temperature specs
These high adhesion techniques prevent peeling.
Tools and Materials That Improve Adhesion
Good adhesion starts with the right tools and products, so gather quality sandpaper, a degreasing cleaner, a bonding agent or adhesion-promoting primer, and appropriate brushes or rollers for your paint type.
You’ll use surface cleaners to remove oils and dust, then match primer selection to surface textures and paint types. Add adhesion additives for tricky substrates.
Choose roller brushes, paint sprayers, or brushes based on application techniques and desired finish. Monitor environmental factors—temperature and humidity affect drying times and grip.
Prep consistently: sand smooth, clean thoroughly, apply compatible primer, then paint using steady, even strokes for best adhesion.
Cost, Time, and Durability Trade-Offs for Repairs
Most repairs force you to balance cost, time, and durability, and you’ll need to decide which matters most for your project.
Do a quick cost analysis and time estimation before you start, weigh a durability comparison of options, and factor repair budgeting into material selection.
Consider professional advice if choices are unclear.
- Cheap patch: low cost, short time, low durability
- Mid-range: moderate cost, moderate time, better durability
- Premium fix: high cost, longer time, highest durability
- Fast temporary: minimal time, repeat repairs
- Long-term: upfront investment, lasting results
When to DIY and When to Call a Pro
Think about your skill level and the complexity of the repair before you start — simple sanding and priming you can handle, but extensive surface damage or stubborn adhesion problems might need a pro.
Weigh the time and cost tradeoffs: doing it yourself can save money but could cost more if you botch the job.
If the fix is beyond your comfort zone or needs specialized tools, call a professional.
Skill Level Required
When your paint isn’t sticking, decide quickly whether the job matches your skills or needs a pro: Assess surface texture, wall preparation, environmental factors, and paint quality before you start.
You should tackle simple fixes; call a pro for structural or persistent adhesion problems. Consider your comfort with adhesion techniques, substrate selection, primer effectiveness, and matching finish types and paint formulations.
- Minor sanding and cleaning
- Reapplying correct primer
- Adjusting humidity and temperature
- Switching paint formulations or finishes
- Inspecting substrate for damage
Be honest about your experience; the right choice saves time and prevents wasted materials.
Project Complexity Limits
If a surface problem is purely cosmetic and you’ve handled basic prep before, you can usually tackle the job yourself; however, call a pro if the issue involves structural damage, persistent moisture, extensive peeling that reveals multiple layers, or specialty substrates like metal, drywall with mold, or historical finishes that need conservation. You should judge by project scope, surface condition, and required material selection. Consider environmental factors, drying time, and equipment quality. Complex application techniques or rare finish types also push you to hire help. Use this quick guide to decide:
| DIY Signs | Call a Pro |
|---|---|
| Small area, simple prep | Structural/mold issues |
| Common materials | Specialty substrates |
Time And Cost Tradeoffs
Because your time and budget both matter, weigh how long a DIY job will take against the true cost of hiring a pro: factor in your hourly value, the convenience of someone else doing the work, and any downtime while areas cure or remain unusable.
You’ll balance cost efficiency with time management when deciding. If prep, multiple coats, or repairs threaten schedules, hire help. If it’s small and skills match, DIY saves money.
Consider liability, finish quality, and warranties. Use this quick checklist to decide:
- Project size and complexity
- Your available hours
- Tool and material costs
- Desired finish quality
- Risk and warranty coverage
Frequently Asked Questions
Why Does Paint Bubble Shortly After Application?
Air or moisture trapped under wet paint causes bubbling shortly after application. You’re often rushing paint application or skipping surface preparation; fix it by ensuring surfaces are dry, clean, primed, and applying thinner coats with proper drying time.
Can Paint Adhesion Issues Cause Mold Growth?
Like a damp forest floor, poor adhesion can invite mold types to settle; you’ll need moisture control, thorough surface preparation, and correct paint application to prevent spores from colonizing and worsening adhesion issues.
Will Low-Voc Paints Stick as Well as Standard Paints?
Yes — low-VOC paints can stick as well as standard ones if you prep surfaces properly; you’ll enjoy low VOC benefits like reduced odors while maintaining paint durability, but choose high-quality formulations and primers for best results.
How Long Must Fresh Plaster Cure Before Painting?
Think of fresh plaster as a ship waiting to sail: you’ll let it cure 2–4 weeks before painting. During that time, check plaster drying and finish surface preparation so paint adheres smoothly and lasts longer.
Can Furniture or Household Chemicals Affect Paint Adhesion?
Yes — furniture materials and chemical residues can harm adhesion. If you drag or lean items, oils, waxes, or cleaners stay on surfaces; you should clean, sand, and prime so paint will stick and last.
Conclusion
You’ve learned what “not sticking” really means, how to test adhesion, and how dirt, gloss, and damp ruin paint. You can clean, sand, or degloss; you can prime, pick the right paint, and use the right tools; you can weigh cost, time, and longevity; and you can decide when to DIY and when to hire a pro. Take the right prep, use the right products, and expect the right results — and you’ll end the cycle of peeling and flaking.