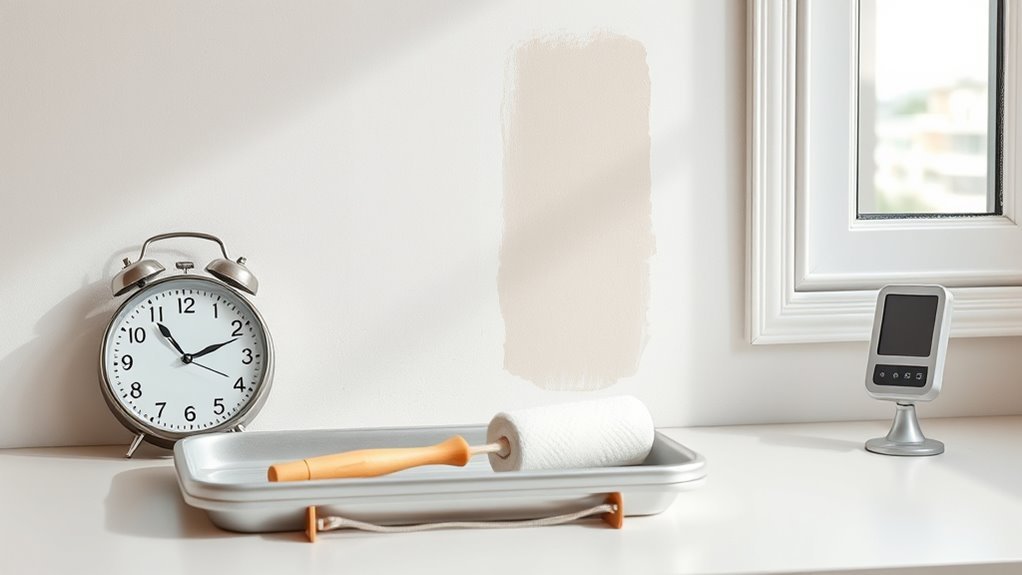
How Long Should I Leave Paint to Dry Between Coats
You should wait until the paint feels dry to the touch, shows no tackiness, and the manufacturer’s recoat window has passed before applying the next coat. For water‑based paints that’s usually 2–4 hours; for oil‑based expect 8–24 hours or longer for full cure. Thin, even coats dry faster; humidity, temperature, and additives change times. When in doubt, test a small area and wait longer to avoid lifting or sheen issues—keep going to learn timing tips and fixes.
How to Use This Guide to Time Your Recoats
When you’re ready to recoat, use this guide to match your paint type, temperature, and humidity with the recommended wait times so you don’t sand through or trap solvents. You’ll check the label for paint branding and formula specifics, note recommended flash times, and factor room temperature plus humidity.
Keep a notebook or phone timer for intervals; adjust if you’re thinning for color mixing or using specialty finishes. Do a quick tack test before sanding or recoating.
If in doubt, wait longer—thin films dry faster but cure slower. Follow manufacturer instructions rather than guesses to avoid finish problems.
Dry vs Cured: What Those Terms Mean for Paint
When you check paint instructions, “dry time” usually means the surface is touchable and ready for a light recoat.
While “cure” means the finish has reached full hardness and chemical resistance. Curing continues long after the paint feels dry as the film cross-links and solvents evaporate, which affects how well the surface resists scratches and stains.
Temperature, humidity, film thickness, and the type of paint all change how long both drying and curing take.
Dry Time Vs. Cure
Although the surface may feel dry to the touch after a short while, that doesn’t mean the paint has fully cured; you’ll need patience. Dry time is when solvents evaporate and you can recoat or handle gently.
Cure is a chemical process that reaches full hardness and durability over days to weeks. Consider color mixing and brush techniques when recoating to guarantee adhesion and uniform finish. Plan around both timelines so you don’t smudge or trap solvents.
- Recoat when surface is dry but not tacky.
- Wait full cure before heavy use.
- Adjust technique for temperature and humidity.
Surface Hardness Development
Because drying makes a surface feel ready but curing builds the actual hardness, you should distinguish the two: drying means solvents have evaporated enough for recoat or light handling, while curing is a chemical change that gradually cross-links the binder and gives paint its scratch, chemical, and impact resistance.
You’ll notice surface hardness keeps increasing long after a coat feels dry; that development determines final paint durability. Treat newly dried paint gently, avoid heavy use, and wait for specified cure times before exposing surfaces to wear, chemicals, or stress.
Proper cure yields a tougher finish and longer-lasting protection.
Factors Affecting Cure
If you want paint to reach its full strength rather than just feel dry, you need to know the factors that speed or slow curing. Curing depends on chemistry, film thickness, and environment; drying is only surface solvent loss. You’ll affect final paint durability through choices and techniques.
Consider how pigment and color mixing can change heat absorption and reaction rates. Control temperature, humidity, and ventilation to encourage proper crosslinking. Avoid overly thick coats that trap solvents. Let manufacturers’ recommended cure times pass before stressing the finish.
- Temperature and humidity
- Coat thickness and application
- Chemical formulation and color mixing
Quick Answer: Typical Recoat Times at a Glance
When you’re planning your next coat, a quick reference saves time. For most interior latex, wait 2–4 hours between coats. For primers or high-build products, aim 24 hours.
Exterior latex often needs 4–8 hours in warm, dry conditions. Fast-dry enamels and some acrylics can be recoated in 1–2 hours, while specialty finishes or heavy texture may demand longer.
Consider color blending—thin seamless coats dry quicker—and match recoat timing to paint sheen: gloss dries faster on surface but may feel tacky longer.
Always check manufacturer labels and test a small area before full recoating.
How Paint Base (Water vs Oil) Affects Recoat Time

If you’re using a water-based (latex) paint, it usually feels dry to the touch in an hour or two and can often be recoated within 4–6 hours.
Oil-based paints take much longer to cure, so you’ll typically wait 24 hours or more before recoating to avoid lifting or poor adhesion.
Knowing the base of your paint lets you plan recoat windows and avoid finish problems.
Water-Based Drying Times
Because water-based paints dry mainly by evaporation rather than chemical curing, you’ll usually be able to recoat them much sooner than oil-based paints—often within 1 to 4 hours for latex or acrylics under ideal conditions.
You should check tackiness, manufacturer recommendations, humidity, and temperature before recoating.
Water-based formulas let you correct color blending quickly and use wet-on-wet brush techniques for smoother gradations once the first coat is dry to the touch.
- Check tack-free time and wait slightly longer in high humidity.
- Lightly sand between coats for adhesion and smooth finish.
- Follow label recoat windows for best results.
Oil-Based Recoat Window
Water-based paints let you recoat quickly, but oil-based formulas behave differently and demand more patience.
With oil-based paint, you’ll wait longer—typically 8–24 hours before a light recoat and up to 48 hours for full recoating—depending on temperature, humidity, and thickness.
You should test edges for tack before proceeding.
Oil binds differently, so paint texture can feel smoother but takes time to harden; rushing causes lap marks and poor adhesion.
For color matching, allow complete drying to guarantee true hue before adding another coat or touching up.
Follow manufacturer guidance and adjust for conditions to avoid problems.
Typical Recoat Times for Latex and Acrylic Paints
When you’re working with latex or acrylic paints, most manufacturers recommend waiting 2 to 4 hours between coats under normal indoor conditions. You’ll want to check surface dryness by touch—no tackiness—and make sure room temp and humidity are moderate. Shorter waits suit quick jobs; longer waits improve adhesion.
- Plan: allow 4 hours for full curing on porous or dark colors to aid color blending.
- Surface prep: light sanding between coats helps with texture matching and smooth finish.
- Environment: lower humidity and warmer temps speed recoat times, but don’t rush; follow label guidance.
Typical Recoat Times for Oil‑Based and Alkyd Paints
If you’ve been working with latex or acrylics, note that oil-based and alkyd paints behave differently and need more time between coats. You’ll usually wait 24 to 48 hours before recoating; heavier alkyds or cooler conditions can extend this. Because solvent cure is slower, you should test tackiness rather than rely on a clock.
For precise color matching and consistent paint sheen, apply thin, even coats and let each fully harden to avoid brushing marks or shade shifts. Sand lightly between coats when recommended, wipe dust, and only recoat once the surface feels dry and resists fingernail pressure.
How Temperature Affects Drying and Recoat Windows
Temperature has a big impact on how quickly paint dries, so you’ll see faster cure times in warm conditions and slower ones in the cold.
High humidity can slow drying even when it’s warm, while dry heat speeds solvent evaporation and shortens your recoat window.
In cold weather you should expect significant delays and plan longer wait times before applying the next coat.
Temperature And Drying Speed
Because paint chemistry speeds up as the air warms, you’ll see faster solvent evaporation and quicker film formation in higher temperatures, which shortens recommended recoat windows. You should still consider how color blending and finish sheen behave when layers set faster.
Warmer conditions let you recoat sooner, but the surface can skin over, trapping solvents beneath. Monitor tack and manufacturer’s times rather than guessing.
- Check tack: if it’s dry to touch, wait the minimum recoat time.
- Watch for skinning: avoid recoating too quickly or you’ll affect adhesion.
- Adjust schedule: higher temps often cut drying times by hours.
Humidity’s Role With Heat
Higher heat speeds solvent evaporation, but humidity determines how fast that moisture actually leaves the film, so you’ll want to factor both when planning recoats.
High humidity slows drying even in warm conditions, so your recoat window widens and tackiness can persist longer.
Low humidity with heat can over-dry the surface, harming paint texture and risking visible lap marks or poor color matching.
Aim for moderate humidity and temperature for predictable cure times.
Use a hygrometer and follow manufacturer guidance; test a small patch for tack and appearance before full recoats to guarantee consistent texture and true color match.
Cold Weather Recoat Delays
When it gets cold, paint dries much more slowly and you’ll need to lengthen recoat windows to avoid trapping moisture or causing poor adhesion. You should monitor substrate temperature and extend wait times; low temps slow solvent evaporation and curing.
Keep paint storage warm to preserve viscosity and avoid thickening that hinders flow. If you’ve done color mixing, remix gently before use because pigments can separate in cold.
Use slow-dry formulations or add manufacturer-approved retarders only when recommended. Check adhesion with a small test patch before full recoating in cold conditions.
- Measure surface temp and extend gap
- Warm paint storage
- Test patch first
How Humidity and Ventilation Change Drying Speed
If the air in your room holds a lot of moisture, paint will take noticeably longer to dry. Good ventilation, on the other hand, strips away that moisture and speeds curing. You should open windows, run fans, or use a dehumidifier to reduce relative humidity and shorten wait times.
Poor airflow can trap paint fumes and slow solvent evaporation, and lingering dampness may alter finish and affect color matching. Monitor conditions with a hygrometer and aim for 40–50% humidity if possible.
Adjust drying expectations accordingly: higher humidity means longer wait between coats, while brisk ventilation lets you recoat sooner.
How Coat Thickness and Coverage Affect Recoat Time
Moisture and airflow aren’t the only things that change how long paint needs between coats — the amount of paint you apply does too. If you lay on heavy coats, solvents take longer to evaporate, so you’ll wait longer before recoating. Thin, even layers dry faster and reduce visible brush strokes and improve color blending.
- Heavy coats: longer recoat time, risk of sagging.
- Thin coats: faster drying, smoother finish, better adhesion.
- Overlap and coverage: consistent film thickness prevents patchy color and lets you plan ideal recoat intervals.
How Different Surfaces Change Drying and Adhesion
Because porous and nonporous substrates absorb and hold paint differently, you’ll see big changes in dry time and adhesion depending on the surface you’re coating.
You’ll notice raw wood or plaster drinks paint, speeding tack-free time but risking uneven color blending unless you prime.
Smooth metals and plastics resist absorption, so paint skins over, slowing cure and requiring scuffing for adhesion.
Textured concrete and brick trap moisture and prolong drying; consider thinner coats and longer waits to aid texture smoothing.
Sanding, cleaning, and using appropriate primers or bonding agents helps control drying behavior and guarantees each coat sticks predictably.
When a Coat Is Ready: Signs You Can Recoat
Check the surface with your fingertip — it should feel dry to the touch without any tackiness.
Run a fingernail gently across an inconspicuous edge to make sure paint doesn’t smear and the finish holds.
Also inspect the progressions: edges should blend seamlessly with the surrounding paint before you apply another coat.
Surface Is Dry To Touch
When the surface feels dry to the touch, you can usually consider the coat ready for a light recoat—just press a fingertip gently in an inconspicuous spot to confirm it no longer feels tacky.
You’ll also check color blending at the edges and the paint sheen for uniformity; if both look consistent, the layer is likely set enough for another thin coat.
Work in good light and avoid heavy pressure when testing. If you’re unsure, wait a bit longer; rushing can trap moisture.
- Test discreetly with fingertip.
- Inspect color blending and sheen.
- Wait extra time if uncertain.
No Tacky Or Smear
If the paint no longer feels tacky or smears when you touch it lightly, it’s ready for a recoat—gently press your fingertip in an out-of-the-way spot to confirm there’s no transfer or indentation.
When there’s no tack and no smearing, you can confidently continue without disturbing the underlying film. Avoid heavy pressure that could leave a mark.
Keep in mind color mixing can change drying behavior, so test areas if you’ve adjusted shades.
Proper paint storage between sessions preserves consistency and prevents skinning that might mimic tackiness.
If tests pass, proceed with your next coat, maintaining light, even strokes for best results.
Edges Blend Seamlessly
While the surface may feel dry, you’ll know a coat is ready for recoating when the edges blend seamlessly into the surrounding paint—no hard lines, ridges, or visible overlap should remain where wet meets dry. You want consistent color blending across the panel; mismatched edges mean solvent or film isn’t set.
Lightly inspect in different angles and diffuse light to spot subtle ridges.
Test a small area with a fingertip (gloved) to confirm no tack. When edge blending is uniform, you can recoat without lap marks or texture differences.
- Inspect in varied light
- Gentle touch test
- Check for uniform color blending
When to Wait Longer: Signs You Should Not Recoat
Because paint can feel dry to the touch long before it’s ready for another coat, don’t trust surface dryness alone—look for these clear signs that you should wait longer before recoating.
If color mixing streaks are still visible or sheen varies, pigments haven’t leveled; pause until uniform.
Watch for tackiness, sagging, or runoff at edges—these indicate underlying wetness.
If solvent smell remains strong, curing’s incomplete.
When brush selection left visible ridges or the texture hasn’t flattened, give more time.
Also delay recoating in high humidity or low temperature; drying slows, and premature coats trap moisture, causing peeling later.
Fingernail and Touch Tests for Recoat Readiness
You can use two simple checks to tell if paint is ready for another coat. Gently press a fingernail into a discreet spot—if the paint dents or peels, it needs more time.
Then lightly touch the surface; if it feels tacky, don’t recoat yet.
Fingernail Press Test
If paint no longer feels tacky when you lightly press a clean fingernail into an inconspicuous spot, it’s usually ready for the next coat. The fingernail press test gives a quick, low-tech way to judge surface dryness without specialized tools.
You’ll avoid denting fresh layers if the nail leaves no mark and you don’t smell solvents strongly. Consider paint type, temperature, and humidity. For delicate finishes, test near trim or behind furniture.
Remember proper color mixing can affect drying, and consistent brush techniques prevent thin or thick patches that skew results.
- Test multiple spots.
- Use light pressure.
- Wait longer if unsure.
Touch Dry Check
How soon is a painted surface really ready for another coat? You’ll use a touch dry check—light fingertip press and a gentle drag—to judge recoat readiness. Don’t press hard; a slight tack means wait. Fingernail tests risk marring soft films, so prefer pad-of-finger checks. Note that color mixing can affect dry feel and drying time; eco friendly paints sometimes dry differently than conventional ones. Use this table to guide quick decisions:
| Test | Result | Action |
|---|---|---|
| Barely tacky | Finger leaves slight trace | Wait 30–60 min |
| Dry to touch | No transfer | Ready for recoat |
| Soft film | Indents persist | Wait longer |
Sanding Between Coats: When and How Long to Wait
When sanding between coats, wait until the paint feels dry to the touch and has cured enough that it won’t clog the sandpaper—usually the manufacturer’s minimum recoat time or about 4–6 hours for latex and 24 hours for oil-based paints.
You’ll sand lightly with fine grit to knock down imperfections, then clean dust before recoating.
Keep stirred paint properly for consistent color mixing and store leftovers in sealed cans to simplify touch-ups; proper paint storage prevents contamination that affects sanding.
Keep paint well-stirred and store leftovers sealed to ensure consistent color and contamination-free sanding.
- Use 220–320 grit for finish coats.
- Wipe with a tack cloth.
- Recoat after dust-free inspection.
Primer Types: How They Change Recoat Timing
Because different primers dry and bond differently, the type you pick directly affects how soon you can recoat. Learn manufacturer times: oil-based primers often need longer curing than fast-drying acrylics, so you’ll wait more before recoat.
High-build primers can smooth uneven surfaces, improving paint texture and reducing the need for extra coats.
Stain-blocking primers may require full cure to avoid bleed-through when color matching, so plan longer intervals.
Shellac primers dry quickly but can be sensitive to humidity.
Always check labels, test a small area, and factor temperature and ventilation to decide safe recoat timing for your project.
Additives and Extenders: Effects on Drying Time
If you add retarders, extenders, or fast-dry agents to paint, you’ll change how long each coat needs to dry and cure. You should test small areas because additive effects vary by formula, temperature, and humidity.
Extender properties can slow surface drying but improve flow and leveling, which may require longer tack-free times.
Fast-dry agents speed drying but can reduce open time and leveling, risking brush marks. Keep manufacturer limits in mind and record ratios.
- Test: small panel, note drying and cure times.
- Adjust: follow recommended percentages, avoid overuse.
- Observe: humidity and temperature impact results.
Low‑VOC and Fast‑Dry Paints: What to Expect
If you choose low‑VOC or fast‑dry paints, you’ll usually get much quicker tack‑free times so you can recoat sooner.
Just remember the tradeoff: lower odor doesn’t always mean faster full cure, and some formulations can feel dry on the surface while still curing underneath.
Check the manufacturer’s recoat and cure times so you don’t sand or layer too early.
Faster Tack-Free Times
When you’re pressed for time, low‑VOC and fast‑dry formulations can go tack‑free in a fraction of the time traditional paints need. Many modern water‑based fast‑dry paints become touch‑dry in 30 minutes to an hour under ideal conditions, though full recoat recommendations still vary by product.
You can speed things with ventilation, moderate heat, and thin coats. Be mindful: quicker tack‑free times may affect paint texture and subtle color matching, so test a small area first.
- Use thin coats and good airflow.
- Check manufacturer recoat times.
- Test texture and color before large areas.
Low Odor Tradeoffs
Because low‑VOC and fast‑dry paints cut down on fumes, you’ll notice much less lingering smell and can return rooms to use sooner—but that convenience comes with tradeoffs you should know.
You’ll get lower VOC emissions, reducing health risks and allowing quicker reoccupation, yet fast curing can shorten working time and hide surface issues. Some formulas use odor masking to make smell tolerable without lowering emissions, so don’t assume scent equals safety.
You may sacrifice durability, leveling, or coverage, requiring extra coats. Read labels for drying and recoating times, test adhesion on scrap, and plan for ventilation despite milder odors.
Speeding Drying Safely With Fans, Heat, and Dehumidifiers
Although speeding up paint drying can save you time, you’ll want to do it carefully to avoid surface issues like blistering, cracking, or poor adhesion. You can use fans, controlled heat, and dehumidifiers to speed drying while preserving paint texture and ensuring accurate color matching.
Speed up drying cautiously—use airflow, gentle heat, and dehumidifiers to avoid blistering, cracking, or poor adhesion.
- Fans: increase airflow to evaporate solvents faster; avoid direct high-speed blasts that can create dust or uneven finish.
- Heat: use moderate, even warmth (avoid open flames or hot spots) so coating cures evenly without compromising adhesion.
- Dehumidifiers: lower humidity to speed evaporation, especially in damp spaces, but monitor curing times closely.
Safety and Environmental Limits When Forcing Drying
If you speed up drying, watch the risks from heat sources so you don’t scorch finishes or start a fire.
You’ll also need to control solvent fumes—open windows and use ventilation so concentrations stay below safe limits.
Finally, monitor surface temperature to avoid blistering or trapped solvents that can ruin the next coat.
Heat Source Risks
When you speed up drying with heaters, fans, or torches, you must balance time saved against safety and environmental risks. You’ll face heat hazards like scorched surfaces, igniting dust or old finishes, and damaging substrates.
Practice heat safety: keep clearances, monitor temperatures, and never leave equipment unattended. Use appropriate-rated heaters and grounded cords, and avoid open flames near flammable materials.
Consider ventilation needs but don’t vent toward ignition sources.
- Inspect area: remove combustibles and test a small patch.
- Monitor: use a thermometer and stay present.
- Choose equipment: prefer radiant or low-temp forced air over direct flame.
Solvent Fume Limits
Because forcing paint to dry boosts solvent evaporation, you’ll also raise airborne fume concentrations and shorten safe exposure windows. You should check product Safety Data Sheets for occupational exposure limits and follow local regulations; don’t assume ventilation or short cycles eliminate risk.
Use respirators rated for organic vapors if limits might be exceeded, and monitor with detectors in enclosed spaces.
Remember color theory won’t change toxicology, but pigment choice can affect formulation and solvent load during paint application.
Dispose of solvent-laden waste per guidelines, and avoid forcing drying where environmental emissions or occupant health could be compromised.
Surface Temperature Control
Controlling surface temperature matters just as much as managing solvent fumes, since heating a substrate to speed drying changes evaporation rates, flashpoint behavior, and emissions. You should monitor temps to avoid overheating, which can alter color mixing, weaken binders, and reduce paint durability.
Use controlled, even heat and follow manufacturer maxima; don’t aim for faster touch-dry by brute force. Keep ventilation balanced to disperse emissions without cooling the surface too rapidly.
Test a small area first and measure solvent concentrations if you force-dry indoors.
- Monitor surface and ambient temperature limits.
- Use gentle, even heat sources.
- Verify ventilation and emissions.
Trim, Doors, and Cabinets: Ideal Recoat Timings
If you’re painting trim, doors, or cabinets, aim for thinner, well-dried coats so your next pass goes on smoothly and resists drips or brush marks.
Wait 2–4 hours for water-based paints and 6–8 hours for oil-based before light sanding and recoating; low-VOC or enamel finishes may need longer.
Maintain consistent temperature and humidity to avoid tackiness.
Keep leftover tintable paint separate for touch-ups—proper color mixing and sealed paint storage prevent shade shifts.
Sand between coats for adhesion, clean dust, and use a tack cloth.
Test a corner before full recoating to confirm cure and finish quality.
Walls and Ceilings: Timing for Successive Coats
After finishing trim, doors, and cabinets, shift your focus to walls and ceilings, where paint behavior and drying times often differ because of larger surface area and airflow patterns. You’ll wait longer between coats than on trim; thin, even coats dry faster, and proper color mixing ensures consistent coverage. Adjust based on temperature and humidity, and don’t rush.
- Use consistent brush techniques and rollers to avoid lap marks; wait 2–4 hours for water‑based paints in normal conditions.
- For oil‑based or high‑humidity rooms, allow 8–24 hours before recoating.
- Test a small area to confirm tack‑free readiness.
Exterior Siding and Trim: Weather and Recoat Timing
Because exterior surfaces face sun, wind, and moisture, you’ll need longer, more cautious recoat timing than for interiors. Check temperature, humidity, and dew—ideal conditions are typically 50–85°F and low humidity.
Let siding and trim cure to the touch before recoating; durable latex often needs 4–6 hours between coats in good weather, oil-based longer. Avoid recoating late in the day to prevent moisture trapping.
Proper timing helps prevent paint peeling and guarantees even color matching across boards and corners. If rain’s forecast or temperatures drop overnight, wait until stable conditions return to protect adhesion and finish.
Multiple Thin Coats vs One Thick Coat: Timing Tradeoffs
While it might seem faster to slap on one thick coat, you’ll get better adhesion, smoother coverage, and quicker usable drying time by applying multiple thin coats spaced properly. You can manage timing to control sagging, avoid long cure delays, and preserve the desired paint sheen.
Apply multiple thin coats with proper spacing for better adhesion, smoother coverage, and faster usable drying.
Thin coats let you correct color matching between layers and build finish without runs. Wait the manufacturer’s recommended flash time; you won’t need full cure before recoating.
- Thin coats: faster tack-free times, even sheen, easier color matching.
- Thick coat: longer drying, higher risk of drips and uneven sheen.
- Smart spacing: balance speed and quality.
Troubleshooting After Recoating Too Soon
If you recoat too soon, you’ll likely see problems like lifting, tackiness, brush marks, or uneven gloss that undo the benefits of thin layers. You can test and fix spots: gently press a corner, wait, re-sand glossy ridges, and recoat only when dry. Check color matching if solvents or tackiness altered hue, and note paint branding to guarantee compatibility before touch-ups. Keep records: brand, batch, and drying conditions.
| Problem | Cause | Fix |
|---|---|---|
| Lifting | Solvent trapping | Sand, thin topcoat |
| Tacky | Incomplete cure | Wait, ventilate |
| Gloss mismatch | Early recoat | Blend carefully |
Planning a Multi‑Day Painting Schedule Around Recoats
When you’re planning a multi‑day painting schedule, map each coat’s dry and cure times against realistic work blocks so you don’t end up stuck waiting or rushing recoats. You’ll sequence primer, base coats, and topcoats around temperature and humidity, noting how color mixing affects opacity and how paint sheen changes perceived drying. Leave full recoat windows plus contingency for touchups. Communicate timing to helpers, and mark completed stages.
- Day 1: prep, primer—allow recommended dry time.
- Day 2: base coat, inspect for color mixing consistency.
- Day 3: topcoat, confirm desired paint sheen and cure.
Pro Tips: How Professionals Shorten Recoat Windows
You’ve scheduled your coats and left proper dry windows, but pros often shave hours—or even days—off recoat waits by controlling the environment, choosing faster-drying products, and using targeted techniques.
You’ll speed drying by raising temperature, lowering humidity, and adding airflow with fans or dehumidifiers. Use quick-dry primers, waterborne enamels, or catalyzed finishes when appropriate.
Thin coats and spot-heat with a heat gun at safe distance. Learn from historical painting techniques for layering logic and adhesion.
Consider color psychology when picking sheens—darker tones absorb heat and dry faster. Test small areas to confirm timelines before full application.
Frequently Asked Questions
Can I Recoat Over Wallpaper or Textured Wallcoverings?
Yes — you can recoat, but consider wallpaper removal first; you’ll need textured surface preparation, cleaning, and priming. If wallpaper’s firmly adhered and smooth, use a quality primer-sealer; otherwise remove or repair before painting.
How Do Metallic or Specialty Finishes Affect Recoat Timing?
Metallic finishes and specialty coatings often need longer cure times, so you’ll wait extra between coats; follow manufacturer’s instructions, allow tack-free time, and test a small area before recoating to avoid lifting, streaks, or texture issues.
Does Paint Color Pigment Concentration Change Drying Speed?
Like a slow sunrise, yes — higher pigment concentration can alter paint chemistry and slightly lengthen drying time; you’ll notice denser pigments slow solvent escape, so adjust recoats and ventilation to guarantee proper cure.
Can I Use Spray Equipment Between Brush-Applied Coats?
Yes — you can, but you’ll need compatible products and proper technique: use spray application for even coverage, feather edges from brush versus spray, thin appropriately, mask thoroughly, and test adhesion to guarantee finish uniformity between brush and spray coats.
How Long to Wait Before Applying Clear Topcoats or Polyurethane?
Wait about 24–48 hours before applying clear topcoats or polyurethane; you’ll guarantee proper drying time and tackle surface preparation like sanding and cleaning so the topcoat bonds well and avoids runs, bubbles, or adhesion issues.
Conclusion
Think of recoating like giving a plant time to drink—if you rush it, things wilt; if you wait, it thrives. You’ll want to follow the paint type and temp cues so each layer bonds, not battles. Plan thin coats, monitor tackiness, and use heat or fans only when recommended. With patience and the right conditions, your finish will glow like a well-tended garden, durable and even for years to come.