How to Paint Harlequin Pattern on Wall for Stylish Design
You can create a stylish harlequin wall by measuring and marking a precise diamond grid, painting a light base, then taping and filling alternating diamonds with your chosen contrasting hues; work top to bottom, use thin coats, press tape edges and score for crisp lines, and remove tape at a 45° angle once paint’s tacky for clean edges. Choose colors for your light, room function, and trim, and keep tools and touch‑up brushes handy—continue for step‑by‑step layout, tips, and finishing tricks.
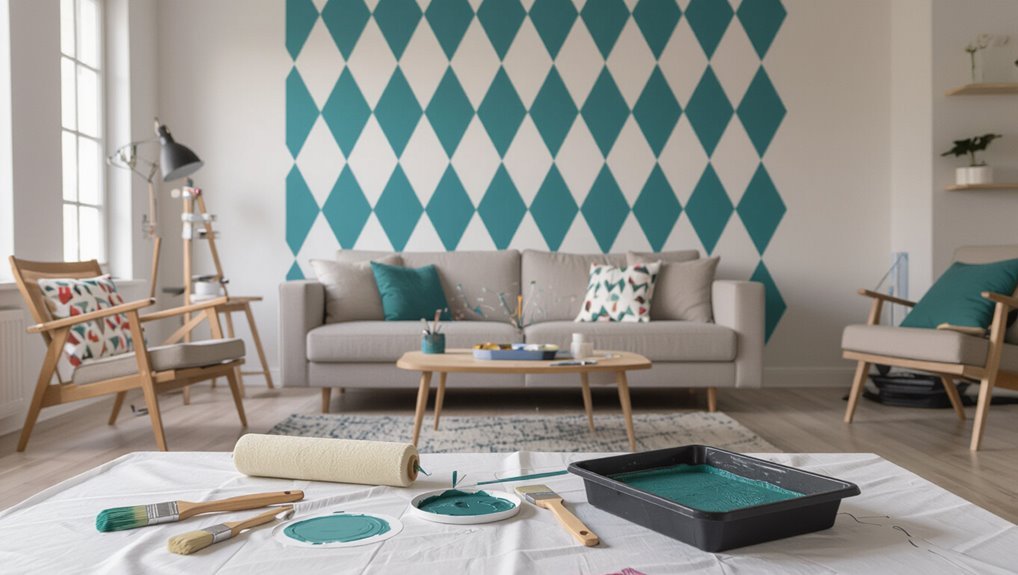
Quick Photo Tutorial: What This Guide Covers
Wondering what you’ll learn here?
You’ll get a step-by-step photo tutorial showing tools, layout, and painting techniques for a clean harlequin wall.
Photos highlight measurement tips, crisp edge methods, and color pairing for design inspiration.
Brief notes cover pattern history so you understand proportions and repeats.
Follow images and captions to recreate the look confidently, without extra theory.
Why a Harlequin Wall Works in Modern Homes
A harlequin wall gives your room instant bold visual interest with geometric punch.
You can pair it with minimalist furniture for contrast or mix patterns and textures for a layered, modern look.
Use color and scale to keep the pattern fresh and suited to your space.
Bold Visual Interest
Because bold geometry catches the eye and anchors a room, a harlequin wall instantly adds visual interest without overwhelming your space.
You’ll create bold visual interest with eye-catching patterns that guide sightlines and highlight focal points.
Use contrasting colors and crisp diamonds to energize a room, reinforce architectural features, and give your decor a confident, contemporary edge without cluttering the space.
Versatile Style Pairing
Texture and shape make a harlequin wall surprisingly adaptable, so you can pair it with minimalist furniture, vintage finds, or eclectic accents without the room feeling disjointed.
You’ll mix versatile combinations confidently: contrast bold diamonds with neutral textiles, add metal or wood tones, or layer patterned rugs.
Embracing eclectic styles lets you balance statement geometry with softer elements for a cohesive, modern look.
Best Rooms for a Harlequin Pattern
Bold patterns like a harlequin can transform a room’s mood, so pick spaces where you want energy or a focal point.
You’ll love it in a living room as an accent wall to anchor seating, in a nursery design for playful rhythm on one wall, or in a hallway, powder room, or home office to add personality without overwhelming the whole house.
Choosing a Color Scheme for Light and Mood
Light and color will set the room’s mood, so choose hues that work with the natural and artificial light you have.
Think about color psychology: warm tones energize, cool tones calm. Test swatches at different times of day for true effect.
For mood enhancement, pick one dominant hue and one accent, ensuring contrasts read well under your lighting without overpowering the space.
Balancing Bold and Subtle Pairings
You can temper a vivid harlequin pattern by pairing it with neutral tones to let the shapes pop without overwhelming the room.
Mix matte and glossy finishes or textured paints to add depth and keep the look dynamic.
Use a single accent color sparingly to create focal points and tie the scheme together.
Pairing With Neutral Tones
Pairing a harlequin pattern with neutral tones can ground its drama while letting the diamonds remain the room’s focal point.
You’ll balance color contrast by selecting soft beiges, greys, or muted whites that calm vivid diamonds.
Use neutrals on trim, larger furniture, and adjacent walls to maintain design harmony.
This keeps the pattern striking without overwhelming the space.
Mixing Texture And Finish
When you blend different textures and paint finishes with a harlequin pattern, you can temper its bold geometry and add tactile depth to the room.
Use textured finishes sparingly on alternate diamonds to create subtle contrast, and employ paint layering—matte over satin or glaze washes—to soften shifts.
You’ll control shine, prevent visual clutter, and keep the pattern elegant without overpowering surrounding decor.
Accent Colors For Impact
Start with one dominant accent color and one restraint—this lets you create impact without overwhelming the room.
Choose hues using accent color psychology: warm tones energize, cool tones calm.
Pair bold shades with muted neutrals, or try contrasting color combinations for drama.
Test swatches under real light, balance scale and spacing, and let one color lead while the other supports quietly.
Two‑Tone vs. Multi‑Color Harlequin: Pick Your Approach
Although both styles create striking geometry, choosing between a two‑tone and a multi‑color harlequin comes down to the mood you want and the room’s existing palette.
You’ll favor two‑tone for calm, modern spaces and easy coordination with color choices.
Go multi‑color to energize, follow bold design trends, or highlight furnishings, but keep balance so the pattern supports—never overwhelms—the room.
Tools and Materials for a Crisp Harlequin Wall
Preparation is key: gather quality paints, a precision roller and angled brush, low‑tack painter’s tape, a reliable level or laser, a measuring tape and straightedge, a chalk line or pencil for marking diamonds, sandpaper and primer for surface prep, plus drop cloths and masking paper to protect floors.
Choose tools that suit your color selection and decide pattern scaling; include a utility knife, mixing sticks, trays, and a small foam edger for crisp edges.
Prep a Harlequin Wall for Paint Adhesion
Before you tape your diamonds, clean the wall to remove dust, grease, and cobwebs so paint will bite.
Patch any holes or cracks with spackle, let it dry, then sand smooth to a uniform surface.
Doing these steps now prevents imperfections from showing through your harlequin pattern.
Surface Cleaning
Wipe down the wall thoroughly to remove dust, grease, and cobwebs so your paint will stick evenly and the crisp harlequin lines won’t lift or blister.
Use mild detergent, trisodium phosphate substitute, and microfiber cloths from your wall cleaning supplies; rinse and let dry.
These surface preparation techniques prevent contamination, guarantee tape adhesion, and give you a clean, consistent base for painting.
Patch And Sand
Once you’ve cleaned the wall, take time to patch holes and sand smooth so your harlequin diamonds sit flat and the paint lays on evenly; small imperfections will telegraph through thin or contrasting colors.
Fill cracks and dents with spackle, let it dry, then sand feathered edges.
Wipe dust, inspect for remaining surface imperfections, and repeat as needed for proper wall preparation before taping and painting.
Measure Your Wall and Choose Diamond Size
Start by measuring the full height and width of the wall so you can pick diamond dimensions that fit evenly and look balanced.
Use your wall measurements to test a few diamond sizes on paper or digitally, aiming for whole repeats across height and width.
Consider ceiling height, furniture placement, and visual scale so diamonds neither overwhelm nor get lost on the wall.
Create a Precise Diamond Grid (Simple Formula)
Now that you’ve picked your diamond size, measure the tile width and height so each unit repeats evenly across the wall.
Use those measurements to calculate centers by spacing marks at half the tile width along horizontal and vertical lines, creating a grid of diamond centers.
Snap chalk lines through those centers to guide crisp, evenly sized diamonds.
Measure Tile Size
Measure each diamond tile by its widest point across the center (the diagonal), because that measurement determines the spacing of your grid; divide the wall’s horizontal length by the diagonal to get how many full diamonds fit, then adjust the diagonal slightly if you need to make an even number or avoid tiny slivers at the edges.
Then note tile dimensions and consider pattern scaling to refine spacing.
Mark Diamond Centers
Choose a reference corner and mark a small, visible starting point—this will anchor your grid so every diamond lines up evenly.
Use simple marking techniques and a formula: divide wall width by diamond spacing, mark intersections, then transfer with chalk line.
You’ll:
- measure horizontally and vertically
- score faint guide crosses
- snap parallel chalk lines
- confirm centers before painting
Transfer Your Diamond Grid Accurately to the Wall
Before you start painting, lay out the diamond grid precisely on the wall so every pattern element lines up and looks crisp.
Measure from established reference points, use a level and straightedge, and snap light guidelines.
Check wall alignment frequently, adjust for irregularities, and transfer intersections carefully so your layout stays true before you begin painting.
Mark the Wall: Pencil, Chalk, and Tape Tips
You’ll choose between pencil for precise, erasable lines and chalk for bold, easy-to-brush-away marks depending on your wall finish.
Use a level and a chalk line for long runs, then align painter’s tape exactly on the marks to keep diamond edges sharp.
Press the tape down firmly and score the edges for the cleanest paint bleed prevention.
Pencil Vs. Chalk
Although both pencil and chalk can guide your layout, they behave very differently on drywall and primer—you’ll want to pick the one that wipes or sands off cleanly for your surface and the level of permanence you need.
You’ll choose based on pencil accuracy versus chalk visibility. Consider:
- Pencil: fine lines, low dust
- Chalk: bold, easy to see
- Erasing: sand or wipe
- Surface: test first
Tape Alignment Techniques
Start by marking key reference lines with a pencil or chalk. Then apply painter’s tape along those guides so your diamonds stay sharp and even. Use a level or laser to keep lines straight and a long straightedge to press tape flat.
Use tape measurement techniques to space diamonds evenly. Number or notch intersections, and follow tape application tips: press edges firmly and seal seams to prevent bleed.
Pick the Right Painter’s Tape and Edge Method
Pick a high-quality, low-bleed painter’s tape designed for delicate surfaces and strong adhesion so your diamonds get crisp, clean edges without peeling paint when you remove the tape.
Choose tape types and edge techniques that match your wall texture; press edges firmly and seal with a thin basecoat if needed.
- Paper tape for smooth walls
- FrogTape for textured surfaces
- Low-tack for fresh paint
- Use a putty knife to burnish edges
Paint Order: Step‑By‑Step Sequence to Avoid Mistakes
Now that your tape’s sealed and edges are burnished, plan the paint sequence to avoid smudges and uneven coverage.
Start with the lighter base color, let it cure, then tape for darker diamonds. Work top to bottom and left to right to prevent drips.
Use controlled paint layering and deliberate application techniques, drying between coats, and remove tape slowly for clean shifts.
Techniques to Get Sharp Paint Edges With Minimal Bleed
A few simple habits make the difference between crisp diamonds and fuzzy edges: press tape firmly, paint thin layers, and seal the tape edge before applying your color.
Use sharp edge techniques and bleed reduction methods so your pattern looks pro.
Tips:
- Use high‑quality painter’s tape
- Burnish tape edges with a credit card
- Apply thin coats, let dry
- Peel tape slowly at 45°
Handling Overlaps and Fast Touch‑Ups
When you align tape edges carefully, you’ll prevent most overlaps before they happen.
If a seam still shows, feather the new color into the old with a light brush to blend the shift.
For small mistakes, keep a loaded fine brush and matching paint handy for quick spot corrections.
Aligning Tape Edges
- You’ll align tape edges precisely using tape types and alignment techniques to prevent bleed and speed touch‑ups. Press seams flat, overlap minimally, and trim excess.
- use low‑tack painter’s tape for delicate surfaces
- choose high‑adhesion tape on glossy walls
- butt edges tightly for sharp diamonds
- trim overlaps with a fresh blade
Quickly seal, paint, and remove while paint’s tacky.
Feathering Paint Transitions
Since paint edges often overlap, you’ll want to feather shifts by thinning the roller or brush load and working outward from the tape line with light, staggered strokes; this softens any ridge, helps the new color blend into the existing coat, and makes quick touch‑ups nearly invisible.
Use feathering techniques: tap or roll sparingly, blend edges with short, overlapping passes, and check under varied light to guarantee smooth paint blending.
Quick Spot Corrections
Catch small flaws quickly to keep your harlequin pattern crisp and reduce rework: dab a thin, slightly damp brush or a fingertip-sized roller into the new color and lightly tap over overlaps or stray marks, feathering outward to blend without building ridges.
Use color selection and pattern scaling awareness to match tone and edge.
- Spot-clean edges
- Smooth ridges
- Match hue/finish
- Re-scale corner tiles
Finishing Around Trim, Baseboards, Doors, and Windows
When you finish the harlequin pattern, focus on clean shifts where the diamonds meet trim, baseboards, doors, and windows—these edges make the pattern look intentional or sloppy.
Use trim techniques like painter’s tape and angled brushes for crisp lines.
Sand and caulk gaps, paint trim separately if needed, and choose consistent edge finishes so corners and openings read as polished, not rushed.
Scaling the Pattern Across Multiple Walls and Corners
If you want the harlequin pattern to read seamless across adjacent walls and around corners, plan your grid from a fixed reference point and carry the layout lines continuously so each diamond aligns exactly where the wall planes meet.
Use scaling techniques and corner adjustments to maintain proportions.
- establish a reference line
- transfer measurements around corners
- tweak diamond sizes subtly
- check alignment frequently
Matching Diamonds Around Doors and Windows
You’ll start by measuring the diamond layout carefully so the pattern aligns perfectly at door and window edges.
Mark trim lines and transfer those measurements to your stencil or grid, checking that half-diamonds are balanced on each side.
When you paint, trim precisely around openings with a small brush or edging tool to keep clean, consistent shapes.
Measuring Diamond Layout
Because doors and windows interrupt the diamond grid, you’ll measure and adjust each row so diamonds align evenly across openings.
Use precise wall measurements and chosen diamond sizes to plan balanced rows. Mark centerlines, check vertical alignment, and shift start points as needed.
- Measure full wall span
- Note opening widths
- Calculate partial diamonds
- Sketch alignment points
Trimming Around Openings
When trimming diamonds around doors and windows, plan each cut so the pattern reads continuous and balanced across the opening; mark centerlines, transfer diamond grid onto jambs, and note offsets.
Use precise opening measurements to calculate partial diamonds, choose trimming techniques like angled cuts or inset trim, and dry-fit templates.
Paint full diamonds first, then trim and touch up edges for seamless alignment and crisp corners.
Working Inside Tricky Trim and Baseboards
If your harlequin diamonds meet trim or baseboards, take a steady approach: you’ll need careful trim techniques and patience with baseboard challenges.
Protect edges, work from corner to corner, and use angled brushes for accuracy.
- mask edges tightly
- cut in with a sash brush
- remove tape while wet
- touch up with a small artist brush
Stenciling or Vinyl Templates: When to Use Them
If you want crisp, repeatable diamonds with minimal measuring, use a stencil for smaller walls or detailed areas.
Choose vinyl templates when you need larger shapes or want to reposition pieces as you work.
Both methods save time, so pick the one that fits the scale and complexity of your room.
When To Stencil
Wondering whether to stencil or use vinyl templates for your harlequin wall? You’ll choose stenciling when you want crisp repeats, custom stenciling techniques, and control over texture using specific stencil materials.
It’s ideal for smaller walls, layered colors, or detailed motifs. Consider:
- Tight pattern repeats
- Textured paint effects
- Reusable stencils
- Precise alignment needs
When To Use Vinyl
When you want a fast, foolproof way to lay down large, consistent harlequin diamonds, vinyl templates are the better choice: they stick to the wall, prevent bleed, and let you cover bigger areas with fewer touch-ups than freehand or traditional stencils.
You’ll appreciate vinyl durability for repeated use, quick alignment, and clean edges. Choose vinyl finishes that match sheen and remove templates gently to avoid paint lift.
Creating a Faded or Distressed Harlequin Finish
To get a worn, vintage look on your harlequin wall, start by deciding how much of the base layer you want showing through and where natural wear would occur.
Decide how much base layer to reveal and where natural wear would occur for an authentically faded harlequin finish.
Work intentionally to create faded finishes and subtle distressed effects.
Try techniques like:
- Light sanding on corners
- Dry-brushing diamonds
- Glazing with diluted paint
- Targeted scuffing for realism
Adding Metallics or Texture for a Luxe Finish
Although a harlequin pattern already reads bold, adding metallics or texture instantly elevates it into a luxe focal wall—so pick one or two complementary metallic tones (like warm gold with a subdued pewter) and decide where texture will enhance the design without overpowering the diamonds.
Apply metallic finishes sparingly on accent diamonds, and use textured paints for subtle depth, blending edges for cohesion.
Speed Tricks That Keep Clean Edges (Time Savers)
Start with a solid plan and the right tools so you can work fast without sacrificing crisp edges: use a laser level or long straightedge to mark your grid, mask the diamonds with high-quality painter’s tape applied with a plastic scraper or credit card, and cut tape corners with a utility knife for precise points.
- roll thin coats
- peel tape warm
- touch edge cleaning with a small brush
- time paint application between coats
Common Mistakes and How to Avoid Them
When you rush or skip prep, the harlequin pattern will betray every shortcut. So plan your layout, clean and prime the wall, and tape carefully before you paint.
Avoid poor color selection by testing swatches in different light. Measure twice to prevent alignment issues and use a level and straightedge.
Work patiently, letting coats dry to keep edges crisp and uniform.
Repairing Errors and Refreshing the Pattern Later
If a diamond chips or a seam bleeds, don’t panic—assess the damage, gather matching paint and a fine brush, and work deliberately to fix it.
You’ll want a clear plan for error correction and future pattern refresh. Quick steps:
- Clean and sand tiny flaws
- Feather edges with glaze
- Repaint precise lines
- Seal with matte varnish
Safety, Ventilation, and Clean‑Up Best Practices
Because paint fumes can build quickly in a closed room, make sure you ventilate well and protect yourself before you begin cleanup or touch up, wearing a respirator or mask rated for paint vapors and gloves for solvent‑based products.
Use safety gear, follow ventilation tips like cross‑venting and fans, keep clean up essentials handy (rags, soap, proper containers), and follow local paint disposal rules.
Cost Estimate: Budget Breakdown for a DIY Harlequin Wall
Although project size and paint choice will drive the final tally, you can plan a realistic budget for a DIY harlequin wall by breaking costs into materials, tools, and labor-equivalent time.
Plan a realistic DIY harlequin wall budget by splitting costs into materials, tools, and labor-equivalent time.
Do a cost comparison for paint selection and supplies, then list expenses and contingencies.
- Paint (two colors, primer)
- Tape, primer, brushes, rollers
- Drop cloths, sandpaper, patching
- Time estimate (hours × your hourly value)
When to Hire a Pro vs. DIY
When deciding whether to tackle a harlequin wall yourself or hire a pro, weigh your skills, schedule, and the room’s visibility; simple patterns in low-traffic rooms are great DIY projects, while complex layouts, high ceilings, or rooms where mistakes will be costly (like a living room you use daily) are better left to a professional.
If you’re a DIY enthusiast with time and steady hands, try it; otherwise hire a professional painter.
Styling Tips: Decorate a Room With Your Harlequin Wall
Once your harlequin wall’s complete, let it lead the room’s palette and pick furniture and accessories that echo its colors and scale.
Balance bold diamonds with simple, solid-colored pieces, add metallic or wood accents for warmth, and repeat a key hue in textiles or artwork to create cohesion.
Use color psychology and pattern harmony to guide choices:
- Neutral sofa to ground pattern
- Accent pillows matching diamonds
- Warm wood side table
- Metallic light fixture for contrast
Frequently Asked Questions
Can I Use Wallpaper Instead of Painting a Harlequin Pattern?
Yes — you can use wallpaper instead of painting; it’s a quick wallpaper alternative that gives crisp diamonds. You’ll guarantee pattern adhesion by prepping smooth, clean walls, using quality paste or peel-and-stick, and matching seams carefully.
How Do I Match the Pattern Between Two Different Paint Batches?
Match batches like a seamstress aligning fabric: you’ll test paint consistency, mix small trial pots, adjust color mixing until swatches vanish. Keep records, stir full cans, and blend leftovers for flawless pattern continuity.
Will a Harlequin Wall Show Dents or Wall Imperfections More?
Yes — a harlequin pattern can highlight wall imperfections; its high contrast and sharp geometry increase pattern visibility, so you’ll notice dents or bumps more. You should prep, skim, and prime to minimize visible flaws.
Can I Create a Harlequin Pattern on Textured or Plaster Walls?
Yes — you can create a harlequin pattern on textured surfaces, but you’ll need adapted painting techniques: use flexible stencils, high-build primer, careful edge sealing, and thin multiple coats to maintain crisp diamonds despite plaster irregularities.
How Do I Remove or Repaint a Harlequin Wall Without Damaging Drywall?
About 60% of DIYers regret rushed projects, so you’ll use gentle removal techniques and repainting tips: score and peel old paint, sand lightly, patch with joint compound, prime, then repaint with thin coats to protect drywall.
Conclusion
You’ve got everything to tackle a harlequin wall with confidence — from color choices and safety tips to styling and budget. Whether you go bold or keep it muted, plan carefully, measure twice, and tape once so the finished look sings. If it feels overwhelming, call in a pro. With smart prep and a steady hand, your wall will become the room’s showpiece, turning heads and pulling the whole space together.