Can I Paint Water Based Latex Over Oil Based Primer
Yes — you can usually paint water‑based latex over a fully cured oil‑based primer if you prep the surface properly. Clean, degloss or lightly sand to a dull profile, remove dust, and test a small patch to confirm adhesion. Wait the primer’s recommended cure time and address any peeling, stains, or soft spots first; otherwise strip and re‑prime. Follow proper ventilation and primer compatibility tips, and keep going to learn the step‑by‑step checks and fixes.
Will Latex Paint Stick to Oil-Based Primer? (Quick Answer)

Wondering whether latex paint will stick to an oil-based primer? You can often get good primer adhesion if the oil primer is fully cured and the surface is clean, scuffed, and free of contaminants.
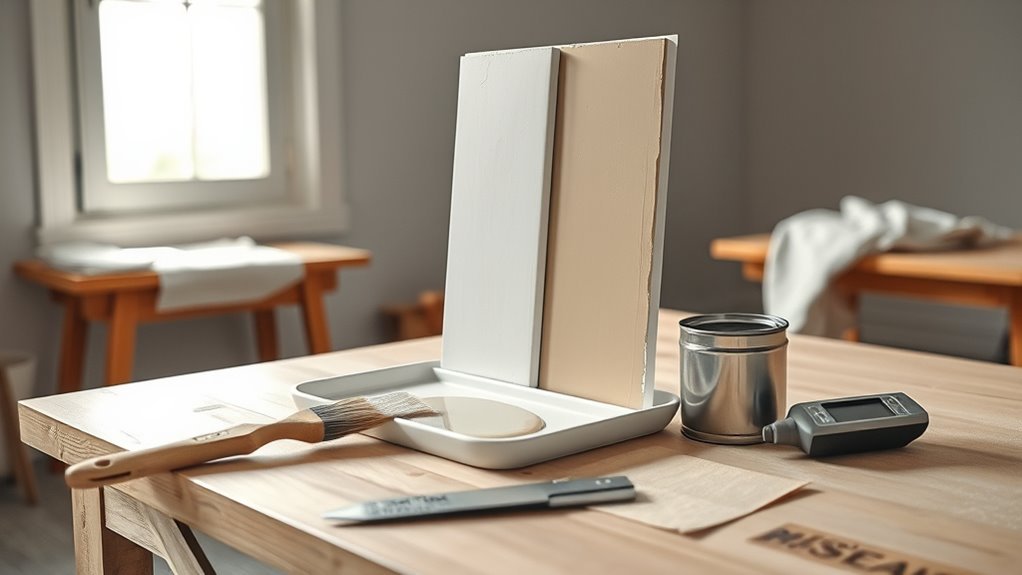
Lightly sand to promote mechanical bonding, then wipe away dust before applying latex. Test a small patch to check color matching and finish, since sheen and base differences can alter appearance.
Use a high-quality latex formulated for adhesion to existing coatings or a bonding additive if needed. If adhesion fails in the test, you’ll avoid a larger repainting problem by addressing the primer first.
When Is It Safe to Paint Latex Over Oil Primer?
Before you roll on latex, make sure the oil primer’s surface is clean, scuffed, and fully cured so the new paint can adhere.
Check the primer label for compatibility with water-based topcoats or consider a bonding primer if it’s not rated for latex.
Also confirm temperature and humidity are within the paint manufacturer’s recommended range to avoid adhesion or drying problems.
Surface Preparation Requirements
When you plan to cover oil‑based primer with latex paint, proper surface preparation determines whether the new finish will adhere and last. You’ll clean the surface thoroughly—remove grease, dirt, and chalking with mild detergent and water—then rinse and dry.
Lightly sand the primer to dull finish gloss and create mechanical tooth; use 120–150 grit for even abrasion. Repair imperfections, fill cracks, and sand repairs smooth. Wipe with a tack cloth to remove dust.
Test a small area for color blending and adhesion before full application. Proper prep prevents peeling and guarantees an even, durable latex topcoat.
Primer Compatibility Check
Although oil‑based primers can accept latex topcoats in many cases, you should verify a few compatibility factors first. Check the primer label for manufacturer guidance on topcoat types and dry time.
Confirm adhesion by scuffing and doing a small test patch with your chosen latex paint; wait for full cure before evaluating.
Consider sheen and color matching—primers tinted to a final shade cut down on coats. Avoid DIY paint mixing across chemistries; use professional tinting compatible with both primer and latex.
If the test holds, proceed; otherwise, sand and apply a recommended bonding primer for safety.
Environmental Conditions Matter
Wondering if it’s safe to roll latex over an oil‑based primer right now? You should check temperature, humidity, and odor clearance first. Latex adheres poorly if surfaces are cold or damp; wait for 50–85°F and under 70% humidity. Allow full solvent cure to avoid trapping smells or blocking Eco friendly paints’ low-VOC benefits. Test a small patch for Color matching and adhesion before committing. Use this quick reference:
| Condition | Action |
|---|---|
| Temperature | Paint between 50–85°F |
| Humidity | Below 70% for drying |
| Odor/Cure | No solvent smell; fully cured |
That ensures adhesion and finish.
Key Signs an Oil Primer Is Failing
If the primer is peeling or flaking, you’ll see loose edges and bare substrate showing through.
You’ll also notice discoloration or yellowing that won’t go away with cleaning.
Finally, press on the surface—if it feels soft or tacky, the primer isn’t curing properly and needs attention.
Peeling Or Flaking
When you see paint lifting in sheets or tiny chips flaking off, that’s a clear sign the oil-based primer’s adhesion is failing. You’ll notice peeling issues where sections separate from the substrate, often at edges, joints, or high-moisture spots.
If you neglect it, topcoats won’t bond and you’ll get larger failures. For flaking prevention, remove all loose material, sand glossy areas, and clean surfaces thoroughly before recoating.
Use a compatible primer—sometimes re-priming with a high-quality oil or an adhesion-promoting product helps. Address underlying moisture or contamination to stop recurring peeling and guarantee a stable base for latex paint.
Discoloration Or Yellowing
How can you tell an oil-based primer is failing before paint starts to peel? Look for discoloration or yellowing that spreads under your topcoat. You’ll notice color fading in previously bright areas, dark halos around joints, or an overall amber tint—especially on white or pastel paints.
This yellowing signals chemical breakdown or contamination, which often precedes primer peeling. Don’t ignore these shifts: they reduce topcoat adhesion and alter final color.
If you spot uneven tones or staining through the latex finish, strip or sand the compromised primer and reapply a compatible sealer before repainting.
Soft Or Tacky Surface
Because oil primers cure by oxidation, you’ll notice a failing coat feels soft or tacky long before visible peeling appears. If you touch the surface and it sticks, don’t paint over it with latex—you’ll trap solvents and cause adhesion failure.
Test small areas with solvent and light pressure to confirm tackiness. Addressing the issue may require stripping or sanding to a firm substrate, then re-prime.
When re-priming, consider color matching for topcoat accuracy and choose proper brush selection to avoid streaks and guarantee even coverage.
Let the new primer fully cure per manufacturer instructions before applying latex paint.
Quick Checklist to Decide: Paint Over or Re-Prime
If you’re unsure whether to paint directly over an oil-based primer or re-prime first, use this quick checklist to decide.
Check adhesion: press a piece of tape, peel—no paint lift means good bond.
Inspect sheen and dryness: fully cured primer should feel hard, not tacky.
Look for stains or bleed-through: severe staining suggests a new coat of oil-blocking primer.
Consider color matching: if touch-ups or drastic color changes are needed, re-priming ensures uniform coverage.
Review primer types used previously and your latex topcoat specs.
If doubts remain, verify on the side of re-priming for reliability.
Why Surface Profile and Sanding Matter for Latex Adhesion
When you paint latex over an oil-based primer, the surface profile and sanding determine whether the new coat will stick or peel, so you can’t skip this step. You must create a slight tooth for latex to grip; otherwise moisture and movement can lift films.
Proper sanding evens sheen, reveals defects, and helps achieve consistent color matching by eliminating flash differences. A well-prepared profile improves paint durability, reducing chips and peeling over time.
Skip or underdo this prep and even the best latex will fail. Focus on uniform abrasion, clean dust removal, and correct profile for lasting adhesion.
How to Scuff-Sand Oil Primer for Latex Paint
Start by evaluating the primer’s gloss—high-gloss areas need more abrasion than dull ones. Pick a method that fits the job: 220–320 grit sandpaper for hand sanding, or a fine sanding pad or orbital sander for larger surfaces.
After scuff-sanding, thoroughly clean the dust and tack any residue so the latex paint can bond properly.
Assess Surface Gloss
How glossy is the oil-based primer you’re covering? Inspect the finish in daylight and run your fingernail; high gloss resists scuffing and needs more abrasion.
Low- to semi-gloss will accept light sanding to create a keyed surface for better adhesion. Consider how your topcoat’s color mixing might reveal imperfections—smoother gloss masks seams but hinders mechanical bite.
Aim for a uniform dullness without exposing substrate. That dullness improves paint durability by allowing the latex to mechanically lock onto the primer.
Mark areas that remain shiny so you can focus effort later when you choose abrasives and technique.
Choose Sanding Method
Now that you’ve identified glossy spots to target, pick a sanding method that fits the size of the job and your comfort level.
For small areas, use 220–320 grit sandpaper by hand to scuff the oil primer gently; you’ll preserve edges and help color blending later.
For larger surfaces, an orbital sander speeds work but stay light-handed.
Detail sanding around trim lets your brush techniques remain precise.
Wear a mask and test a small patch first.
- Hand-sanding: intimate, controlled, satisfying.
- Orbital sander: fast, efficient, empowering.
- Detail files: meticulous, calming, precise.
- Sanding sponge: forgiving, tactile, reassuring.
Clean And Prime Surface
Want a durable bond between your oil-based primer and latex paint? Clean the surface thoroughly with mild detergent, rinse, and let it dry.
Scuff-sand the primer lightly with 220–320 grit paper to remove gloss and create tooth; you’ll feel the surface change.
Wipe away dust with a tack cloth or damp microfiber.
Address stains or residues with a suitable solvent, then spot-prime bare areas.
Test a small area to confirm adhesion and watch how color blending performs under your chosen finish.
Proper prep guarantees uniform finish textures and prevents peeling, giving your latex topcoat lasting hold.
Cleaning Steps Before Applying Latex Paint
Before you apply latex paint over oil-based primer, clean the surface thoroughly to remove dust, grease, and loose primer so the paint can bond properly. You’ll want a spotless base to protect color matching and guarantee paint durability. Wipe with a mild detergent solution, rinse, and dry.
Sand glossy spots lightly to create tooth. Remove sanding dust with a tack cloth. Degrease stubborn areas with mineral spirits, then ventilate until dry.
Finally, inspect under good light for missed spots before painting.
- Feel confident
- Notice true color
- Trust long-lasting finish
- Enjoy a smooth application
How Long to Wait After Oil Primer Before Latex Topcoat?
Although oil-based primers dry to the touch fairly quickly, you should wait the full recommended cure time—typically 24 to 48 hours—before applying a latex topcoat so the primer fully hardens and any solvents evaporate.
Allow oil primers to fully cure—usually 24–48 hours—before applying latex topcoat to ensure hardness and solvent evaporation.
You’ll also factor in temperature and humidity: cooler or humid conditions can extend cure times.
Before painting, check the primer manufacturer’s label and test a small area for adhesion.
Waiting the proper time helps guarantee color matching accuracy and prevents topcoat defects like blistering or lifting.
Proper cure improves paint durability and gives you a reliable surface for a long-lasting finish.
When Should You Use a Bonding Primer?
When you’ll be painting surfaces that are glossy, stained, or otherwise hard for latex paint to stick to, reach for a bonding primer first; it’s formulated to bridge the gap between slick substrates (like glass, tile, or previously glazed cabinetry) and water-based topcoats, improving adhesion and preventing peeling.
You should use bonding primer when you need reliable Paint durability, when surfaces show tannin bleed or heavy staining, or when drastic Color contrast demands a stable base so your topcoat performs and looks right.
- Relief — no flaking later
- Confidence — uniform finish
- Pride — professional results
- Calm — long-lasting protection
Choosing the Right Latex for Primed Surfaces
When you’re picking a latex topcoat for an oil‑primed surface, decide between water‑based and acrylic formulas based on durability and flexibility.
Consider the sheen you want — flatter finishes hide imperfections while glossier sheens offer easier cleaning.
Also check coverage ratings so you know if you’ll need one or two coats for full hide.
Water-Based Vs. Acrylic
If you’ve primed a surface with an oil-based primer, choosing the right latex topcoat matters: water-based latex and acrylic latex behave differently over that primer, so pick the one that best matches durability and adhesion needs. You’ll feel confident when you understand differences: water-based dries faster, cleans with soap and water, and eases color mixing.
Acrylic (a water-based acrylic latex) offers a stronger film, better flexibility, and improved adhesion to oil primers. Match your project: indoor touch-ups may favor water-based; high-wear areas benefit from acrylic.
Consider brush selection for finish control and application comfort.
- Relief — choose durability.
- Pride — nail the color.
- Confidence — trust adhesion.
- Satisfaction — finish strong.
Sheen And Coverage
Now that you’ve matched the right latex type to an oil-based primer, think about sheen and coverage because they determine both appearance and how many coats you’ll need. Pick sheen based on use: eggshell hides imperfections; satin cleans easily; semi-gloss resists scuffs. Coverage affects coat count—higher solids mean fewer coats. Test Color matching under your actual Lighting conditions to avoid surprises. Use a sample panel and view at different times.
| Sheen | Use |
|---|---|
| Eggshell | Living areas |
| Semi-gloss | Trim, kitchens |
Oil Primer Types That Work Best Under Latex
Although oil-based primers can feel like a single category, you’ll get the best results by choosing ones formulated specifically to bond with latex topcoats—high-adhesion alkyd primers and blocking primers designed for stain and tannin control outperform generic oil primers.
You’ll care about color mixing because a stable base prevents unpredictable undertones, and paint durability improves when adhesion is right. Pick primers labeled for latex topcoats and stain blocking.
Consider these emotional, practical choices:
- High-adhesion alkyd — confidence in bond.
- Shellac-modified blocking — relief from stains.
- Tannin-blocking oil — peace of mind.
- Fast-dry oil primer — urgency satisfied.
Existing Oil-Based Paint vs Oil Primer: What Differs
If you’re working over an old oil-based paint, remember it’s a cured finish with different binders than an oil primer, which is formulated to stick and seal for topcoats. That means your prep needs are different: existing oil paint may need scuffing, deglossing, or spot-priming to guarantee adhesion.
While bare or patched surfaces often benefit from a dedicated oil primer. Knowing the composition and proper surface prep will determine whether you can topcoat with water-based latex successfully.
Composition And Binder Differences
Because primers and topcoats serve different jobs, their compositions and binders are formulated quite differently. You’ll notice primers use stronger alkyd or oil-based binders for adhesion and stain blocking, while topcoats favor flexible latex polymers for durability and color retention.
That affects odor, dry time, and how pigments behave during color mixing. Tool selection matters too: brushes and rollers for oil binders differ from those for latex. You’ll feel relief choosing the right product.
- Surprise at adhesion strength
- Frustration with incompatible gloss
- Comfort from predictable drying
- Confidence in final color
Surface Preparation Requirements
When you’re prepping a surface, oil-based paint and oil primer demand different steps to guarantee the latex topcoat will stick and look right. You’ll clean, degloss, and sand oil paint more aggressively; oil primer needs scuffing and tack-free cure. Strip or sand loose layers, wipe with solvent if necessary, and use a high-adhesion oil or bonding primer for tricky substrates. Watch color mixing if tinting primer—use compatible pigments. Proper prep boosts paint durability and prevents peeling. Reference the quick checklist below for the most common scenarios.
| Surface | Prep Step | Why it matters |
|---|---|---|
| Old oil paint | Sand & clean | Adhesion |
| Oil primer | Scuff lightly | Bonding |
| Glossy finish | Degloss | Key grip |
| Stained wood | Seal first | Prevent bleed |
| Metal | Prime | Corrosion control |
How to Handle Glossy Oil Primer Surfaces
Wondering what to do with a glossy oil-based primer before applying water-based latex? You’ll want a dull, clean surface so color mixing behaves predictably and paint durability isn’t compromised. Lightly scuff glossy spots, clean dust, and inspect for runs or drips.
When ready, use a suitable bonding primer if adhesion seems weak.
- Scuff glossy areas to reduce shine and ease bonding.
- Wipe with a tack cloth to remove residue and oils.
- Spot-prime imperfections to ensure even color mixing.
- Test a small patch to confirm adhesion and long-term paint durability.
Deglossers vs Sanding: Pros and Cons
You can use a chemical deglosser to quickly dull a glossy oil primer without creating dust, which is great for tight spaces.
Sanding gives you more control and a stronger mechanical bond but takes more time and cleanup.
Consider surface condition, ventilation, and how much prep you’re willing to do when choosing between them.
Chemical Deglossing Benefits
Although sanding can give you a rough profile, chemical deglossers let you skip the dust and often save time on small projects, especially when you’re working with delicate trim or finished surfaces. You’ll rely on chemical reactions to dull glossy finishes without abrasion, so check surface compatibility before use.
Deglossers reduce mess, preserve detail, and speed prep for water-based latex over oil primer when allowed. You should still follow manufacturer directions and rinse thoroughly.
Consider emotional impacts as you decide:
- Relief — no airborne dust
- Confidence — even dulling
- Care — preserves trim
- Caution — test first
Sanding Practical Considerations
When prepping oil-based primer for a latex topcoat, choose the method that fits the job: chemical deglossers work fast and keep dust off delicate trim, while sanding gives you tactile feedback and a consistently keyed surface for heavy-duty wear areas.
You’ll prefer deglossers when preserving edges and minimizing cleanup; they aid color blending by avoiding uneven sheen. Sanding’s pros are control and predictable adhesion—use fine grit, test with your brush techniques, and remove dust thoroughly.
Cons: deglossers can be harsh on finishes, sanding kicks up dust and risks gouging. Pick based on surface sensitivity and finish durability.
Spot-Priming Repairs and Patched Areas
If a small area needs fixing, spot-priming saves time and guarantees a uniform finish without redoing the whole wall. You’ll sand the patch, remove dust, and apply a thin coat of oil-based primer to prevent color contrast and to restore primer durability where the surrounding coat is intact.
Let it cure fully so adhesion’s solid before latex paint. Test a tiny area if unsure.
Allow the primer to cure completely for strong adhesion before painting; test a small area if unsure.
Follow these emotional prompts to stay confident:
- Feel relief seeing the patch disappear.
- Gain pride from a seamless repair.
- Enjoy the calm of consistent color.
- Trust the lasting protection you’ve applied.
How to Check Primer–Paint Compatibility on Labels
Before you start painting, check the primer and paint labels for compatibility symbols and notes so you’re sure they’re meant to work together. Look for icons or phrases like “compatible with latex” or “use with water-based topcoats.”
Follow any listed surface prep or drying-time instructions. If the labels don’t clearly match, don’t guess—contact the manufacturer or choose a confirmed-compatible product.
Check Label Compatibility Symbols
Because manufacturers use simple symbols to show what their primers and paints work with, you should learn to spot those icons on the can. They tell you if latex over oil is safe, help with color matching, and hint at paint durability so you won’t guess and risk costly rework.
Read symbols first; they communicate adhesion, surface type, and compatibility at a glance.
- Look for a latex-over-oil or multi-surface icon—relief.
- Spot adhesion or bonding symbols—confidence.
- Find surface-specific pictograms (wood, metal)—assurance.
- Note warranty or performance marks—peace of mind.
Read Application Instructions
When you inspect the primer can, read the application instructions carefully to confirm the manufacturer designed that product to accept water‑based latex topcoats. Check for explicit statements about adhesion, recoat times, and surface preparation.
Look for notes on Color mixing restrictions and whether tinted primers change compatibility. Follow specified dry times and recommended Brush techniques—nap length, stroke direction, and thinning instructions—to guarantee an even bond.
If instructions mention solvent‑based topcoats only, don’t assume latex will work. When in doubt, contact the manufacturer or perform a small test patch following their guidelines to verify compatibility before committing to the whole project.
Application Tips for Smooth Latex Over Oil Primer
If you want a smooth finish, prep carefully and apply the latex topcoat with steady technique and the right tools. You’ll sand the primed surface lightly, wipe dust, and guarantee tack-free primer before painting.
Practice color blending on a scrap to match edges, and use consistent brush techniques to avoid lap marks. Work in manageable sections, keep a wet edge, and apply thin, even coats.
Practice color blending on scraps, use consistent strokes, work in sections, keep a wet edge, and apply thin coats.
Let each coat dry fully and inspect under good light; touch up imperfections with light sanding between coats. Patience rewards you with a durable, uniform finish that feels professionally done.
- Anticipation
- Confidence
- Satisfaction
- Pride
Tools and Brushes for Painting Latex Over Oil Primer
Choose the right tools and you’ll make painting latex over oil primer faster and cleaner: use a high-quality synthetic-bristle brush (nylon or polyester) for cutting in and detail. A short- to medium-nap synthetic roller is ideal for smooth to lightly textured surfaces. Additionally, a good angled brush is useful to reach corners and trim.
You’ll also want a sturdy roller frame, extension pole, and disposable trays. Keep separate brushes for primer and latex to avoid contamination. Use clean, lint-free cloths for wiping drips.
Proper tools help achieve even coverage, accurate color matching, and maximize paint durability so your finish looks professional and lasts.
Temperature and Humidity Limits for Best Adhesion
Because paint chemistry reacts to the air, you’ll get the best adhesion when both temperature and humidity stay within the paint maker’s recommended range—typically 50–85°F (10–29°C) and relative humidity below 70%. You’ll plan timing: avoid early morning chill or muggy afternoons.
Stable conditions help solvent evaporation, color mixing consistency, and proper film formation so your finish bonds to the oil primer. Watch forecasted swings; sudden drops or rises stress the coating and affect texture matching.
- Calm mornings feel reassuring.
- Sunny afternoons boost confidence.
- Cool evenings demand caution.
- Damp days breed anxiety.
Fix Bubbling, Peeling, and Wrinkling (Causes + Fixes)
When you see bubbling, peeling, or wrinkling on a fresh coat over oil-based primer, it usually signals a problem with surface prep, moisture, or incompatible products — and you’ll want to address it before repainting.
Scrape loose areas, sand to feather edges, and clean with a degreaser. Check for trapped moisture or condensation and fix leaks or ventilation.
Scrape and sand loose paint, clean with a degreaser, and resolve moisture or ventilation issues before repainting.
If incompatibility caused defects, strip back to primer or use a properly bonded primer before applying latex. Match your color schemes after repairs to avoid repeat touch-ups.
Proper prep and product choice improve paint durability and prevent recurring failure.
How to Test Adhesion Before Full Repaint
Before you roll out a full repaint, do a simple adhesion test on a small, inconspicuous area to confirm the new paint will bond. Clean the spot, sand lightly, and apply your water-based latex over the oil-based primer. Wait 24 hours, then check for color matching issues and signs of paint peeling.
- Press clear tape, then remove to see if paint lifts—your heart sinks if it peels.
- Scrape gently with a fingernail to feel adhesion strength.
- Compare dried color to surrounding surfaces for matching surprises.
- Note any bubbling or soft spots before committing.
When to Strip and Start Over Instead of Painting Over Primer
If you’ve tried spot tests and the paint still won’t stick, it’s time to strip and start over instead of painting over the primer. You’ll strip when adhesion fails across large areas, primer is brittle or yellowed, or solvent tests show contamination.
Remove old primer, sand to clean substrate, and prep according to material—don’t skip dewaxing or degreasing.
Remove old primer, sand to bare substrate, and thoroughly prep—always dewax and degrease before repainting.
After stripping, consider fresh color mixing to match your scheme and pick compatible products.
Choose proper brush types for the new paint—synthetic for latex, natural for oils—to assure smooth application and long-lasting adhesion on the newly prepared surface.
Safety and Ventilation When Mixing Oil and Water Products
Curious about safety? You’ll want clear Safety precautions before mixing oil- and water-based products. Wear gloves, goggles, and an N95 or respirator rated for organic vapors. Open windows and doors, and run fans to make Ventilation strategies active and constant.
Keep rags in a sealed metal can to avoid spontaneous combustion, and store solvents separately from latex cans.
- Feel anxious? Use a respirator.
- Worried about fumes? Increase airflow now.
- Nervous about spills? Contain and clean immediately.
- Unsure of compatibility? Check product labels and MSD sheets.
Special Surfaces: Trim, Cabinets, and Doors (Latex Over Oil)
When you’re tackling trim, cabinets, or doors, recognize that these high-wear surfaces need extra prep before applying water-based latex over oil-based primer. Proper sanding, cleaning, and the right bonding primer will help the latex adhere and resist chipping.
You’ll sand to dull the glossy oil surface, degrease, and fix gaps with flexible caulk. Use a high-quality bonding primer noted for Primer durability so the latex finish stays put under frequent contact.
For cabinets and doors, consider paint formulated for trim to withstand knocks, and pay attention to Color mixing to match sheen and avoid visible shifts.
Exterior Use: Will Latex Over Oil Primer Hold Up Outside?
Although oil-based primers provide strong adhesion and stain-blocking, they don’t guarantee long-term success for water-based latex topcoats on exterior surfaces unless you prep and choose compatible products. You’ll need to confirm primer brands specify exterior use and latex topcoat compatibility, and you should test adhesion and color matching in sunlight.
Oil primers help, but prep and product compatibility are essential—test adhesion and color outdoors before committing.
Edge sealing, full cure time, and flexible topcoats matter. Expect more maintenance where weather is severe.
- Fear—outdoor failure feels devastating.
- Relief—proper products restore confidence.
- Pride—durable finish reflects smart choices.
- Anxiety—mixed systems can still surprise you.
Quick Timeline and Step-by-Step Checklist for the Job
Before you start, gather your materials and block out a full-day timeline so you can work steadily and let each step cure as recommended.
Step 1: sand glossy oil primer lightly (15–30 minutes), wipe clean.
Step 2: spot-prime any bare areas (30 minutes to apply; follow primer cure).
Step 3: test color mixing on a scrap to confirm hue and viscosity.
Step 4: thin latex per label if needed.
Step 5: apply first coat with appropriate brush techniques—cut in, then smooth with even strokes (1–2 hours).
Step 6: let dry fully, then apply second coat and inspect.
Cost vs Performance: Is Re-Priming Worth It?
Deciding whether to re-prime comes down to comparing the extra time and expense against the long-term payoff. You’ll weigh upfront costs—materials, labor, tool selection—against risks like adhesion failure, uneven color mixing, and future touch-ups.
If surfaces are sound and you use a compatible bonding primer, you might skip re-priming; if not, re-priming buys durability and color fidelity.
- Relief: avoiding callbacks by re-priming.
- Anxiety: short-term savings could cost more later.
- Confidence: correct tool selection improves finish.
- Pride: clean color mixing and long-lasting results.
Make a choice based on surface condition and budget.
Warranty and Contractor Concerns When Mixing Systems
If you mix a water‑based latex topcoat over an oil‑based primer, check your paint and contractor warranties first, because manufacturers and pros often void coverage when products from different systems are combined without explicit approval.
You should ask your contractor and read product labels so you know whether color matching or paint durability claims remain valid. Get approvals in writing if someone recommends mixing systems; otherwise you could pay for future repairs.
If warranties won’t cover the combo, consider re-priming with a compatible product or hiring a contractor who guarantees results and documents materials and procedures for your protection.
Frequently Asked Questions
Can I Use Tinted Latex Paint Over an Oil Primer Without Altering Adhesion?
Yes — you can use tinted latex over oil primer if you guarantee primer compatibility and proper surface prep; you’ll sand, clean, and use a recommended bonding primer or sealer so paint adhesion won’t be compromised, avoiding peeling later.
Will Latex Upholstery or Fabric Paint Adhere to Oil-Primed Furniture?
Yes — fabric or latex upholstery paint can adhere to oil‑primed furniture if you guarantee proper surface preparation and use color matching techniques; sand glossy areas, clean thoroughly, and test adhesion, because adhesion depends on prep and compatible products.
Does Oil Primer Affect the Drying Smell and VOCS of Latex Topcoats?
Yes — oil primer can prolong odors and VOC concerns, but it won’t ruin latex topcoat drying. You’ll want odor mitigation: ventilate, use low‑VOC latex, or let primer cure fully to minimize lingering smells and emissions.
Can I Apply Textured Latex Coatings Over Oil-Based Primer?
Yes — you can apply textured latex coatings over oil-based primer if you guarantee primer compatibility, sand glossy spots, and address oil based staining. You’ll prep, use bonding additives as needed, and test a small area first.
How Does Oil Primer Interact With Paint Additives or Mildew-Resistant Latex?
About 70% of homeowners report mildew issues; you’ll find oil primer often blocks additives’ penetration, but mildew-resistant latex additives usually still bond; test adhesion, sand glossy oil primer, and follow manufacturer limits for paint additives.
Conclusion
You can usually put latex over oil-based primer if the primer’s sound and you sand it first, but don’t be casual about it. Check for cracking, peeling, or a glossy film, and roughen the surface with 120–150 grit before cleaning. Outdoors you’ll want extra prep and a high-quality exterior latex. If in doubt, re-prime with a modern bonding primer—you’ll save headaches later. Think of a smartphone slid into a wooden chest: old meets new, carefully.