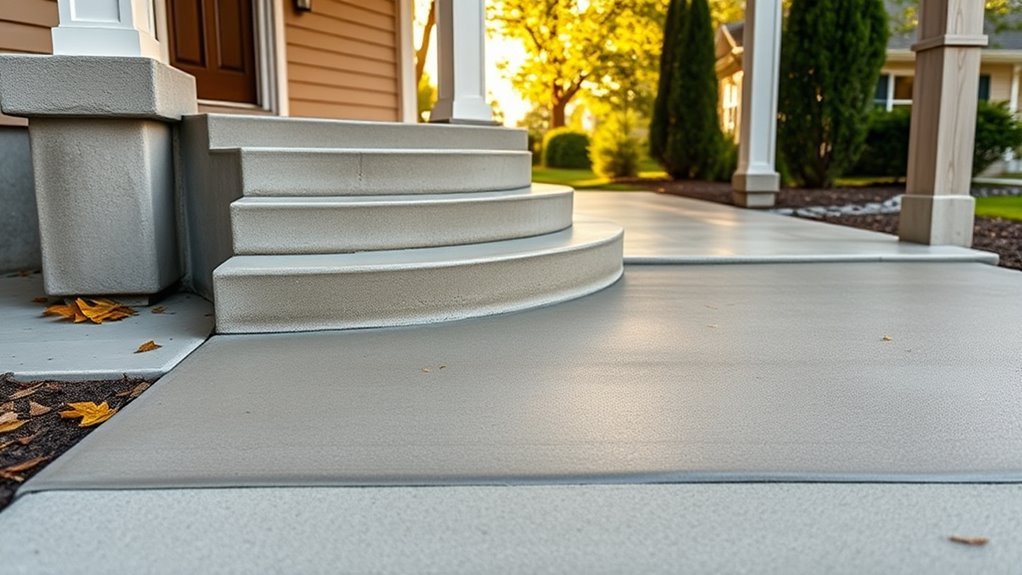
Can You Paint Exterior Concrete
Yes — you can paint exterior concrete successfully if you pick breathable, masonry-grade paints or stains, prep and repair the surface, and use the right primer or bonding agent. Clean, etch, and patch cracks, test porosity and adhesion, then apply thin coats in suitable weather, finish with a breathable sealer, and maintain it with gentle cleaning and touch-ups. Follow proper product and timing guidance, and you’ll get lasting results; keep going to learn the how-to and troubleshooting.
Should You Paint Exterior Concrete?
You’ll consider slip resistance, UV-stable pigments, and prep like etching or patching cracks. For creative projects, artistic techniques—stenciling, color washing, or faux finishes—let you customize driveways, patios, or planters without costly replacement.
You’ll choose breathable products compatible with concrete and plan periodic touch-ups to keep the finish looking intentional and well cared for.
When Painting Exterior Concrete Makes No Sense
Painting exterior concrete doesn’t always make sense—especially when the surface is prone to recurring moisture, heavy abrasion, or structural problems that paint won’t fix.
Painting exterior concrete isn’t always wise—don’t coat surfaces that suffer recurring moisture, heavy abrasion, or structural issues.
You should skip painting if water seeps through, freeze-thaw cycles cause flaking, or cracks need repair; paint will only hide problems temporarily.
Don’t invest in coatings when surfaces see constant traffic or impact that will abrade the finish.
If the concrete has historical value, unique texture, or engineered finishes, consider preserving it instead of adding decorative patterns or choosing trendy color options.
In short, fix underlying issues or choose alternative treatments before painting.
Choose Paint and Coatings Specifically for Exterior Concrete
Which coating will actually last on your exterior concrete? You’ll want products formulated for masonry: 100% acrylic elastomeric, masonry paint, or concrete stain plus a clear sealer.
Pick breathable, UV-resistant coatings that handle temperature shifts and moisture.
Consider color options for heat reflection and curb appeal; lighter hues reduce thermal stress, while deeper tones need UV-stable pigments.
For pathways or patios, choose slip-resistant sealers.
If you want visual interest, explore decorative finishes like stamped overlays, metallic stains, or acid washes applied before sealing.
Match coating flexibility and porosity to your surface to assure adhesion and long-term performance.
Which Primer and Bonding Agent to Use
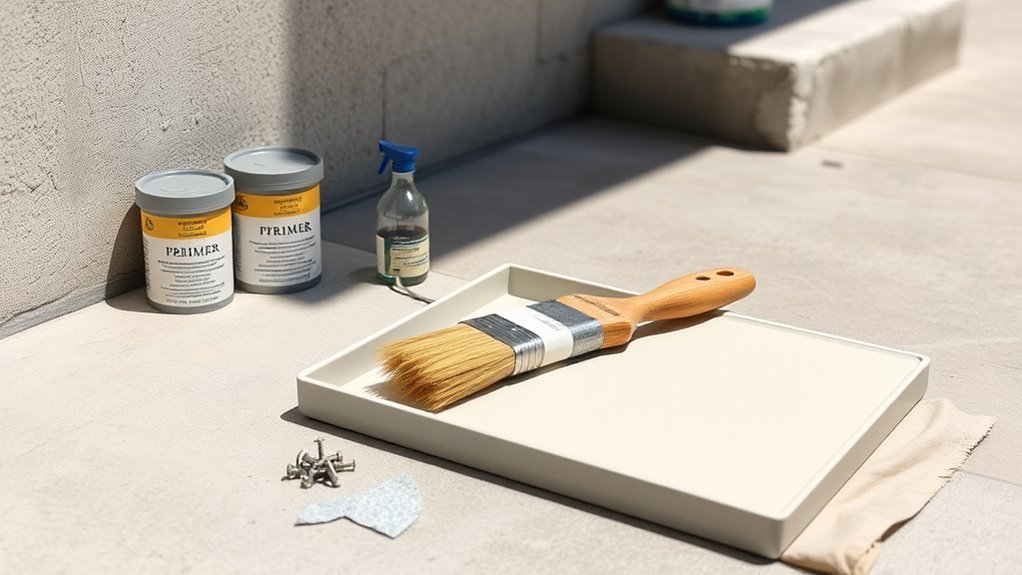
After you pick a coating that matches your concrete’s porosity and exposure, the right primer or bonding agent makes the difference between a durable finish and premature failure. You’ll focus on surface preparation first: clean, etch, and repair so the primer bonds to sound concrete.
For primer selection, choose a masonry primer or acrylic bonding primer compatible with your topcoat. Solvent-based primers suit dense, smooth slabs while water-based primers work for porous, newer concrete. Use a bonding agent on difficult, glossy, or repaired areas to promote adhesion.
Follow manufacturer cure times, apply evenly, and avoid shortcuts that ruin longevity.
Tools and Materials to Gather Before Cleaning and Repair
Before you start cleaning and repairing, gather the right tools and materials so the job goes smoothly: a stiff broom and shop-vac for debris, a pressure washer or hose with a high-pressure nozzle for deep cleaning, concrete cleaner or degreaser, muriatic acid or etching solution if etching is needed (plus rubber gloves and eye protection).
Before you begin, gather essential tools—broom, shop‑vac, pressure washer, cleaner, and proper PPE for safe, effective work
Patching compound and trowel for cracks, a masonry primer or bonding agent, quality brushes and rollers rated for masonry, drop cloths and painter’s tape, and personal protective equipment like gloves, goggles, and a respirator.
Also bring mixing buckets, a margin trowel, wire brush, and sanding block.
Choose products compatible with concrete sealing and any decorative finishes you plan to apply.
How to Clean Exterior Concrete for Lasting Adhesion
Now that you’ve gathered the right tools and materials, start by removing loose dirt, oil, and old coatings so whatever you apply can bond properly. Sweep, then pressure-wash with a detergent designed for concrete, working in sections and rinsing thoroughly.
Use a degreaser or trisodium phosphate on oil stains, scrub with a stiff brush, and rinse until residue’s gone. Let the surface dry completely—48 hours in good weather.
Test adhesion with a small primer patch before committing to color options or decorative finishes.
Wear gloves and eye protection, and dispose of runoff responsibly to protect landscaping and drains.
Repair Cracks, Spalls, and Surface Defects
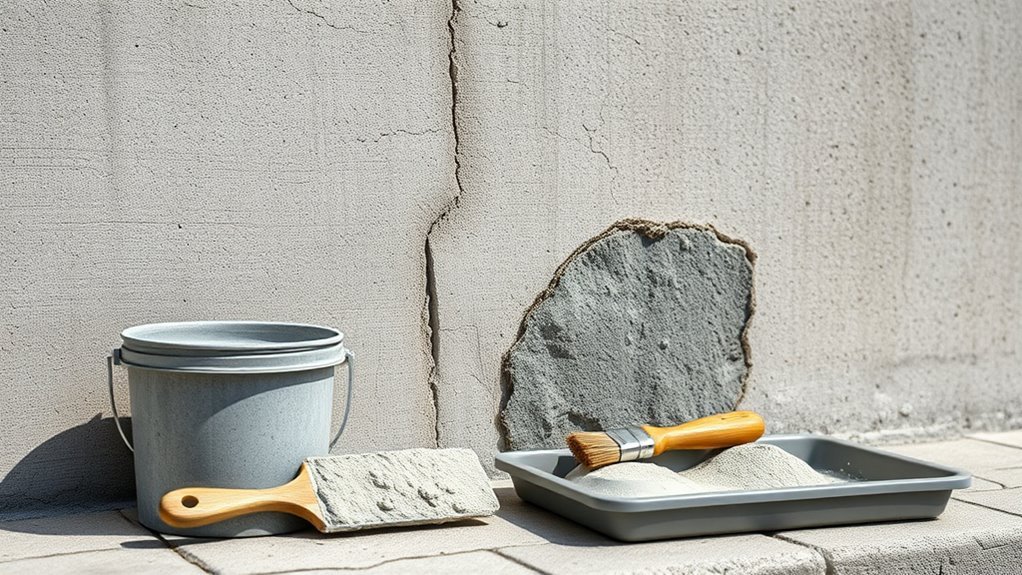
Before you paint, assess what kind of cracks and spalls you’re dealing with so you know whether they’re cosmetic or structural.
Clean out loose debris and dust, then prep edges and dampen the area for better adhesion.
Use the right patching compound to fill, level, and feather repairs so the finish goes on smooth.
Assess Crack Types
How do you tell which concrete cracks need simple patching versus full-depth repair? You’ll inspect width, depth, and movement:
Hairline and static surface cracks under 1/8″ usually need patching.
Cracks wider than 1/4″, deep, or actively shifting ones demand full-depth repair.
Check for spalling, exposed aggregate, or rusted rebar that indicate structural issues.
Note patterns—map cracking suggests settling; linear cracks follow joints.
Choose repairs that allow color matching and texture enhancement so patched areas blend when painted.
Document locations and size, prioritize safety, and plan appropriate materials and techniques for each crack type before proceeding.
Prep And Clean
Why start with a clean surface? You’ll remove loose debris, salts, and contaminants that prevent adhesion and reveal true defects before repair. Tackle spalls and cracks by exposing sound concrete and cleaning interiors.
- Sweep and pressure‑wash to remove dirt and efflorescence.
- Use a wire brush or grinder to open damaged edges.
- Apply a concrete cleaner or degreaser; rinse thoroughly.
- Let the slab dry fully before sealing or painting.
As you prep, consider Color selection and Finish options; they’ll depend on surface uniformity and the repairs you’ve exposed, ensuring a consistent, durable result.
Patch And Level
Ready to fix the worst of the damage? You’ll remove loose debris, widen hairline cracks slightly, and dampen the area before applying patching compound.
Use a polymer-modified mortar for spalls and a flexible filler for movement joints. Trowel and feather edges to level surfaces, then sand or grind high spots.
Match color options by testing stain or paint on a small patch; sealed patches accept finishes differently.
Use texture techniques—stipple, broom finish, or sponge—to blend repairs with surrounding concrete.
Let cures fully set, then prime before painting to guarantee lasting adhesion and uniform appearance.
Test Concrete Porosity and Adhesion Before Painting
Before you paint, check the concrete’s surface porosity by sprinkling water or using a mason’s drop test to see how quickly it soaks in.
Then run a simple adhesion test—apply a small patch of your chosen primer/paint, let it cure, and perform a tape pull or cross-hatch cut to check bond strength.
These quick checks tell you whether the surface needs etching, priming, or other prep for a lasting finish.
Surface Porosity Check
How porous is your concrete, and will paint stick to it? You’ll check porosity to predict surface durability and guide color selection. Perform a quick water test: drop water, observe absorption speed, and note darkening.
If water beads, surface is dense; if it sinks, it’s porous. Record results and adjust prep: cleaning, etching, or primer may be needed. Consider extreme porosity for heavy-duty coatings.
Don’t skip multiple spots—concrete varies. Keep notes for each area so you match treatment and paint type to porosity, ensuring consistent adhesion and long-lasting finish across the entire exterior surface.
Adhesion Test Methods
Once you’ve mapped porosity across the surface, perform simple adhesion tests to confirm paint will bond. Pick several spots representing low, medium, and high porosity.
Clean each area, apply a small paint patch or primer, let it cure per label, then tape-test by pressing and ripping clear tape to see lift-off.
For textured or historic concrete, try a pull-off adhesion gauge for quantitative results—use this especially if color selection ties into historical preservation requirements.
Record results, adjust surface prep or primer choice, and repeat until adhesion meets manufacturer specs before full painting.
Best Weather and Timing to Paint Exterior Concrete
While you can paint exterior concrete any time it’s clean and dry, the best results come when temperatures stay between about 50°F and 85°F with low humidity and no rain in the forecast for at least 24–48 hours. You should plan around consistent conditions so paint cures properly and adhesion holds.
Consider Color options and Decorative finishes when scheduling—some effects need longer dry windows. Check surface temperature too; concrete can be colder or hotter than air.
Follow this quick timing checklist:
- Pick a multi-day dry stretch.
- Paint during mild daytime temps.
- Avoid high humidity.
- Don’t paint before rain.
Step-by-Step: Prime, Paint, and Seal Exterior Concrete
Before you start, get the surface, tools, and weather right: clean and dry concrete, a compatible primer, exterior masonry or concrete paint, and a clear sealer. Plus, gather a stiff brush, pressure washer or hose, roller, brushes, and protective gear.
Patch cracks, etch if needed, and let the slab fully dry.
Repair cracks, etch when necessary, and allow the slab to dry completely before painting.
Apply primer evenly; follow drying times.
Roll two thin coats of paint for durability, choosing a color selection that suits sunlight and use.
Add decorative finishes like stencils or faux textures between coats if desired.
Finish with a breathable exterior sealer applied in thin, even layers; cure before foot traffic.
Maintain Painted Exterior Concrete to Extend Its Life
If you want your painted exterior concrete to keep looking good and resist wear, set up a simple maintenance routine that catches problems early and prevents bigger repairs. Inspect monthly for chips, peeling, and dirt buildup.
Clean with a mild detergent and soft-bristle brush, rinse thoroughly, and avoid harsh pressure washing that can harm paint and concrete textures.
Reapply a breathable sealant every 2–3 years based on exposure, and touch up paint to maintain color options and uniform protection.
Follow these steps:
- Monthly visual checks
- Gentle cleaning
- Spot touch-ups
- Re-seal periodically
Common Problems After Painting and How to Fix Them
After painting your exterior concrete, you might notice peeling or flaking where adhesion failed, or white powdery efflorescence and other stains from moisture and salts.
You can often fix peeling by removing loose paint, treating the surface, and using a proper primer and breathable exterior paint.
For efflorescence and staining, clean with a mild acid or commercial cleaner, address the moisture source, then repaint with a masonry-grade coating.
Peeling And Flaking
- Scrape and wire-brush
- Pressure-wash and dry
- Sand and vacuum
- Prime, then repaint with breathable exterior paint
Efflorescence And Staining
When salts leach through concrete and dry on the surface, they leave a chalky white residue called efflorescence that can stain paint and cause it to lose adhesion. You’ll need efflorescence removal before repainting: scrub with a stiff brush and dilute muriatic or vinegar solution, rinse thoroughly, and allow full drying. For stain prevention, seal cracks, improve drainage, and use breathable masonry primer and paint. If staining persists, use a stain-blocking primer. Table summarizes actions and outcomes:
| Problem | Action | Result |
|---|---|---|
| Efflorescence | Clean/remediate | Restored adhesion |
| Stains | Prime/block | Color uniformity |
| Moisture | Fix/drain | Long-term durability |
Frequently Asked Questions
Can You Paint Exterior Concrete That Contains Oil Stains?
Yes — you can, but you’ll need oil stain removal first; scrub and degrease thoroughly, then choose appropriate concrete primer options like solvent-based or stain-blocking primers. Apply primer, then paint with a masonry exterior paint.
Will Painting Concrete Affect Nearby Landscaping or Plants?
Yes — if you’re careless, paint runoff or fumes can harm plants; use proper concrete sealing, work on calm days, mask soil, and choose low-VOC products to preserve landscaping and improve weather resistance without damaging vegetation.
Are There VOC Restrictions for Exterior Concrete Paints in My Area?
Yes — you’ll check local VOC limits, unless you enjoy bureaucratic perfume; regulations vary by state and city. Prioritize low-VOC options that still offer color matching and paint durability so your finish lasts without fines.
Can Painted Concrete Be Pressure Washed Regularly?
Yes — you can pressure wash painted concrete regularly if you use proper surface preparation and gentle settings. You’ll protect paint durability by rinsing loose debris first, using low pressure, and avoiding aggressive temperatures or harsh detergents.
Is Painting Exterior Concrete Covered by Homeowner’s Insurance?
Like a sudden downpour, no — you usually aren’t covered if paint fails; insurers focus on structural damage. You’ll need excellent surface prep and careful paint selection to prevent claims, and you should document work for peace of mind.
Conclusion
You can paint exterior concrete, but don’t expect miracles: painted concrete resists stains and looks better, yet it won’t stop structural issues. If a theory that paint permanently seals concrete were true, you’d never need repairs—but moisture, freeze‑thaw cycles, and surface salts still push paint off over time. So choose proper coatings, prep and prime carefully, and plan for maintenance; paint’s a useful protection and cosmetic upgrade, not a one‑time cure.