Do You Wait for Paint to Dry Before Removing Tape
Don’t wait for paint to fully dry—you’ll get the sharpest edge by peeling tape while the surface is still slightly tacky. For latex, that’s often 20–60 minutes; oil-based paints need several hours. Peel slowly at a low angle, support the edge, and score stubborn spots with a blade to avoid lifting. Adjust for humidity, temperature, and surface porosity, and test a hidden area first; keep going and you’ll pick up tips for tougher surfaces and finishes.
When to Remove Paint Tape: Wet, Tacky, or Dry?
When you finish painting, don’t wait until the paint is bone-dry to pull the tape—doing so often peels dried edges with the tape. You should remove tape while paint is tacky but not wet, so you keep crisp lines without smudging.
Check edges: if paint moves slightly when nudged, it’s ready. Good surface prep lets tape adhere evenly and prevents bleed, so you won’t need to wait for full cure.
Check the edges—if the paint yields to a nudge, remove tape. Proper prep prevents bleed and speeds removal.
For multi-color work, plan color combinations and remove tape between coats as recommended to avoid lifting underlying layers.
Pull slowly at a 45-degree angle for best results.
Quick Answer: Tape Removal Rules for Clean Lines
For the cleanest lines, you’ll usually peel tape while the paint is still slightly tacky rather than fully dry.
Use a slow, steady motion and pull the tape back on itself at a 45-degree angle to avoid lifting paint.
If the paint’s set, score the edge first and peel gently to preserve the line.
When To Peel
Although you might be enthusiastic to reveal the fresh edge, you should usually peel painter’s tape while the paint is still slightly tacky—about 20 to 60 minutes after application for water-based paints—so the edge lifts cleanly without pulling dried paint.
You’ll time removal based on paint type, humidity, and temperature; oil-based paints need longer cure time.
For sharp lines, peel slowly at a 45-degree angle back against the painted surface. Use this window to prevent color blending or disturb texture masking.
If paint skins over, score the tape edge first to avoid lifting cured paint.
Best Peel Technique
Now that you know the timing for removal, follow a few simple rules to get razor-sharp lines every time. You’ll peel slowly and steadily, holding the tape at a low angle back against the painted surface to avoid lifting fresh edges.
Peel toward the painted area when edges are still slightly tacky, or away if paint’s fully cured. Score stubborn spots with a sharp blade.
Good surface preparation—clean, dry, and smooth—reduces bleed and makes peeling predictable. For strong color contrast, go extra slow and use premium low-tack tape to prevent paint pull and keep lines crisp.
Why Timing Matters for Crisp Paint Lines
You’ll get the cleanest edges by timing tape removal to the paint’s tackiness. Peel while the paint is still tacky for sharp lines, or wait until it’s fully dry if the paint’s pulling away.
Either way, remove the tape slowly and at a low angle to protect the edge.
Remove Tape While Tacky
When paint’s still tacky, pull the tape at a 45-degree angle away from the painted surface to get the sharpest edge. You’ll reduce lifting because tack allows the film to separate cleanly instead of ripping dried paint.
Work steadily, keeping the strip low and close to the wall to control the break point. This technique helps preserve crisp lines where color blending would otherwise feather, and protects subtle finishes when you’re doing texture masking.
If paint’s tacky across multiple coats, remove each layer before full cure. Trust the angle and timing—you’ll save touch-ups and keep edges professional.
Peel After Drying
If you chose to peel while the paint was still tacky to protect delicate finishes, you might also consider situations where waiting pays off. You’ll get cleaner edges when paint fully cures, reducing bleed and unwanted color blending. Wait for manufacturer-recommended cure time, then peel slowly at a 45° angle to reveal crisp lines. This approach helps preserve tool maintenance—tape residue won’t gum your blades or rollers. Below’s a quick comparison to guide your choice.
| When to Peel | Benefit |
|---|---|
| Tacky | Protects fragile surfaces |
| Cured | Crisp lines, less bleed |
| Immediate | Faster completion |
| Delayed | Easier cleanup, tool longevity |
How Water‑ vs Oil‑Based Paint Changes Tape Timing
Because water‑ and oil‑based paints behave differently, you’ll need different tape‑removal timing for each type.
With water‑based latex, drying is faster; tack goes away sooner, so you can often remove tape within an hour or when the edge feels set. Be mindful of color mixing at edges if you cut in wet; quick removal prevents bleed.
Oil‑based paints dry by oxidation and remain tacky longer, so wait until paint is firm but not fully hardened to avoid tearing.
Paint sheen affects drying time—glossier finishes cure slower—so adjust your timing based on sheen and feel.
Which Painter’s Tape Types Peel Cleanly and Fast?
Although peel performance varies by surface and finish, certain tape constructions consistently come off clean and fast: low‑tack paper tape for delicate surfaces, medium‑adhesion painter’s tape for trim and glass, and high‑adhesion tapes for rough outdoor siding.
You’ll choose based on substrate and paint type, matching tape to whether you’re doing fine color blending or broad coverage. Use proper brush techniques to avoid seepage along edges.
Test a short strip first, and remove tape at a 45° angle while paint’s still slightly tacky for the cleanest line.
- Low‑tack paper: delicate walls, wallpaper
- Medium: trim, windows
- High: masonry, rough siding
Painter’s Tape vs Blue Masking Tape: What’s the Difference?
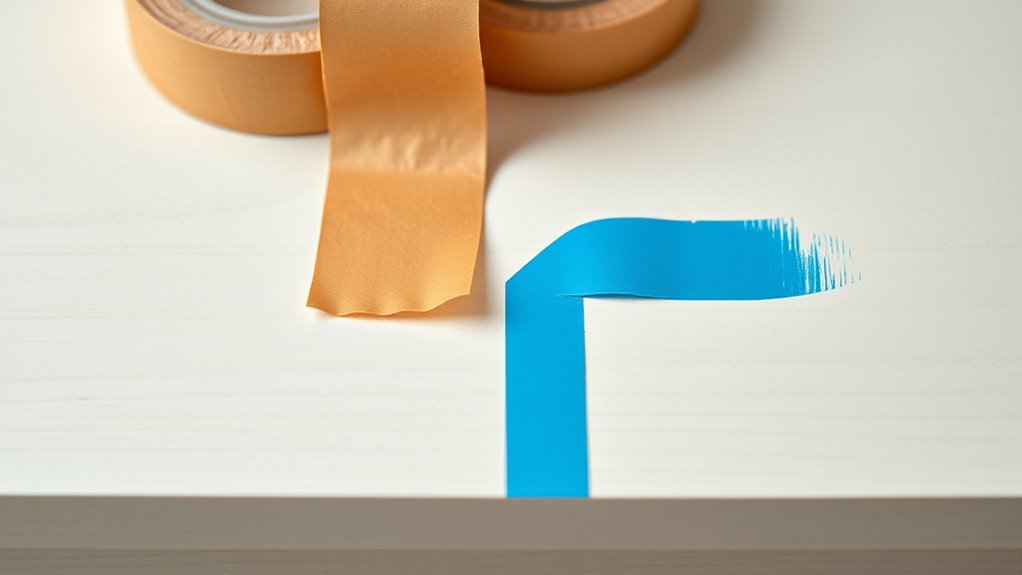
When you’re choosing between painter’s tape and blue masking tape, focus on adhesive strength, backing material, and meant use. You’ll find painter’s tape has gentler adhesive, paper backing that flexes, and is tailored for clean edges on finished surfaces. It supports color coordination by offering varied widths and hues for tasks.
Blue masking tape uses stronger adhesive and stiffer crepe backing, better for rough surfaces or heavy-duty jobs. For best results, you’ll do proper surface preparation—clean, dry, and smooth—so tape adheres evenly.
Pick painter’s tape for delicate trim; use blue masking when durability outweighs delicate removal.
When to Remove Tape From Water‑Based Paint?
With water‑based paint, you’ll usually get the cleanest edges if you pull the tape while the paint is still tacky rather than completely hard.
If the paint has fully dried and risks lifting, score the edge or re‑wet slightly before removing.
Always peel the tape back slowly at a 45° angle to minimize tearing or jagged lines.
Remove Tape While Tacky
If you’ve used water‑based paint, pull the tape while the edge is still tacky rather than waiting for full dryness; doing so prevents the dried paint film from lifting and gives you a crisp line. You’ll notice cleaner edges when you remove tape before full cure. Timing depends on humidity, paint thickness, and your color mixing choices; test a hidden spot.
Proper surface preparation reduces seepage and lets tacky removal work best.
- Remove tape slowly at a 45° angle.
- Pull toward the painted area, not away.
- If paint strings, score with a utility knife before peeling.
Wait For Fully Dry
You might choose to wait for water‑based paint to fully dry before removing tape when you need maximum durability or when the paint layer is thick or heavily pigmented.
You’ll want flawless edges for areas where color mixing or overlapping layers occur, since wet removal can smear pigments.
Guarantee surface preparation was thorough—clean, primed, and dry—so the cured film bonds correctly and tape lifts without pulling.
Wait until the paint reaches its specified dry time on the can and feels hard to the touch.
Patience prevents jagged lines and touch‑ups; only remove tape after full cure when structural integrity matters.
Peel At 45° Angle
A 45° peel gives you the cleanest edge when removing tape from water‑based paint—lift the tape slowly toward the painted surface at a shallow angle so the paint separates neatly along the tape line. You’ll avoid lifting fresh paint and preserve crisp contrast, especially when managing color blending near edges or compensating for texture variation on walls.
Move steadily, don’t yank, and stop if you see pulling so you can adjust pressure or use a sharp blade to score.
- Practice on a scrap to feel the right angle.
- Keep a damp cloth nearby for tiny fixes.
- Go slow when edges meet different textures.
When to Remove Tape From Oil‑Based Paint?
Because oil-based paints dry more slowly and form a tacky skin before fully curing, you’ll usually wait longer before removing tape than with latex.
Oil-based paints dry slowly and form a tacky skin, so wait longer before removing tape than with latex.
Aim to remove tape after the paint’s surface is dry to the touch but before it fully cures and bonds too strongly to the tape edge; typically that’s 6–24 hours depending on temperature and ventilation.
Pull tape slowly at a 45° angle to avoid lifting edges.
Keep solvent-ready tools for touchups to preserve color blending; clean brushes and knives promptly as part of tool maintenance.
If unsure, test a small corner before removing all tape.
How Finish (Flat, Eggshell, Satin, Gloss) Affects Drying Time
While finish sheen doesn’t radically change the chemistry of drying, it does affect how quickly paint feels dry and how likely tape is to pull the film. You’ll notice flat finishes absorb light and feel dry sooner to the touch, but their delicate paint texture can lift with aggressive tape.
Eggshell and satin sit in the middle—easier to clean, slightly slower to cure, and less prone to tearing. Gloss dries to a hard surface that resists scuffs but can remain tacky beneath the sheen longer.
- Flat: softer look, subtle Color psychology impact
- Eggshell: balanced durability
- Gloss: toughest surface, cautious removal
How Humidity and Temperature Change Safe Removal Time
High humidity slows how quickly paint’s surface dries, so you’ll often need to wait longer before removing tape to avoid smudges.
Cooler temperatures also extend the full cure time, while warmer, well-ventilated conditions speed it up.
Check both humidity and temperature and add extra removal time when conditions are damp or cool.
Humidity’s Effect On Drying
If you’re working in a humid room, paint will take longer to cure and you should wait more time before pulling off the tape. Humidity slows solvent evaporation, so you’ll notice tacky edges longer than usual.
Consider how color mixing can affect pigment density and how different brush techniques lay paint differently; both change drying feel. Monitor tack rather than clock time, and gently test a hidden corner before peeling.
- Expect delays when air feels heavy; plan extra drying time.
- Use fans and dehumidifiers to speed drying carefully.
- Keep samples to compare drying between areas.
Temperature’s Role In Cure
Because temperature speeds or slows the chemical curing of paint, you’ll need to adjust when you remove tape based on how warm or cold the room is. Lower temperatures slow paint chemistry, extending tackiness and risking adhesive lift if you peel too soon.
Higher temperatures accelerate curing, so tape may release cleanly earlier but can also make edges brittle, causing flakes if you wait too long. Watch surface feel rather than just time, and consider how temperature affects sheen and color matching as paint cures.
Use gentle, steady pulls at a 45-degree angle to minimize damage while accounting for thermal effects.
Adjusting Removal Time
When humidity climbs or temperatures drop, you should extend the wait before pulling tape because paint stays tacky longer and the adhesive can lift fresh edges. You’ll check local conditions and adjust removal time: cooler or damper air can double cure times, while warm, dry rooms speed things up.
Consider ventilation and avoid forced heat that skates the surface. Good surface preparation and correct color mixing reduce rework, but environmental caution still matters.
Follow these quick tips so you don’t ruin crisp lines:
- Wait longer when dew or high humidity’s forecast.
- Test a small corner before full removal.
- Keep room temperature steady during drying.
How Old Tape Adhesion Affects Peel‑Off Risk
Older masking tape gets stickier over time, and that stronger bond raises the chance you’ll pull paint off when you peel it. You should assess tape durability before reuse: older rolls often show adhesion degradation, leaving residue or gripping paint layers. Test a small scrap on a hidden edge, wait the recommended dry time, then peel slowly at 45 degrees. If paint lifts, discard the tape and choose a low‑tack option. Quick removal after paint skins over also helps. Use this simple reference to compare age effects.
| Tape age | Likely behavior |
|---|---|
| New | Low tack, clean removal |
| Old | High tack, possible lift |
How Surface Porosity Changes Bleed and Timing
Tape age matters, but the surface you’re painting on has a bigger say in bleed and how long you should wait before removing tape. If the substrate is porous, it soaks paint, increasing the risk of paint bleed under the tape and requiring longer set times.
Smooth, nonporous surfaces let you peel sooner with cleaner edges. You should assess porosity and adjust timing rather than follow a fixed clock.
- High porosity (raw wood, cement) soaks paint; wait longer.
- Medium porosity (primed drywall) reduces bleed; moderate wait.
- Low porosity (glass, tile) resists bleed; peel sooner.
How Primer Alters Your Tape Removal Plan
Because primer changes how paint bonds and soaks into a surface, it should directly shape when you remove masking tape. When you prime, you reduce bleed risk and create a uniform base so tape lifts cleaner; you’ll often pull tape sooner than on unprimed drywall.
Choose primers compatible with your topcoat and consider color psychology when selecting primer tint—warm undertones can influence final hue. If you use eco-friendly paints and low-VOC primers, drying feels different but adhesion stays reliable.
Peel tape at a 45-degree angle after primer sets to the touch, not fully cured, for crisp edges.
How Long to Wait for Walls and Ceilings?
For walls, you’ll usually wait about 30 minutes to an hour before pulling tape so the paint’s skin has set but isn’t fully cured.
Ceilings often take longer—plan on waiting at least a couple of hours because gravity and thicker coats slow drying.
Next we’ll cover how to test readiness and the best removal angle for each surface.
Walls: Wait Time
When you’re painting walls or ceilings, timing your tape removal matters for clean lines and to avoid peeling. You should wait until paint is tack-free—usually 30–60 minutes for latex in normal conditions—then remove tape slowly at a 45° angle.
Consider how color mixing affects drying speed and whether primer compatibility requires different wait times. Test a hidden corner first.
- If paint pulls, reapply a thin edge coat and wait longer.
- In high humidity, extend wait times to prevent smudges.
- For oil-based paints, wait several hours to achieve crisp edges before removing tape.
Ceilings: Drying Period
How long should you wait before removing tape from a freshly painted ceiling? You’ll usually wait 24 hours for latex or eco-friendly paints to set, though lower humidity or thinner coats can shorten this.
Ceilings dry slower than walls because paint settles and drips. Check by gently lifting a corner—if paint peels, wait longer.
Remove tape at a 45-degree angle for a clean edge, pulling slowly.
Consider color psychology: lighter ceilings show imperfections less, letting you risk a quicker removal, while dramatic hues demand caution to preserve crisp lines and finish.
How Long to Wait for Trim, Baseboards, and Moldings?
If you’re painting trim, baseboards, or moldings, plan to wait longer than you’d for flat walls because these surfaces show imperfections and get handled more.
You’ll usually wait 24–48 hours before removing tape to avoid smudges and dents; high-gloss finishes may need up to 72 hours.
Consider color psychology when choosing sheen to highlight profiles, and use eco-friendly paints to reduce odors during the extended drying period.
Handle corners gently and test a hidden spot before full removal.
- Wait 24–48 hours for latex trim
- Allow 48–72 hours for oil or high-gloss
- Peel tape slowly at a 45° angle
How Long to Wait for Cabinets and Furniture?
Because cabinets and furniture endure more handling and often get multiple coats, you’ll usually wait longer before removing tape than you’d on walls—expect at least 48 hours for latex-based finishes and up to 7 days for oil-based or high-gloss lacquers to reach a safe removal point.
You’ll also consider how you applied paint: careful brush techniques reduce seepage and let edges cure cleaner, while heavy layers from color mixing experiments may extend tack time.
Handle painted pieces gently after the minimum wait, avoid slamming doors or drawers, and keep humidity and temperature steady to guarantee the finish fully stabilizes before regular use.
How to Test an Inconspicuous Spot Before Peeling?
Before you peel tape from a painted surface—especially on cabinets or furniture—check an inconspicuous spot so you don’t ruin a visible edge. You want to verify adhesion, finish cure, and color blending before committing.
Choose a hidden corner or inside cabinet edge; clean it as part of surface preparation, then press tape and remove slowly at a 45° angle. Watch for lifting, tugging, or uneven paint.
- Test a small strip behind a hinge or inside drawer.
- Use the same tape and peel technique you’ll use on visible areas.
- Note how the paint and primer react for future reference.
Should You Remove Tape When Paint Is Tacky?
When paint is still tacky, you should generally remove the tape—gently and at a low angle—to avoid tearing the film as it fully cures. You’ll prevent jagged edges by pulling slowly and keeping the tape close to the surface.
If paint pulls, stop and let it set a bit longer.
Watch how tackiness affects color blending at the edge; slightly tacky paint can feather into the adjacent color for a softer blend, while fully cured paint resists.
Consider the paint sheen too: glossy finishes show flaws more, so be extra careful removing tape to preserve a crisp line and even finish.
Step‑by‑Step: Remove Wet Tape for Razor‑Sharp Edges
For razor‑sharp edges, remove the tape while the paint is still wet so the film lifts cleanly.
Hold the tape back at a slight angle and use a utility knife or razor to score any stubborn spots for precision.
If you spot tiny imperfections afterward, quickly smooth them with a fine brush or a touch of solvent.
Remove Tape While Wet
Want razor-sharp paint lines? Remove tape while the paint’s still wet to prevent ridges and get crisp separation. Work steadily: pull the tape back on itself at a 45-degree angle, keeping a low, steady speed so wet paint peels cleanly.
Watch how color blending behaves at the edge—wet removal preserves smooth transitions when desired, or keeps clean contrasts on flat versus textured walls. Consider wall textures and paint thickness; textured surfaces may need gentler pulling to avoid tearing.
Tips to follow:
- Pull at a consistent angle and pace
- Use your free hand to steady the tape
- Clean up any bleed immediately with a damp brush
Angle Cutter For Precision
Although removing tape while wet gives the sharpest lines, using an angle cutter lets you trim any stray paint and tidy edges without lifting fresh paint—so grab a sharp blade, steady the tape with your free hand, and slice along the seam at a shallow angle to cut through ridges and prevent pulling. You’ll follow style cues—color psychology informs edge contrast; paint color trends influence how visible imperfections become. Work slowly, replace dull blades, keep fingers behind the cut. Practice on scraps.
| Tool | Tip |
|---|---|
| Angle cutter | Shallow angle |
| Tape edge | Hold steady |
| Blade | Sharp only |
| Motion | Single pass |
| Safety | Cut away |
Clean Up Tiny Imperfections
You’ve already trimmed any ridges with an angle cutter, so now clean up tiny imperfections while the tape is still wet to get razor‑sharp edges. Work quickly: remove the tape at a 45° angle, then inspect the cut line. Use a fresh artist’s brush or small scraper to feather stray paint and correct slight bleeds.
Good surface preparation earlier makes touchups easier and reduces rework; think of color mixing only when blending edges for seamless gradations.
- Keep a damp cloth handy for smudges.
- Use minimal paint on the brush.
- Step back to spot subtle flaws.
Step‑by‑Step: Remove Tape After Paint Fully Dries
When the paint is fully dry, take your time removing the tape slowly and at a sharp angle to protect the crisp edge you worked for. Start at a corner, peel back along the line, and keep the tape close to the surface to avoid lifting paint.
If you planned for color blending, remove tape after the final coat cures to preserve gradations.
Use a utility knife for any stubborn spots, cutting where tape meets trim. Inspect edges and touch up tiny flaws with a fine brush.
Good surface preparation pays off—clean edges mean fewer fixes and a professional finish.
How to Remove Tape on Freshly Painted Textured Surfaces?
If your textured surface is still tacky, peel the tape slowly and at a steep angle to prevent paint from tearing out of the high points; you’ll protect texture peaks while guiding edge smoothing and minimizing snags. Use steady tension, watching for lift so you can stop and re-secure if needed. Keep a damp cloth and a small brush handy to tidy minor smudges and help subtle color blending at the seam. If paint resists, score along the tape with a utility blade.
Peel tape slowly at a steep angle, using steady tension and short pulls to protect texture peaks and tidy seams.
- Work in short pulls for control
- Keep tools within reach
- Check lighting to spot flaws
How to Handle Corners and Angles Without Ragged Edges
Although corners and angles trap paint and tape edges, you can get crisp results by planning your tape placement and peel angle before the paint fully sets.
Position tape slightly beyond the corner, press firmly into the crease, then overlap short strips for consistent coverage.
Use a fingertip or a plastic tool to seal edges; heat gently with a hair dryer for stubborn spots.
Peel slowly at a 45-degree inclination toward the painted area while paint is tacky, not wet.
For decorative finishes or color mixing near edges, mask shifts carefully to avoid bleed and preserve sharp junctions.
How to Cut the Paint Edge With a Utility Knife Safely
Because a clean cut prevents paint from peeling back with the tape, you should score the paint edge carefully with a sharp utility knife before pulling tape away. Hold the blade at a shallow angle, follow the tape line steadily, and replace dull blades promptly to avoid slipping.
Think about paint sheen differences; satin or gloss can hide tiny nicks, while flat shows flaws more. Color theory won’t affect cutting technique, but it helps you spot uneven edges against adjacent hues.
Work in good light, steady your hand, and keep fingers clear of the blade for safer, crisper results.
- Use a new blade.
- Keep steady pressure.
- Check lighting.
How to Minimize Paint Peelback If Tape Is Dry
When the tape’s fully dry and the paint’s cured a bit, you can still prevent peelback by taking slow, deliberate steps. Peelback risk drops if you lift tape at a low angle, pulling back over itself slowly while supporting the freshly painted edge with your free hand.
Warm the tape slightly with a hair dryer to soften adhesive if it’s stubborn. Good surface preparation beforehand—cleaning, priming, and using the right tape—reduces lifting later.
If you plan a subtle color blending at the edge, feather with a brush after tape removal rather than forcing tape off.
Inspect edges and touch up tiny lifts immediately.
How to Fix Paint Bleed Without Re‑Taping
If paint bled under the tape, you don’t always have to re-tape the whole edge to fix it. Small bleed spots can be cleaned up quickly with a few simple tools and steady hands.
Lightly sand the bleed edge, wipe dust, and use a fine artist brush to lift or paint over the stain. Match tones by careful color mixing and test on scrap. Seal with a thin topcoat to blend edges.
- Use a razor blade to scrape raised flakes gently.
- Keep a damp cloth handy for immediate wipe-ups.
- Work in good light and prep the surface beforehand.
How Long to Wait Between Coats Before Re‑Taping?
After cleaning up any bleed spots, you’ll want to know how long to wait between coats before re-taping to avoid fresh paint lifting or new bleed.
Wait until the topcoat feels dry to the touch and is firm—typically 2–4 hours for water-based paints, longer for oils. Check manufacturer’s recoat time and test a hidden edge before applying tape.
Use gentle brush techniques when cutting in after re-taping, avoiding heavy loading that can push paint under tape.
Consider color mixing impacts: darker pigments can appear tackier, so allow extra cure time.
Re-tape only when paint resists light pressure.
When to Use Caulk or Sealant Along Tape Lines?
Because paint and tape don’t create a perfect seal, you’ll want to use caulk or sealant along taped edges when gaps, seams, or uneven surfaces could let paint bleed or leave a visible joint. Use caulk to hide gaps between trim and wall, smooth connections, and prevent moisture intrusion that harms paint durability.
Sealant also helps when textured surfaces or aging wood make straight lines impossible. Think about color psychology when choosing white versus colored trim—seamless joins read cleaner and influence perceived space.
Apply thin bead, smooth with finger, and remove tape promptly for crisp edges.
- Trim-to-wall gaps
- Exterior joints
- Textured surfaces
How to Choose Tape Width for Different Projects
Think about the size of the surface you’re taping—wider tape covers large areas faster, while narrow tape gives you more control on small or detailed surfaces.
You’ll balance precision versus speed: choose thinner tape for sharp edges and wider tape when you need to block off big swaths quickly.
Also consider paint layer thickness, since heavy coats may bleed under narrow tape and might call for a wider barrier or multiple passes.
Project Surface Size
When you’re picking painter’s tape, match the tape width to the surface size and the level of detail. You’ll choose wide tape for large walls and narrow tape for trim, balancing speed with neatness. Good surface preparation prevents bleed, so clean and dry areas before applying tape.
Consider how color mixing near edges might affect your choice—narrower tape helps control stray tones in tight spots.
- Use 2–3″ tape for big, flat surfaces to save time.
- Use 1–1.5″ tape for baseboards, door frames, and narrow moldings.
- Use delicate-edge tape for freshly painted or fragile surfaces.
Precision Versus Speed
Though you want to finish quickly, choosing the right tape width means balancing speed with the clean lines you’ll actually be happy with. You’ll pick wider tape for long straight runs to work faster and reduce seams, but narrower tape gives precision around trim and complex patterns.
Think about color matching when edges meet different hues; a narrower tape helps prevent bleed that ruins contrasts. Also weigh budget considerations: wider rolls cost more per roll but save time on large jobs.
Match tape width to surface and detail level so you don’t sacrifice finish quality for mere speed.
Paint Layer Thickness
Because thicker paint layers raise the mask line and increase the chance of seepage, match tape width to how much paint you’ll apply and how you’ll build coats. You’ll pick narrower tape for thin, layered work and wider tape when glazing or using heavy texture. Consider how color mixing changes opacity and how your brush technique lays down paint.
- For light washes and fine edges, use 1/4–1/2″ tape and soft brush technique.
- For standard wall coats, choose 1″–1.5″ tape and steady strokes to prevent bleed.
- For textured or heavy-bodied paint, use 2″+ tape and overlap slightly between coats.
Budget vs Premium Tape: Which Peels Best?
If you’re deciding between budget and premium painter’s tape, think about how cleanly each one lifts off after drying — that’s where they really differ. You’ll find premium tape peels with minimal edge lift, reducing bleed and preserving crisp lines so your color mixing stays true and your Painter’s fantasy edges remain sharp.
Budget tape can seem fine at first but often leaves residue or takes paint chips when removed, especially from delicate surfaces. Choose premium for tricky jobs or glossy finishes; save budget tape for rough, quick projects where perfect edges aren’t critical.
How to Store Leftover Tape to Preserve Adhesion
Picking premium tape was a smart move when you want clean lines, but you’ll only get that performance again if you store leftovers properly. You’ll keep adhesion and avoid dust, moisture, and edge damage by treating rolls right.
For Tape storage, seal the roll, keep it flat, and avoid temperature swings to aid Adhesion preservation.
- Put tape in a resealable plastic bag and squeeze out air.
- Store rolls flat in a cool, dry drawer away from sunlight.
- Label bags with purchase date and tape type so you use older rolls first.
Do this and your tape will stick like new.
Tools That Make Clean Tape Removal Easier
You’ll want a few simple tools on hand to make tape removal clean and painless. A plastic scraper or putty knife helps lift edges without gouging paint.
A razor or dedicated tape cutter gives you straight, controlled cuts. Using these tools properly cuts down on touch-ups and speeds the job.
Clean Removal Tools
When you want crisp paint lines without tearing or sticky residue, the right removal tools make all the difference. You’ll protect edges influenced by color mixing and maintain surfaces prepped after surface priming by choosing tools that lift tape cleanly and gently.
Use a light, steady pull at a 45-degree angle and keep tools handy for touchups.
- Razor scraper with a new blade for stubborn edges
- Microfiber cloth and gentle adhesive remover for residue
- Plastic putty knife for prying without gouging
These tools help you remove tape confidently and leave perfect, ready-to-finish lines.
Tape Cutting Guides
Although it might seem minor, using a proper tape cutting guide will speed your masking and give consistently straight edges, so you’ll avoid jagged cuts and wasted tape. You’ll clamp or align the guide, score tape cleanly, and peel precise strips without guessing. That saves time during surface preparation and reduces touch-ups.
Choose metal or plastic guides with non-slip feet and a sharp edge; some have angle marks for trim and color blending progression. Practice steady pressure and short cuts for corners.
A simple guide improves speed, accuracy, and the final paint line, so your removal is cleaner and less stressful.
How to Remove Tape Adhesive Without Damaging Paint
If tape residue’s stubborn, don’t panic—you can lift it without harming the paint by using gentle solvents, heat, or careful scraping.
You’ll protect color blending and respect surface preparation by testing methods first on an inconspicuous spot. Work slowly, keep the area clean, and avoid aggressive tools that gouge or dull finish.
- Use a microfiber cloth with mild solvent (rubbing alcohol) and dab gently, not rub.
- Warm the adhesive with a hair dryer to soften, then peel or wipe away softly.
- Carefully lift remaining bits with a plastic scraper, then clean and let fully dry.
How to Salvage Edges That Peeled With the Tape
If the tape pulled paint away, you can still fix those peeled edges without redoing the whole wall. Gently sand the ragged edge, feather new paint from the undamaged area into the bare spot, and use a small brush for precise blending.
With thin layers and light pressure you’ll hide the seam and restore a clean line.
Fixing Peeling Edges
When tape pulls fresh paint up, don’t panic—you can usually repair the edge without repainting the whole wall. Gently lift any loose flakes, sand the thin ridge smooth, and wipe dust away.
If bare drywall shows, apply a light coat of surface priming to seal it before touching up. Match nearby tones and use careful feathering for color blending so the fix disappears.
- Use a fine sanding block and moderate pressure.
- Spot-prime exposed areas, then let dry fully.
- Apply thin paint layers with a small brush, feathering outward for a seamless look.
Blending Paint Seamlessly
Now that you’ve smoothed and primed any peeled areas, focus on blending the repair so it disappears into the surrounding finish. Match sheen and hue by testing Color mixing on a scrap or palette until the repaired patch reads the same in different light.
Use thin coats and let each dry fully before the next. Employ soft, angled Brush techniques: feather strokes radiating from the repair, light pressure, and minimal paint on the bristles to avoid ridges.
After drying, evaluate under natural light and apply a final skim coat if needed. Clean tools and store leftover mixed paint for touch-ups.
How Pros Handle Tape on Large Paint Jobs?
Because large jobs demand speed and consistency, pros plan tape use around workflow and drying times. You’ll focus on surface preparation first so tape adheres cleanly, then sequence sections to allow color blending without re-taping edges. You’ll label areas and choose tape widths to match detail level.
Plan tape use around workflow and drying—prep surfaces, sequence sections, label areas, and choose tape widths for crisp consistency.
- Prep surfaces: clean, sand, and prime for firm tape grab.
- Stage work: paint contiguous zones, wait recommended tack time, then remove tape at an angle.
- Monitor drying: use ambient controls to speed curing and avoid paint lift.
You’ll move methodically, balancing speed with careful removal to protect crisp lines.
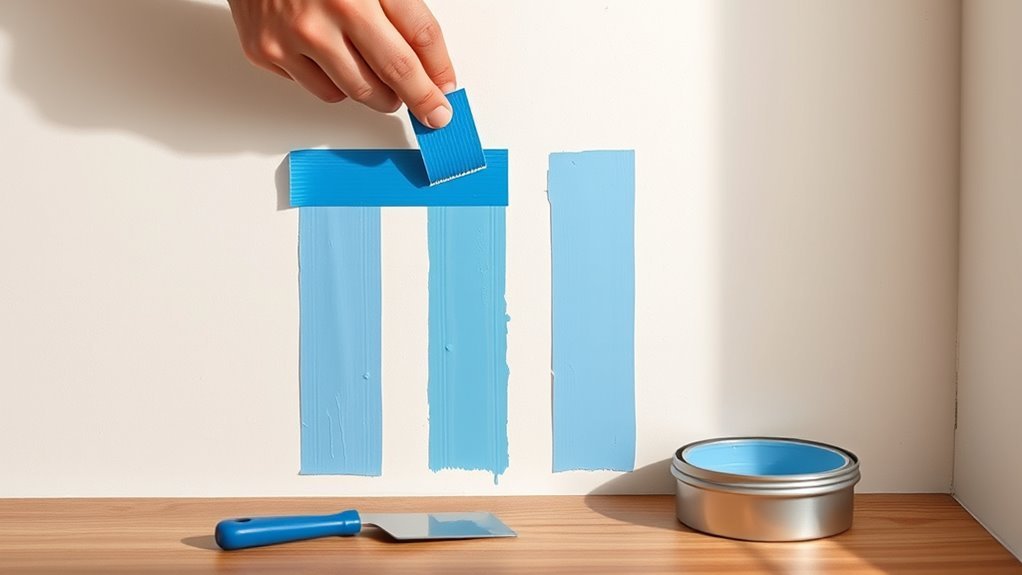
How to Tape and Remove for Multi‑Color or Striped Walls?
Start by planning your stripe layout so you know where each color and tape line will fall.
Use low-tack painter’s tape to protect edges without pulling fresh paint.
When removing tape, pull it back slowly at a 45-degree angle to keep the lines crisp.
Plan Your Stripe Layout
When planning stripes, map the layout on paper and the wall so you know exact widths, placement, and where each color will meet before you tape. You’ll check surface prep, note any texture that affects crisp lines, and consider color mixing impacts when adjacent hues interact.
Measure and mark with a level, then sequence colors so shifts stay clean. Think through trimming order and drying times to avoid smudges.
- Visualize with swatches and test patches
- Mark reference lines and label every stripe
- Plan paint sequence and touch-up strategy for edges
Use Low‑Tack Tape
If you want crisp, clean stripes without peeling fresh paint, choose a low‑tack painter’s tape designed for delicate surfaces and press it down firmly along your measured lines so the adhesive seals but won’t strip underlying layers on removal. You’ll protect edges while allowing multiple colors without lifting previous coats.
During workspace preparation, mask adjacent areas and clean surfaces so tape adheres evenly. When planning color mixing or adjacent hues, test small swatches to confirm opacity and drying times.
Label each taped section to avoid errors, and replace tape between colors if it becomes saturated to maintain sharp lines and prevent bleed.
Remove Tape At Angle
After pressing low‑tack tape firmly into place and finishing your last coat, pull the tape back on itself at a 45‑degree angle to the painted surface; this cuts the paint cleanly and prevents lifting.
You’ll avoid jagged edges on stripes and multi‑color designs if you remove tape while paint is dry-to-touch but not fully cured.
Keep primer adhesion in mind—if primer bonded poorly, lift slowly and use a razor to score.
Manage color mixing by preventing wet edges from contacting adjacent bands.
- Work steadily, one strip at a time.
- Pull slowly for crisp lines.
- Use light heat if stubborn.
How Ventilation and Fans Speed Up Safe Removal
Wondering how ventilation speeds things up? You’ll boost evaporation by introducing fresh air and reducing humidity. Fans move solvent-laden air away so paint skins faster, helping you remove tape without smudging.
Position a box fan to pull air across the drying surface, and open windows to create a cross-breeze. Combine airflow with careful application: proper color mixing prevents excess solvent, and clean brush techniques avoid heavy buildup that hampers drying.
Aim for steady, gentle circulation rather than blasting wind that can lift tape edges. Check tackiness before peeling to guarantee clean lines and safe removal.
How Seasonal Weather Affects Indoor Drying Times
Airflow helps speed drying, but the season you’re in sets the baseline for how fast paint will dry indoors. You’ll notice Seasonal humidity and Temperature fluctuations change tack time: high humidity in summer slows curing, cold winters can slow solvent evaporation, and swings between day and night add unpredictability. Adjust expectations and schedule tape removal accordingly.
- In humid months, open windows and run dehumidifiers to help.
- In winter, raise indoor temperature but avoid rapid heating that causes uneven drying.
- During changing seasons, monitor surface tack and wait longer if humidity spikes.
How to Decide Whether to Retouch or Sand After Removal
If the paint edge looks clean, you’ll likely only need a small touch-up; but if you see lifting, gaps, or rough edges, sanding and a more thorough retouch will give a professional result.
You’ll inspect edges under good light, run a finger to detect snags, and decide: feather with fine sandpaper when texture needs blending, or spot-retouch when coverage and paint sheen match.
When blending, consider color mixing to recreate subtle variations and test on scrap. Use thin layers, letting each dry before evaluating sheen.
Finish only when edges sit smooth and the sheen and color integrate seamlessly.
How Porosity and Texture Change Removal Technique
Those same edge inspections that tell you whether to sand or spot-retouch also reveal how the surface will respond when you pull tape: porosity and texture change both how paint bonds and how cleanly tape releases. You’ll adjust timing and peel angle based on substrate absorption and surface roughness.
Porosity effects mean porous plaster soaks paint, grabbing tape; denser surfaces let edges lift sooner. Texture considerations force slower, careful pulls to avoid tearing peaks. Match technique to material, testing a small strip first.
- Test a hidden corner for bonding and release
- Peel slowly at a low angle on rough surfaces
- Use heat or solvent sparingly for stubborn edges
Common Tape‑Removal Mistakes Beginners Make (And How to Avoid Them)
When you rush the peel or use the wrong tape, you’re inviting ragged edges, paint lift, and extra touch‑up work. Beginners often either yank tape too soon or leave it on until the paint becomes brittle.
You’ll cause paint peel by pulling perpendicular to the surface or using high‑tack tape on delicate finishes. Ignore tape adhesion differences at your peril: choose low‑tack for fresh coats, high‑tack for rough surfaces.
Don’t stretch tape during application or peel in jerks. Instead, pull slowly back on itself at a low angle, support adjacent paint with your free hand, and replace mistakes with small, careful touchups.
Quick Checklist: When and How to Remove Paint Tape
Ready to finish cleanly? You’ll remove tape at the right moment when paint is tacky but not fully cured to avoid peeling or messing with color blending.
Check surface preparation first: tape should be applied to a clean, dry edge so paint seals properly.
Ensure tape adheres to a clean, dry edge so paint seals properly for crisp, professional lines.
Peel slowly at a 45-degree angle while keeping the paint film supported.
- Wait for paint to be dry-to-touch but not hard; test a hidden corner.
- Score the edge with a sharp blade for raised film or stubborn lines.
- Pull tape back on itself slowly to preserve crisp lines and avoid lift.
Frequently Asked Questions
Can You Remove Tape From Latex-Painted Surfaces After 24 Hours?
Yes — you can remove tape after 24 hours, but you’ll want to use painting techniques that minimize adhesion; with careful tape application and a sharp pull at 45 degrees, you’ll avoid tearing and get crisp paint lines.
Will Sunlight Exposure Affect Tape Adhesion and Timing?
Yes — sunlight impact can speed drying, so you’ll see changed adhesion timing; heat tightens tape and dries paint faster, but UV can weaken adhesive, so check edges and remove tape carefully to avoid tearing or lifting.
Does Using Primer-First Eliminate Paint Bleed Under Tape?
Primer-first helps, but it won’t completely eliminate bleed under tape; you’ll improve Painting techniques and Tape adhesion by sealing porous surfaces with primer, using proper tape type, pressing edges, and cutting or scoring before topcoating for cleaner lines.
Can Tape Removal Damage Freshly Painted Wallpaper?
Yes — you can damage freshly painted wallpaper if you rush; like tugging a bandage, improper tape removal techniques and ignoring paint drying times can peel or lift paper, so peel slowly, hold edge, and pull at a low angle.
Should Painters Remove Tape Differently After Spraying Paint?
Yes — you should remove tape differently after spraying paint: use slow, angled peeling while paint’s tacky, wear respirator and gloves, follow tape removal techniques to avoid lifting, and follow painter’s safety tips to protect health and finish.
Conclusion
You’ve got this—remove tape when the paint’s just tacky, not bone‑dry, to avoid tearing or bleeding. Match timing to paint type: water‑based dries faster, oils need more patience. Use the right tape for your surface and pull back slowly at a 45° angle. If you see haze, touch up gently or sand. Keep these rules in your back pocket and your edges will stay sharp every time.