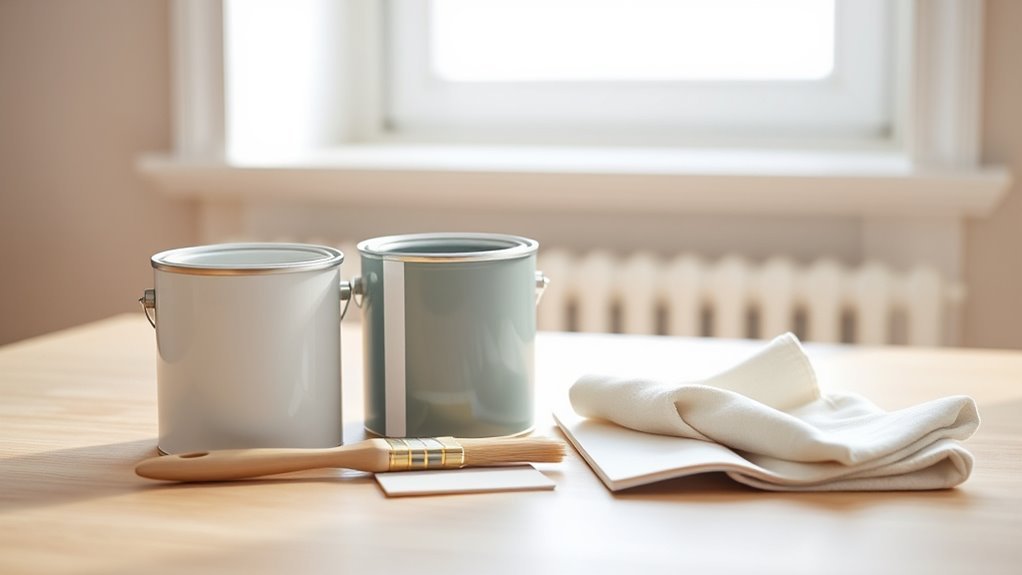
How Long Does Valspar Interior Paint Take to Dry
You’ll find Valspar interior paint usually feels dry to the touch in about 30–60 minutes and is ready for a light recoat in 2–4 hours under good conditions. Heavier coats, lower temps, or high humidity slow things down, so allow 24–48 hours for normal handling and up to 7–30 days for full cure. Follow surface prep and thin, even coats for best results, and keep going for tips on timing and troubleshooting.
Quick Answer: Typical Valspar Touch, Recoat, and Cure Times
When you apply Valspar interior paint, it usually feels dry to the touch within 30 minutes to an hour.
However, you should wait about 2 hours before recoating and 24–48 hours for normal handling. Full curing can take up to 30 days depending on the formula and conditions.
Wait about 2 hours before recoating, 24–48 hours for handling; full cure may take up to 30 days.
You’ll find quick touch times let you test color blending on trim and walls the same day, while waiting the recommended recoat interval prevents lift and streaks.
For texture enhancement, allow longer between coats when building texture or glazing.
Always follow label guidance and adjust for humidity, temperature, and ventilation.
How Valspar Paints Dry: Basics and Timelines
You’ll want to know the main factors that affect Valspar’s drying time—temperature, humidity, ventilation, and coat thickness all play a role.
Remember that “touch dry” (when the surface feels dry) can come in as little as 30 minutes, while full cure (maximum hardness and durability) can take several days to weeks.
Knowing the difference between touch, recoat, and cure times helps you plan sanding, second coats, and when to return furniture to the room.
Drying Time Factors
Although drying times can feel straightforward on the label, several factors interact to determine how quickly Valspar interior paint dries, so you should know what influences those timelines. Room temperature, humidity, and airflow directly affect evaporation and film formation; warmer, drier, ventilated spaces speed drying.
Surface porosity and previous coatings change absorption and adhesion — primed drywall dries differently than bare wood. Application thickness and number of coats matter: heavier layers take longer.
Color blending or custom tints can slightly alter drying chemistry, and paint branding implies different formulations and additives, so always check product specs for best estimates.
Touch vs. Cure
Because drying involves two distinct stages—touch dry and full cure, you should treat painted surfaces differently depending on timing.
You’ll notice touch dry means the surface feels dry and resists light contact.
Full cure means solvents have evaporated and the film reached maximum hardness.
Protect freshly painted areas until cure to avoid marks, impaired color blending, or altered texture consistency.
Plan tasks accordingly: wait for recoat times, avoid heavy use, and control humidity and temperature to speed curing.
- Light handling after touch dry
- Wait full cure before cleaning
- Prevent abrasion during cure
How Paint Sheen Affects Touch and Recoat Times
When you’re picking a sheen, remember it changes how quickly paint feels dry to the touch and how soon you can recoat. Higher sheens—like satin, semi-gloss, and gloss—dry to a firm touch faster than flat or eggshell, so you can often recoat sooner.
Lower sheens stay tackier longer and may need extra drying time. If you’re matching color later, note sheen alters perceived shade, so do color matching under the same finish.
Also store leftover tins upright in cool, dry conditions; proper paint storage preserves sheen characteristics and helps predictable touch and recoat timing.
How Coat Thickness Affects Valspar Drying and Curing
If you apply Valspar in thin, even coats, the paint will dry faster and you’ll get a smoother finish.
Thicker coats hold more solvent and can lengthen tack-free and full cure times, so you’ll need to wait longer before recoating.
Also be careful with heavy application because thick layers are more likely to sag or drip before they set.
Thin Versus Thick Coats
Although thinner coats dry faster on the surface, they’ll need multiple layers to build durable coverage.
While thicker coats take longer to dry and can trap solvents beneath the surface. You’ll balance speed and finish: thin coats reduce runs and help with color matching, while thick coats can hide imperfections but risk longer cure times and uneven gloss.
Keep leftover paint sealed for proper paint storage to avoid skinning between sessions.
Consider:
- Thin coats: faster touch-dry, more uniform drying.
- Moderate coats: best compromise of coverage and cure.
- Thick coats: slower solvent release, higher risk of tackiness.
Impact On Dry Times
Because coat thickness controls how quickly solvents escape and how heat moves through the film, it’ll have the biggest effect on both touch-dry time and full cure for Valspar paints.
If you apply thin, even layers, solvents evaporate faster, so touch-dry arrives sooner and curing completes in the expected window.
Heavier coats trap solvents, prolonging tackiness and extending cure time. That means you’ll wait longer before recoat or placing items against the wall.
Also consider finish and color options—darker pigments can retain heat differently.
Choose recommended film build and eco-friendly ingredients to minimize extended drying and achieve predictable results.
Potential For Drips
When you lay on a heavy coat of Valspar, gravity and trapped solvents combine to raise the risk of drips and sags before the paint sets. You’ll slow drying and curing when film thickness traps solvents, so apply thinner coats to control run-off.
Thick layers also obscure color blending and exaggerate texture variation, creating uneven finishes that need sanding and recoat.
- Thin coats dry faster and reduce sagging risk.
- Watch edges and corners—these collect excess and form drips.
- Sand between coats if texture variation appears, then recoat lightly to finish.
How Surface Type Alters Valspar Drying Time
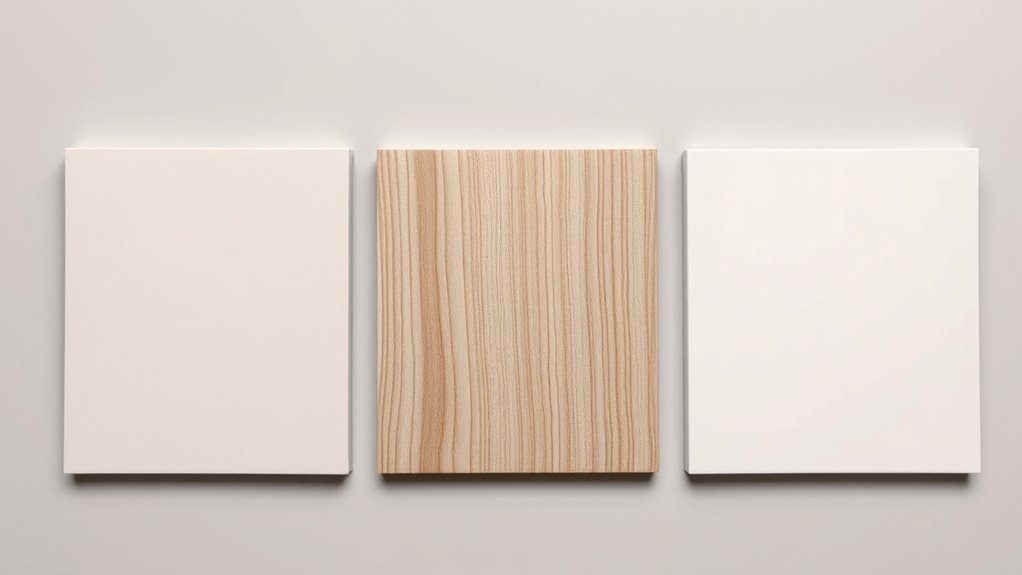
If you’re painting over glossy trim, bare wood, drywall, or previously painted surfaces, the substrate will change how quickly Valspar dries and how well it adheres. You’ll notice porous wood soaks paint faster, shortening tack time but risking uneven color blending unless you prime.
Glossy surfaces slow absorption, so paint skins over and takes longer to cure; scuff-sand first. Painted surfaces vary—smooth enamel may extend drying, latex over latex dries normally.
Your brush selection matters: synthetic bristles suit latex for smoother lay-in and fewer strokes, reducing lap marks and inconsistent sheen that affect perceived drying.
New Drywall vs. Previously Painted Walls: Timing Differences
Although new drywall soaks up Valspar faster than a previously painted wall, you’ll see shorter tack times but longer overall finishing needs as the surface evens out. You’ll notice the fresh paper pulls moisture, so you’ll wait longer between coats even if the surface feels dry.
Previously painted walls repel some absorption, letting you recoat sooner. Plan for consistent Color mixing across batches and proper Paint storage to maintain uniform sheen and adhesion.
Consider these timing differences:
- New drywall: faster initial drying, longer curing before sanding.
- Painted wall: quicker recoats, less touch-up time.
- Transitional spots: expect variable dry times.
Primers That Speed Valspar Drying
Because the right primer seals and evens porosity, it can cut total Valspar drying and recoating time on new or absorbent surfaces. You’ll choose a high-quality bonding or fast-dry primer to reduce absorption and speed topcoat cure.
Look for primers formulated for quick recoat and low-VOC options if ventilation’s limited. Use tinted primers for color matching when covering dark or stained areas; that reduces required topcoat layers.
Match primer type to substrate to avoid texture issues—smooth primers preserve paint texture, while heavy-bodied ones can hide imperfections. Proper primer choice saves time and improves final appearance.
Paint on Wood and Trim: Recommended Wait Times
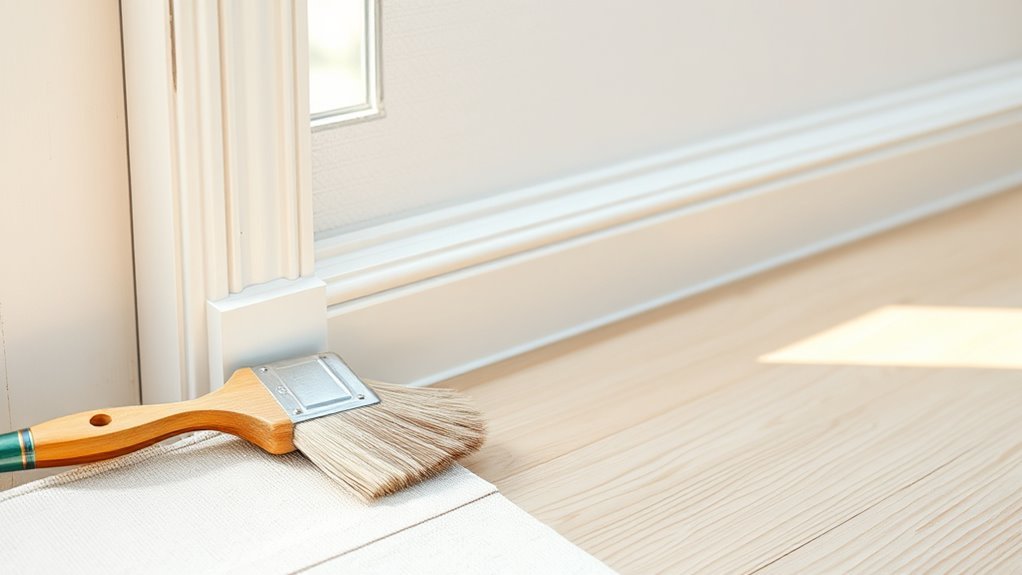
When you’re painting wood trim, plan for longer tack and cure times than on drywall: trim absorbs less but shows every brush mark and needs more careful recoating. You’ll let thin coats set 2–4 hours before light sanding; heavier or pigmented coats need 6–8 hours. Temperature, humidity, and Finish sheen affect dry and cure behavior, and Color mixing can change viscosity and drying, so test a sample.
- Light satin or eggshell: 2–4 hours to handle, 24–48 hours cure for light use.
- Semi‑gloss/gloss: 4–6 hours handle, 48–72 hours cure.
- Thick or multiple coats: allow 24 hours between coats for best results.
Standard Water‑Based Valspar Formulas and Dry Times
You’ve seen how wood and trim demand longer set and cure times; now let’s look at Valspar’s standard water‑based formulas and what to expect from their dry times. You’ll typically see touch‑dry in 30 minutes to 1 hour and recoat ready in 2 to 4 hours under ideal indoor conditions.
Temperature, humidity, and ventilation change that window, so monitor surface feel rather than just the clock. For best results, maintain texture consistency by stirring gently and applying even coats; color blending works well between coats once the film is set.
Follow label directions for maximum adhesion and finish.
Low‑VOC and Zero‑VOC Valspar: Drying Behavior
Though low‑VOC and zero‑VOC Valspar formulas release fewer odor‑causing solvents, they still follow familiar water‑based drying patterns: expect touch‑dry in roughly 30–60 minutes and recoat in about 2–4 hours under ideal indoor conditions.
You’ll notice slightly slower curing in high humidity or low temperature, but overall performance matches typical latex behavior. Pay attention to finish and film thickness; those affect final hardness.
- Follow label recommendations for ventilation and temperature.
- Use thin, even coats to preserve Color matching accuracy and reduce dry time.
- Choose Eco friendly formulations for low odor without sacrificing durability.
Valspar Signature vs. Valspar Premium: Drying Comparison
If you liked the predictable drying of Valspar’s low‑VOC options, comparing Signature and Premium helps pick the right balance of speed and durability for your project. You’ll find Signature typically sets to the touch faster, while Premium aims for tougher finish and richer Color mixing. Consider Paint texture: Signature feels slightly smoother sooner; Premium may need longer cure for full hardness.
| Feature | Signature | Premium |
|---|---|---|
| Touch dry | 1 hour | 2 hours |
| Recoat | 2–4 hours | 4–6 hours |
| Durability | Moderate | Higher |
Choose based on timeline versus longevity.
Valspar Ultra vs. Valspar Reserve: Drying Differences
While both Valspar Ultra and Valspar Reserve are formulated for interior use, they differ in how quickly they set and reach full hardness, so you should pick based on your schedule and desired finish. You’ll notice Reserve often dries to a tougher finish slower, letting you tweak color blending and smooth paint texture before it fully cures.
Ultra tends to set faster, so you can recoat sooner but have less working time. Consider:
- Dry-to-touch and recoat windows for each line.
- Ease of smoothing to affect final texture.
- How long you need to adjust blending and edges.
How Humidity Changes Valspar Drying: Practical Thresholds
Now that you know how different Valspar lines behave, consider how humidity changes drying times: moisture in the air slows solvent evaporation and can extend both dry-to-touch and recoat windows by hours or even days depending on conditions.
You’ll notice Humidity impact most above 50% relative humidity; expect 1.5–2× longer dry-to-touch times. Threshold guidelines: below 40% RH drying is near ideal, 40–60% RH is moderate delay, and above 60% RH you should plan for significant extension or use dehumidification.
Monitor RH and adjust ventilation or wait times to avoid tacky finishes and poor adhesion.
Temperature Ranges That Speed or Slow Curing
Because temperature directly controls solvent evaporation and polymer flow, it’s one of the most important factors you’ll manage to speed or slow Valspar’s curing. You’ll want to aim for the manufacturer’s recommended window—usually 50–90°F—to guarantee predictable tack-free times and final hardness without affecting Color matching or performance seen in Brand comparisons.
Temperature governs solvent evaporation and polymer flow—keep within the 50–90°F window for predictable tack-free times and final hardness
Cooler temps slow polymer crosslinking; warmer temps accelerate evaporation but can cause surface skinning before underlying layers cure.
- 50–60°F: slows curing; extend recoat times.
- 65–75°F: ideal balance for consistent cure.
- 80–90°F: faster dry; risk of defects if too hot.
Airflow and Ventilation Tips to Shorten Dry Time Safely
If you increase airflow and keep fresh air moving through the room, Valspar paint will dry more evenly and often faster without raising temperatures to risky levels. Open windows and use box or oscillating fans to create cross-ventilation; point fans toward an exhaust window to pull moist air out.
Keep humidity lower with a dehumidifier if needed, but avoid blasting heat.
For touch-ups, wait until the topcoat feels tack-free before re-coating.
Note that ventilation supports consistent Color matching by reducing uneven sheen.
With Eco friendly formulations, good airflow helps cure without compromising low-VOC benefits or indoor air quality.
Safe Accelerants and Additives to Shorten Drying
You can speed up Valspar interior paint with approved drying additives designed for water-based formulas, but follow the manufacturer’s dosing instructions closely.
Avoid homemade “accelerants” like solvents or heat sources that can harm finish or indoor air quality, and stick to products labeled safe for interior latex paints.
I’ll outline the common additives and safe accelerant options so you can choose what fits your project and ventilation setup.
Use Of Drying Additives
When you’re pressed for time, safe drying additives can speed up Valspar interior paint without sacrificing finish or adhesion. You’ll choose additives that suit paint color and texture finish, since some can slightly alter sheen or tint. Follow manufacturer dosages, test a small swatch, and mix thoroughly to avoid streaks.
- Use a compatible drying agent per instructions to reduce tack time.
- Add a mild retarder sparingly only if leveling issues appear.
- Always test on scrap to confirm no color shift or texture change.
Keep ventilation good and store mixed paint properly for best results.
Safe Accelerants Overview
Although additives can speed drying, choose only ones labeled compatible with Valspar interior formulas to protect finish and adhesion. You’ll want accelerants designed for latex or oil-based Valspar; they won’t alter paint color or compromise Brush selection. Test a small patch first, wait full cure time, inspect sheen and adhesion. Use manufacturer instructions and avoid overuse—too much can weaken film.
| Accelerant Type | Best For |
|---|---|
| Latex-compatible | Walls, trim |
| Oil-compatible | Doors, cabinets |
| Water reducer | High humidity |
| Fast-dry additive | Quick recoats |
| Natural options | Low VOC needs |
How to Read Valspar Labels for Drying Times
If you’re checking a Valspar can for drying times, focus on three key labels: “dry to the touch,” “recoat,” and “fully cured.” You’ll also note batch info useful for color mixing and paint storage consistency. Read times assume ideal temperature and humidity; adjust expectations if conditions vary.
- “Dry to the touch”: tells when surface won’t feel tacky.
- “Recoat”: indicates minimum wait before applying another coat without adhesion issues.
- “Fully cured”: defines when paint reaches maximum hardness and chemical resistance.
Follow those labels, keep cans sealed between uses, and store by batch for predictable results.
Measuring Touch Dry Accurately at Home
Because surface feel can be subjective, you should use a simple, consistent method to check whether Valspar paint is truly touch dry: gently press a clean fingertip against an inconspicuous area for one second, lift straight up, and look for tackiness, transfer, or indentation.
Repeat at several spots, comparing edges, corners, and large panels. Note any texture differences between brushed, rolled, or sprayed sections and observe color blending where wet and dry areas meet.
Record times and environmental conditions (temperature, humidity). If you get no tack, no transfer, and uniform texture and color, the paint is reliably touch dry.
When Is a Second Coat Safe to Apply?
When deciding whether to apply a second coat of Valspar, wait until the first coat is fully touch dry, free of tackiness, and shows no visible seams where wet and dry areas meet.
You’ll know it’s safe when the surface feels dry, the color blending looks uniform, and sheen consistency is even across the wall. Check in several spots and under different light angles.
- Inspect for tackiness and seam lines.
- Confirm color blending without streaks.
- Make certain sheen consistency before recoating.
If all three checks pass, you can apply the second coat confidently for a smooth, uniform finish.
When to Delay Recoating to Avoid Sheen and Adhesion Issues
Don’t rush a recoat just because the surface feels dry—wait for the paint’s full cure to avoid soft spots and poor adhesion.
Before you paint again, inspect the sheen: a patchy or glossy area can signal incomplete curing or contamination. If the sheen isn’t uniform, give it more time so your next coat sticks and looks even.
Wait For Full Cure
If you want your next coat to stick and look right, wait for the paint to fully cure rather than just feel dry to the touch. Curing guarantees adhesion, prevents sheen mismatch, and lets pigments settle so your chosen color options stay true.
With Valspar and many eco-friendly products, cure times depend on humidity, temperature, and film thickness. Don’t rush recoat; test discreet areas before committing.
- Wait manufacturer’s recommended cure time.
- Monitor room conditions—ventilate to speed cure.
- Lightly test adhesion with a fingernail before recoating.
Patience avoids peeling, blotches, and uneven gloss.
Check Surface Sheen
While the paint may feel dry, check the surface sheen before recoating to avoid adhesion problems and visible gloss differences. You should inspect under good light, angling your view to spot patchy gloss or tacky spots that signal incomplete drying.
Run your fingertip gently; if it sticks or leaves a mark, wait longer. Remember paint gloss varies with formulation and environment, so follow Valspar’s recommended recoat window but trust your inspection over timers.
If sheen looks uneven, sand lightly with fine grit and clean dust before applying the next coat to guarantee proper bonding and consistent finish.
Full Cure Signs: When Painted Surfaces Can Be Cleaned
Once the paint reaches its full cure, you’ll notice several practical signs that tell you it’s safe to clean and handle the surface without risking damage. You’ll see a consistent color matching across the wall and a stable sheen, especially with eco friendly finishes that often dry differently. Check these cues before washing:
- No tackiness when you press lightly with a clean finger.
- Hardened edges—scraped paint doesn’t lift or gum up.
- Even sheen and color under varied light, with no dark patches or smudges.
When all three are present, you can gently clean without harming the finish.
How Long Before Moving Furniture Against Painted Walls?
You should wait until the paint is dry to the touch before leaning anything against the wall, which usually takes a few hours for Valspar interior paints.
For furniture that will press or rub the surface, give the paint at least 24–48 hours to set, and up to a week for high-traffic items or darker colors that cure slower.
If you must move pieces sooner, use spacers or felt pads to prevent sticks or scuffs.
Dry Time Before Touching
Although Valspar’s interior paint may feel dry to the touch within a couple of hours, you should wait longer before moving furniture against the wall to avoid smudges, dents, or paint transfer. You’ll want to take into account color matching and primer selection when planning: fresh paint can still scuff or mark if disturbed.
Follow these practical steps before contact:
- Wait for surface cure—typically 24 hours for light contact.
- Test a hidden spot by pressing gently with a soft cloth.
- Allow full cure time for heavy furniture or adhesives as recommended on the can.
These steps reduce touch-up and finish damage.
Recommended Wait For Furniture
After you’ve tested a hidden spot and waited the initial surface-cure period, plan on keeping furniture off freshly painted walls for at least 24 hours for light contact and 72 hours for heavier pieces.
You’ll also consider humidity, temperature, and the paint’s specific Valspar formula; higher humidity or cooler temps extends cure time.
If you must lean a soft piece sooner, use felt pads or a gap to avoid sticking and scuffs.
Check that primer compatibility was correct to prevent adhesion issues and uneven sheen.
Finally, verify color matching after full cure before moving large items that could hide touch-ups.
How Long Before Hanging Art or Mirrors on New Paint?
When planning to hang art or mirrors, wait until Valspar’s paint has fully cured rather than just dry to the touch; that typically takes 7–30 days depending on the formula, humidity, and temperature. You’ll avoid nail pops, paint scuffs, and ruined finish by letting painters’ solvents off-gas and the film harden.
Consider these practical steps:
Consider these practical steps before hanging: measure, test for tackiness, and protect cured paint with padded hangers.
- Measure and mark mounting points after a light touch test confirms no tackiness.
- Use padded hangers or felt bumpers to protect cured surfaces and aid color matching.
- Prefer eco friendly options for adhesives and hanging strips to prevent chemical interaction.
Drying Time Differences for Colored vs. White Valspar Paints
If you’ve waited for paint to cure before hanging anything, note that color can affect how quickly Valspar dries and hardens: pigmented (colored) paints often take longer than white because the added dyes and pigments can slow solvent evaporation and alter film formation.
You’ll notice deep hues may feel tacky longer and show variations in sheen while lighter colors set faster. To keep color consistency, apply samples and watch drying in your room’s temperature and humidity.
Expect slight differences in paint odor duration too; stronger pigments can prolong scent. Plan extra dry time for saturated or custom-mixed shades.
How Multiple Coats Affect Final Curing Time
Although multiple coats speed up achieving full coverage, they also extend the paint’s final curing time because each layer adds thickness and traps solvents beneath newer layers. You’ll notice thicker builds take longer to fully harden, especially with deep colors or heavy color matching efforts that demand extra layers.
Choose eco friendly options to reduce volatile compounds, but remember lower-VOC paints can cure a bit slower. Plan drying intervals, and you’ll avoid recoat mistakes.
- Space coats to allow solvent escape and tack-free drying.
- Light sanding between coats improves adhesion and evens thickness.
- Monitor humidity and temperature to predict final cure time.
Mistakes That Cause Tacky or Gummy Finishes : And Fixes
If your Valspar paint stays tacky, check the basics: poor surface prep, high humidity, or applying coats too thickly can all cause gummy finishes.
You can fix this by sanding glossy or contaminated areas, improving ventilation or using a dehumidifier, and applying thinner, even coats.
After correcting the problem, allow extra drying time and recoat only when the surface is fully dry.
Poor Surface Preparation
When you skip proper cleaning, sanding, or priming, paint can sit tacky or turn gummy instead of curing correctly. You’ll often blame the paint, but surface contamination—dust, grease, or old finish—prevents adhesion and traps solvents.
Improper paint mixing leaves inconsistent binder distribution, too, so drying stalls. Fix it: clean with degreaser, sand glossy spots, and apply a compatible primer. Restore the right conditions before recoating.
- Remove contaminants thoroughly.
- Sand and feather edges for adhesion.
- Mix paint per label and strain before use.
High Humidity Conditions
Since moisture slows solvent evaporation, high humidity often leaves Valspar interior paint feeling tacky or gummy rather than drying properly. You’ll notice longer dry times and poor adhesion when air is saturated.
To fix it, use dehumidifiers or run air conditioning to reduce room humidity before and during painting. Increase ventilation with fans to speed solvent release without overspraying.
Wait longer between coats and test a small patch for tackiness before proceeding.
Proper humidity control preserves Color blending and aids Texture smoothing, giving a consistent, durable finish instead of a sticky, uneven surface that attracts dust and debris.
Overapplication Of Paint
Although you want full coverage, laying on too much Valspar interior paint will trap solvents and leave a tacky, gummy surface that never fully cures. You’ll notice tackiness when paint stays soft; don’t assume more time fixes overapplication. Thin coats dry properly, especially after proper color mixing and when old cans get shaken for even pigments.
If a layer stays gummy, remove it and recoat correctly.
- Wait: strip or sand tacky layers, wipe dust, then apply thin coats.
- Technique: use light, even passes; avoid heavy buildup.
- Storage: follow paint storage advice to keep solvents stable.
How to Salvage Uneven Sheen on Valspar Paint
If your Valspar paint dries with an uneven sheen, you can often fix it without stripping the whole surface. Start by identifying whether the problem’s caused by inconsistent application, surface contamination, or incompatible sheen levels. Then choose the right corrective method—cleaning, light sanding, or spot-recoating—to restore a uniform finish.
Inspect under good light, then clean greasy or dusty areas with mild detergent. Lightly scuff glossy patches with fine sandpaper, vacuum dust, and wipe.
When spot-recoating, feather edges and match color precisely—use proper color matching and avoid mixing old paint you’ll need to dispose of; follow local paint disposal rules.
Best Rollers and Brushes to Influence Finish and Dry Time
When you pick the right roller or brush, you’ll control not just application speed but also how the Valspar paint levels and dries—tools with denser nap and fine bristles lay down paint more evenly, reducing lap marks and speeding uniform drying.
Choose tools that suit surface texture and sheen to encourage consistent moisture release and better color blending. Match roller nap to wall texture; use high-quality synthetic brushes for trim to minimize visible brush strokes.
Clean tools between coats to avoid drag.
- Dense 3/8″ nap roller for smooth walls
- 1/2″ nap roller for slight texture
- Fine synthetic sash brush for edges
When to Use a Paint Conditioner With Valspar
You should add a conditioner when paint feels too thick for smooth application or when you’re working in hot, dry, or windy conditions that speed drying.
Check the paint type and viscosity—latex often accepts a conditioner, while specialty finishes may not—so follow Valspar’s guidelines.
Conditioning can help maintain open time and reduce brush/roller drag during tricky weather or fast applications.
When To Add Conditioner
Because paint thins unevenly as it ages or faces extreme temperatures, you’ll want to contemplate adding a conditioner when Valspar feels too thick to spread smoothly or shows brush marks, lap lines, or poor leveling during application. You’ll also notice issues with color blending and inconsistent paint texture across panels.
Add conditioner when:
- Coverage drags and brushstrokes remain after typical sanding and cutting-in.
- Paint resists self-leveling in moderate room temperatures and humidity.
- Multiple coats cause visible texture mismatch between previously painted and new areas.
Follow manufacturer ratios; test a small batch before treating a whole can.
Paint Types And Viscosity
If your Valspar feels too thick despite adding conditioner in small tests, consider how paint type and viscosity affect that decision: different sheens and formulations flow, level, and respond to thinners in distinct ways. You’ll pick conditioner differently for eggshell, satin, or semi-gloss because higher sheen resists leveling. Satin aids color blending more predictably; flat finishes forgive heavier thinning. Match conditioner to acrylic or alkyd bases, and adjust for brush techniques—nap size, stroke speed, and overlap matter. Use small test panels and note drying times before full application.
| Paint Type | Viscosity Note |
|---|---|
| Flat | Higher body |
| Satin | Moderate flow |
| Semi-gloss | Lower body |
| Alkyd/Acrylic | Base-sensitive |
Weather And Application Conditions
When conditions are cool, humid, or windy, you’ll want to contemplate a conditioner to help Valspar paint dry evenly and reduce brush marks. You’ll notice faster flow, extended open time, and fewer lap marks when humidity or temperature would otherwise set the paint too quickly or unevenly.
Conditioners aid color blending and support subtle texture enhancement without thinning the finish.
- Use with latex in low temps to prevent fast skinning and uneven sheen.
- Add for high humidity to improve leveling and reduce brush lines.
- Apply during windy drafts to slow drying and maintain uniform color.
Seasonal Scheduling: Painting Timelines by Month
Although paint dries faster in warm, low-humidity months, you’ll want a month-by-month plan to match Valspar’s drying times to local conditions and typical weather patterns.
In spring, aim for weekends with mild temps; open windows to control humidity and check color blending on small patches.
Summer offers quick dry times but watch high humidity spikes and maintain consistent paint texture.
Early fall provides stable conditions—schedule larger rooms then.
Late fall and winter need controlled indoor heat and dehumidifiers; extend drying and recoat intervals.
Adjust project scope by month, prioritize ventilation, and test small areas before full application.
Troubleshooting Long Cure Times in Basements and Bathrooms
Because basements and bathrooms trap moisture and limit airflow, you’ll often see Valspar interior paints taking much longer to cure there than in other rooms.
You can speed curing by controlling humidity, increasing ventilation, and choosing formulations designed for damp spaces.
Consider color matching to guarantee topcoats look right after slower cures, and explore eco-friendly options that resist mildew without harsh fumes.
- Run dehumidifiers or timed exhaust fans.
- Use low-VOC mildew-resistant primers and paints.
- Allow extra dry time between coats; test a small area before full application.
Professional vs. DIY Curing Expectations
When you’re comparing pros and DIYers, expect faster curing in professional jobs because they control temperature, humidity, and air circulation.
Your application technique matters too—sprayers and consistent thin coats cure more evenly than heavy brush or roller passes.
Remember professionals also use commercial-grade equipment and additives that can shorten cure time compared with typical DIY setups.
Dry Time Expectations
If you’re comparing pros to DIYers, expect different curing timelines. You’ll notice pros manage color blending and primer compatibility to speed predictable curing, while you might face slight delays from uneven coats or incompatible primers. Consider environmental control, coat thickness, and ventilation.
- Pros: controlled humidity, lean coats, consistent flash-off times.
- DIY: variable temps, occasional heavy coats, possible primer mismatches.
- Hybrid: follow label dry times, allow extra 24–48 hours for full cure if conditions aren’t ideal.
Plan for surface use after touch-dry but wait the full cure for cleaning or heavy use.
Application Technique Differences
Although professionals and DIYers both follow the same dry-time guidelines, the way you apply Valspar interior paint will noticeably affect curing. Professionals tend to lay down uniform coats, controlling thickness and overlap so solvents evaporate evenly; you’ll see consistent tack time and predictable recoat windows.
DIYers who rush, apply heavy coats, or skimp on prep can trap moisture, extending cure. Pay attention to color matching to avoid extra coats that prolong drying.
Also, choose the right brush selection for your finish—synthetic brushes for latex, angled sash brushes for trim—to spread paint smoothly and promote proper curing.
Professional Equipment Effects
Those application habits also intersect with the equipment you use: pros bring sprayers, airless pumps, and industrial fans that speed solvent evaporation and create thinner, more uniform films, while most DIYers stick to rollers and household fans that lead to thicker coats and slower cure.
You’ll notice faster tack-free times with professional gear; thinner wet films dry and allow quicker recoats. Your Color blending improves with spray and controlled airflow, while Brush techniques matter more when you roll.
Consider these trade-offs:
- Sprayers: fast, even, better color blend.
- Rollers: accessible, thicker film, slower cure.
- Brushes: detail work, needs skilled technique.
Safety and Ventilation When Accelerating Drying
When you speed up Valspar interior paint drying, keep safety and fresh air your top priorities. You’ll open windows, run fans, and use masks to avoid fumes while protecting any color blending or texture techniques you’ve applied. Monitor for overspray or dust that can mar finishes.
| Action | Purpose |
|---|---|
| Open windows | Ventilate fumes |
| Use fans | Increase airflow |
| Wear mask | Protect lungs |
Keep electrical heaters away from wet paint, avoid smoking, and let helpers know ventilation plans so drying accelerates safely without risking finish quality.
Measuring and Adjusting Humidity and Temperature at Home
If you want consistent, fast drying for Valspar interior paint, measure and control both temperature and humidity in the room; a small change can shave hours off dry time. You’ll use a hygrometer and thermostat to monitor conditions, aiming for 50–70°F and 40–50% RH for best curing.
Consistent climate also helps color blending and texture smoothing by preventing tacky layers or over-rapid skinning.
Consistent room climate improves color blending and texture, stopping tacky layers or overly fast skinning during drying
- Use a digital hygrometer and set HVAC or portable heater/dehumidifier.
- Increase ventilation with fans to equalize temperature.
- Pause if conditions swing; wait until readings stabilize.
Plan a Room Painting Timeline
Pick a start date that gives you enough warm, low-humidity days so paint can dry on schedule. Check Valspar’s recommended drying times and build in the recoat window—typically a few hours for latex and longer for oil-based formulas.
Pad the timeline for ventilation, touch-ups, and unexpected delays so you’re not rushed between coats.
Project Start Timing
Because you’ll want consistent conditions for drying and touch-ups, plan your start time around the day’s temperature, humidity, and light—begin early enough to finish cutting in and rolling before evening so coats can dry overnight and you can assess coverage first thing. You’ll coordinate ventilation and drying zones, account for paint branding recommendations, and prepare sample swatches for color blending tests.
Start on a day with stable weather and low indoor humidity. Schedule breaks between tasks to inspect edges and drips under natural light. Prioritize busiest walls first so you’re not blocking access later.
- Prep room early
- Test swatches
- Follow label times
Drying And Recoat Schedule
When you plan your room timeline, map drying and recoat windows around the paint’s stated tack, dry-to-touch, and recoat times so you won’t trap solvents or ruin the finish.
You’ll schedule first coats when humidity and temperature match label guidance, then factor in extra cure time for deep colors or heavy color mixing.
Open windows or run fans to reduce paint odor and speed solvent evaporation, but avoid drafts that cause dust adhesion.
Plan for at least two hours between thin coats for most Valspar interior latex, longer for oil-based or low-VOC formulas, and test a small area before full recoating.
Estimate Total Project Time: Prep Through Cure
Before you start rolling, map out every phase—from surface prep and priming to dry times between coats and the final cure—so you know how long the whole project will take and can schedule work in realistic blocks. Include color mixing and paint storage time when planning; tinting adds minutes, conditioning and return to room temperature can add hours. Estimate door/window protection, sanding, and tack-cloth steps. Anticipate manufacturer recoat windows plus full cure.
- Prep and priming: 2–6 hours active, plus primer dry.
- Coats and recoat waits: 4–24 hours depending on temp/humidity.
- Cure and cleanup: 24–72 hours.
Answers to Common Valspar Drying Questions
Now that you’ve lined up prep, priming, coats, and cure in your schedule, you’ll probably have specific questions about how Valspar paints behave day-to-day.
You’ll want to know dry-to-touch versus recoat times, how humidity and temperature speed or slow drying, and when odor fades.
For color blending, wet edges matter—work quickly to avoid lap marks.
Check paint texture after the first coat; it should even out as it cures, but heavy brush strokes or roller stipple may need light sanding before recoat.
If unsure, test a small patch and follow recommended dry times on the can.
Final Checklist Before Declaring a Valspar Job Complete
Although the paint may look finished, you should run a concise final checklist to confirm coverage, adhesion, and cleanup before declaring the job complete.
Although the paint may look finished, run a quick final checklist to confirm coverage, adhesion, and cleanup.
Walk the room under varied light, checking for missed spots, uneven color blending, drips, and roller texture.
Test adhesion by fingernail-scratching an inconspicuous area.
Verify trim and edges for crisp lines and proper brush techniques; touch up with a fine brush if needed.
Clean tools, remove tape after paint skins, and ventilate until odor dissipates.
Photograph the results for reference and note any follow-up touch-ups or curing time before moving furniture back in.
Frequently Asked Questions
How Does Paint Colorant Concentration Change Drying Behavior?
You’ll find higher colorant concentration slows drying because pigments and extender particles increase viscosity, causing color consistency shifts and drying variance; lower concentration dries faster and more evenly, so you’ll adjust formulation for desired finish and timing.
Can Valspar Paint Be Safely Applied Over Oil-Based Finishes Without Sanding?
A neighbor once slapped latex over old enamel and it peeled; you shouldn’t. You’ll need oil based compatibility checks and thorough surface prep requirements—cleaning, deglossing or sanding—before applying Valspar to oil-based finishes for reliable adhesion.
Do VOC Levels Affect Long-Term Adhesion or Only Odor and Drying?
They affect more than odor longevity; VOC impact can influence long-term adhesion by altering resin chemistry and cure quality, so you’ll notice differences in durability, not just smell and drying times over months or years.
Will Heat Sources Like Space Heaters Cause Blistering or Fish-Eye Defects?
Yes — using space heaters too close can cause heat impact that leads to paint blistering or fish-eye defects; you’ll warp the drying rate, trap solvents, and create surface tension problems, so avoid intense localized heat during curing.
How Does Paint Age in Unopened Cans Affect Future Dry and Cure Times?
Old paint is like a clock with sticky hands; you’ll find paint thickens, slows dry and cure, and risks separation. Proper paint storage preserves shelf stability, but aged, poorly stored cans’ll prolong drying and harm final film.
Conclusion
You’ve got the timeline and variables—now trust the process. Valspar typically feels dry to the touch in 30 minutes to an hour, is safe to recoat in 2–4 hours, and reaches full cure in up to 30 days depending on sheen, coat thickness, and surface. Keep humidity and temperature in check, sand between coats when needed, and give furniture and fixtures time to re-enter the scene like guests arriving after the party—slow and steady wins the finish.