How to Fix Dried Paint Drips on Walls and Trim
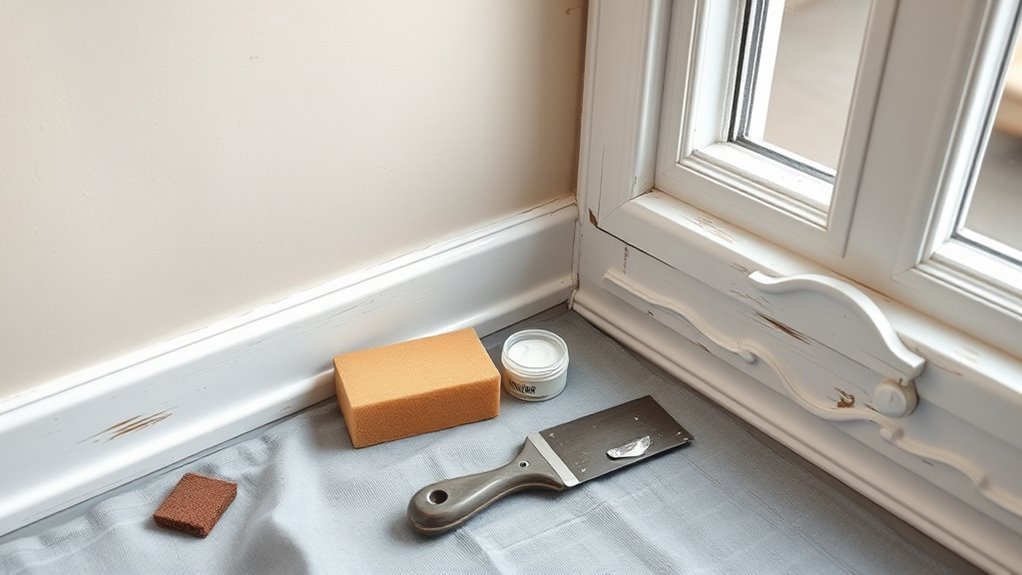
You can fix small dried paint drips on walls and trim with a utility knife, fine sandpaper, primer, and touch-up paint. Score and lift the drip gently with the blade to avoid gouging, then sand smooth until flush. Wipe away dust, spot-prime any bare areas, and feather new paint into the surrounding surface for an invisible blend. If you want step-by-step tips on testing paint type, evaluating damage, and preventing future drips, keep going for more.
Quick Way to Remove Small Dried Paint Drips

If you spot a small dried paint drip, don’t panic — you can usually remove it quickly with just a utility knife and some light sanding.
First, score the drip’s edges gently and lift the excess with the blade, keeping pressure light to avoid gouging.
Gently score the drip’s edges and lift the excess with a light-touch blade to avoid gouging the surface.
Smooth the area with fine-grit sandpaper until flush.
Wipe away dust, prime if the substrate shows, then touch up with matched paint.
Check color matching and paint sheen under the room’s usual lighting before applying.
Feather the repair into surrounding paint to hide blends, letting each coat dry fully between steps.
How to Identify Dried Paint Drips on Walls and Trim
Look closely for raised bumps that stand out from the wall or trim—those are usually dried paint drips.
Run your hand lightly over the surface to feel differences in texture compared with the surrounding finish.
Also check for irregular gloss or brush marks where the paint finish looks uneven.
Visible Raised Bumps
When paint drips dry, they often leave small raised bumps that you can feel with your fingertips and see from a few feet away. Run your hand over the area to locate irregularities; bumps cast tiny shadows that reveal their edges.
Check nearby surfaces for surface contamination that prevented smooth leveling—dust or grease can cause droplets to bead. Note whether bumps lift or flake, since poor paint adhesion indicates a problem beyond mere aesthetics.
Mark affected spots before repair so you don’t miss any. Photograph the bumps for reference, then decide whether sanding and spot-priming will restore a uniform finish.
Texture And Paint Finish
Though small drips can blend in at first glance, their texture and finish give them away—run your hand lightly across the surface and you’ll feel raised edges or uneven sheen that breaks the wall’s uniformity.
When you inspect closely, differences in paint texture are obvious: drips sit higher, create ridges, or scatter tiny nodules.
Shine varies too—those spots catch light differently because the finish sheen is thicker where paint pooled. Use a flashlight at an angle to reveal inconsistent gloss.
Noting these clues helps you map drip locations before sanding, feathering, or repainting for a seamless result.
How to Test Paint Type Before You Start
Curious which paint you’re dealing with? Start by examining paint color and surface texture under good light—glossy paints reflect more. Rub a hidden area with a damp white cloth: if pigment lifts, it’s water-based; if not, try a small dab of rubbing alcohol on a cotton swab.
If alcohol softens the finish, it’s latex; if it only affects topcoat or nothing changes, it’s oil-based. For extra confidence, press a clear tape patch, pull sharply: flaky lifts hint at poor adhesion or old oil finish.
Label your findings before sanding or priming so you choose the right remover and primer.
How to Check If Drips Damaged Drywall, Plaster, or Trim
Now that you know how to identify the paint type, check whether those dried drips did more than look messy by inspecting the substrate closely. Run your hand gently to feel raised edges or soft spots—drywall or plaster that flakes, crumbles, or dents indicates seepage or adhesion failure.
On trim, look for raised grain, swelling, or splitting wood. Tap areas to hear hollow sounds. Note any discoloration that affects color matching or alters paint sheen; document locations and take photos for reference.
If damage is limited, you can spot-repair; significant structural issues will need proper patching before repainting.
When to Sand Drips vs. Strip Them
If the drip is just a raised ridge of paint that’s well-adhered, you’ll usually sand it smooth and touch up the spot.
If the drip has multiple thick layers, peeling edges, or solvent-softened paint, you’ll need to strip it down to a sound surface first.
Choose sanding for minor blemishes and stripping when the buildup or damage is too deep to correct by abrasion.
When Sanding Is Better
When a drip’s edges are thin and the surrounding paint is well-adhered, sanding is usually the smarter, faster choice—you can feather the bump down and blend it with the existing finish without stripping an entire area.
You’ll want to assess paint type, surface texture, and whether underlying layers involve old lead paint; follow lead safety protocols if needed.
Use fine-grit sandpaper, a sanding block, and light pressure to avoid gouging.
After smoothing, clean dust, prime exposed substrate, and touch up using careful color mixing to match sheen and hue.
Sanding saves time and preserves most of the original finish.
When Stripping Is Necessary
How do you know stripping is necessary instead of sanding? If drips are thick, multiple layers, or have bubbled, you’ll need a stripper. Also strip when the finish is oil-based and sanding would clog or release fumes; check the paint container label for type.
Weather conditions matter: high humidity or cold can keep older drips tacky, making chemical removal safer than aggressive sanding. Stripping preserves delicate trim profiles and avoids deep gouges.
Test a small area first, vent the room, and use proper PPE. After stripping, neutralize and clean thoroughly before repainting to ensure adhesion and a smooth finish.
Tools for Removing Dried Paint Drips

Before you start scraping or sanding, gather the right tools so you can work cleanly and avoid damaging the surface. You’ll need a flexible putty knife (1–2 inch) for thin drips and a stiffer 3–4 inch knife for heavier blobs.
Add sanding pads (fine and medium) and a sanding block to match wall texture. Keep a utility knife for raised edges, a soft-bristle brush to clear dust, and a vacuum with a brush attachment.
For touch-ups, have matching paint ready—consider color mixing notes—and small angled brushes. Finally, use tack cloths to remove residual particles before repainting.
Essential Safety Gear and Surface Protection Tips
Before you start scraping or sanding, put on protective clothing—long sleeves, gloves, and eye protection—to keep paint chips off your skin and out of your eyes.
Use a proper respirator or mask when working with solvents or sanding to avoid inhaling dust and fumes.
Cover floors and furniture with drop cloths or plastic sheeting and tape edges to prevent accidental splatters.
Protective Clothing Essentials
Want to keep paint off your skin and your favorite clothes? You should assemble basic protective gear: coveralls or a dedicated painting smock, long sleeves, and sturdy shoes.
Choose disposable or washable coveralls for easy cleanup and prioritize clothing safety by avoiding loose fabrics that can snag.
Use gloves—nitrile for solvents, cotton for latex—to protect hands while letting you grip tools.
Add a brimmed cap or hood to shield hair and a lightweight apron for trim work.
Keep a spare set of clothes nearby to change out of contaminated garments promptly and reduce spread of paint around your workspace.
Respiratory Protection Tips
Along with keeping paint off your clothes and skin, you need to protect your lungs—especially when sanding, stripping, or spraying. Wear an N95 or respirator with appropriate cartridges; test fit and check seals. Monitor air quality and use ventilation strategies like open windows and box fans to direct fumes outside. Take breaks in fresh air and replace filters regularly. Keep children and pets away until odors subside.
| Item | Purpose |
|---|---|
| N95 / Respirator | Particle and vapor protection |
| Fans | Create airflow |
| Air quality monitor | Detect particulates/fumes |
| Replacement filters | Maintain effectiveness |
Floor And Furniture Covering
While you’ll be focused on the walls and trim, protecting floors and furniture is just as important. Cover high-traffic areas with drop cloths or rosin paper and wrap furniture in plastic or canvas to prevent drips, dust, and paint transfer.
Set up weighted floor protection to stop shifting and tape edges to baseboards so paint won’t seep underneath. Move small pieces out or cover them completely; use furniture covering that breathes if items stay wrapped for days.
Keep a dedicated bucket and scrub brush nearby for quick cleanup of accidental drips. Inspect coverings regularly and replace any saturated sections to avoid stains.
Best Sandpaper Grits for Smoothing Paint Drips
When you’re smoothing paint drips, choosing the right sandpaper grit makes the job faster and prevents visible sanding marks. Start with 120–150 grit to knock down high drips without gouging; it’s safe on most latex and oil paints so you can preserve paint color and avoid deep scratches.
Follow with 220–320 grit to refine the area and blend edges into surrounding finish consistency. For heavy enamel or gloss, begin at 100 grit, then progress to 220.
Light touch, even strokes, and checking progress often prevents over-sanding and keeps the repair invisible.
How to Use a Sanding Block for Even Results
Pick a sanding block with the grit you chose earlier so you get consistent abrasion across the drip.
Hold the block flat and sand gently with the grain to avoid scratches and feather the edge of the repair.
Check your progress frequently so you stop as soon as the surface is smooth.
Choose The Right Grit
Start with a medium grit—typically 120–150—for removing dried paint drips without gouging the surface. Use that to level bumps, then switch to finer grits (180–220) to smooth before touch-up.
Hold a sanding block flat, apply even pressure, and check progress often so you don’t sand into underlying substrate.
Match your final sanding to the paint sheen you’ll apply; glossy finishes need smoother prep.
After sanding, wipe dust and assess color matching under good light—sometimes a light scuff is enough before repainting.
Replace abrasive when worn to keep results consistent and avoid uneven surfaces.
Sand With The Grain
For best results, rub the sanding block along the wood or grain direction so you blend the repaired area into the surrounding surface; this prevents visible cross-sanding marks and keeps the finish consistent. Use light, even strokes and check often so you don’t over-sand.
Start with the grit you chose earlier, then finish with a finer grit for a smooth feathered edge. Wipe dust before you test paint.
Good sanding helps color matching by avoiding texture differences that reveal shade shifts. When satisfied, pick primer selection that suits the topcoat and substrate, then repaint for an invisible repair.
How to Use a Detail Sander on Trim Safely
Because trim is often narrow and detailed, using a detail sander lets you remove dried paint drips precisely without damaging profiles or adjacent surfaces. Hold the sander flat and use light pressure; let the pad do the work so you don’t alter molding shapes.
Work with the grain where visible, matching brush strokes and feathering edges to blend into the surrounding paint color. Keep the pad moving to avoid gouges, and switch to finer grit as the drip disappears.
Vacuum dust frequently and wipe with a tack cloth before repainting. Wear eye and dust protection, and secure drop cloths to protect floors.
When to Use a Scraper Instead of Sanding
While sanding works well on gradual imperfections, reach for a flat or flexible scraper when paint drips are thick, brittle, or have formed sharp ridges that sanding would merely gum up. You’ll avoid clogging sandpaper and damaging adjacent wall textures by lifting chunks cleanly.
Use light, controlled strokes, keeping the blade nearly flat to prevent gouges. Test a small area first to see how the underlying surface reacts, especially after recent paint mixing or multiple coats.
After scraping, feather edges with fine-grit sanding only if needed. Clean dust, prime exposed areas, and repaint for a seamless finish.
How to Remove Drips With a Razor Blade Safely
If scraping didn’t remove a thin, stubborn ridge without harming the surrounding paint, reach for a razor blade to shave the drip down flush. You’ll do precise paint removal by holding the blade at a low angle and using short, controlled strokes.
Take safety precautions: wear gloves and eye protection, and guarantee good lighting and a steady hand. Work slowly to avoid gouging. Clean the blade and surface as you go to see progress, and wipe away dust before touching up.
- Use a new, sharp blade.
- Hold blade at 30° or less.
- Keep strokes toward the drip edge.
- Stop if paint peels.
How to Soften Stubborn Drips With Heat Without Damage
When heat softens a dried paint drip, you can gently reshape or remove it without cracking the surrounding finish. Use controlled, low-temperature warming so you don’t melt glossy or plastic trim.
Position a hair dryer or heat gun on the lowest setting about 6–8 inches away, moving constantly to avoid surface melting. Test a hidden spot first.
As the paint becomes tacky, press with a silicone spatula or soft cloth to smooth or lift the drip. Let the area cool fully before sanding tiny edges with fine-grit paper.
Finish by cleaning dust and repainting or touching up as needed.
Use Chemical Paint Remover Safely on Small Drips
If a small drip won’t come off with scraping, pick a chemical remover made for the paint type you’re dealing with.
Wear gloves, eye protection, and guarantee good ventilation, and test the remover on an inconspicuous spot first.
Apply it sparingly with a cotton swab, work carefully, and neutralize or rinse according to the product instructions.
Choose Appropriate Remover
Because small drips respond differently than large patches, you should pick a chemical remover formulated for the substrate and paint type before you work. Match remover strength to the paint color and finish; darker or glossy paints may need gentler solvents to avoid staining or sheen changes.
Consider wall texture—flat, eggshell, or textured surfaces absorb differently. Test remover on an inconspicuous spot, wait, and inspect.
- Identify paint type (latex, oil, enamel).
- Choose remover labeled for that paint and your surface.
- Prefer gel for vertical drips to limit run-off.
- Confirm manufacturer compatibility with your wall finish.
Follow Safety Precautions
Before you start, protect yourself and the room: wear chemical-resistant gloves, eye protection, and a respirator rated for organic vapors. Ventilate the area by opening windows or using a fan to blow fumes outside.
Use safety gloves even for brief contact; chemicals can soak through thin liners. Test remover on an inconspicuous spot to confirm it won’t damage the finish.
Keep a fire extinguisher nearby and store solvents in sealed containers away from heat.
Work with a well-lit, uncluttered workspace. Wipe spills immediately, and dispose of rags safely.
If you feel dizzy or irritated, stop and get fresh air.
Eco-Friendly Options for Removing Paint Drips
When you want to remove paint drips without harsh chemicals, several eco-friendly methods work well and are gentle on both your home and the environment. You’ll find eco friendly solvents and natural removal methods that cut through fresh or dry drips without toxic fumes. Test any method on an inconspicuous spot first, work gently, and rinse thoroughly.
- Vinegar and warm water: soften latex drips, scrape carefully.
- Baking soda paste: mildly abrasive for small spots, scrub with a cloth.
- Citrus-based cleaner: effective on oil-based paints, follow directions.
- Rubbing alcohol: removes stubborn spots; ventilate mildly.
How to Feather Edges for Invisible Repairs
Start by sanding the repaired area until the surface is smooth and feathered into the surrounding surface.
Apply thin layers of joint compound or paint, letting each coat dry fully before adding the next.
Blend your final coats with a light feathering stroke so the repair disappears into the original finish.
Sand Smooth Transitions
If you want an invisible repair, sand the drip area so the patched paint blends seamlessly into the surrounding surface. Use fine-grit sandpaper and work feathering strokes outward until edges are smooth and level.
Check color matching and paint sheen before finishing so the repair won’t reveal itself under light. Clean dust, then inspect under angled light.
- Lightly sand center, then outward feathering.
- Blend edges until texture matches.
- Wipe with a tack cloth; let dry.
- Reinspect for sheen and color coherence before painting.
Apply Thin Layers
After sanding the area smooth, apply paint in thin, overlapping strokes to feather the edges so the repair disappears into the surrounding finish.
Work outward from the repaired spot, using a small brush or foam brush and minimal paint on the tip to avoid ridges.
Let each thin layer dry fully before adding the next; build coverage gradually until texture and color match the wall.
Pay attention to color matching and replicate the original paint sheen by testing a tiny area first.
Clean brush strokes and controlled layering keep the repair invisible without heavy buildup or visible brush marks.
Blend Paint Feathering
When you feather paint edges, you’re blending the new coat into the old so the repair vanishes instead of standing out. You’ll sand the drip area smooth, wipe dust, and test color matching on a hidden strip.
Use primer selection only if the patch absorbs differently or the old finish is glossy. Load a small brush, thin the paint slightly, and sweep from the center outward with light, overlapping strokes. Practice pressure control so edges taper.
- Sand and clean
- Test color matching
- Choose primer selection if needed
- Feather with thin, overlapping strokes
Choosing the Right Filler for Trim Drips
Because trim sits in plain sight, you’ll want a filler that matches its material, durability, and the final paint finish. Choose between wood filler for solid trim, latex-based for painted MDF, or epoxy for high-impact areas.
Match paint color considerations: pick a filler that accepts primer and paint evenly so the repaired spot blends once topcoated.
Check Filler drying times and shrinkage on the label; faster isn’t always better if it cracks.
For stained trim, use stainable fillers.
Avoid soft spackles on doorstops or floors.
Test a small area to confirm adhesion and look before completing the repair.
How to Apply Wood Filler on Trim Drip Spots
If you’re dealing with dried paint drips on trim, start by cleaning and gently sanding the area so the wood filler will bond properly. Remove loose paint, dust, and glossy finish with fine-grit sandpaper.
If you have dried paint drips on trim, clean and lightly sand so filler will adhere properly.
For wood filler application, choose a high-quality filler matched to your trim material. Use a putty knife to press filler into depressions, overfilling slightly.
Let it cure fully, then sand flush with surrounding trim. Finish with primer and matching paint for seamless trim drip repair.
- Clean and sand
- Apply filler with putty knife
- Cure and sand smooth
- Prime and paint
How to Use Spackling on Drywall Drips
Start by scraping away any loose paint or crusted drip edges and lightly sanding the area so spackling will adhere; you’ll then clean dust, apply spackling with a putty knife, feather edges, and sand smooth when set. Use proper spackling techniques for drywall repair to avoid bulges. Protect nearby trim and prime patched spots before repainting.
| Step | Purpose |
|---|---|
| Scrape | Remove weak material |
| Sand | Create adhesion |
| Apply | Fill depressions |
| Feather | Smooth gradation |
| Sand finish | Ready for paint |
Drying and Curing Times for Fillers and Spackle
When you apply spackle or a filler, know that drying and curing aren’t the same thing: drying removes surface moisture and can take 15 minutes to several hours depending on product and thickness. Curing is the chemical hardening that can take days.
You’ll choose fast-dry for thin repairs and longer cure times for deep fills. Consider paint color and wall texture when timing final coats; textured surfaces may hide slight shrinkage, while color matching demands full cure.
- Follow manufacturer drying times.
- Allow full cure before priming.
- Thin layers dry faster than deep fills.
- Control humidity and temperature.
How to Sand Filled Areas Without Overcutting
After your filler has cured, sanding shapes the repair and blends it into the surrounding surface without removing too much material. Start with a medium-grit block or sanding sponge to level high spots, keeping strokes along the surface to avoid gouging.
Switch to finer grit for feathering edges until the patch is smooth and flush. Check progress with raking light and touch—if the area hollows, you’ve overcut. Minimal, controlled passes prevent that.
Once smooth, clean dust thoroughly; this helps accurate color matching later and guarantees your primer selection performs evenly without seal failures.
How to Prime Repaired Areas for Repainting
Why bother with primer? You want repaired spots to blend and hold paint. After surface preparation—cleaning, sanding, and removing dust—you’ll choose priming techniques suited to material and stains.
Why prime? To blend repairs and ensure paint adhesion—prep well, then use primers matched to surface and stains.
Apply thin, even coats; let each dry fully. Seal patched drywall or trim joints to prevent flash-through and uneven sheen.
- Use a stain-blocking primer for tannin or repair compound.
- Feather primer out beyond the repair for smooth blending.
- Sand lightly between coats for adhesion and uniform texture.
- Match primer type to topcoat (latex vs. oil) to guarantee proper bonding.
How to Match Paint Finish After a Repair
If you’re aiming for an invisible repair, match not only color but sheen and texture too. Assess the existing surface under natural light, noting gloss level and tactile texture.
Use basic color theory to account for fading or undertones that make a perfect hue look off. Test small patches with the desired finish, let them cure, and compare at different times of day.
Choose matching sheen (flat, eggshell, satin, semi-gloss) to maintain finish durability and cleanability. If texture differs, replicate with light stippling or thin-skimming compound before painting.
Document brands and sheen for future touch-ups.
Touch-Up Painting Techniques for Walls
When you tackle touch-ups on walls, work methodically so repairs blend seamlessly with surrounding paint. Prep by sanding and cleaning the spot, then feather edges for a smooth match. Use small amounts of paint and test before applying.
- Match color: use samples and adjust via careful color mixing to mimic wall tones.
- Thin coats: apply multiple light layers, letting each dry fully to avoid drips.
- Edging: use a small roller or pad to replicate texture without obvious brush marks.
- Store leftovers: label and seal cans for proper paint storage and future touch-ups.
Brush Techniques to Blend Trim Repairs
Although trim shows every brushstroke, you can make repairs disappear by using the right brush and controlled strokes. Choose a high-quality sash or angled brush sized to the trim profile so you load paint evenly and maintain a thin, smooth film.
Feather each stroke outward from the repair, keeping wrist motion steady and overlapping wet edges. Match sheen and color carefully to avoid visible patches; test in an inconspicuous spot.
Use paint formulated for paint durability on trim to resist wear. Clean and lightly sand between coats, and allow proper dry time before light use to ensure seamless blending.
How to Retouch High-Gloss Trim Without Brush Marks
When retouching high-gloss trim, you’ll want to feather the edges so the new paint blends into the old.
Use a high-quality brush, apply thin coats, and work with light strokes to avoid leaving marks.
Let each coat level and dry before adding the next so the finish stays smooth.
Feathering The Edges
Since high-gloss trim shows every stroke, you’ll want to feather the edges to blend new paint into the old without leaving brush marks. Before you start, confirm color matching and paint sheen so the repair won’t stand out.
Lightly sand the drip area, wipe with a tack cloth, and apply thin, even coats. Work beyond the drip edge, feathering each pass so strokes fade into existing finish.
- Sand smooth with fine grit
- Clean residue and dust
- Thin coats, brush minimally
- Light final pass with barely loaded brush
Let each coat cure before evaluating.
Use A High-Quality Brush
If you want a flawless finish on high-gloss trim, start with a high-quality brush designed for smooth surfaces—synthetic filament brushes with flagged tips hold and release paint evenly so you won’t leave streaks or bristle marks.
Choose the right width for the trim profile, and inspect the ferrule for secure bristles.
Keep your brushes clean between uses to prevent dried bits that cause imperfections; proper paint storage extends brush life and keeps color mixing consistent from touch-up to touch-up.
Work confidently, loading the brush modestly and maintaining steady pressure so you blend repaired areas into the surrounding sheen.
Thin Coats, Light Strokes
Now that you’ve got a quality brush and clean tools, apply paint in thin coats and use light, steady strokes to avoid brush marks on high-gloss trim. You’ll control paint consistency and minimize visible texture by loading the brush sparingly, wiping excess, and keeping strokes aligned with the trim’s grain. Work quickly between wet edges to blend, and sand very lightly between coats if needed.
- Load brush lightly for even coverage.
- Use long, steady strokes toward the edge.
- Maintain smooth paint consistency; thin if necessary.
- Wait proper dry time, then inspect and spot-fix.
How to Use Mini Rollers for Seamless Touch-Ups
Wondering how to get a flawless blend between your repaired spot and the surrounding wall? Use mini rollers for seamless touch ups: they match texture and distribute paint evenly.
Prep the area by sanding the drip smooth and wiping dust.
Sand the drip smooth, then wipe away dust for a clean, ready surface before touching up.
Load the mini roller lightly—avoid dripping—then roll excess off on a tray.
Feather paint from the repair into the surrounding area with short, even strokes, overlapping existing finish.
Work quickly while paint’s wet to avoid lap marks.
If needed, apply a second thin coat after drying.
Clean the roller promptly to preserve nap and performance.
How to Fix Drips on Textured Walls
Because textured surfaces hide flaws differently than flat walls, you’ll need a slightly different approach to remove paint drips without wrecking the texture. Start by softening the drip with a damp sponge, then gently scrape raised paint with a flexible putty knife.
Use textured wall techniques to match patterns when you rebuild small areas, and follow paint adhesion tips so patch paint bonds.
- Soften drip, dab—don’t saturate.
- Scrape carefully along texture grain.
- Feather patches with stipple or sponge.
- Prime tiny repairs, then touch up with matching texture.
How to Fix Drips on Smooth Plaster Walls
On smooth plaster, start by evaluating how severe the drip is—tiny bumps can be spot-fixed, but larger ridges may need more work.
You’ll gently sand the drip down until it’s flush with the surrounding plaster. Then feather the edges with fine sandpaper so the repair blends smoothly before repainting.
Assess Drip Severity
Before you grab sandpaper or a scraper, take a close look at each drip to judge how much surface prep it really needs. You’re checking how raised and visible the drip is against the smooth plaster. Note color contrast and paint sheen differences that make drips obvious under room light.
Use this quick checklist to assess severity:
- Tiny bump, matches color and sheen — cosmetic.
- Small ridge, slight sheen change — light prep.
- Noticeable lump, visible shadow or color shift — moderate prep.
- Large drip, cracking or pronounced sheen mismatch — extensive prep and possible spot priming.
Sand And Feather
Now that you’ve judged how severe the drips are, it’s time to sand and feather them so the surface will read as smooth as the surrounding plaster. Use fine-grit sandpaper to level drips, working outward to feather edges into the surrounding wall. Keep pressure light and check frequently so you don’t gouge plaster.
Brush or vacuum dust, then apply a thin skim of joint compound if needed; sand again when dry. Prime repaired spots before repainting to guarantee even color matching and consistent paint sheen.
Finally, repaint with thin, even coats, blending into surrounding area for an invisible repair.
How to Fix Drips on MDF and Painted Trim
When you spot dried drips on MDF or painted trim, act carefully to preserve the smooth finish while removing the blemish. Lightly sand the drip with fine-grit paper, feathering edges so the profile stays even. Clean dust with a tack cloth.
If bare MDF shows, apply a thin coat of primer—primer selection matters to seal and prevent bleed. Match paint using a swatch or sample for accurate color matching. Repaint with thin, even coats, sanding between if needed. Finish with a final light buff for uniform sheen.
- Sand
- Clean
- Prime/Match
- Paint
How to Fix Drips on Stained or Varnished Trim
First, identify whether the trim has a stain, varnish, or polyurethane so you know how fragile the finish is.
Gently remove the paint drip with a plastic scraper and a mild solvent, taking care not to abrade the stained surface.
If the finish is damaged, sand and refinish only the affected area, then blend the stain and topcoat to match the surrounding trim.
Assess Finish Type
Because stained or varnished trim reacts differently than painted surfaces, you’ll need to identify the finish before you touch the drip. Check gloss level, stain penetration, and any topcoat sheen; that guides your approach without damaging wood.
Consider how previous Color mixing or varnish sheens affect repair visibility, and plan tools accordingly — your Brush selection matters for blending and touchups.
- Inspect sheen: satin, semi, or high gloss.
- Test a hidden spot with mild solvent.
- Note whether stain shows through or is surface film.
- Photograph the area for color-match reference before proceeding.
Gentle Paint Removal
Now that you’ve identified the finish and documented color and sheen, you can remove paint drips with methods that protect stained or varnished wood. Work gently: use a soft plastic scraper or fingernail to lift edges, then a fine razor held nearly flat for stubborn bits.
Test a solvent like mineral spirits on an inconspicuous spot to ensure it won’t soften the varnish. Blot—don’t rub—and pause to let paint drying state guide you; fully cured spots need more mechanical removal, tacky spots respond to solvent.
Keep a damp cloth and light sanding pad handy for minimal surface adjustment.
Refinish And Blend
When a drip has been removed from stained or varnished trim, you’ll often need to refinish and blend the area so the repair disappears into the surrounding finish. Start by lightly sanding the spot to smooth edges and remove finish remnants. Clean dust, then test stain and varnish on scrap or an inconspicuous spot to match tone and paint sheen.
Apply thin coats, letting each dry fully, and feather edges.
- Sand lightly to blend contour.
- Wipe clean with tack cloth.
- Apply matching stain in thin layers.
- Top with appropriate sheen varnish, feathering edges to avoid color contrast.
Rolling vs. Brushing for Drip-Free Trim Work
If you want crisp, drip-free trim, choosing between a brush and a mini roller comes down to the finish you’re after and how you control your paint load.
For smooth, ultra-flat trim or tight corners, use a high-quality angled brush; it lets you feather edges and maintain color matching and paint sheen consistency.
For ultra-flat trim and tight corners, rely on a quality angled brush to feather edges and keep sheen consistent.
A short-nap mini roller speeds coverage on wider casings and reduces visible brush marks, but won’t handle crevices as cleanly.
Whichever tool you pick, work in short strokes, move with the grain, and inspect under good light so you catch runs before they set.
Paint Thinning and Load Control to Avoid Drips
Because paint that’s too thin or too heavy behaves the same way—running—you need to control both viscosity and load to prevent drips. You’ll check paint consistency and avoid over-thinning; add only manufacturer-recommended reducers.
Match brush selection to paint body: use a firmer brush for heavier paint, a softer one for thinner finishes. Load the brush modestly and tap off excess; don’t overload the tip.
Keep a wet edge and work smaller sections so paint won’t pool.
- Stir thoroughly for uniform viscosity.
- Test on scrap before applying.
- Wipe brush heel to control load.
- Adjust technique, not dilution.
How to Apply Multiple Thin Coats Properly
Although it’s tempting to slap on a thick coat for faster coverage, applying multiple thin coats gives a smoother, stronger finish and reduces drips, laps, and brush marks. Work in light, even strokes, let each thin layer dry to touch, then sand lightly between coats for adhesion. Check color matching on a small patch before continuing. Thin coats improve paint durability and let you control opacity without runs. Use a soft brush or roller nap appropriate to the surface. Visualize progress:
| Coat | Look | Action |
|---|---|---|
| 1 | Sheer | Light stroke |
| 2 | Even | Feather edges |
| 3 | Solid | Final sand |
| 4 | Smooth | Topcoat finish |
How to Maintain Proper Drying Conditions
When you control temperature, humidity, and airflow, paint dries evenly and you’ll avoid sagging, tacky spots, or hidden drips. You’ll also preserve sheen and color; ignore painting myths that promise faster cures. Rely on recommended conditions on the can and consider color psychology only when scheduling—darker hues absorb heat and may dry differently.
- Keep room 50–75°F and stable.
- Maintain 40–50% humidity with a dehumidifier or humidifier.
- Run fans or ventilate to remove solvents without blasting paint.
- Stagger coats so each layer gets full dry time; test tack before recoating.
These steps cut defects and save touch-ups.
Quick Fixes for Small Drips Before Guests Arrive
If you spot a tiny dried drip right before guests arrive, you can quickly sand and wipe it smooth so it blends with the surrounding finish.
For small spots, a careful touch-up with matching paint will hide the blemish without a full repaint.
If time’s really tight, reposition a piece of furniture or decor to conceal the area until you can fix it properly.
Quick Sand And Wipe
Before your guests arrive, you can quickly sand down small paint drips and wipe the area clean to make them nearly invisible. Grab fine-grit sandpaper, sand the drip until flush with the surface, then wipe with a damp microfiber to remove dust.
Don’t sand through wallpaper or delicate trim; if you’ve done wallpaper removal nearby, be extra gentle. If color matching is a concern, stop before sanding raw and assess lighting.
Follow this quick numeric checklist:
- Lightly sand the drip edges.
- Wipe away residue.
- Inspect for texture or color differences.
- Pause for spot paint decisions.
Spot Paint Touchups
Although time’s tight, you can hide small dried drips with a few targeted touchups that won’t slow you down, and you don’t need pro skills to do it.
Lightly sand the drip until smooth and wipe away dust. For bare spots, apply a thin coat of appropriate primer selection to guarantee adhesion; let it dry.
Use a small artist’s brush or foam swab and feather paint outward. Match the sheen and use careful color matching—test a tiny dab in an inconspicuous spot.
Blend edges while paint is wet, then let it cure. Clean brushes and inspect in different light before guests arrive.
Conceal With Furniture
When time’s short, you can quickly hide small dried paint drips by strategically placing furniture or décor to draw the eye away from imperfections. Use smart furniture arrangement and lighting adjustments to minimize attention to drips.
Move a plant, side table, or lamp in front of the spot, or angle a bookshelf to interrupt sightlines. Adjust lamps or floor lights to create gentle shadows that soften contrast.
Keep items proportional so they look intentional, not like a cover-up. For a polished appearance, tidy the surrounding area and choose décor that complements the room’s style.
- Place a tall plant
- Angle a lamp
- Add a small table
- Use a framed print
Cost and Time Estimates for Paint-Drip Repair
If you’re tackling paint-drip repairs yourself, expect most small fixes to take 30–90 minutes and cost under $25 for sandpaper, putty, and a small amount of paint. You’ll use Cost estimates to plan materials and Time management to schedule drying and recoat windows. Larger jobs need more time and a primer or filler, raising costs.
| Task | Typical time | Typical cost |
|---|---|---|
| Small spot | 30–90 min | <$25 |
| Multiple spots | 1–3 hrs | $25–$75 |
| Trim repair | 1–2 hrs | $20–$50 |
Plan buffer time for drying.
Common Mistakes That Make Drip Repairs Worse
Don’t sand so hard you gouge the surface—gentle sanding removes the bump without creating more repair work.
Don’t skip cleaning; dust and grease prevent primers and paints from adhering properly.
And avoid slathering on thick primer paint, which can form new drips and obscure the finish.
Sanding Too Aggressively
Although you might think aggressive sanding speeds the job, it often makes the repair more obvious and creates uneven surfaces that show through new paint. You should sand gently, feather edges, and preserve surrounding texture so color matching and paint sheen stay consistent. Over-sanding can gouge trim or thin primer, causing visible halos.
- Use fine-grit sandpaper and light pressure.
- Feather the repair into surrounding surface for a smooth blend.
- Check frequently by touch and sight under good light.
- Reprime small areas if sanding exposes bare substrate before repainting.
Skipping Surface Cleaning
You’ve prepped the area and sanded carefully, but skipping a clean before filling or repainting will undo that work fast. If you don’t remove dust, grease, or old flaking paint, surface contamination prevents fillers and topcoats from bonding.
Wipe with a damp cloth, then an appropriate cleaner or degreaser; let it dry fully. Check crevices for trapped particles that’ll telegraph through new paint.
Clean surfaces improve adhesion and reveal true imperfections so you can sand or fill precisely. Also consider primer selection after cleaning—pick one compatible with the cleaned substrate to guarantee a uniform, long-lasting repair.
Using Thick PrimerPaint
If you slap on a heavy primer to hide dried drips, you’ll likely make the problem worse by sealing in irregularities and creating a lumpy substrate that shows through the topcoat. You should thin primer to correct primer consistency, not bury defects. Thick primer masks nothing and reduces paint adhesion, causing peeling later.
Instead, sand low spots, remove high drips, and apply a thin, even coat.
- Sand and feather edges until smooth.
- Remove dust before priming.
- Adjust primer consistency per label.
- Apply thin coats, checking adhesion between layers.
How to Fix Paint Drip Shadows and Sheen Mismatch
When light hits a repaired drip, it can reveal a shadow or sheen difference that makes the fix obvious, so you’ll want to address both texture and finish for a seamless repair.
First, feather the area with fine sandpaper and blend texture using lightweight spackling or glazing compound; match the original surface profile. Prime the spot if needed, then focus on color matching: test small paint samples and view them under the room’s light before committing.
For sheen correction, use the same sheen level as the surrounding paint or flatten/gloss selectively with a compatible topcoat. Feather brush strokes and allow full cure before final inspection.
How to Deal With Paint Drips on Baseboards
Fixing drips on baseboards follows the same goal as correcting wall drips—match texture and finish—but you’ll also need to account for the smaller, more visible profile and nearby flooring. You’ll inspect for baseboard discoloration or paint peeling, then decide whether to sand, fill, or repaint. Protect the floor, work carefully, and blend repairs into the trim.
Fix baseboard drips by matching texture and finish—inspect, protect the floor, sand or fill, then repaint to blend.
- Sand drips smooth with fine grit, remove dust.
- Scrape loose paint if you spot paint peeling.
- Fill gouges or blobs with lightweight wood filler; sand flush.
- Prime spots, then feather in matching trim paint.
How to Repair Drips Around Windows and Doors
Because windows and doors sit at junctions of trim, glass, and wall, you’ll want to approach drips there with care to preserve sightlines and seal integrity.
Lightly sand the dried drip until smooth, protecting glass with painter’s tape. Use a scraper for thicker beads, then vacuum debris and wipe with a damp cloth.
If bare wood or primer is exposed, touch up after choosing primers suited to trim or exterior rating.
Paint carefully with small brushes and keep cleaning brushes handy to remove stray paint.
Remove tape before paint fully dries to avoid ripping edges and maintain crisp lines.
How to Fix Drips on Crown Molding Without Ladder Marks
When you tackle crown molding, protect the finish by wrapping ladder rails with foam or using a ladder with padded feet so you won’t leave scuff marks.
If you spot dried paint drips, gently scrape and sand the blemish, then feather in fresh paint with a small brush.
Finish by checking from below to make sure the repair blends seamlessly with the molding.
Prevent Ladder Scuff Marks
If you’re working on crown molding, take steps to prevent ladder scuff marks before you start so you won’t have to touch up both paint drips and scraped edges afterward. Protect the molding and wall with soft padding and low-tack painters tape where ladder feet or rails might rub.
Practice ladder safety to keep steady contact and avoid sudden slips that cause scuffs. Keep a small touch-up kit with matching paint for quick fixes and guarantee paint color matching if blending becomes necessary.
- Pad ladder contact points
- Use a ladder with rubber feet
- Keep a stable stance
- Carry touch-up paint
Repair Paint Drip Blemishes
Now that you’ve prevented ladder scuffs and kept a touch-up kit handy, you can focus on removing dried drips on crown molding without damaging surrounding trim. Lightly sand the drip tip, feather edges, and clean dust. Match sheen and hue—use color mixing notes from original job or sample swatches. Apply primer to bare wood, then thin coats of matched paint. Keep strokes parallel to molding profile to avoid brush marks. Store leftover paint properly; proper paint storage preserves tint for future touch-ups.
| Step | Action |
|---|---|
| 1 | Sand |
| 2 | Prime |
| 3 | Paint |
| 4 | Store paint |
When to Call a Pro for Severe Drip Damage
Although minor drips you can sand and touch up yourself, severe drip damage often needs a pro’s tools and experience to restore a smooth, even finish without causing further problems.
You’ll want help if damage affects large areas, textured surfaces, or visible trim where interior lighting and paint color choices make flaws obvious. A pro can match sheens, skim, and blend seamlessly.
- Widespread drips across walls or ceilings.
- Drips that damaged underlying drywall or wood.
- Visible flaws under varied interior lighting.
- Color-matching challenges with complex paint color choices.
How to Document Repairs and Create a Warranty Record
Because repairs can look fine today and show issues later, you should document every step as you fix dried paint drips so you can prove what was done and when. Photograph the damaged area before, during, and after repair, capturing close-ups of texture, any sanding, and final brush strokes.
Note dates, materials, batch numbers, and precise color matching methods used, plus the paint sheen applied. Keep receipts and labeled sample chips together in a digital folder and a printed file.
Provide a simple written warranty with scope, duration, and contact info. Share copies with the homeowner and retain one for your records.
How to Store Leftover Paint for Touch-Ups
When you finish a job, keep a small amount of each paint you used so you can quickly touch up drips later. Store samples in labeled, airtight containers and date them for easy reference. Proper paint storage prevents skinning and contamination, aiding leftover preservation for months. Keep cans cool, dry, and away from sunlight; don’t freeze them. Seal lids tightly and place a layer of plastic wrap over the surface before closing.
Keep a small sample of each paint in labeled, airtight containers—date them, seal tightly, and store cool and dry for easy touch-ups.
- Label with room, brand, sheen, and date.
- Use small, airtight jars or sample pots.
- Store upright in a stable, cool area.
- Check seals before reuse.
Blend Old Paint for Perfect Touch-Up Matches
If your touch-up jars don’t match perfectly, you can blend old paint to recreate the original color and sheen—start by testing small mixes and adjust gradually. You’ll strip a teaspoon of each leftover can into clear labeled cups, then mix tiny increments to reach the right hue.
Use matte, satin, or gloss base to match sheen. Compare mixes under the same light where the wall sits; let samples dry before judging. Once satisfied, scale the recipe and record proportions.
For best color matching, wear gloves, stir thoroughly, and retest on a scrap before touching the repaired area.
Seasonal Tips: Fixing Drips in Hot or Cold Weather
Although temperature and humidity change how paint dries, you can still fix dried drips effectively by adjusting your technique for hot or cold conditions.
Although temperature and humidity alter drying, you can still correct dried drips by adjusting technique for hot or cold conditions
In summer, seasonal humidity and rapid temperature effects speed curing — sand gently sooner, wipe with a damp cloth, and use fast-dry touch-up paint.
In winter, slow curing means you should let filler and primer dry longer, work in warmer parts of the day, and avoid forced heat that causes surface skinning.
Follow these steps:
- Assess surface hardness before sanding.
- Match drying time to temperature effects.
- Control humidity with dehumidifiers or humidifiers.
- Recoat only when fully cured.
How to Train DIY Helpers to Avoid Creating Drips
Start by having your helpers use the right tools—quality brushes and the proper rollers cut down on excess paint.
Show them brush technique like loading a brush correctly and using short, controlled strokes to prevent drips.
Finally, mark clear work zones so people know where to stand and how to move without bumping wet surfaces.
Choose The Right Tools
Because drips usually come from using the wrong tools or handling them poorly, teach helpers which brushes and rollers suit each surface and how to hold them to control paint flow.
Explain how color mixing affects viscosity and why proper paint storage keeps consistency stable.
Show lightweight rollers for smooth walls, angled brushes for trim, foam for cabinets, and a small sash brush for detail.
Reinforce neat loading habits and using trays or grids to avoid overloading.
Label tools and store them cleanly between sessions so helpers pick the right piece quickly and don’t introduce drips by guessing.
Teach Proper Brush Technique
Now that helpers know which tools to use, teach them how to handle a brush so it doesn’t leave drips. Show finger placement, grip pressure, and wrist motion for a consistent, controlled brush stroke.
Emphasize loading the brush lightly and tapping off excess, matching paint consistency to the job so it flows without running.
Demonstrate cutting in with smooth, deliberate strokes, then feathering edges to blend.
Teach pauses to check for drips along vertical surfaces and how to back-brush before paint skins.
Reinforce practicing on scrap material until they can maintain an even film and spot drips immediately.
Set Clear Work Zones
Where should helpers stand and what should they handle? You assign clear stations so everyone knows their scope: rollers, trim, taping, or cleanup.
Explain Painting safety rules—no standing on unstable ladders, gloves, and keeping paths clear.
Mark zones with tape and dropcloth edges so tools and paint stay put. Use verbal cues and a simple map so helpers don’t cross finished areas.
Review Work zone setup before starting and enforce it gently.
Check that each person has appropriate tools sized for their task.
Praise compliance and correct slips immediately to prevent drips and rework later.
- Define roles
- Mark boundaries
- Verify PPE
- Communicate rules
Step-by-Step Repair Checklist (Printable)
Before you plunge into repairs, grab this printable checklist so you can follow each step without missing anything; it keeps tools, materials, and timing organized and reduces rework.
Use the checklist to note areas, mark drip sizes, and rank repairs by priority.
Gather scraper, sandpaper, filler, primer, brush, and a small roller.
Confirm paint match, finish, and consider color psychology when choosing touch-up tones; note if you’ll use eco friendly paints.
Schedule drying times, recoat windows, and final inspection.
Check trim alignment, clean edges, and photograph results.
Store the checklist with project notes for future reference.
Troubleshooting: What to Do If the Repair Still Shows
If your touch-up still shows after everything dries, don’t panic—start by isolating the cause: poor feathering, mismatched sheen, or inadequate priming are the usual suspects. You’ll want to reassess technique and materials, checking whether color mixing errors or old cans from poor paint storage caused the mismatch.
Try these targeted fixes:
- Lightly sand and re-feather edges, then recoat with thin layers.
- Apply a bonding primer to even surface porosity before repainting.
- Match sheen and finish, testing on a hidden spot.
- If color’s off, remix or bring a sample to match at a store.
Frequently Asked Questions
Can Dried Paint Drips Cause Mold Growth Behind Trim?
Not usually, but dried paint drips can trap moisture and indirectly encourage mold growth behind trim; you should remove paint drips and focus on paint removal plus mold prevention by drying, sealing gaps, and improving ventilation to avoid problems.
Will Paint Drips Affect VOC Levels in Indoor Air?
Yes — paint drips can raise VOC emissions and lower indoor air quality; you’ll release solvents as they cure, especially from oil-based or high-VOC paints, so you’ll ventilate, use low-VOC products, and remove excess buildup.
Can Humidity Re-Soften Fully Cured Oil-Based Drips?
No, humidity re softening won’t make fully cured oil based drips pliable; you’ll find oil based drips stay hard once cured. High humidity might slightly tacken fresh or partially cured paint, but not thoroughly cured finishes.
Are There Warranty or Liability Issues When Fixing Drips in Rental Properties?
Yes — you should check lease and landlord policies because warranty concerns and liability issues can arise; you’ll want written permission, document condition before and after, and avoid repairs that could void warranties or create legal responsibility.
How to Prevent Drips When Using Spray Guns Indoors?
Measure twice, cut once: you’ll prevent drips by doing spray gun calibration, testing sprays, adjusting paint flow regulation, keeping even speed and distance, using proper viscosity, ventilating, and masking surfaces so overspray won’t settle and run.
Conclusion
You can fix dried paint drips without panic — just assess, test, sand or strip, then spot-prime and repaint. For example, when you helped your neighbor repaint their trim after a weekend DIY mishap, you sanded tiny drips, feathered the edges, primed, and matched the sheen, making the repair invisible. Follow the checklist, teach helpers to brush and tip correctly, and adjust methods for temperature so future projects stay smooth and drip-free.