How to Paint a Wood House Exterior Like a Pro
Start by surveying siding for rot, moisture, and loose paint, then repair or replace damaged boards and seal joints. Clean and remove mildew, chalk, or old coatings, prime bare or repaired wood promptly, and pick primers and topcoats suited to your siding and climate. Use sprayers for big areas and brush/roll for edges, maintain proper temperatures and humidity, and follow safety and ladder rules. Keep touch-up paint handy for maintenance, and keep going to learn pro tips and timing.
Quick Plan: Paint Your Wood House in 7 Steps
Before you pick up a brush, map the job into seven clear steps so you know what to do and when. You’ll survey surfaces, note repairs, and choose primers to boost paint durability.
Before you pick up a brush, map the job into seven clear steps: survey surfaces, note repairs, and choose primers to boost durability.
Next, pick colors with color psychology in mind—consider light, mood, and curb appeal.
Then prep: clean, scrape, sand, and caulk seams. Mask and protect plants and fixtures.
Apply primer where needed, then paint trims and siding in systematic sections.
Inspect for missed spots, apply touch-ups, and remove masking.
Finally, clean tools and store leftover paint with labels for future maintenance.
Is DIY Exterior Painting Right for You?
Deciding whether to tackle exterior painting yourself comes down to time, skill, and comfort with heights. You’ll weigh costs, safety, and the satisfaction of doing it right. If you enjoy color psychology and choosing hues, DIY gives creative control; if you prefer guaranteed speed, hire pros. Consider prep, ladders, and learning proper techniques. Choosing eco friendly paints adds a step—research low-VOC options and proper application. Envision this planning aid:
| Task | Feeling |
|---|---|
| Choose color | Excited |
| Buy supplies | Practical |
| Climb & paint | Focused |
Be honest about limits before committing.
Inspect Siding Condition: Rot, Moisture, Substrate Soundness
When you inspect siding, look for soft spots, peeling paint that reveals bare wood, and stains that suggest trapped moisture—these signs point to rot or a failing substrate that need repair before painting. You’ll probe seams, press suspicious areas with a screwdriver, and note where Siding material has warped or delaminated.
Address Moisture damage sources—gutters, flashing, or flashing failures—before sealing. Prioritize sound substrate; paint won’t adhere to compromised wood.
- Tap boards to find hollow sounds indicating decay.
- Pry a small trim corner to inspect backing.
- Map damp areas after rain.
- Schedule repairs then prime.
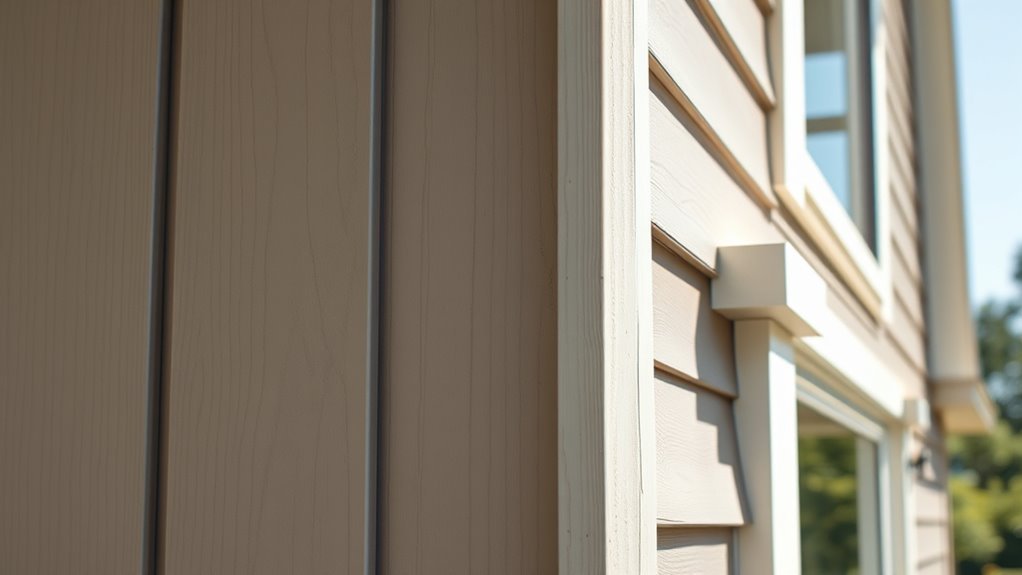
Identify Siding Type: Clapboard, Shingles, Board-and-Batten, Engineered Wood
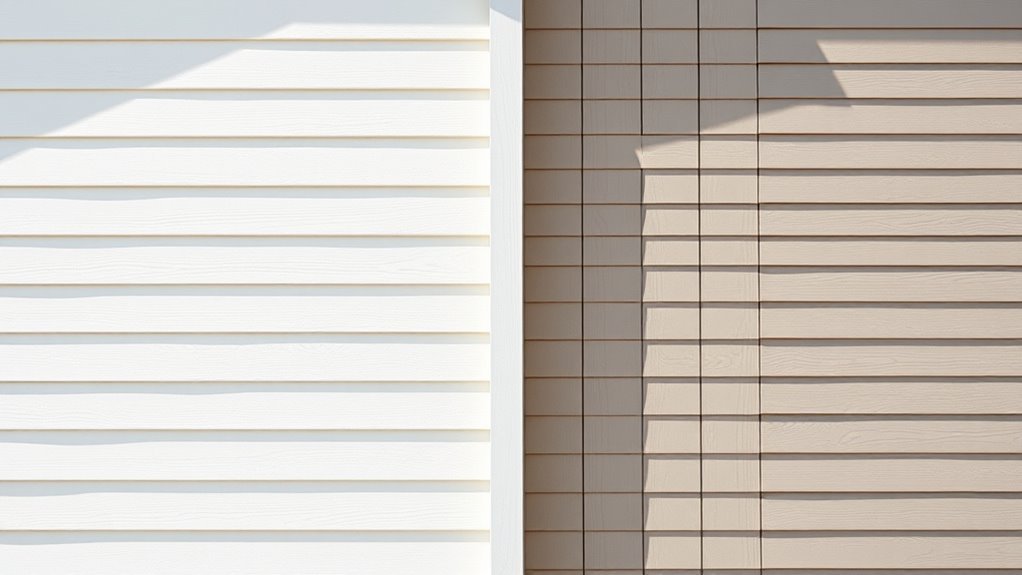
Because each siding type sheds water and accepts paint differently, you should identify whether you’re dealing with clapboard, shingles, board-and-batten, or engineered wood before you prep and prime.
Walk the exterior and note seams, overlap, and nail patterns: clapboard has long horizontal laps, shingles are small overlapping tabs, board-and-batten shows wide boards with narrow battens covering joints, and engineered panels often have uniform edges or faux wood grain.
Run your hand to feel siding texture and inspect for raised or smooth wood grain. Label each area so you can tailor cleaning, repair, and priming techniques to the substrate.
Choose the Right Paint System for Wood Exteriors
Now that you’ve identified the siding types, pick a paint system that matches each substrate’s needs and the local climate. You’ll want durable exterior coatings that resist moisture, UV, and mildew while reflecting your color psychology choices. Consider low-VOC, eco-friendly paints to reduce odors and environmental impact without sacrificing performance.
Match finish to exposure: satin hides imperfections; semi-gloss deflects dirt. Balance flexibility for expansion with hardness for longevity.
- Select an acrylic latex topcoat for most wood siding.
- Use elastomeric where cracks and movement occur.
- Choose mildew-resistant formulations in humid areas.
- Prioritize low-VOC primers and topcoats.
How to Pick Primer: Oil-Based, Acrylic, or Bonding Primers
Although primers often get overlooked, picking the right one sets the foundation for a durable finish on wood exteriors. You’ll choose between oil-based for knotty, tannin-rich wood; acrylic for flexibility and easy cleanup; and bonding primers when adhesion to weathered or glossy surfaces matters.
Base your primer selection on wood species, existing coatings, and moisture. During siding preparation, scrape, sand, and spot-prime bare or stained areas, and let primer fully cure before topcoating.
Use oil-based primers where bleeding’s a risk, acrylic primers for most new or previously painted wood, and bonding primer for tricky, slick substrates to guarantee long-term adhesion.
Pick Finish Sheen and Color That Resist Fading and Hide Flaws
After you’ve primed properly, pick a finish sheen and color that both stand up to sun exposure and mask minor imperfections. You’ll choose based on color durability and sheen selection to minimize fading and disguise small blemishes. Consider lightfast pigments and UV-resistant formulations.
Mid to low sheens hide texture better; higher sheens resist dirt but highlight flaws. Test samples in sunlight and shade, let them cure, then inspect at different times. Balance aesthetic with performance, and prefer manufacturers with proven color durability warranties.
- Test samples on different facades.
- Evaluate UV-resistant pigments.
- Select sheen for texture hiding.
- Confirm warranty and fade data.
Tools for Pro Results: Exterior Brushes, Rollers, Sprayers, Scaffolding
When you want a pro finish, pick tools that match the job: quality angled sash brushes for trim, dense rollers for even coverage on boards, a high-volume-low-pressure (HVLP) or airless sprayer for large areas, and sturdy scaffolding or ladders that keep you safe and steady.
Choose synthetic brushes for latex and natural for oil, matching nap to board texture.
Use synthetic brushes for latex and natural-bristle for oil, and match nap to your board’s texture.
Use a roller extension and consistent pressure to avoid lap marks and aid color blending between sections.
Maintain sprayer tip size and technique for uniform film thickness, which preserves paint durability.
Clean and store tools properly for repeatable pro results.
Prepare Safe Access and Work Area Setup
Now that you’ve picked the right brushes, rollers, sprayer, and scaffolding, focus on preparing safe access and organizing your work area before any paint goes on the wood. You’ll reduce safety hazards by planning ladder and scaffold placement, establishing clear walkways, and marking wet zones.
Keep tool maintenance simple: clean, inspect, and store equipment nearby to prevent trips and delays. Staging materials minimizes back-and-forth and contamination. Communicate boundaries to helpers and neighbors.
- Inspect anchors, guardrails, and ladder feet.
- Lay down drop cloths and non-slip pathways.
- Arrange paints, tools, and buckets by task.
- Keep a first-aid kit and fire extinguisher nearby.
Surface Prep: Cleaning, Mildew Removal, Alkaline Washing
Before you put a brush to wood, clean the siding thoroughly to remove dirt, chalk, and biological growth so paint will adhere and last. Rinse with a garden hose, then use a low-pressure washer if needed.
Before painting wood siding, thoroughly rinse and remove dirt, chalk, and growth so paint will adhere and last
Treat mildew with a 1:3 bleach-to-water solution or a commercial mildewcide, scrubbing with a stiff brush and rinsing well.
For heavy chalking, apply an alkaline wash to restore the surface pH and promote bonding.
Allow full drying before priming.
Proper cleaning preserves wood and enhances paint durability, helping chosen color combinations look consistent and professional across the whole exterior.
Strip Old Coatings: Sanding vs Chemical Stripping
After the siding is clean and dry, decide whether to remove old paint by sanding or with a chemical stripper based on paint condition, the wood type, and safety concerns. You’ll weigh speed, substrate sensitivity, and cleanup. Sanding’s mechanical control suits small areas; stripping removes multiple layers faster but needs containment and neutralization.
Consider how removal method affects color matching and long-term paint durability when you pick primers and topcoats. Follow safety: ventilation, PPE, and disposal rules.
- Inspect adhesion and thickness.
- Test a small patch.
- Choose compatible primer.
- Protect nearby plants and fixtures.
Repair Wood Damage: Patching, Board Replacement, Treating Rot
When you find cracked, warped, or rotted boards, address them promptly to prevent moisture and pests from spreading and to keep your finish lasting longer. You’ll assess wood rot extent, remove soft material, and decide between patching or full board replacement. Use epoxy for small voids, match grain when splicing, and fasten new boards with corrosion-resistant nails. For damage repair, keep joints tight and surfaces smooth before priming. Follow local codes for structural members and dispose of compromised wood properly.
| Task | When to Use | Quick Tip |
|---|---|---|
| Epoxy patch | Small rot | Sand feather edge |
| Board replace | Structural or large rot | Use cedar or treated |
| Fastening | New boards | Use stainless nails |
| Inspect | After repair | Prime immediately |
Proper Caulking and Trim Sealing to Stop Water Intrusion
Before you paint, inspect all joints and trim for cracked or missing caulk and remove any loose material.
Use sealants that’re compatible with both wood and your chosen paint—silicone for wet areas, paintable polyurethane or acrylic for trim.
Prep joints properly by cleaning, drying, and using backer rod where needed so sealant adheres and lasts.
Identify Damaged Caulk
If you want your paint job to last, start by inspecting all exterior caulk lines for gaps, cracks, or soft, crumbly sections that let water sneak in. You’ll perform a caulk inspection by probing joints with a tool or fingernail, watching for separation from siding or trim.
Note areas where old compound pulls away or looks discolored. Mark spots for removal and replacement, and document substrate type to guarantee future sealant compatibility.
Prioritize repairs near eaves, windows, and door trim to prevent rot.
- Probe joints
- Look for gaps
- Mark failures
- Log substrate
Use Compatible Sealants
Which sealant should you use where matters — and using the wrong one can trap moisture or fail fast. You should pick sealants rated for exterior use and compatible with the materials you’re sealing: wood, painted trim, metal flashing, or masonry.
Check labels for adhesion to paint and movement capability so paint and caulk expand together. Use silicone for nonpaintable gaps, paintable polyurethane or hybrid sealants where you’ll topcoat.
Prioritize sealant compatibility to avoid chemical reactions or peeling. Properly applied, compatible sealants form a durable barrier and are a core part of weatherproofing techniques that stop water intrusion.
Ensure Proper Joint Prep
When you prep joints correctly, caulking and trim sealing become the frontline defense against water intrusion, so clean, dry surfaces and the right joint geometry are vital. You’ll remove old sealant, backer rod when needed, and guarantee gaps are the correct width and depth for adhesion.
Choose a compatible caulk that accepts your paint’s color matching and finish. Test adhesion, too, then prime exposed wood before sealing. After cure, check paint sheen compatibility to avoid lap marks and premature failure.
- Remove old caulk and debris
- Insert backer rod for deep gaps
- Apply compatible caulk smoothly
- Prime and paint for uniform sheen
Sanding Techniques for Adhesion Without Harming Profiles
Because the right sanding keeps paint sticking without dulling trim detail, you’ll focus on selective abrasion rather than heavy stock removal. Use sanding techniques that scuff old finish and remove loose fibers while preserving molded edges and shallow grooves.
Work with fine-grit sandpaper (120–180) and flexible sanding pads for contours; a detail sander suits tight corners. Always sand along grain, keep pressure light, and check adhesion profiles visually—raised ridges should remain sharp.
Clean dust with a vacuum and tack cloth before priming. Spot-sand any bare wood more aggressively, then feather gradations to avoid visible edges under paint.
Masking and Protecting Windows, Hardware, and Landscaping
Before you start painting, protect windows, hardware, and landscaping with careful masking so paint goes only where you want it. You’ll tape edges, cover glass, and secure trims to prevent bleed and drips; use breathable paper to avoid trapped moisture.
For hardware, remove what you can and wrap fixed pieces with painter’s tape. For plants, set waterproof drop cloths and create barriers to keep runoff away.
- Use low-tack tape for window masking to avoid pull-off.
- Cover sills with plastic when scraping.
- Shield shrubs with breathable landscaping protection fabric.
- Anchor tarps to resist wind.
Calculate Materials: Paint, Primer, Caulk, and Supply Quantities
Before you start painting, calculate paint coverage so you know how many gallons you’ll need for each coat and surface.
Then figure primer and caulk quantities plus extras for touch-ups and waste.
Finally, list brushes, rollers, tape, and drop cloths so you don’t run out mid-job.
Calculate Paint Coverage
Start by measuring the house’s exterior surface area so you can figure how much paint, primer, caulk, and other supplies you’ll need. Calculate wall, trim, and soffit areas, subtract windows and doors, and note texture which affects coverage.
Consider color psychology when choosing lighter vs. darker hues—lighter coats often cover better, darker may need extra.
Check paint durability ratings to pick a product that lasts in your climate. Use the manufacturer’s coverage (sq ft per gallon) and factor for two coats plus primer if needed.
- Measure surface area precisely.
- Subtract openings.
- Factor texture.
- Apply coverage rates.
Determine Supply Quantities
Now that you’ve calculated the areas and adjusted for openings and texture, you can turn those square-foot figures into exact quantities of paint, primer, caulk, and other supplies. Divide total square feet by the coverage per gallon for primer and paint, then round up to account for trims and touch-ups.
Add 10% for waste and future touch-ups; include separate cans for color combinations or accent colors. Count tubes of exterior caulk per linear foot of seams. Don’t forget brushes, rollers, drop cloths, and tape.
Plan safe paint disposal and label leftovers for future repairs.
Sprayer vs Brush-And-Roll: When to Use Each?
When you’re deciding between a sprayer and brush-and-roll, weigh speed against control. You’ll choose a sprayer for large, flat areas where sprayer efficiency saves time; pick brush-and-roll where brush control preserves detail and seals edges. Consider surface, access, and finish.
- Large siding: sprayer efficiency covers broad runs quickly.
- Trim and corners: brush control reaches tight joints without overspray.
- Weather and wind: brush-and-roll reduces drift on breezy days.
- Texture and prep: use brush-and-roll for rough or patched wood; sprayer for smooth, primed boards.
Sprayer Setup for Even Coverage on Wood Siding
Because an even finish depends on consistent pressure, proper tip choice, and correct overlap, set up your sprayer with the manufacturer’s recommended nozzle for exterior siding. Adjust pressure to produce a medium-fine spray, and test on a scrap board to dial in fan width and flow before you paint the house.
You’ll keep the gun perpendicular to boards, move at a steady pace, and overlap passes about 50% to avoid streaks. Use lower pressure on thin coats to boost paint durability and maintain true house color without runs.
Clean filters, check hoses for leaks, and keep spare tips handy.
Brush and Roller Technique for Cutting In and Finishing Trim
After you’ve dialed in your sprayer for broad coverage, switch to brush and roller work for crisp edges and trim detail. You’ll cut in with a quality angled sash brush, keeping steady pressure and a light wrist to avoid blobs.
After sprayer work, switch to an angled sash brush—steady pressure and a light wrist for crisp, blob-free edges.
Use a small roller to smooth roller marks on flat trim surfaces, matching nap to your paint. Remember color psychology when choosing trim hues—contrast draws the eye, subtle tones soothe.
Prioritize brush maintenance: clean thoroughly between colors and store bristles straight. Follow this short checklist as you work:
- Load brush correctly, tap off excess.
- Angle for a sharp line.
- Roll light, overlapping passes.
- Clean and reshape bristles.
Application Timing: Coat Intervals, Temperature, Humidity Limits
Check the paint can for recommended recoat intervals, and don’t rush—waiting the proper time guarantees good adhesion and an even finish.
You should also paint only when temperatures and humidity fall within the manufacturer’s limits, typically above 50°F and below about 85% relative humidity for most exterior paints.
If conditions aren’t right, postpone the job to avoid blistering, poor leveling, or extended cure times.
Optimal Recoat Intervals
When you plan your repainting, timing each coat correctly is as important as choosing the right products. You’ll wait for the manufacturer’s recommended recoat window—usually 2–4 hours for quick-dry primers and 12–24 hours for solvent-based topcoats—so you get smooth color blending and maximum paint durability. Don’t rush; tackiness or poor adhesion means sanding and delays.
Monitor surface dryness visually and by touch. If rain’s expected or dew forms, postpone.
- Follow label recoat window precisely.
- Allow full cure before heavy handling.
- Recoat thinner coats faster; thick coats need longer.
- Touch up only after proper cure.
Temperature And Humidity Limits
Although paint can go on at a range of conditions, you’ll get the best adhesion and drying when temperatures are within the manufacturer’s recommended window—typically 50–90°F (10–32°C) for most latex and oil-based products—and relative humidity stays below about 85%.
You should check Temperature guidelines on the label and plan coats for stable daytime temps, avoiding early morning chill or late-day heat.
Humidity effects slow curing and can cause blushing, sagging, or poor film formation, so wait for a dry forecast and ventilate where possible.
If humidity or temps fall outside limits, postpone until conditions meet specifications.
Fix Common Problems: Blistering, Peeling, Lap Marks, Sagging
If your paint’s blistering, peeling, showing lap marks, or sagging, you can fix most of these issues without redoing the whole job—start by identifying the underlying cause (moisture, poor prep, wrong product or technique). Then remove loose paint, sand smooth, spot-prime with a compatible primer, and repaint using proper thinning and application methods.
Consider how color psychology affects perceived uniformity and how environmental impact guides product choice. Work in small sections, keep tools clean, and follow manufacturer drying times to avoid repeat failures.
- Scrape and sand to stable edges.
- Check for moisture sources.
- Use compatible primer and paint.
- Apply even, thin coats.
Touch-Up Strategies: Blending New Paint Into Old Surfaces
Because touch-ups sit beside aged finish, you’ll need to match sheen, color, and texture carefully to make repairs disappear. Start by cleaning and feathering edges; sand lightly to remove gloss and create a smooth shift.
Test small patches to verify color blending under the same light. Use the original paint batch or tint a sample to match faded tones.
For texture matching, mimic brush or roller marks and stipple if required. Apply thin, overlapping coats, letting each cure before evaluating.
Blend gradually outward from the repair so new paint integrates seamlessly with the old surface.
Best Months to Paint and Handling Unpredictable Weather
When planning exterior painting, pick months with steady mild temperatures and low humidity—typically late spring and early fall—so paint cures properly and you won’t race shifting weather.
You’ll get consistent color contrast and better paint durability when coatings dry at recommended temps. Watch forecasts, avoid windy or rainy windows, and prep backup days.
- Check 48–72 hour forecasts before starting.
- Aim for daytime temps 50–85°F and low dew.
- Start early morning to use full dry-day hours.
- If storms appear, pause; do small sections under tarps to protect wet paint.
Stay flexible and prioritize cure time.
Safety & Environmental Rules for Exterior Painting (Ladders, PPE, Lead)
Good weather makes painting easier, but safety and environmental rules keep you and the jobsite protected. You’ll follow ladder safety: place ladders on firm level ground, angle them properly, secure the top, and never overreach—move the ladder instead.
Wear PPE: eye protection, gloves, N95 or respirator for sanding, and non-slip shoes.
If the house has older layers, assume lead paint may be present; test first. If positive, use certified abatement methods: wet-sanding, HEPA vacuums, containment, and proper disposal.
Keep children and pets away, bag debris, and follow local regulations for hazardous-waste disposal.
Maintenance Schedule to Extend Exterior Paint Life
To keep your exterior paint looking fresh and performing well, set a simple, regular maintenance schedule you can stick to: inspect annually, wash every 1–2 years, touch up damaged spots as you find them, and repaint major areas on the manufacturer’s recommended timeline.
- Inspect for peeling, mildew, caulk failure, and flashing issues; note where your exterior color palette fades unevenly.
- Wash gently to remove dirt and prevent biological growth that breaks down coatings.
- Touch up chips and exposed wood promptly to avoid rot and larger repainting jobs.
- Reassess color choices for historical accuracy before full repaints to preserve character.
Cost-Saving Tips and When to Hire a Pro
You can save a lot by doing smart prep yourself—cleaning, scraping loose paint, and taping trim carefully cuts labor costs.
Still, hire a pro for complex jobs like high or steep roofs, extensive rot repair, or detailed trim work to avoid costly mistakes.
We’ll cover which tasks you can tackle and when to call in an expert.
Save With Smart Prep
Wondering which prep tasks you can tackle yourself and which ones deserve a pro? You can save a lot by doing straightforward prep: cleaning, scraping loose paint, and priming small patches. Consider color psychology when testing swatches, and respect historical styles if your home has period details.
- Pressure-wash and let dry — prevents peeling.
- Scrape and sand loose areas — do reachable spots yourself.
- Caulk seams and repair trim — saves on paint waste.
- Mask and drop cloths — protects landscaping and reduces cleanup.
Know your limits; complex repairs still warrant professional assessment.
Hire Pros For Complexity
After handling the straightforward prep tasks, it’s smart to call in pros for anything beyond your comfort or skill level—structural repairs, rotten siding, lead paint abatement, or extensive caulking and trim replacement can quickly balloon in cost and risk if done poorly.
Hire experienced contractors for those jobs, get multiple bids, and ask for references and proof of insurance. A pro can advise on paint color trends, substrate repair, and efficient scheduling so you avoid costly rework.
Budget for quality labor; you’ll save time and protect value. Use the money you save to refresh garden furniture after the job.
Frequently Asked Questions
Can I Paint Over Previously Stained (Not Painted) Wood Siding?
Yes — you can paint over previously stained wood siding, but you’ll need thorough prep work like cleaning, sanding, and a compatible primer; choose an appropriate paint sheen for durability and appearance, and you’ll get long-lasting results.
How Does Nearby Saltwater or Coastal Exposure Change Paint Choices?
You should choose coatings rated for saltwater corrosion resistance; coastal paint durability matters, so pick high-quality marine or acrylic latex formulas, use corrosion-resistant fasteners, and maintain frequent inspections and touch-ups to protect siding and trim.
Can Paint Color Selection Affect Termite or Insect Attraction?
Yes — you can reduce attraction: you’ll pick paint pigmentation and finishes that act as an insect deterrent, choosing cooler, muted tones and insect-deterrent additives so surfaces repel pests and avoid colors that draw insects.
What Warranties Typically Cover Labor Versus Paint Product Failure?
Ironically, warranties usually split blame: manufacturers cover paint product failure—guaranteeing paint durability and finish—while contractors cover labor and paint adhesion issues from poor application; you’ll want both for full protection.
How Do Historic Preservation Rules Affect Exterior Paint Choices?
Historic preservation rules require you to prioritize historical accuracy and meet regulatory compliance, so you’ll choose period-appropriate colors, finishes, and materials, obtain approvals, and document changes to protect authenticity while following local guidelines.
Conclusion
You’ve got the roadmap to paint your wood house like a pro, and now it’s time to get your hands dirty. With proper prep, the right paint system, and attention to safety and weather, you’ll save money and boost curb appeal. Keep up routine maintenance so small issues don’t turn into big headaches. Know when a pro’s needed, and you’ll be painting with confidence—no need to reinvent the wheel.