Will a Fan Help Paint Dry Faster? Pros, Cons and Tips
Yes — a fan can speed drying for water‑based paints by moving humid air away and boosting evaporation, but you’ll want steady, moderate airflow aimed across the surface rather than a direct blast. For oil or slow‑cure finishes, strong airflow can cause tacky spots, skinning, or brush marks, so use gentle ventilation or wait until tackiness subsides. Position fans a few feet away, control speed, and monitor the finish for issues, and more practical tips follow if you keep going.
Do Fans Speed Paint Drying?
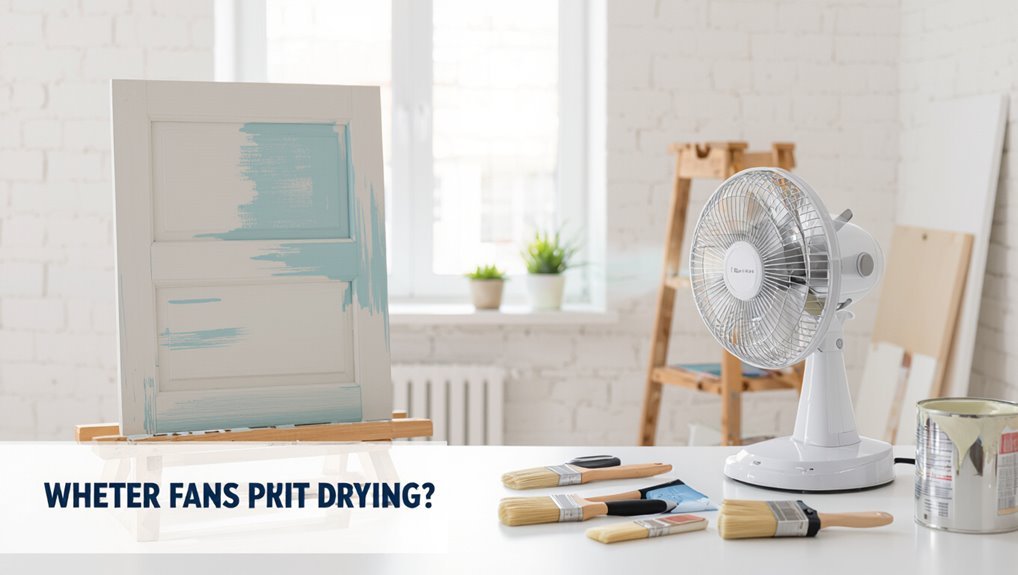
If you want paint to dry faster, using a fan can help by increasing air movement across the surface, which speeds evaporation of solvents or water in the paint.
You’ll improve fan efficiency by positioning airflow parallel to the surface and avoiding direct blasts that cause uneven drying.
Combine this with other drying techniques like controlling humidity and temperature for consistent, faster results.
How Paint Dries: Evaporation vs. Chemical Curing
Now that you know how airflow speeds evaporation, it helps to understand that paint can dry by two very different processes: solvent or water-based paints primarily dry through evaporation, where the carrier liquid leaves the film, while many coatings—like epoxies and some alkyds—harden by chemical curing, where molecules react and cross-link to form a solid.
You should monitor evaporation rates and allow time for chemical reactions.
Why Airflow Affects Water‑Based vs. Oil‑Based Paints
Because water-based and oil-based paints rely on different drying mechanisms, airflow affects them in distinct ways: you’ll notice an airflow impact that speeds evaporation in water-based paints, removing moisture and reducing tack quickly.
Oil-based coatings cure chemically, so drying differences mean airflow mostly aids solvent dispersal slowly and won’t greatly hasten crosslinking; too much airflow can cause surface skinning or dust defects.
When a Fan Helps Water‑Based Paint Dry Faster
You’ll see a fan speed up drying when it increases surface evaporation by moving humid air away from the paint.
It also boosts overall air circulation, preventing moisture from pooling and lowering drying time.
Use a fan to create targeted drying zones for edges or thick spots that need extra airflow.
Improved Surface Evaporation
If you point a fan across a newly rolled coat of water‑based paint, it speeds surface evaporation by replacing the humid air right above the film with drier air.
This allows solvent (mostly water) to leave the paint faster and the top skin forms sooner. You’ll notice a faster evaporation rate without raising surface temperature much, reducing tackiness and shortening recoat time.
- Faster solvent loss
- Reduced tack
- Shorter recoat
- Less running
Enhanced Air Circulation
When you aim a fan across a freshly painted surface, it doesn’t just lower humidity at the paint-film interface — it promotes steady air movement over the whole area, so solvent leaves more uniformly and the paint cures more consistently.
You’ll notice airflow benefits: fewer tacky spots, faster tack-free times, and more even sheen.
Use controlled drying techniques and moderate fan speed to avoid surface defects.
Targeted Drying Zones
Although a single fan can speed drying across a room, aiming multiple fans or directing airflow to specific sections lets you create targeted drying zones that speed water‑based paint curing where you need it most.
You’ll boost targeted airflow and drying efficiency by positioning fans, adjusting angles, and monitoring humidity.
- Spot‑dry high‑traffic areas
- Sequence coats logically
- Use low heat, high airflow
- Check tackiness regularly
When Fans Harm Oil‑Based and Solvent Paints
Because oil-based and solvent paints cure by chemical evaporation and oxidation rather than simple surface drying, strong airflow can actually disrupt the process and cause problems.
You’ll see tacky spots, surface skinning, and uneven gloss when fan impact accelerates solvent loss.
With oil paint especially, rushing the chemistry can trap solvents, extend curing, and weaken adhesion, so avoid high-velocity fans.
Fan Placement: Effects on Drying and Finish
Where you put the fan matters: positioning it too close or aimed directly at wet paint can cause uneven drying and brush marks, while a gentle, indirect breeze promotes steady evaporation.
You’ll get the best results by angling airflow to sweep across the surface rather than blasting one spot, and by keeping fans a few feet away to avoid overspeeding the surface skin.
Pay attention to intake and exhaust paths so air moves across the room and doesn’t just recirculate stagnant pockets.
Optimal Fan Positioning
When you place a fan to speed paint drying, small changes in angle and distance make a big difference: aim airflow across the surface rather than directly at it, and keep the fan far enough to promote even evaporation without blasting solvent to the edges.
- Adjust fan height to match surface plane and avoid pooling.
- Test airflow patterns for uniform coverage.
- Maintain moderate speed to prevent dust.
- Reposition between coats for consistency.
Airflow Direction Effects
Having the fan angled across the surface sets you up for the next consideration: how airflow direction affects both drying speed and the paint’s final look. You’ll test airflow patterns and adjust fan angles to avoid pooling, brush marks, or dust adhesion. Use table below for quick guidance.
| Placement | Effect | Tip |
|---|---|---|
| Side | Even flow | Angle shallow |
| Direct | Faster | Risk texture |
| Overhead | Gentle | Reduce streaks |
Best Fan Types for Paint Drying (Box, Oscillating, HEPA)
Picking the right fan can cut drying time and improve finish quality, so you’ll want to weigh box, oscillating, and HEPA models against your room size, paint type, and dust sensitivity.
Choosing the right fan—box, oscillating, or HEPA—cuts drying time and safeguards your finish.
- Box: powerful, good fan efficiency for large areas.
- Oscillating: spreads airflow, reduces hotspots.
- HEPA: filters dust, protects finish.
- Combine types when needed for balance.
Fan Speed and Distance: How to Set Them
You’ll want a moderate fan speed—too low won’t move enough air, too high can cause overspray or tacky surfaces.
Place the fan about 3–6 feet away and slightly angled to create steady airflow across the painted area.
Adjust both speed and distance based on paint type and room ventilation to avoid blistering or dust settling.
Optimal Fan Speed
When drying paint with a fan, set the speed so air moves steadily across the surface without creating visible ripples, dust swirl, or overspray—typically a low to medium setting for most interior jobs.
- Aim for steady airflow to maximize fan efficiency.
- Use lower speeds to avoid disturbing finish.
- Combine with proper drying techniques like ventilation.
- Adjust for temperature and humidity to balance drying speed.
Ideal Fan Distance
Although distance and speed work together, placing the fan at the right spot matters most for even, fast drying—aim to position it so a gentle, consistent breeze skims the surface without lifting paint or stirring dust. Set fan distance about 3–6 feet for walls, closer for panels. Use ideal placement to avoid streaks and dust.
| Surface | Distance | Note |
|---|---|---|
| Wall | 4 ft | Even |
| Trim | 2 ft | Gentle |
| Panel | 1.5 ft | Closer |
| Ceiling | 5 ft | Caution |
Using Ventilation and Fans Together Safely
If you’re trying to speed paint drying, pair fans with proper ventilation to move fumes out and fresh air in—fans circulate air, but they won’t remove solvent vapors unless there’s a clear exhaust path.
Use ventilation safety and smart fan usage to reduce fumes and fire risk. Follow these steps:
- Open windows for cross-flow.
- Position exhaust fan opposite intake.
- Avoid blowing directly on wet paint.
- Use rated electrical outlets.
Temperature and Humidity: What Fans Change
You’ll notice a fan can warm the air slightly and sweep away moist boundary layers that slow drying.
By lowering local humidity and boosting airflow, it raises the evaporation rate of solvent from the paint surface.
Keep in mind the effect varies with room temperature and how much moisture the air can hold.
Air Temperature Effects
When you point a fan at a freshly painted surface, it doesn’t actually raise the air temperature but it changes how heat and moisture move around the paint.
You’ll influence drying by altering air temperature gradients and shifting humidity levels near the film.
Consider:
- Faster evaporation at warmer surfaces
- Cooler surfaces slow cure
- Uneven drying risk
- Monitor ambient conditions
Humidity Reduction Basics
Because fans move air away from the painted surface, they lower the local humidity around the film and speed moisture evaporation.
You’ll notice improved humidity control in the immediate area, which prevents trapped dampness and reduces tackiness.
Position fans to pull moist air away and introduce drier room air.
Monitor moisture levels with a hygrometer so you don’t overdry or create drafts.
Evaporation Rate Increase
If you blow air across a wet paint film, you speed evaporation by thinning the saturated layer of air that clings to the surface; that layer normally limits how fast moisture can leave the paint.
You’ll use fans as practical evaporation techniques to improve moisture control. Consider:
- Direct airflow angle
- Fan speed balance
- Room ventilation
- Temperature moderation
Preventing Dust, Orange Peel, and Brush Marks
Although a fan speeds evaporation, you still need to control airflow and airborne particles to prevent dust, orange peel, and brush marks.
Keep the room clean, use slow, even strokes, and position gentle, consistent airflow so the paint levels before it skins over.
Keep the room tidy, apply slow even strokes, and aim gentle, steady airflow so paint levels before skinning.
For dust control, seal vents, wipe surfaces, and use tack cloths.
Maintain proper surface texture by thinning paint slightly and sanding between coats.
When to Avoid Fans: Tacky Coats and Fresh Solvents
You’ve done the prep to keep dust and surface texture under control, but there are times when a fan will do more harm than good.
- Don’t blast tacky surfaces; flow can create ridges.
- Avoid strong airflow during solvent evaporation; it can trap solvents under skin.
- Skip fans on freshly applied slow-cure coats.
- Use gentle ventilation or timed bursts once tackiness subsides.
Drying Time Benchmarks for Common Paints and Primers
Different coatings dry at different rates, so know the benchmarks before you plan tasks around a finish.
You’ll find latex dries to touch in 30–60 minutes, oil-based in 6–8 hours, and primers vary—fast-setting in under an hour, conventional primers 2–4 hours.
Check manufacturer specs for precise drying rates by paint types, and adjust ventilation and temperature accordingly.
Coats and Recoat Windows With Fan‑Assisted Drying
When you use a fan between coats, it can cut the wait for recoat windows by boosting airflow across the surface and speeding solvent evaporation; just don’t overdo it or you’ll risk dry-skin formation that traps solvents underneath.
Using a fan between coats speeds solvent evaporation and shortens recoat times—use moderate airflow to avoid trapping solvents under a dry skin.
- Match air movement to coat thickness and paint types.
- Adjust fan for drying conditions and application methods.
- Maintain surface preparation to protect finish quality.
- Combine fan use with proper drying techniques.
Quick Fixes: Speeding Small Touch‑Ups Without a Fan
For small touch‑ups when a fan isn’t an option, you can use a hairdryer on low heat to speed drying — just keep it moving and hold it several inches away to avoid softening the paint.
Apply only thin coats so each layer dries quickly and won’t sag or streak under the warm air.
Test a hidden spot first so you’re sure the heat won’t cause bubbling or discoloration.
Use Hairdryer Carefully
A hairdryer can speed small touch-ups if you use it carefully, directing warm (not hot) air in short bursts to avoid bubbling or weakening the paint film.
Adjust hairdryer settings to low or medium, keep a 6–12 inch distance, and move constantly.
Follow safety precautions: avoid moisture, unplug between uses, and test on a hidden spot.
- Low heat
- Short bursts
- Constant motion
- Test first
Thin Coats Only
1 thin, even coat dries far faster than one heavy layer, so stick to light applications for quick touch-ups without using a fan.
You’ll find thin coat techniques—dragging the brush or rolling gently—cuts drying time and prevents runs.
Wait proper flash times, then add another light pass for ideal layering.
This approach saves time and yields smoother, more durable results.
Safety First: Fumes, Fire Risk, and Electrical Hazards
Though a fan can speed drying, you should prioritize safety: paint fumes can build up, many paints are flammable, and fans or extension cords can introduce electrical hazards.
You’ll manage fume exposure and meet ventilation requirements, observe fire safety, and practice electrical safety.
Checklist:
- Open windows for airflow
- Use explosion‑proof fixtures
- Keep combustibles away
- Inspect cords and outlets
Better Options Than a Fan: Dehumidifiers & Heat Guns
If humidity’s high, use a dehumidifier to pull moisture from the air and speed drying without stirring fumes.
For small areas or quick spot work, a heat gun set to a low temperature can accelerate curing, but don’t get it too close to the paint.
I’ll cover safe settings and precautions so you can choose the right tool.
Use A Dehumidifier
While a fan moves air, a dehumidifier actually removes moisture from the room, and that makes it a far more effective way to speed paint drying in humid conditions.
You’ll control humidity, improve drying efficiency, and reduce tackiness.
Use a dehumidifier to:
- Lower ambient moisture quickly
- Shorten cure times
- Prevent runs and blushing
- Protect fresh finishes
Apply A Heat Gun
Use a heat gun to speed drying when you need fast, localized results—it concentrates hot air on the wet surface so solvent and moisture evaporate quickly.
You’ll use heat gun techniques like keeping the nozzle moving, maintaining distance, and working in short passes.
Follow safety precautions: ventilate, avoid overheating, keep flammables away, and wear gloves and eye protection to prevent burns and fire risk.
Room Setup for Even, Fast Drying
Before you turn on a fan, arrange the room so air can move freely across painted surfaces: clear furniture and drop cloths away from walls, open windows to create a cross-breeze, and position fans to pull fresh air in and push moist air out.
Before running a fan, clear obstructions, open windows for cross-breeze, and aim fans to move fresh air through.
You’ll optimize the paint environment and drying conditions by following:
- Direct airflow parallel to walls.
- Maintain moderate humidity.
- Keep doors open.
- Avoid obstructions.
Troubleshooting Uneven Drying and Blistering
If paint’s drying unevenly or blistering, don’t panic—you can usually diagnose the cause by checking a few common factors: surface contamination, trapped moisture, incompatible products, or overly strong airflow. Check substrate, humidity, and product labels; fix contamination and wait for moisture to clear. Identify blistering causes and correct to prevent uneven texture.
| Symptom | Likely Fix |
|---|---|
| Blisters | Dry, strip, recoat |
| Patchy finish | Sand, clean, prime |
Pro Painters’ Rules: When They Turn On a Fan
When pro painters switch on a fan, they’re not just trying to speed things up—they’re controlling airflow to balance drying time and finish quality.
You’ll follow clear fan usage rules from professional insights: position fan for gentle cross-breeze, avoid direct blast on wet coats, use low speed for solvent-based paints, and monitor humidity closely to prevent skinning or tackiness.
Cost vs. Benefit: Time Saved, Finish Risk, and Equipment Cost
Although a fan can shave hours off drying time, you’ll want to weigh that against the risk to the finish and the cost of the equipment and setup.
Do a quick cost analysis: fan purchase or rental, energy, and any protective gear.
Your benefit evaluation should compare minutes saved versus potential surface defects and touch-up time so you decide if the tradeoff’s worth it.
Decision Checklist: Should You Use a Fan on This Paint Job?
Wondering whether to run a fan on this paint job? You’ll weigh fan types, paint finishes, drying techniques, and air quality to decide.
Consider these clear factors:
Consider these clear factors: ventilation, finish, drying method, and fan placement before deciding to run airflow on paint.
- Room ventilation and air quality — any fumes or dust?
- Paint finish — gloss tolerates airflow better.
- Drying techniques — speed vs. cure time balance.
- Fan placement — avoid direct blast on wet coats.
Frequently Asked Questions
Can Fans Affect VOC Readings or Indoor Air Quality Monitors?
Yes — fans can alter VOC levels and indoor air quality readings by boosting air circulation, shortening drying time, and speeding odor dispersion; you’ll see fluctuating monitor readings and should position sensors away from direct airflow for accuracy.
Do Fans Impact Paint Adhesion to Metal or Plastic Substrates?
Yes — fans can influence paint adhesion on metal or plastic substrates by altering drying rate and solvent evaporation; you’ll guarantee substrate compatibility, follow manufacturer cure times, and avoid overly rapid drying that can cause poor bonding or film defects.
Will Using a Fan Change the Color or Sheen of Cured Paint?
By and large, you won’t see dramatic changes: a fan can cause minor color consistency issues and slight sheen variation if it speeds surface curing unevenly, so monitor airflow and distance to avoid hotspots and blotchy finishes.
Can Fans Spread Mold Spores During Paint Curing in Damp Environments?
Yes — you can spread mold spores with a fan in damp environments. You’ll increase airborne spores if mold growth exists; prioritize moisture control, ventilation, and filtration to reduce spore distribution and support proper paint curing.
Are There Insurance or Warranty Implications From Using Fans During Painting?
A cracked umbrella over wet paint, don’t assume safety: you’re risking insurance coverage and might void warranty claims if fans cause damage or improper curing. Check policy language and manufacturer terms before using fans to avoid denied claims.
Conclusion
You can use a fan to speed drying for water‑based paints in many situations, but don’t blast solvent or oil‑based finishes or you’ll ruin the job. Think about airflow, distance, humidity, and temperature, and watch for uneven drying, blistering, or dust settling. When in doubt, follow the paint label and do a small test. A little breeze can be a miracle worker—but a gale will turn a great finish into a disaster.