Will Oil Based Primer Stick to Latex Paint? Explained
Yes — you can usually apply oil-based primer over fully cured latex paint, but it needs cleaning and light sanding to stick reliably. Remove grease, soap residue, and chalking, then scuff the surface with fine sandpaper so the oil primer can bite. Use a good-quality oil primer for glossy latex or problem stains. Allow proper drying and ventilate well. Keep in mind other tradeoffs like odor and cleanup, and keep going to learn when oil is truly the best choice.
Who’s Asking : And What They Need
Who’s asking matters because your goals change what advice you need: are you a homeowner prepping walls for a long-lasting finish, a DIYer covering old latex with oil primer, or a pro handling high-traffic trim?
You’ll weigh latex paint concerns, surface prep, and primer selection differently. Match technique and product to experience level, substrate condition, and desired durability to avoid adhesion failures.
Will Oil Primer Stick to Latex Paint?
If you’re wondering whether oil primer will bond to existing latex paint, start by reflecting on surface preparation needed—cleaning, sanding, and deglossing are often essential.
You’ll also need to contemplate adhesion compatibility factors like the age and sheen of the latex coat and the specific primer formulation.
Finally, weigh long-term performance: even with proper prep, monitor for yellowing, cracking, or peeling over time.
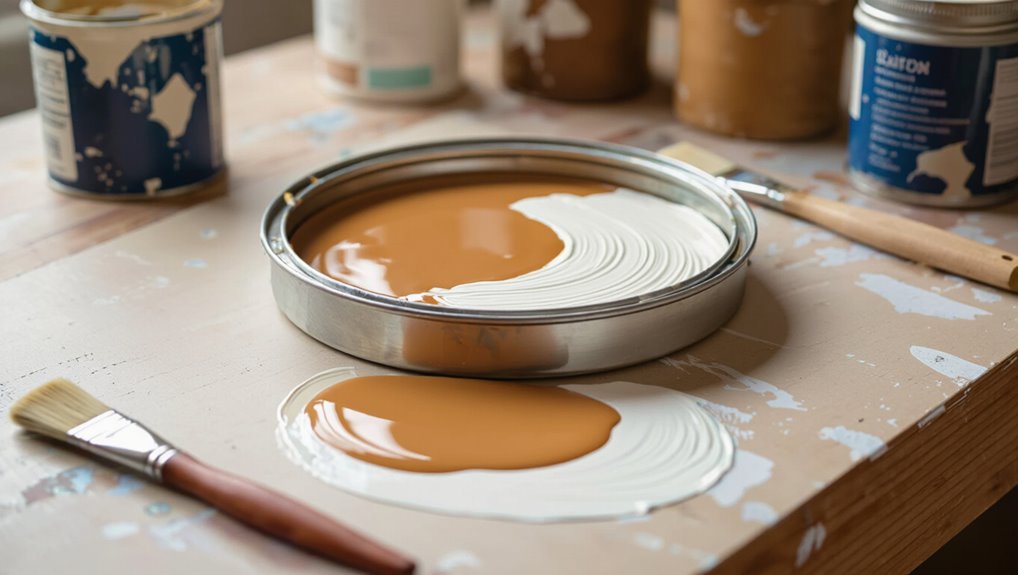
Surface Preparation Needed
Preparation matters: before applying oil-based primer over latex paint, you’ll need to clean, scuff, and degrease the surface so the primer can bond.
You should remove dirt, chalking, and loose flakes to guarantee surface cleanliness. Lightly sand glossy areas, wipe away dust, and use a mild solvent for greasy spots.
Test paint compatibility on a small patch before full application.
Adhesion Compatibility Factors
Now that the surface is clean and scuffed, you’ll want to evaluate several adhesion compatibility factors before rolling on an oil-based primer over latex paint.
Consider:
- Existing latex gloss level — high gloss increases adhesion challenges.
- Primer chemistry — choose oil formulas designed to bond to latex or use a bonding agent.
- Environmental conditions — temperature and humidity affect cure and adhesion.
Long-Term Performance
Because oil-based primers form a hard, slow-curing film, they’ll often adhere to properly cleaned and deglossed latex paint.
However, long-term performance depends on factors you control—surface profile, primer choice, and environmental conditions during cure.
You should sand for tooth, choose a compatible oil primer, and allow full cure; doing so improves long lasting adhesion and surface longevity, reducing peeling and maintenance needs.
Quick Verdict and When to Use Oil Primer
If you’re short on time: oil-based primer will bond to latex paint in many cases, but you should only use it when the surface is glossy, stained, or previously treated with oil products—otherwise a latex primer is usually a better choice.
Use oil primer benefits when facing tough adhesion.
Consider scenarios:
- Glossy surfaces
- Stain blocking
- Old oil-treated trim
Why Pick Oil Primer Over a Latex Primer
Having covered when oil primer makes sense, let’s look at why you might choose it over a latex primer: oil formulas offer stronger adhesion to slick, previously oiled, or heavily stained surfaces and resist tannin bleed-through that latex primers can struggle with.
You’ll pick oil primer for durability, stain blocking, and smoothing rough surfaces; weigh oil primer advantages against latex primer disadvantages like flexibility and faster drying.
How Oil vs Latex Paint Actually Differ
While both oil and latex paints cover surfaces, they differ in composition, drying chemistry, and performance traits you’ll notice during application and over time.
While both oil and latex coat surfaces, they differ in composition, drying chemistry, and performance over time
You’ll observe oil characteristics like slower drying, richer leveling, and stronger solvent resistance.
Latex properties include faster cure, easier cleanup, and greater flexibility.
Consider these contrasts:
- Durability vs. flexibility
- Dry time vs. quick return to service
- Solvent resistance vs. water cleanup
What Adhesion Needs: Key Surface Bonds
Because adhesion depends on how well coating molecules lock onto a surface, you need to think about chemical bonding, mechanical interlock, and surface energy.
You’ll assess surface chemistry to guarantee compatible functional groups, clean substrate, and appropriate porosity.
Effective bonding mechanisms combine van der Waals forces, covalent or polar interactions, and physical anchoring.
Prep and matching chemistry determine durable adhesion.
When Oil Primer Bonds Well to Cured Latex
If the latex is fully cured you’ll get a much better bond because solvents in the oil primer won’t disrupt the film.
You should sand or scuff the surface and clean off grease or dust so the primer can key mechanically.
Also pick an oil-based primer that’s formulated to work over latex or a universal bonding primer to guarantee chemical compatibility.
Surface Fully Cured
Cured latex paint gives oil-based primer a reliable surface to bond to, so you can expect strong adhesion once the latex has fully hardened.
You’ll know it’s ready after the curing process completes and the finish resists thumbprints.
Different surface types (wood, drywall, metal) affect timing. Consider:
- Smooth, cured latex = best adhesion.
- Semi-porous needs longer cure.
- Non-porous may require test.
Proper Surface Preparation
Now that the latex is fully hardened and resisting thumbprints, you’ll want to focus on preparing the surface so oil-based primer can grip properly.
Scuff-sand glossy areas to create consistent surface texture, clean off dust and oils, and repair chips. Use a high-quality deglosser if needed.
Proper cleaning and abrasion directly improve paint adhesion and guarantee the oil primer bonds reliably.
Compatible Primer Formulations
When the latex has fully cured and you’ve scuff-sanded and cleaned the surface, certain oil-based primer formulations will bond reliably to the old paint.
You should choose based on primer types and formulation differences:
- Alkyd oil primers for tight adhesion on cured latex.
- Bonding or adhesion-promoter oils for slick surfaces.
- High-solids oil primers when extra durability and sealing are needed.
Conditions That Stop Oil Primer From Sticking
If the surface is dirty, glossy, or covered with existing latex that’s not properly abraded, oil-based primer won’t bond reliably. You’ll see failed oil primer adhesion when contaminants, high gloss, or flexible latex paint compatibility issues exist. Avoid moisture, chalking, or silicone residues; these stop bonding and cause peeling.
| Issue | Effect | Fix |
|---|---|---|
| Dirt | Blocks bond | Clean |
| Gloss | Reduces bite | Scuff |
| Silicone | Repels primer | Remove |
| Moisture | Prevents cure | Dry |
Prep Checklist: Make Latex Paint Ready for Oil Primer
You’ve already seen what prevents oil primer from sticking; next, prepare the latex surface so the primer can grab and cure properly.
Follow this prep checklist for latex paint preparation and primer application tips:
- Clean with mild detergent, rinse, dry.
- Repair chips, remove loose paint, sand edges.
- Wipe with a tack cloth, guarantee oil-free surface, tape edges.
How to Degloss and Scuff Latex Paint Correctly
Before you prime, make sure you clean the surface thoroughly to remove grease, dust, and chalky residue.
Then lightly scuff any glossy latex with fine-grit sandpaper or a scuffing pad so the primer can bite.
Wipe away sanding dust and tack-cloth the area before applying your oil-based primer.
Clean Surface Thoroughly
When you’re prepping latex paint for an oil-based primer, clean, deglossed surfaces are nonnegotiable: grease, dirt, and the shiny top layer keep primer from bonding properly.
Remove surface contaminants with proper cleaning methods, then rinse and dry. Follow these steps:
- Degrease with trisodium phosphate or mild detergent.
- Rinse thoroughly.
- Dry and inspect for residue before priming.
Lightly Scuff Gloss
Now that the surface is clean and dry, lightly scuffing the gloss gives the oil-based primer something to bite into.
Use fine-grit sandpaper or a scuff pad, sanding with even pressure to create uniform gloss reduction without damaging edges.
Wipe away dust, inspect for sheen consistency, and apply primer promptly.
These scuff techniques guarantee adhesion and a smooth, durable finish.
Cleaning and Degreasing Latex Surfaces Before Priming
If your latex surface looks dull, greasy, or has fingerprints, you’ll need to clean and degrease it before you prime.
Use proper preparation methods to remove surface contaminants with suitable cleaning agents and degreasing techniques.
Follow steps:
- Wipe with a mild detergent solution.
- Rinse and dry thoroughly.
- Use a solvent wipe if oily residues persist before priming.
Best Oil-Based Primers for Priming Latex
Now that you’ve cleaned and degreased the surface, let’s look at oil-based primers that bond well to latex.
You’ll get tips on prepping the surface for best adhesion and a few top oil-based picks that consistently perform.
Read on to compare compatibility, application notes, and which brands are worth considering.
Oil Primer Compatibility
While oil-based primers can bond well to existing latex paint, you should pick formulas designed for adhesion and stain-blocking to avoid peeling or solvent-related issues.
You’ll weigh oil primer benefits against latex paint drawbacks and choose compatible products for trim, cabinets, or high-traffic walls.
- High-adhesion oil primers
- Stain-blocking formulas
- Low-VOC hybrid options
Surface Preparation Tips
Because a clean, sound surface makes the difference between lasting adhesion and premature failure, prep is the step you can’t skip when using oil-based primers over latex paint.
You should clean, degloss, sand to adjust surface texture, and remove loose paint.
Test small areas to confirm paint compatibility, use a solvent wipe if needed, and guarantee surfaces are dry and dust-free before priming.
Top Oil-Based Picks
With the surface prepped, you’re ready to pick a primer that’ll bond well to latex paint and stand up to wear.
Consider these top oil based choices—popular options from best brands offering primer benefits like oil durability and improved paint adhesion.
Application tips and project considerations follow:
- Zinsser Cover Stain — classic oil durability.
- Kilz Original — strong adhesion, stain blocking.
- Rust-Oleum Zinsser — versatile, easy application tips.
When to Choose Bonding/Adhesion Primers
If your surface is glossy, slick, or previously painted with oil-based products, choose a bonding/adhesion primer to confirm new latex paint will grab and hold. These primers chemically link to difficult substrates and create a paint-ready surface so you don’t end up with peeling or uneven coverage.
Use bonding techniques during primer selection: scuff-sand, clean thoroughly, and pick a primer formulated for adhesion to guarantee long-lasting results.
How Long to Wait After Latex Paint Before Oil Primer?
Before you slap oil-based primer over newly laid latex paint, consider dry time factors like humidity, temperature, and the paint’s label instructions.
You’ll also want to follow surface preparation steps—clean, sand lightly, and remove any gloss—so the primer can bond properly.
As a rule, wait the manufacturer’s recommended cure time (usually 24–48 hours for latex touch-dry, longer for full cure) before priming.
Dry Time Factors
When you’re planning to apply an oil-based primer over latex paint, the key question is how long you should wait for the latex to fully cure rather than just feel dry.
Cure depends on dry time and environmental factors.
Consider typical waits:
- Low humidity, warm: 24–48 hours.
- Moderate: 3–7 days.
- Cold/damp: 2+ weeks.
Surface Preparation Steps
Since latex paint can feel dry long before it’s fully cured, you should let it harden according to conditions—typically 24–48 hours in warm, dry rooms, 3–7 days in moderate conditions, and two weeks or more in cold or humid environments—before applying an oil-based primer.
Then clean, sand, and degrease the surface to guarantee proper adhesion.
Use Surface cleaning, Preparation techniques, Paint bonding checks, and careful Primer selection.
Recommended Waiting Period
You should wait until latex paint has fully cured—not just dry to the touch—before applying an oil-based primer: typically 24–48 hours in warm, dry conditions, 3–7 days in moderate climates, and two weeks or more in cold or humid environments; if the paint still feels soft, tacky, or emits a strong paint smell, give it more time to harden to secure proper adhesion and avoid peeling or blistering.
- Check tackiness.
- Note odor.
- Confirm firm finish.
Plan your waiting period and application timing to guarantee lasting results.
Brush, Roller, or Spray: Applying Oil Primer Over Latex
Although oil-based primer can bond to latex-painted surfaces, choosing between a brush, roller, or sprayer affects adhesion, finish uniformity, and drying time—and you’ll want to pick the method that matches the surface texture, project size, and your comfort level.
Use proper brush techniques for edges, roller application for flats, and spray methods for smooth results.
Address coverage issues, primer types, paint adhesion, finish quality, and application tips.
Drying and Curing Expectations for Oil Primer on Latex
After you’ve chosen your application method and laid down an even coat, temperature, humidity, and film thickness will determine how fast oil primer dries and how long it takes to fully cure over latex.
You’ll monitor drying times and curing processes; expect variations.
Typical timeline:
- Tack-free: 6–12 hours
- Recoat: 24–48 hours
- Full cure: 7–30 days
Common Adhesion Failures and How to Spot Them
Peeling, flaking, and blistering are the most common signs that an oil-based primer didn’t properly bond to latex paint, and spotting them early saves you time and rework.
Check edges, seams, and high-moisture areas for loose film. Run your thumbnail over suspect spots to test adhesion.
Note discoloration, bubbles, or powdery residues—these are clear adhesion issues indicating poor surface contact and need assessment.
Fixes for Peeling, Blistering, or Lifting Primer
Noticing peeling, flaking, or blisters means you’ll need to act before repainting; start by removing loose material with a scraper or putty knife and work back to firmly adhered edges.
Address peeling paint, blistering primer, lifting issues, adhesion challenges, and surface flaws by:
Address peeling, blisters, and lifting by sanding, cleaning, and spot-priming with a compatible primer before repainting.
- Sand to feather edges.
- Clean and degrease.
- Spot-prime with compatible primer and recoat.
Safety, Ventilation, and VOC Tips for Oil Primers
When you use oil-based primer indoors, keep windows and doors open and run a fan to push fumes outside.
Wear a respirator rated for organic vapors, gloves, and eye protection to avoid skin and inhalation exposure.
Limit time in the space, take frequent breaks outside, and consider low-VOC or waterborne alternatives if VOCs are a concern.
Proper Ventilation Practices
Because oil-based primers release strong fumes and higher VOCs than most latex products, you’ll want to prioritize ventilation before and during application.
Use effective ventilation methods to keep a healthy workspace and reduce exposure. Follow these steps:
- Open windows and doors to create cross-breeze.
- Run exhaust fans or box fans to push air outside.
- Use filtered air purifiers for lingering VOCs.
Personal Protective Equipment
1 essential step before you start applying oil-based primer is gearing up with proper personal protective equipment: wear a respirator rated for organic vapors, chemical-resistant gloves (nitrile or thicker), safety goggles, and long sleeves to limit skin contact.
You’ll also use safety gear like disposable coveralls and protective clothing, keep a spill kit nearby, and inspect equipment for leaks before mixing or brushing.
Managing VOC Exposure
If you’re working with oil-based primer, control VOC exposure by maximizing ventilation, minimizing time in the space, and using respirators rated for organic vapors.
Open windows and run cross-ventilation with fans, and, if possible, use a mechanical exhaust to pull fumes outside.
Follow safety guidelines, know VOC regulations, and consider alternative primers or eco-friendly options.
Proper paint disposal matters.
- Wear respirator
- Ventilate
- Limit exposure
Disposal and Environmental Tips for Oil-Based Products
Proper disposal of oil-based primers and related solvents matters for your safety and the environment, so don’t toss them in the trash or pour them down drains.
Use community hazardous-waste events, follow local regulations, and seek oil product recycling options.
Store leftovers sealed, label containers, and never mix solvents.
For smaller amounts, let paint solids harden for eco friendly disposal per municipal guidance.
When You Should Use a Latex Primer Instead
When you’re painting interior walls, trim, or surfaces that won’t see heavy wear or solvent exposure, choose a latex primer because it dries fast, cleans up with water, and breathes with the substrate—making it ideal for drywall, plaster, and previously primed latex surfaces.
Use latex primer benefits and smart application techniques to:
Use latex primer to seal drywall, improve topcoat adhesion, and speed projects with easy cleanup
- Seal porous drywall.
- Promote topcoat adhesion.
- Speed project completion with easy cleanup.
Cost, Durability, and Finish: Oil Primer vs Latex Primer
Although oil and latex primers can both prep a surface, they differ noticeably in cost, durability, and the finish they deliver—so you’ll want to weigh budget against performance. In a brief cost comparison and durability analysis, oil often costs more but resists stains; latex is cheaper, quicker drying, and easier cleanup.
| Aspect | Notes |
|---|---|
| Cost | Latex cheaper |
| Durability | Oil more durable |
| Finish | Oil glossier |
| Cleanup | Latex water-based |
Quick Decision Checklist: Should You Use Oil Primer Over Latex?
Wondering whether to pick oil primer over latex for your project? Use this quick checklist to decide:
- Surface prep: If latex paint compatibility is questionable, sand and degloss first.
- Performance needs: Choose oil primer benefits for stain blocking and adhesion on tricky surfaces.
- Timeline and cleanup: Pick latex if you need faster drying and easier cleanup; choose oil for durability.
Frequently Asked Questions
Can Oil Primer Be Tinted to Match Existing Latex Paint?
Yes — you can tint oil primer to approximate your latex paint; professionals offer tinting options and color matching, but don’t expect perfect matches. You’ll want test patches and possibly final topcoat adjustments for exact color.
Will Oil Primer Yellow Over Light-Colored Latex Finishes?
About 30% of oil primers show noticeable yellowing; you’ll find oil primer adhesion decent but it can yellow over light finishes, so test for latex paint compatibility and consider a white shellac or alkyd alternative first.
Can I Apply Wallpaper Over Oil-Primed Latex Walls?
Yes — you can apply wallpaper over oil-primed latex walls if you prepare properly. You’ll guarantee wallpaper adhesion by sanding glossy oil primer application, cleaning, and using a high-quality wallpaper paste compatible with nonporous surfaces for lasting bond and finish.
How Long Before Repainting With Latex Over Oil Primer?
Give it 24 hours—unless you enjoy suspense; oil needs time to cure. You’ll speed things by testing tackiness, choosing primer selection wisely, and using proper repainting techniques so your latex topcoat bonds and lasts without drama.
Do Oil Primers Affect Indoor Air Quality Long-Term?
Yes — oil primers can worsen indoor air quality long-term because they emit volatile compounds that become persistent indoor pollutants; you’ll need good air circulation, source control, and ventilation to reduce long-term effects and protect occupant health.
Conclusion
Yes — oil-based primer will stick to latex paint if the surface’s clean, dull, and scuffed up a bit; think of it as a stubborn seed finding purchase in rough soil. You’ll reach for oil primer when you need stain-blocking, extra adhesion, or a hard, shell-like finish. But if the latex topcoat’s flexible, or you want easier cleanup and lower fumes, stick with a latex primer instead.