
How to Paint an Exterior Door Without Removing It (Step-by-Step)
You can paint a hung exterior door without removal by masking hardware, taping nearby trim, and covering floors and plants with drop cloths. Clean, degloss, and lightly sand the surface, fill dents, and spot-prime bare areas. Caulk seams, then apply thin, even coats with a sash brush for edges and a foam roller for panels, allowing proper dry times and light sanding between coats. Test operation after curing, and keep going for full step‑by‑step guidance.
Can You Paint an Exterior Door Without Removing It?
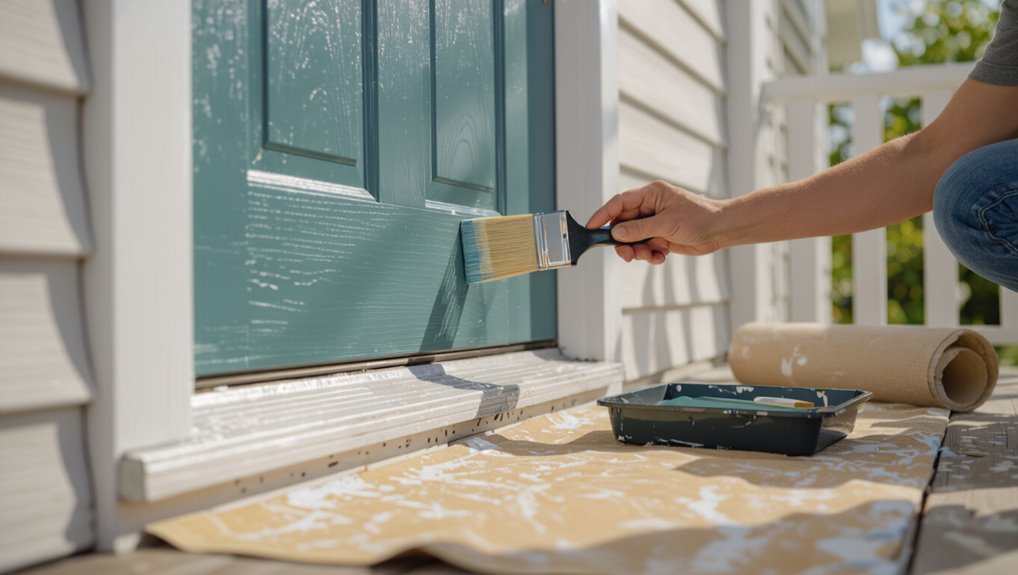
Yes—you can paint an exterior door without taking it off the hinges.
You’ll prep by cleaning, sanding, and masking trim and hardware, then apply primer and weatherproof coatings suited to your climate.
Work systematically—top to bottom, using thin, even coats—and follow drying times.
This approach updates curb appeal and lets you experiment with current color trends without removing the door.
Who Should Tackle a Hung Exterior Door Project
If you’re comfortable with basic DIY tasks—cleaning, sanding, taping, and using a brush or roller—you can handle painting a hung exterior door yourself.
DIY novices should start with small prep and one coat, progress cautiously, and expect tidy results.
Call Professional contractors if the door has structural damage, complex trim, severe weatherproofing needs, or you want guaranteed durability and finish.
Tools and Materials for Painting an Exterior Door in Place
Now that you know whether the job suits your skills, gather the right tools and materials so painting in place goes smoothly. You’ll need sandpaper, a tack cloth, quality exterior primer and paint, angled brushes, foam rollers, drop cloths, painter’s tape, a caulk gun with exterior caulk, safety goggles and weatherproof gloves, a small screwdriver for hardware, and paint thinner for cleanup.
Protect Siding, Trim, Porch, and Hardware Before You Start
Before you put brush to door, protect everything around it: drape drop cloths over the porch floor and nearby plants, tape plastic or paper over siding and trim, and remove or mask hardware so paint can’t drip onto hinges, locks, or glass.
Use precise siding protection and a clean masking technique: secure edges with painter’s tape, cover trim seams, and shield doorknob and threshold thoroughly.
Set Up Drop Cloths, Ladders, and Safe Scaffolding
Once the surrounding surfaces are protected, lay down drop cloths to catch drips and give yourself a stable work area; secure them with tape or weights so wind or foot traffic won’t shift them.
Create a clear safety perimeter and set ladders with proper ground anchoring. Choose scaffolding you trust. Feel confident, calm, and focused as you work.
- Relief
- Pride
- Control
- Safety
Remove or Mask Weatherstripping and Thresholds In Place
Frequently, you’ll need to either remove or carefully mask weatherstripping and the threshold to get clean paint lines and prevent sticky buildup; take a moment to decide which approach works best for your door.
Decide whether to remove or mask weatherstripping and the threshold for clean paint lines and no sticky buildup.
If removable, peel gently and note adhesive compatibility for reinstallation.
If masking, use low‑tack tape and leave gaps for thermal expansion.
Protect hardware and test movement before painting.
Clean an Exterior Door for Paint Adhesion
Before you paint, clean the door thoroughly to remove dirt, cobwebs, and loose debris so the new finish will stick.
Degloss and scuff sand glossy spots to create tooth, then wipe the surface with a damp cloth or a mild cleaner to remove sanding dust and oils.
Don’t forget to clean hinges and hardware (or mask them) so paint won’t build up or cause sticking.
Remove Dirt And Debris
Regularly clean the door’s surface so paint will stick: wipe away loose dirt, dust, cobwebs, and bird droppings with a soft brush or cloth, then wash remaining grime with a mild detergent solution and a non-abrasive sponge.
Remove stubborn buildup, pet hair, and residues—avoid high-pressure pressure washing on delicate trims.
Follow this simple routine:
- Brush
- Wipe
- Rinse
- Dry
Degloss And Scuff Sand
Once the door’s clean and dry, you’ll degloss and scuff-sand the finish so new paint bonds properly; dull the existing sheen with fine-grit sandpaper or a scuff pad, working evenly across panels, edges, and trim until the surface feels slightly toothy.
This step alters paint chemistry at the surface, promoting adhesion and enhancing finish durability. Wipe dust away before priming and painting.
Clean Hinges And Hardware
Don’t skip the hinges and hardware—they collect grime and oils that can prevent primer and paint from sticking and can stain the new finish. You’ll clean, degrease, and protect metal so paint looks flawless.
Then:
- Remove loose dirt.
- Degrease hinges.
- Polish hardware.
- Lubricate hinges.
Do it gently so the door functions and your finish stays pristine.
Sand and Scuff Wood, Steel, and Fiberglass Doors
Now that the door’s clean, you’ll need to sand or scuff the surface so paint can grip properly.
Use fine-grit sandpaper for wood to smooth imperfections, a scuffing pad or 220–320 grit for steel to remove gloss, and a light sanding with 220–320 grit or a scuff pad for fiberglass to avoid damaging the gel coat.
Work evenly, wipe away dust, and spot-prime any bare areas before you paint.
Sanding Techniques For Materials
Start by identifying the door material—wood, steel, or fiberglass—because each needs a different sanding approach to create proper adhesion without damaging the surface. Choose grit selection wisely and adjust your pressure technique for each material. Follow these emotional steps:
- Empathize with wear.
- Respect the original finish.
- Breathe through the chore.
- Admire the renewed surface.
Scuffing And Surface Prep
Prep the surface by scuffing and sanding each door material according to its needs: use medium-grit sandpaper (120–150) or a scuff pad on wood to remove gloss and smooth imperfections, a fine abrasive pad or 220-grit sandpaper on fiberglass to dull the gelcoat without cutting through, and a fine-grit sandpaper or non-woven scuff pad on steel to knock down rust spots and old paint edges before cleaning.
| Feel | Goal | Result |
|---|---|---|
| Relief | Clean surface | Better adhesion |
| Confidence | Even texture | Texture primers work |
| Safety | Environmental testing done | Durable finish |
Fill Dents, Gouges, and Nail Holes on a Hung Door
Patch dented spots, gouges, and nail holes before painting so your hung door looks smooth and professional. You’ll want wood filler for shallow flaws and epoxy putty for deeper damage.
Follow steps to feel pride in the result:
- Clean and sand area.
- Apply filler or putty.
- Smooth and let cure.
- Sand flush, wipe clean, paint.
When to Repair Hardware Before Painting (Vs. Replace)
Before you paint, check that locks, hinges, and handles work smoothly—if something sticks or wobbles, repair or replace it first. Next, judge cosmetic wear: minor scratches can be cleaned or touched up, but pitted or rusted pieces usually need replacing. Finally, weigh the cost versus time—a quick inexpensive fix may save effort now, but swapping hardware could be faster and give a better long-term result.
Assess Functionality First
When you scope out the door, check every moving part to decide whether to repair the hardware now or replace it later—locks, hinges, and weatherstripping should operate smoothly and align correctly so paint won’t hide deeper problems. Use an operation checklist and test latch adjustment.
Feel confident fixing issues first:
- Tighten loose hinges
- Lubricate moving parts
- Adjust latch alignment
- Replace failing seals
Evaluate Cosmetic Damage
Inspect the door hardware closely to decide whether you’ll repair cosmetic flaws or swap parts out entirely.
If you spot surface discoloration, light scratches, or minor rust, clean and touch up hardware before painting.
Severe corrosion, warped trim, or paint blistering under metal usually means replacement is smarter.
Choose repairs you can finish cleanly so new paint adheres and looks professional.
Consider Cost Versus Time
If you want the best balance of budget and time, weigh how much effort a repair will take against the price of a replacement. Decide based on Labor cost, expected Time savings, and door function.
Consider:
- Repair if screws and latch are simple.
- Replace for rusted, failing mechanisms.
- DIY only if confident.
- Factor resale and aesthetics.
Tape Off Glass Panes, Decorative Hardware, and Hinges
Before you start painting, protect any glass panes, decorative hardware, and hinge areas with painter’s tape so paint lines stay crisp and hardware stays functional.
Use glass masking tape for clean edges around panes, cover knobs and escutcheons, and wrap hinge protection tape or thin foil to prevent buildup.
Press tape edges firmly, check for gaps, and remove tape while paint is tacky for best results.
Pick Brushes, Rollers, or a Sprayer for a Hung Door
For a hung exterior door, pick tools that match the surface: use a brush for trim and crevices, a roller for flat panels, and a sprayer when you want fast, even coverage.
You’ll likely combine a small angled brush for edges with a mini roller for larger recessed areas.
If you choose a sprayer, mask surrounding surfaces thoroughly to avoid overspray.
Brush For Detail Work
Usually you’ll want a small, angled sash brush for cutting in edges and a 2–3 inch straight brush for panels and flat areas. Choose a fine liner or trim brush for crisp lines, synthetic bristles for latex, and a good-quality sash for corners. Use tools that make the job feel satisfying:
- Precise
- Calm
- Confident
- Proud
Roller For Flat Panels
A small foam or short-nap roller will get you the smoothest finish on flat door panels, and you’ll find it faster than brushing each section by hand.
Use a foam roller or mini roller for even coverage, working from top to bottom in light, overlapping passes. Keep edges neat with a trimmed brush, reload the roller sparingly, and avoid excess drips.
Sprayer For Quick Coverage
Consider a paint sprayer if you want the fastest, most uniform coverage on a hung door—especially when tackling raised panels, trim, or textured surfaces that eat up time with a brush or roller.
You’ll love speed and even finish, but factor in HVLP maintenance and mask for electrostatic benefits.
- Fast
- Smooth
- Messy prep
- Rewarding finish
Paint Panels, Edges, and Recessed Details Cleanly
Start by tapping into the right tools: a slim brush, an angled sash brush, and a small foam brush will help you reach panel edges, recessed grooves, and narrow trim without flooding them with paint.
Work from center outward, load brushes sparingly, and follow grain. Carefully paint grooves, feather edges, and apply edge sealing to prevent drips and make certain crisp lines around panels and hardware.
How to Spray‑Paint a Hung Exterior Door: Pros and Cons
If you want a faster, smoother finish than brushing offers, spray‑painting a hung exterior door can be a great option — but it comes with trade‑offs. You’ll gain speed and uniformity, especially with electrostatic spraying, but risk overspray, ventilation issues, and prep complexity.
Consider:
- Speed vs control
- Overspray anxiety
- Ventilation needs
- environmental impact concerns
Paint Around Hinges Without Binding the Door
When you paint around hinges without removing the door, mask and shim carefully so the paint won’t build up and cause binding; use low‑profile tape on the hinge leaves, slip folded wax paper or thin plastic between the hinge knuckles, and apply thin, even coats to avoid drips that can freeze the joint.
After painting, remove masks, perform clearance testing, and add hinge lubrication if needed to guarantee smooth operation.
How Many Coats and Drying Times Between Coats
You’ll usually need two coats for even coverage, though dark-to-light color changes or rough surfaces might call for a third.
Wait the paint maker’s recommended drying time between coats—typically 2–4 hours for latex and 6–24 hours for oil-based formulas—to avoid tackiness or brush marks.
Lightly scuff or sand between coats if the surface feels rough to guarantee good adhesion for the next layer.
Number Of Coats
Deciding how many coats to apply comes down to the paint type, door material, and desired durability: most exterior doors need two thin, even coats for full coverage and protection, while a primer may add an extra coat if you’re covering bare wood or a dark color.
Aim for Coverage Count that guarantees Finish Uniformity and emotional satisfaction:
- Confidence
- Pride
- Relief
- Joy
Drying Time Between
Usually, let each coat dry fully before adding the next so you don’t trap solvents or cause tackiness; most latex paints need about 1–2 hours to be touch-dry and 4–6 hours between coats, while oil-based or alkyd paints often require 6–8 hours (or up to 24 for colder, humid conditions). You’ll factor ambient humidity and use rapid ventilation to shorten waits.
| Coat | Dry | Wait |
|---|---|---|
| 1 | touch | 4–6h |
| 2 | feel | 4–8h |
| 3 | cure | 24h |
Fix Runs, Drips, and Orange Peel on a Hung Door
Spotlight any runs, drips, or orange peel right away so you can address them before the paint fully cures. Sand gently with fine grit to blend paint texture and aid finish leveling. Wipe dust, feather edges, spot-prime, then repaint. Feel relieved as the door smooths.
Spotlight flaws, sand lightly, wipe clean, spot-prime, repaint — breathe easy as the door smooths.
- Frustration
- Hope
- Satisfaction
- Pride
Remove Tape and Reveal Crisp Lines Safely
When the paint feels dry to the touch but not fully cured, peel the tape back slowly at a 45-degree angle to reveal crisp lines without lifting the new finish.
Use steady pressure for a clean edge release, keeping the pull low and close to the surface.
If paint tacks, score the tape with a razor first.
Proper crisp masking prevents jagged edges and touchups.
Reattach Weatherstripping, Thresholds, and Hardware
Now that the paint’s cured and the tape’s off, start reattaching the weatherstripping, threshold, and hardware in the reverse order you removed them. Check fit and alignment to preserve thermal insulation and seal longevity.
Follow steps to feel confident:
- Press weatherstripping firmly.
- Set threshold and screw securely.
- Reinstall strike plate.
- Mount knob/lock, test operation.
Cure Paint to Prevent Sticking and Scuffing
Let paint cure fully before you close the door, paying attention to the recommended dry time and ideal temperature and humidity so it doesn’t stick.
Use several thin coats rather than one thick one to speed drying and reduce tackiness.
Finish with a durable topcoat to protect against scuffs and guarantee smoother operation.
Dry Time And Conditions
Although the paint may feel dry to the touch within a few hours, you’ll need to allow proper cure time and the right conditions before rehanging or heavy use to avoid sticking and scuffing.
Curing is weather dependent and tied to humidity thresholds; plan patience.
- Wait 24–48 hours before light use.
- Avoid high humidity.
- Keep temps 50–85°F.
- Test gently before full use.
Thin Coats For Faster Cure
Apply thin, even coats to speed drying and reduce the risk of sticking or scuffing. You’ll use thin layers, wait recommended intervals, and lightly sand between coats for better adhesion. This gives faster drying and lowers tackiness so the door won’t scuff. Be patient; multiple quick passes beat one heavy swipe.
| Step | Tip |
|---|---|
| 1 | Thin layers |
| 2 | Short passes |
| 3 | Wait intervals |
| 4 | Light sand |
| 5 | Inspect touches |
Protective Topcoat Application
Usually, you’ll add a clear protective topcoat once the final paint layer has fully cured to lock in the finish and prevent sticking or scuffing. Choose a formula with UV inhibitors and optional Slip resistance for thresholds.
Apply thin, even coats; sand lightly between coats if needed. Follow drying times to avoid tackiness.
- Protect
- Smooth
- Last
- Confident
Maintain Your Freshly Painted Exterior Door
Once the paint’s dry, keep up a simple routine to protect your door and extend that fresh look: inspect for chips and dirt monthly, wipe away grime with a mild detergent, and touch up small nicks promptly with matching paint to prevent moisture intrusion and peeling. Include seasonal maintenance for long term protection.
| Task | Frequency | Tools |
|---|---|---|
| Inspect | Monthly | Cloth |
| Clean | As needed | Mild detergent |
| Seal | Yearly | Exterior sealer |
Touch‑Up Quick Fixes for Chips and Scratches
Keeping up with monthly inspections and quick cleanups helps you spot small chips and scratches before they worsen, so now let’s look at fast touch-up fixes you can do yourself.
Monthly checks and quick cleanups catch small chips early—try simple DIY touch-ups to keep damage from spreading.
Use paint pens for precise repair and test color matching on a hidden edge.
Follow these steps to feel relief and pride:
- Clean
- Sand
- Apply
- Seal
Cost and Time Estimates for Painting a Hung Exterior Door
Estimate the job by breaking it into parts: prep (cleaning, sanding, masking), materials (paint, primer, brushes/rollers, tape), and labor if you hire help. Plan 2–6 hours for a single hung door, longer if multiple coats dry slowly. Budget materials around $30–$100; factor Labor costs if hiring pro rates. Always allow extra time for Weather delays.
Common Mistakes to Avoid When Painting a Hung Door
When you’re painting a hung exterior door, avoid shortcuts that compromise the finish—skip poor prep, don’t use the wrong paint, and don’t rush drying times. You’ll want to protect paint longevity and weather resistance by doing things right. Consider these mistakes to avoid:
- Skipping sanding
- Using interior paint
- Painting in humidity
- Ignoring hardware protection
Final Checklist: Finish, Test, and Reopen Your Door
Finish strong: inspect the paint for even coverage, run your hand lightly to check for drips or tackiness, and confirm hinges, weatherstripping, and locks work smoothly before you reopen the door.
Do a final inspection for missed spots, sand and touch up if needed, then perform weather testing—open and close the door in various conditions.
Reinstall hardware and enjoy your refreshed entry.
Frequently Asked Questions
Can I Paint an Exterior Door in Cold or Humid Weather?
You can, but you shouldn’t if conditions exceed temperature limits or humidity effects impede drying; paint when temperatures stay within the product’s range and humidity’s low to moderate so coatings cure properly and adhesion and finish remain reliable.
What Paint Finish Is Best for High-Traffic Doors?
Think of a knight’s armor: you’ll want satin enamel for balanced durability and subtle sheen, but use high gloss polyurethane on edges or hardware for extra protection; you’ll get wear resistance without looking like a battlefield.
Can I Change Door Color Without Repainting the Jamb?
Yes — you can change door color without repainting the jamb; you’ll create color contrast deliberately, use trim staging like coordinating accents or temporary masks, and guarantee clean edges so the new hue looks intentional and polished.
How Long Before Waxing or Polishing a Painted Door?
You should wait at least 24–48 hours for touch-dry, but 7–30 days for full cure before waxing or polishing, depending on paint type, drying times, and surface prep quality; don’t rush—ensure complete cure for durability.
Is Painting Necessary for Storm Doors or Screen Doors?
You don’t have to paint storm or screen doors; imagine bright hardware gleaming while mesh breathes—paint’s optional unless protection or aesthetics demand it. Check materials compatibility and ventilation requirements before applying paint to avoid peeling or fumes.
