
Can You Paint Ceiling Tiles Black? What You Need to Know First
You can paint ceiling tiles black, but first you’ll confirm material, check for stains, mold, sagging, or fire‑rating labels, and test porosity and adhesion on a spare tile. Use the correct primer for metal, PVC, fiberglass, or mineral‑fiber, apply several thin coats, and preserve ventilation and safety; don’t paint if asbestos, active moisture, or compromised fire performance exist. Follow local codes and AHJ guidance, and keep in mind long‑term acoustic and maintenance effects as you go further.
Can You Paint Ceiling Tiles Black?
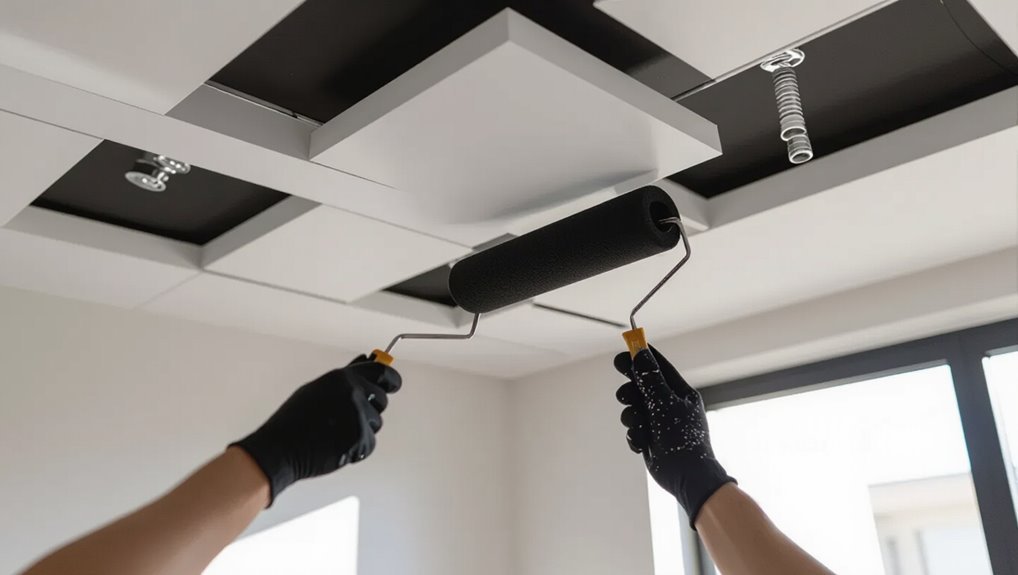
If you’re wondering whether you can paint ceiling tiles black, the short answer is yes—you can, but success depends on the tile material and prep.
You’ll get matte trends right with proper primer and a matte finish paint, and you’ll create dramatic contrast that changes room mood.
Test a spare tile, check for moisture or texture, and sand or clean as needed.
Quick Decision: Should You Paint or Replace?
You’ll want to weigh upfront cost versus long-term benefit: painting is cheaper now but may need touch-ups or replacement sooner.
Consider how durable your current tiles are and whether paint will mask or worsen issues over time.
Choose painting for short-term savings and replacement if durability and low maintenance matter more.
Cost Versus Benefit
When weighing whether to paint or replace ceiling tiles, consider both upfront costs and long-term value: painting runs cheap and quick, but it only masks issues like water damage, sagging, or mold that replacement will actually fix. Do a cost analysis and benefit assessment to decide.
| Option | Key Point |
|---|---|
| Paint | Low cost |
| Replace | Higher cost |
| Repair | Targeted fix |
| Aesthetic | Instant update |
Long-Term Durability
Because ceiling tiles face moisture, heat, and movement over years, think about how long a painted surface will actually last versus a full replacement: painting gives a quick aesthetic fix but won’t stop underlying deterioration, while replacing tiles restores structural integrity and resists future issues longer.
You’ll weigh cost, long term maintenance, and durability testing results to decide whether to paint or replace.
Identify Tile Material Without Removal
Before you paint, take time to identify what your ceiling tiles are made of so you pick the right prep and paint—without ripping any down. Inspect texture, weight, and edges to avoid material guessing.
Look for Removal signs like exposed backing at access points, labels in the grid, or different tile colors near vents. Use a magnet for metal detection and a light touch for softness.
Which Ceiling Tile Materials Take Paint Best
When you paint ceiling tiles black, the material matters: metal needs a primer for adhesion, fiberglass and plastic can be tricky without the right prep, and mineral fiber usually accepts paint well once cleaned.
You’ll want to treat each type differently to avoid peeling or clumping. Next we’ll cover specific prep and products for metal, fiberglass/plastic, and mineral fiber tiles.
Metal Tile Compatibility
If you’re working with metal ceiling tiles, know that their smooth, nonporous surface needs proper prep for paint to stick well. Sand lightly, clean off oils, and use a metal primer to aid adhesion and corrosion prevention.
Choose flexible paint that tolerates thermal expansion and contraction. Test a small panel first, and avoid heavy coatings that could peel or obscure tile detail.
Fiberglass And Plastic
Fiberglass and plastic ceiling tiles present very different painting challenges: fiberglass takes paint reasonably well after light sanding and a good bonding primer, while many plastics resist adhesion and need a specialty plastic primer or a paint formulated for vinyl or PVC. Consider Fiberglass health and Plastic recyclability when choosing finishes.
| Material | Tip |
|---|---|
| Fiberglass | Sand, prime |
| Plastic | Use plastic primer |
| Safety | Ventilate |
Mineral Fiber Tiles
Mineral fiber tiles accept paint better than many people expect: you can usually get good coverage with a stain-blocking primer and a flat or eggshell latex, but you’ll need to use light touch to avoid clogging the porous surface and changing the tile’s acoustic performance.
Prep by cleaning and testing a scrap; use gentle installation techniques and thin, even coats to preserve texture and sound control.
When to Avoid Painting Acoustic or Fiberglass Tiles (Risks)
While painting can freshen up a room, you should avoid coating acoustic or fiberglass ceiling tiles when doing so would harm their performance or safety—such as when tiles are designed to absorb sound, contain fire-retardant treatments, or show signs of water damage, mold, or asbestos contamination.
Don’t paint acoustic or fiberglass ceiling tiles if it risks acoustics, fire safety, or indicates water, mold, or asbestos.
Avoid painting in these cases to prevent compromised acoustics and Health hazards.
- visible mold
- water stains
- asbestos risk
- fire-rating loss
- active vents
How Porous Mineral-Fiber Tiles React to Paint
If your mineral-fiber tiles are highly porous, they’ll soak up paint unevenly and change the surface texture, which can affect how well the paint holds.
That same porosity also raises the risk of moisture absorption and visible staining over time.
Test a small area first so you can judge coverage, texture changes, and any susceptibility to damp spots.
Porosity Affects Absorption
Often, porous mineral-fiber ceiling tiles soak up paint like a sponge, so you’ll see uneven coverage and higher paint usage unless you adjust your approach.
You should do porosity testing to measure absorption rates, choose thinner coats, and use a primer sealer to reduce soak-in.
- Test a small area first
- Note drying time
- Record absorption rates
- Use sealing primer
- Apply thin coats
Texture And Paint Hold
Feel the surface before you paint: the texture of mineral-fiber ceiling tiles—from smooth to heavily fibrous—directly determines how well paint will cling and how many coats you’ll need.
You’ll test spots, sand lightly if necessary, and choose primers that boost paint adhesion without obscuring Texture preservation.
Gentle application preserves texture while ensuring coverage; heavy buildup risks flaking and uneven finish.
Moisture And Staining Risks
After you’ve assessed texture and paint adhesion, turn your attention to moisture and staining because mineral-fiber tiles are porous and readily absorb water, smoke, and airborne contaminants.
You should do moisture mapping, seal problematic tiles, and use stain prevention primers before painting. Consider replacing badly stained tiles to avoid trapped odors and mold.
- moisture mapping
- primer sealing
- stain prevention
- replace damaged tiles
- monitor humidity
What to Do With Vinyl-Coated or PVC Tiles
If your ceiling tiles are vinyl-coated or made from PVC, you’ll need to treat them differently than porous mineral tiles: these smooth, nonporous surfaces resist paint adhesion, so proper preparation is essential to get a lasting finish.
You can consider vinyl removal for damaged tiles or sand and degrease for PVC bonding. Then use a primer formulated for plastics and a flexible paint to avoid peeling.
Should You Paint Suspended (Drop) Ceiling Tiles Black?
Vinyl-coated and PVC tiles need special prep, but when you’re dealing with suspended (drop) ceiling tiles the question shifts from adhesion to practicality: will painting them black give you the look and performance you want? You can, but weigh acoustic concerns and visual contrast before starting.
Painting drop ceiling tiles black is possible, but consider adhesion, acoustics, and how it affects light and fixtures.
Consider:
- Room brightness impact
- Sound absorption change
- Tile material type
- Maintenance needs
- Fixture visibility
Will Painting Tiles Affect Fire Ratings or Code Compliance?
Before you paint ceiling tiles black, check whether the fire-rating label would be obscured or removed, since that can void compliance.
Consider that paint can alter a tile’s flammability or smoke rating, so test data or manufacturer guidance matters.
Finally, confirm local codes and your building inspector’s rules to make certain you won’t create a violation.
Fire-Rating Label Integrity
Although painting ceiling tiles can refresh a space, you’ll need to confirm it won’t obscure or remove fire-rating labels that prove compliance with building codes and insurance requirements.
You should preserve visible fire labeling, follow manufacturer guidance, and keep documentation of testing protocols.
If labels are damaged, consult authorities before proceeding.
- Check label location
- Verify legibility
- Contact manufacturer
- Retain records
- Ask inspector
Material Flammability Changes
When you paint ceiling tiles, you need to take into account whether the coating will change how the material burns or how authorities view its fire rating; some paints can add combustible solvents or alter surface characteristics enough to affect compliance.
You should verify that your chosen coating preserves fire resistance and doesn’t introduce chemical off‑gassing that could compromise safety, testing, or insurer expectations.
Local Code Requirements
If you’re in a building governed by commercial or multi‑family codes, check local regulations and the tile manufacturer’s guidance to confirm that painting won’t void a fire rating or violate code; many jurisdictions treat ceiling tiles in fire‑rated assemblies differently than ordinary finishes, and adding paint can change the listed performance.
You should do permit research, watch for code exceptions, and consult authorities.
- Verify manufacturer approval
- Check fire-rating labels
- Confirm permit research needs
- Ask about code exceptions
- Get written approval from AHJ
How Black Ceilings Change Perceived Room Size and Depth
Because black absorbs light rather than reflecting it, a dark ceiling makes the room feel lower and more intimate, so you’ll notice reduced vertical height and a stronger sense of enclosure.
You can use black to heighten perceived intimacy and shift vertical emphasis toward walls, making spaces feel cozier or more dramatic. Balance with lighter furnishings and selective contrast to avoid claustrophobia.
How Lighting Type Alters Black Ceiling Appearance
Switch your light sources and you’ll see a black ceiling change its mood—from velvety and absorbing under soft, warm light to crisp and textured under bright, cool illumination.
You’ll notice contrast metamerism with different bulbs, so pick lamps that match finishes and prioritize glare control to avoid hotspots.
- Warm incandescent
- Cool LED
- Directional spotlights
- Diffused pendants
- Dimmable fixtures
Can You Sand or Smooth Textured Tiles Before Painting?
When you’re prepping textured ceiling tiles, sanding or smoothing is possible but depends on the tile material and how much texture you want to retain; lightweight mineral, fiberglass, or polystyrene tiles can be sanded lightly, while heavier popcorn or acoustic tiles often crumble or lose fire/acoustic ratings.
You’ll use surface sanding for gentle texture removal, test a scrap, wear a mask, and avoid aggressive abrasion.
How to Spot Stains, Water Damage, or Mold Before Painting
Before you paint, walk the room and look for visible discoloration patterns like brown rings or mottled spots that can signal stains or past leaks.
Press lightly on tiles to check for soft or sagging areas that indicate water damage or weakening.
If you see dark, fuzzy patches or persistent dampness, don’t paint—address the mold and moisture first.
Visible Discoloration Patterns
Although a fresh coat of black paint can hide a lot, you should clearly identify any discoloration patterns first so you don’t seal in stains, water damage, or mold.
Use stain mapping and pattern analysis to locate sources, note color, spread, and recurrence, then address causes before painting.
- color rings
- clustered spots
- linear streaks
- fuzzy edges
- repeating patches
Texture And Soft Spots
If you press gently around a stained area and the tile gives or crumbles, you’re likely dealing with water damage or mold rather than a surface blemish.
Do texture testing by rubbing and tapping suspect tiles; soft spotting or spongy areas signal compromise.
Mark affected tiles, inspect above for leaks, and replace or remediate before painting to avoid trapping moisture or spreading mold.
When to Replace Damaged Tiles Instead of Painting
When tiles are cracked, warped, water-stained, or crumbling, you should replace them rather than try to paint over the damage. You’ll need to assess replace thresholds, check for mold, and call a structural inspection if ceilings sag. Don’t waste time painting failing tiles.
If tiles are cracked, warped, stained, or sagging, replace them—check for mold and get a structural inspection.
- visible cracks
- sagging panels
- mold or rot
- adhesive failure
- repeated staining
Which Primers Work by Tile Material
Before you start painting, you’ll want to match the primer to your tile material—metal, mineral fiber, and PVC all need different adhesion properties.
Use a rust-inhibiting primer for metal, a high-adhesion or bonding primer for smooth PVC, and a stain-blocking, breathable primer for mineral fiber or porous tiles.
Choosing the right surface-specific primer will make your black paint look professional and last longer.
Primer Selection By Tile
Sorting primers by tile material makes the job simpler and helps you choose a product that bonds well and lasts. You’ll pick based on Surface Adhesion and Texture Matching: some primers grip mineral tiles, others suit painted or vinyl-faced tiles.
Match primer type to material, sand or degloss as needed, then spot-test.
- Mineral (fibrous)
- Vinyl-faced
- Painted tiles
- Metal grid pieces
- Acoustic panels
Surface-Specific Primer Types
Now that you’ve matched primers to tile families and prepared surfaces, let’s look at specific primer chemistries that bond to each tile type. You’ll choose surface specific primers: acrylic for mineral tiles, shellac for stains, alkyd for metal. Check product compatibility for coatings and textures, understand adhesion mechanisms (penetration vs. film-forming), and follow manufacturer drying times to guarantee a durable black finish.
Prepare Tiles for Painting (Step‑By‑Step)
Clear off the work area, then gather your supplies—mild detergent, a scrubbing brush, sandpaper (120–220 grit), tack cloths, painter’s tape, and a suitable primer and paint—so you can prep each tile efficiently. Clean, sand, and dry tiles for proper surface cleaning. Mask edges and focus on edge sealing before priming.
- Degrease
- Sand lightly
- Wipe with tack cloth
- Tape edges
- Prime evenly
Test Adhesion With a Simple Tape Test
Before you paint, you’ll want to confirm the surface and prep are solid by doing a simple tape pull test. Press a piece of strong adhesive tape onto a small painted or primed area, peel it off sharply, and check for any paint or loose fibers that come away.
If the tape lifts material, redo your surface preparation until the tape stays clean.
Tape Pull Test
Grab a strip of strong packing tape and press it firmly onto a small painted area of the ceiling tile, then pull it off quickly to check whether the paint lifts—if flakes or film come away, adhesion’s poor and you’ll need to strip or re-prime that tile before continuing.
Watch tape durability and adhesion patterns to judge the repair needed.
- Test multiple spots
- Use fresh tape
- Note repeat failures
- Mark bad tiles
- Re-test after priming
Surface Preparation Check
For a quick, reliable check of adhesion, press a strip of fresh, strong packing tape onto several areas of the painted tile, smooth it down, then pull sharply—if paint peels or comes away on the tape, that spot needs stripping or re-priming before you paint it black.
Do a thorough surface inspection, repeating adhesive testing across tiles so your finish lasts and won’t flake.
Choosing the Right Paint Finish for Black Ceilings
When you’re painting a ceiling black, the finish you pick will shape how the room feels and how much surface detail shows, so choose deliberately. You’ll use matte drama to hide texture or gloss contrast to highlight architectural lines.
Consider light, room size, and maintenance. Pick a finish that complements mood and cleaning needs.
- hides flaws
- emphasizes lines
- eases cleaning
- affects light
- matches mood
Best Paint Types for Tiles: Latex, Oil, Acrylic
Choose the right paint type for your ceiling tiles and you’ll get better adhesion, durability, and the look you want.
Use latex for easy cleanup and proven Latex durability on porous tiles; acrylic offers fast drying, flexibility, and good color retention.
Oil paints deliver a hard finish and notable Oil sheen but need stronger prep and longer curing—pick based on tile material and room conditions.
Paint Tiles In Place Vs. Paint Off‑Grid
You can paint tiles in place to save time and avoid lifting a heavy grid, and that approach works well if you can protect the room and reach all surfaces.
Removing tiles first gives you better access for thorough coverage and makes cleanup and drying easier without drips or fumes trapped in the room.
Consider how much drying space you have and whether you can control overspray and cleanup before choosing a method.
Paint In Place Pros
Often, painting ceiling tiles in place saves you time and effort because you skip removal, avoid rehanging, and can work room by room without disrupting other areas. You’ll get paint benefits and installation convenience, cut cleanup, and keep fixtures intact while monitoring coverage and drip control.
- Faster workflow
- Less mess
- Maintains grid alignment
- Easier touchups
- Saves labor cost
Remove Tiles First
Pulling tiles out of the grid before painting gives you cleaner, more even coverage and eliminates drips, overspray, and paint buildup on the grid itself.
You’ll work flat, control ventilation, and inspect each tile for damage.
Use proper removal tools to avoid breakage, label tiles for reinstallation, and plan for tile disposal of damaged or unneeded pieces so the job stays tidy and efficient.
Drying And Cleanup
While painting tiles in place saves time, drying and cleanup demand more care than when you work off‑grid, so plan ventilation, drips, and access for wiping before you start.
You’ll manage longer drying times and limited access; solvent cleanup may be needed for spills.
Consider these precautions:
- Protect floors and fixtures
- Keep air moving
- Have solvent cleanup ready
- Use drip trays
- Remove loose debris
Tools You’ll Need for a Neat Black Ceiling Finish
Gather the right tools before you start—this simple step keeps the job tidy and speeds up the work.
You’ll need a quality roller selection (short-nap for smooth tiles), an extension pole, angled brush for edges, paint tray, painter’s tape, and drop cloths.
Wear protective clothing and a mask, keep spare bulbs and a ladder handy, and have a damp cloth for quick wipes.
Avoiding Brush Marks and Unwanted Roller Texture
Pick a low-nap roller made for smooth surfaces so you don’t leave a heavy texture on the tiles.
Work in thin, even coats rather than trying to cover in one thick pass.
Let each coat dry fully before applying the next to maintain a flat, brush-mark-free finish.
Choose The Right Roller
Choose a roller with the correct nap length for your tiles—short naps (1/4″–3/16″) for smooth or lightly textured surfaces, and 3/8″ for moderately textured tiles—to minimize visible roller texture and avoid brush-like streaks.
Pick a high nap roller only for very rough surfaces; use a microfiber cover for even laydown.
Consider:
- Foam vs nap
- Roller size
- Quality fibers
- Seamless covers
- Replace often
Paint In Thin Coats
Often you’ll get the best results by applying several thin coats rather than trying to cover in one thick pass; thin layers dry faster, level out brush and roller marks, and let you spot imperfections to fix before they build up.
Work quickly, maintain a wet edge, and use light, even strokes.
If paint has slow drying properties, wait fully between coats to avoid tacky buildup and texture.
How Many Coats of Black Paint You’ll Need
Because black is so unforgiving of thin coverage, you’ll usually need at least two coats to get an even, solid finish on ceiling tiles.
Use contrast primers to mask base color and improve adhesion; check coverage estimates on your can.
Expect touch-ups.
Consider lighting and texture when deciding final coats.
- Two base coats
- One touch-up coat
- Primer layer
- Dry time checks
- Coverage estimates
Handling Grid Frames and Exposed Metal Runners
Before you paint ceiling tiles, address the grid and exposed metal runners so they don’t undermine the finish: remove lightweight tiles if possible, mask or cover the grid with painter’s tape and plastic, and sand or clean any rusted runners to assure paint adhesion.
For grid removal, label tiles first; for runner repair, treat corrosion, apply metal primer, and touch up with matching paint to blend.
Painting Safely Around Fixtures, Lights, and Vents
How will you protect fixtures, lights, and vents while painting ceiling tiles black? You’ll plan fixture clearance, power down lights, and use painter’s tape for vent masking. Work tile by tile, removing accessible fixtures when possible. Keep a small gap for heat dissipation and follow manufacturer limits. Check seals after painting to confirm no blockage or safety hazards remain.
Plan fixture clearance, power down lights, tape vents, remove accessible fixtures, leave heat gaps, and inspect seals after painting.
- Turn off power
- Remove fixtures when safe
- Tape vents
- Maintain clearance
- Inspect seals
Managing Drips, Overspray, and Cleanup
With fixtures taped and power off, you’ll shift focus to preventing drips, containing overspray, and leaving a clean workspace.
Lay plastic drop cloths, secure edges with tape, and use painter’s pyramids or brushes to minimize drip containment issues. For overspray control, use low-pressure spray, a shield, or roll sections instead. Clean tools immediately and dispose of waste per local guidelines.
Cure Time and Off‑Gassing for Painted Tiles
While painted ceiling tiles may look dry to the touch within a few hours, they need substantially more time to cure fully and release residual solvents; expect surface dryness in 2–4 hours, recoat windows at the manufacturer’s minimum, and full cure—when the paint reaches its peak hardness and stops off‑gassing—can take several days to weeks depending on paint type, temperature, and ventilation.
- Use cure monitoring strips or timers
- Increase ventilation for odor mitigation
- Avoid rehandling until full cure
- Choose low‑VOC paints when possible
- Allow extra time in cool or humid conditions
How Painting Tiles Black Affects Acoustics
After paint has fully cured and odors have dissipated, you’ll want to contemplate how a dark coat alters a tile’s sound behavior.
Painting can slightly reduce surface porosity, changing acoustic impact by reflecting more high frequencies and lowering absorption.
You’ll notice modest soundproofing implications—rooms may feel livelier with less dampening.
Choose matte, porous paints or add acoustic treatments if retention of absorption matters.
Cleaning and Maintaining Painted Black Tiles
Once the paint’s cured, you’ll keep black tiles looking sharp by using gentle, regular care that avoids abrasive cleaners or scrubbing pads.
Do routine inspections to spot dirt, fading, or damage early, and consider protective coatings for high-traffic areas.
Clean with soft cloths and mild detergent, and dry promptly to prevent staining.
- Dust weekly
- Wipe spills immediately
- Use soft brushes
- Avoid solvents
- Inspect seams regularly
Touching Up Scuffs and Chips Without Full Redo
Spot minor scuffs and chips quickly so you can patch them without redoing the whole ceiling; small repairs take just a little prep, matching paint, and careful feathering to blend into the surrounding tiles.
You’ll use scuff blending with fine sandpaper and a soft brush, then apply thin coats.
For deeper damage, do chip sealing with a lightweight filler before repainting to hide flaws.
Cost: Painting Vs. Replacing With Black Tiles (Estimates)
Decide whether to paint or replace by weighing upfront cost, labor, and long-term value: painting black tiles usually runs $20–$60 per 100 sq ft in materials and a few hours of your time (or $100–$300 if you hire pros), while replacing with new black tiles often costs $2–$6 per sq ft for materials plus $3–$8 per sq ft for installation, raising total project costs substantially.
- Budget comparison: paint vs replace
- Paint: low upfront cost
- Replace: higher materials + labor
- Consider lifecycle costs and durability
- Factor disposal and matching existing ceiling
Design Ideas That Work With Black Ceilings
While a black ceiling can feel bold, it also lets you create drama, depth, or cozy intimacy depending on how you pair it with color, light, and texture.
Use a moody canopy effect with warm pendants, metallic accents, and layered lighting. Keep walls lighter for balance, add contrast molding to define edges, and choose reflective finishes sparingly to avoid overwhelming the room.
Best Rooms for Black Ceiling Tiles
After exploring how black ceilings shape mood and contrast, think about where that effect will work best in your home. You’ll favor rooms where intimacy, focus, or drama help the purpose. Consider these spots:
- Home theater for immersive darkness
- Dining nook to heighten coziness
- Master bedroom for a restful canopy
- Entryway for bold first impressions
- Study to reduce glare and distractions
Rooms Where Black Ceiling Tiles Are a Bad Idea
Although black ceilings can add drama, they aren’t the right choice for every space; you should avoid them where light, perceived size, or safety are priorities.
Don’t use black tiles in small bathrooms, narrow hallways, or rooms with limited natural light—these can feel like basement caves.
Avoid dark closets too; you’ll struggle to find things and compromise visibility and safety.
Alternatives: Buy Black Tiles, Fabric, or False Ceilings
If you don’t want to paint, you can easily buy black ceiling tiles, hang fabric, or install a lightweight false ceiling to get the same dramatic effect without DIY painting.
You can buy alternatives prefinished, choose fabric options for draping or acoustics, or use modular false ceilings for easy removal. Consider cost, weight, and room acoustics.
- Prefinished tiles
- Draped fabric
- Acoustic panels
- Lightweight grids
- Peel-and-stick panels
Safety Checklist Before You Start Painting Black Tiles
Before you break out the paint, make sure you’ve covered the basics: ventilate the room, turn off any nearby circuits if you’re working around fixtures, and wear a respirator and eye protection suited for paint fumes and particulates.
Check tiles for mold or asbestos, use gloves, set up ventilation planning and test fans, and follow respirator selection guidance for organic vapors.
Measure lighting and clear work area.
Top Mistakes to Avoid When Painting Tiles Black
When you paint ceiling tiles black, the biggest mistakes usually come from skipping prep, using the wrong products, or rushing dry times—each can ruin the finish and shorten its lifespan.
When painting ceiling tiles black, don’t skip prep, use proper products, or rush drying—or the finish will fail.
You should plan lighting experiments and consider contrast psychology to avoid flat, muddy results.
- Skipping primer
- Using interior wall paint
- Painting damp tiles
- Ignoring ventilation
- Overlooking test patches
Frequently Asked Questions
Will Painting Tiles Black Affect Indoor Air Quality Long-Term?
About 30% of indoor VOC emissions come from paints, so you should know painting black can raise VOC emissions briefly; you’ll also increase particle absorption on dark surfaces, but long-term air quality usually recovers with ventilation.
Can I Paint Tiles Black if I Have Underlying Asbestos?
You shouldn’t paint if tiles contain asbestos; disturbing them can release fibers. You can consider asbestos encapsulation as a mitigation method, but you’ll likely need professional abatement advice or service before painting to guarantee safety and compliance.
Do Black Painted Tiles Void My Home Insurance Policy?
About 30% of insurers flag altered materials; yes, you could risk insurance implications if upgrades or hazardous materials aren’t disclosed. Check policy exclusions and notify your insurer—if you hide asbestos or violate terms, claims might be denied.
Will Black Ceilings Impact Resale Value or Buyer Perceptions?
Yes — buyers’ reactions vary: you might hurt curb appeal and perceived height if rooms feel darker or lower, but tasteful, well-lit black ceilings can appeal to niche buyers, especially in modern or industrial-styled homes.
Can I Safely Repaint Over Lead-Based Paint on Ceiling Tiles?
No—you shouldn’t repaint over lead-based paint without proper lead abatement; you’ll use encapsulation methods only if approved by a pro, wear PPE, follow regulations, and test before attempting any repainting or repairs.
