Can You Wash Latex Paint Brushes in the Sink? Safe Way
Yes — you can wash latex paint brushes in the sink if you act promptly and take precautions. Rinse brushes under lukewarm water, use mild soap and a brush comb, and catch solids with a strainer or rinse into a bucket to avoid plumbing clogs. Wipe excess paint onto newspaper and collect rinse water for proper disposal per local rules. Follow simple maintenance steps to keep bristles usable, and keep going to learn safe cleanup tips and disposal options.
Quick Answer: Can I Wash Latex Paint Brushes in the Sink?
Can you wash latex paint brushes in the sink? Yes, you can, but you should act promptly: flush brushes with warm water, work bristles with mild soap, and rinse until water runs clear.
Proper paint brush maintenance prevents clogs and preserves shape.
Understand basic latex paint chemistry—waterborne binders dry into films—so clean before dries solid.
Dispose rinse water responsibly to avoid plumbing issues.
Who This Guide Is For
This guide is for homeowners, DIYers, and anyone who wants to clean latex paint brushes without wrecking them or your plumbing.
You don’t need pro skills—just basic handiness and willingness to follow a few steps.
You’ll need a few common tools and about 10–30 minutes depending on how clogged the brush is.
Who Should Read
Wondering if this guide applies to you?
If you paint walls, trim, or furniture with latex and want clear paint cleanup steps and sink safety tips, this guide’s for you.
You’ll learn safe rinsing practices, what to avoid, and how to protect plumbing and the environment.
Home DIYers, renters, and casual painters will find practical, actionable advice here.
Skill Level Needed
If you’ve ever rinsed brushes after a weekend project, you’ve got the basic skills needed here; the guide suits beginners through intermediate DIYers who want safe, effective cleanup tips for latex paint.
You’ll learn cleaning techniques, sink safety, eco alternatives, and disposal methods. Preparation steps, maintenance tips, and troubleshooting issues vary by brush types and paint types.
- Beginner basics
- Intermediate tips
- When to seek help
- Quick reference
Time And Tools
Plan on spending about 15–30 minutes of active work per brush for a basic rinse-and-clean, with longer times for heavily loaded or natural-hair brushes; gather your tools before you start so you won’t be rinsing under running water while you search. You’ll benefit from simple time management and careful tool selection.
| Item | Purpose |
|---|---|
| Brush comb | Remove dried paint |
| Mild soap | Clean bristles |
When Sink Cleanup Is Safe : And When It Isn’t
How do you know when it’s okay to wash latex paint brushes in your sink? You check sink safety, plumbing considerations, and environmental impact.
Check sink safety, plumbing, and environmental rules before rinsing latex brushes—otherwise use containment and proper disposal.
If paint disposal is minimal and water systems accept rinse, proceed; otherwise use cleanup alternatives and proper waste management to protect drains.
- Brush maintenance with immediate rinse techniques
- Contain excess paint first
- Use collection trays
- Follow local disposal rules
Why Latex Paint Chemistry Matters for Cleanup
Because latex paint is a water-based emulsion, its cleanup behavior and environmental risks differ from oil-based paints, and knowing the chemistry helps you choose the right cleanup method.
You’ll understand how binders, pigments, and surfactants respond to water, which informs safe disposal and practical cleanup techniques. That knowledge helps you minimize sewer contamination and prolong brush life.
Tools for Safely Washing Latex Paint Brushes at the Sink
When you wash latex brushes in the sink, wear protective gloves and an apron to keep paint and cleaning residue off your skin and clothes.
Use a brush comb to loosen trapped bristles and a sink strainer to catch flakes and clumps before they go down the drain.
These simple tools make cleanup safer and keep your plumbing clear.
Protective Gloves And Apron
Protect your skin and clothes by wearing chemical-resistant gloves and a washable apron before you rinse latex paint brushes in the sink.
Choose glove types that resist solvents and punctures; pick apron materials that repel water and dry fast. Use them every time to avoid irritation and stains.
- Nitrile gloves
- Neoprene gloves
- PVC apron
- Waterproof cotton blend apron
Brush Comb And Strainer
A brush comb and a sink strainer are simple, must-have tools for rinsing latex paint brushes safely: the comb loosens dried and trapped bristles and paint from the ferrule while the strainer catches loose bristles and paint chunks so they don’t clog your plumbing.
Use the comb to restore brush shape during brush care, and the strainer to trap debris as part of efficient cleaning methods.
Set Up a Sink Station for Paint Cleanup
Before you start rinsing brushes, set up a dedicated sink station so cleanup stays contained and efficient.
You’ll arrange tools and protect plumbing for safe paint cleanup and a tidy sink setup.
- Line sink with a strainer or disposable tray.
- Have a bucket for excess paint.
- Keep rags and soap handy.
- Use gloves and eye protection.
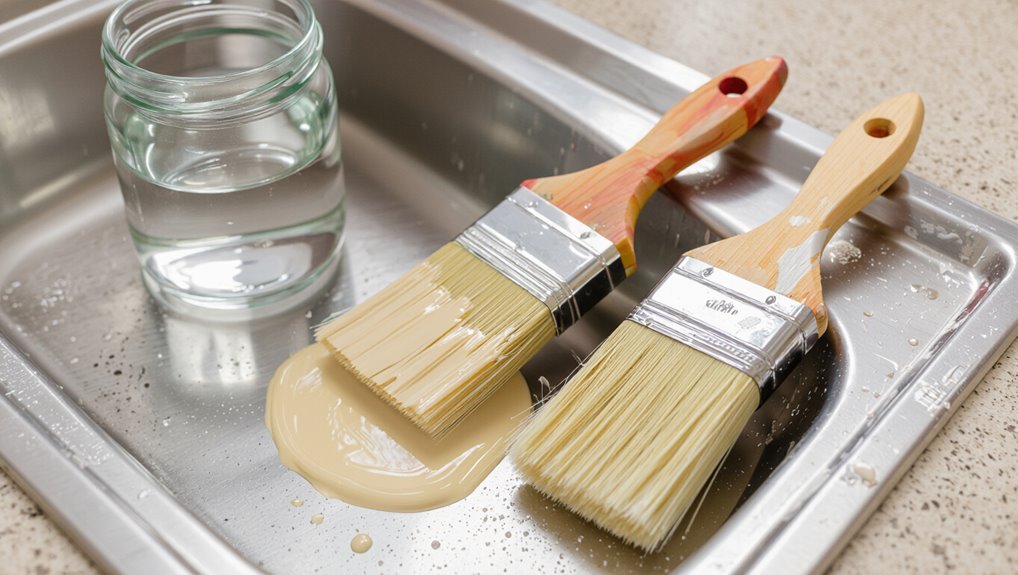
Step-By-Step: Rinsing Fresh Latex Paint From Brushes
Start by protecting your sink with a disposable liner or a plug to catch stray paint.
Hold the brush under lukewarm running water and gently flex the bristles until the water runs clear.
Rinse repeatedly, reshaping the brush as you go so it dries in proper form.
Protect Your Sink
1 simple precaution will keep your sink from becoming a permanent paint palette: line it. You’ll protect plumbing, aid sink maintenance, and catch paint residue before it sets.
Use disposable or reusable liners, then rinse into a container for proper disposal.
Follow this quick checklist:
- Plastic bag
- Aluminum foil
- Basin insert
- Disposable tray
Rinse Until Clear
Flush the bristles under warm running water and work the paint out by gently splaying and massaging them with your fingers or a brush comb. Rinse until water runs clear, checking for paint residue and repeating gentle combing. Finish with light shake and reshape. Proper brush care preserves bristle life and keeps future projects clean.
| Step | Action |
|---|---|
| 1 | Splay bristles |
| 2 | Rinse warm |
| 3 | Comb gently |
| 4 | Check water |
| 5 | Reshape dry |
Removing Partially Dried Latex From Bristles
If you left latex on your brush long enough to firm up but not harden into a rock, you can usually revive the bristles by softening the paint first and then working it free with a combination of water, soap, and gentle agitation.
Use these steps for paint residue and brush care:
- Soak tips in warm water.
- Apply dish soap and massage.
- Comb bristles with a brush comb.
- Rinse until clear and reshape.
Cleaning Brushes Used With Glaze or Additives

If you’ve used glaze or additives, you’ll need to clear the sticky residue before it hardens.
Start by rinsing thoroughly, then use a mild solvent or brush cleaner if the glaze contains oils or waxes.
Take extra care with additive oils—work them out of the ferrule so they don’t loosen the bristles.
Removing Glaze Residue
When you’ve used glaze or additives, they’ll leave a thin, tacky film on bristles that plain water won’t remove.
So start by working a solvent recommended by the glaze manufacturer into the brush—either a mild mineral spirit or a specialized brush cleaner—and gently massage the bristles from ferrule to tip to loosen the residue.
- Use appropriate glaze removal techniques.
- Swirl in solvent, then comb bristles.
- Rinse with warm soapy water.
- Follow brush care tips and reshape before drying.
Handling Additive Oils
Glaze solvents loosen the tacky film, but brushes used with oil-based additives need extra care because those oils cling to bristles and repel water.
You’ll identify additive types and check oil properties before cleaning. Start with a solvent recommended for that additive, work it through bristles, then wash with warm soapy water until clear.
Rinse, reshape, and dry flat.
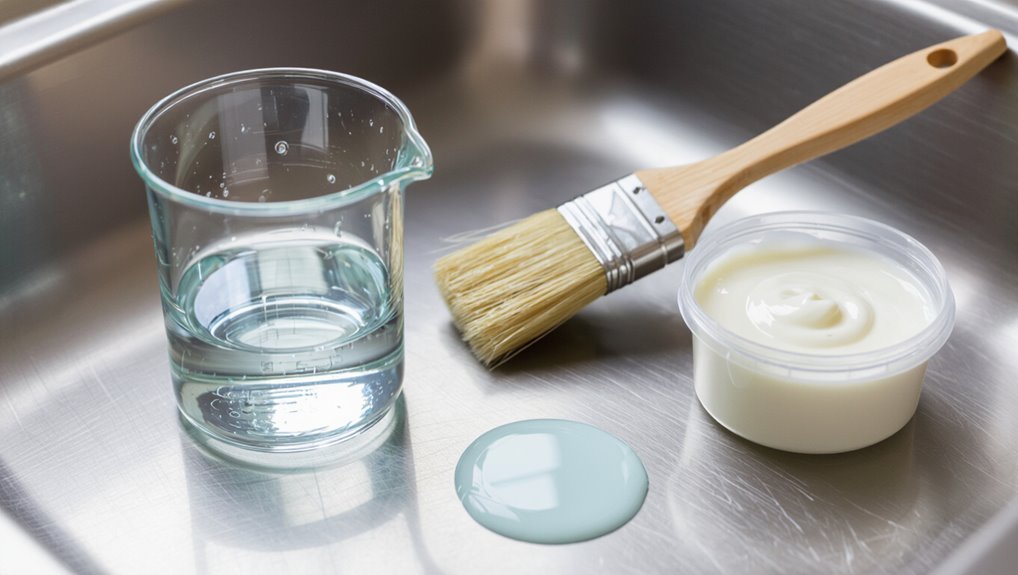
Finish Brushes With Mild Soap: Technique and Timing
Rinse the brush under warm water, then work a mild soap into the bristles to remove remaining latex and restore flexibility.
You’ll use mild soap techniques and watch brush timing to avoid overworking fibers. Gently lather, rinse, repeat briefly, then squeeze excess water.
- Lather gently
- Rinse thoroughly
- Check for residue
- Repeat if needed
Reshape and Dry Brushes After Washing
Squeeze the bristles gently back into their original shape, fanning them slightly so the tip narrows and the ferrule isn’t distorted.
Use reshape techniques like smoothing with your fingers or a combed thumb to align hairs.
Tap excess water, reshape once more, then hang brushes or lay them flat with bristles over an edge.
Choose gentle drying methods away from heat and direct sun.
Synthetic vs Natural-Hair Brushes: Cleaning Tips
While both types handle latex paint, synthetic brushes (nylon, polyester, or blends) are the better choice for water-based paints because they flex and spring back without swelling, and you can clean them easily with soap and water.
For latex and other water-based paints, synthetic brushes (nylon, polyester, or blends) are best—clean easily with soap and water.
Natural-hair brushes, made from animal fibers, absorb more water, can mat or lose shape with prolonged soaking, and need gentler cleaning and quicker drying to preserve the tip and texture.
- Use appropriate brush types.
- Rinse synthetics with soap and water.
- Gently wash naturals with mild cleaner.
- Reshape and dry upright, avoiding prolonged soaking.
Preventing Drain Clogs When Rinsing Brushes
If you’re washing latex paint brushes in the sink, take steps to keep paint and debris out of the drain to avoid clogs and costly plumbing fixes.
Use a strainer to catch bristles and dried bits, rinse brushes over a bucket, and wipe excess paint onto newspaper before washing.
Regular drain maintenance prevents buildup; follow local paint disposal rules for solids and excess.
What to Do With Paint Rinse Water
After you’ve kept solids and brush bristles out of the drain, decide how to handle the rinse water—don’t pour it down household sewers or storm drains.
- Collect rinse water in a sealable container for proper paint disposal.
- Let latex settle, then pour clear water off for garden-safe use only if paint-free.
- Use commercial rinse techniques or water-treatment services.
- Label and transport to hazardous-waste facility.
How to Strain and Dispose of Paint Solids Responsibly
When you rinse brushes and containers, catch the paint solids before they reach the drain by straining the rinse water through a fine mesh or coffee filter into a sturdy, sealable container.
Label the container and let solids settle or dry.
Check local paint disposal methods: some centers accept hardened waste for paint solid recycling or hazardous-waste programs.
Check local disposal options—many centers accept hardened paint solids for recycling or hazardous-waste programs.
Don’t pour solids or slurry down drains.
When to Use a Bucket Instead of the Sink
Although rinsing a few brushes briefly in the sink seems convenient, choose a bucket whenever you’re cleaning multiple brushes, working with stirred-up or partially dried latex, or need to soak tools for more than a minute—using a bucket keeps paint solids contained, reduces the risk of clogging your plumbing, and makes it easier to strain and dispose of residue properly.
- Use a bucket to limit sink limitations.
- Contain solids for safe disposal.
- Prefer buckets over bucket alternatives that aren’t sealed.
- Soak and agitate without risking drains.
Setting Up an Outdoor Rinse Station
If you’ve decided a bucket is the better option for heavy cleanup, set up an outdoor rinse station to keep paint mess out of your plumbing and yard.
Place a sturdy bucket, disposable liners, and a brush comb on a tarp or tray.
Use a gentle garden hose rinse, strain solids into a container, and dispose of solids per local rules—this outdoor setup keeps brushes manageable.
Cleaning Brushes in Apartments or Shared Plumbing
Because apartment plumbing and shared sewage systems are more sensitive, you’ll need to avoid washing latex paint down the sink or communal drains.
Follow rules for communal spaces, cleaning etiquette, and waste management to protect shared utilities and reduce environmental impact.
- Contain brush rinse water.
- Collect solid paint for proper paint disposal.
- Use sealed containers for transport.
- Report plumbing issues and follow maintenance tips.
Cleaning Brushes at Job Sites With No Plumbing
When you’re working where there’s no plumbing, plan ahead so you can clean brushes without contaminating the site or the environment: set up a contained wash station, capture rinse water and solids in sealable containers or absorbent media, and transport waste to an appropriate disposal facility.
You’ll use portable buckets, disposable liners, and minimal water; label waste, follow job site cleanup protocols, and consider plumbing alternatives like solvent mitts or brush combs.
Cleaning Large Brushes, Rollers, and Components
After you’ve handled on-site cleanup and captured rinse water, shift focus to larger tools: big brushes, rollers, and detachable components need more water, agitation, and attention to avoid trapped paint.
Follow cleaning techniques that balance sink safety and paint chemistry:
- Soak parts, agitate, rinse for residue removal.
- Use proper paint disposal.
- Prioritize brush maintenance for tool longevity.
- Consider eco friendly options.
Eco-Friendly Alternatives to Sink Rinsing
If you want to avoid rinsing latex paint down your sink, there are several practical, eco-friendly options you can use instead.
You can wipe excess paint onto newspaper, use eco-friendly solvents to loosen dried residue, and soak brushes in a jar before disposal.
Choose biodegradable cleaners for final rinses in a basin, then strain and dispose of solids per local guidelines.
Use Brush Combs and Scrapers to Cut Water Use
Grab a brush comb or metal scraper to remove most latex paint before you reach for water; these tools pull bristles apart and shear off dried and wet paint so you only need a quick rinse or a small soak afterward.
- Scrape excess paint into a can for proper disposal.
- Comb bristles toward the ferrule.
- Inspect for trapped paint.
- Store dry for brush maintenance and eco practices.
Spot-Clean Paint From Sinks and Fixtures
If a bit of latex splashes onto your sink or fixture, rinse it immediately with warm water to keep the paint from hardening.
For stubborn spots, use a gentle cleaner like dish soap or a mild non-abrasive bathroom cleaner and a soft cloth or sponge.
Avoid harsh scrubbers that can scratch finishes, and repeat rinsing until the residue is gone.
Immediate Rinse Techniques
When fresh latex splatters hit your sink or faucet, act fast to limit staining: run warm water over the spot while rubbing gently with a soft cloth or sponge to loosen paint before it dries.
Use rinse techniques that respect paint chemistry and sink safety; combine brush care, cleanup methods, eco friendly options, disposal guidelines, and maintenance tips.
- Flush immediately
- Wipe gently
- Repeat as needed
- Inspect finish
Gentle Cleaners Choice
Although harsh solvents can damage finishes, you can remove fresh latex spots from sinks and fixtures with mild, sink-safe cleaners: choose gentle cleansers like dish soap, baking soda paste, or vinegar diluted with water.
You’ll scrub gently with a soft cloth or sponge, avoiding abrasives. These effective solvents lift paint without harming finishes; rinse thoroughly and dry to prevent residue and water spots.
Preventing Water Stains & Residue on Stainless Sinks
Water spots and soap residue can quickly dull stainless steel after you rinse paint brushes, but a few simple habits will keep your sink looking new.
- Rinse thoroughly to remove sink residue and paint bits.
- Wipe dry with a microfiber cloth to prevent water stains.
- Use mild vinegar solution weekly for mineral buildup.
- Avoid abrasive pads that scratch and trap grime.
Storing Partially Cleaned Brushes Overnight
If you need to pause overnight, wrap the bristles tight with foil or the brush’s original paper to keep them aligned.
Stand brushes upright in a jar so water drains away from the ferrule and hairs stay straight.
Cover the bundle with plastic to prevent dust and drying out.
Wrap Brushes Tight
When you need to pause mid-job, wrap the brush tightly to keep the bristles moist and shaped overnight: squeeze excess paint and solvent from the ferrule, then snugly cover the head with plastic wrap, a resealable bag, or cling film, securing it at the ferrule so no air can reach the bristles.
- Maintain brush storage habit.
- Use clean wrap materials.
- Label wrapped brushes.
- Replace wrap after 24 hours.
Keep Brushes Upright
After wrapping a brush to hold moisture, stand it upright overnight so any remaining water or solvent drains away from the ferrule and into the handle instead of soaking the bristles; this prevents rusting of the ferrule and keeps the brush’s shape intact. You’ll protect bristles, simplify brush storage, and combine this with other drying methods for quick reuse.
| Tip | Time | Benefit |
|---|---|---|
| Upright | Overnight | Shape |
| Ventilate | Hours | Dry |
| Inspect | Morning | Ready |
Cover With Plastic
Because you’re pausing work overnight, cover partially cleaned latex brushes with plastic to lock in moisture and keep bristles from drying out or getting stiff.
- Wrap ferrule and bristles snugly for short-term paint storage.
- Squeeze excess water before sealing to prevent mildew.
- Label wrapped brushes with paint color and date.
- Use this brush maintenance habit to preserve shape and ease next-use cleaning.
How Long Cleaned Brushes Stay Usable Between Jobs
If you clean your latex brushes properly and store them right, they’ll stay usable for days to weeks between jobs depending on how often you use them and how well you rinsed out the paint.
Track cleaning frequency to improve brush longevity, use simple maintenance tips like combing bristles and drying upright, and prevent paint buildup so brushes stay ready without constant rewashing.
When to Replace a Brush Instead of Saving It
If the bristles are splaying or misshapen, you’ll get poor control and uneven paint laydown, so it’s time to contemplate a replacement.
Likewise, if you can’t remove dried or gummy paint after thorough cleaning, the brush won’t perform reliably.
Don’t waste time trying to salvage tools that won’t give a professional result.
Bristles Splaying Or Misshapen
Check the bristles before you try to salvage a brush: if they’re permanently splayed, bent, or uneven so they can’t form a crisp edge, it’s time to replace the brush rather than waste effort on restoration.
You’ll balance bristle care, brush maintenance, cleaning techniques, paint residue, drying methods, storage tips, brush types, paint solvents, cleaning frequency, and bristle quality.
- Inspect shape
- Test performance
- Consider cost
- Replace promptly
Inadequate Paint Removal
A brush with permanently splayed bristles won’t perform well, but even a brush that looks fine can be ruined by paint that won’t come out.
If dried or embedded latex resists thorough cleaning, it compromises paint adhesion and leaves streaks. You should replace the tool when clogged bristles impair coverage; doing so preserves brush longevity and prevents ruined finishes.
Common Mistakes That Ruin Latex Paint Brushes
Painting brushes suffer most from a few avoidable missteps that shorten their life and ruin performance. You can prevent damage with proper brush care and by removing paint residue promptly.
Common errors include:
- Leaving brushes soaking in water or solvent.
- Letting paint dry on bristles.
- Using harsh scrubbing that misshapes the tip.
- Storing unclean brushes bristle-down.
How to Recognize Irreversible Paint Buildup
You’ll know a brush has irreversible paint buildup when the bristles clump, harden, or lose their tip shape despite repeated cleaning attempts.
Check for brittle, discolored fibers, gaps in the bristle line, and poor paint pickup—clear paint buildup signs.
If cleaning solvents, soaking, and combing don’t restore flexibility or tip resilience, accept irreversible damage and replace the brush.
How Local Disposal Rules Affect Paint Rinse Handling
You should check local sewer regulations before rinsing brushes, since some systems prohibit paint solids and pigments from entering drains.
You also need to know if your area classifies leftover rinse water as hazardous waste, which changes how you must collect and dispose of it.
Ignoring these rules can lead to fines or required cleanup costs, so follow local guidance or contact your waste authority.
Local Sewer Regulations
Because sewer rules vary widely by municipality, you should check local regulations before rinsing latex paint down the sink.
You’ll follow sewer guidelines to avoid fines and blockages, and guarantee proper paint disposal.
Check municipal websites or call authorities.
- Permitted rinse practices
- Volume limits
- Pretreatment requirements
- Reporting or disposal options
Hazardous Waste Rules
When local hazardous waste rules apply, they can change whether and how you rinse latex paint down the sink, since some jurisdictions classify certain paint residues or solvent-containing cleanup materials as hazardous.
Check whether your area requires special handling, limits quantities, or mandates drop-off at a household hazardous waste facility.
You should follow latex paint safety guidance and local hazardous waste management procedures to avoid improper rinsing and guarantee compliant disposal.
Disposal Penalty Risks
If your municipality bans rinsing paint down drains or treats paint residue as hazardous, you’ll face fines or other penalties for noncompliance—so learn your local rules before you clean brushes.
- Check disposal penalties before washing.
- Use designated collection sites to avoid fines.
- Minimize environmental impact by drying and disposing solids.
- Document drop-offs; you’ll prove compliance if inspected.
Document Cleanup to Meet Job-Site Rules
To meet job-site rules, you need to document how you clean and dispose of paint, rinse water, and contaminated tools so inspectors can quickly verify compliance. You should log job site regulations, cleanup procedures, dates, personnel, and disposal locations to prove proper handling.
| Item | Action | Record |
|---|---|---|
| Paint | Neutralize/contain | Photo |
| Rinse water | Collect/strain | Log |
| Tools | Dispose/clean | Ticket |
| Transport | Licensed hauler | Receipt |
Sink-Safe Commercial Brush Cleaners: Recommendations
Anyone using commercial brush cleaners should pick products labeled sink-safe and biodegradable so you can rinse responsibly without violating local waste rules.
You’ll match cleaner to commercial brush types and favor eco-friendly cleaners to limit impact.
Consider:
- Water-based universal cleaner
- Low-odor biodegradable solvent
- Fast-acting brush soak
- Reusable rinse concentrate
Follow label directions and local disposal rules.
Using a Paint Locker or Drain Filtration Kit
When you rinse brushes at a dedicated sink, a paint locker or drain filtration kit catches solids and separates water so harmful pigments and binders don’t reach the sewer. You protect plumbing, simplify paint disposal, and use filter systems that trap sludge. Install, empty responsibly, and recycle captured solids.
| Soothe | Secure | Solve |
|---|---|---|
| Calm | Safe | Clean |
| Hope | Hold | Heal |
Cleaning Brushes Used With Mixed Latex & Oil
If you’ve been using a paint locker or drain filter for rinsing, remember that brushes soaked in a mix of latex and oil need different handling.
You’ll separate solvents: water for latex, mineral spirits for oil, then condition and store.
Follow steps:
- Rinse latex with warm water and mild soap.
- Use mineral spirits for oil removal.
- Avoid mixing solvents.
- Dry and use proper brush storage.
Cost Benefit: Sink Cleanup vs Professional Services
You’ll want to weigh the time you spend scrubbing and rinsing brushes in the sink against the hourly cost or flat fee of a professional cleaning service.
Consider material and disposal costs for solvents, soap, and water, plus any local restrictions that could raise expenses.
Also factor in how proper professional care or thorough at-home cleaning affects your brushes’ long-term longevity and replacement frequency.
Time Investment Comparison
How much time will you actually spend rinsing brushes at the sink versus handing them off to a pro? You’ll weigh time saving techniques against DIY paint cleanup.
If you value control, expect 20–45 minutes per session; pros are faster overall but require dropoff/pickup.
- Prep and soak: 10–20 min
- Rinse and comb: 10–25 min
- Drying time: 20–60 min
- Pro turnaround: 30–90 min
Material And Disposal Costs
Buckets, rags, and a bottle of brush cleaner add up quickly when you clean latex brushes yourself.
You should do a cost analysis comparing supplies, water use, and time versus hiring pros.
Factor in disposal options for contaminated rinse water and used solvents—bucket disposal, hazardous-waste fees, or service pickups.
Often DIY saves money for occasional jobs; frequent work may justify professional service.
Long-Term Tool Longevity
Beyond the cost and disposal questions, think about how your cleaning method affects brush life. You’ll weigh sink cleanup vs professional services for brush preservation and choose cleaning techniques that extend life.
Consider:
- Immediate rinsing prevents dried bristles.
- Proper soap and combing preserve shape.
- Professional deep-cleaning restores function.
- Long-term replacement costs justify occasional service.
Five-Minute Safe Sink-Cleanup Checklist
Quickly secure the area so you won’t track paint around the sink: shut off any nearby drains, clear the faucet and surrounding counter of dishes or towels, and turn on a basin plug or stopper if you have one.
Rinse brushes gently, use minimal water with soap or eco friendly cleaning solution, comb bristles, empty rinse water into a sealed container for proper disposal, and dry brushes upright for paint brush care.
Troubleshooting: Brush Still Stiff After Washing
If your brush still feels stiff after rinsing, start by checking for dried paint residue trapped near the ferrule or between bristles.
Make sure you thoroughly rinsed out soap and paint—leftover detergent or pigment can make fibers clump.
Also inspect the bristles for splaying or breakage, since physical damage won’t be fixed by washing.
Dried Paint Residue
- Soak in warm water and dish soap.
- Work bristles with a comb.
- Use a solvent-safe remover sparingly.
- Rinse and reshape, then dry flat.
Incomplete Soap Rinse
Wondering why your brush still feels stiff after washing? If you leave incomplete soap on bristles, dried residue makes them clump.
Run multiple rinse cycles under warm water, gently splay and flex the hairs, and repeat until suds and color disappear.
Finish with a final cold rinse to close the cuticle. Proper rinsing prevents stiffness and preserves performance.
Brush Hair Damage
Incomplete rinsing can cause stiffness, but actual damage to the brush hairs is a different problem that you can usually spot by touch and sight: splayed, bent, or frayed bristles won’t spring back even after thorough cleaning.
You should assess and act for brush care and paint preservation:
- Remove loose bristles.
- Trim uneven tips.
- Condition natural hair.
- Replace badly damaged brushes.
Troubleshooting: Sink Clogged With Paint Residue
If your sink starts draining slowly or stops entirely after rinsing brushes, paint residue has likely built up in the trap or drain line and you’ll need to act before it hardens and becomes much harder to remove.
Turn off water, remove the P-trap, and clear clumps into a disposable container.
Flush with hot water and mild detergent. For stubborn buildup, use a plastic drain snake; avoid harsh chemicals for sink maintenance.
Best Maintenance Routines to Extend Brush Life
Keep a simple, consistent routine to get the most life out of your brushes: immediately remove excess paint, rinse or wipe them according to paint type, reshape the bristles, and store brushes hanging or flat to dry.
- Clean thoroughly after each use.
- Check ferrules for dried paint weekly.
- Adjust maintenance frequency for heavy use.
- Use proper brush storage to prevent bending and contamination.
Where to Find Local Hazardous-Waste or Paint-Recycling Options
Once you’ve cleaned and stored your brushes properly, you’ll want to dispose of leftover latex paint and any solvent waste responsibly. Check city websites, local transfer stations, or home‑improvement stores for hazardous waste drop‑offs and paint recycling programs. Call ahead for hours and rules.
| Location type | What to bring |
|---|---|
| Transfer station | Sealed cans |
| Retail hub | Curbside or drop‑off info |
Frequently Asked Questions
Can I Use a Dishwasher to Clean Latex Paint Brushes Safely?
No — you shouldn’t use a dishwasher to clean latex paint brushes safely. You’ll damage the dishwasher and the brushes; instead, use proper brush cleaning with warm water, soap, and paint removal solvents for stubborn dried paint.
Will Vinegar or Baking Soda Neutralize Latex Paint in Rinse Water?
No — vinegar or baking soda won’t neutralize latex paint in rinse water. You’ll need proper paint disposal methods and eco friendly cleaners; filter, let solids settle, and dispose of dried paint and contaminated water per local regulations.
How Does Water Temperature Affect Latex Paint Removal From Brushes?
Imagine a neighbor rinsing brushes in warm water after a mural; you’ll find warm water loosens latex quicker, improving paint removal methods, while hot can soften bristles and cold reduces effectiveness—use moderate warmth with proper brush cleaning techniques.
Can Dried Latex Paint Be Rehydrated for Salvageable Brushes?
Yes — you can often rehydrate dried latex paint on brushes if it’s not fully hardened; soak them in warm water with gentle agitation, use brush care solvents for stubborn bits, and repeat paint removal until bristles recover.
Are There Health Risks From Inhaling Fumes While Cleaning Brushes Indoors?
Yes — you can face health risks from fume exposure while cleaning brushes indoors; you should open windows, use fans for indoor ventilation, wear a mask if needed, and take breaks to reduce inhalation of irritating vapors.
Conclusion
Yes — you can wash latex paint brushes in the sink, but only if you take precautions to avoid clogs and environmental harm. Rinse with cold water, loosen paint with a brush comb, use minimal soap, and strain solids into a disposable container; never dump milky rinse into drains. If that sounds like too much hassle, remember: a few extra minutes now prevents costly plumbing or fines later — and keeps your brushes usable for many more projects.