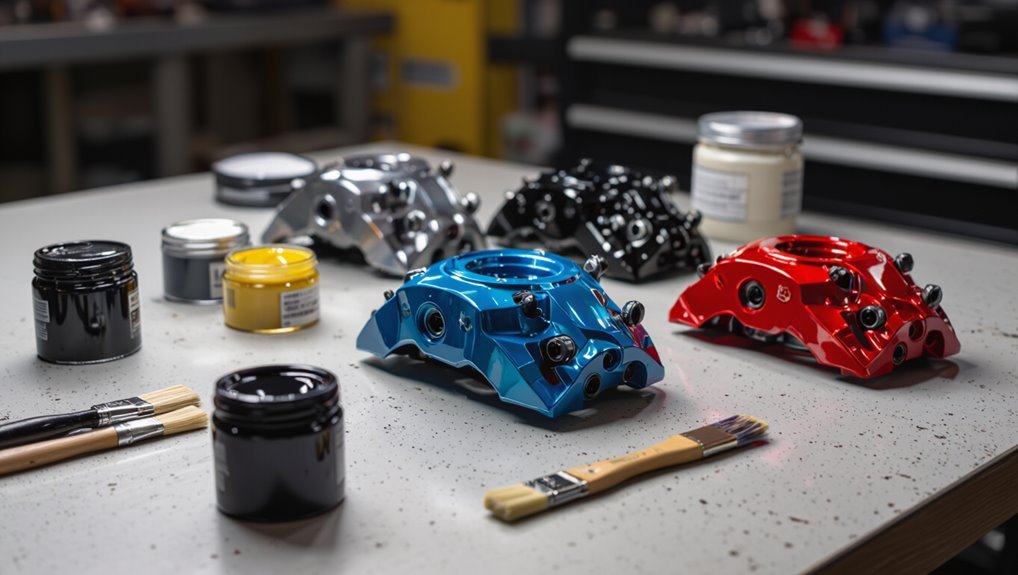
How Long Does Caliper Paint Take to Dry? Full Dry Time
You’ll usually have caliper paint that’s touch‑dry in 15–60 minutes and safe to handle after a few hours to a day, depending on type and coat thickness. High‑temp formulas often tack‑free in 20–60 minutes and cure in 24–72 hours, while acrylics take about 24–48 hours and enamels may need up to 72 hours or longer for full hardness. Temperature, humidity, and ventilation matter, and proper prep and thin coats speed cure — keep going to learn timing, fixes, and faster methods.
Quick Caliper Paint Drying Timelines (At a Glance)
Most caliper paints feel dry to the touch within 15–30 minutes, but they usually take 24 hours to cure enough for light handling and up to 7 days for full chemical resistance.
Keep in mind temperature, humidity, and coat thickness will change those times. You’ll see variability by paint types and drying conditions.
Plan staging: tack-free, handle, then full use, spacing coats accordingly.
What “Dry” Means: Tack-Free, Handling, Full Cure
Those general timing benchmarks tell you when caliper paint stops feeling wet, but “dry” actually covers three distinct stages you should know: tack-free (no sticky surface), handling (safe to touch or reinstall parts), and full cure (maximum hardness and chemical resistance).
You’ll learn dry definitions and curing stages depend on paint types, application techniques, environmental factors, surface conditions, adhesion issues, and drying methods.
Typical Dry Times for High-Temp Caliper Paint
High-temp caliper paints typically become tack-free within 20–60 minutes.
They let you handle or reinstall components after 2–8 hours and reach a full cure in 24–72 hours depending on the formula and conditions.
When you do caliper paint application, remember drying time factors like ambient temperature, humidity, coat thickness, and oven-bake options; these determine when it’s safe to reassemble and drive.
Typical Dry Times for Acrylic and Enamel Caliper Paints
Acrylic caliper paint typically feels dry to the touch within 30–60 minutes and can be handled lightly after a few hours, though full cure may take 24–48 hours.
Enamel caliper paint usually takes longer, often needing several hours to tack-free and up to 72 hours or more for a complete cure.
You’ll want to factor in temperature and humidity since they’ll shift those windows.
Acrylic Caliper Paint Drying
When you paint calipers with acrylic or enamel formulas, drying happens in stages: tack-free within 15–30 minutes, recoatable after about 1–2 hours, and fully cured anywhere from 24 hours up to 7 days depending on conditions and product.
For acrylic paint, you’ll use fast drying techniques, ventilation, and thin coats to speed cure.
- Thin coats
- Good ventilation
- Low humidity
- Moderate temperature
- Proper prep
Enamel Caliper Paint Drying
If you liked how acrylic dries fast with thin coats and good airflow, enamel behaves differently and you’ll need to plan for longer cure times and different handling.
You’ll wait longer between coats—often 24–48 hours touch-dry, several days to fully cure—and you should control temperature and humidity to protect enamel properties and guarantee paint adhesion.
Use light sanding between coats for best results.
How Coat Thickness Changes Dry and Cure Time
If you apply thin coats, they’ll dry faster and cure more evenly, reducing runs and orange peel.
Thick coats trap solvents and extend both tack-free and full-cure times, so you’ll need more patience.
Stacking multiple thin layers usually gives a stronger, quicker-curing finish than one heavy pass.
Thin vs. Thick Coats
One thin coat dries and cures far quicker than a heavy one, so you’ll usually see tack-free times measured in minutes for thin layers versus hours (or longer) for thick applications.
You’ll notice:
- thin application evaporates solvents faster
- thick application traps solvents longer
- thin layers cool and harden uniformly
- thick films risk sagging or tackiness
- thin coats promote predictable cure time
Multiple Layer Effects
When you apply multiple caliper paint layers, each new coat slows solvent escape and adds to overall cure time.
So a sequence of thin, well-timed passes dries far faster and more reliably than stacking thick wet-on-wet layers.
You should use careful application techniques and drying strategies to preserve layer adhesion, manage paint interactions, and optimize color layering.
This enhances finish quality, paint durability, and layering aesthetics.
How Ambient Temperature Affects Caliper Paint Drying
Because paint chemistry speeds up or slows down with temperature, ambient heat plays a big role in how quickly your caliper paint dries.
You’ll notice temperature variations change drying stages and curing times, affecting paint adhesion and overall paint performance.
Monitor environmental conditions and avoid direct heat sources; use temperature control to manage drying effects.
- ambient temperature
- temperature variations
- drying stages
- paint adhesion
- curing times
How Humidity and Moisture Slow Paint Cure
When humidity is high, your caliper paint will take longer to dry because the air holds more moisture.
That moisture can interfere with the chemical curing process, leaving tacky or soft spots.
Improve ventilation to strip damp air away and speed up a proper cure.
High Humidity Effects
Although caliper paint can look dry to the touch, high humidity and moisture slow the chemical reactions that actually cure the coating.
As a result, your finish may stay soft and vulnerable for much longer than the label times suggest.
You’ll notice altered paint behavior and weaker paint adhesion under poor humidity control; weather effects and environmental factors change drying conditions and create drying challenges tied to moisture levels and the curing process.
- Monitor humidity impact
- Reduce indoor moisture
- Use controlled drying
- Allow extra cure time
- Avoid wet conditions
Moisture Inhibits Curing
High humidity doesn’t just slow surface drying—you’ll often find it actually interrupts the chemical cure of caliper paint by introducing water molecules that compete with the planned cross-linking reactions.
You should expect moisture effects to cause soft spots, tackiness, and longer tack times.
Addressing these curing challenges means preventing water contact during initial hours, using dry conditions, and waiting longer before handling or recoating.
Ventilation Reduces Dampness
Because damp air slows the chemical cure, you should ventilate the workspace to move moisture away from fresh caliper paint.
You’ll speed drying and avoid tackiness by using ventilation tips and active humidity control.
Follow practical steps:
- Open cross-ventilation paths
- Use exhaust fans
- Run a dehumidifier
- Avoid painting in fog
- Monitor relative humidity closely
Setting and Controlling Shop Humidity for Consistent Cures
When you want predictable cures, controlling shop humidity is as important as choosing the right caliper paint; too much moisture slows chemical reactions and too little can cause premature skinning or cracking.
You’ll use humidity control, shop ventilation, moisture management, and temperature regulation to create a stable drying environment.
Maintain air circulation and consistent conditions to improve paint adhesion and guarantee even, repeatable cures.
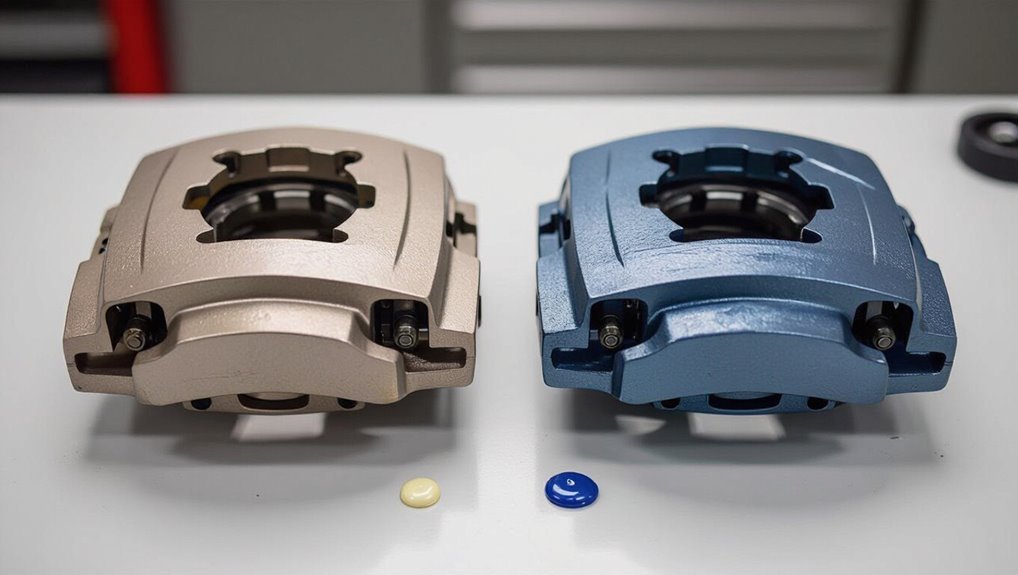
Surface Prep and Why It Changes Dry Time and Adhesion
If you don’t remove grease, rust, and old paint first, the new caliper paint won’t adhere properly and the drying profile will change.
You’ll see slower cure, blotching, or flaking if surface cleanliness and adhesion importance are ignored.
Use preparation techniques to abrade and degrease, then follow proper application methods for even coats.
- Abrasion
- Degreasing
- Masking
- Thin coats
- Flash times
How Primer Choice Affects Overall Dry Time
Although the primer you choose might seem like a small detail, it directly changes how fast your caliper paint dries and how well it cures; you’ll notice primer types, drying agents, application techniques, and environmental factors all shift cure speed. Choose compatible primers, use proper thinning, and control temperature and humidity for best results.
| Primer | Drying Agents | Notes |
|---|---|---|
| Epoxy | Fast | Strong adhesion |
| Acrylic | Medium | Flexible |
| Zinc | Slow | Corrosion protection |
Solvent vs. Waterborne Paints : What Changes Cure Time?
Because solvent and waterborne caliper paints use different carriers and chemistry, they’ll cure at noticeably different rates and behave differently under the same conditions.
You’ll notice solvent differences speed tack-free times, while waterborne benefits include lower VOCs and longer open times.
Consider these drying factors tied to paint chemistry:
- solvent differences: faster evaporation
- waterborne benefits: eco-friendlier
- humidity sensitivity
- film formation rate
- recommended flash times
How Curing Method (Air-Dry vs. Oven-Bake) Changes Timelines
When you choose between air-dry and oven-bake curing, you’re picking a timeline and level of control: air-drying relies on room temperature and humidity and can take hours to days to fully cure, while oven-baking forces faster, more uniform crosslinking in minutes to an hour at elevated temperatures.
You’ll balance curing processes and paint chemistry: air-dry tolerates field work; oven-bake accelerates hardness and solvent removal reliably.
When Is Professional Oven-Bake Worth It vs. DIY Air-Dry?
Choosing oven-bake or air-dry comes down to your project’s scale, desired finish, and tolerance for downtime.
You’ll weigh professional benefits against DIY drawbacks: oven-bake gives uniform cure, speed, and warranty; air-dry suits small jobs and low cost.
Consider these factors:
- scale and quantity
- finish consistency
- time constraints
- cost vs. warranty
- repairability and longevity
How Forced Hot Air or Heat Lamps Speed Drying Safely
If you need to speed caliper paint drying without an oven, forced hot air or heat lamps can cut cure times considerably while keeping finishes safe—provided you control temperature, distance, and exposure time. Use Air flow, Heat source selection, and Safe methods. Follow Drying techniques, Equipment types, Paint additives guidance. Balance Speed factors with Efficiency tips.
| Heat source | Distance | Time |
|---|---|---|
| Heat lamp | 12 in | 15m |
| Fan + lamp | 18 in | 20m |
| Forced air | 24 in | 25m |
| Low heat | 30 in | 30m |
Two-Coat and Multi-Layer Strategies for Faster, Durable Results
When you apply two coats or multiple thin layers, you’ll get faster tack-free times and a tougher finish than with one heavy coat.
Follow best practices by letting each layer cure to the manufacturer’s recommended tack stage before re-coating, keeping film thickness consistent, and sanding lightly between coats if specified.
Doing so speeds overall drying and reduces runs, ensuring durable, professional results.
Two-Coat Best Practices
Two thin, well-applied coats usually deliver the strongest, fastest-drying finish with caliper paint: the first lays a uniform base and the second builds durability and color depth without bogging down the film.
You should focus on caliper paint application and ideal layering to avoid runs and uneven curing.
- Wait recommended flash time
- Use consistent spray distance
- Thin coats if needed
- Light crosshatches
- Inspect under good light
Layer Curing Techniques
Although careful layering seems simple, curing caliper paint reliably across two or more coats takes deliberate timing and technique to speed dry times and maximize durability. You’ll match layer types to curing methods: thin base, mid build, topcoat; flash between coats, use gentle heat or IR, and allow extended cure for traffic. Plan intervals and test adhesion.
| Layer | Method |
|---|---|
| Base | Flash |
| Mid | Gentle heat |
| Top | Extended cure |
| Test | Adhesion check |
How to Test for Tack-Free Surface at Each Stage
How do you know if each coat of caliper paint has reached a tack-free state? Use simple tack free testing and surface evaluation steps so you can proceed confidently.
- Visually inspect for sheen change and uniformity.
- Lightly hover a fingertip without touching to sense stickiness.
- Use a clean cotton swab to press gently on an inconspicuous spot.
- Check edges and recesses for delayed drying.
- Record times and conditions for comparison.
How to Perform a Rub/Thumb Test for Handling Cure
Before you handle the painted caliper, wait until the coat passes basic tack-free checks.
Then perform a rub/thumb test by gently pressing and rubbing with a clean thumb to assess surface hardness and transfer.
Gently press and rub with a clean thumb to check surface hardness and any pigment transfer before handling.
Use light pressure, check multiple spots, and look for tackiness or pigment lift.
If no transfer occurs and surface resists imprinting, you’ve reached basic handling cure; proceed cautiously.
How to Check Full Cure With a Solvent or Adhesion Test
When you need to verify full cure, perform a controlled solvent or adhesion test to confirm the paint has chemically cross‑linked and bonded to the caliper rather than just feeling dry to the touch.
You’ll use solvent testing and simple adhesion methods to spot-soften, scratch, or peel tiny areas to guarantee permanent bonding.
- Choose compatible solvent
- Protect surrounding parts
- Test small inconspicuous spot
- Rub with cotton swab
- Inspect for residue or lift
When to Handle Painted Calipers Safely
Once the paint has passed your solvent or adhesion checks, wait until the surface feels fully tack-free and the recommended cure window has elapsed before touching the calipers.
When you do handle them, wear nitrile gloves, avoid gripping painted faces, and lift by unpainted mounting points.
Prioritize paint safety: keep solvents and heat away, and don’t rush caliper handling to prevent smudges or weakened bonds.
When to Reassemble Brakes After Caliper Paint
Anyone reassembling brakes after painting calipers should wait until the paint is fully cured to the manufacturer’s recommended time and has passed tack, solvent wipe, and adhesion checks.
You’ll then confirm brake assembly timing based on paint adhesion factors and safety checks.
- Verify full cure
- Perform solvent wipe
- Check adhesion
- Inspect hardware fit
- Torque to spec
Typical Drying Timelines for Performance and Track Use
After you’ve confirmed the paint is fully cured and passed adhesion and solvent checks, know that performance and track use impose heavier thermal and mechanical stresses than street driving.
Plan a Weekend Caliper Refinishing
Plan your weekend caliper refinishing by mapping tasks to a realistic timeline so you finish between coats and before cleanup becomes a rush.
You’ll focus on caliper preparation, masking, drying windows, and reassembly. Weekend planning keeps you from rushing cures or missing prep steps.
- Remove wheels and clean
- Mask surrounding areas
- Sand and degrease
- Apply coats with cure time
- Reinstall and test
Common Mistakes That Extend Dry Time (And Fixes)
One of the biggest reasons caliper paint takes forever to dry is applying coats that are too thick, so you’ll want to use thin, even layers.
Another common culprit is poor surface preparation—dirt, grease, or old loose paint prevents proper adhesion and lengthens cure time.
I’ll show quick fixes for both so your refinishing finishes faster and lasts longer.
Applying Too-Thick Coats
If you apply caliper paint in thick globs, it won’t just look sloppy—it’ll dramatically lengthen dry time and increase the chance of runs or soft spots.
You should use proper layering and control paint viscosity to avoid drying issues and compromised paint adhesion.
Match application technique to the drying environment to optimize finish quality and curing time.
- thick application
- paint viscosity
- proper layering
- paint interaction
- drying environment
Poor Surface Preparation
Because caliper paint needs a clean, well-prepared surface to bond and dry properly, skipping prep steps will almost always extend drying time and cause adhesion problems.
You should use proper prep tools and preparation techniques for surface cleanliness, dust removal, and to avoid contamination risks.
Don’t skip primer importance; it boosts adhesion strength and guarantees paint compatibility, reducing rework and delayed curing.
How Contaminants (Grease, Brake Fluid) Affect Curing
When contaminants like grease or brake fluid get on your caliper before painting, they’ll interfere with adhesion and slow or prevent proper curing; even tiny residues can create weak spots where paint won’t bond.
You must address contaminant types and maintain surface cleanliness to avoid adhesion issues and protect paint longevity.
- Oil and grease
- Brake fluid
- Road grime
- Silicone residues
- Improper cleaners
How to Troubleshoot Slow or Sticky Paint Cures
Although frustrating, slow or sticky caliper paint cures usually point to fixable issues you can diagnose and correct; start by checking surface prep, ambient conditions, and product compatibility.
Inspect for contamination or inadequate primer affecting paint adhesion.
Verify temperature, humidity, and ventilation are within specs.
Review manufacturer drying techniques and cure times, thin coats, and proper recoat intervals.
Replace incompatible products if needed.
How to Speed Up Drying Without Damaging the Finish
If you want caliper paint to dry faster without risking streaks, bubbles, or poor adhesion, focus on controlled, gentle acceleration rather than shortcuts that stress the finish.
Use safe drying techniques and minimal paint additives only when recommended; avoid heat blasts or chemical shortcuts that compromise cure.
- Thin coats
- Gentle airflow
- Low, even heat
- Manufacturer-approved accelerators
- Adequate flash times
Storage, Humidity Control, and Consistent Results
Speeding up drying is only part of consistent caliper paint results; how you store materials and control humidity during and after application matters just as much.
You’ll use storage solutions and workspace organization to protect cans, maintain paint preservation, and reduce contamination.
Monitor moisture levels, temperature control, and air circulation as key environmental factors.
Good humidity management guarantees stable drying conditions and consistent outcomes.
Cost and Real-World Tradeoffs: DIY vs. Professional Bake
When you’re weighing DIY baking of caliper paint against a professional oven cure, cost is often the deciding factor: doing it yourself saves on labor and shop rates but adds expenses for equipment, time, and the risk of uneven cures or mistakes that can force a redo.
- DIY Cost vs Professional Tradeoffs
- Equipment Needs and Skill Level
- Time Investment realities
- Finish Quality and Long term Durability
- Project Complexity impacts choice
Frequently Asked Questions
Can Caliper Paint Withstand High-Pressure Car Washes Immediately?
No, you shouldn’t expose caliper paint durability to high pressure washing immediately; you’ll risk stripping or chipping fresh coatings. Wait full cure per manufacturer guidance, then high pressure washing becomes safer for longevity.
Will Painted Calipers Affect Brake Heat Dissipation?
Think of calipers like suns; painted surfaces shed heat slightly. You won’t notice meaningful brake performance impact if you use high-temperature caliper paint—proper caliper paint durability preserves cooling while avoiding glazing or trapping excessive heat.
Can I Paint Calipers With ABS Plastic Nearby Without Melting It?
Yes — you can paint calipers near ABS plastic if you use high-temp caliper paint, mask plastic thoroughly, and avoid spraying or overspray; prioritize plastic safety by keeping heat low and letting paint cure per instructions to prevent melting.
Does Caliper Paint Interfere With Wheel Sensor or ABS Function?
Caliper paint effects rarely cause sensor interference if you clean, mask, and avoid painting tone rings or wiring; you’ll prevent buildup, overheating, or magnetic issues by using compatible products and careful application near ABS/wheel sensors.
Are There VOC or Legal Restrictions on Caliper Paint for Street Use?
Curious about restrictions? You’ll need to check VOC regulations and legal compliance in your area; manufacturers list paint safety, and you’re responsible for street legality—follow labels, local laws, and avoid noncompliant products to stay safe and legal.
Conclusion
In short: caliper paint feels tack-free in 30–60 minutes, is safe to handle in 4–8 hours, and reaches full cure in 24–72 hours depending on type and thickness. Remember: a single heavy coat can multiply cure time, so try thin, even layers. Imagine this—your caliper can go from sticky to fully cured in about the same time it takes to binge three 45‑minute episodes: roughly 2–3 hours to feel right, but give it a full day.