What Can I Use to Clean Walls Without Removing Paint?
You can safely clean painted walls with gentle, nonabrasive methods that won’t strip the finish. Start with a soft microfiber cloth or sponge and warm water with a few drops of mild dish soap, blotting and rinsing small sections as you go. For tougher marks try a baking soda paste or diluted white vinegar, but always spot-test first on an inconspicuous area. Work gently and dry thoroughly; keep going and you’ll find tips for paint types, stains, and tougher jobs.
Quick Checklist: Clean Painted Walls Safely
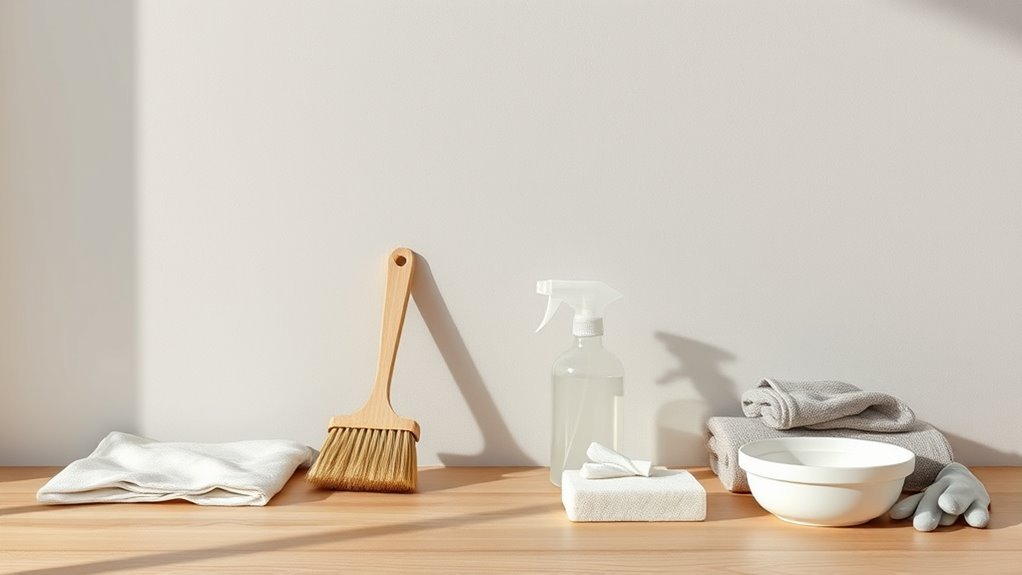
Before you start scrubbing, gather the right supplies and test a hidden spot so you don’t damage the paint. You’ll need soft cloths, a sponge, mild detergent, bucket, gentle cleaner, and gloves.
Check paint type and age; older or flat finishes need extra caution. Work from bottom up to avoid streaks and rinse frequently. Use light pressure and small areas to monitor results.
Spot-treat stains rather than soaking entire walls. Keep a ceiling-to-baseboard routine for consistent wall maintenance and focus on paint preservation by avoiding harsh abrasives, bleach, or excessive moisture that can strip or fade finishes.
Quick Answer: Safe Wall-Cleaning Methods
For quick, safe cleaning you’ll usually start with a gentle soap solution—warm water and a mild dish soap—to lift grime without stripping paint.
If you need something stronger, try magic eraser alternatives like melamine-free cleaning pads or a baking soda paste to avoid abrasive damage.
Test any method on an inconspicuous spot first, and work gently in small areas.
Gentle Soap Solution
Mix a gentle soap solution by combining a few drops of mild dish soap with warm water in a bucket—this creates a safe, effective cleaner for most painted walls.
You’ll dip a soft sponge or microfiber cloth, wring it well, and wipe in gentle, overlapping strokes to avoid streaks. Test an inconspicuous spot first to confirm paint won’t lift.
Rinse the sponge frequently and change the water when it gets dirty. For stubborn marks, let the damp cloth sit briefly to loosen grime, then blot rather than scrub.
Dry the area with a clean towel to prevent water spots.
Magic Eraser Alternatives
If you want a Magic Eraser-style clean without the melamine sponge, try household items like baking soda paste, white vinegar diluted with water, or a soft microfiber cloth dampened with mild dish soap—each works well on different marks and won’t strip paint when used gently. You can follow simple cleaning hacks that protect finish and support paint preservation. Test a hidden spot, work top to bottom, and use light pressure. For regular wall maintenance, alternate methods to avoid abrasion and fading.
| Item | Use |
|---|---|
| Baking soda | Scuffs |
| Vinegar mix | Grease |
| Microfiber | Dust |
| Soap water | Marks |
Choose Cleaners by Paint Type (Flat, Eggshell, Satin, Semi-Gloss)
Because different paint sheens react differently to scrubbing, you’ll want to match your cleaner and technique to the finish to avoid dulling or stripping the paint.
Choose mild cleaners for flat paint; it hides imperfections but needs gentle touch.
Eggshell paint tolerates light detergents; focus on low-abrasion sponges.
Satin paint handles moderate scrubbing and is more stain-resistant, so increase cleaning frequency for high-traffic areas.
Semi gloss paint is the most durable against water and scrubbing; stronger cleaners are usually safe.
- Assess paint compatibility before cleaning.
- Consider wall texture when choosing tools.
- Match cleaner strength to stain types.
- Test small areas first.
Why Spot-Testing Saves Your Paint
When you test a cleaner on a small, hidden patch first, you’ll catch discoloration, dulling, or finish damage before it affects the whole wall. You’ll also learn how a product reacts to your specific paint and surface buildup.
Use basic testing techniques: apply, wait, blot, and inspect under good light. Record results and water-dilution ratios so you can replicate safe mixes.
Spot-testing protects gloss, color and adhesion, supporting long-term paint preservation. If a cleaner alters the test area, stop and choose a gentler option.
This quick step prevents costly repairs and preserves your painted surfaces.
Essential Tools for Cleaning Painted Walls
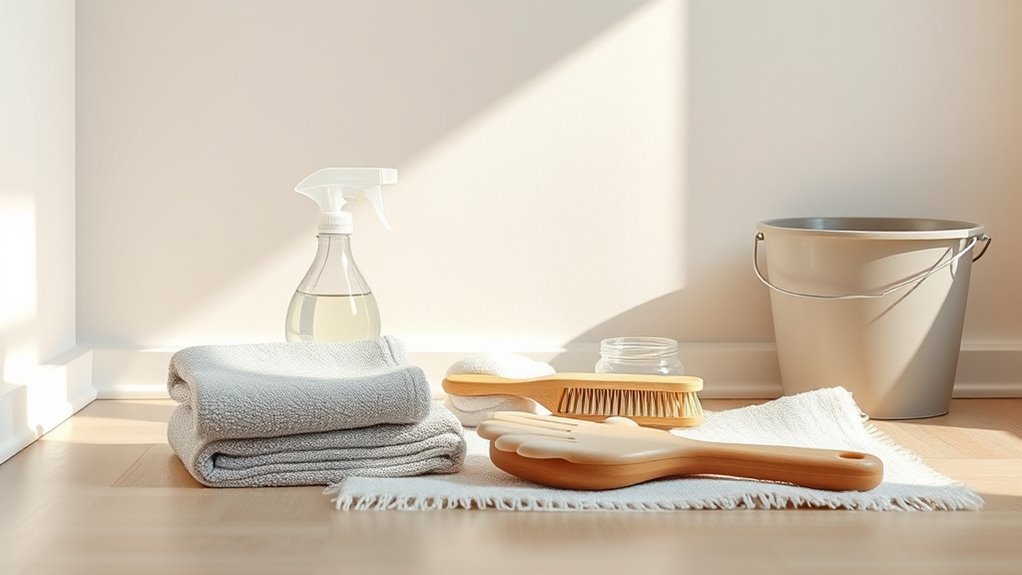
Before you start cleaning, gather soft microfiber cloths, a mild cleaning solution, and non-abrasive sponges to protect the finish.
Use the microfiber to lift dust, the gentle solution for stains, and the sponge for stubborn spots without scrubbing hard.
With the right tools on hand, you’ll clean effectively while keeping paint intact.
Soft Microfiber Cloths
- Choose plush, high-quality microfiber
- Use light pressure only
- Keep cloths clean between uses
- Air-dry completely before storing
Gentle Cleaning Solutions
After you’ve got soft microfiber cloths on hand, pick cleaning solutions that lift dirt without stripping paint. You’ll want gentle cleaners that cut grime yet preserve finish; dilute mild dish soap or a pH-neutral cleaner, test a hidden spot, then proceed. Regular wall maintenance prevents buildup and reduces scrubbing.
| Solution | Dilution | Use |
|---|---|---|
| Mild dish soap | 1 tsp/1 qt water | Light stains |
| pH-neutral cleaner | Manufacturer | General cleaning |
| Vinegar (diluted) | 1/4 cup/1 qt | Grease spots |
| Rinse water | Plain | Remove residue |
Non-Abrasive Sponges
When you need to remove scuffs and smudges without damaging paint, reach for non-abrasive sponges—these soft, low-scrub pads lift grime while protecting finishes.
You’ll wet the sponge lightly, wring thoroughly, and test a hidden spot. Use gentle pressure and short strokes; avoid bleaching agents on colored walls.
Rotate sponge faces to prevent buildup and replace when worn. For stubborn marks, add a mild detergent or baking soda paste sparingly, then rinse and pat dry.
Pair proper tools with basic cleaning techniques to extend paint life and keep walls looking fresh.
- Choose melamine or cellulose options
- Start with a spot test
- Use mild detergents
- Replace when damaged
Dish Soap Solutions Safe for Painted Walls
If you want a gentle, effective way to lift dirt from painted walls without stripping the finish, a mild dish soap solution is often your best bet.
You’ll get dish soap benefits like grease-cutting power and gentle cleaning when you mix a few drops of mild liquid soap into a bucket of warm water.
Use soap dilution techniques: start with a weak mix (about one teaspoon per quart), test a hidden spot, and increase slightly only if needed.
Start with a weak soap mix—about 1 teaspoon per quart—test a hidden spot, then adjust slightly if needed.
Wring your sponge well, work from top down, rinse with clear water, and pat dry to avoid streaks or water damage.
When to Use a Baking Soda Paste
Because baking soda is mildly abrasive and alkaline, you’ll reach for a paste for scuffs, crayon marks, or baked-on grime that won’t lift with soap and water but where you still want to protect the paint, not strip it.
Use soft pressure and test an inconspicuous spot first. The baking soda benefits include gentle abrasion and odor neutralization without harsh chemicals. Mix with water to a toothpaste consistency.
Paste applications are ideal for spot-treating without sanding. Rinse gently and dry.
- Crayon and pencil marks
- Grease spots near stovetops
- Handprints and scuffs in high-traffic areas
- Stubborn food splatters
Vinegar on Painted Walls: How It Works and When to Avoid It

Although vinegar’s acidity makes it a powerful, natural cleaner for many surfaces, you should use it cautiously on painted walls. You’ll appreciate vinegar benefits like degreasing and deodorizing, but its acidity can dull or strip some finishes.
Test a hidden spot first to check paint compatibility, especially on flat, matte, or older paints. Dilute white vinegar with water (about 1:4) and apply gently with a soft cloth; rinse and dry quickly.
Avoid using vinegar on oil-based, specialty, or recently painted surfaces. When in doubt, consult manufacturer guidelines or choose a milder cleaner to protect your paint.
Using Hydrogen Peroxide for Organic Stains Safely
Before using hydrogen peroxide on an organic stain, test it on an inconspicuous spot to make sure the paint won’t fade.
Apply a small amount with a soft cloth and blot gently rather than scrubbing.
Rinse the area with clean water and dry thoroughly to prevent residue or further damage.
Test Inconspicuous Spot
When you’re dealing with organic stains like coffee or wine, always test hydrogen peroxide on an inconspicuous patch first to make sure it won’t bleach or damage the paint finish.
You want to evaluate paint durability and how different wall textures react before treating visible areas. Pick a corner, behind furniture, or inside a closet at eye level.
Apply a small drop, wait 10–15 minutes, then blot—don’t rub—to check for color change or surface softening. If safe, proceed carefully; if not, try gentler cleaners or consult manufacturer guidance.
- Choose hidden spot
- Note time and result
- Use minimal product
- Photograph for records
Apply With Soft Cloth
Now that you’ve confirmed hydrogen peroxide won’t harm the paint, apply it sparingly with a soft, lint-free cloth to treat organic stains. You’ll dab gently, avoid scrubbing, and work from the stain edge inward. Use soft cloth techniques to lift residue without abrading finish. These wall cleaning tips help preserve sheen and color while removing food, mildew, or blood spots. Monitor for any paint change, repeat in short intervals, and blot excess moisture. Below is a quick reference:
| Action | Purpose |
|---|---|
| Dab | Limit contact |
| Blot | Remove moisture |
| Small amount | Prevent saturation |
| Edge-to-center | Contain spread |
| Repeat | Gradual removal |
Rinse And Dry Thoroughly
- Blot excess peroxide with a damp microfiber cloth.
- Rinse the area with clean water using a gentle sponge.
- Pat dry immediately with a soft towel to prevent streaks.
- Air-dry fully before evaluating repeat treatment.
Performing careful wall cleaning this way keeps stains gone while minimizing peroxide contact time, preserving paint integrity and uniform appearance.
Magic Erasers: Careful Use Without Stripping Finish
Although Magic Erasers work wonders on scuffs and grime, they act like very fine sandpaper and can remove paint or sheen if you scrub too hard.
You should follow magic eraser precautions: test a hidden area first, use light pressure, and avoid prolonged rubbing.
Check surface compatibility—they’re better on semi-gloss and trim than on flat or chalky paint.
Wet the sponge and squeeze out excess; never use a dry pad.
Work in small sections, rinse the wall, and let it dry to assess results.
Stop immediately if gloss changes or paint lifts; switch to milder cleaners if needed.
Top Commercial Wall Cleaners and When to Buy Them
Some cleaners tackle stains and grime better than generic soaps, so you’ll want to pick one that matches your paint type and the mess you’re facing.
Look for commercial brands labeled safe for latex or enamel, and test a hidden spot first. Buy heavy-duty degreasers for kitchen splatter and non-abrasive solutions for matte finishes.
Watch for seasonal sales to stock up before big cleaning projects. Consider scent, biodegradability, and surface compatibility.
- All-purpose, non-abrasive cleaners for general scuffs
- Grease-cutting formulas for kitchen walls
- Mild, pH-neutral cleaners for delicate paints
- Spot-removal sprays for stubborn marks
How to Mix and Store Homemade Wall Cleaners Safely
If you prefer DIY solutions over commercial cleaners, you’ll want to know how to mix and store them safely to protect paint and your health.
Measure ingredients precisely, dilute gentle surfactants like dish soap in water, and add vinegar or baking soda only when appropriate—don’t mix bleach with acids or ammonia.
Test each homemade cleaner recipe on an inconspicuous spot first.
Label containers with contents and date, and keep solutions in opaque, childproof bottles away from heat and sunlight.
Store concentrates separately from ready-to-use mixes, follow disposal guidance, and keep a spill kit and ventilated workspace for safe storage tips and handling.
Cleaning Fingerprints and Light Smudges on Painted Walls
Start by gently lifting fingerprints and light smudges with a soft, damp microfiber cloth—don’t scrub hard or you risk dulling the paint. For most finishes, a little water or a mild soap solution works; blot, then pat dry.
For stubborn spots, test a hidden area first. Regular attention prevents buildup and keeps surfaces fresh.
- Use a clean microfiber for effective fingerprint removal without abrasion.
- Try diluted dish soap for greasy smudges, then rinse with plain water.
- Pat dry to avoid streaks and water spots.
- Schedule quick wipe-downs as part of wall maintenance.
Removing Scuff Marks and Shoe Rubs (Step-by-Step)
When scuffs and shoe marks appear, tackle them promptly with gentle, controlled actions to avoid damaging the paint; you’ll protect the finish and restore appearance faster than letting grime set.
Start by dry-rubbing with a clean microfiber cloth or a soft eraser sponge, testing an inconspicuous spot first. For persistent marks, dampen the cloth with mild dish soap and water, blotting rather than scrubbing. Rinse with a damp cloth and pat dry.
Use non-abrasive products only, and avoid bleach or ammonia.
Adopt scuff removal techniques routinely and implement shoe mark prevention like door mats and clear rules to minimize future contact.
Cutting Through Grease and Kitchen Splatter
Kitchen grease and splatter often cling stubbornly to walls and backsplashes, but you can remove them without stripping paint by using the right cleaners and gentle technique.
Begin with a soft microfiber cloth and warm soapy water; escalate only if residue remains. Test any kitchen cleaners in an inconspicuous spot first. Work from top down, blotting rather than scrubbing to protect finish.
For tough buildup, mix a mild degreaser solution or vinegar and water, apply briefly, then rinse.
- Use microfiber cloths for gentle lifting
- Try diluted dish soap first
- Spot-test stronger kitchen cleaners
- Rinse and dry thoroughly
Removing Crayon, Marker, and Ink Stains
Before you start, test a hidden spot to make sure the method won’t strip the paint.
Try gentle erasing techniques first—soft cloths, a magic eraser on low pressure, or a pencil eraser—to lift crayon and marker without damage.
If that doesn’t work, use a stain-safe cleaning solution designed for painted walls and rinse promptly.
Test Hidden Spot First
Curious how a cleaner will affect your paint? You should always test a hidden spot first before treating crayon, marker, or ink stains.
Pick an inconspicuous area, apply your chosen cleaning techniques, wait, and inspect for fading, texture change, or sheen loss. Testing protects finish and informs your wall maintenance plan.
- Use the same cleaner you’ll use on the stain.
- Apply gently with a cloth, not a scrub brush.
- Wait at least ten minutes before evaluating.
- Note results and proceed only if paint looks unchanged.
This quick check prevents damage and saves time.
Gentle Erasing Techniques
Once you’ve confirmed the paint’s safe, start with the gentlest erasing methods to lift crayon, marker, and ink without harming the finish.
Use a soft, dry eraser or a clean microfiber cloth to rub lightly; you’ll avoid pressure that damages paint. For stubborn marks, dampen the cloth slightly and perform gentle scrubbing in small circles, checking how wall textures respond.
Work from edges inward to prevent smearing. Test any tool on a hidden spot first. If residue persists, repeat cautiously rather than increasing force. You’ll preserve the coating while gradually reducing visible stains.
Stain-Safe Cleaning Solutions
When you’re ready to move beyond erasers, pick stain-safe solutions that dissolve crayon, marker, and ink without stripping the finish.
You’ll test solvents on an inconspicuous spot, work gently, and repeat only as needed to protect sheen. Adjust cleaning frequency to prevent buildup; quick spot treatment beats aggressive scrubbing.
- Use a diluted dish soap mix for fresh crayon marks.
- Try isopropyl alcohol on marker, dabbing, not rubbing.
- Apply a magic-eraser lightly for stubborn ink, monitoring paint.
- Make a baking soda paste for persistent residue, rinsing thoroughly.
Prioritize stain removal techniques that preserve paint.
Handling Mildew and Mold on Painted Walls
If you spot mildew or mold on painted walls, act quickly to prevent staining and spread: isolate the area, improve ventilation, and gather mild cleaners and a soft brush or sponge.
You’ll want to wear gloves and a mask, test a small hidden spot, then use a diluted mixture of water and mild detergent or a 1:10 bleach solution for stubborn spots.
Gently scrub, rinse with clean water, and dry thoroughly.
For mildew prevention, control humidity, fix leaks, and keep air flowing.
For mold treatment, repeat cleaning if needed and monitor the area; call a professional for extensive growth.
Cleaning Textured and Popcorn-Painted Walls Gently
When you clean textured or popcorn-painted walls, stick to mild solutions like diluted dish soap or a gentle all-purpose cleaner to avoid stripping paint.
Use soft tools—microfiber cloths, soft-bristled brushes, or a sponge with light pressure—to lift dirt without damaging the texture.
Work in small sections and blot rather than scrub to protect both the finish and the raised surfaces.
Use Gentle Cleaning Solutions
Because textured and popcorn-painted walls trap dirt differently than smooth surfaces, you’ll want cleaning solutions that lift grime without dissolving paint or flattening texture.
Test any mix on a hidden patch first, since wall materials react differently. Use mild cleaners and avoid strong solvents.
- Diluted dish soap: cuts grease gently without harsh chemicals.
- Baking soda paste: a light abrasive that won’t damage paint when used sparingly.
- Vinegar solution: 1:4 white vinegar to water for odor and mild stains.
- Commercial gentle cleaners: labeled safe for painted/textured surfaces.
Rinse lightly and pat dry to prevent streaks or moisture damage.
Clean With Soft Tools
Although textured and popcorn-painted walls can look delicate, you can clean them effectively with the right soft tools that lift dirt without scraping or flattening the finish.
Start by dusting with a soft bristle brush attached to a long handle or vacuum brush to remove loose particles.
For stains, dampen gentle cleaning pads or microfiber cloths with mild detergent solution and blot—don’t rub—to avoid dislodging texture.
Work small sections, rinsing pads frequently and patting dry with a clean cloth.
Test an inconspicuous spot first.
Regular gentle maintenance prevents buildup and keeps paint intact without harsh abrasion.
Cleaning Trim and Baseboards Without Harming Adjacent Paint
If you want to freshen trim and baseboards without damaging nearby paint, start by protecting adjacent walls and working from top to bottom so dirt doesn’t smear onto cleaned areas.
Protect nearby walls and clean trim from top to bottom to avoid smearing dirt onto freshly cleaned areas
You’ll use gentle cleaners, soft cloths, and narrow brushes to address grooves and corners. For effective trim cleaning and baseboard maintenance, follow a careful sequence and test solutions on an inconspicuous spot first.
- Use a microfiber cloth dampened with mild detergent
- Apply a soft-bristled toothbrush for crevices
- Rinse with a clean, damp cloth to remove residue
- Dry promptly to prevent streaks or swelling
How Often to Clean Painted Walls to Protect Finishes
How often you clean painted walls depends on the room—high-traffic areas like kitchens and hallways need weekly to monthly attention, while bedrooms and formal spaces can go several months.
Watch for visible dirt, sticky spots, scuff marks, or a dulling finish as clear signs it’s time to clean. Keeping a simple schedule based on room use will help protect the paint and extend its life.
Frequency By Room Type
Typically, you’ll clean painted walls at different intervals depending on the room’s use and soil level: high-traffic spaces like kitchens and hallways need monthly or biweekly attention. Bathrooms and kids’ rooms often benefit from monthly wipe-downs, while low-traffic bedrooms and formal living areas can usually be cleaned every few months.
You should tailor frequency: living room frequency is quarterly unless you entertain often; bathroom frequency is monthly to control humidity stains; kitchen frequency is biweekly to manage grease; bedroom frequency stays every few months unless kids or pets increase soil.
Consider hallway frequency and entryway frequency for spot checks.
- Living room: quarterly (or more)
- Bathroom: monthly
- Kitchen: biweekly
- Bedroom: every few months
Signs It’s Time
When you start noticing dull patches, streaks, sticky spots, or small scuffs, it’s a clear sign your painted walls need attention to protect the finish. You should check high-traffic areas weekly and less-used rooms monthly; that balance limits wall wear without overcleaning. Use gentle cleaners and soft cloths, testing a hidden spot first. Track cleaning frequency based on visible soil, odors, or marks, not a calendar alone. If marks reappear quickly, increase attention; if walls stay clean, stretch intervals.
| Area | Suggested Interval |
|---|---|
| Entryways | Weekly |
| Living room | Monthly |
| Bedrooms | Every 2–3 months |
Signs a Paint Job Is Too Fragile to Clean
Not sure if your walls can handle a scrub? You’ll want to assess paint durability and consider cleaning frequency before touching a surface.
If you rush, you can peel fragile finishes.
- Paint flakes or powders when you lightly touch it.
- Surface looks uneven with patchy gloss or bald spots.
- Paint softens or smears with a damp cloth.
- Excessive previous coatings; many layers can delaminate.
If you notice these signs, skip aggressive cleaning.
Test a small hidden area with gentle water and a soft cloth first. When in doubt, consult a pro to avoid worsening the damage.
Avoid Mistakes That Strip Paint or Leave Rings
If you’ve found flaky or soft paint, proceed carefully so your cleaning doesn’t make things worse. You should test a hidden spot first, matching cleaning methods to paint types and wall finishes to protect paint integrity.
Use soft cleaning tools and mild solutions, and avoid abrasive pads or overly wet cloths that cause surface damage or rings. Adjust cleaning frequency based on traffic and soil, not habit, to minimize wear.
When in doubt, choose gentler techniques and spot-clean; escalating to stronger cleaners risks stripping paint. Prioritize paint protection by following manufacturer guidance for your finish and materials.
Rinsing and Drying Techniques to Prevent Streaks
After rinsing a washed area with clean water, you’ll remove residue that can cause streaks.
Wring your cloth well and follow with a microfiber towel to blot and buff the surface.
That quick rinse-and-dry routine keeps paint intact and streak-free.
Rinse With Clean Water
When you rinse walls with clean water, work from top to bottom and use a fresh, soft cloth or sponge so you don’t spread dirt or leave streaks.
Rinse promptly after any cleaning solution to protect paint preservation and support effective wall cleaning. Use gentle, even motions and change water often. Avoid overwetting; blot excess moisture with a clean towel and allow gravity to carry runoff downward.
Check edges and trim for residue.
- Use lukewarm water to loosen grime
- Replace rinse cloths when soiled
- Rinse small sections to control drying
- Inspect under different light to spot streaks
Dry Using Microfiber
Pat down the rinsed wall with a clean microfiber cloth to lift moisture without dragging dirt back across the surface; microfiber’s fine fibers absorb water quickly and help prevent streaks by dispersing liquid evenly.
Move in vertical strokes from top to bottom, changing cloth sections as they get damp so you don’t reapply grime. For larger areas, work in overlapping panels to maintain consistent wall drying and avoid lap marks.
Wring or replace the cloth often and let trimmed edges reach corners. You’ll notice microfiber benefits immediately: faster drying, reduced streaks, and less effort compared with regular towels or paper.
Spot-Primer and Touch-Up Paint After Cleaning Damage
If cleaning lifts or dulls small patches of paint, you’ll want to spot-prime and touch up those areas before they show or spread.
You’ll assess damage, sand feathered edges lightly, apply a compatible spot primer, then match paint sheen and color for precise repairs.
Use spot primer techniques to seal exposed substrate; follow touch up tips for thin, layered strokes.
- Sand and wipe the damaged spot gently
- Apply a stain-blocking spot primer sparingly
- Use a small brush or sponge for paint matching
- Feather edges and blend multiple thin coats until invisible
Safe Methods for High or Hard-to-Reach Wall Areas
Because high spots pose fall and strain risks, you should prioritize stable access and proper tools before cleaning.
Use a sturdy step ladder or scaffold and never overreach. Choose high reach tools with extendable poles and soft microfiber attachments to avoid scrubbing through paint.
Work in small sections, testing a hidden area first to confirm your wall cleaning techniques won’t damage finish. Keep movements gentle and controlled, rinsing and wringing tools to prevent drips.
If texture or fixtures complicate access, use an angled brush head or enlist a helper to steady the ladder and hold drop cloths beneath the work area.
Eco-Friendly Cleaners That Won’t Harm Paint or Indoor Air
When you want to clean walls without stripping paint or filling your home with fumes, choose mild, plant-based solutions and diluted household ingredients that cut grease and dirt but won’t degrade finishes or indoor air quality.
You’ll protect finishes by testing a small spot, using soft cloths, and avoiding abrasive scrubs. Prioritize eco-friendly ingredients and sustainable practices to keep air healthy and disposal simple.
Test first, use soft cloths, avoid abrasives, and choose eco-friendly cleaners to protect finishes and indoor air quality.
Mix gentle options, work top-to-bottom, and rinse lightly.
- Diluted castile soap solution
- White vinegar diluted for semi-gloss and flat-safe tests
- Baking soda paste for stubborn spots
- Microfiber cloths and warm water
DIY vs. Pro Wall Cleaning: Cost, Time, and When to Hire
Curious whether you should tackle wall cleaning yourself or call a pro? You’ll weigh DIY Techniques against Professional Services by doing a clear Cost Comparison and Time Investment estimate.
Consider Hiring Considerations like insurance, guarantees, and experience with specific Surface Types.
Do an Effectiveness Assessment: small scuffs suit DIY, extensive grime or textured panels often need pros.
Factor Cleaning Frequency—regular light cleaning reduces need for deep professional jobs.
If budget’s tight and you’re comfortable with ladders and solutions, do it yourself; if damage risk, tight timeline, or tricky surfaces worry you, hire trained cleaners.
Troubleshooting: What to Do If Paint Lifts or Discolors
If you try DIY cleaning and notice paint lifting or discoloring, don’t panic—there are clear steps to assess and fix the issue.
First, stop cleaning and let the wall dry. Evaluate whether paint lifting is from harsh cleaners, moisture, or poor adhesion.
Stop cleaning, let the wall dry, and determine whether cleaners, moisture, or poor adhesion caused the paint lift.
Test a small hidden area with mild detergent and a soft cloth before proceeding. For discoloration prevention, use pH-neutral cleaners and avoid scrubbing painted surfaces hard.
If damage’s limited, sand, prime, and touch up with matching paint. For widespread lifting or stains, consult a pro to prevent further harm.
- Stop, dry, and inspect
- Test milder cleaners
- Spot-sand, prime, touch up
- Call a professional
Frequently Asked Questions
Can I Use a Steam Cleaner on Painted Walls?
Yes — you can use a steam cleaner on painted walls carefully. You’ll enjoy steam cleaner benefits like sanitizing and degreasing; use gentle painted wall techniques, low heat, quick passes, and a soft cloth to avoid paint damage.
Will Wallpaper-Safe Cleaners Harm Painted Surfaces?
Yes — they usually won’t melt your paint into rainbow goo, but you’ll still check labels: choose gentle cleaning solutions with tested surface compatibility, spot-test first, and avoid abrasive scrubs or strong solvents to keep finishes intact.
Can I Clean Lead-Painted Walls Safely Myself?
You can’t safely clean lead-painted walls yourself if paint’s deteriorating; you should follow lead paint precautions and hire professionals. If intact, use safe cleaning methods: damp cloths, HEPA vacuum, wet-wipe debris, wear PPE.
How Do I Remove Nicotine Stains Without Repainting?
Like wiping fog off a window, you can remove nicotine stains by using nicotine removal techniques: try trisodium phosphate, vinegar-water, or baking soda paste as the best cleaning solutions, scrubbing gently and rinsing, repeating until stains fade.
Are Aerosol Cleaners Safe for Glossy Paint Finishes?
Yes — you can use aerosol application on glossy finish, but test first on an inconspicuous spot. Use gentle cleaners, hold the can back, avoid solvents or abrasive sprays, and wipe softly to prevent dulling or damage.
Conclusion
Think of your painted walls as a favorite sweater: treat them gently and they’ll keep looking new. Spot-test first, pick cleaners that match your paint sheen, and use soft tools to avoid scrubbing the finish away. For high areas, work from a stable step stool and a long-handled duster. When stains won’t budge or paint peels, call a pro. With the right care, your walls will stay bright and ready to welcome every moment.