How Long Does Bondo Need to Dry Before Painting? Guide
You should wait until Bondo is fully cured before painting: it’s usually sandable in 15–30 minutes but needs about 24 hours for a complete cure under normal 60–80°F conditions. Warm, dry air and proper hardener mixing speed things up; cool, humid conditions slow them down. Use thin layers, test with a fingernail or tape, and avoid tacky spots before priming. Follow safe ventilation and mix practices, and keep going for tips on troubleshooting and timing.
Quick Answer: Bondo Cure Times at a Glance
While exact times vary with temperature, humidity and the amount of hardener you mix in, Bondo usually becomes sandable within 15–30 minutes and reaches full cure in 24 hours under typical workshop conditions.
You’ll assess drying conditions and curing environments, choose Bondo types, use proper repair tools, follow surface preparation, sanding methods, application techniques, safety precautions, check paint compatibility, and run an inspection checklist before painting.
How to Use This Guide to Time Bondo Drying
Use the guide to match the Bondo mixing ratio you’re using with the cure times listed so you don’t under- or over-harden the filler.
Account for temperature and humidity—warmer, drier conditions speed curing while cold or humid air slows it.
Adjust your working time and sanding schedule accordingly.
Mixing Ratios Matter
Getting the proportion right helps you predict drying time and avoid problems like soft spots or excessive heat.
You should follow mixing techniques, account for hardener effects, match application methods, and consider environmental factors.
Steps:
- Measure precisely
- Mix thoroughly
- Test small patch
- Note cure time
Temperature And Humidity
Because temperature and humidity directly control Bondo’s chemical reaction, you should use them as your primary timing cues when planning a repair.
You’ll speed cure in warm, dry conditions and slow it in cool, humid ones. Watch temperature effects closely: ideal range is 60–80°F.
Account for humidity impact: over 60% slows drying. Adjust hardener amount and wait times accordingly.
Standard Bondo Cure Time Before Sanding and Painting
When you apply a standard Bondo body filler, it typically takes about 20–30 minutes to set enough for initial sanding and up to 24 hours to fully cure before painting, depending on temperature and hardener amount.
You’ll follow repair techniques and application tips to guarantee proper cure:
- Check tack after 20–30 minutes.
- Sand progressively.
- Allow full 24-hour cure if possible.
- Clean before primer.
Lightweight Bondo vs. Standard: Cure Time Comparison
When you compare lightweight Bondo to standard, you’ll notice lightweight formulas usually set faster but can be less dense and more prone to shrinkage.
Consider that standard Bondo often offers greater strength and less shrink over large fills, which affects when it’s safe to sand and paint.
Also remember cure times for both will vary with temperature and humidity, so adjust your schedule accordingly.
Cure Time Differences
Although both lightweight and standard Bondo are two-part polyester fillers, they cure at different rates because of formulation and filler density; you’ll notice lightweight Bondo often sets faster but can reach full sandability sooner under the same conditions.
You should consider cure time variations and environmental impacts when planning.
- Temperature affects cure speed.
- Humidity slows curing.
- Hardener ratio matters.
- Thickness increases cure time.
Strength And Shrinkage
Because lightweight Bondo contains more air-filled microspheres, it tends to cure faster but gives you slightly less compressive strength and is more prone to minimal shrinkage than standard Bondo.
Standard Bondo cures a bit slower but yields a denser, stronger patch with less dimensional change.
You’ll want to perform strength testing on repairs and watch for shrinkage issues; choose product based on load and finish needs.
Temperature And Humidity
If you’re working in warm, dry conditions, both lightweight and standard Bondo will set faster.
However, the lightweight formula usually reaches usable cure times sooner because its air-filled microspheres let heat penetrate and accelerate the reaction.
In cool or humid environments, the difference narrows as both types slow down, with standard Bondo retaining a slight advantage in dimensional stability even as it takes longer to fully cure.
- Temperature effects: warm = faster.
- Humidity impact: slows cure.
- Lightweight = quicker usable cure.
- Standard = better final stability.
How Temperature Affects Bondo Drying Speed
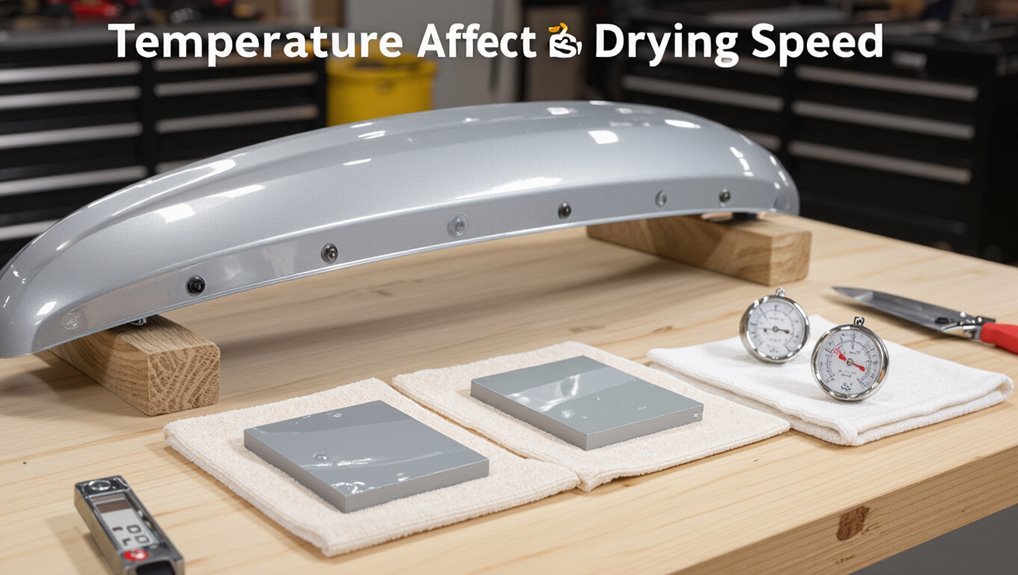
When the temperature rises, Bondo’s hardener reacts faster and the filler cures more quickly, so you’ll notice shorter work times and faster sanding readiness in warm conditions.
You should adjust mix ratios and plan tasks knowing temperature effects alter drying conditions; in cooler temps expect longer cure times and delayed sanding.
Monitor surface warmth and follow manufacturer timing for best results.
How Humidity Changes Bondo Curing
High humidity slows Bondo’s cure by holding moisture in the air and on substrates, so you’ll see longer work and sanding times in damp conditions.
You must monitor humidity levels and account for curing effects from weather conditions.
Consider these tips:
- Check forecasts for moisture impact.
- Use fans to reduce drying challenges.
- Control environmental factors indoors.
- Delay painting until fully cured.
How Layer Thickness Alters Cure Time
If you apply Bondo in thin layers, it cures faster and gives you better spread and coverage control.
Thick layers take much longer to harden and can trap heat or cure unevenly, so you’ll want to avoid big buildups.
When you need more thickness, plan multiple coats and wait the recommended time between each so each layer fully sets before shaping or sanding.
Thin vs Thick Layers
One thin coat of Bondo will cure far faster than a thick application, so you should plan layers around how quickly you need to sand or recoat.
You’ll notice thin layer benefits and avoid thick layer drawbacks when you:
- Apply thin coats for quicker cure.
- Sand sooner between layers.
- Reduce cracking risk.
- Use multiple thin passes for shape control and strength.
Spread And Coverage
How thick you spread Bondo directly changes how fast it cures: thinner passes let the hardener work through the filler quickly, while thicker beads trap heat and slow the chemical reaction.
You should use proper spread techniques to control thickness, aiming for even coverage.
Follow coverage tips: smooth thin layers for faster cure, avoid piling material, and monitor temperature for consistent results.
Multiple Coats Timing
When you apply multiple Bondo coats, each layer changes how heat and hardener interact, so thinner successive passes cure faster than a single thick buildup.
You’ll manage drying intervals and strength by layering thoughtfully.
- Thin coats reduce exotherm.
- Wait between coats for tack-free feel.
- Thicker layers need longer cure.
- Sand lightly before next coat to guarantee adhesion.
Substrate Differences: Wood, Metal, and Fiberglass

Different substrates affect Bondo’s drying and adhesion, so you’ll need to adjust cure times and prep methods for wood, metal, and fiberglass.
For wood, focus on wood preparation—clean, sand, and seal to prevent moisture draw.
For metal, prioritize metal adhesion with rust removal and primer.
For fiberglass, guarantee fiberglass compatibility and proper surface treatment for lasting bond before painting.
Hardener Ratio: Speed vs. Strength
Now that you’ve matched prep and substrate, you’ll need to balance the hardener ratio to control cure time and final strength.
You’ll choose between hardener types and adjust for conditions, but avoid over-accelerating.
Consider application techniques and desired toughness:
- Low ratio: slower cure, more strength
- Medium: balanced
- High: fast cure, less strength
- Climate-adapted ratio: temperature-aware choice
Mixing Technique That Improves Set and Strength
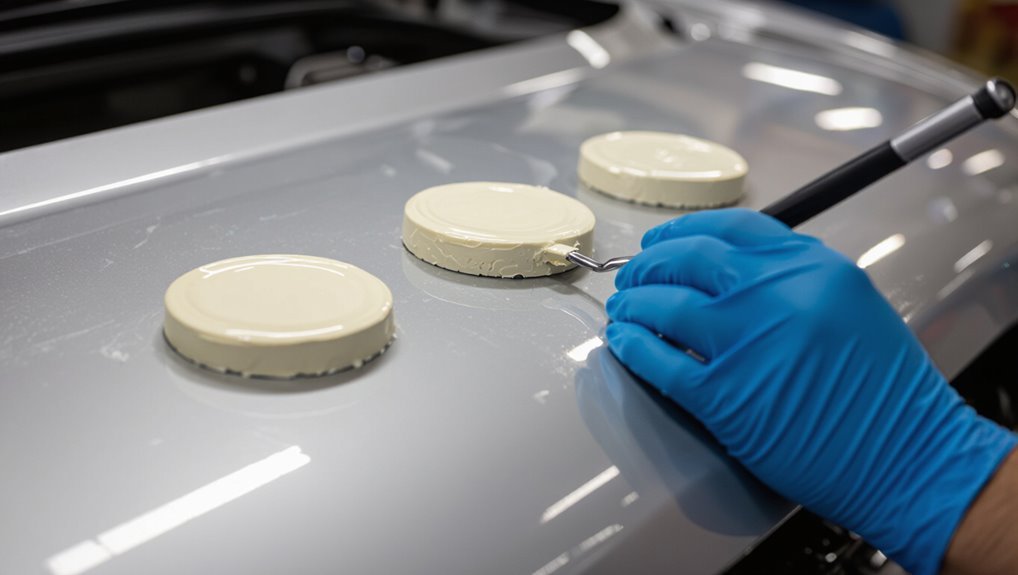
Mix the Bondo with a steady, deliberate stroke so the resin and hardener blend to a uniform color and consistency; this guarantees the filler sets predictably and reaches its designed strength.
You’ll scrape and fold, avoiding air pockets and streaks. Use short, controlled passes and a flat spreader.
These mixing techniques give consistent cure times and measurable strength enhancement for reliable repairs.
Visual Cues a Bondo Repair Is Ready to Sand
Once the filler looks uniformly blended, shift your attention to how it behaves on the surface—those visual cues tell you when it’s safe to sand.
Check these visual indicators for sanding readiness:
- Color has shifted from glossy to matte across the repair.
- Edges are firm, not gummy.
- Shrinkage lines appear subtly.
- No wet sheen remains on deeper spots.
Fingernail and Tape Tests to Confirm Readiness
Want to be sure the Bondo is truly ready to sand? Use the fingernail test: press gently; cured Bondo won’t dent or stick.
For edges and small chips, try the tape test: press a strip, pull sharply—if material lifts, wait longer.
Combine both checks across the repair, and only sand when neither test dislodges or marks the surface.
When Bondo Is Ready for Primer Versus Paint
After your fingernail and tape checks show no movement or marks, you can determine whether the Bondo is ready for primer or needs more prep.
You’ll assess surface finish and adhesion with Bondo application techniques and Paint compatibility testing. Follow steps:
- Inspect for pinholes.
- Light sand for profile.
- Clean residue.
- Test primer adhesion before topcoat.
How Long to Wait Between Final Sand and Primer
When you’ve finished the final sanding and removed all dust, give the Bondo a short dwell so solvents and any trapped moisture dissipate—typically 30 minutes to an hour at room temperature—before applying primer.
After that, inspect for contaminants, wipe with a tack cloth or solvent as recommended, then proceed with primer application.
Don’t rush; proper dwell avoids adhesion issues and trapped bubbles.
Sanding Grits and Timing for Best Adhesion
Now that you’ve let the primer dwell, focus on sanding grits and timing to guarantee the filler bonds and the finish looks smooth.
After primer dwell, sand progressively—80–120 shaping, 180–220 refining, 320–400 feathering—then clean and wait before painting.
You’ll use proper sanding techniques and a grit progression to prep surfaces without over-sanding. Follow this plan:
- 80–120 to shape.
- 180–220 to refine.
- 320–400 for feathered shift.
- Clean, wait 10–30 minutes before primer/paint.
Feathering Edges for Invisible Repairs
Because the repair sits next to intact paint, you’ll want to feather the filler smoothly into the surrounding surface so the shift disappears under primer and paint. Use feathering techniques during surface preparation, employ progressive sanding methods, and focus on blending repairs for invisible joins. Practice light passes and check edges under raking light.
| Step | Action |
|---|---|
| 1 | Clean |
| 2 | Sand |
| 3 | Feather |
| 4 | Prime |
| 5 | Inspect |
How to Avoid Sinkage and Cracks While Curing
Start by making sure the surface is clean, dry, and well-sanded so the Bondo bonds evenly.
Mix the filler with the exact hardener ratio the manufacturer specifies to prevent soft spots or overheating.
Keep the repair in a stable, moderate-temperature area with low humidity while it cures to avoid sinkage and cracking.
Proper Surface Preparation
Before you apply Bondo, make certain the surface is clean, dry, and free of loose paint, rust, oil, and wax so the filler bonds uniformly and won’t sink or crack as it cures.
Use these steps:
- Ensure surface cleanliness with solvent wipe.
- Remove rust and loose material.
- Apply proper sanding techniques for profile.
- Clean dust and degrease before filling.
Correct Mix Ratios
When you measure Bondo and hardener accurately and mix only what you’ll use within its working time, you’ll prevent soft spots, sinkage, and cracking as it cures; aim for the manufacturer’s recommended ratio (typically a golf-ball size of filler to a pea-size hardener) and mix thoroughly until the color is uniform and streak-free.
Use proper mixing techniques, match hardener types to temperature, and avoid overmixing.
Controlled Curing Environment
Anyone can ruin a repair by letting Bondo cure under fluctuating temperatures or high humidity, so you should create a stable, moderate environment to prevent sinkage and cracking.
Use a controlled environment with ideal conditions:
- Keep temperature 60–80°F.
- Maintain 40–60% humidity.
- Avoid direct sunlight.
- Give full cure time before sanding or painting.
Speeding Up Drying Safely: Heat, Airflow, Dehumidifying
If you need Bondo cured faster, you can safely speed drying by adding controlled heat, boosting airflow, and cutting humidity—each method shortens cure time but needs to be used carefully to avoid surface defects or weakening the bond.
Use low-intensity heat sources, targeted airflow techniques like fans, and sensible dehumidifier usage.
Follow safety precautions: avoid overheating, maintain ventilation, and check cure progress often.
Slowing Curing When You Need More Working Time
If you need more working time, you can extend the open time by mixing smaller batches or cooling the parts slightly.
Choosing a slower hardener lets you shape and feather without the filler setting too fast.
Just follow the manufacturer’s mix ratios and temperature guidelines to avoid weak cures.
Extend Open Time
When you need more working time with Bondo, slowing the curing process lets you shape and feather edges without the filler setting up too fast.
You can extend open time using careful application techniques and environmental control.
Try these steps:
- Thin layers for slower cure.
- Cool workspace to reduce reaction speed.
- Mix smaller batches.
- Use spreaders to redistribute product evenly.
Use Slower Hardener
One straightforward way to buy more working time with Bondo is to switch to a slower hardener; it delays the epoxy reaction so you can shape, feather, and blend without the filler setting up too fast.
Choose a slow hardener for extended working time in warm conditions, mix precisely, and work efficiently—clean tools and controlled temps keep cures predictable while you finish shaping before sanding and painting.
Fixing Bondo That Cured Too Fast or Unevenly
Because Bondo sometimes cures too fast or sets unevenly, you’ll need to act quickly and methodically to salvage the repair.
Because Bondo can cure unevenly or too quickly, act fast and methodically to salvage the repair.
Identify curing issues, then follow repair techniques below:
- Sand down high, uneven areas to solid, sound Bondo.
- Remove dust and debris thoroughly.
- Apply a thin, controlled feather coat with correct hardener.
- Re-sand, inspect, and repeat until surface is uniform and ready.
Choosing Primer and Paint Compatible With Bondo
Before you prime, make certain the Bondo’s fully cured, sanded smooth, and free of dust so the primer can bond properly.
Choose primer types rated for Bondo compatibility to guarantee surface adhesion.
For paint selection, pick automotive or filler-specific paints that offer color matching and finish durability.
Test small areas, follow manufacturer cure times, and use compatible clear coats for long-lasting results.
Seasonal Scheduling: Plan for Winter vs. Summer
In winter you’ll need to plan for longer curing times because cold slows the chemical reaction, so don’t rush sanding or painting.
In summer Bondo will dry much faster, letting you move to the next steps the same day if temperatures and humidity are favorable.
Adjust your schedule and workspace conditions accordingly to avoid trapping moisture or causing weak cures.
Winter Curing Time
When temperatures drop and humidity rises, Bondo takes considerably longer to cure, so you’ll need to adjust your schedule and workspace to avoid extended tackiness or weak bonds.
In winter conditions with cold temperatures, you should:
- Warm the workspace to 60–75°F.
- Use fast hardener sparingly.
- Thin coats and wait longer between layers.
- Allow extra cure time before sanding or painting.
Summer Drying Speed
If winter slows curing, summer speeds it up—you’ll notice Bondo set much faster in warm, low-humidity conditions.
You should use controlled sun exposure and ventilated shade to avoid skin-over while interior layers remain soft.
Adjust drying techniques: mix smaller batches, apply thinner coats, and check firmness sooner.
Plan painting earlier in the day when temperatures rise but humidity stays low to guarantee consistent cure.
Multi-Stage Repair Timeline for a Single Panel
Although the exact timing depends on temperature and the amount of material you apply, a typical multi-stage repair on a single panel follows a predictable rhythm: you’ll mix and apply body filler, let it cure, sand and feather the edges, apply a glaze or skim coat for fine imperfections, sand again, and then prime before paint.
Follow repair techniques and application tips:
- Apply filler
- Cure fully
- Sand/skim
- Prime and prep
Safety, Ventilation, and Chemical Exposure Tips
When working with Bondo, you should wear proper respiratory protection like a respirator with organic vapor cartridges to avoid inhaling styrene and polyester fumes.
Make sure your workshop has effective ventilation—use fans or an exhaust system to keep fresh air flowing.
Also wear nitrile gloves and long sleeves to minimize chemical skin contact and wash exposed skin promptly if it’s contaminated.
Proper Respiratory Protection
Because sanding and shaping Bondo releases fine dust and solvent fumes, you should protect your lungs with the right respirator and proper ventilation.
You’ll reduce respiratory hazards by choosing appropriate protective gear and following these steps:
- Use a NIOSH-rated N95 or P100 for dust.
- Use a cartridge respirator for solvents.
- Fit-test masks before work.
- Replace filters per manufacturer guidance.
Effective Workshop Ventilation
Good ventilation makes working with Bondo safer and more comfortable, so set up steady airflow that removes dust and solvent fumes away from your breathing zone.
Use ventilation methods like exhaust fans, window cross-ventilation, and portable fume extractors.
Position fans to promote air circulation from clean to dirty zones, keep intake clear, and run equipment during mixing and sanding to minimize inhalation risks.
Minimizing Chemical Skin Contact
If you’re working with Bondo, protect your skin by wearing nitrile gloves and long sleeves to prevent direct contact with the resin and hardener.
Follow chemical safety steps to minimize exposure and guarantee skin protection:
- Use respirator and eye protection.
- Work in ventilated area or outdoors.
- Wash exposed skin immediately with soap.
- Dispose of contaminated materials safely and promptly.
Troubleshooting Common Drying Problems and Fixes
When Bondo won’t cure as expected, start by checking the basics: mix ratio, room temperature, humidity, and the age of your hardener and filler.
Adjust mix and environment, use recommended drying techniques like warm airflow, and thin coats.
If spots stay tacky, remove uncured filler, re-sand, and apply fresh patch using proper repair methods.
Test a small area before painting.
How to Document Drying Times for Consistent Results
After you’ve corrected mix, environment, and application issues, start recording drying times so you can reproduce successful results.
You’ll use simple drying documentation and consistency techniques:
- Note temperature, humidity, and mix ratio.
- Record application thickness and cure start time.
- Log tack-free and sandable moments.
- Compare outcomes and adjust procedures for repeatable finishes.
Checklist to Finish and Inspect Your Bondo Repair
Before you call the job done, walk through a short, targeted checklist to make sure your Bondo repair’s surface, edges, and bond are ready for primer and paint.
Check for firm cure, no tackiness, and consistent color.
Ensure the filler is fully cured — no tackiness and an even, consistent color before sanding.
Sand smooth with proper grit, remove dust, and inspect edges for lift.
Use Bondo inspection tips: tap for voids, flex panel gently.
Keep a concise repair checklist.
Frequently Asked Questions
Can Bondo Be Painted Over Existing Primer Without Re-Sanding?
Yes — you can, but you shouldn’t skip sanding; proper Bondo application techniques demand feathering into existing primer and scuffing for adhesion. Follow recommended Bondo drying times, then sand and clean before painting for reliable results.
Will Bondo Adhere to Plastic Bumper Repair Adhesives?
Like glue to paper, yes — you’ll get adhesion if the bumper adhesive’s plastic compatibility is rated and its surface’s preps match. Check adhesive properties, sand, clean, and use a plastic-compatible primer for reliable Bondo bonding.
Can Clear Coat Be Applied Directly Over Bondo-Filled Areas?
Yes, you can clear coat over Bondo application, but you’ll guarantee proper sanding, priming, and compatible paint system so clear coat adhesion bonds well; otherwise clear coat can lift, haze, or fail over untreated filler.
How Does UV Exposure Affect Bondo Long-Term Stability?
Coincidentally, if you leave Bondo baking in sun, you’ll see UV degradation causing chalking and reduced bonding strength; you’ll want meticulous surface preparation to mitigate long term effects, or the filler’ll crumble and delaminate prematurely.
Is Bondo Compatible With Epoxy-Based Primers?
Yes — you can use epoxy primers over properly cured Bondo; you’ll follow bondo application techniques like sanding and cleaning, and you’ll enjoy epoxy primer benefits such as adhesion and moisture resistance, ensuring durable, stable finishes.
Conclusion
Think of your Bondo repair like planting a sapling: you can’t rush the roots. Let standard Bondo sit until it firms, and lightweight versions get their own gentle season; temperature and ventilation are the weather you watch. Keep a log like a gardener’s journal, check texture and cure times, then sand and paint when the surface feels steady. With patience and the right conditions, your repair will grow into a lasting finish.