How to Paint Steel Exterior Door Without Brush Marks
You can get a smooth, brush‑mark‑free finish by prepping the steel door well: strip loose paint, degrease, remove rust, and sand through progressively finer grits to a light scuff. Mask hardware, then use an HVLP sprayer or a fine‑nap foam roller for flats and a synthetic angled brush for edges, applying several thin coats and sanding lightly between coats. Keep even overlap, proper distance, and good ventilation, and continue for tips on tools, paints, and troubleshooting.
Quick Step-by-Step: Paint a Steel Door Without Brush Marks
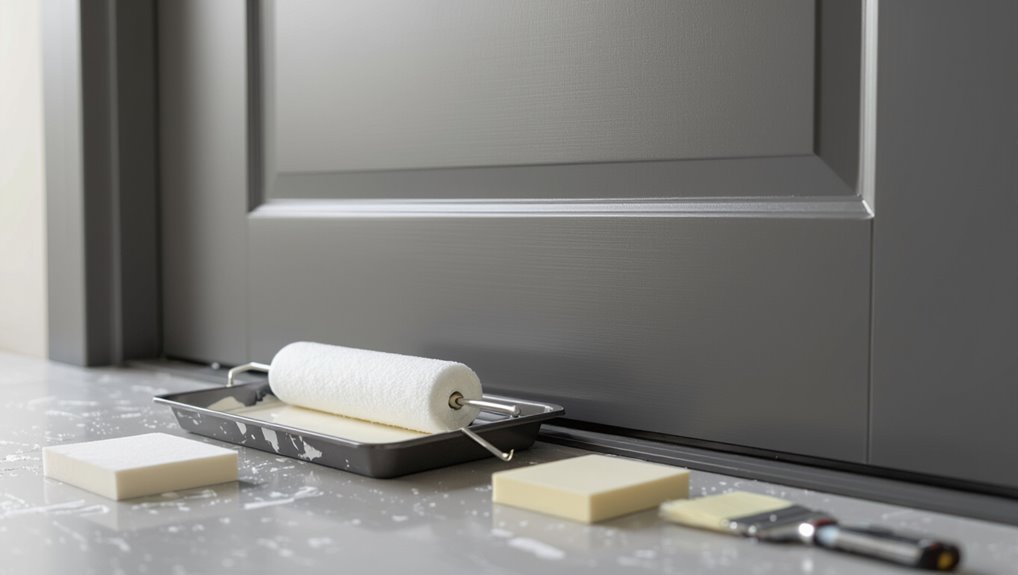
Start by prepping the door: remove hardware, clean off dirt and chalky paint residue with a degreaser, and sand any rough spots until the surface feels smooth.
Begin by prepping the door: remove hardware, degrease and clean, then sand until smooth.
Choose quality primer and paint suited for metal. Use thin, even coats and allow full drying between layers.
Employ a foam roller for flat areas and a synthetic brush for edges.
Follow door painting techniques and regular steel door maintenance.
Why Brush Marks Happen on Steel Doors
You’ll often see brush marks when paint is applied unevenly, leaving thick ridges in some spots and thin coverage in others.
Using the wrong brush — one with the wrong bristle type or poor quality — makes it harder to level the paint and smooth those ridges.
Fixing brush choice and controlling paint thickness will cut down on visible strokes.
Uneven Paint Thickness
Even with careful strokes, brush marks appear when paint lays down unevenly across the steel’s smooth surface, leaving ridges and thin spots that catch light and show every pass.
You’ll reduce uneven application by loading the brush properly, spreading thin, consistent layers, and smoothing edges before they skin over.
Prevent paint buildup at corners and seams to keep a flat, uniform finish.
Incorrect Brush Selection
If you followed the steps to load and lay down thin, consistent coats but still see brush marks, the culprit is often the brush itself.
Choose correct tools to avoid incorrect brush types: assess bristle quality, brush sizes, and synthetic vs. natural.
Maintain brush cleanliness and brush care. Focus brush application, brush pressure, paint flow, and brush techniques.
- Test
- Replace
- Clean
Should You Roll, Spray, or Brush a Steel Door?
Wondering whether to roll, spray, or brush your steel door? You’ll weigh roller vs. sprayer and traditional painting techniques.
Rollers give control and texture that’s easy to smooth with light passes; sprayers deliver the most uniform, brush‑free finish but need masking and practice.
You should only brush for small touchups. Choose based on skill, prep time, and desired finish.
Essential Tools for a Brush‑Free Steel‑Door Finish
Since sprayers give the most uniform, brush-free finish, you’ll want the right gear to get professional results.
Since sprayers deliver the most uniform, brush-free finish, choose the right gear for professional results.
Choose a quality HVLP or airless unit after a sprayer comparison, plus safety mask, drop cloths, and tack cloths. Consider paint additives for flow and leveling.
Essentials:
- Sprayer with adjustable tip
- Respirator and goggles
- Cleaning kit and spare nozzles
Best Paints for Steel Exterior Doors
When choosing paint for a steel exterior door, pick a formulation that resists rust, adheres strongly, and tolerates weather swings. You’ll want durable acrylic-enamel or oil-based paints for a high gloss finish and thoughtful color selection to match curb appeal. Compare options below:
| Type | Durability | Notes |
|---|---|---|
| Acrylic‑enamel | High | Quick dry |
| Oil‑based | Very high | Smooth finish |
| Urethane | Extreme | Weatherproof |
| Latex | Good | Easier cleanup |
Choose the Right Primer for Steel Exterior Doors
After you pick a paint that resists rust and stands up to the weather, pick a primer formulated for bare or previously painted steel so your topcoat bonds and the metal stays protected.
Choose a primer made for bare or painted steel so your topcoat bonds and the metal stays protected.
Choose based on primer types, primer benefits, surface preparation, application techniques, and drying times.
Consider:
- Rust-inhibiting
- Bonding/adhesion
- Zinc-rich product recommendations
Which Primer + Paint Combo Prevents Brush Marks?
For the cleanest finish, start with an alkyd primer to lock to the steel and level the surface.
Pair that with a waterborne urethane topcoat—you’ll get better flow and fewer brush marks than with traditional enamels.
This combo helps the paint self-level as it dries, so you can use a brush without leaving noticeable strokes.
Use Alkyd Primer
1 reliable way to cut brush marks on a steel exterior door is to start with an alkyd (oil-based) primer and top it with a compatible alkyd or high-quality oil-modified acrylic enamel, since those combinations level out more smoothly than straight latex systems.
You’ll appreciate alkyd benefits during primer application and finish.
Follow:
- Clean and degloss
- Thin first coat slightly
- Sand between coats
Choose Waterborne Urethane
One smart alternative to oil-based systems is a waterborne urethane primer paired with a high-quality acrylic-urethane topcoat, which gives you the leveling and fast drying of modern waterborne chemistry while resisting brush marks better than standard latex paints.
You’ll enjoy waterborne advantages like low VOCs and quick cure, plus urethane benefits: durability, chemical resistance, and smoother laydown that minimizes brush strokes.
Weather and Timing for Painting Exterior Doors
If you’re painting an exterior steel door, pick a day when temperatures stay between about 50°F and 85°F and humidity is low so paint can dry evenly and bond properly.
Consider weather conditions and timing strategies to avoid rain, dew, or extreme heat.
Plan:
- Morning start for cool, dry air
- Avoid evenings with dew
- Check multi-day forecasts
Remove Old Paint and Loose Rust
Before you start painting, inspect the door for peeling paint, bubbling, or flaky rust so you know what needs attention.
Use a wire brush or sandpaper to knock off any loose rust and paint until the surface feels solid.
Wipe the area clean so primer and paint will stick properly.
Assess Surface Condition
Start by inspecting the door closely, running your hand and a scraper over the surface to find peeling paint, bubbled areas, and flaky rust you’ll need to remove.
For proper surface preparation and door inspection, note damage, adhesion issues, and contours.
Prioritize these steps:
- Mark weak spots.
- Check primer integrity.
- Plan sanding and patching.
Remove Loose Rust
Scrape away all loose paint and flaky rust with a stiff wire brush or paint scraper so you’re left with a sound surface; work until you hit firm, tightly adhered metal or primer. Use rust removal techniques like sanding and chemical rust remover, then clean and degrease. Follow surface preparation tips to guarantee primer bonds and paint lays smooth.
| Step | Action |
|---|---|
| 1 | Scrape |
| 2 | Wire-brush |
| 3 | Sand |
| 4 | Clean |
| 5 | Prime |
Fix Seams and Gaps With Filler and Sealant
When you see visible seams or gaps around the frame or where panels meet, fix them now with a suitable filler and a paintable exterior sealant so paint adheres evenly and moisture can’t get in.
Choose filler types and sealant options that bond to metal. Prep, apply, smooth, and cure before priming.
- Clean
- Fill
- Seal
Sanding for Metal: Grit and Technique
Start with coarse 80–120 grit to knock down rough spots. Then move to 220–320 grit for a smooth finish before priming.
Use light, even pressure and sand with the grain or along flat panels to avoid gouges. Keep a sanding block or pad for consistent contact.
Wipe metal dust away and inspect frequently so you don’t over-sand.
Choosing Grit Levels
Choose the right sandpaper grit and you’ll set yourself up for a smooth, durable finish on a steel exterior door.
For grit selection, start coarse to remove rust, then refine with finer paper; match sanding techniques to surface condition.
Follow this simple progression:
- 80–120 for rust/old paint
- 180–220 for smoothing
- 320–400 for final scuff before primer
Sanding Technique Tips
After selecting grits, focus on sanding technique to get an even, burr-free surface that bonds well with primer.
You’ll use sanding techniques that match grit selection and material: start coarser to remove defects, then progress finer for finish smoothing.
Use appropriate sanding tools, keep consistent pressure, and follow a grid pattern.
Adjust sanding frequency based on adhesion checks and surface preparation needs.
Clean the Door for Reliable Paint Adhesion
Before you paint, clean the steel door thoroughly so the new coat will stick and last; dirt, grease, and rust can cause bubbling, peeling, or uneven coverage.
You’ll focus on surface preparation and proven adhesion techniques. Do this:
- Degrease with trisodium phosphate or mild detergent.
- Remove rust with a wire brush and rust converter.
- Rinse, dry, and scuff-sand before priming.
Tape and Mask for Crisp Edges and Hardware
Pick a quality painter’s tape with a clean-release adhesive so paint won’t bleed or peel when you remove it.
Mask hinges, knobs, and any glass or weatherstripping with tape and paper or plastic to keep hardware spotless.
Run a putty knife or your fingernail along tape edges to create crisp paint lines before you start.
Choose Quality Painter’s Tape
Because clean edges make your paint job look professional, choose a high-quality painter’s tape that sticks well without peeling paint when removed.
You’ll control paint bleed with proper tape application and easy tape removal.
Consider these benefits:
- Clean lines for a pro finish
- Strong adhesion that won’t lift
- Residue-free peel for neat results
Protect Hinges And Knobs
1 simple step you shouldn’t skip is taping and masking hinges and knobs so paint won’t gum up their moving parts or leave uneven edges; use painter’s tape, plastic bags, or masking film to cover hardware snugly and press tape down along seams for crisp lines.
For hinge protection, wrap edges and pad knuckles; guarantee full knob coverage and secure tape to prevent seepage.
Create Clean Tape Lines
With hinges and knobs safely covered, move on to taping the door and surrounding trim so you get crisp paint lines every time.
You’ll use careful tape application and proven masking techniques to avoid bleed. Follow these steps:
- Clean surface and press tape edge firmly.
- Overlap when needed, remove seams.
- Peel back at 45° after paint is tacky, not fully dry.
Remove or Protect Door Hardware and Thresholds
Start by taking off any removable hardware—doorknobs, deadbolts, kick plates, and mail slots—so you get clean, paint-ready edges and avoid sticky messes later.
For door hardware removal, label and bag fasteners, store parts safely, and loosen hinges if you’ll remove the door.
Cover fixed items and the sill with durable masking and guarantee threshold protection to prevent drips and scratches.
Prepare Panels, Recessed Areas, and Seams
Start by thoroughly cleaning and degreasing panels and recessed areas so paint will adhere properly.
Fill any gaps or seams with a flexible exterior-grade filler, then smooth and let it cure.
Finish by sanding panels and recesses to a uniform profile before priming.
Clean And Degrease
Scrub the panels, recessed areas, and seams thoroughly to remove dirt, grease, and old residue before you prime or paint.
Use proper prep techniques and approved cleaning solutions so paint adheres evenly. Rinse and dry completely.
Follow this sequence:
- Degrease with trisodium phosphate or a mild detergent.
- Agitate with a nylon brush in seams.
- Rinse, towel dry, then air dry fully before priming.
Fill Gaps And Seams
Patch any gaps and seams before priming so the surface’s contours are smooth and the paint won’t crack or trap moisture.
You’ll inspect panels and recessed areas, use exterior-rated caulk or polyurethane filler, and perform precise seam filling for tight joints.
Allow proper cure, then recheck for shrinkage.
Proper gap sealing prevents water intrusion and guarantees a uniform finish once you prime and paint.
Sand Panels And Recesses
Grab a medium-grit sandpaper or a sanding sponge and work each panel, recessed area, and seam until the surface feels even and any rough spots or leftover filler are feathered into the surrounding metal.
Use proper sanding techniques for panel preparation, keeping edges crisp.
Focus on:
- Even pressure
- Recess attention
- Clean dust between passes
Choose the Right Roller Nap for Steel Surfaces
Pick a roller nap that matches the smoothness of your steel door to get even coverage without texture, and aim for a short nap—typically 1/4″ or less—for factory-finished or smooth-pressed steel.
Choose a dense roller fabric designed for enamel or latex to minimize stipple.
Match nap to surface texture, test on a scrap, and swap to 3/16″ for ultra-smooth panels.
How to Load a Roller to Avoid Lap Marks
Now that you’ve chosen the right nap for a smooth finish, loading the roller correctly will help you avoid lap marks.
Use precise roller loading techniques to keep coverage even and aid lap mark prevention.
- Pour paint into tray well.
- Roll evenly until saturated, not dripping.
- Remove excess by rolling on tray grid before painting.
Roller Technique: Pressure, Strokes, and Overlap
Keep your roller pressure consistent so paint lays down smoothly without thinning or splotches.
Use long, even strokes and resist stopping mid-panel to maintain a uniform finish.
Overlap each pass by about 50% to blend edges and avoid visible seams.
Consistent Roller Pressure
Apply steady pressure to the roller so the paint goes on evenly without drips or thin spots; you want enough pressure to spread the paint smoothly but not so much that the roller squashes flat and leaves streaks.
You’ll control roller technique and paint application by keeping pressure uniform.
Tips:
- Test pressure on scrap.
- Adjust as paint thins.
- Maintain wrist relaxation.
Smooth, Even Strokes
Start each pass with a light, even pull of the roller and work in short, controlled strokes so the paint lays down uniformly and you can spot thin areas before they dry.
Keep consistent speed and moderate pressure, blending each stroke into the last for a smooth application. Aim for even coverage without overworking the paint, and step back frequently to check for laps or missed spots.
Proper Stroke Overlap
Overlap each roller pass by about one-third to one-half of the previous stroke so the wet edges blend seamlessly and you avoid lap marks.
You’ll maintain stroke consistency by using steady pressure and consistent speed. Practice this overlap technique with short, controlled strokes.
Follow these steps:
- Load roller evenly
- Apply steady pressure
- Blend wet edges immediately
When to Use a Paint Sprayer for Doors
You should reach for a paint sprayer when you want fast, even coverage on a metal door with minimal brush marks—especially if the door has panels, beveled edges, or textured finishes that take hours to roll and touch up. Consider sprayer types and door preparation for best results.
| Benefit | Note |
|---|---|
| Speed | Covers quickly |
| Even finish | No brush marks |
| Detail | Reaches crevices |
| Prep required | Masking essential |
Airless vs. HVLP: Best Sprayer for Doors
You’ll find airless sprayers speed up coverage and handle thicker exterior coatings without thinning.
HVLP systems give you finer control and a smoother finish on door panels and trim.
Pick the sprayer that matches your project size and finish needs—fast, heavy-duty jobs lean toward airless; detail-oriented work favors HVLP.
Airless Sprayer Benefits
While both airless and HVLP sprayers can give a smooth finish on a steel exterior door, an airless sprayer usually wins on speed and coverage—especially for larger, flat surfaces and multiple doors.
You’ll appreciate raw power, fewer passes, and consistent atomization.
Consider these advantages for sprayer types and application techniques:
- Faster coverage
- Thicker laydown
- Less tipping/rework
HVLP Finish Control
One key reason many pros choose HVLP for finishing steel exterior doors is its superior control over atomization and paint laydown, which helps you avoid runs and get consistently thin, even coats.
You’ll find an HVLPAirless Comparison shows HVLP offers finer control, less overspray, and smoother finish.
Weigh HVLPAdvantages Disadvantages like transfer efficiency versus speed when deciding.
Choosing Based On Project
Which sprayer is best really comes down to the specifics of your door project — size, finish desired, and how much prep you’re willing to do.
You’ll weigh project scope, budget considerations, color selection, finish types, and door style.
Choose airless for speed and heavy coats; HVLP for control and smoothness.
- Airless: speed
- HVLP: control
- Prep: critical
Sprayer Setup: Nozzle, Thinning & Pressure
Getting your sprayer dialed in makes the job faster and gives a smoother finish; start by matching nozzle size, thinning, and pressure to the paint and door profile so you don’t overspray or clog.
Test nozzle selection on scrap, adjust pressure settings for a fine, even atomization, and thin per manufacturer guidelines.
Clean filters and tip between coats to prevent sputtering and uneven coverage.
Spray Technique: Distance, Passes, and Wet Edge
Distance matters: hold the gun about 6–10 inches from the door surface, keeping it parallel as you move to guarantee even coverage.
You’ll control spray patterns and use ideal pressure to avoid buildup. Keep a steady rhythm, overlap passes, and maintain a wet edge so seams blend.
- Move evenly
- Overlap 50%
- Watch edges
Apply Thin, Even Coats; Avoid Runs
When you spray, apply several thin coats instead of one heavy one so the finish builds smoothly and you avoid runs; thin layers dry faster, level better, and sand more easily between coats.
You’ll keep the spray moving, overlap passes slightly, and inspect for sagging.
Proper paint application and simple drying techniques help you correct imperfections early and maintain an even, professional finish.
Drying Times Between Exterior Enamel Coats
1–2 hours is a typical tack-free window for many exterior alkyd enamel coats, but you should wait the manufacturer’s recommended flash time—often 6–8 hours—before sanding or recoating to guarantee proper adhesion and avoid soft spots.
Consider drying duration and temperature impact:
- Cool temps lengthen cure.
- Heat speeds solvent release.
- Humidity slows film set.
Plan recoats accordingly.
Sanding Between Coats for a Silky Finish
A light sanding between coats keeps your enamel smooth, helps the next layer stick, and removes dust nibs or brush marks so the finish looks factory-flat.
Use fine 320–400 grit, sand lightly in circular or cross-grain motions, wipe with tack cloth, and avoid cutting through the primer.
Proper sanding techniques maintain adhesion and dramatically improve finish quality for a silky, uniform exterior enamel surface.
Blend Touch-Ups to Hide Repaired Areas
When you touch up repaired spots, feather the edges so the patch blends into the surrounding paint.
Match the texture and sheen of the existing finish before you apply color.
Use light, cross-coats to build coverage without creating ridges or gloss differences.
Feather Edges Into Surrounding Paint
Feather the new paint into the old by brushing outward from the repaired area with light, tapering strokes so the edge thins and blends; this reduces visible ridges and helps the finish match smoothly.
Use the feather technique and focus on blending edges.
Steps:
- Light pressure outward
- Overlap slightly with surrounding paint
- Remove excess paint immediately
Match Texture And Sheen
Now that you’ve blended the paint edges, focus on matching the door’s existing texture and sheen so touch-ups disappear from sight.
Check nearby areas for finish level, then use light stippling or a matching roller to achieve texture matching.
Test small patches for sheen consistency under real light. Adjust technique or thin coats until the repaired area visually blends with the original finish.
Use Light, Cross-Coats
Start with light, crosswise coats to blend your touch-ups into the surrounding finish—apply thin, even strokes horizontally, then immediately follow with a perpendicular pass while the paint is still wet.
Use the cross coat technique and maintain light application to avoid ridges.
Follow these steps:
- Feather edges outward
- Keep coats thin
- Smooth with light pressure
Finish Edges and Corners Without Brush Marks
Once you’ve masked the door and removed loose paint, tackle edges and corners with a small angled sash brush and light, confident strokes so you don’t leave visible brush marks.
Use thin paint, feather strokes outward for edge blending, and pause to smooth excess at tight joins.
For corner smoothing, rotate the brush tip gently and wipe off buildup to keep crisp, even lines.
Painting Textured or Factory‑Finished Steel Doors
Edges and corners done, you’ll next face textured or factory‑finished steel doors, which need a different approach than smooth, previously painted surfaces.
You’ll prep and paint them like this:
- Scuff with fine abrasive for textured finishes.
- Clean with solvent to remove oils from factory coatings.
- Use bonding primer, then spray or roll thin coats for even coverage.
Paint Glass Inserts and Trim on Steel Doors
Mask the glass and trim carefully before painting to avoid drips and guarantee clean lines—use low‑tack painter’s tape and a plastic or paper mask cut to fit each pane.
Use glass insert techniques like thin, even coats with a foam roller or small pad to prevent brush marks.
Follow trim painting tips: feather edges, remove tape while paint’s tacky, and clean spills promptly.
Use Additives to Improve Flow and Leveling
After you’ve taped and painted the glass and trim, consider additives that help your topcoat flow and level for a smoother finish.
After painting glass and trim, try a flow additive to help your topcoat level for a smoother finish.
You’ll use flow additives and leveling agents sparingly to reduce brush marks and improve sheen.
Follow these steps:
- Add recommended drops per can directions.
- Mix thoroughly, avoid overthinning.
- Test on scrap before full application.
Temperature and Humidity Troubleshooting Tips
Because paint reacts to the environment, you’ll need to monitor temperature and humidity before and during application to prevent problems like poor adhesion, extended drying times, or blushing.
Check forecast and paint can specs; avoid painting below recommended temps.
Use dehumidifiers, fans, or wait for low humidity periods for proper humidity control.
If temperature effects cause tackiness, pause and let conditions normalize before recoating.
Fix Orange Peel, Drips, and Sags
Even with ideal temperature and humidity, you can still run into surface defects like orange peel, drips, and sags — and you’ll want to correct them before the finish fully hardens.
Even in perfect conditions, surface flaws like orange peel, drips, and sags can appear—fix them before the finish hardens.
Use quick fixes: sand and recoat, remove drips, level sags.
Steps:
- Sand smooth.
- Wipe dust.
- Recoat thin.
These orange peel solutions and drip prevention tips keep steel door finishes flawless.
Remove Brush Marks After Paint Dries
Once the paint’s fully dry, you’ll sand any brush marks and raised imperfections smooth with fine-grit sandpaper.
Follow up with fine abrasive pads to blend the surface without cutting through the finish.
Recoat using thin, even layers to hide the repairs and prevent new brush marks.
Sand Smooth Imperfections
Let any paint cure fully, then inspect the door under good light and run your hand over the surface to feel for brush marks, drips, or raised edges; these are what you’ll gently sand away to create a smooth, factory-like finish.
Use careful sanding techniques as part of surface preparation.
Follow steps:
- Lightly sand high spots.
- Feather edges.
- Clean dust before recoating.
Use Fine Abrasive Pads
After you’ve sanded high spots and feathered edges, fine abrasive pads are the next tool for erasing remaining brush marks without cutting back into the paint film.
You’ll work lightly, using even strokes and minimal pressure to blend imperfections. This step complements surface preparation techniques and refines paint application methods, leaving a smooth base ready for final inspection and any targeted touch-ups.
Recoat With Thin Layers
Recoat in thin, even layers to level out any remaining brush marks without building up a thick, uneven film.
Wait recommended dry time, sand lightly, then recoat with a thin application for smoothness. Maintain proper temperature while painting to guarantee curing.
Apply:
- Light sanding
- Thin coats
- Inspect and touch up
You’ll avoid ridges and get an even finish.
Topcoats, UV Protection, and Long-Term Durability
A durable topcoat is what keeps your steel door looking fresh and resisting UV damage over time. It seals the base paint, adds abrasion resistance, and blocks sunlight that would otherwise fade or chalk the finish.
You’ll choose fade resistant options and protective sealants, follow topcoat application techniques, and apply UV protection benefits and long term durability strategies while noting maintenance tips to prolong results.
Maintenance to Keep a Steel Door Smooth
Keep the finish smooth by establishing a simple maintenance routine: inspect the door monthly for chips, dirt buildup, and worn sealant, then clean, touch up, and lubricate as needed to prevent small issues from becoming rust or peeling.
Keep finishes smooth with a monthly inspection: clean, touch up chips, and lubricate to prevent rust and peeling.
You’ll extend surface protection and simplify door maintenance by:
- Cleaning with mild detergent
- Touching up chips promptly
- Lubricating hinges and locks
Cost and Time Estimates for a DIY Job
Once you’ve got a routine to keep the surface smooth, you’ll want to know how much time and money to set aside for the whole repainting project. Plan a clear cost breakdown and strict time management: estimate 4–8 hours, primer, paint, supplies, and incidental costs. Compare options below.
| Item | Typical Cost | Time |
|---|---|---|
| Primer | $10–$25 | 1 hr |
| Paint | $25–$60 | 2–3 hr |
| Supplies | $10–$30 | 1–2 hr |
Safety: Ventilation, PPE, and Disposal
Because you’ll be working with solvents and airborne dust, ventilate the area well and wear proper PPE to protect your lungs, eyes, and skin.
Use ventilation methods like open windows, fans, or a respirator-rated setup to maintain air quality.
Follow disposal guidelines for rags and solvent waste.
- PPE essentials
- Ventilation methods
- Disposal guidelines
Eco‑Friendly Paint Options for Exterior Doors
While you’re preparing your door, consider low‑VOC or zero‑VOC exterior paints and water‑based alkyds that cut emissions without sacrificing durability.
You’ll want sustainable paint options formulated for metal, mildew resistance, and UV protection. Choose primers compatible with those systems, and test natural finishes like low‑sheen or matte to hide imperfections.
Clean tools with mild soap and follow label drying times for best adhesion.
When to Hire a Pro for a Flawless Finish
If you want a truly flawless finish or you’re facing complex issues—extensive rust, dented panels, intricate trim, or mismatched factory coatings—hire a pro who’s the right tools, metal‑specific primers, and experience with prep techniques that guarantee adhesion and longevity.
You’ll benefit from professional techniques and expert recommendations.
Consider hiring when:
- Structural repairs needed
- Advanced rust treatment
- Spray‑finished matching color
10 Common Mistakes That Cause Brush Marks and Fixes
When you see streaks or raised ridges after painting, chances are a few common mistakes caused brush marks—but most are easy to fix once you know what to look for.
You’re using the wrong brush, overloading it, or rushing dry time.
Improve brush mark prevention with proper painting techniques: use quality angled brushes, thin coats, light strokes, and sand between layers for a smooth steel exterior door finish.
Frequently Asked Questions
Should I Remove Factory Primer Before Repainting a Steel Door?
Yes — you should remove or scuff factory primer so paint bonds properly. You’ll keep factory primer benefits in mind while doing steel door preparation: sand, clean, and prime with a compatible product for durable, smooth results.
Can I Paint a Steel Door in Direct Sunlight or on Hot Asphalt?
About 70% of paint failures stem from poor conditions, so don’t paint in direct sunlight effects or on hot asphalt challenges—you’ll cause blistering and uneven drying; wait for cool, shaded conditions and paint in milder temperatures.
Will Regular Household Paint Thinner Clean Spray Gun Residue Safely?
Yes, regular household paint thinner can remove some spray gun residue, but you’ll want proper spray gun maintenance; consider paint thinner alternatives like mineral spirits or dedicated gun cleaners, and always follow manufacturer safety and disposal guidelines.
How Do I Prevent Paint Sticking to Weatherstripping and Thresholds?
You’ll protect weatherstripping by covering it with painter’s tape or foam, and use threshold masking with low-tack tape or masking film; remove hardware, press edges firmly, and spray or roll carefully to avoid overspray and seepage.
Can I Use the Same Paint for Interior and Exterior Sides of the Door?
About 60% of doors exposed to weather fail sooner with wrong finishes, so you shouldn’t always use the same paint for interior and exterior sides; consider paint types and application techniques suited to each side’s exposure and finish.
Conclusion
Finish strong: take your time, prep thoroughly, and pick the right tools. Think of your door like a vinyl record—one homeowner I knew sanded, primed, and sprayed carefully; the result played smooth like a favorite song, with no scratches or skips. With proper sanding, thin even coats, and patience (or a pro if needed), you’ll get a mirror‑smooth, weatherproof finish that keeps your entry singing for years.