Can You Paint an Exterior Door? Step-by-Step Guide
Yes — you can paint an exterior door to refresh its look and add weather protection, and it’s often faster and cheaper than replacing it. You’ll clean and repair the surface, sand or scuff depending on material, prime if needed, then apply thin, even coats of exterior-grade paint in a semi-gloss or gloss for durability. Reattach hardware after curing and maintain seals to prevent moisture damage. Keep going to learn step-by-step prep, paint choices, and troubleshooting.
Can You Paint an Exterior Door? Quick Answer and Checklist
Wondering whether you can paint an exterior door? Yes — you can.
You’ll need basic paint prep: clean, sand, prime, and mask hardware. Choose exterior-grade paint and work in mild, dry weather.
Expect a couple coats and proper drying time. This refresh helps curb appeal and door maintenance, sealing against moisture and wear so your entry stays protected and looks sharp.
When to Paint Your Exterior Door vs. Replace It
How do you know whether to paint your exterior door or replace it?
Inspect damage: minor scratches, fading, or peeling paint you can fix with paint. Severe rot, warping, compromised security, or insulation failures mean look into door replacement options.
Weigh cost considerations: painting is cheaper short-term; replacement costs more but improves performance and resale value.
Choose based on condition and budget.
Which Exterior Door Materials You Can Paint (Wood, Metal, Fiberglass)
You can paint wood, metal, and fiberglass doors, but each material needs different prep to stick and last.
For wood, you’ll sand, fill cracks, and prime bare or weathered areas.
For metal and fiberglass, you’ll clean, scuff, and use a compatible primer to prevent peeling and corrosion.
Wood Door Prep
When prepping a wood exterior door for paint, start by inspecting the surface for rot, deep scratches, or peeling finish so you can address problems before they spread.
Check door condition, fill holes, and choose proper sanding techniques.
Then:
- Remove hardware.
- Clean grime.
- Patch and prime.
- Sand smooth and wipe dust before painting.
Metal & Fiberglass Care
Although metal and fiberglass doors need different prep than wood, you can paint both successfully with the right steps and products.
For metal door maintenance, remove rust, sand lightly, prime with a rust-inhibiting primer, and use enamel or exterior acrylic paint.
For fiberglass door care, clean, sand scuffs, use a high-bond primer, then apply flexible exterior paint for long-lasting adhesion and finish.
How to Choose Paint Type and Finish for an Exterior Door
When choosing paint for your exterior door, you’ll pick between oil-based and water-based formulas depending on adhesion and ease of cleanup.
Consider sheen and finish—semi-gloss or gloss resists scuffs and sheds water better than flat.
Prioritize durability and weatherproofing so the coat holds up to sun, rain, and temperature swings.
Paint Type Options
Because your front door faces weather, traffic, and close scrutiny, choosing the right paint type and finish matters more than you might think; pick a durable exterior latex for ease of maintenance or an oil-based formula for tougher, high-traffic doors, and match the finish—flat, satin, semi-gloss, or gloss—to how much wear and shine you want.
Consider eco friendly options and finish comparisons.
- Weatherproof latex door
- Tough oil-based sheen
- Low-VOC eco option
- Hybrid enamel balance
Sheen And Finish
If you want your exterior door to resist scuffs, hide imperfections, and complement your home’s style, choose the right sheen: gloss and semi-gloss give maximum durability and easy cleaning for high-traffic doors.
Satin offers a balance of toughness and subtlety, and flat finishes minimize glare but show wear faster.
For sheen selection, pick a finish that matches finish durability needs and aesthetic goals.
Durability And Weatherproofing
Although your door’s color and sheen set the look, choosing the right paint chemistry and finish is what actually protects it from sun, rain, and wear.
You’ll pick acrylic latex for flexibility or oil-based for durability, add primers, and use weather resistance techniques to seal edges for long lasting finishes.
- Sun-faded panel
- Raindrop bead
- Swollen sill sealed
- Smooth, glossy rebound
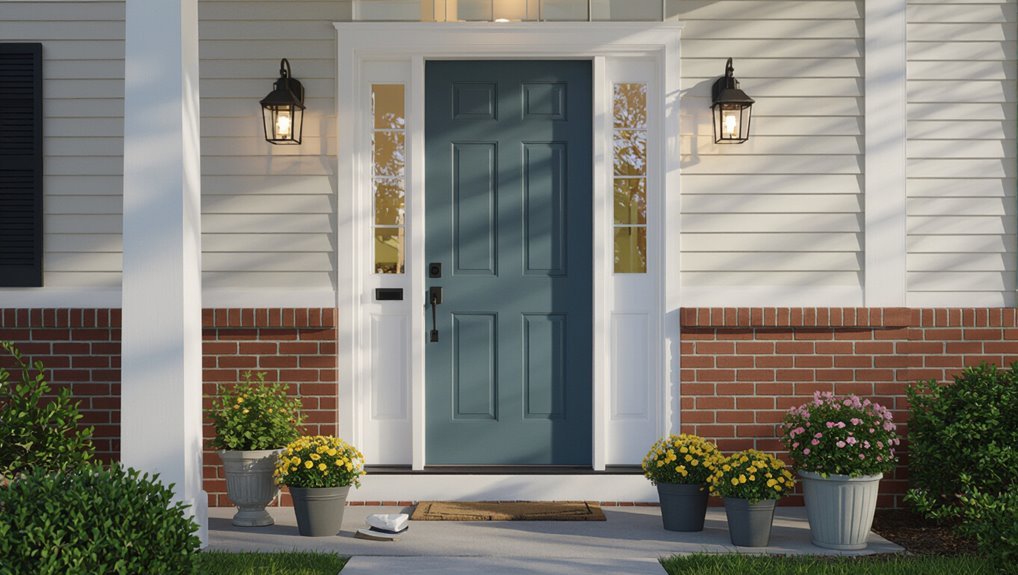
How Door Color Affects Curb Appeal and Resale
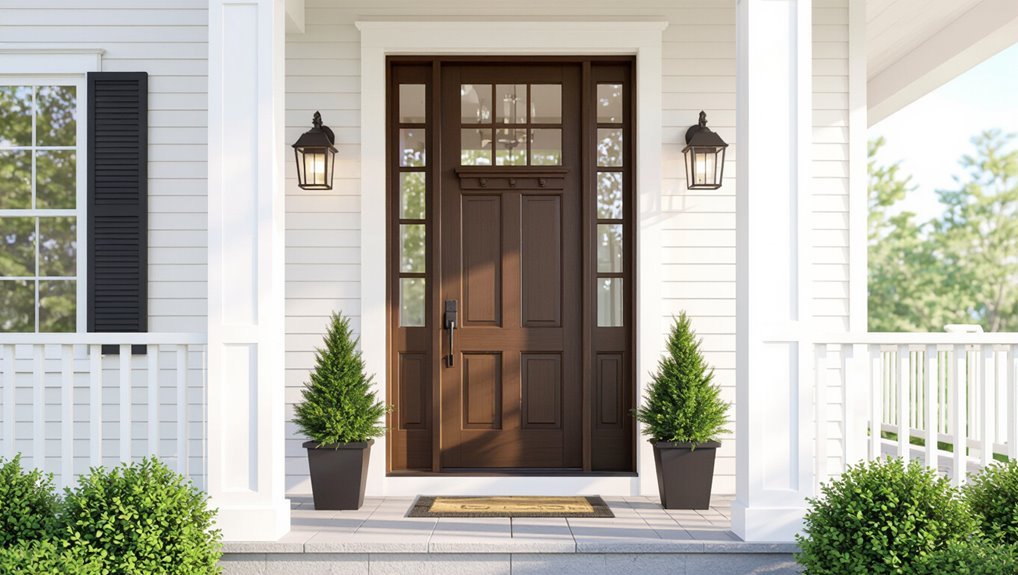
When you pick a door color, you’re choosing the home’s first impression—one bold hue can boost curb appeal and signal quality to potential buyers.
You should use door aesthetics and color psychology to match neighborhood style and target buyers.
A well-chosen shade highlights architectural details, suggests maintenance, and can increase perceived value, making your property more memorable and marketable.
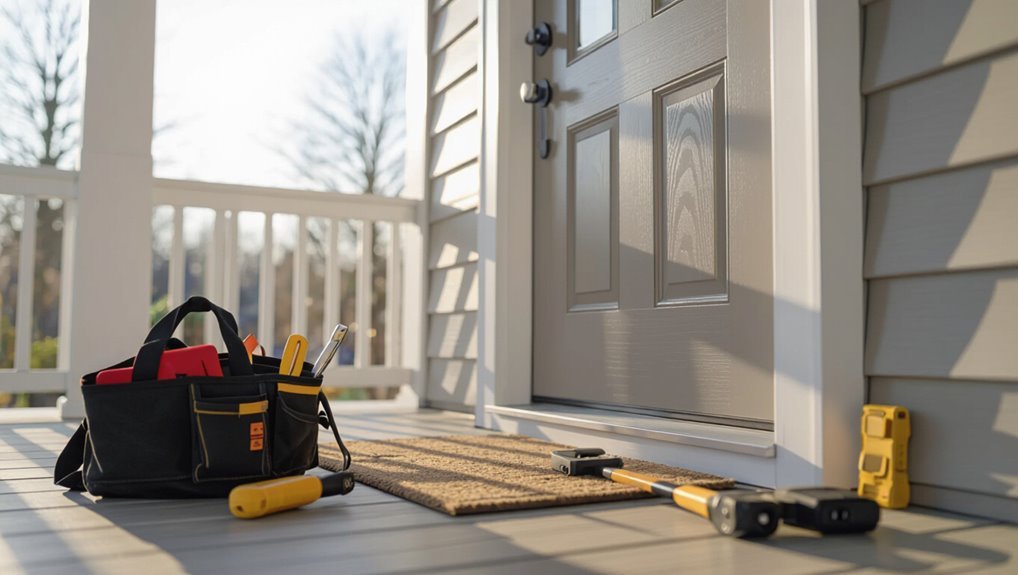
Tools and Supplies You Need to Paint an Exterior Door
Before you start, gather the right materials so the job goes smoothly: exterior-grade paint or stain, a weatherproof primer, and rust-resistant hardware options.
You’ll also need quality brushes and a small foam roller for smooth panels, plus sandpaper and tack cloths for prep.
Don’t forget safety gear—gloves, goggles, and a respirator or mask—along with drop cloths to protect surrounding areas.
Essential Paint Types
If you want a durable, weatherproof finish, pick a paint formulated for exteriors and suited to your door’s material—oil-based or acrylic latex for wood, 100% acrylic latex for fiberglass, and specialized metal primers and enamels for steel.
Choose sheen for paint durability and match exterior color to curb appeal.
Visualize application:
- Smooth satin door surface
- Glossy highlights on trim
- Matte recessed panels
- Contrasting frame color
Necessary Brushes And Rollers
Tools matter: pick brushes and rollers that match your door’s material and the paint you’re using so you get smooth, durable coverage without brush marks or pile.
Choose synthetic angled sash brushes for trim and natural-bristle for oil-based paints; use foam or short-nap rollers for flat panels.
Match brush types and roller sizes to door profile for even application and fewer touch-ups.
Prep And Safety Supplies
Since a clean, safe workspace makes the job faster and the finish last longer, gather your prep and safety supplies before you open a can of paint.
You’ll need basic safety gear and tools for thorough surface preparation:
- Drop cloths and painter’s tape
- Sandpaper and scraper
- Respirator or mask and gloves
- Cleaning solution and rags
How to Protect Nearby Surfaces and Work Safely
Before you open cans or lift a brush, take a few minutes to protect nearby surfaces and set up a safe workspace so you won’t create extra work or hazards.
Lay drop cloths and plastic sheeting for surface protection, tape edges, and move breakables.
Guarantee good ventilation, wear gloves and eye protection, keep a fire extinguisher nearby, and follow basic safety precautions.
How to Remove or Mask Locks, Hinges, and Kick Plates
Start by removing the locks so you’ve got clear access and fewer awkward edges to paint around.
Mask the hinges carefully with painter’s tape or remove them if you can to prevent paint buildup.
Cover kick plates with plastic or tape to protect their finish while you work.
Remove Locks First
Remove the locks, hinges, and kick plate—or securely mask them—so you get clean, even paint coverage without risking sticky mechanisms or drips.
First, identify door hardware and lock types. Remove lockset screws, pull the latch, and stash parts.
If you must mask, cover exposed cylinders and keyholes tightly.
- Screwdriver in hand
- Loose screws in a bag
- Bare latch exposed
- Protected cylinder
Mask Hinges Carefully
1. You’ll want precise masking techniques for hinge protection. Remove screws when possible; otherwise tape hinges tightly with painter’s tape and thin plastic. Work around edges so paint lines stay crisp. Check alignment after reattaching.
| Tool | Purpose |
|---|---|
| Tape | Seal edges |
| Screwdriver | Remove hinges |
| Plastic | Dust cover |
| Cloth | Clean surfaces |
| Pencil | Mark alignment |
Cover Kick Plates
Before you paint, decide whether you’ll take off the kick plate and hardware or mask them in place; both methods protect finishes and make cleanup easier.
You can remove screws or tape edges, noting kick plate materials and finishes to avoid damage.
Apply protective coatings where needed, then paint.
Visualize steps:
- Unscrew plate
- Mask edges
- Clean surface
- Reattach after curing
When to Remove the Door From Hinges : Pros and Cons
If you want a cleaner, faster paint job, taking the door off its hinges can make a big difference: it lets you access edges, avoid drips, and work on both sides without awkward maneuvering.
Door removal benefits include smoother finish and easier sanding.
But weigh hinge damage risks, heavy doors, and rehanging effort; keep hardware labeled and use proper support to prevent warping.
How to Clean an Exterior Door of Dirt, Grease, and Mildew
Start by brushing or wiping away loose dirt and cobwebs so grime doesn’t smear when you wash.
Use a degreasing cleaner or a mild dish soap solution to cut oil and fingerprints, rinsing thoroughly.
For mildew, apply a diluted bleach solution or a commercial mildew remover to the spots, scrub gently, then rinse and let the door dry before painting.
Remove Surface Dirt
Grab a soft brush or sponge and a mild cleaning solution to remove surface dirt, grease, and mildew from your exterior door.
For surface preparation, work top to bottom using gentle cleaning techniques. Scrub, rinse, and dry thoroughly before painting.
Visualize grime removal:
- Bristles loosen dust
- Sponge lifts residue
- Runoff clears streaks
- Microfiber dries surface
Degrease With Cleaner
Once surface dirt’s gone, you’ll need to cut through grease and mildew with a proper cleaner to confirm paint adhesion.
Mix recommended cleaning solutions—mild detergent or trisodium phosphate per label—and apply with a sponge.
Use targeted degreasing techniques: scrub stubborn spots gently, rinse thoroughly, and wipe dry.
Let the door fully air-dry before sanding or priming to guarantee a clean painting surface.
Treat Mildew Spots
If you spot small dark patches on your exterior door, treat them promptly to prevent spread and staining:
Use mildew treatment—mix diluted bleach or a commercial mildew remover with water.
Apply, scrub with a soft brush, rinse, and dry. Repeat if needed.
Follow with weather-safe primer before painting.
- soft brush
- diluted bleach
- rinse thoroughly
- dry completely
How to Repair Dents, Gouges, and Cracks (Wood & Fiberglass)
Start by evaluating the damage so you know whether you’re dealing with a shallow dent, a deep gouge, or a crack that needs structural attention.
For small dents, use wood filler or epoxy for dent repair; press, level, and let cure.
For gouges and cracks, apply flexible wood filler or marine-grade epoxy for crack filling, shape while pliable, then allow full cure before priming and painting.
How to Sand Wood, Metal, and Fiberglass Doors
Before you paint, you’ll need to sand each door type differently to guarantee proper adhesion and a smooth finish.
For wood, you’ll use progressively finer grits to remove old finish and smooth repairs; for metal and fiberglass, you’ll scuff the surface and remove corrosion or loose paint.
Follow the right grit and technique for each material to avoid damage and get a professional result.
Sanding Wood Doors
Tackle sanding a wood exterior door by removing old finish and smoothing imperfections so paint adheres evenly and lasts longer.
You’ll use proper sanding techniques and wood preparation: start coarse, refine, clean dust, and inspect. Visualize the process:
- Strip glossy finish with 80–120 grit.
- Smooth panels with 150–180 grit.
- Sand details by hand.
- Wipe and tack before priming.
Sanding Metal & Fiberglass
Prepare to sand metal and fiberglass doors with techniques that differ from wood: metal needs rust and old paint removal plus a scuffed surface for primer; fiberglass needs gentle abrading to avoid sanding through the gel coat while removing chalky oxidation and high-gloss finishes. Use proper sanding techniques and surface preparation.
| Tool | Use |
|---|---|
| 80–120 grit | Metal rust removal |
| 180–220 grit | Fiberglass scuffing |
| Wire brush | Paint removal |
| Tack cloth | Dust cleanup |
When and How to Prime an Exterior Door for Best Adhesion
Priming an exterior door is essential whenever you’re switching between paint types, covering bare wood, or fixing peeling finish—do it anytime the surface isn’t uniform or the old coating’s compromised.
Priming an exterior door is essential when changing paint types, covering bare wood, or repairing a compromised finish.
Use primer suited to material, apply thin even coats, sand lightly between coats, and follow cure times. Priming techniques and adhesion tips help durability.
- Clean
- Spot-prime
- Roll/brush
- Dry before topcoat
How to Pick and Apply Caulk and Weatherstripping Correctly
Once your primer and topcoat are cured, sealing gaps and weatherproofing are the next steps to lock in performance and keep moisture and drafts out.
Inspect joints and gaps, choose appropriate caulk types (silicone for exterior, paintable latex for trim), and apply smooth beads.
Select weatherstripping options (foam, V-strip, or door sweep), cut to fit, and fasten for a tight, lasting seal.
Brush, Roller, or Sprayer: Choosing the Right Method
Choosing between a brush, roller, or sprayer comes down to the door material, the finish you want, and how much time you’re willing to spend—each method gives different control, coverage, and texture.
You’ll use brush techniques for trim, a roller for flat panels, and a sprayer for fast, smooth coats.
- Fine brushwork
- Foam roller sweep
- HVLP sprayer mist
- Touch-up brush
Step-by-Step: Painting an Exterior Door Off the Hinges
Removing the door from its hinges gives you better access, cleaner edges, and a smoother finish—so set aside a clear workspace, gather your tools, and label hardware before you start.
Lay the door flat, sand, prime, and paint in thin coats, allowing full drying between layers.
Consider door color psychology and exterior door trends when choosing shade to boost curb appeal and mood.
Step-by-Step: Painting an Exterior Door While It’s Hung
If you’re keeping the door on its hinges, you can still get a professional-looking finish with careful preparation and the right technique; work from top to bottom, protect surrounding surfaces, and take your time with sanding, priming, and thin paint coats so drips don’t ruin your progress.
Use door painting techniques and color selection tips to guide choices.
- Tape trims and hardware.
- Sand lightly.
- Roll panels, brush edges.
- Remove tape when tacky.
How Many Coats You Need and Drying Times Between Them
Generally, two thin coats of exterior paint give the best balance of coverage and durability for a door, with a third coat only needed if the color or finish still looks uneven.
Space coats by the manufacturer’s recommended drying duration—typically 2–4 hours for latex, 6–8 for oil.
Maintain consistent coat thickness to prevent runs and guarantee full adhesion before applying the next coat.
How to Avoid Brush Marks, Drips, and Runs
Start with a well-loaded, but not dripping, brush or roller—dip about a third of the bristle length and tap off excess—to lay down an even coat and reduce brush marks.
Start with a well-loaded, not dripping, brush—dip a third of the bristles and tap off excess for an even coat
Use steady brush techniques, work top-to-bottom, and smooth with long strokes.
Keep a wet edge, watch for drips, and remove runs immediately as part of your finishing touches.
- Smooth long strokes
- Watch drips
- Maintain wet edge
- Tidy runs
How to Paint Glass Panels, Grilles, and Decorative Trim
After you’ve smoothed brush marks and kept your wet edge, tackle glass panels, grilles, and decorative trim with care so the finish looks professional.
Mask glass edges with low-tack tape, paint trim in thin coats, and use an angled sash brush for crevices.
Use glass panel techniques to avoid smears and follow trim painting tips for crisp lines.
Remove tape before full cure.
When to Reattach Hardware and Reinstall Your Door
Wait to reattach hardware and rehang the door until the paint feels dry to the touch and has reached its initial cure—usually 24 to 48 hours for latex and longer for oil-based paints—so you won’t dent the finish or gum up moving parts.
Check hardware timing, test hinges, and confirm door alignment before final mounting.
- Visual inspection
- Smooth latch action
- Even hinge gaps
- Full swing clearance
How to Protect a Painted Exterior Door From Weather and Wear
Because your exterior door takes the brunt of sun, rain, and temperature swings, you’ll want to use a few simple strategies to keep the paint intact and the door weatherproof: apply weather resistant coatings, seal edges and bottoms, and install a proper overhang or storm door.
Follow door maintenance tips like checking seals and recoating high-wear areas to prevent moisture intrusion and UV damage.
Simple Maintenance to Keep a Painted Door Looking New
Keep up with a few simple, regular tasks and your painted exterior door will keep looking fresh for years.
You should schedule light door cleaning, inspect seals, and touch up chips to maintain paint protection. Do these tasks seasonally and after storms to prevent grime and moisture damage.
- Wipe with mild soap
- Rinse and dry
- Repaint small nicks
- Lubricate hinges and seals
Troubleshooting Peeling, Blistering, and Adhesion Failures
If your exterior door’s paint is peeling, blistering, or failing to stick, you’ll want to diagnose the root cause quickly so small problems don’t become costly repairs.
Inspect for moisture, heat, or old incompatible coatings. Use proper surface preparation, strip loose paint, and apply adhesion techniques like sanding and primer.
Address blistering causes by improving ventilation and drying. Consider targeted peeling solutions and recoating.
Time, Cost Estimate, and When to Hire a Pro Instead of DIY
When you’re planning a door paint job, estimate the time and money realistically so you don’t bite off more than you can handle:
When planning a door paint job, realistically estimate time and cost so you don’t take on too much.
You’ll weigh Time considerations and a clear Cost breakdown, compare DIY alternatives, and decide if Professional help makes sense.
- Prep day with sanding and priming.
- Paint and drying cycles.
- Materials and tools list.
- Complex repairs or matching finish.
Frequently Asked Questions
Can I Paint Over Lead-Based or Old Lead-Containing Door Paint Safely?
Yes—you can, but only with strict safety precautions: assume lead paint, use HEPA respirator, wet-scrape or chemically strip, contain and dispose debris as hazardous waste, and consider hiring certified abatement pros if you’re unsure.
How Do I Prep and Paint an Insulated or Storm Door Differently?
You’ll notice subtle differences: for insulated or storm doors, you prep based on door material considerations—clean, degloss, sand lightly; choose paint type selection suited to metal, fiberglass, or wood; prime, use thinner coats, and rehung carefully.
Will Painting My Door Void Its Manufacturer’s Warranty?
It might—some manufacturers limit warranty implications if you use improper paint types or alter finishes. You should check your warranty terms and choose recommended paints, or get written approval to avoid voiding coverage.
Can I Change the Door’s Thermal Performance by Painting It a Darker Color?
Yes — painting a door a darker color can slightly change thermal absorption and color impact; you’ll notice increased heat gain on sun‑exposed surfaces, which may alter expansion, fading, or insulation effectiveness over time.
How Do I Remove Graffiti or Spray Paint From a Finished Exterior Door?
You’ll spot fresh spray paint glistening—start with mild graffiti removal: test a solvent on an inconspicuous area, use a soft brush or microfiber, choose remover compatible with the door’s paint types, rinse and repeat gently until gone.
Conclusion
So yes — you can totally paint your exterior door, and it’ll freshen your curb appeal faster than you can say “surprise HOA meeting.” You’ll save money, learn a few handy skills, and probably make more of a statement than the neighbor who replaces their door for twice the price. Do the prep, pick the right paint, and seal it well — then enjoy your handiwork until Mother Nature reminds you she’s boss.