How to Prime a Wall for Wallpaper: Perfect Surface Prep Guide
You should always prime before hanging wallpaper to guarantee strong adhesion, even suction, and fewer bubbles or seam problems. Start by cleaning, repairing holes and cracks, sanding glossy spots, and sealing stains. Choose a primer that matches the surface and wallpaper adhesive—water‑based for drywall, stain‑blocking or oil‑based where needed—and apply an even coat with a roller or brush, then allow full cure. Keep going to get primer choices, tools, and troubleshooting tips.
Quick How‑To: Prime Walls for Wallpaper (Overview)
Start by cleaning and smoothing the surface so your wallpaper will stick and look even. You’ll inspect for holes, sand rough spots, and remove dust—basic wall preparation.
Apply an appropriate primer evenly, let it dry, and check for stains.
Primer benefits include uniform absorption and easier hanging, so you’ll achieve a flat, consistent base that helps wallpaper adhere and look professional.
Why Priming Matters for Wallpaper Adhesion
Because wallpaper relies on consistent surface grip, priming your walls makes hanging easier and the result more durable. You get adhesion benefits and surface protection that prevent bubbling and uneven seams. Primer seals porous patches, evens suction, and helps paste bond. Use the table below to pace steps and expectations.
| Step | Effect | Result |
|---|---|---|
| Seal | Less soak-in | Strong bond |
| Even | Uniform grip | Smooth hang |
| Protect | Barrier | Longevity |
| Prep | Faster work | Neat seams |
| Cure | Stable base | Lasting finish |
Which Walls Need Primer Before Wallpaper
If your walls show bare drywall, fresh plaster, heavy stains, or a strong texture, you should prime them before wallpapering.
You’ll also prime when peeling paint, moisture issues, or recent wall repairs exist.
Consider wall texture and wallpaper types, perform adhesion testing, and follow primer application during surface preparation.
Weigh environmental impact and primer alternatives only if standard primers aren’t suitable.
Choosing the Best Primer for Wallpaper
When you’re choosing a primer for wallpaper, focus on adhesion, stain-blocking, and the finished surface the paper needs; different primers suit different substrates and papers, so pick one formulated for drywall, plaster, moisture-prone areas, or heavy stains as required.
Choose a primer that ensures adhesion, blocks stains, and matches your wall’s substrate and wallpaper finish.
- Evaluate primer types, surface conditions, primer thickness.
- Check application methods, drying times, adhesion tests.
- Consider wallpaper compatibility and environmental impacts.
Water‑Based vs. Oil‑Based Primers: Which to Use?
Now that you’ve matched primer properties to your wall and wallpaper, pick between water‑based and oil‑based formulas based on room conditions and paper type.
You’ll weigh water based advantages like low odor considerations, faster drying time, lower environmental impact and easier primer application against oil based disadvantages such as longer drying time, stronger odor, higher cost comparison, different surface compatibility, varied finish quality and recoat requirements.
When to Use Shellac or Stain‑Blocking Primers
If your wall has stains, heavy tannin bleed, smoke damage, or strong odors, you’ll want a shellac or stain‑blocking primer before wallpapering.
Shellac primers block the toughest stains and dry fast, while solvent‑based stain‑blocking primers handle many discolorations with easier cleanup.
I’ll explain which types suit specific problems and how to apply them for best results.
When To Use
Wondering whether you need a shellac or stain‑blocking primer? Use them when stains, tannin bleed, or odor risk threaten wallpaper adhesion.
Consider wall texture and moisture levels before choosing; shellac seals fast, stain‑blockers handle oilier marks.
Follow these simple triggers:
- Visible stains or water marks
- High humidity or mildew risk
- Strong odors or nicotine residue
Types Of Primers
When stains, smoke, or tannin bleed threaten your new wallpaper, you’ll want to choose between shellac and stain‑blocking primers based on the problem’s severity and the surface you’re covering. You’ll pick primer types for adhesion, odor sealing, or stain control. Primer benefits include faster prep and fewer failures.
| Primer | Best use |
|---|---|
| Shellac | Severe stains |
| Stain‑blocking | Light to moderate stains |
Match Primer to Your Wallpaper Adhesive
Adhesion matters: match your primer to the type of wallpaper adhesive you’ll use so the paste bonds properly and the paper lays flat.
Match your primer to the wallpaper adhesive so the paste bonds correctly and the paper stays flat.
You should consider adhesive compatibility and primer types to prevent lifting or seep-through.
Follow these steps:
- Confirm adhesive chemistry (starch, methylcellulose, pre-pasted).
- Choose a primer formulated for that chemistry.
- Test a small area before full application.
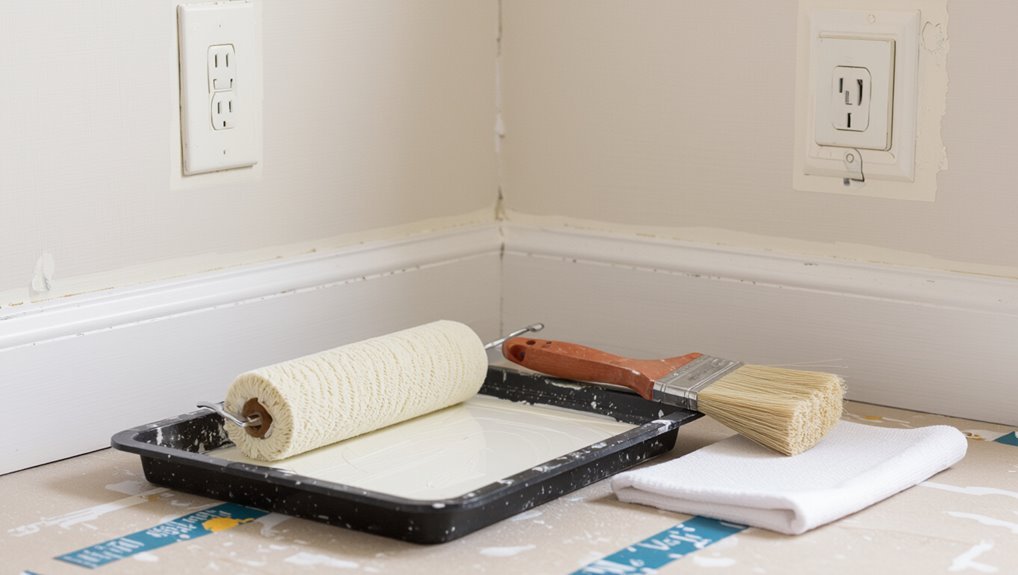
Tools and Materials You’ll Need
Before you start priming, gather the essential tools—roller, tray, brush, sandpaper, putty knife, and a drop cloth—so you won’t stop midway.
Check your materials checklist too: primer matched to your adhesive, patching compound, cleaner, and painter’s tape.
Having everything ready will make the job faster and cleaner.
Essential Tools List
Although prepping a wall for wallpaper seems simple, having the right tools makes the job faster and produces a better result. You’ll need items that support primer application techniques and respect primer drying times.
Prioritize quality for smoother work and fewer touch-ups.
- Roller and tray
- Taping knife and sandpaper
- Measuring tape and level
Required Materials Checklist
You’ve already picked the right tools; now gather the materials that’ll let you prime properly and keep your wallpaper looking great.
Get quality primer suited to wall surface characteristics, a roller and tray, angled brush for edges, sanding block, spackling compound, clean rags, tack cloth, bucket, mild detergent, and painter’s tape.
Follow primer application techniques and manufacturer drying times for best adhesion.
Safety and Ventilation: Before You Start Priming
When you’re getting ready to prime, make sure the room’s well ventilated and you’ve got basic protective gear—gloves, goggles, and a respirator or mask rated for paint fumes—so you avoid inhaling vapors or getting irritants on your skin.
Use safety equipment and proven ventilation methods. Follow these steps:
- Open windows and run fans.
- Use respirator and goggles.
- Limit exposure time and keep doors closed.
Inspect Walls and Map Problem Areas
Start by doing a thorough visual and tactile scan of each wall, noting cracks, nail pops, old adhesive, stains, and areas with uneven texture. Use an inspection checklist to record wall condition, surface texture, moisture issues, problem identification, wall materials, and damage assessment to plan repair techniques.
| Issue | Action |
|---|---|
| Cracks | Assess |
| Stains | Test moisture |
| Adhesive | Scrape |
Prep New Drywall for Primer (Step‑By‑Step)
Start by inspecting the new drywall for dents, seams, or nail pops and make any necessary repairs with joint compound.
Sand smooth and remove all dust so the primer will bond evenly.
Then apply primer using the recommended technique and coverage for drywall to guarantee a uniform base for your wallpaper.
Surface Inspection And Repair
Inspect the new drywall carefully for nail pops, seams, paper tears, or uneven tape—these defects will telegraph through primer and wallpaper if you don’t address them first.
Use an inspection checklist to note surface types, damage assessment, moisture issues, texture analysis, and previous treatments.
Then apply repair techniques to restore wall integrity:
- Fill and tape
- Treat moisture
- Feather and prime
Sanding And Dust Removal
Prep the surface for primer by sanding all repaired areas and removing every bit of dust—if you skip this, the primer won’t bond evenly and the wallpaper will show imperfections.
Use proper sanding techniques and sanding tools, control dust with vacuum attachments and dust control sheeting, wear dust masks, and follow wall cleaning steps.
Check wall texture for uniformity before primer application.
Priming Techniques And Coverage
Lay down a consistent, even coat of primer so the wallpaper adheres properly and the wall’s color and texture won’t show through; for new drywall that means choosing the right drywall primer, brushing or rolling with the correct nap and technique, and overlapping passes to guarantee full, uniform coverage without lap marks.
Consider Primer application, Primer types, Coverage calculations.
- Check Wall conditions.
- Address Surface imperfections.
- Balance Texture considerations, Adhesion factors, Primer drying and Environmental impact.
Prep Painted Plaster and Older Walls
Older painted plaster and vintage walls need a careful but straightforward approach before wallpapering: clean grime, tighten loose plaster, and address flaking paint so the surface will hold primer and adhesive.
You’ll inspect for plaster issues, sand glossy spots, and fill hairline cracks.
Match wall textures when patching, skim where needed, then prime with a bonding primer to guarantee even adhesion and finish.
Prepare Stained or Nicotine‑Discolored Walls
If you’ve handled grime and loose plaster, the next step is to tackle stains and nicotine discoloration that can bleed through wallpaper and adhesives.
Use targeted stained wall solutions and nicotine stain treatments before priming.
Steps:
- Clean with trisodium phosphate or degreaser.
- Spot-seal stubborn stains with an oil‑based primer.
- Sand and wipe, then apply a stain‑blocking primer evenly.
Fix Water Damage, Mold, and Efflorescence First
Water damage, mold, and efflorescence can wreck your wallpaper job if you don’t address them first.
You’ll arrange water damage repair and mold remediation, including efflorescence treatment and structural assessment to restore wall integrity.
Focus on moisture management and surface sealing before priming, and verify paint compatibility with the chosen primer to prevent recurrence and guarantee a durable wallpaper bond.
Repair Holes, Cracks, and Seams Before Priming
Patch all holes, cracks, and seams so your primer and wallpaper have a smooth, stable surface to bond to.
Use proper hole repair, crack sealing, and seam treatment techniques to prevent telegraphing.
Follow steps:
1. Fill holes with appropriate compound and level.
2. Run bead of sealant into hairline cracks and smooth.
3. Treat seams with joint compound and tape for uniform surface smoothing.
Sanding and Dust Removal Best Practices
Before you sand, clear the room and cover furniture and floors so dust doesn’t spread.
Use the right grit and a light touch to smooth repairs without over-sanding the surface.
After sanding, vacuum thoroughly and wipe the wall with a damp cloth so the primer will bond properly.
Prep The Work Area
2. Remove fixtures and cover outlets.
3. Tape seams and create a clean perimeter.
4. Set up a portable vacuum and damp cloths for ongoing dust removal.
Organize tools and label containers to maintain workspace organization and speed.
Effective Sanding Techniques
Start by choosing the right grit and tool for the job: use a medium-grit (100–150) to level out high spots and a fine-grit (180–220) to smooth seams and feather repairs.
Prefer a sanding block or orbital sander for even pressure. Use appropriate sanding tools, alternate hand sanding and power sanding, and follow sanding techniques for drywall sanding.
Wear dust masks, and aim for consistent surface smoothing.
Thorough Dust Removal
Clear dust removal is as important as good sanding—if you leave grit and particles on the wall, primer and wallpaper won’t adhere properly.
You should use proper dusting techniques and aim for surface cleanliness before priming.
Follow these steps:
- Vacuum with brush attachment.
- Wipe with a damp microfiber cloth.
- Allow to dry fully, then tack cloth for final pass.
Clean Grease, Soap Scum, and Chalky Paint
Before you prime, remove grease, soap scum, and any chalky paint residue so the primer can bond properly; these contaminants repel primer and cause peeling.
Start with grease removal using a degreaser or trisodium phosphate solution, rinse well, then scrub soap scum with a mild detergent.
Sand or scrape away chalky paint, clean dust, and wipe with a damp cloth before priming.
Seal Fresh Plaster or a Skim Coat Correctly
Before you prime, make sure the plaster or skim coat is completely dry by checking moisture with a meter or the knock test.
Choose a sealer made for fresh plaster—usually a water-based or PVA primer—and apply it evenly to lock in the surface.
Once dry, sand any high spots and smooth imperfections so the wallpaper goes on flat.
Assess Dryness Thoroughly
If your plaster or skim coat isn’t fully dry, the primer won’t bond and the wallpaper can bubble or peel, so always test moisture before you seal.
You should perform a careful moisture assessment using simple drying techniques and avoid rushing.
- Use a dampness meter.
- Tape a plastic sheet for 24 hours.
- Check for cool spots and odor.
Use Appropriate Sealers
Sealers lock in moisture and create a stable surface, so you’ll want to choose and apply one correctly on fresh plaster or a skim coat.
Pick sealer types based on surface compatibility—water-based for porous plaster, solvent-based for stubborn stains.
Use proper application techniques: thin even coats with roller or brush.
Respect manufacturer drying times before priming or wallpapering.
Sand And Smooth Surface
Begin by sanding the plaster or skim coat with a fine-grit sanding block or pole sander to knock down high spots and create a smooth, even surface.
Use careful sanding techniques to avoid gouges, then wipe dust before sealing.
Follow these steps:
- Sand high spots gently.
- Vacuum and tack cloth.
- Apply sealer for consistent smooth finishes.
Priming Over Previously Wallpapered Walls
When you’re dealing with walls that once wore wallpaper, the key is evaluating what’s left before you prime: any remaining paper, adhesive residue, tears, or uneven texture will affect primer adhesion and the final finish. You’ll assess wallpaper removal, wall condition, adhesion challenges, and texture considerations, then choose a stain-blocking or bonding primer for a uniform base.
| Issue | Solution |
|---|---|
| Residue | Wash/solvent |
| Tears | Patch/sand |
| Stain | Seal with primer |
| Texture | Skim/sand |
| Loose paper | Remove/adhesion coat |
Protect Trim, Floors, and Fixtures
Before you prime, protect baseboards and floors with drop cloths or rosin paper so primer splatters won’t stain them.
Cover light fixtures and outlets with plastic and secure it with tape to keep primer off electrical parts.
Run painter’s tape along trim edges for crisp lines and easy cleanup.
Protect Baseboards And Floors
Although you’ll be focused on the walls, protect baseboards, trim, and floors first so paint and paste don’t stain them; use baseboard protection and secure a floor covering.
Follow these steps:
- Remove or tape trim, sealing seams.
- Lay heavy-duty floor covering, overlap edges.
- Weight corners and tape to prevent movement and paste seepage.
Cover Light Fixtures
Since dust, paste, and paint can easily ruin light fixtures, cover them thoroughly before you start priming and hanging wallpaper. Use plastic bags or painter’s masks and tape around bases for Light fixture protection, and Covering outlets too. Work top-down, remove bulbs, and secure coverings.
| Item | Action |
|---|---|
| Fixture | Bag + tape |
| Bulb | Remove |
| Outlet | Cover |
| Floor | Drop cloth |
| Trim | Protect |
Tape Off Trim Edges
Start by taping off the trim edges so paint and paste won’t stain your moldings, floors, or protected fixtures.
Use painter’s tape for walls, delicate trim tape for finished wood, and masking tape for rough surfaces. Choose tape types based on surface and drying time.
Follow this simple checklist:
- Clean surface.
- Apply tape straight.
- Press edges for trim protection.
Estimate Primer Coverage and Buy the Right Amount
Before you buy primer, measure the wall area and calculate how much paint you’ll need based on the product’s coverage per gallon; most primers cover 300–400 sq ft per gallon.
So divide your total square footage by that number and add 10–15% for waste, textured surfaces, and touch-ups.
Compare primer brands, check label coverage calculations, and buy whole gallons to avoid color or batch mismatches.
How to Thin, Shake, and Mix Primer
Now that you’ve bought the right primer, get it ready for application by thinning, shaking, and mixing it correctly.
Use proper thinning techniques to adjust primer consistency without overwatering. Shake sealed cans well; stir open tubs thoroughly. Follow manufacturer ratios.
Thin primer carefully—follow manufacturer ratios, shake sealed cans, and stir open tubs thoroughly to avoid overwatering.
- Add small amounts of water or reducer.
- Stir with slow, deep motions.
- Test on scrap for even coverage.
Choose: Roller, Brush, or Sprayer
When you pick between a roller, brush, or sprayer, think about coverage, wall texture, and how much control you want—rollers give fast, even coverage on smooth or lightly textured walls; brushes handle edges and corners; sprayers cover quickly and get into deep textures but need masking and practice.
Choose roller vs. brush for balance; use sprayer advantages for textured surfaces, accepting cleanup and setup time.
Apply Primer Evenly Without Lap Marks
Work in sections and keep a wet edge so you don’t get visible lap marks as the primer dries.
You want an even coating for lap mark prevention; maintain consistent pressure and overlap slightly.
Follow these steps:
- Load the roller evenly and start from the top.
- Roll in overlapping W patterns.
- Blend edges quickly before they set.
Drying Times and Temperature Guidelines
Almost every primer lists a recommended drying time, but actual cure depends on temperature and humidity, so you should plan accordingly.
Check product drying times and follow temperature guidelines on the label. Work in 50–70°F and moderate humidity for reliable results.
Allow full cure before wallpapering—often longer than touch-dry—so adhesion and seams won’t suffer.
How Many Primer Coats Do You Need?
How many coats you need depends on the surface and the primer type: one good coat often covers new, smooth drywall, while textured, stained, or repaired walls usually need two (sometimes three) to guarantee full sealing and uniform color.
Consider:
- Primer types, Primer benefits, Application methods.
- Coverage considerations, Drying times, Environmental impact.
- Cost comparison, Adhesion factors, Surface conditions, Finish options.
Spot‑Prime vs. Full‑Wall Prime: When to Choose
When you’re prepping for wallpaper, decide whether to spot‑prime or prime the whole wall based on how uniform and sound the surface is: choose spot priming when isolated stains, repairs, or patches exist—spot priming benefits include faster work and less product.
Pick a full wall approach for uneven porosity or multiple repairs; full wall advantages are consistent adhesion and uniform sheen for better wallpaper results.
Handle Glossy Paint and Varnish Before Priming
If your wall still has a glossy paint or varnish, first assess how shiny the surface is so you know how much prep it needs.
You’ll need to sand or scuff a smooth finish to give the primer something to bite into.
Then pick a primer made for glossy surfaces or a bonding primer to guarantee proper adhesion before hanging wallpaper.
Assess Surface Gloss Level
Because glossy surfaces resist adhesion, you should always check the paint or varnish sheen before priming for wallpaper.
Determine gloss level and note surface imperfections. Then:
- Inspect sheen with a flashlight at an angle.
- Test adhesion with a small primer patch.
- Decide if a bonding primer is needed for glossy finishes.
Record results so you choose the right primer and guarantee long-lasting wallpaper adhesion.
Sand Or Scuff Smooth Finish
Prep glossy surfaces by sanding or scuffing them so primer can grab hold; you’ll remove the shine, create a slightly rough texture, and eliminate surface contaminants that block adhesion.
Use fine-grit sandpaper or abrasive pads, employ controlled sanding techniques across the surface, and test scuffing methods on a small area.
Wipe dust with a tack cloth before priming to guarantee reliable adhesion.
Use Appropriate Primer
Choose a primer formulated for glossy paint or varnish so the wallpaper adhesive will stick reliably.
You’ll prep by cleaning, sanding, and selecting the right primer types.
Follow these application tips and proceed confidently:
- Clean and degrease surface thoroughly.
- Sand lightly to scuff gloss for adhesion.
- Apply bonding primer evenly, allow full cure before hanging wallpaper.
Prime Ceilings and Corners for Wallpaper Runs
Start by tackling the ceilings and corners where your wallpaper runs will meet—these areas take the most wear and show seams if you don’t prime them properly. Focus on ceiling edges and corner preparation: sand, dust, and apply a cut-in coat, then roll. Use stable primer and smooth shifts so seams stay flat.
| Step | Tool | Tip |
|---|---|---|
| 1 | Sandpaper | Feather edges |
| 2 | Brush | Cut-in precisely |
| 3 | Roller | Even coverage |
| 4 | Primer | Stain-block |
| 5 | Dry | Touch-up as needed |
Priming in High‑Humidity Rooms and Bathrooms
When you’re working in bathrooms or other high‑humidity rooms, pick a mildew‑resistant, moisture‑blocking primer and apply it evenly so the wallpaper adhesive bonds and seams stay secure; these primers help prevent bubbling, staining, and mold growth that humidity can cause.
- Improve moisture control with a sealed primer to boost adhesive performance.
- Use ventilation tips—fans, dehumidifiers—for mold prevention.
- Proper priming extends wallpaper longevity.
Troubleshoot Blisters, Streaks, and Tackiness
If you spot blisters, streaks, or tacky spots, start by checking for moisture sources like leaks, condensation, or poor ventilation.
Address any water issues before proceeding, since damp walls will keep primer and adhesive from setting properly.
Then confirm you applied the adhesive and primer at the right coverage and open time to prevent sagging or sticky seams.
Identify Moisture Sources
Before you prime, you’ve got to locate any moisture sources causing blisters, streaks, or tacky spots on the wall.
Use systematic moisture detection and manage humidity control to prevent recurrence.
Check these common origins:
- Leaky pipes or roofs near the wall.
- Condensation from poor ventilation.
- Rising damp at the base of exterior walls.
Fix Adhesive Application
Check the adhesive application carefully—blisters, streaks, and tacky spots usually mean you’ve got uneven glue, wrong viscosity, or poor working time management.
You should smooth bubbles with a roller, thin or thicken paste per manufacturer instructions, and maintain consistent open time.
Use tested adhesive techniques, spot-clean streaks immediately, and address common issues by reapplying or replacing affected strips to prevent later peeling.
Test Adhesion Before Hanging Wallpaper
Try a small adhesion test on an inconspicuous section of the wall to confirm your primer and paste will bond properly.
You’ll perform quick adhesion testing with wallpaper samples to verify reliable results. Follow these steps:
- Apply primer, then paste a small sample.
- Press, smooth, and mark time.
- Peel gently after recommended set to check bond.
When It’s Safe to Start Papering After Priming
Wait for the primer’s recommended drying time before you start papering, since most primers need several hours to cure.
Do a quick touch test—if the surface feels dry and not tacky, it’s usually OK to proceed.
Also account for humidity and temperature, because cool or damp conditions can extend drying times.
Drying Time Guidelines
Although drying times vary with primer type and conditions, you’ll generally want the primer to be fully dry and tack-free before you start hanging wallpaper.
Consider drying conditions and temperature effects to gauge timing. Follow these checkpoints:
- Cool, humid rooms: allow 24–48 hours.
- Warm, ventilated rooms: 6–12 hours.
- High-absorption surfaces: extend drying by 12–24 hours.
Touch Test Check
Something you can do in minutes is the touch test: press a clean fingertip lightly to several primer spots to feel for tackiness and temperature differences.
You’ll detect areas still slightly sticky or cool, signaling inadequate cure. Use this simple adhesion testing and surface evaluation to mark spots needing more drying or a thin recoat.
Start papering only when all test points feel dry and non-tacky.
Environmental Conditions
After you’ve checked for tackiness with the touch test, consider the room’s environment before hanging paper.
Confirm drying conditions are stable: monitor humidity levels and avoid temperature fluctuations that affect wall texture and adhesive grip. Remove surface contaminants and meet ventilation needs for proper moisture control and ambient light exposure.
- Ideal humidity: 40–60%
- Stable temperature
- Clean, dry surface
Save Money on Primer Without Losing Performance
When you’re prepping a whole room, you don’t need to blow your budget on high-end primer to get reliable adhesion and stain blocking; smart product choices and proper technique deliver the same results for less.
Shop cost effective solutions like contractor-grade primers, diluted PVA for fresh drywall, or stain‑blocking additives as primer alternatives.
Apply thin, even coats and sand between layers for best performance.
Eco‑Friendly and Low‑VOC Primer Options
You can choose low‑VOC primers that cut fumes without sacrificing adhesion, or opt for natural‑ingredient primers like clay or casein for an even greener option.
I’ll explain how these formulas perform during application and what drying times to expect. That way you’ll pick a product that’s healthy for your home and suited to your wallpaper.
Low‑VOC Primer Choices
Because you’ll likely want to minimize fumes and environmental impact, choosing a low‑VOC or eco‑friendly primer is a smart first step before hanging wallpaper.
You’ll balance eco friendly options with primer effectiveness—look for labeled low‑VOC, stain‑blocking, and adhesion ratings.
Consider:
- Water‑based acrylic for general use
- Shellac‑alternative for stains
- High‑adhesion low‑VOC for difficult surfaces
Natural Ingredient Primers
You’ll find plant‑based binders, clay and milk‑casein formulas that highlight natural ingredient benefits while reducing odors.
Choose certified eco friendly options, check surface adhesion and stain‑blocking specs, and match primer type to wallpaper weight and wall condition.
Application And Drying
When you apply eco‑friendly, low‑VOC primers, work in thin, even coats and keep a wet edge to avoid lap marks and secure consistent adhesion; use recommended application techniques and note drying duration on the label.
- Roll or brush slowly for uniform film.
- Ventilate to speed safe curing.
- Test tackiness before wallpapering to confirm full adhesion and even finish.
When to Call a Pro for Wall Prep
If your walls show major damage, hidden moisture issues, or you’ve never tackled large-scale prep, call a pro—these problems can compromise wallpaper adhesion and lead to costly repairs later.
You should seek professional help for structural cracks, persistent damp, extensive mold, or uneven surfaces beyond DIY skills. A pro guarantees correct wall prep, repairs, and moisture mitigation so wallpaper lasts and looks right.
Maintain Primed Walls for Future Wallpaper
Because proper maintenance keeps your primed walls ready for wallpaper, perform a few simple checks and light touch-ups every few months.
You’ll preserve adhesion and appearance with targeted wall maintenance:
- Inspect for chips, stains, or moisture and spot-prime.
- Wash gently with mild soap; rinse and dry.
- Recoat high-traffic areas before you hang future wallpaper to guarantee an even bond.
How Primer Affects Wallpaper Removal Later
Although a good primer can make wallpaper stick better, it also changes how the paper comes off later, so you’ll want to choose and apply it with removal in mind. You’ll balance primer adhesion and wallpaper longevity: a strong bond helps durability but can make stripping harder. Consider peelable primers or use release agents for easier future removal.
| Primer Type | Removal Impact |
|---|---|
| High-adhesion | Difficult |
| Peelable | Easy |
Weekend Project Checklist: Priming Workflow
1 Saturday morning is all you need to get through the priming workflow: gather supplies, prep the walls, apply primer, and clean up so the room’s ready for wallpaper by Sunday.
You’ll follow a clear project timeline:
- Wall inspection and surface preparation
- Choose primer types and apply evenly
- Respect drying times before adhesive application
This weekend project stays efficient and on schedule.
Common Myths About Priming for Wallpaper
Wondering which priming tips you can trust? You’ll want myth debunking: primers don’t always block stains, but the right one helps adhesion and prevents bleed-through. Don’t skip sealing new drywall or assume one primer fits all—those primer misconceptions cost time.
| Myth | Reality |
|---|---|
| Primer blocks all stains | Only stain-blocking types do |
| One primer fits all | Choose by surface |
| Primer is optional | Needed for adhesion |
| Thicker is better | Apply per instructions |
Quick Reference: Primer Picks by Wall Type
Pick the right primer for the wall you’ve got, because the correct type guarantees adhesion, prevents bleed-through, and saves you rework.
Pick the right primer for your wall—ensure adhesion, stop bleed-through, and avoid costly rework.
Assess surface assessment, choose primer types matched to wall preparation and adhesion factors, and note primer benefits and application techniques.
Consider environmental considerations, eco friendly options, cost effective solutions, and avoid common mistakes.
- Vinyl
- Porous
- Moisture-resistant
Frequently Asked Questions
Can I Prime Directly Over Smoke‑Stained Wallpaper Without Removing It First?
You shouldn’t prime directly over smoke‑stained wallpaper; you’ll trap odors and residues. For proper smoke stain removal, strip or seal the paper first, then prime to guarantee reliable wallpaper adhesion and a lasting finish.
Will Primer Prevent Adhesive Bleed‑Through From Dark Paint Colors?
Yes — but don’t expect miracles. You’ll want a stain‑blocking primer so adhesive types don’t pull pigment through; high‑contrast colors need more layers or pigmented primers, or you’ll still see bleed‑through under scrutiny.
Can I Use Leftover Household Paint as a Primer Substitute?
You can sometimes use leftover household paint as a primer substitute, but lower paint quality reduces primer effectiveness; you’ll get better adhesion and bleed‑through protection using a proper primer, especially over dark or stained surfaces.
How Soon Can I Apply Vinyl Wallpaper After Primer Sets?
Quickly yet patiently: you can usually apply vinyl wallpaper after primer drying time reaches one to two hours, but waiting 24 hours is safer; vinyl wallpaper application benefits from fully cured primer to prevent lifting and bubbles.
Does Primer Affect Heated or Radiant Wall Systems?
Yes — primer can affect heated or radiant wall systems; you’ll consider temperature considerations and cure times, and match primer type to wall material so heat doesn’t degrade adhesion or release odors, ensuring stable bonding and performance.
Conclusion
You’ve read the primer spiel and now you’re ready to skip priming and blame the wallpaper when it bubbles—how comforting. But seriously: don’t. A good primer saves you scrubbing, steaming, and regretting late-night decorating decisions. Do the prep, pick the right product, and enjoy a smoother hang and an easier peel years from now. You’ll thank yourself—probably while sipping coffee, admiring walls that actually look like you meant them to.