How to Paint Walls in a Mobile Home for a Modern Look
You can give your mobile home a modern, airy look by prepping vinyl or drywall, deglossing and sanding seams, priming, then cutting in and rolling high-quality low‑VOC latex in light, cool tones. Use satin on trim and matte or low‑sheen on walls, keep colors neutral or soft pastels, and feather edges for a smooth finish. Patch and sand flaws, control humidity, and touch up seasonally; continue for step‑by‑step tips, color palettes, and tool lists.
Quick 6‑Step Plan to Paint Mobile Home Walls for a Modern Look
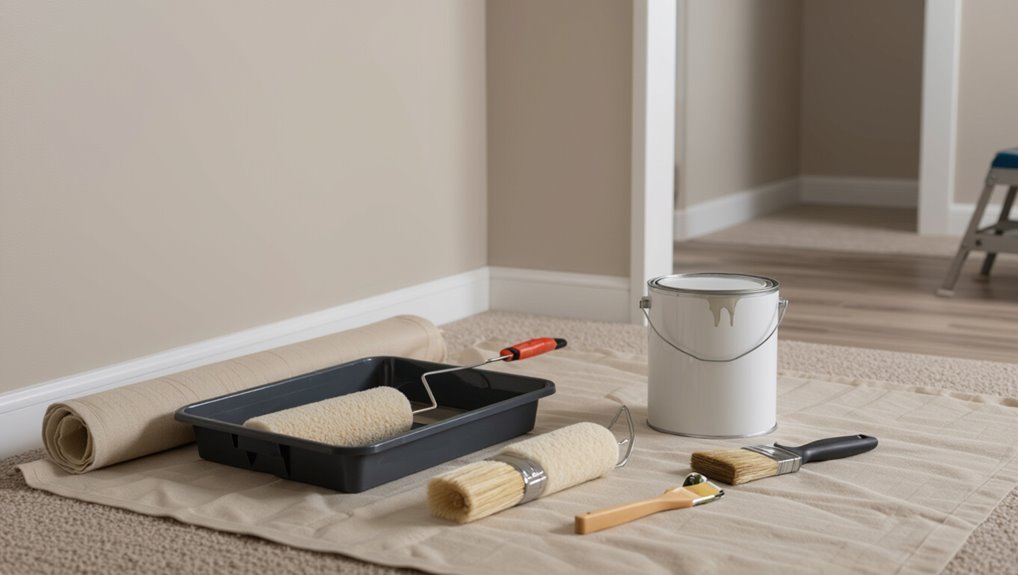
Start by clearing the room and gathering tools so you can work efficiently: drop cloths, painter’s tape, a good primer, two rollers (one smooth, one nap), angled brushes, sandpaper, and a quality latex paint in a modern neutral or accent color.
Follow six clear steps: prep surfaces, sand seams, apply primer, cut edges, roll evenly, touch up.
Blend modern color trends with simple wall texture techniques.
Choose the Best Paint Type for Mobile Home Walls
Pick a high-quality latex paint formulated for interior walls—it’s durable, easy to clean, and breathes well for the thinner construction of mobile homes.
Choose low-VOC or zero-VOC eco-friendly options to improve indoor air quality.
Prioritize paint durability for areas with traffic or moisture.
Test samples on your wall, check coverage and adhesion, then commit to a trusted brand for consistent results.
Pick Paint Finishes That Make Narrow Rooms Feel Bigger
Pick light-sheen finishes to reflect more light and make narrow rooms feel airier.
Use satin on trim and moldings so edges catch light and read as crisp without glare.
Reserve matte for feature walls to add depth without highlighting imperfections.
Choose Light Sheen Finishes
One simple trick to make narrow rooms feel more open is to choose a light, low-sheen paint—like eggshell or satin—so walls reflect soft, even light without highlighting imperfections.
You’ll enjoy light sheen advantages: subtle glow, easier touch-ups, and balanced contrast with furniture.
Keep tones neutral or soft pastels to reinforce a modern aesthetic, making your mobile home feel brighter and more spacious.
Use Satin For Trim
Using satin on trim helps define edges and bounces light without the glare of high-gloss, so your narrow rooms read as cleaner and more spacious. You’ll use satin sheen for crisp contrast; proper trim application makes lines pop and reflects light subtly. Choose a slightly lighter shade than walls to widen sightlines.
| Area | Benefit | Tip |
|---|---|---|
| Baseboard | Definition | Sand first |
| Door trim | Contrast | Light shade |
| Window trim | Reflects light | Thin coats |
| Crown | Highlights | Careful taping |
| Switch plates | Continuity | Match sheen |
Matte For Feature Walls
After you’ve defined edges with satin trim, set the scene for a feature wall with a matte finish to anchor the room without stealing light.
Use matte textures to reduce glare and deepen color, making narrow rooms feel wider.
Paint one wall in a muted hue, add subtle accent patterns for interest, and keep surrounding walls lighter so the feature reads intentional, not heavy.
Select Contemporary Paint Colors for Small Mobile Home Rooms
Light, cool hues make small mobile home rooms feel larger and more modern, so favor soft grays, warm whites, pale blues, and muted greens.
You’ll use contemporary color schemes focused on contrast with trim and accents, and choose small space palettes that maximize light.
Stick to two or three harmonizing tones, add one subtle accent, and keep finishes low-sheen for a sleek, airy result.
Test Paint Colors at Home Before You Commit
Before you commit, test swatches directly on the wall so you see how the paint looks with your mobile home’s finishes.
Watch the colors at different times of day to catch how natural and artificial light change the tone.
If possible, roll on larger paint samples to judge coverage and how the hue reads from across the room.
Test Swatches On Wall
Pick three or four paint swatches you think might work and put 4″–6″ patches of each color directly on the wall in multiple spots—near windows, in a corner, and by artificial light—so you can see how they change throughout the day.
Note swatch placement, note how color combinations read against trim and furniture, and evaluate finish, texture, and true undertones before deciding.
Observe Colors In Light
Now that you’ve placed swatches around the room, watch how each color behaves under different lighting throughout the day and at night.
Note shifts in warmth, saturation, and mood — color psychology matters for how spaces feel.
Observe lighting effects from windows, fixtures, and bulbs.
Take photos at set times, jot impressions, and decide which hue supports your desired atmosphere before committing.
Try Large Paint Samples
Want to be sure a color works in your space? Apply large color samples on different walls and live with them for several days.
Move furniture, observe morning and evening light, and note reflections.
Use systematic paint swatch testing—label each sample and take photos at various times.
This helps you confidently pick a shade that complements your mobile home’s layout and lighting.
Prep Vinyl Walls for Painting Without Damage
Preparing vinyl walls for paint starts with gentle cleaning and careful inspection to avoid damage. You’ll use mild detergent, a soft sponge, and spot-test in an inconspicuous area.
For vinyl wall preparation, remove grease, mildew, and loose particles, repair seams, and sand any rough spots lightly. Focus on damage prevention by working slowly and avoiding harsh chemicals or abrasive scrubbing.
Degloss Slick Vinyl and Glossy Surfaces for Adhesion
After you’ve cleaned and repaired the vinyl, you’ll need to dull any slick or glossy areas so paint will stick.
Use light sanding with fine-grit paper or a liquid deglosser to remove sheen, working gently to avoid damage.
Wipe residue with a tack cloth.
Test adhesion in a small area before applying recommended vinyl primers to guarantee long-lasting bond and a smooth finish.
Prime Vinyl, Glossy, and Patched Wall Surfaces Correctly
Before you prime, assess the surface for glue residue, gloss level, and any patched spots that need sanding or feathering.
Pick a primer formulated for vinyl or glossy surfaces—usually a bonding or stain-blocking primer—and match it to the finish and any repairs.
Prep and repair areas thoroughly so the primer can adhere evenly and give your topcoat a uniform base.
Assess Surface Condition
When you inspect your mobile home’s walls, focus on three things: vinyl panels, glossy surfaces, and any patched areas—each needs a different prep and primer to bond and hide imperfections.
You’ll perform surface preparation techniques: clean, sand, and degloss.
Do a quick wall damage assessment—look for cracks, peeling, or uneven patches—and mark spots needing repair before you prime and paint.
Choose Appropriate Primer
Since vinyl, glossy finishes, and patched drywall all bond differently, you’ll pick primers formulated for each surface to secure adhesion and a uniform topcoat, prevent bleed-through, and hide repairs.
Choose primer types like bonding primers for vinyl, deglossing or alkyd primers for glossy surfaces, and stain-blocking drywall primers.
Proper surface preparation guarantees primers work, so clean, sand, and remove contaminants before priming.
Prep And Repair Areas
Start by inspecting and cleaning each area so the primer can do its job: wipe away dirt, oils, and chalky residue with a mild cleaner, rinse and let dry.
Then sand glossy spots and feather the edges of patched drywall so surfaces are smooth and keyed for primer.
After surface cleaning, match primer to wall texture and substrate—use vinyl bonding primer on vinyl, high-hide on patched areas, and deglossing primer for glossy finishes.
Prep Drywall and Paneling Seams for a Smooth Finish
Prep the seams on drywall and paneling carefully so paint goes on smooth and hides joints.
You’ll tape and mud seams, sand once dry, and check for feathered edges.
For paneling techniques, fill grooves and use flexible caulk where panels meet trim.
Good drywall preparation prevents texture show-through and guarantees a crisp, modern finish before priming and painting.
Repair Dents, Holes, and Nail Pops Professionally
Once your seams are smooth and feathered, move on to repairing dents, holes, and nail pops so the surface reads uniform under paint.
For dent repair, sand around low spots, apply spackling, and level with a putty knife.
For hole filling, push filler into gaps, smooth, let dry, then sand flush.
Prime patched areas before painting for consistent adhesion and finish.
Remove Grease, Mildew, and Stains Safely Before Painting
Before you paint, identify what’s causing each stain—grease, mildew, or something else—so you can pick the right treatment.
Use safe cleaners like mild detergent, a vinegar solution for mildew, or a trisodium phosphate substitute for greasy spots, and always wear gloves and ventilate the area.
After cleaning, let surfaces dry, sand any residue smooth, and prime stained areas with a stain-blocking primer before you paint.
Identify Stain Types
When walls show discoloration, you’ll want to identify the stain type so you can treat it correctly—grease, mildew, smoke, and water stains each need a different cleaner and approach.
Check texture, odor, and spread: oily sheen suggests grease, fuzzy spots signal mildew, yellowing implies smoke, and soft patches point to water.
Match stain types to proper stain removal steps.
Choose Safe Cleaners
Now that you can spot different stains, pick cleaners that remove grease, mildew, and smoke without damaging mobile-home wall materials.
Choose safe cleaning supplies labeled for vinyl, paneling, or drywall. Test a small area, follow dilution instructions, and wear gloves.
For safer alternatives, try eco-friendly options like vinegar-based solutions or biodegradable cleaners that cut grime without harsh fumes.
Prep And Prime Surfaces
Start by stripping away grease, mildew, and stubborn stains so your primer and paint can bond properly; use a degreasing cleaner for kitchen areas, a mildew-killing solution (bleach diluted per label or a hydrogen peroxide product) for mold spots, and a stain-blocking primer on tannin or smoke marks.
Then follow surface cleaning techniques, sand glossy areas, repair damage, and choose wall texture options before priming.
When and How to Sand Mobile Home Wall Surfaces
Inspect the wall surfaces for gloss, rough spots, or peeling paint before you paint—sanding is required if the finish is shiny, uneven, or flaking, or if you’re switching from a darker to a lighter color. Use proper sanding techniques for effective surface preparation: sand smooth, clean dust, and spot-prime bare areas.
| Tool | Grit |
|---|---|
| Sandblock | 120 |
| Sponge | 180 |
| Orbital sander | 100 |
Choose Brushes, Rollers, and Extension Poles for Tight Spaces
Pick compact tools that let you work confidently in narrow hallways, alcoves, and around built-ins—small angled brushes for cutting in, slim rollers for tight runs, and lightweight extension poles that fit between obstacles.
Choose brush types and roller sizes for edges and panels.
Select angled sash brushes for crisp edges and small-diameter rollers for smooth panel coverage.
Evaluate extension pole options for reach and balance.
Use tight space techniques and ergonomic tools to guarantee precision painting without strain.
Use Tape and Edging Tools for Crisp Modern Lines
Start by cleaning and smoothing trim and corners so tape will stick and paint lines stay sharp.
Apply painter’s tape carefully, pressing down the edges to prevent bleed-through.
Use a dedicated edging tool or a pad edger to paint right up to tape for crisp, modern lines.
Prep Surface Edges
When you’re ready to paint, protect trim, switches, and adjoining walls by taping and using edging tools so you get clean, modern lines without reworking drips or jagged edges.
Use edge preparation techniques and surface cleaning methods before taping.
- Wipe dust and grease
- Sand rough spots
- Prime exposed areas
- Choose flexible edging tool
- Smooth tape edges with a putty knife
Apply Painter’s Tape
1 simple roll of painter’s tape makes the difference between crisp, modern lines and a job that looks rushed; apply it firmly along trim, baseboards, and around outlets so paint can’t bleed under the edge.
Choose painter’s tape options suited to your surface, press edges down with a flat tool, and follow proven tape application techniques to prevent seepage and guarantee neat, professional-looking results.
Use Edging Tools
Although painter’s tape gives you a strong foundation, edging tools let you finish fast and keep lines razor-sharp; grab a quality edger or angled brush and work along tape and trim with steady, confident strokes to prevent smudges and stray bristles.
- Choose a comfy grip edger
- Use light, even pressure
- Clean brushes after each pass
- Practice edging techniques on scrap
- Match edges to modern aesthetics
Cut In Ceilings and Tight Corners Like a Pro
Start by trimming a crisp edge where the ceiling meets the wall so you’ll get a professional-looking line without taping off the whole room.
Use steady cutting techniques with a loaded angled brush, working small sections. Hold the brush like a pencil, feathering paint into tight corners.
Employ corner strategies: paint toward the joint, then smooth with light strokes for an even, sharp finish.
Roll Without Lap Marks on Long Wall Panels
Roll steadily and keep a wet edge as you work down long mobile-home wall panels to prevent lap marks.
Use proper roller techniques and thorough wall preparation so paint lays evenly.
Use correct roller technique and prep walls well so paint lays smooth and even every time.
Follow these quick steps:
- Load roller evenly
- Work in 3–4 foot sections
- Overlap by 50%
- Maintain consistent pressure
- Feather edges into wet paint
Paint Low Ceilings to Create a Sense of Height
If your mobile home has low ceilings, paint them a lighter shade than the walls to lift the room visually.
You can add thin vertical stripes on the walls to draw the eye upward and create the illusion of height.
Finish with glossy trim around the ceiling and windows to reflect light and reinforce that taller feeling.
Paint Ceilings Lighter
Because low ceilings can make a room feel cramped, painting them a shade or two lighter than the walls immediately opens up the space and draws the eye upward.
You’ll enhance ceiling colors and modern aesthetics while keeping things simple:
- Choose a soft white
- Use satin finish
- Test small swatches
- Keep trim matching
- Guarantee even lighting
Use Vertical Stripes
When you paint narrow vertical stripes from floor to ceiling, you’ll trick the eye into seeing taller walls and a more open room.
Use subtle contrast and consistent stripe width to keep lines clean.
Apply vertical stripe techniques that reflect modern design principles: neutral palettes, matte and satin finishes, and careful edge-taping.
You’ll create height without heavy molding or busy patterns.
Add Glossy Trim
Paint glossy trim around ceilings and windows to reflect light upward and visually lift low ceilings. You’ll use glossy techniques and tailored trim styles to brighten rooms and add sleek contrast.
Try these approaches:
- White high-gloss crown molding
- Contrasting window casings
- Narrow glossy bands near ceiling
- Semi-gloss baseboards for balance
- Satin door frames for cohesion
Use Light‑Reflective Colors to Open Up Small Rooms
If you want small rooms in a mobile home to feel larger, choose light‑reflective colors that bounce natural and artificial light around the space.
Pick soft neutrals or pale pastels informed by light color psychology to uplift mood and increase perceived depth.
Paint ceilings a shade lighter than walls, keep finishes subtle, and use consistent tones to reinforce small space illusions without cluttering the eye.
Create Modern Accent Walls in Mobile Homes
Although a bold accent wall can redefine a room, you’ll want to choose placement, color, and finish intentionally so the feature feels modern rather than overpowering.
Choose placement, color, and finish carefully so a bold accent wall feels modern, not overpowering.
Use Accent Wall Ideas and Color Combination Tips to guide you.
Consider these steps:
- Pick one focal wall
- Contrast with neutrals
- Use matte or eggshell finish
- Add minimal decor
- Test samples in daylight
Apply Two‑Tone and Color‑Block Schemes That Read Modern
Once you’ve settled on a single accent wall, you can broaden the look by using two-tone or color-block schemes that feel modern and intentional.
You’ll pick colors using color theory basics: complementary or analogous pairs.
Tape clean lines, balance proportions for visual weight, and favor muted hues from modern design trends.
Two-tone layouts can define zones, add depth, and keep surfaces feeling cohesive.
Paint Around Windows Without Drips or Splatter
Start by protecting the sill and glass with low-tack painter’s tape and a thin plastic or paper shield so paint can’t drip or splatter onto the window or floor.
Use precise window masking techniques and drip prevention methods as you:
- Use angled brush for tight corners
- Remove excess paint from brush
- Work top to bottom
- Keep a damp rag ready
- Peel tape while wet or tacky
Paint Doors and Trim for a Cohesive Look
When you paint doors and trim, you tie the whole room together and give your mobile home a finished, intentional look.
Choose a door color that complements wall tones and pick trim styles that match your home’s era. Use semi-gloss for durability, crisp edging, and quality brushes.
Paint hinges and hardware after drying, and step back to verify cohesive contrast and clean lines.
Handle Textured or Embossed Mobile Home Walls
After finishing doors and trim, turn your attention to textured or embossed walls—they need different prep and techniques to look their best.
You’ll choose textured wall solutions and embossed wall techniques that minimize bumps and highlight modern lines.
- Clean surface
- Sand high spots
- Prime with high-build primer
- Use roller nap suited for texture
- Apply thin, even coats
Paint Over Wallpaper Safely and Effectively
If you’re considering painting over wallpaper, know that it can work well for firmly‑adhered, intact paper—just clean the surface, repair any seams or bubbles, and prime with a high‑adhesion primer before applying paint.
You’ll still evaluate paint removal techniques for damaged areas and compare wallpaper primer options to guarantee adhesion.
Test a small patch, sand lightly, and use quality paint for lasting, modern results.
Speed Up Multi‑Room Painting Without Sacrificing Quality
Once you’ve prepped walls—cleaned, repaired seams, and primed—you can keep momentum and tackle multiple rooms efficiently without cutting corners on finish quality.
- Use speed techniques: roller and pole, quality nap, and angled brush.
- Batch tasks: cut‑in all rooms, then roll.
- Stagger coats for drying.
- Keep tools organized for quick swaps.
- Build an efficient scheduling block per room to save time.
Ensure Proper Ventilation and Safety When Painting Inside
While you’re painting, keep fresh air moving through the home and take simple safety steps to protect yourself and others: open windows and doors, run fans to exhaust fumes, wear a respirator or mask rated for paint vapors, and keep children, pets, and open flames well away from the work area.
You’ll appreciate ventilation importance; follow safety measures like proper disposal, clear exits, and wet‑floor warnings.
Estimate Paint Quantity for Rooms and Odd Shapes
Measure each room’s length and height so you can calculate wall square footage and match it to the paint’s coverage rate.
Subtract areas for doors and windows, then add extra for trims or touch-ups.
For odd or angled walls, break them into smaller rectangles or triangles to estimate surface area accurately.
Room Dimensions And Coverage
Start by calculating each room’s wall area so you know how much paint you’ll need: multiply wall length by height for each wall, subtract doors and windows, then add the totals for the room.
Use accurate wall measurements and a clear coverage calculation.
- Measure each wall
- Note ceiling height
- Sketch odd shapes
- Calculate total area
- Compare to paint spread per gallon
Accounting For Doors And Windows
Because doors and windows don’t need full wall paint, subtract their areas from your total to avoid overbuying; calculate each opening’s square footage (height × width), then deduct those numbers from the corresponding wall areas.
Measure door framing separately if it will be painted.
For windows, decide if window treatments cover trim; exclude covered glass but include exposed trim in your remaining square footage.
Estimating For Irregular Shapes
Once you’ve subtracted doors and windows, tackle oddly shaped walls and rooms by breaking them into simple rectangles, triangles, and circles you can calculate; add or subtract those areas just like you did for openings.
Use clear measurement techniques for irregular shapes and sum areas to get total square footage.
- Sketch each wall
- Measure bases and heights
- Calculate triangle areas
- Use πr² for circles
- Add/subtract totals
Save Money: Where to Splurge and Where to Skimp
If you’re trying to stretch a painting budget in a mobile home, focus your spending where it matters most and save on the rest. Choose budget friendly options for ceilings and hidden trim, splurge on luxury paint choices for accent walls and durable high-traffic surfaces. Pick quality rollers, skip costly tools you won’t reuse.
| Splurge | Skimp |
|---|---|
| Accent walls | Ceilings |
| Trim | Hidden areas |
Choose Eco‑Friendly Paint Options for Mobile Homes
Choosing eco-friendly paint for your mobile home cuts indoor air pollution and often gives you durable, low-odor finishes that everyone will appreciate.
Pick paints from eco friendly brands and look for sustainable materials like plant-based resins.
Consider these tips:
- Choose low-VOC or zero-VOC labels
- Verify third-party certifications
- Test small swatches first
- Use recycled rollers and trays
- Dispose leftovers responsibly
Fix Bubbling, Peeling, Streaks, and Other Paint Problems
Don’t panic when paint bubbles, peels, or streaks show up—these problems usually point to surface prep, moisture, or application issues you can fix with the right steps.
Address bubbling issues by scraping and sanding, treat moisture sources, and prime for better paint adhesion.
For peeling paint, remove loose flakes, feather edges, then prime.
Use targeted techniques for streak removal and recoat evenly.
Achieve a Smooth Finish on Metal or Aluminum Trim
Once you’ve fixed peeling, bubbling, and streaks on walls, give metal or aluminum trim the same careful prep so paint will stick and look professional.
Use metal trim techniques and explore aluminum finish options for a sleek result.
- Clean with degreaser
- Sand lightly with fine grit
- Apply a metal primer
- Use high-quality enamel
- Finish with thin, even coats
Blend New Paint With Existing Finishes Seamlessly
When you’re updating a wall, matching the new paint to the existing finish matters as much as prep work; small differences in sheen, color, or application can make repairs stand out.
Test swatches on inconspicuous areas, sand and feather edges, and use matching sheen to create seamless shifts.
Blend with thin layers, step back frequently to guarantee color harmony, and spot-correct until invisible.
Choose Methods and Tools for Renters vs. Owners
If you’re renting, focus on temporary, low-impact options like peel-and-stick wallpaper or removable trim that won’t damage surfaces.
If you own the home, you can use permanent upgrade techniques such as skim-coating, priming, and high-quality paint for longer-lasting results.
For both situations, pick compact rollers, angled brushes, and extension poles made for tight spaces to get a professional finish in narrow rooms.
Temporary, Low-Impact Options
Though you might want a dramatic makeover, temporary, low-impact paint options let you refresh walls without risking your security deposit or permanent changes; renters can use removable products and techniques, while owners have more freedom to try semi-permanent finishes and reversible treatments that protect underlying surfaces.
- Use temporary wallpaper for pattern without glue
- Apply removable decals for accents
- Try peel-and-stick panels
- Use washable, low-VOC paints
- Test color with sample peelable coats
Permanent Upgrade Techniques
Decide up front whether you’re making a reversible refresh or a true, long-term upgrade, because the methods and tools you pick will differ for renters and owners.
Renters stick to peel-and-stick panels, temporary trim, and neutral color psychology choices; owners can retexture, skim coat, install durable trim, and pick bold palettes informed by color psychology.
Match scope to tenancy.
Tools For Tight Spaces
Tight spaces demand the right tools and a clear plan, and you’ll choose differently depending on whether you’re renting or owning.
Use compact, damage-free options if renting; go pro if you own.
Focus on tight space tools and precise painting techniques:
- Mini roller for narrow walls
- Angled brush for trim
- Painter’s tape low-tack
- Extension pole compact
- Drop cloths tailored
Weekend Timeline: Step‑by‑Step Refresh Plan
Start your weekend refresh with a clear, time‑boxed plan so you’ll know exactly what to tackle each day and avoid costly rework.
Day 1: clear walls, sand, fill holes, and apply primer in high‑traffic rooms.
Day 2: cut in edges, roll main surfaces, and inspect for touchups.
Weekend painting in a mobile home stays efficient when you schedule breaks and clean tools promptly.
Protect Floors, Furniture, and Fixtures During Painting
Before you open a can of paint, cover floors completely with drop cloths or rosin paper to catch spills and protect flooring seams in a mobile home.
Move or wrap furniture and shield fixtures like vents, switches, and trim with plastic and painter’s tape so you can work quickly without worrying about splatters.
Taking these simple steps will save you cleanup time and prevent costly damage.
Cover Floors Thoroughly
Cover the floors completely with durable drop cloths or plastic sheeting so paint, drips, and tracked dirt won’t damage vinyl, wood, or carpet.
Tape seams and edges with painter’s tape and weigh corners down to keep everything flat and secure while you work.
Use these floor protection techniques and drop cloth options:
- Heavy canvas drop cloths
- Plastic sheeting
- Adhesive film
- Cardboard runners
- Layered protection
Protect Furniture And Fixtures
1. You’ll move furniture to the center or another room, then use furniture protection methods like drop cloths, plastic sheeting, and secure tape.
Wrap delicate pieces and remove small items.
For lights, vents, and trim apply fixture masking techniques—painter’s tape and plastic—to prevent drips.
Keep pathways clear, check coverings before painting, and touch up any accidental spots promptly.
Use Stencils and Subtle Textures for a Modern Look
Add stencils and subtle texture to give your mobile home walls a modern, custom feel without a full remodel.
You can refresh rooms with stencil designs and textured patterns that mimic modern finishes and small-scale wall art.
Try these quick options:
- Repeat geometric stencils
- Light glaze for depth
- Tape-off stripe accents
- Sponge-on subtle texture
- Metallic wash highlights
Update Mobile Home Kitchens and Baths With Paint
Kitchens and baths are the easiest rooms to refresh quickly—paint can brighten cabinets, shrink visual clutter, and make surfaces feel cleaner without a costly remodel. You can pick bold kitchen colors, add crisp bathroom accents, and use semi-gloss for durability. Plan small swatches, prep surfaces, and protect fixtures.
| Area | Paint Type | Tip |
|---|---|---|
| Cabinets | Semi-gloss | Sand |
| Walls | Eggshell | Test |
| Trim | Gloss | Tape |
Hide or Embrace Exposed Seams and Joints With Paint
You can hide seams by adding texture—thin skim coats, textured paint, or light stippling will blend joints into the wall.
If you prefer to highlight them, use a contrasting color or a neatly painted trim line to make the seams a design feature.
Pick the approach that fits your style and prep the surface so paint adheres smoothly.
Conceal Seams With Texture
Patch or texture the seams before you paint so they disappear into the finish—or highlight them purposely for an industrial look.
You’ll get better seam concealment with textured finishes; apply thin joint compound, sand, and feather edges so paint blends.
Try techniques to match or contrast texture:
- Knockdown for subtle depth
- Orange peel for uniformity
- Skip trowel for character
- Spray texture for speed
- Light sanding before priming
Highlight Joints Intentionally
After you’ve smoothed or textured seams, decide whether to hide them completely or make them a design feature.
If you embrace joints, use contrasting paint, thin trim, or metallic accents to draw the eye; if you hide them, match color and finish precisely.
Choose highlight techniques that suit your aesthetic goals, balancing durability with clean joint aesthetics for a modern, intentional result.
Maintain Painted Mobile Home Walls Long‑Term
While regular touch-ups keep small blemishes from spreading, a few simple routines will preserve your paint’s look for years.
Use these long term care tips for wall maintenance:
- Wipe marks gently with mild soap and water.
- Patch nail holes and sand smooth.
- Reapply touch-up paint seasonally as needed.
- Control humidity to prevent peeling.
- Avoid abrasive cleaners that dull finish.
When to Hire a Pro vs. DIY for Mobile Home Painting
Deciding whether to hire a pro or tackle the job yourself depends on your budget, time, and comfort with prep work and ladder or trim work.
Use this quick checklist to see if DIY suits you: small rooms, minimal wall repairs, and steady patience for prep and clean-up.
If you face major drywall damage, high ceilings, or want a flawless finish fast, hire a pro.
When To Hire
Wondering whether you should tackle painting your mobile home yourself or call a pro? You’ll weigh cost considerations and professional benefits.
Hire a pro when time, safety, or finish quality matter; DIY if you’re confident and have time.
Consider these triggers:
- extensive damage
- tricky textures
- tight deadlines
- safety hazards (electrical, mold)
- desire for flawless finish
DIY Suitability Checklist
If you’re weighing whether to paint your mobile home yourself or call in a pro, this checklist will help you quickly spot the deal-breakers: assess damage and hidden issues, evaluate surface textures and access, estimate time and skill required, and factor safety and finish expectations. Use this quick diy project guide to decide when to DIY or hire help.
| Risk | Emotion | Action |
|---|---|---|
| Structural damage | Alarm | Hire pro |
| Textured walls | Frustration | Test patch |
| High access | Dread | Rent lift |
| Tight schedule | Stress | Hire pro |
Troubleshoot Adhesion Failures and Surface Problems
When paint won’t stick or the finish looks uneven, you’ll want to identify the specific cause before redoing anything; common culprits include dirt, grease, moisture, failing previous coatings, or incompatible primers and paints.
- Check for adhesion issues: tape test.
- Clean and degrease surfaces.
- Sand glossy or flaking spots.
- Repair moisture sources and drywall damage.
- Use compatible primer after proper surface preparation and allow full cure.
Best Months and Conditions to Paint Your Mobile Home Interior
Choose a mild, low-humidity stretch—typically spring or early fall—to paint your mobile home interior, because consistent temperatures and dry air help paint cure evenly and reduce problems like blistering or tackiness. Aim for an ideal temperature range of 50–80°F and humidity levels below 60%. Check forecasts, ventilate, and avoid rainy, very hot, or freezing days.
| Month | Temp | Humidity |
|---|---|---|
| Mar | 55–70°F | 30–50% |
| Apr | 60–75°F | 35–55% |
| Sep | 60–80°F | 30–60% |
| Oct | 50–70°F | 30–50% |
Quick Modern Touch‑Ups for Resale or Open‑House Prep
Small updates can make your mobile home look fresh and modern without a full remodel, so focus on high-impact, low-effort touch-ups like painting trim in a crisp white, swapping outdated light fixtures for simple, bright options, and rejuvenating cabinet faces with a coat of semi-gloss paint.
Small, high-impact updates—fresh white trim, brighter fixtures, and refreshed cabinet faces—modernize your mobile home without a full remodel
- Declutter and neutralize for staging strategies
- Touch up scuffed walls
- Replace dated hardware
- Brighten with LED bulbs
- Add removable backsplash for resale tips
Modern Color Palettes Tailored to Mobile Homes
After you’ve handled basic touch-ups and brightened fixtures, pick a modern color palette that suits a mobile home’s scale and lighting. Choose warm neutrals for openness, cool grays for calm, and modern accent colors sparingly. Embrace minimalist design with contrast trims and one focal wall to keep spaces airy and cohesive.
| Area | Base | Accent |
|---|---|---|
| Living | Soft beige | Teal |
| Kitchen | Cool gray | Mustard |
| Bedroom | Pale sage | Navy |
| Hallway | Off-white | Charcoal |
Tools and Product Checklist to Finish Your Paint Project
Tools make the difference between a messy job and a crisp, long-lasting finish, so gather the right brushes, rollers, tapes, and safety gear before you start.
Tools turn a sloppy paint job into a sharp, durable finish—collect the right brushes, rollers, tape, and safety gear.
Choose quality paint tools and trusted product brands to save time and guarantee coverage.
Pack essentials:
- Angled sash brush
- 9″ roller and tray
- Painter’s tape
- Drop cloths
- Sandpaper and spackle
Frequently Asked Questions
Can I Paint Over Lead‑Based Paint in an Older Mobile Home Safely?
You can, but you shouldn’t DIY if layers are deteriorating; follow lead paint safety protocols and mobile home regulations, hire certified abatement or use encapsulation by pros, and get clearance testing to protect occupants and comply legally.
How Do I Paint Around Electrical Outlets and Light Switches Without Removing Them?
You’ll paint carefully around outlets and switches using painting techniques like cutting‑in with a brush, painter’s tape, and outlet protection (foam gaskets or taped covers); you’ll remove faceplates, paint, then reattach for clean edges.
What Paint Cleanup Methods Are Best for Mobile Home Carpeting and Upholstery?
About 70% of DIYers report minor spills—so you’ll act fast: use paint removal techniques like blotting with solvent and enzyme cleaners, rinse carefully, and prioritize carpet protection with plastic sheeting and furniture covers to prevent stains.
Can Scent‑Free or Low‑Voc Paint Still Cause Allergy Reactions?
Yes — you can still react: even scent‑free or low‑VOC paint can trigger allergy symptoms if you’re sensitive to paint ingredient safety issues, like preservatives, additives, or trace solvents, so test small areas and ventilate well.
How Long Before Moving Furniture Back Against Freshly Painted Walls?
It’s true that patience pays: you should wait at least 24–48 hours before furniture placement, and preferably 72 hours to be safe, since drying time varies with paint type, humidity, and ventilation.
Conclusion
You’ve got this—remember when your neighbor painted their tiny kitchen soft gray and it suddenly felt like a café? That’s the point: paint changes space. Studies show light, warm neutrals can make rooms appear up to 20% larger, so pick finishes and colors that bounce light. With the right tools and a simple plan, you’ll modernize your mobile home quickly—finish one room, enjoy the change, then move confidently to the next.