How to Remove Paint From Red Brick Wall Without Damage
You can safely strip paint from red brick by first inspecting and repairing any loose or crumbling bricks and mortar, then identifying the paint type (test for lead if the home predates 1978). Use biodegradable, masonry-safe chemical strippers or low-heat steam, scrape gently with plastic tools and soft brushes, neutralize and rinse with low-pressure water, let the wall dry, and finish with a breathable sealer to protect the masonry—keep reading to get detailed methods, safety steps, and timing.
Who This Guide Is For and What It Covers
This guide is for homeowners, renters, and DIYers who want safe, effective ways to strip paint from exterior or interior brick; it covers tools, chemical and mechanical methods, safety precautions, and how to restore and protect the brick afterward.
You’ll learn paint removal techniques tailored to different brick types, risk-aware steps, and practical brick maintenance tips so you can plan, act, and preserve masonry without guesswork.
Quick Answer: Safest Way to Remove Paint From Red Brick
Start with the gentlest approach: test a small, hidden area and use a plastic or nylon brush with warm soapy water to see if the paint softens.
Then progress to low-pressure water rinsing and a biodegradable, masonry-safe paint stripper if needed.
Reserve wire brushes, grinders, or high-pressure washers for stubborn spots only, since they can damage red brick and mortar.
Use targeted paint removal techniques and careful brick preservation methods.
How to Inspect Brick and Mortar Before You Start
Before you touch a single tool, walk the wall closely and look for loose, crumbling, or spalled bricks and cracked or missing mortar joints—these defects change how aggressively you can work and whether repairs are needed first.
Do a thorough surface inspection to note Brick condition and Mortar strength.
Record a concise damage assessment, mark zones needing repointing, and prioritize repairs before paint removal.
How Paint Type (Latex, Oil, Lead) Changes Approach
After you’ve assessed brick and mortar condition, identify the paint type—latex, oil, or lead-based—since each demands a different removal strategy and safety measures.
Latex often peels with heat or chemical strippers if paint adhesion is weak; oil may need stronger solvents and more careful surface preparation.
Lead requires strict containment and professional-level precautions; avoid sanding or dry scraping.
When and How to Test for Lead Paint?
Wondering whether the paint on your brick contains lead? You should assume risk if the home predates 1978.
Hire a certified professional for reliable lead paint testing or buy an EPA-approved DIY kit and follow instructions exactly.
Take health precautions: wear a respirator, gloves, and isolate the area.
Wear a respirator, gloves, and seal off the area to protect yourself from lead dust and debris.
Stop work and get professional help if results are positive.
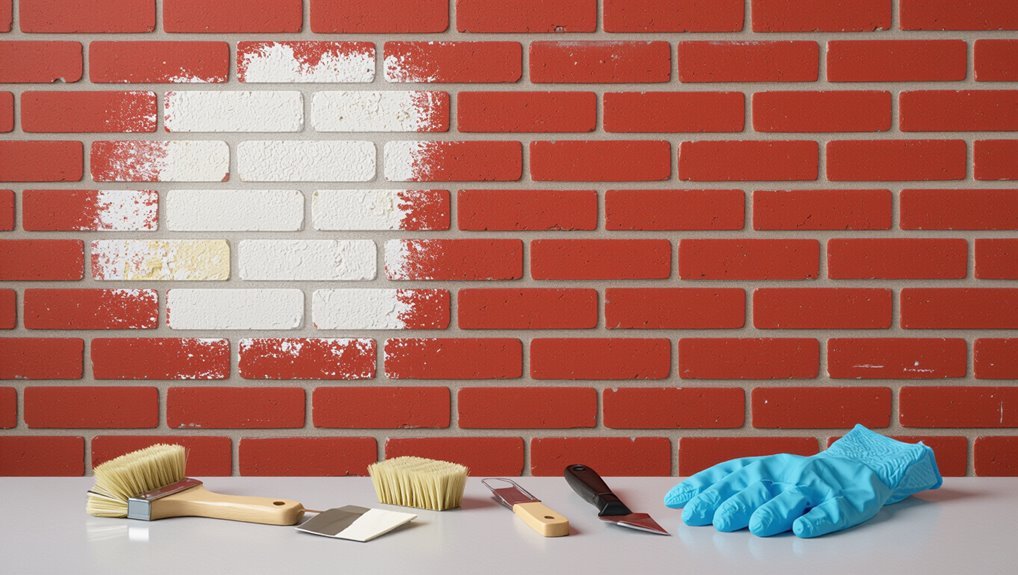
Tools and Supplies to Remove Paint From Red Brick
If your lead test came back clear or you’ve hired a pro to handle hazardous coatings, you’ll need the right tools and supplies to remove paint from red brick safely and effectively. Use scrapers, chemical strippers, brushes, and protective gear while balancing paint removal techniques with brick preservation methods.
| Tool | Purpose | Note |
|---|---|---|
| Scraper | Remove loose paint | Use plastic first |
| Stripper | Dissolve coatings | Choose masonry-safe |
| Brush | Agitate residue | Nylon or wire |
| PPE | Protect you | Gloves, mask |
| Rinse | Clean surface | Gentle water only |
Why Choose Low-Pressure Washing Over High-Pressure?
When you’re removing paint from brick, low-pressure washing is gentler on the masonry and helps protect the brick’s surface.
It also reduces the risk of washing out mortar joints, which preserves the wall’s structural integrity.
Plus, low pressure is safer for nearby plants, windows, and trim so you won’t cause unintended damage.
Protects Brick Integrity
Because brick is porous and mortar joints are relatively fragile, you should favor low-pressure washing over high-pressure to avoid chipping, etching, or forcing water deep into the wall where it can cause long-term damage. You’ll preserve texture using gentle brick preservation techniques and effective paint removal methods.
| Visual | Feeling |
|---|---|
| Soft spray | Intact surface |
| Controlled flow | No chiseling |
| Even coverage | Lasting finish |
Prevents Mortar Erosion
Choose low-pressure washing to protect mortar joints from rapid erosion—the gentler spray removes paint without blasting away the lime and sand that bind bricks together.
You’ll preserve mortar stability while achieving effective paint removal. Using lower pressure reduces crumbling, hairline gaps, and future repointing needs.
Opt for controlled passes and suitable nozzles so you strip coatings safely without compromising joint cohesion or brick alignment.
Safer For Surroundings
Low-pressure washing reduces the risk of collateral damage to nearby plants, windows, and delicate trim, so you won’t be trading a clean wall for broken landscaping or cracked glass.
You protect surrounding vegetation and hardscapes while using eco friendly methods that minimize runoff.
You’ll prefer low pressure for sustainable practices, preserving mortar and finishes, reducing cleanup, and lowering the chance of costly repairs.
Setting Up Low-Pressure Washing for Brick
Before you start, pick a pump and nozzle matched to low-pressure cleaning—usually a rotary or wide-angle nozzle—and make sure your detergent feed is compatible.
Set the washer to a gentle PSI (typically 500–1000) and test on an inconspicuous patch to confirm it removes paint without harming the mortar.
Keep the wand at a steady distance (about 12–24 inches) and adjust as needed to maintain even coverage.
Equipment And Nozzle Selection
Start with a pressure washer rated for 500–1200 PSI and a flow rate around 1–2 GPM, and pair it with a chemical injector or siphon for gentle paint stripper application; this combo gives you enough cleaning force to remove loose paint without blasting mortar or brick.
Choose wide-angle, low-pressure nozzle types (25°–40°) and inspect seals, hoses, and filters regularly—equipment maintenance prevents damage and guarantees consistent application.
Optimal Pressure And Distance
When you set up for washing brick, aim for the gentlest pressure that still moves paint and residue—typically in the 500–1200 PSI range—and hold the wand 12–24 inches from the surface so the spray removes paint without eroding mortar or nicking brick faces.
You’ll test ideal pressure on a hidden area, adjust by small increments, and use consistent distance measurement to protect the masonry.
When to Use Chemical Paint Strippers
If the paint’s stubborn, peeling, or multiple layers make sanding impractical, you’ll want to reach for a chemical paint stripper—especially on vertical brick where scraping alone tears up mortar or leaves stubborn residue.
Use strippers when mechanical methods damage brick or miss layers.
Prioritize chemical safety: ventilate, wear PPE, and contain runoff to minimize environmental impact and protect mortar and nearby plants.
Best Chemical Strippers for Red Brick and Why
Having decided that a chemical stripper is the right tool for stubborn paint on vertical brick, you’ll want products formulated for masonry—those that remove multiple layers without damaging clay brick or soft mortar. Choose low-VOC, biodegradable formulas and citric or soy-based alternatives for eco friendly options; always consider chemical safety and compatibility with mortar.
| Product | Why |
|---|---|
| Soy-based | Gentle, biodegradable |
| Citristrip | Low odor, effective |
| Methylene chloride-free | Safer, masonry-friendly |
How to Apply Chemical Stripper Safely on Brick
Because chemical strippers can be harsh, protect yourself and the surrounding area before you start: wear gloves, eye protection, respirator, and cover plants, wood, and mortar.
Test a small inconspicuous area to confirm compatibility. Apply stripper in thin, even coats with a brush, follow manufacturer timing, and avoid pooling.
Maintain chemical safety and work gently to guarantee brick preservation.
Neutralizing and Rinsing Brick After Stripping
Once the chemical stripper has done its work, neutralize the surface promptly to stop any remaining reaction and prevent mortar damage.
You should apply recommended neutralizing agents following product labels, scrubbing gently with a stiff brush.
Use low-pressure rinsing techniques, flushing residue downward and away from mortar joints.
Repeat neutralizing and rinsing until pH tests show neutrality, then allow the brick to dry fully before further work.
Using Steam and Heat Safely on Brick and Mortar
Before applying steam or heat, inspect the brick and mortar for cracks, loose joints, or crumbling that could be damaged by moisture or thermal stress.
When you use a steam cleaner, keep it at a moderate pressure and hold it several inches from the surface to loosen paint without saturating the wall.
Control heat and timing carefully—work in small sections, avoid prolonged exposure, and let the area cool before testing or replastering.
Assess Brick And Mortar
1 simple inspection can tell you whether steam or heat will work on your brick and mortar: look for loose, powdery, spalling, or brittle areas and test a small, inconspicuous spot. Check brick condition and perform a mortar assessment before applying heat.
| Area | Condition | Action |
|---|---|---|
| Brick | Solid/soft | Proceed/caution |
| Mortar | Cracked/crumbly | Repair first |
Use Steam Cleaner Properly
If your bricks and mortar passed the inspection, you can use a steam cleaner to lift paint without the harsh abrasion of scrapers or chemicals; just work methodically, keep the nozzle moving, and avoid high-pressure bursts that could damage soft or aged masonry.
Adjust steam settings conservatively, test a small area, and prioritize brick care.
- Slow sweeping motion
- Small test patch
- Low steam pressure
- Gentle brush finish
Control Heat And Timing
When you use steam or a heat gun on brick and mortar, keep temperatures moderate and exposure brief so you don’t crack mortar joints or spall the brick face; you’ll protect structure with good heat management and timing strategies. Follow a measured approach and test small areas first.
| Step | Temp | Duration |
|---|---|---|
| Test | Low | 5s |
| Increase | Moderate | 10s |
| Pause | Cool | 30s |
| Inspect | N/A | N/A |
| Repeat | Adjust | Vary |
When Gentle Abrasion Is Appropriate
Because brick can be delicate and you don’t want to damage the mortar or surface texture, choose gentle abrasion for small, flaky paint areas, thin layers, or spots where chemical strippers aren’t suitable.
Use gentle techniques and prioritize surface protection while working slowly.
- Soft-bristle brush removing flakes
- Low-pressure water rinse
- Non-abrasive pads for smudges
- Spot-test on hidden area
Hand-Tool Techniques for Removing Flaking Paint
Start by working methodically with the right hand tools to lift loose, flaking paint without harming the brick.
Use stiff nylon brushes, plastic or wooden scrapers, and small putty knives to target chips. Favor gentle scraping methods, keeping tool edges angled shallowly to avoid gouging.
Work in sections, clear debris frequently, and stop if mortar shows stress so you can reassess.
Protecting Mortar Joints During Scraping and Washing
If you want the bricks to stay sound, protect the mortar joints before you scrape or power-wash—mortar is softer than brick and can crumble under sharp scrapers or high-pressure water.
Use mortar joint protection: cover joints with tape, hand-scrape along the brick face, keep pressure low, and spot-test cleaners.
Protect mortar joints—tape seams, hand-scrape along the brick face, use low pressure, and spot-test cleaners.
Follow gentle scraping techniques to preserve edges and avoid undercutting.
- Tape seams
- Hand-scrape
- Low pressure
- Spot-test
Protecting Plants, Windows, and Nearby Surfaces
Before you start scraping or pressure-washing, cover nearby plants with plastic sheeting and secure it so debris and chemicals won’t settle on leaves.
Tape heavy-duty paper or plastic over windows and trim, and use painter’s tape to seal edges so you don’t damage glass or finish.
Also lay down drop cloths or cardboard to shield sidewalks, patios, and other adjacent surfaces from drips and chips.
Cover Nearby Plants
1 simple precaution will save you hours of cleanup: cover any plants, windows, and nearby surfaces before you begin scraping or spraying paint from a brick wall.
You’ll protect foliage and guarantee surrounding safety by using breathable tarps and stakes for plant protection. Think barrier, not suffocation.
- Drop cloth over soil
- Cardboard shields for shrubs
- Plastic sheeting taped low
- Weights to hold edges
Protect Windows And Trim
Apply tape tightly around glass and use cardboard or plastic sheets for window protection.
For wood or metal trim, use trim shielding like foam guards or rigid plastic to prevent chemical contact.
Check seals periodically and replace any compromised barriers before you resume work.
Shield Adjacent Surfaces
Start by surveying the work area and covering any nearby surfaces that could catch paint chips or stripper residue—plants, windows, siding, walkways, and outdoor furniture all need attention.
Use tarps, plastic sheeting, and masking tape for paint shielding and surface protection. Seal edges tightly and weigh coverings down.
- Shrubs wrapped
- Windows taped
- Patio covered
- Gutters guarded
Containing and Disposing of Paint Waste Safely
When you’re removing paint from brick, don’t let chips, runoff, or used solvents scatter—contain them immediately so they don’t contaminate soil or storm drains.
Use tarps, drip trays, and sealed containers to collect debris and liquids.
Label hazardous material, follow local paint waste management guidance, and comply with disposal regulations.
Arrange pickup or deliverables to licensed hazardous-waste facilities promptly and responsibly.
Testing a Small Patch to Predict Final Results
Pick an inconspicuous spot to test your chosen removal method so any unexpected damage stays hidden.
Apply the treatment and check the patch right away, then recheck it after 24–48 hours to see how the brick and mortar react.
Use those observations to adjust your technique or choose a different product before treating the whole wall.
Choose An Inconspicuous Spot
Because brick and paint both vary so much, you should test a small, inconspicuous patch before tackling the whole wall.
Pick a spot behind a shrub or near a downspout. Check the test patch for color lift and brick condition. Note results and take a photo.
- Hidden corner
- Behind planter
- Under eave
- Near foundation
Evaluate Results Over Time
After you treat the test patch, monitor it regularly over several days to see how the paint removal affected the brick and mortar. Check for paint adhesion problems, mortar softening, or color change. Record observations for surface evaluation and decide if method adjustments are needed before scaling up.
| Observation | Action |
|---|---|
| Poor paint adhesion | Try gentler remover |
| Mortar damage | Halt and consult pro |
Removing Paint From Mortar Lines, Crevices, and Textures
Tackle mortar lines, crevices, and textured brick carefully, since paint hides in tiny gaps and uneven surfaces and’s harder to remove than on flat faces.
Use mortar cleaning techniques and crevice tools: a stiff nylon brush, wooden skewers, syringed solvent, steam wand.
Work small sections, test first, blot—don’t scrub harshly—and rinse frequently to protect mortar and texture.
Removing Paint Stains and Haloing (Ghosting)
Paint stains and haloing (ghosting) happen when thin paint residue soaks into the brick or leaves a faint ring around cleaned areas. You’ll need targeted, gentle methods to lift that discoloration without damaging the masonry.
Use mild poultices, poultice dwell time trials, and soft bristle brushing to reduce paint ghosting. Rinse, repeat locally, and apply stain prevention like sealers only after testing compatibility.
Restoring Mortar Color If Cleaning Lightens It
When cleaning lightens mortar and leaves it looking patchy, you’ll want to restore the color so the wall reads uniform and well cared for.
Use mortar restoration techniques and color matching solutions to blend repairs.
Visualize steps:
- Mix tint to match original shade.
- Test on scrap mortar.
- Apply with small brush into joints.
- Seal lightly to protect color.
Drying and Conditioning Brick After Paint Removal
Once the paint’s gone, you’ll want to make sure the brick dries thoroughly to prevent trapped moisture and mold.
Use airflow, sun exposure when possible, and gentle heat or fans for stubborn damp spots.
After it’s dry, condition and seal the brick with the appropriate breathable masonry sealer to protect the surface and restore appearance.
Drying Techniques For Brick
After you’ve removed the paint, you’ll need to dry and condition the brick promptly to prevent moisture-related problems like efflorescence, spalling, or mold.
Use targeted drying methods to control brick moisture, monitor temperature effects, and guarantee steady air circulation across the brick surface. Track drying duration to avoid trapped dampness.
- Warm air blower
- Fans for cross-flow
- Humidity monitor
- Gentle heat lamps
Conditioning And Sealing
Now that the brick is clean and dry, you’ll condition and seal it to lock out moisture and restore breathability; proper conditioning evens out moisture levels, prevents efflorescence and spalling, and creates a stable substrate for a suitable sealer.
You’ll test moisture, apply a breathable masonry conditioner if needed, then choose sealing techniques that preserve vapor permeability.
Maintain routine brick maintenance to extend lifespan.
When to Reseal, Repoint, or Leave Brick Unsealed
When should you reseal, repoint, or leave brick unsealed? You’ll decide based on reasons sealing was chosen, visible mortar erosion, and overall brick maintenance needs.
Inspect moisture, flaking paint, and structural gaps. Then act:
- Reseal when mortar is sound but water beads.
- Repoint when joints crumble.
- Leave unsealed on historic, breathable walls.
- Monitor annually for changes.
Choosing a Breathable Sealer Safe for Brick
When you choose a sealer, pick a breathable masonry product so moisture can escape and the brick won’t trap water.
Check compatibility with the paint you removed—some sealers react poorly with oil- or alkyd-based paints.
Test a small area first to confirm adhesion and appearance.
Breathable Masonry Sealers
Because brick needs to breathe to stay sound, choose a masonry sealer labeled “breathable” or “vapor-permeable” so moisture can escape while surface water is repelled.
You’ll rely on breathable sealers for proper moisture control; they prevent trapped dampness and efflorescence.
Visualize effects:
- Rain beads off face.
- Damp evaporates inward.
- Mortar stays intact.
- Brick color endures.
Compatibility With Paint Types
1 key concern is making sure the breathable sealer you pick plays nicely with whatever paint is already on the brick or that you plan to apply.
You’ll test compatibility by checking manufacturer specs and doing small patches after proper surface preparation.
Choose sealers labeled vapor-permeable to preserve mortar and promote paint adhesion.
Avoid film-forming products that trap moisture and lift paint.
DIY vs. Hiring a Professional: Decision Checklist
Deciding whether to tackle paint removal yourself or hire a pro comes down to evaluating your skills, the wall’s condition, time, and budget.
Decide whether to DIY or hire a pro by weighing your skills, the wall’s condition, time, and budget.
Weigh DIY considerations against Professional benefits: Cost analysis, Time investment, Safety measures, Effectiveness comparison, Skill requirements, and Long term impact.
- Scraping and pressure-washing visuals
- Chemical stripping aftermath
- Brick repair needs
- Cleanup and disposal scope
Questions to Ask a Contractor Before Hiring Them
Who’ll handle the work and how they’ll do it are the essential questions to ask before you sign a contract.
Ask about contractor qualifications, licensing, insurance, references, and specific paint-removal methods they’ll use on brick.
Confirm project timelines, milestones, cleanup, warranties, and who’s responsible for unforeseen damage.
Get everything written in the contract before work starts.
Common Mistakes That Cause Permanent Brick or Mortar Damage
When you try to remove paint from brick without the right knowledge or tools, it’s easy to create permanent damage to the brick or mortar—common mistakes include using high-pressure washing, abrasive grinders, or harsh chemical strippers that erode surfaces, drive moisture into joints, or weaken the bond between bricks and mortar.
- Stripping with grinders
- Blasting with pressure washers
- Using strong chemical strippers
- Skipping masonry-safe paint removal techniques and brick preservation tips
Cost Ranges for DIY vs. Pro Brick Paint Removal
You can save money by handling paint removal yourself, but you’ll need to budget for materials like strippers, brushes, pressure washer rental, and safety gear.
Hiring a pro typically raises the bill because labor rates vary widely, though pros can finish faster and avoid mistakes.
Weigh upfront DIY costs against potential long-term expenses from damage or redo work when making your choice.
DIY Material Costs
Tackling paint removal yourself can save a few hundred dollars, but you’ll still need to buy or rent tools, cleaners, and safety gear—expect basic DIY costs to range from about $50 for a small touch-up to $300–$600 for a larger wall when you factor in scrapers, chemical strippers, wire brushes, drop cloths, respirators, and a pressure washer rental.
Consider budget considerations and material sourcing.
- Scrapers and wire brushes
- Chemical strippers and cleaners
- Respirator, gloves, drop cloths
- Pressure washer rental or pump sprayer
Professional Labor Rates
After weighing DIY material costs, it helps to compare what professionals charge so you can decide whether hiring help is worth it.
You’ll see wide ranges: $2–$8 per square foot for basic blasting or chemical removal, higher for intricate brickwork.
Monitor the local labor market and pricing trends; get three bids, check references, and factor project size to estimate final labor costs accurately.
Long-Term Expense Tradeoffs
While initial DIY removal can save you a few hundred dollars, consider long-term tradeoffs like tool wear, surface damage risk, and ongoing maintenance that can push total costs past a professional quote.
Pros charge roughly $2–$8 per sq ft for common methods, and $8–$15+ for delicate or detailed work, so weigh immediate savings against potential repair bills and resale value impacts.
- Cracked mortar and patching
- Repointing costs
- Repeat cleanings and sealers
- Reduced resale appeal
Do a cost analysis comparing DIY outlays to pro rates to estimate long term savings.
Timeline: How Long Each Method Typically Takes
Because each removal method works differently, you’ll want a realistic sense of how long each one takes before you start.
Chemical strippers often need 30–90 minutes plus dwell and cleanup; pressure washing can finish sections in minutes but needs drying time.
Chemical strippers take 30–90 minutes plus cleanup; pressure washing works fast per section but requires drying time
Sanding/grit blasting is slower, often hours to days for full walls.
Balance paint removal techniques with time efficiency for planning.
Step-by-Step Checklist to Remove Paint From Red Brick Without Damage
Now that you know how long each method typically takes, you can move on to a clear, safety-minded checklist that walks you through removing paint from red brick without causing damage.
Follow precautions, choose eco-friendly options, and prioritize brick preservation.
- Test a small area with gentle cleaner.
- Use soft bristle brush and low-pressure rinse.
- Apply eco solvent for stubborn spots.
- Seal and inspect for mortar damage.
Frequently Asked Questions
Can Paint Removal Change the Brick’s Historical Designation or Warranty?
Yes — you can change a brick’s historical designation or void warranties if you alter original fabric; you should consult historical preservation authorities and review warranty implications before removing paint to avoid unintended legal or coverage consequences.
Will Removing Paint Affect Interior Humidity or Insulation?
Removing exterior paint usually won’t change interior humidity or insulation impact considerably; you’ll maintain humidity control if you avoid sealing brick excessively, and you’ll preserve thermal performance by keeping mortar and cavity insulation intact during work.
Can Wildlife or Pets Be Harmed by Residual Chemicals After Stripping?
Yes — if you don’t follow chemical safety, wildlife exposure and pets can suffer from toxins, residue, or inhalation; you should contain runoff, use pet-safe methods, rinse thoroughly, and keep animals away until areas fully cure.
How to Handle Paint on Brick With Embedded Metal Fixtures or Anchors?
By Jove, you’ll carefully mask and shield anchors: use paint removal techniques that avoid abrasive blasting, apply removable tape or foil, protect metal fixtures with rust inhibitors, and hand-scrape tight spots to preserve both brick and hardware.
Are There Local Permits or Regulations for Exterior Paint Removal?
Yes — you’ll need to check local regulations and permit requirements before exterior paint removal; many municipalities regulate methods, waste disposal, and historic facades, so contact your city building department or preservation office for specific rules and permits.
Conclusion
You’ve got the know-how and the right precautions — now pick your method, test a small area, and proceed slowly. As you work, you’ll watch old layers lift and worry about unseen damage fade, but don’t get overconfident: stop at the first sign of mortar loss or deep pitting. If anything looks off, pull back and call a pro—what starts as satisfying DIY could suddenly demand expert rescue, and you’ll want that safety net.