What Is the Best Paint for Exterior Concrete Floors?
For exterior concrete floors you’ll usually get the best mix of durability and UV resistance by using a two-part epoxy or an acrylic-latex coating topped with a polyurethane or polyaspartic sealer; epoxies handle heavy traffic and stains, acrylic-latex is easier to apply and resists fading, and topcoats add scratch and UV protection. Prepare and prime the surface, fix cracks, and choose colors for heat. Keep going to find product picks, prep steps, and troubleshooting tips.
What This Guide Covers and How to Use It
This guide covers the essential factors you need to choose and apply paint for exterior concrete floors, and it shows you how to get durable, attractive results.
You’ll find clear preparation essentials, step-by-step application tips, and guidance on color selection to match durability and aesthetics.
Use it to assess surface condition, pick products, plan timing, and follow concise procedures for long-lasting finishes.
Quick Answer: Best Paint Types for Exterior Concrete
Now that you know how to prepare and plan, here’s a quick rundown of the paint types that give the best results on exterior concrete floors.
Use oil-based epoxy for heavy-duty durability, acrylic latex for UV resistance and ease, and concrete stain for a natural look.
Use oil-based epoxy for durability, acrylic latex for UV resistance and ease, or concrete stain for a natural finish.
Consider color selection for heat and wear.
Follow proper application techniques—primer, thin coats, and non-slip additives—for lasting results.
Decision Flowchart: Pick Paint by Surface and Conditions
Start by identifying your surface type—smooth poured slab, broom-finished, or pavers—as that shapes prep and product choice.
Then factor in local weather and exposure, since UV, freeze-thaw, and moisture demand different formulations.
Finally, match the paint to your planned use level (light foot traffic vs. heavy vehicle use) to guarantee durability.
Surface Type First
Which surface are you working with—smooth poured concrete, broom-finished slab, or concrete pavers—as that choice drives the paint type and prep steps you’ll need?
You’ll tailor surface preparation for textures to guarantee paint adhesion.
Consider:
- Smooth: etch and prime for grip.
- Broom-finished: clean and use thick coating.
- Pavers: joint-safe flexible paint and sealing.
Weather And Exposure
Once you’ve matched paint and prep to your surface, factor in weather and exposure to pick the right coating and schedule the job.
Check local climate for freeze–thaw cycles, humidity, and UV intensity. Prioritize products with proven weather resistance for prolonged outdoor life.
Consider exposure factors like direct sun, wind-driven rain, and salt spray to choose formulation and curing window.
Intended Use Level
Think about how you’ll use the surface: high-traffic driveways and garage floors need tougher, abrasion- and oil-resistant coatings, while decorative patios or porch areas can get by with more flexible, color-stable finishes.
- Assess planned use and traffic level.
- Match coating durability and texture.
- Choose application techniques (roller, squeegee, spray) that suit prep and finish.
How to Choose: Paint vs. Sealer vs. Coating for Concrete
You’ll want to weigh paint, sealer, and coating by what each actually does to the concrete surface.
Consider durability and performance—paints add color, sealers protect and repel moisture, and coatings give the toughest wear resistance.
Also think about application and maintenance: some systems need more prep and recoats, while others last longer with minimal upkeep.
Paint Versus Sealer
When deciding between paint, a sealer, or a thicker coating for your exterior concrete floors, consider how much protection, traction, and longevity you need—paint gives color and basic protection, sealers penetrate and shield against moisture and stains, while coatings form a durable surface layer for heavy wear.
- Paint: easier application techniques, improved paint longevity with prep.
- Sealer: invisible protection, repels stains.
- Coating: thicker wear layer for traffic.
Durability And Performance
Although cost and color matter, your top priority should be how the finish will hold up under real use—paint, sealer, and coatings each deliver different levels of abrasion, moisture, and UV resistance, so pick the one that matches the traffic, exposure, and maintenance you’re willing to do.
Assess durability factors like wear, chemical resistance, and flexibility, and use a strict performance comparison to choose wisely.
Application And Maintenance
Durability and performance set the baseline, but how a product gets applied and what upkeep it needs will determine whether it actually performs over time.
You’ll choose based on surface prep, application techniques, and upkeep frequency. Consider:
- Prep: clean, etch, repair cracks.
- Apply: follow temperature, primer, and thin coats.
- Maintain: regular cleaning and simple maintenance tips to extend life.
Acrylic-Latex Paint for Patios and Walkways: Pros and Limits
If you want a practical, cost-effective finish for patios and walkways, acrylic-latex paint is a popular choice because it balances ease of use with good weather resistance and color retention.
You’ll appreciate acrylic advantages like UV stability, quick drying, and easy cleanup.
But note latex limitations: lower abrasion resistance and potential peeling on poorly prepared concrete.
Prep, primer, and occasional touch-ups keep surfaces looking good.
Epoxy Coatings for Exterior Concrete and Garage Floors
For areas that need heavier protection than acrylic-latex can offer, epoxy coatings give you a tough, long-lasting surface ideal for garages, driveways, and some exterior slabs.
You’ll appreciate epoxy benefits like chemical resistance and durability. Consider surface prep, timing, and ventilation.
Follow clear application techniques:
- Clean and etch thoroughly.
- Mix and apply evenly.
- Allow full cure before use.
Polyurethane & Polyaspartic Topcoats for Concrete: UV and Wear
When you need a UV-stable, high-wear finish over epoxy or bare concrete, polyurethane and polyaspartic topcoats deliver superior scratch resistance and color retention while resisting chalking from sun exposure.
You’ll favor Polyurethane benefits like chemical and abrasion resistance and long-term gloss.
Polyaspartic features include rapid cure, low VOCs, and flexible application in cool temperatures, letting you protect concrete faster with durable UV stability.
Concrete Stains vs. Paints: Color Permanence and Breathability
Although both change a slab’s look, stains and paints do so in very different ways that affect how long color lasts and how the concrete breathes. You’ll weigh color longevity against surface permeability when choosing:
- Stains: penetrate, maintain natural texture, better breathability.
- Paints: sit atop, offer opaque color, can reduce permeability.
- Sealers/topcoats: boost durability but may alter breathability and maintenance.
Elastomeric Coatings for Hairline Cracks and Movement
If your concrete has hairline cracks or shifts with temperature, elastomeric coatings can flex and bridge those gaps without failing.
You’ll get a durable, weatherproof membrane that keeps water and UV out while moving with the slab.
Before you coat, confirm proper prep and compatibility with your chosen primer.
Flexible Crack Bridging
Because outdoor concrete expands, contracts, and develops hairline cracks over time, you’ll want a coating that flexes with it—elastomeric paints are formulated to bridge those tiny fissures and accommodate movement without splitting.
You should choose flexible materials focused on crack prevention and simple maintenance.
- Apply per manufacturer.
- Use primer for adhesion.
- Allow proper cure time.
Durable Weatherproof Membrane
When you need long-lasting protection against moisture and movement, an elastomeric membrane seals and stretches over hairline cracks so water can’t penetrate and freeze-thaw cycles can’t make damage worse.
You’ll apply a flexible coat that bonds tightly, delivering superior weather resistance and surface protection while accommodating substrate movement, reducing maintenance, and preserving appearance on exterior concrete floors.
Breathable Masonry Paints for Exterior Concrete
While exterior concrete needs protection from weather and stains, breathable masonry paints let moisture escape so you avoid trapped dampness and flaking finishes.
You’ll choose breathable options for proper moisture management, longevity, and adhesion.
Consider:
- Vapor-permeable acrylic masonry paint.
- Limewash or silicate-based coatings.
- Primer systems designed for breathability and concrete porosity.
Anti-Slip Additives and Textured Finishes for Safety
Breathable paints protect concrete from moisture, but you also need to think about surface traction—especially on wet or sloped areas.
You can add anti-slip additives or choose textured coatings to boost slip resistance and reduce accidents. As safety measures, broadcast grit into wet paint or use factory-textured products.
Test small areas, follow manufacturer coverage, and maintain surfaces to preserve grip.
Moisture-Vapor Issues Before Coating Exterior Concrete
Because concrete can hold and release moisture long after it seems dry, you need to address vapor issues before you paint exterior floors.
You’ll test and control vapor transmission, choose appropriate moisture barriers, and prevent coating failure.
Steps to follow:
- Measure vapor transmission rates.
- Select compatible moisture barriers.
- Allow remediation and re-test before coating.
Surface-Prep Checklist to Ensure Long-Lasting Adhesion
Before you apply any paint, prepare the concrete so the coating can bond and last: remove dirt, grease, efflorescence, and loose material; repair cracks and spalls; and profile the surface to a consistent texture. Use Surface preparation and Adhesion techniques: check moisture, roughen, patch, prime, and dry.
| Task | Tool |
|---|---|
| Inspect | Tape/probe |
| Profile | Grinder |
| Patch | Mortar |
| Prime | Roller |
| Dry | Time |
Cleaning, Degreasing, and Etching: Step-by-Step for Concrete
When you want paint to stick and last, start by thoroughly cleaning, degreasing, and etching the concrete so contaminants and old coatings won’t interfere with adhesion. This step removes dirt, oil, efflorescence, and laitance, opens the surface profile, and gives primers something to grip.
Use proper cleaning techniques and degreasing methods, then etch with muriatic or phosphoric acid.
- Sweep and pressure-wash
- Apply degreaser, scrub, rinse
- Neutralize and dry before priming
Repairing Cracks, Spalls, and Joints Before Painting Concrete
If cracks, spalls, and failing joints aren’t fixed, paint won’t adhere or wear evenly, so you should repair them to create a stable, uniform surface.
Start by removing loose material, clean debris, then use flexible patching compounds for spalls and routed-back joints.
Apply crack isolation membranes or sealants and perform joint repair with appropriate backer rod and elastomeric sealant to prevent movement under coating.
Primers That Lock Paint to Porous Concrete
Because porous concrete soaks up coatings unevenly, you need a primer that seals and bonds—penetrating the surface to create a uniform base for paint.
You’ll get primer benefits like reduced absorption and improved longevity. Use adhesion techniques suited to substrate. Choose compatible primers and follow surface prep.
- Concrete-penetrating primer
- Acrylic or epoxy primer
- Moisture-tolerant primer
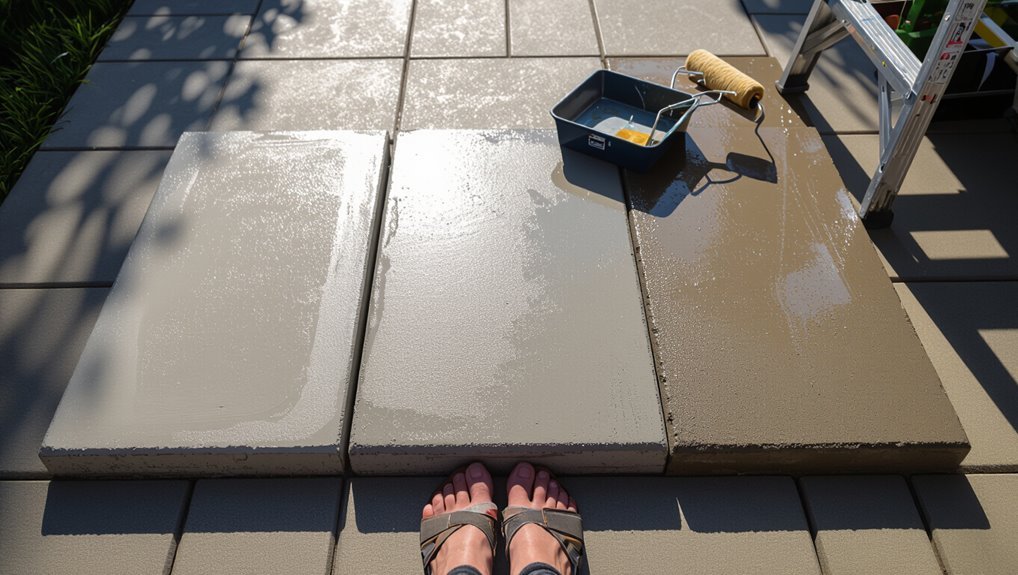
Application Methods: Roller, Brush, and Sprayer Tips
Pick the right tool and technique for each stage—roller for large flat areas, brush for edges and tight spots, and sprayer for fast, even coverage—and you’ll get a durable, professional-looking finish on exterior concrete floors. Use roller techniques for uniform coats, a brush for control, and sprayer efficiency to speed work.
| Tool | Use | Tip |
|---|---|---|
| Roller | Flats | Nap length |
| Brush | Edges | Angle |
| Sprayer | Quick coats | Overlap |
Drying Times and Temperature Limits for Exterior Concrete Coatings
Don’t confuse recoat time with full cure — you’ll be able to walk on many coatings within 24 hours but they may not reach full chemical resistance for several days.
Pay attention to temperature and humidity on the label, since high humidity or low temperatures can stretch drying times considerably.
Also avoid applying coatings below the manufacturer’s cold limit or above heat limits, because extreme temperatures can prevent proper film formation and adhesion.
Cure Time vs. Recoat Time
When you’re planning an exterior concrete coating project, distinguish between recoat time—the window when you can apply another layer without sanding—and full cure time, which is when the coating reaches its maximum hardness and chemical resistance; they can differ by days or even weeks depending on product chemistry and temperature.
- Check recoat time on the label.
- Allow full cure time before heavy use.
- Faster recoat doesn’t mean immediate cure; follow manufacturer cure time.
Temperature And Humidity Effects
Weather matters: temperature and humidity directly control how fast exterior concrete coatings dry, recoat, and reach full cure.
You’ll want to plan your project around the manufacturer’s specified temperature range and relative humidity limits. You’ll monitor humidity levels and avoid big temperature fluctuations during drying.
Work windows shrink as humidity rises or temperatures fall, so schedule applications for stable, moderate conditions.
Cold And Heat Application Limits
Because extreme temperatures slow or stall chemical reactions, you’ll need to respect the manufacturer’s stated application and cure ranges for exterior concrete coatings.
Plan around cold application and heat application limits to guarantee proper adhesion and longevity.
- Apply when temperatures are within the recommended daytime and overnight ranges.
- Allow extended cure time in cold, accelerated in heat per specs.
- Avoid rapid temperature swings during cure.
Coverage Estimates: Calculating Material Needs for Concrete
Estimating how much paint you need for exterior concrete starts with measuring the surface area and checking the product’s coverage rate—usually listed as square feet per gallon—and factoring in porosity, texture, and the number of coats you plan to apply.
For accurate coverage considerations, calculate material estimates by dividing total square footage by coverage per gallon, then add 10–20% for waste, absorption, and touchups.
Cost Comparison: Budget Paints vs. Premium Concrete Systems
Now that you’ve figured out how much paint you need, you’ll want to weigh cost against performance:
- Budget paint advantages: lower upfront cost, quick refresh cycles if you’ll repaint soon.
- Premium paint longevity: higher durability, fewer reapplications and better resistance to weathering.
- Compare lifecycle costs: factor materials, labor, and expected lifespan to decide what fits your budget and goals.
Maintenance Tips to Extend Painted Concrete Life
If you want your painted concrete to last, regular maintenance is essential: sweep and rinse weekly, remove spills promptly, and pressure-wash occasionally for thorough surface cleaning.
Inspect for wear and reapply protective coatings every few years or after heavy use. Use mild cleaners, avoid harsh chemicals, and protect high-traffic areas with mats or runners to reduce abrasion and prolong the finish.
Troubleshooting Peeling, Chalking, and Adhesion Failures
When paint starts peeling, chalking, or refusing to stick, you’ll want to diagnose the root cause quickly so repairs actually hold. Common culprits include poor surface preparation, moisture intrusion, incompatible paint systems, and heavy UV or abrasion.
Inspect, test, then act. Follow steps:
- Remove failing paint and clean thoroughly.
- Fix moisture and apply primer.
- Choose compatible coating and apply per instructions (peeling causes, chalking solutions).
Best Brands and Product Examples for Exterior Concrete
Now that you’ve tackled common adhesion issues, let’s look at top exterior concrete brands and specific products that actually perform.
You’ll find reliable names like Sherwin-Williams, Benjamin Moore, Behr, Rust-Oleum, and KILZ, each with concrete-specific formulas.
I’ll highlight recommended product examples and what makes them a good fit for driveways, patios, and porches.
Top Exterior Concrete Brands
Choosing the right brand can make a big difference in how your exterior concrete holds up to weather, traffic, and UV exposure.
You’ll want brand comparisons and product reviews to guide choices. Consider these top options:
- Epoxy/urethane specialists
- Acrylic concrete paints
- Masonry sealers and stains
Pick based on durability, slip resistance, and climate suitability.
Recommended Product Examples
After narrowing the type of coating that fits your needs—epoxy/urethane, acrylic, or masonry sealer—you’ll want specific products that match your climate, traffic, and slip-resistance requirements.
Choose epoxy kits from Rust-Oleum or Quikrete for heavy traffic, Behr or Valspar acrylics for UV resistance, and Siloxa-Tek or Seal-Krete sealers for breathability.
Check color options and follow recommended application techniques for best results.
Environmental and Safety Considerations: VOCs, Disposal, PPE
Because paints release volatile organic compounds (VOCs) and leave behind hazardous waste, you should consider their environmental and health impacts before starting an exterior concrete-floor project.
Follow local VOC regulations, pick low-VOC coatings, and plan proper disposal methods. Wear durable safety gear and respirators.
Consider:
- Label instructions
- Waste handling
- Ventilation and PPE during application
When to Hire a Pro vs. DIY for Exterior Concrete Painting?
Decide whether to tackle exterior concrete painting yourself by weighing the scope of work—large patios, extensive repairs, or complex textures usually favor a pro.
Consider your skill and experience: if you’ve never prepped, patched, and applied concrete coatings, a contractor will get better, longer-lasting results.
Also factor time and equipment—professionals bring specialized tools and can finish jobs far faster than most DIYers.
Scope Of Work
When your exterior concrete needs painting, weigh the job’s size, surface condition, and your comfort with prep work to decide whether to DIY or hire a pro.
Small patios with sound concrete and light cracking are often manageable for a handy homeowner, while large driveways, severe damage, or jobs requiring specialized coating systems call for a contractor with equipment and warranty options.
- Surface assessment
- Project timeline
- Scope, materials, cleanup
Skill And Experience
Skill level matters: if you’ve tackled home projects that required grinding, patching, and following technical product instructions, you can likely handle a small exterior concrete floor; if you haven’t, or if the job involves deep repairs, complex coatings, or achieving a long-lasting warranty, hire a pro who has the tools, surface-prep experience, and mixing/application know-how.
| You | Pro |
|---|---|
| Basic prep | Advanced surface preparation |
| Simple application techniques | Specialized coatings |
Time And Equipment
Along with experience, time and the right equipment shape whether you should tackle an exterior concrete floor yourself or call a pro.
You’ll balance time management and equipment preparation: assess your schedule, tool access, and project complexity. Decide based on realistic hours and available gear.
- DIY: simple patching, basic tools.
- Hire pro: large areas, specialized gear.
- Hybrid: rent equipment.
Quick Checklist + Decision Summary for Your Project
Before you buy paint or rent equipment, run through this short checklist so you can pick the right product and avoid mistakes:
Assess surface prep needs, drainage, and exposure.
Choose color selection and texture options for safety and style.
Decide between concrete paint, epoxy, or masonry sealer.
Confirm coverage, drying time, and slip resistance.
Gather tools, patching materials, and budget.
Frequently Asked Questions
Can I Paint Concrete With Radiant-Heat Tubing Underneath?
Yes—you can paint concrete with radiant-heat tubing underneath if you choose heat-resistant coatings and properly prepare the surface so paint adhesion stays strong. Test a small area, follow manufacturer temperature limits, and let it cure fully.
Will Painted Concrete Affect Home Resale Value?
Painted concrete can help or hurt resale; you’ll boost aesthetic appeal with tasteful, timely tones aligned to market trends, but you’ll cut value if coatings look cheap, peel, or clash—so choose quality finishes and neutral styles.
Are There Paint Options Safe for Edible Garden Beds?
Yes — you can use non toxic options like food-safe mineral paints, natural linseed oil, or ASTM-approved milk paints; they’re low-VOC, promote garden safety, won’t leach, and you’ll keep edible beds safe for harvest.
How Do Coatings Interact With Concrete Overlays or Microtoppings?
Coatings bond differently to overlays and microtoppings; you’ll need thorough surface preparation to guarantee adhesion. Choose systems rated for coating durability and compatible chemistry, or you’ll face peeling, delamination, or accelerated wear.
Can I Apply Paint Over Previously Colored or Acid-Stained Concrete?
Yes — you can paint over previously colored or acid-stained concrete, but you’ll need thorough surface preparation to guarantee color compatibility and adhesion; you’ll clean, etch or sand, repair, and use a primer suited to the stain.
Conclusion
Think of your concrete like an old ship’s deck: the right paint is the seasoned captain that keeps it seaworthy. Choose acrylic-latex for patios, epoxy or polyaspartic for heavy-traffic or garage decks, and a breathable sealer where moisture’s a concern. Match product to surface, prep well, and wear PPE. If the voyage looks rough, call a pro. With the right choice and care, your concrete will weather storms and still shine.